With the addition of a light fixture and shoe storage this past week (and deciding to nix a window covering for now and just frost the window when we convert the carport into a garage), we just had one last item on our tig ol’ bist (which is how I would imagine Missy Elliott would say “big ol’ list”):
Frost the side door for privacy<– seen here
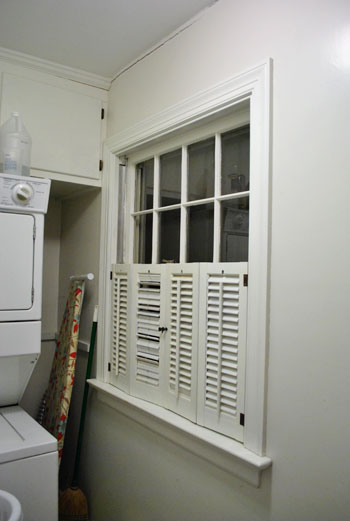
Remove the narrow shelving that gets blocked by the open door<– seen hereRemove the old shutters that block much-needed light<– seen hereCraigslist the old un-energy efficient stacked top loaders and snag a killer deal on new Energy Star front loaders<– seen hereCaulk a big ol’ crack in the ceiling<– seen herePaint the odd brown quarter round near the baseboards glossy white<– seen here
Redo all the dinged up trim (also in semi-gloss white)<– seen here
Paint the walls<– seen here
Replace our dryer hose with a safer all-metal one<– seen here
Add adjustable built-in shelving in that nook next to the stacked washer & dryer<– seen here
Prime & paint the upper cabinetry<– seen here
Replace the hinges and knobs on those upper cabinets<– seen here
Hang the ironing board to obscure the giant metal fuse box<– seen hereAdd other functional storage near the door for shoes<–seen here
Make a new light fixture<– seen here
Add a window treatment (maybe a homemade one?)<— will just frost it when we convert the carport to a garage
- Hang some art to keep it cheerful (and add storage for Burger’s leash)
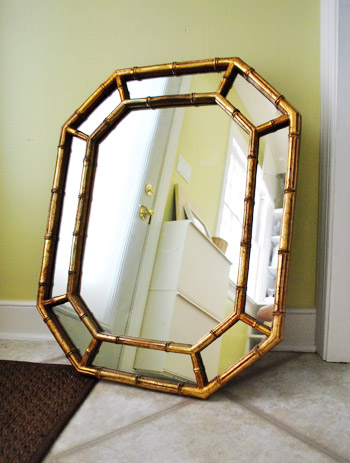
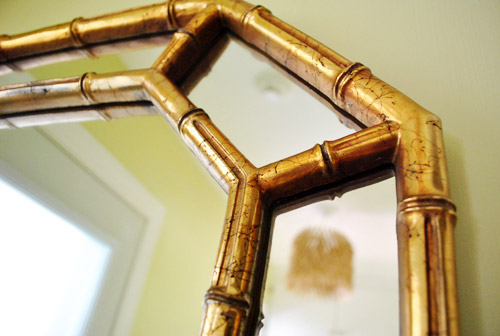
When it came to what to put on the wall besides the hanging ironing board, Sherry and I bounced around a lot of ideas throughout the whole laundry room process. And ultimately we decided we need something else bouncing around in there: light. Lucky for us, we snagged this awesome $10 mirror at a neighborhood yard sale a few weeks ago. Coincidentally, it was the same one where we got our twig & berry art – so imagine us walking home carrying two big frames and a heavy mirror while pushing a stroller and walking a chihuahua. Yeah, that’s how we roll.
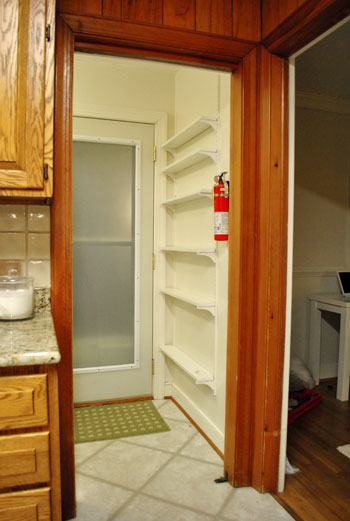
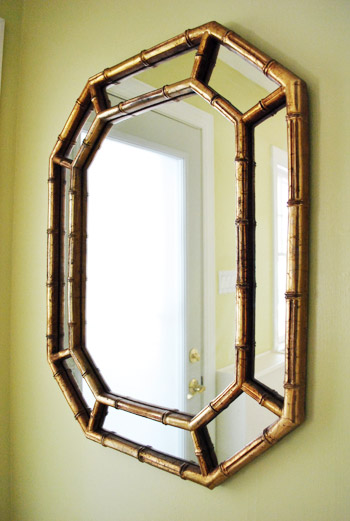
We decided it was perfect for that big blank wall next to the door, since whatever went there had to be relatively flat or risk getting slammed by the door (which is why the narrow open shelving left by the previous owners made us nervous so we removed it and frosted that side door for privacy).
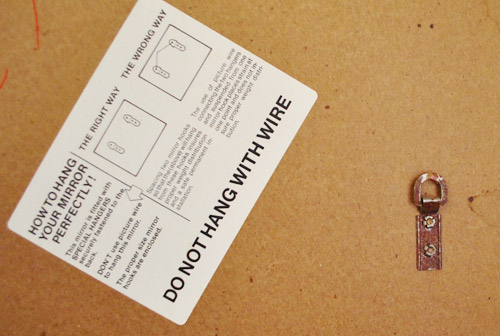
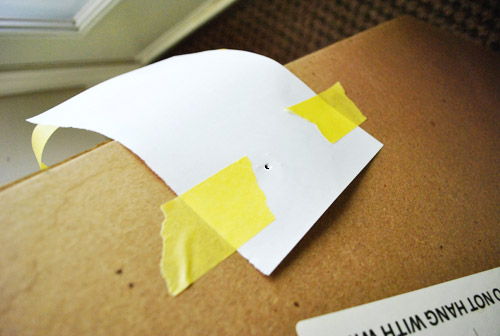
Anyway, the mirror was perfect. Except that hanging it was going to require some planning because my screws in the wall would have to be perfectly placed thanks to this “do not hang with wire” warning (complete with accompanying illustration):
So I tore a piece of printer paper in half, and taped each piece partially over each hook (with that tape facing the mirror) and partially hanging out the sides (with that tape facing away from the mirror). Basically, I gave the mirror dinky paper wings.
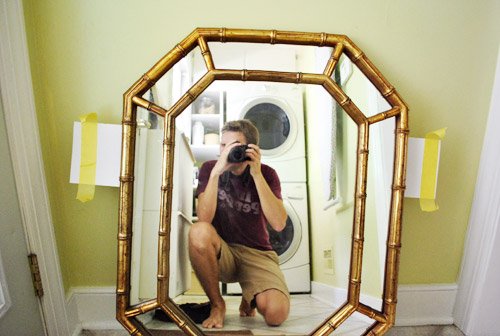
And yes, my Dr. Pepper shirt is campaigning to become The Official Shirt Of Doing Projects With (Or In Front Of) Mirrors. That or I just wear it a lot.
Back to the winged mirror. First I poked a hole right through where my screw would need to go:
That way when we held up the mirror in place (making sure it was centered and level) we could slap the exposed pieces of tape against the wall and have an instant guide for where the screws needed to get a-screwed:
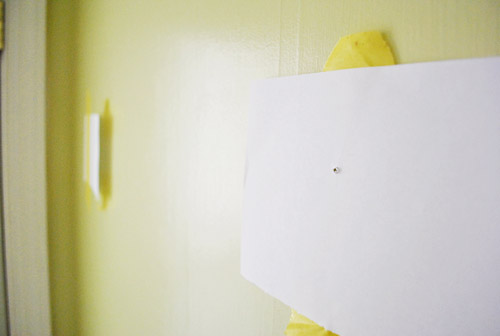
I definitely recommend two people for this method. One to hold it up (me) and one to step back and make sure it’s placed well/not wonky (Sherry). After that step it was also Sherry’s job to hold down the taped wings as I pulled the mirror away from the wall to ensure that they successfully separated and remained in the right spots (as opposed to shifting or unsticking as the mirror was pulled away).
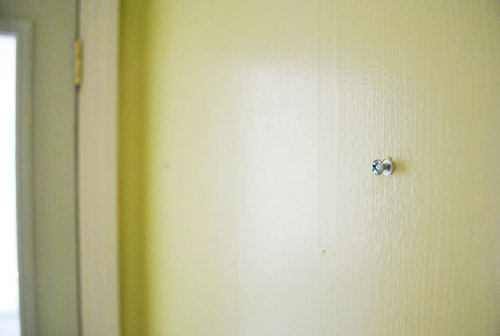
After quickly drilling through my guide holes to make small pilot holes, those paper wings that we had taped to the wall came down and a heavy duty anchor and screw soon took their place on each side:
Just as I had hoped (but didn’t expect), it worked and the mirror was hanging in no time. Total shocker. Quick tip: never expect that something like this will work on the first try because you’re practically ensuring that it won’t and you’ll be pissed. I went into this expecting it to take a fortnight (which resulted in “pleasantly surprised John”).
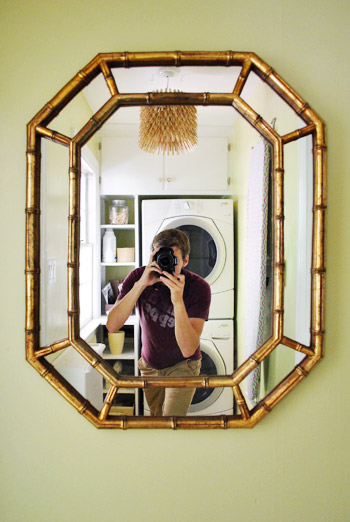
Sherry and I are still a bit undecided about the finish on the mirror. Our usual instinct was to paint it white (or ORB, or even the same deep teal from the built-ins), but lately we find ourselves appreciating a mix of finishes more and more. And letting “old pieces” add to the collected feel of a room without always slapping paint on them right away. I know, another shocker. So, for now, we’re living with this crackled gold dealio. Although down the line when we get stainless appliances in the adjoined kitchen it might look clashy and call for a paint job. We’ll keep you posted.
So far our random $10 yard sale mirror is turning out to be an AWESOME addition to the room. Not only does it allow for that last look at ourselves before heading out the door, it also reflects a lot of additional light into our windowless kitchen. Heck, it even makes the laundry room look bigger too thanks to “visually doubling” the space when you stand in front of the dryer (now the room seems to go on and on).
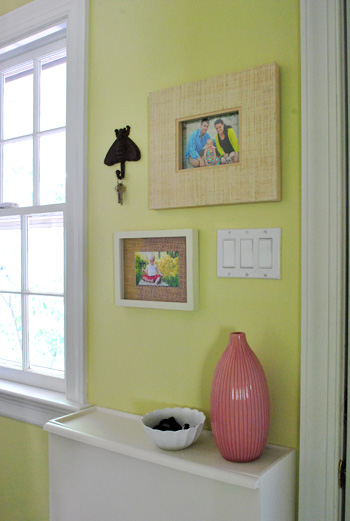
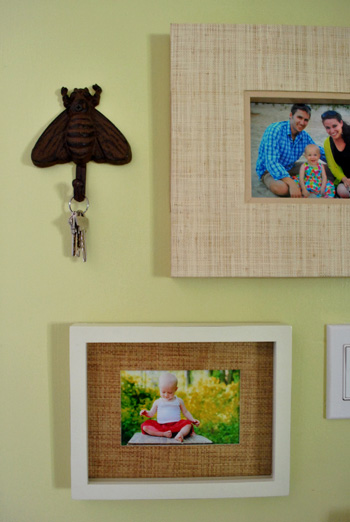
But that’s not our only addition to the laundry room walls. We also hung two textured frames (from the Pottery Barn Outlet a few years back – they used to live in our old office slash guest room). And we decided to use them to proudly display some of our favorite family pictures above our new shoe cabinet. As for Burger’s leash, we just tucked it into a white bowl from the kitchen. Oh and we got that pink vase on sale at Target for $7. I actually found it myself and recommended it to the wife since it reminded me of the colors in our ironing board cover. Who knew I had that in me? The laundry room is evidently helping me branch out in ways that I never imagined.
But back to the art. I actually owe my mom for inspiring the framed family pics. She always had a collage of family photos tacked up in our laundry room growing up and I loved looking at it. Functional spaces like laundry rooms can so quickly become just that – functional – so it’s easy to overlook bringing something personal in. Wow – how lame was that last sentence? To put it in less “TV decorating host” terms: it doesn’t hurt to look at a cute baby while, well, washing diapers for said cute baby. And the rest of the fam doesn’t hurt my eyes either.

The top pic is a family portrait (Burger included!) from our Outer Banks trip last month. And the bottom is one Katie Bower snapped the last time we visited her in GA. Lucky for us, the yellows in each pic accidentally work nicely with the room’s colors scheme (although we’d probably hang them up even if they clashed because they’re favs). Oh, and next to the top frame is a little iron bee (you know we love us some bees) that we got a while ago while thrifting in Delaware. And once again, we opted to leave it as is (even though we mentioned painting it white in the thrifting post). That, my friends, is our form of rebellion. Yup, we’re bad. Bad to the bone.
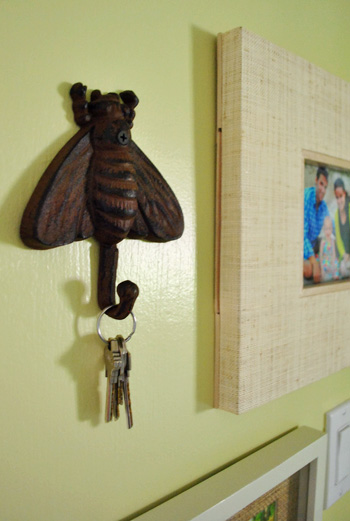
Wow, just realized that wall comes from a lot of states. Pictures taken in NC and GA, frames purchased in SC, and a hook found in DE. Though the miscellaneous keys are for things like local PO Boxes and family members’ homes – so that kinda ruins the streak. Oh well.
And with that fine ladies and gentlemen, we are calling the laundry room COMPLETE… for now at least. So let’s take one more look back at how we got from before…
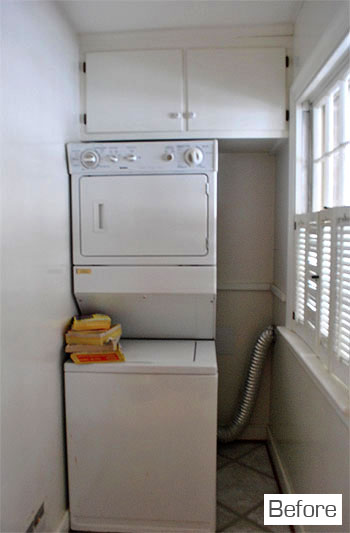
…to done (for now):
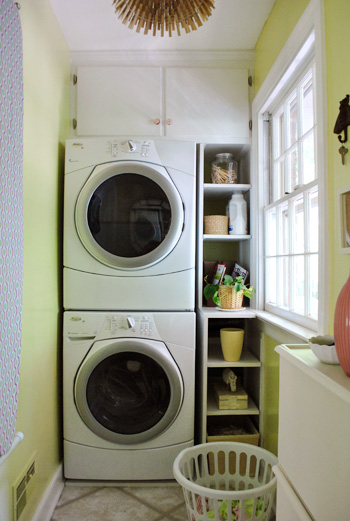
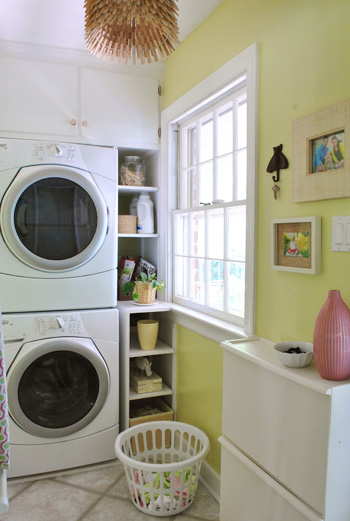


It’s actually the first room we’ve made this much progress on. Quite possibly because it was only about the size of a bathroom stall. Oh well, you know we’re all about taking the whole house makeover thing one tiny project at a time.
And for all you number crunchers out there, here’s the whole budget breakdown of all of the updates we’ve made in the past few weeks:
- New Energy Star front loading washer/dryer: $388 (well, really $638 but we craigslisted the old set for $250)
- Frosting film (Home Depot): $18
- Paint and caulk: $0 (already owned)
- Built-in shelves (supplies from Lowe’s & Home Depot): $74
- Ironing board cover (Etsy): $24
- Ironing board hooks (Lowe’s): $12
- Cabinet knobs (Hobby Lobby): $8
- Shoe cabinets (Ikea): $38
- Clothespin light fixture (homemade here): $34
- Mirror (yard sale): $10
- Family photos (CVS): $1
- Frames (Pottery Barn Outlet): $0 (already owned)
- Iron fly hook (thrift store): $0 (already owned)
- Laundry basket (Target): $0 (already owned)
- Pink vase (Target): $7
- Other accessories like bowls & baskets: $0 (already owned)
- TOTAL: $624*
* which is pretty thrilling considering our new front loading washer & dryer alone were originally $1198!
Oh and we don’t factor in the cost of things that we have leftover from previous projects or already own since they’re usually already “counted” in other budget breakdowns (ex: the wall paint we used was already counted in the kitchen painting breakdown, so using the remaining paint for this project and saying “$20 again” would be double-counting). But a few folks commented to say that it might be helpful to mention the cost of those already-owned items in case someone at home was planning to do the same thing (but had to buy everything from scratch) so adding about $25 for some caulk & a quart of paint, $25 for frames & accessories, $3 for the plastic laundry basket, and $5 for the iron bee hook that we found thrifting should do it (for a grand total of $682).
Thee cheers for appliance deals and DIY built-ins and ironing-board-covers-as-art and thrift store hooks and clothespin chandeliers and all the other odd calls that we made for our tiny laundry room. And now I’ll toss in this awkward monkey-toed picture, lest you forget just how narrow this space really is:
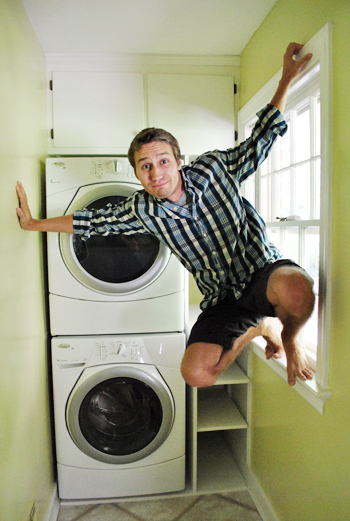
And so ends the laundry room makeover. We’re currently enjoying diaper-washing-day a little too much. And my mom and dad saw our clothespin light in person and proclaimed it “the coolest thing we’ve ever made besides Clara.” Which got us all awkward and blushy. Have you guys done any laundry room revamps lately? Or made any cute babies? Or done some owling on a windowsill? Apparently owling is the new planking.

Grace says
I thought you guys might want to see your new mirror is featured in the newest issue of Lonny (well somewhat). Looks like you got a great deal!
http://lonnymag.com/issues/31-sept-oct-2011/pages/1#p93
YoungHouseLove says
Ooh it’s so pretty on that patterned wallpaper! Love it.
xo,
s
Allison says
Saw this just now and thought of the mirror you guys have…. thought you’d want to see this!
http://www.parishotelboutique.com/store/product2904.html
YoungHouseLove says
So pretty! Love it!
xo,
s
Jaimi says
I just saw this gold mirror at a yard sale this morning that was being sold for a whopping 70 smackaroos. When asked if they would come down on the price by a fellow yard saler, they were told the mirror was very expensive so you guys scarfed!
YoungHouseLove says
Yay! Haha, who knew? The people were actually selling two of them at the sale we found! So someone else made out like a bandit too!
xo,
s
Kirsten says
I love your website! I have a question for you, you might have talked about this somewhere else, but I couldn’t find it. Your front load washer and dryer, were they specifically made to be stackable? Or did you just stack them?
YoungHouseLove says
They sell stacking kits for certain models and they were compatible and we bought a stacking kit with them. Hope it helps!
xo,
s
Carolyn says
Hello! My husband and I just found your laundry room mirror at an estate sale – snagged it for $8! I was looking for the post where you guys spray painted it … I thought you painted it green. Am I imagining that? Or can you direct me to that post? Thanks : )
YoungHouseLove says
Oh yes, here it is: https://www.younghouselove.com/2010/02/nursery-progress-lets-reflect-for-a-bit/
xo,
s
mrs.iHB @ iheartbudgets.net says
I want this!! Definitely on my way to go make that clothespin chandelier! We could really use a super score on a washer and dryer like you guys got too! So many diapers to wash!
Jenny says
Please help me out by taking my survey! It is for student research on consumer behavior! It will take less than 5 minutes!
https://docs.google.com/spreadsheet/viewform?formkey=dENKbmpMZzBCZjNHeEUzd3dQTzdQTHc6MQ
YoungHouseLove says
Just did it Jenny, hope it helps!
xo
s
Claire Marie Murray says
Hi guys,
sorry for double posting but not sure where it is more likely to get an answer. Did you use any kind of system to secure your dryer/washing machine system on top of each other or did you just place it there? I read some mixed views on this so I’d love your opinion. I definitely want to make sure it’s safe!
Thanks!
YoungHouseLove says
We bought a “stacking system” sold by the store at the same time we bought them (so we knew it was compatible). When they were delivered the installer used it and they held up great!
xo
s
Donna Lensmeyer says
was the light fixture made out of clothes pins?
YoungHouseLove says
Yes, we DIYed that here: https://www.younghouselove.com/2011/08/320-pins/
xo
s
Megan says
Love, love, love the mirror (and anything with that faux bamboo mirror). Hoping to find a larger version for my bedroom.
Danielle @ Hang Loose Wahine says
I love this makeover. You guys encouraged me to start doing DIYs around the house. I just finished our laundry room, and I painted it with the same color and absolutely love it. Thank you for inspiring me to make something nice with our home. Aloha!