This mirror-image two-family house in Cape Charles, Virginia was the most far gone home that we’ve ever rescued. Not only did it need things like new electrical & plumbing & structural reinforcement, we actually had to remove the entire roof and all of the walls (you can read all the posts about the renovation here and here’s the Airbnb listing for the left side & the right side if you’re looking for that).
But we lovingly brought it back to life, and what was once the ugly duckling on this street is now all fixed up as a sweet vacation rental (just four blocks from the beach!) and the before & afters are our favorite part. Quick note: you can click the link at the bottom of each section to learn more and see more photos.
The Exterior
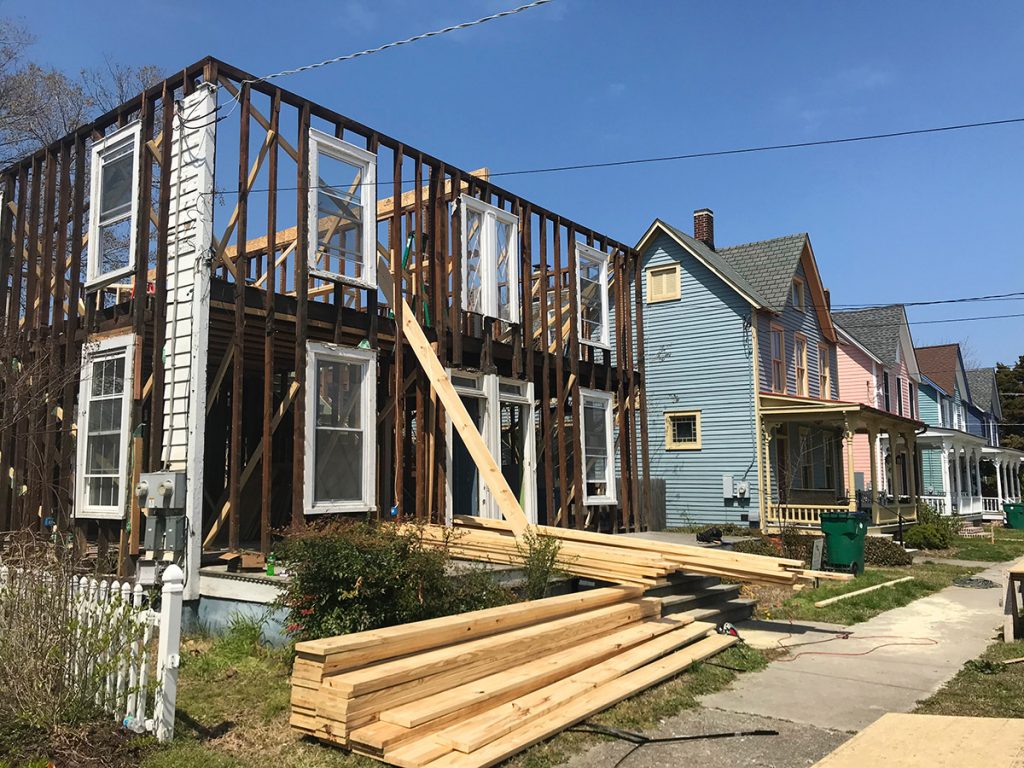
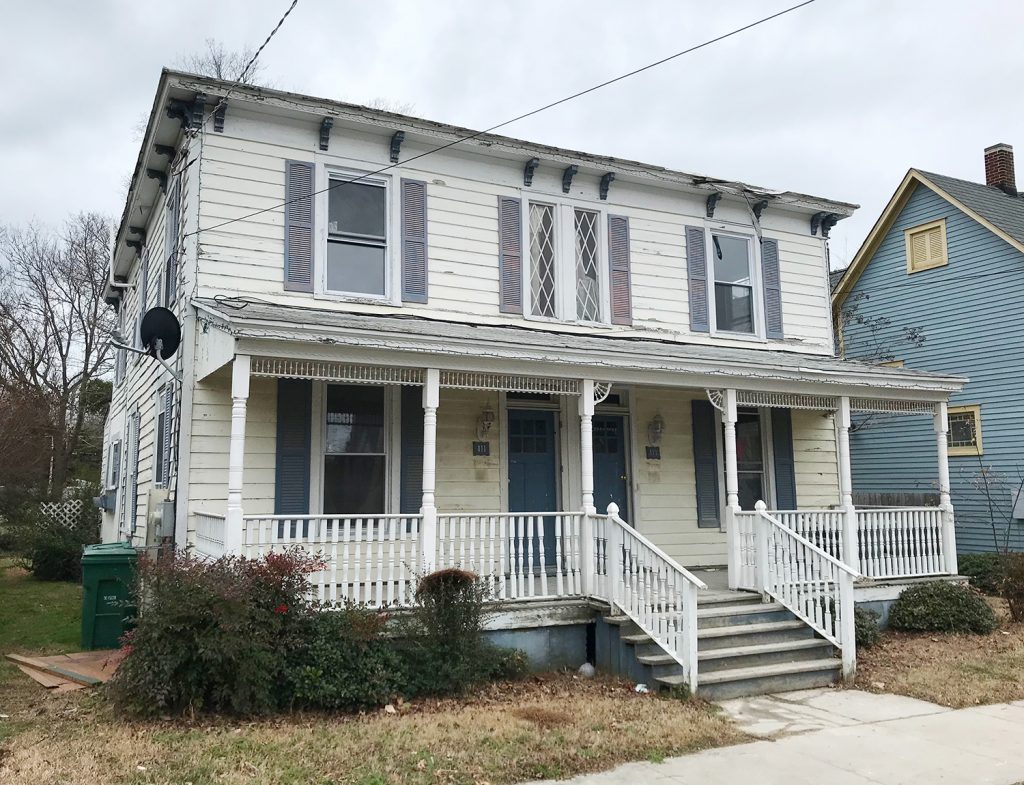
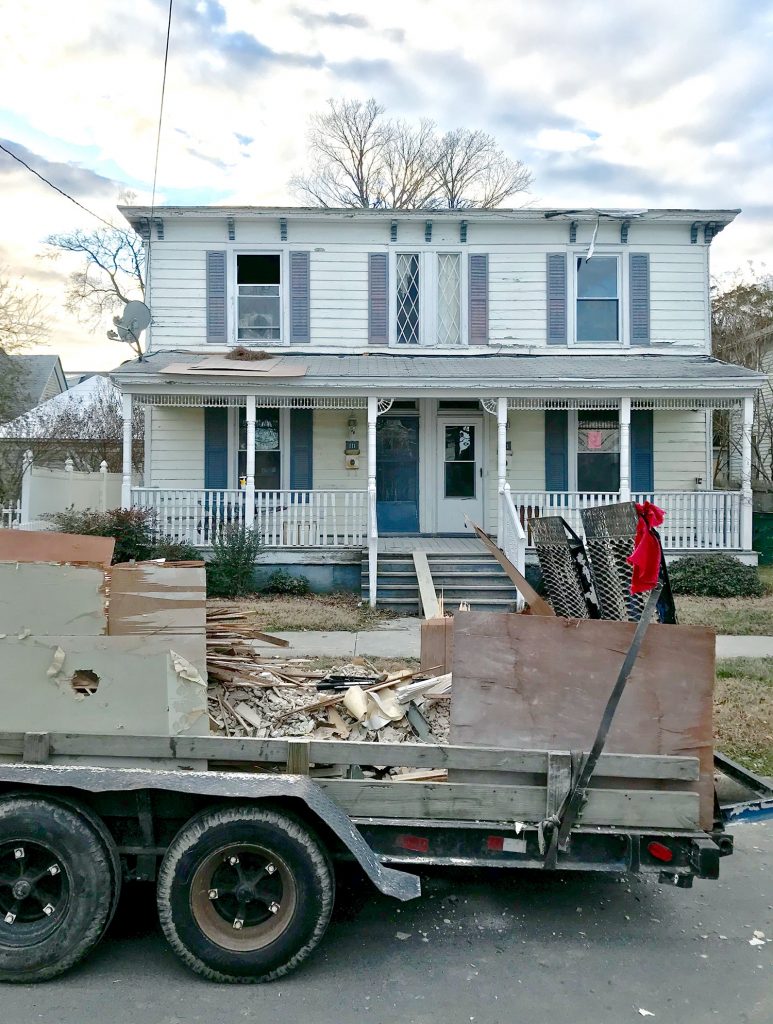
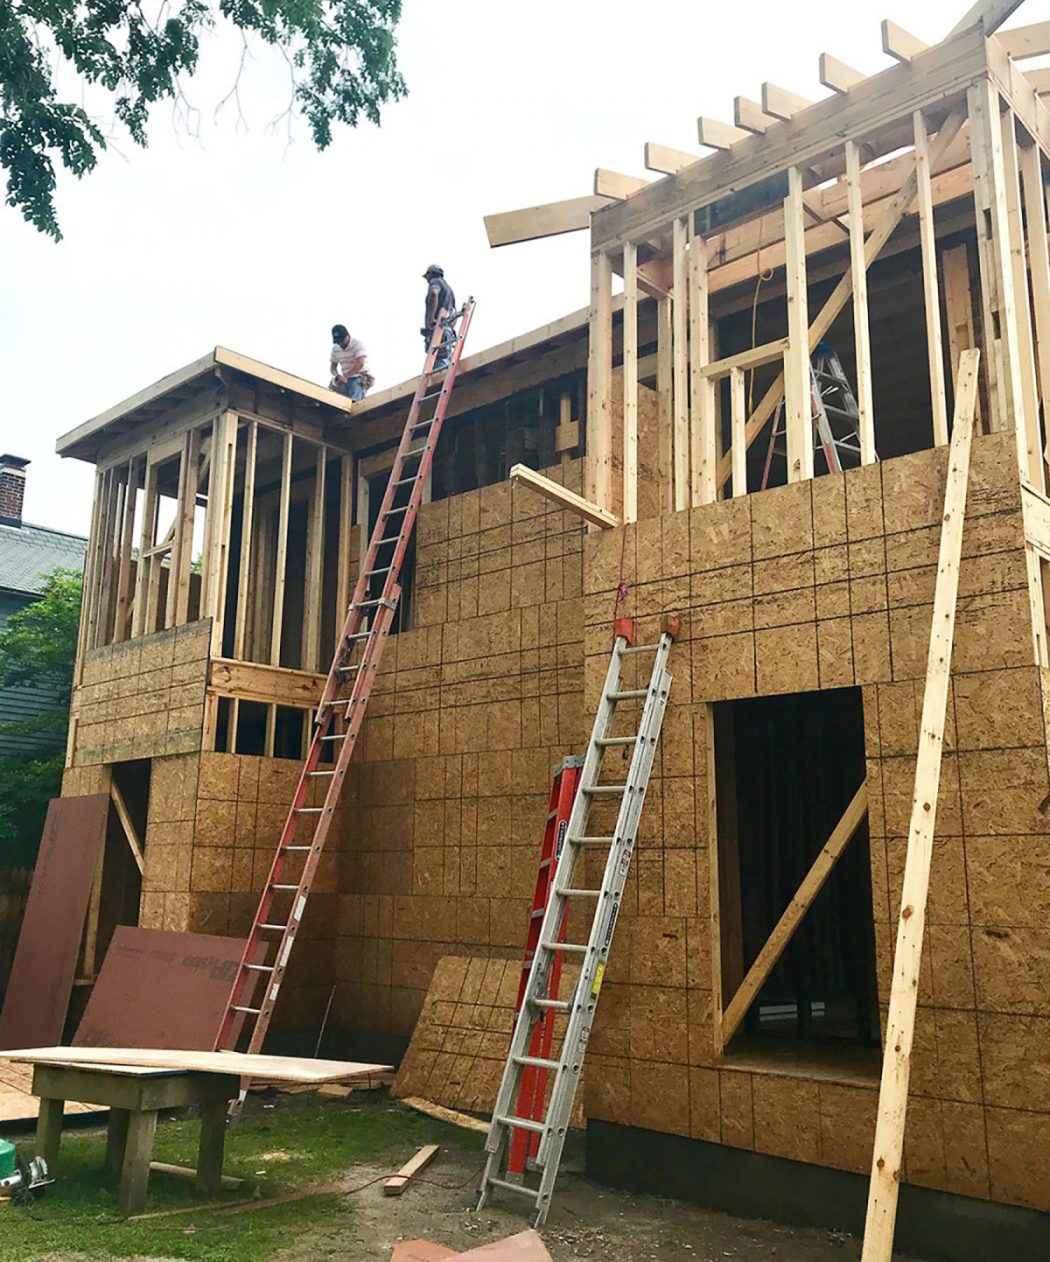
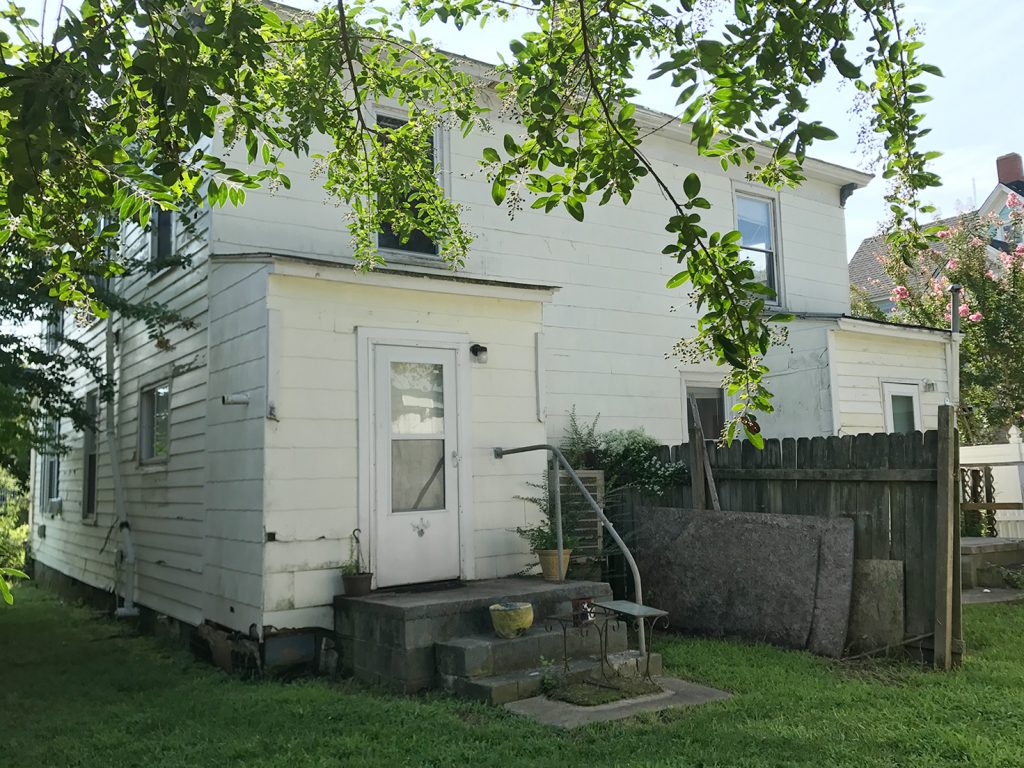
That photo above demonstrates just how far back we had to take this house to remove mold and water damage while also reinforcing everything that was rotten. But the photo below shows exactly where we started (you can tour the entire house as we bought it right here).
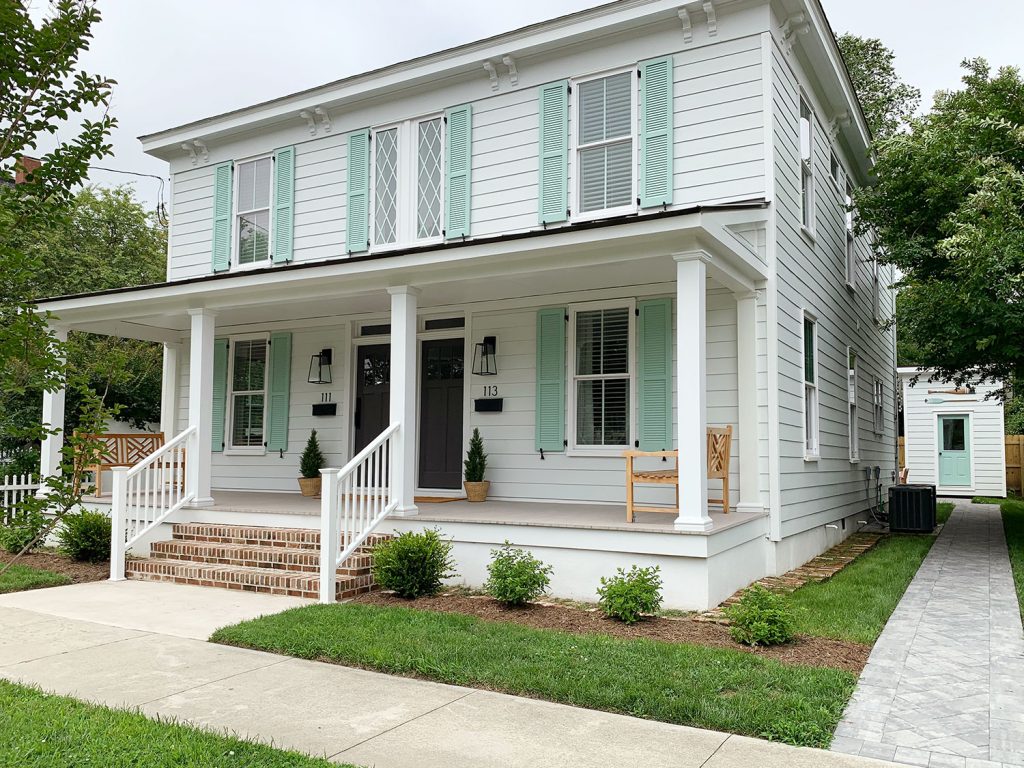
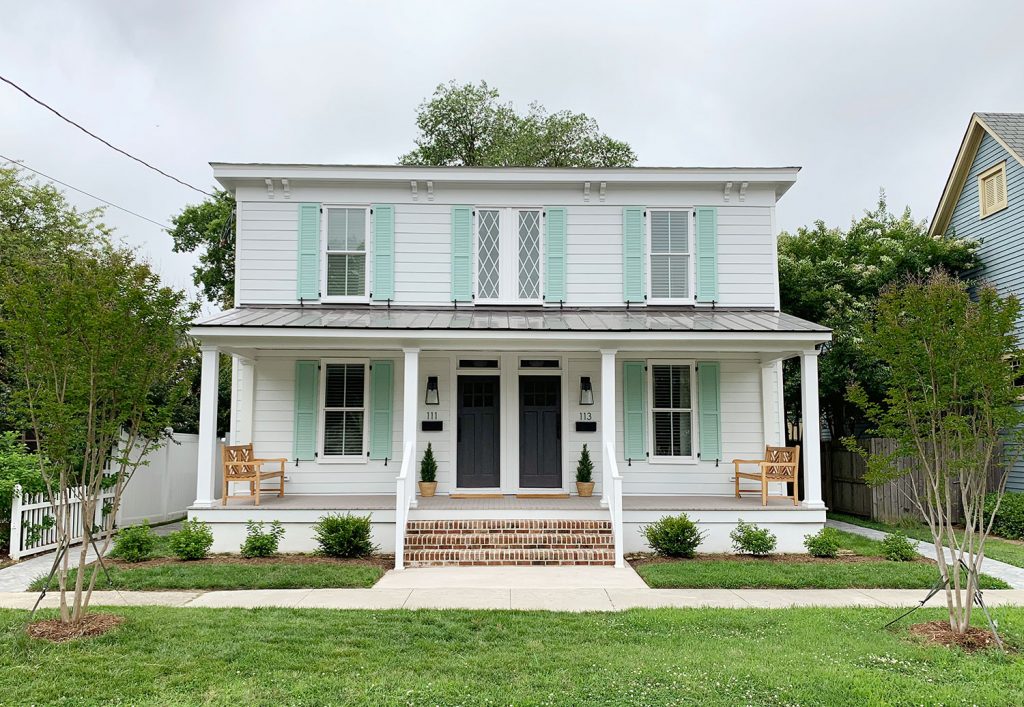
And here’s where we ended up after a 1.5 year renovation full of exciting moments and a few disappointments (remember this debacle?!). Even with all of the ups and downs, it was sooooo worth it. This renovation is our favorite one to date.
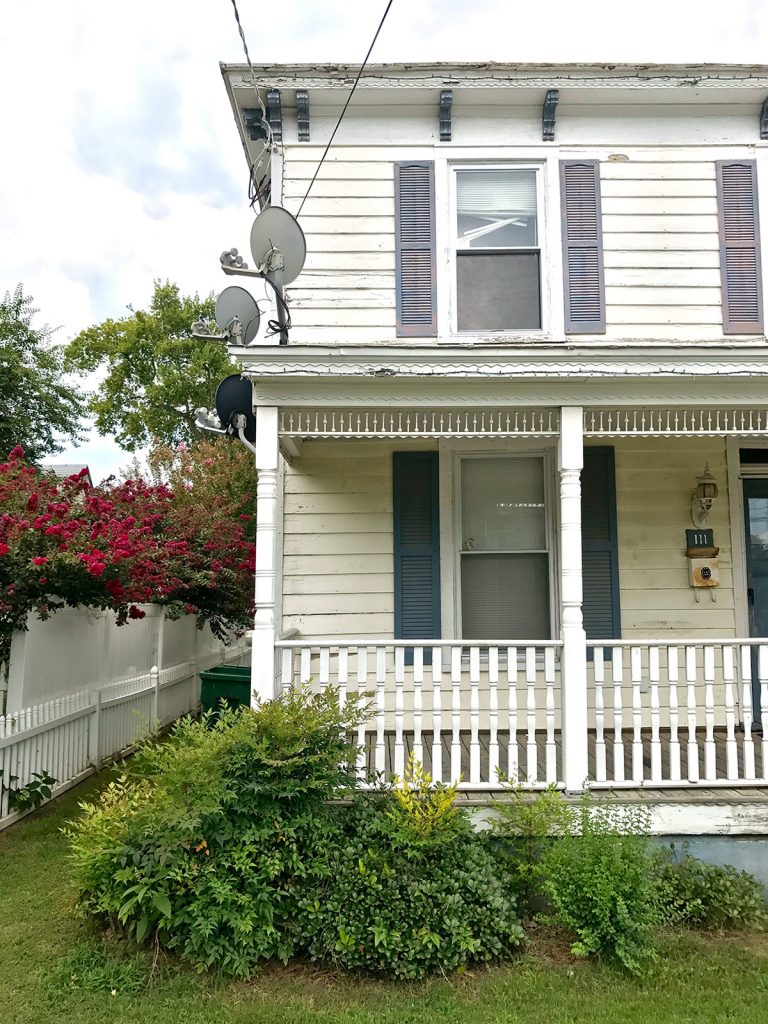
Here’s another shot of the very beginning of the project (right after we found a squirrel’s nest in the HVAC system – see that clump of sticks on the porch roof?).
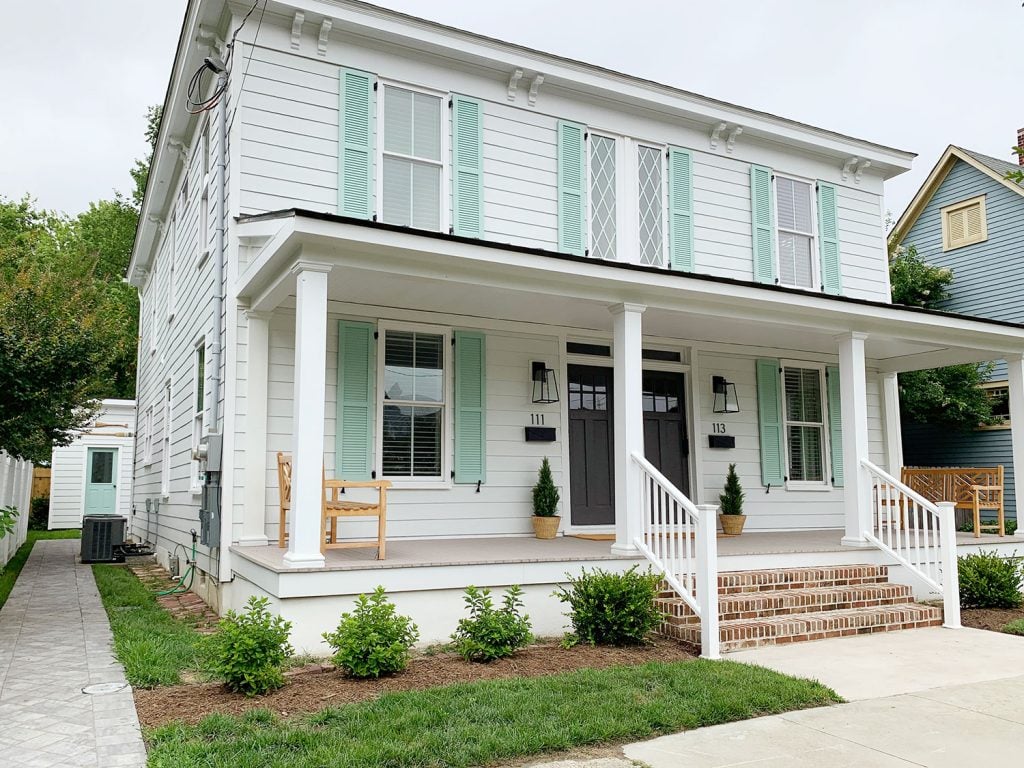
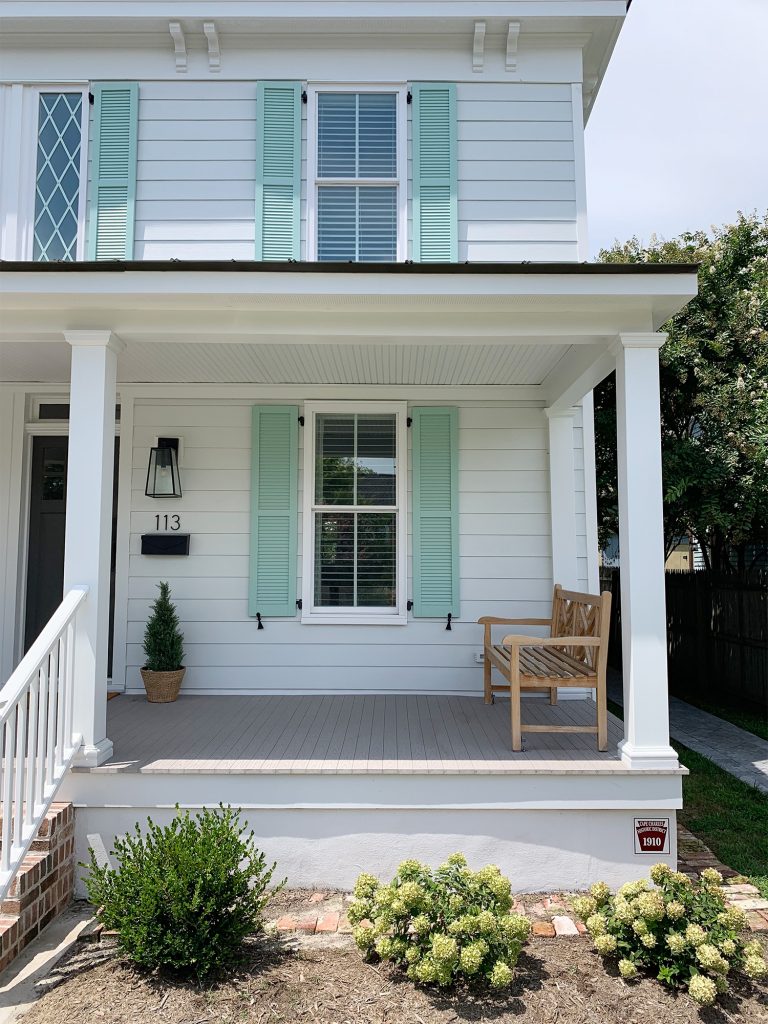
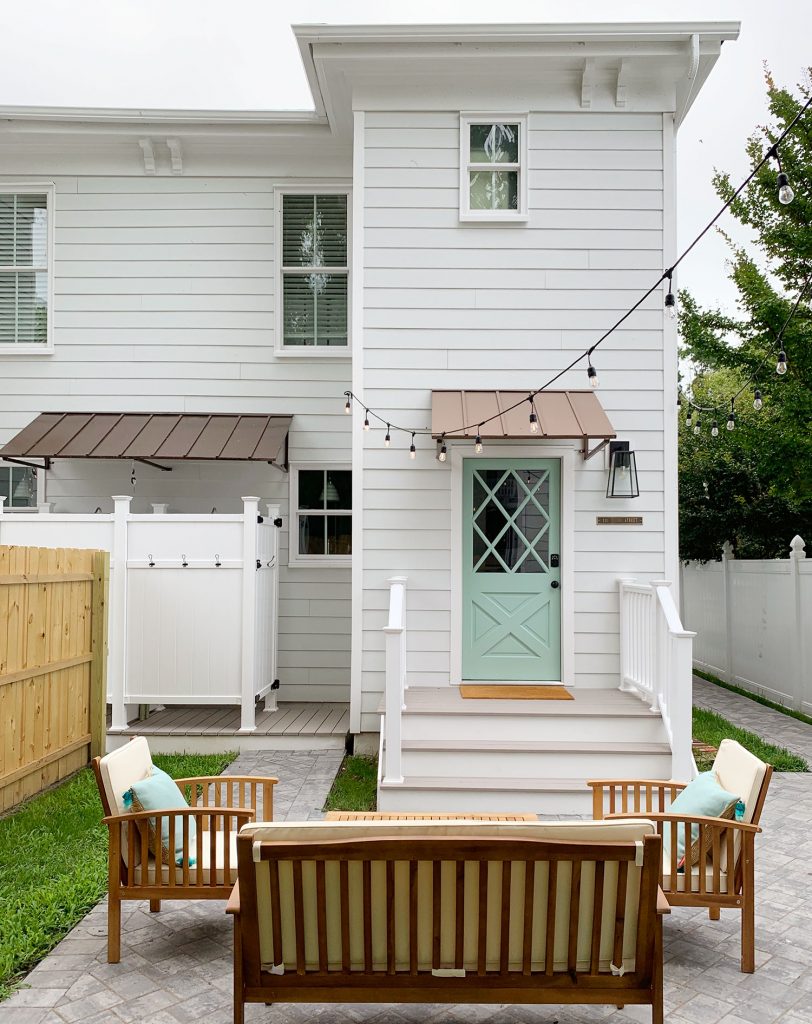
And here’s a similar after shot. You can see some of the old features that we saved/restored, like the diamond gridded windows, the corbels below the roofline, and the original front doors. Plus we added some nice wide brick steps, porch columns that no longer blocked the windows (this is much more likely their original position), and a tin roof that made it even more welcoming.
***See more of the duplex exterior makeover here***
The Front Porch
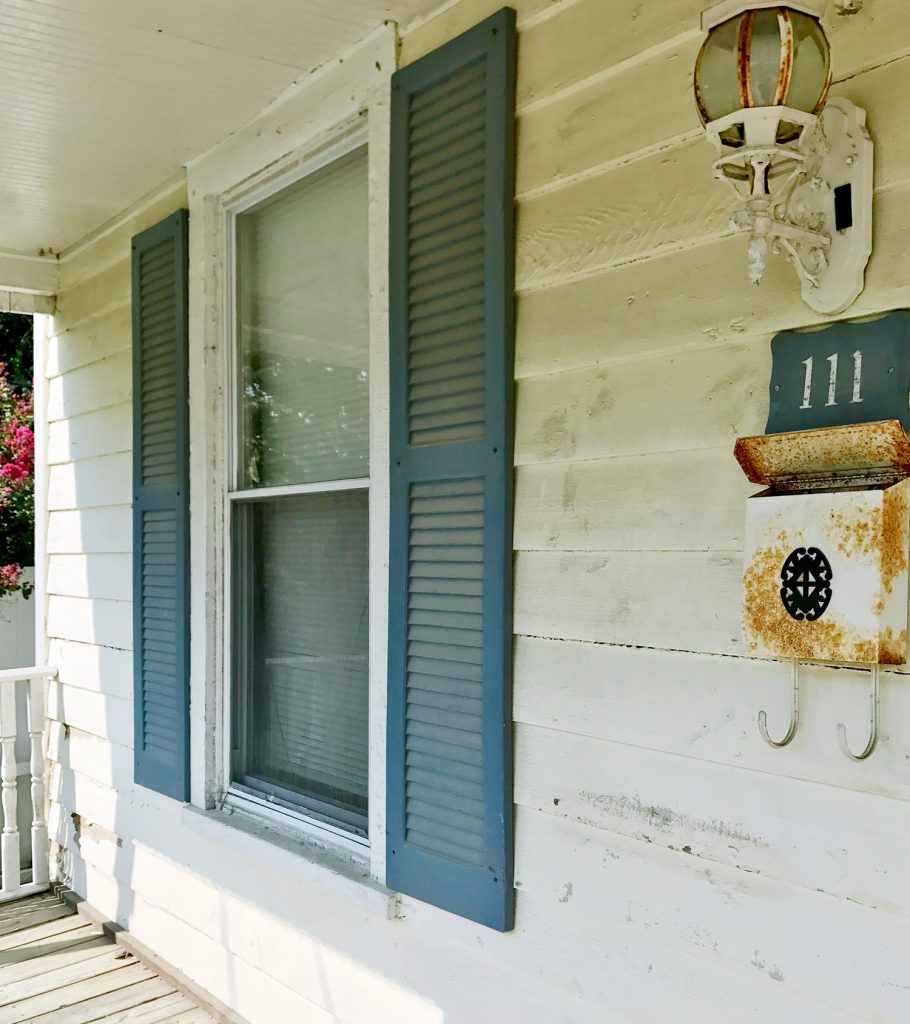
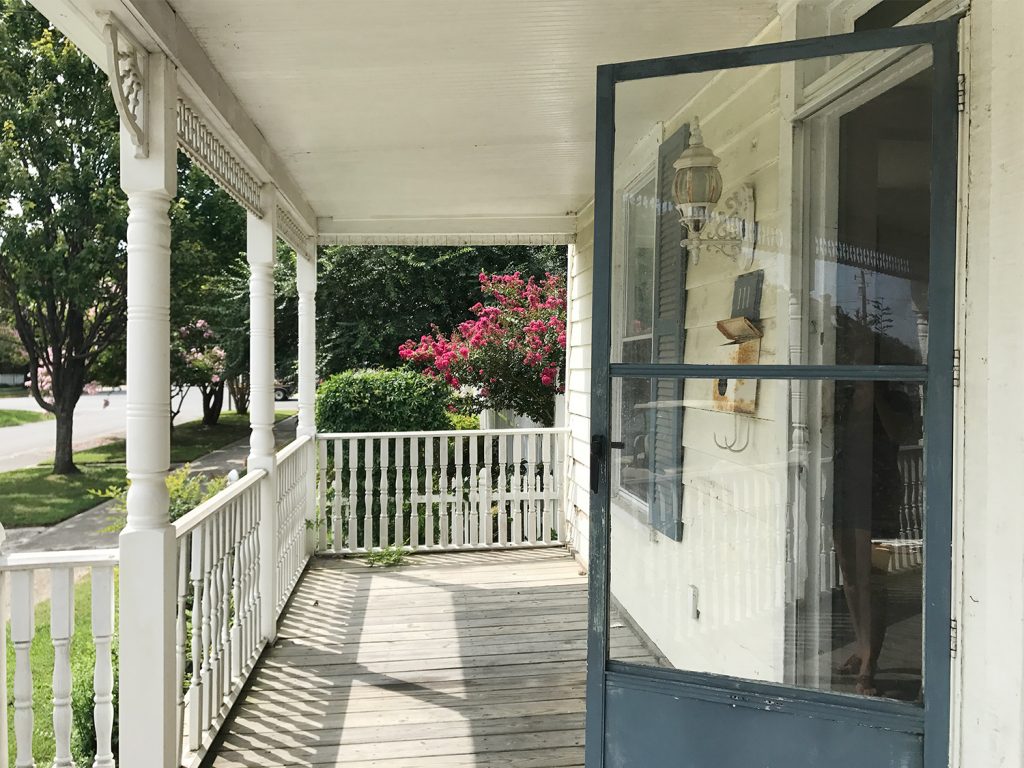
We shared a lot of the big exterior decisions that we made as we went, like choosing our siding, roofing, and picking the color for the shutters. But some of the small porch detail were just as exciting: we have mailboxes! And house numbers! And lanterns to illuminate said house numbers! This was a close-up of the porch from our first walk-through.
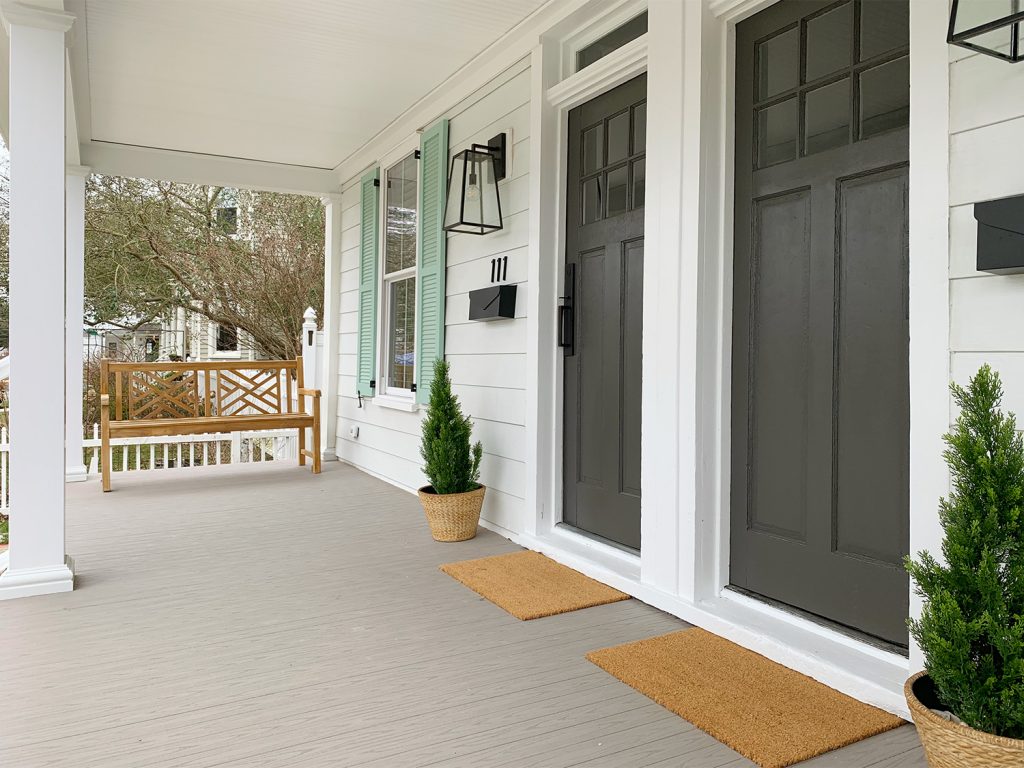
And here’s what that same area looks like these days:
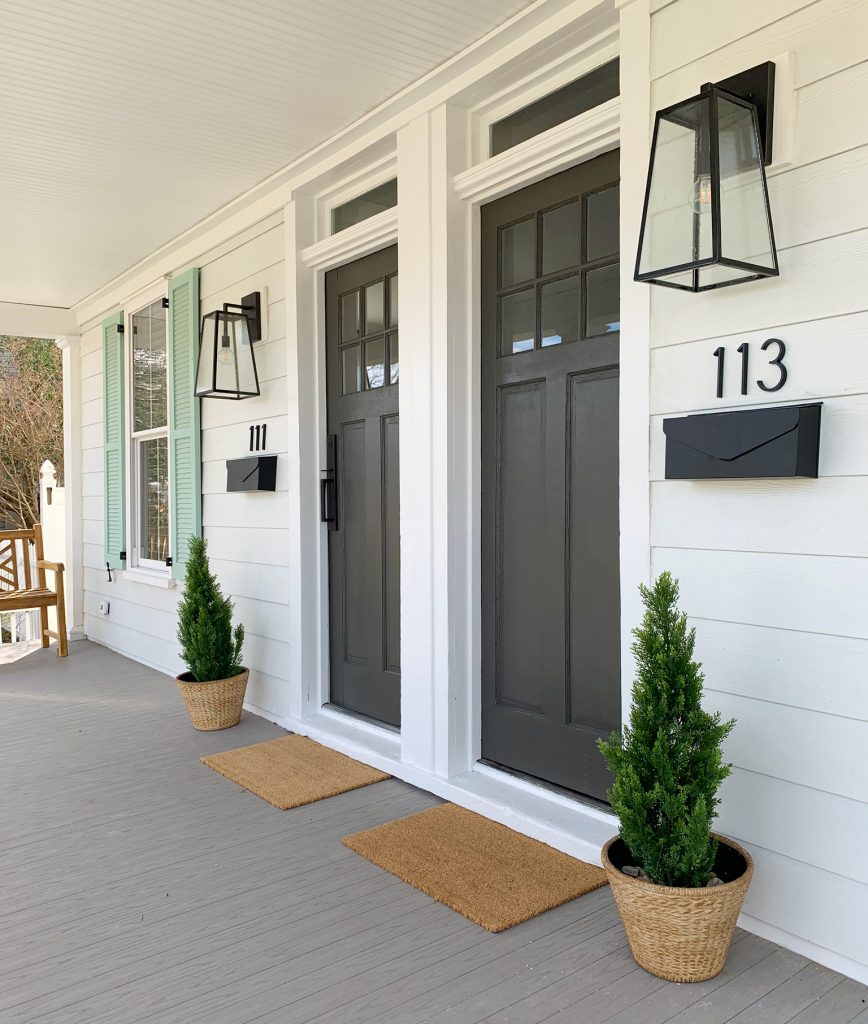
We simplified the porch by removing the old storm door (curiously only found on one of the two doors) and by taking down some of the plastic trim accents that we determined weren’t original.
We were also able to leave the porch railings off (code doesn’t require them at this low height from the ground) so the whole area feels more open and less closed off.
Some of the original corbels were too rotten to reuse, but we were able to replicate them exactly out of newer no-rot material. And we took great joy in removing the old strand of Christmas lights and those three satellite dishes. #TripleThreat
Here’s the porch now, complete with some hydrangeas that we planted out front and our historic district 1910 sign that we applied for and received after researching this cool old house’s history.
***See more about the duplex front porch here***
The Entry & Stairs
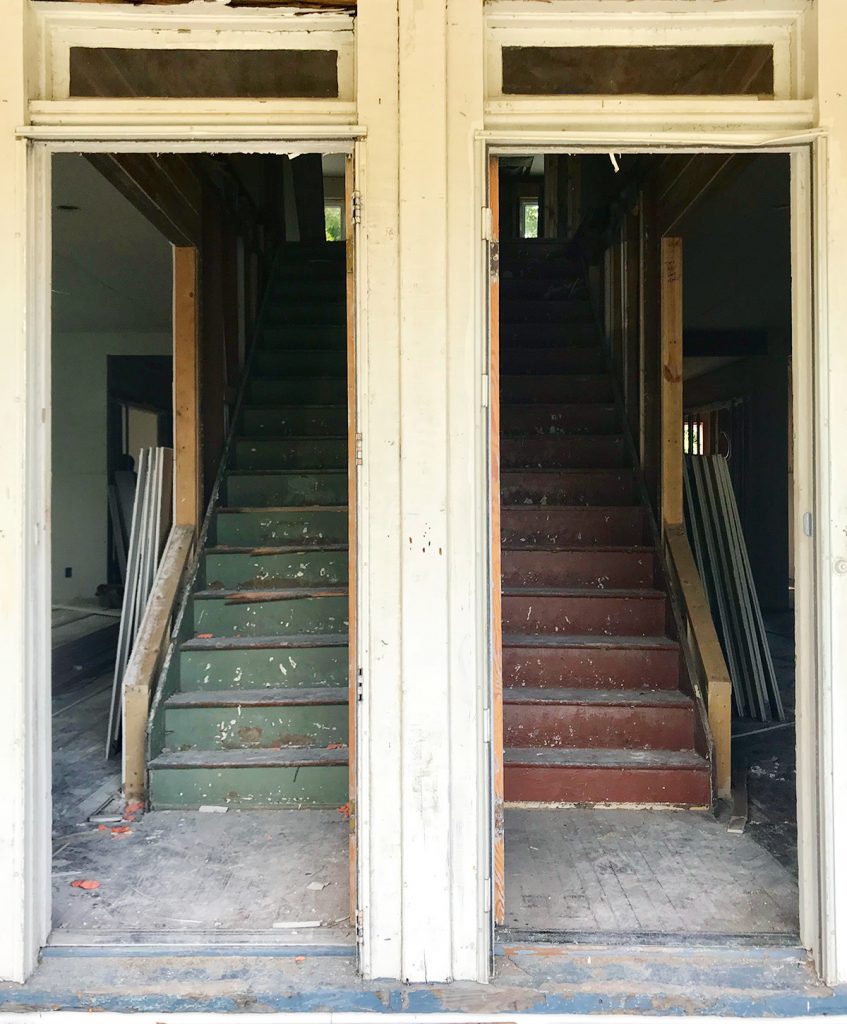
Since the home doesn’t have a proper foyer, the bottom of the staircases act as your entryway and first impression of the house, so we really wanted to open it up and make it feel welcoming and happy. This is how it looked previously with the duplex doors wide open (this shot was taken during demo):
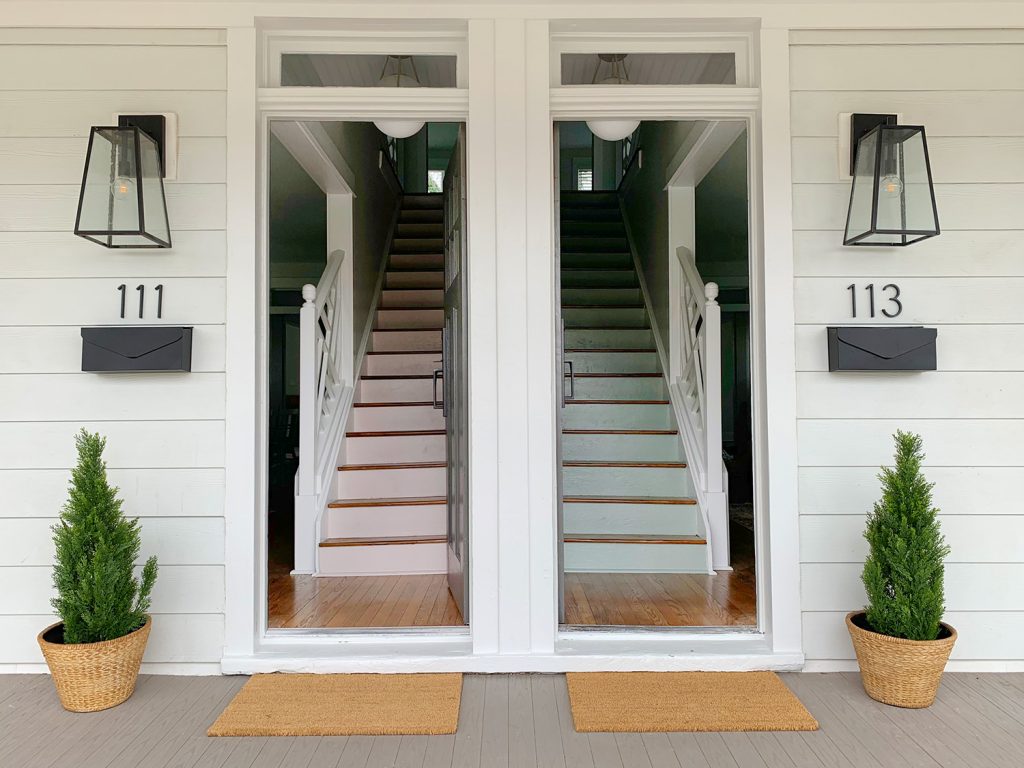
And here it is now, with basically everything upgraded and restored. We painted the stair risers on each side the same color as the interior doors on that side (Sherwin Williams White Truffle on the left, and Sherwin Williams Oyster Bay on the right).
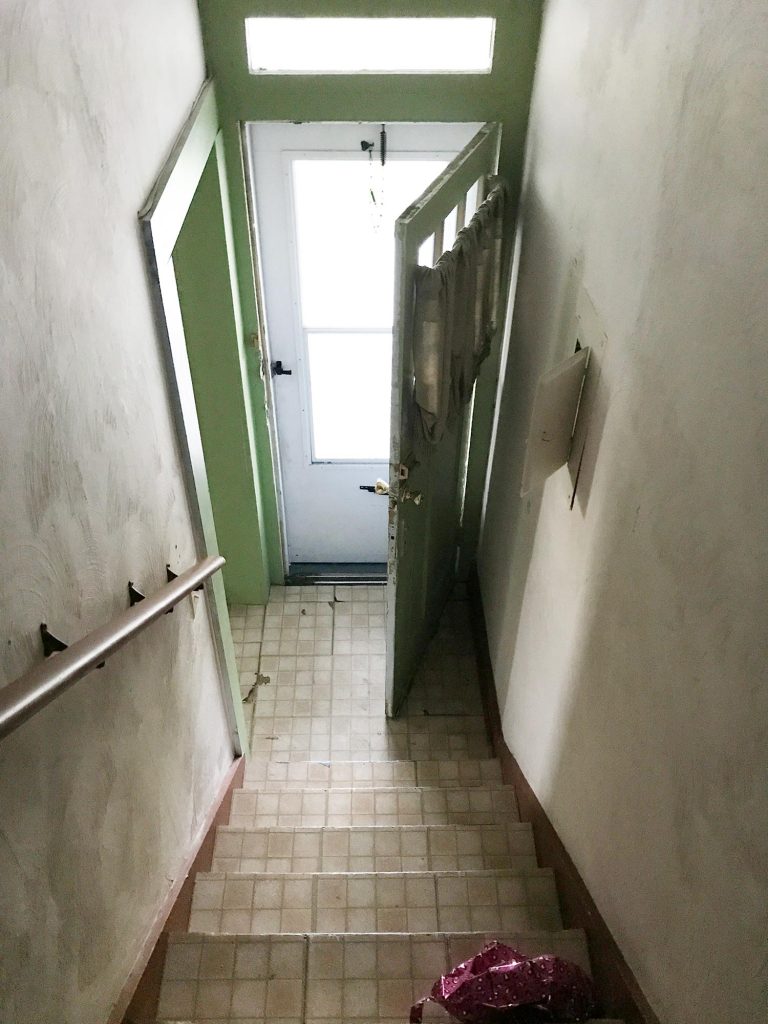
From inside, this before photo really shows you how closed-in the entry was when we bought the house. It was like a dark cramped tunnel with a tiny doorway to enter the living room from the front vestibule. The deflated birthday balloon was not adding much to the vibe either.
Now it looks like this, thanks to creating a much wider doorway into the living room, and an open railing that lets in tons of light & adds some great architectural interest.
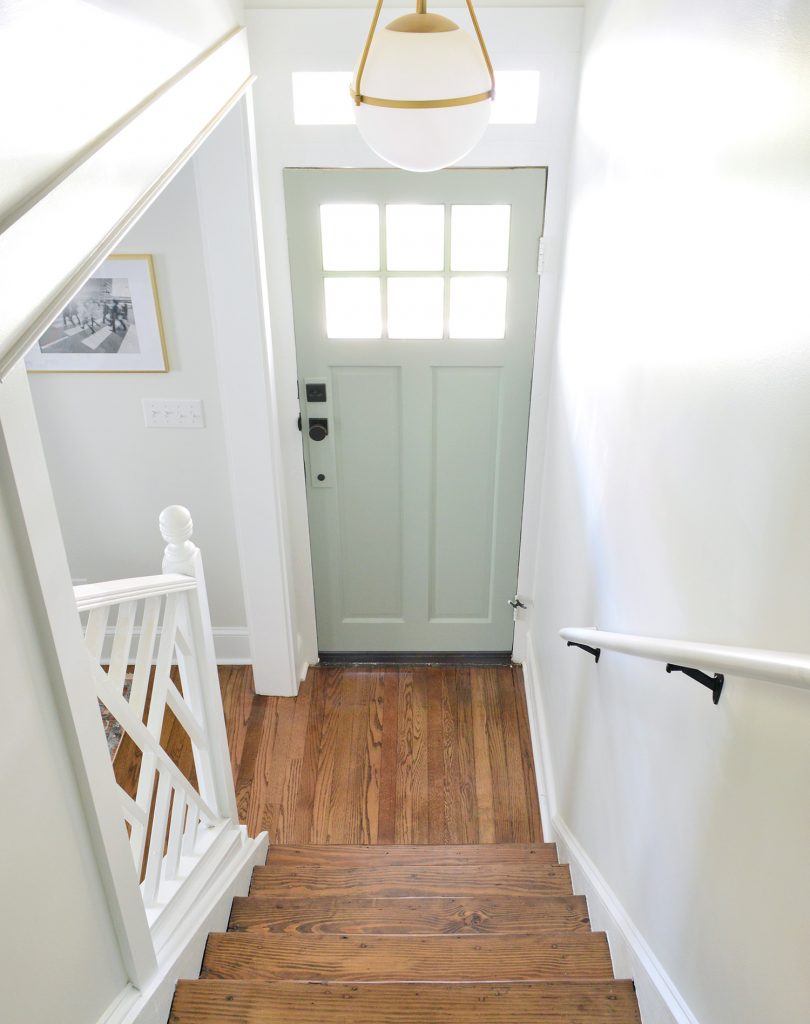
Those cool railings are actually the original railings from the front porch of our house in Richmond, and when we redid the porch we no longer needed them there – and the big reveal was that they fit PERFECTLY in the duplex when we brought them there to see if they’d work. COMPLETELY MEANT TO BE! We’re so glad they got to live on here (more on The Sisterhood Of The Traveling Railing here & here). For reference, here’s the other side with the pink doors.

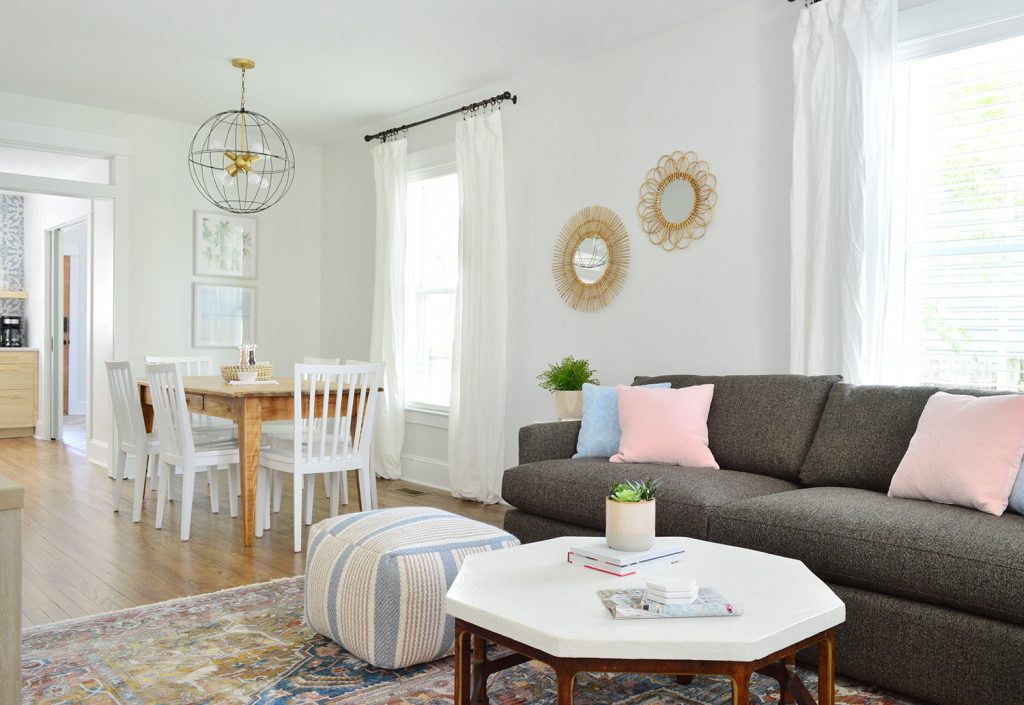
The Living & Dining Rooms
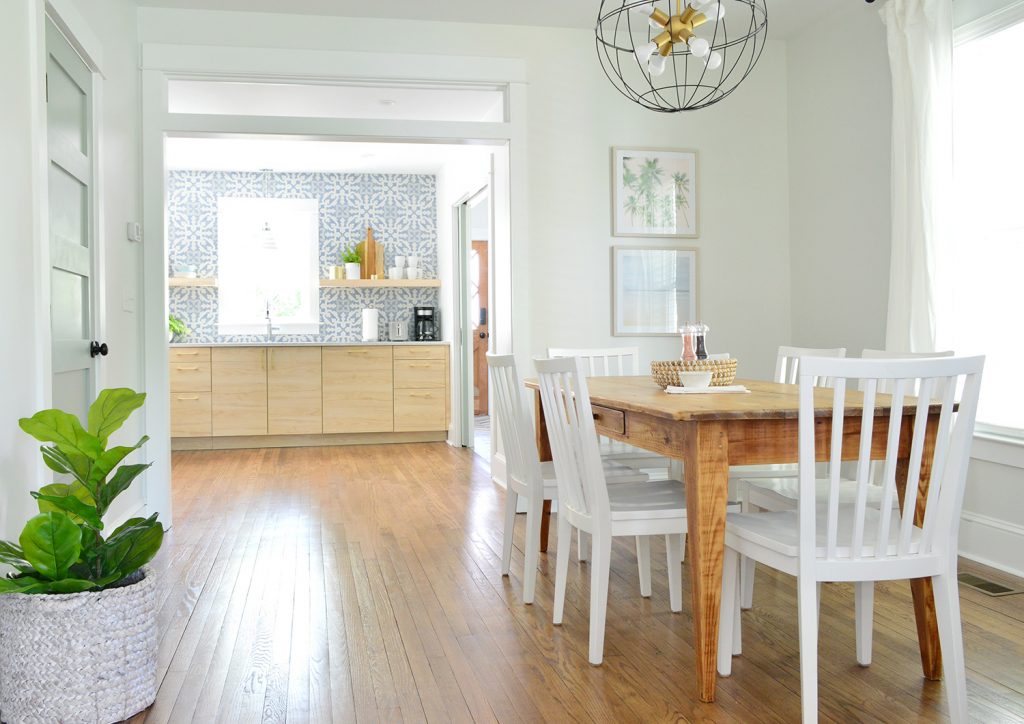
From the entryway, you enter the main living area of each side, which is a combination living room and dining room. Here’s what one side looked like at first (the doorway at the far left is the one that leads to the front door).
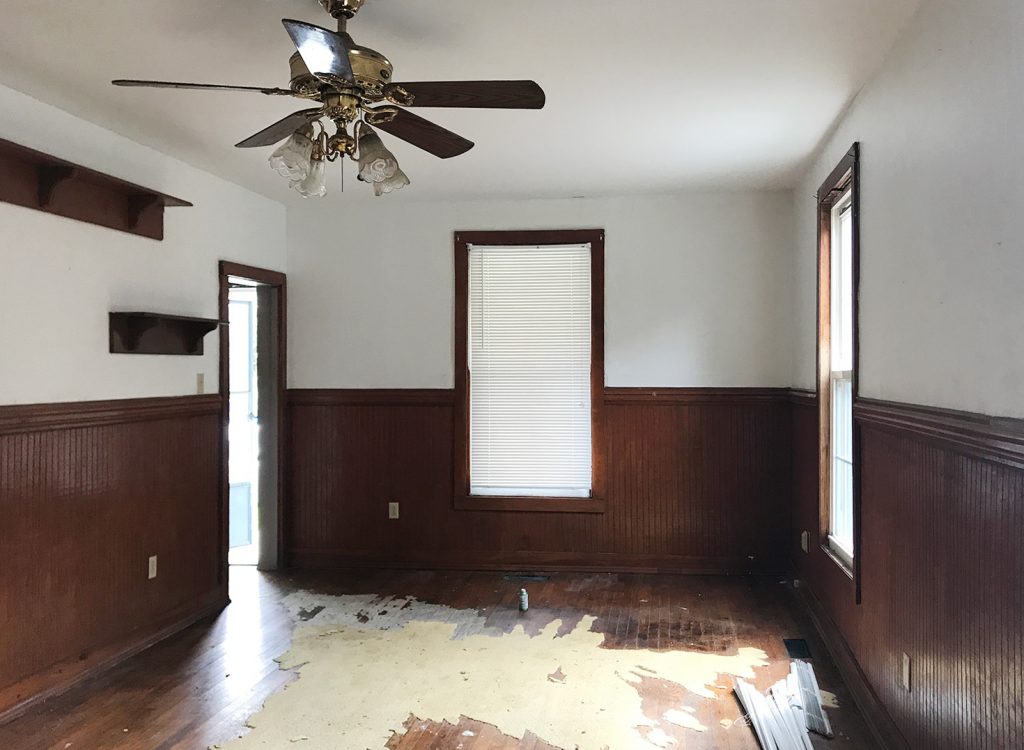
Widening that opening not only helped brighten the stairway and entry area, but it really helped the living room itself feel brighter and less cramped too. Plus, you get to enjoy the architecture of the railings from both sides. Win-win!

In addition to a few other really helpful changes – like nixing the dark faux-wood paneling and refinishing the wood floors – we also helped make the room function better as a dining space by widening the doorway at the other end of the room too.
That doorway connects to what is the new kitchen area (we even added a glass transom over it!) so the whole downstairs flows together a lot better while feeling brighter and more connected. Not only do you get to enjoy the view of the kitchen from the moment you walk in, but many of our guests remarked that for a small house it felt really big – probably due to the 9′ ceilings and all of the cramped doorways that we widened.
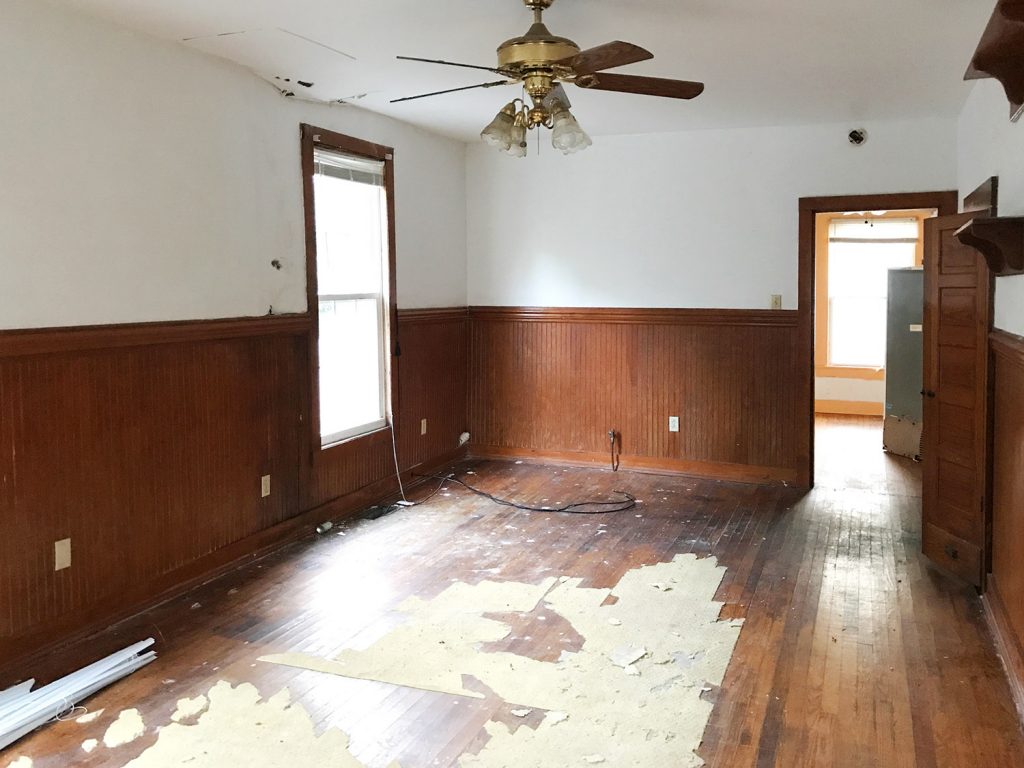
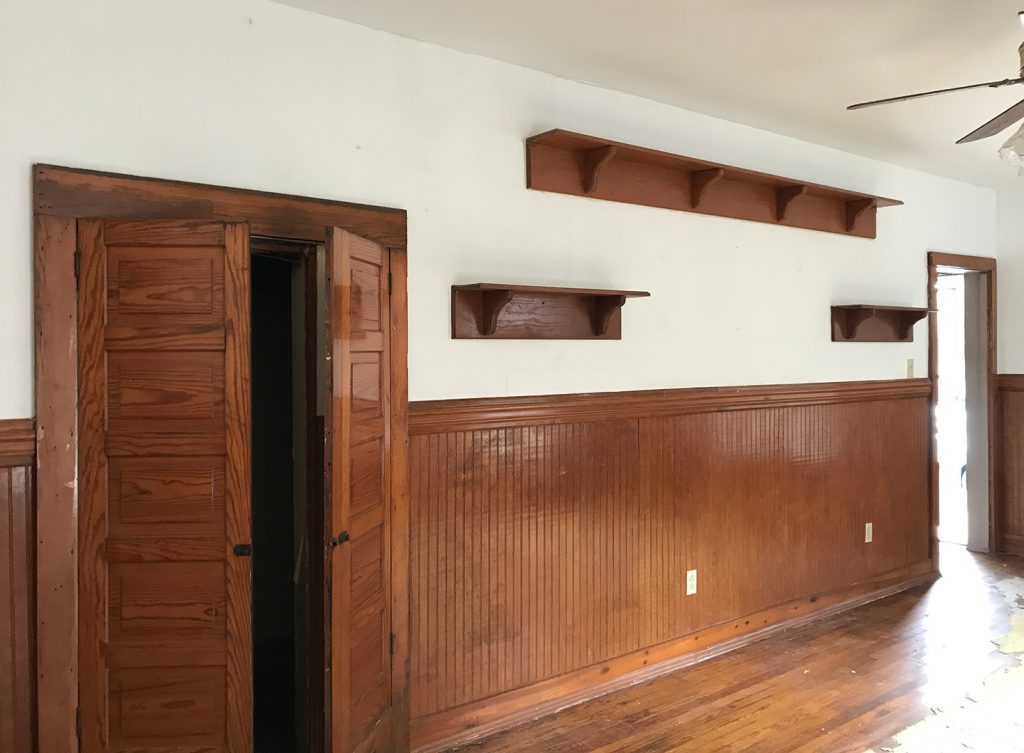
This is the same space looking back in the other direction. Take note of those wood doors to your right, since you’ll be seeing them again in one of the bedrooms.
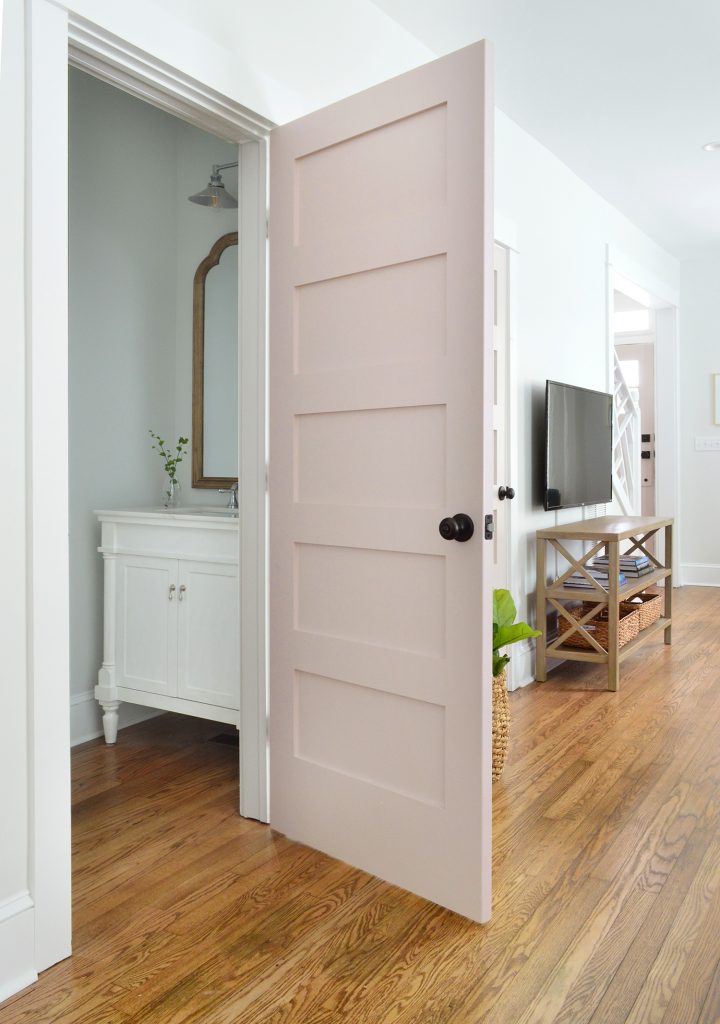
We got new 5-panel doors throughout both sides (with the exception of a few original ones that we could salvage – like the ones in the photo above) and we painted them fun colors: SW White Truffle on one side (seen below) and SW Oyster Bay on the other. It helps give each side a distinct personality and feels beachy but not too crazy or bold.
The doors in this space in particular lead to some helpful adjustments we made to this side of the living area. Originally there had just been one closet under the stairs, but it left a lot of wasted (completely unused!) space back there.
So we were able to make that old closet into a powder room (originally there was no bathroom downstairs on either side of the duplex – apart from a random toilet in one of the kitchens that wasn’t behind a door or anything!). And even with this closet-to-powder-room conversion, we were still able to fit a new closet under the sloped area of the stairway, which is our locked owners closet that houses our tankless water heater and a bunch of cleaning stuff and extra supplies.
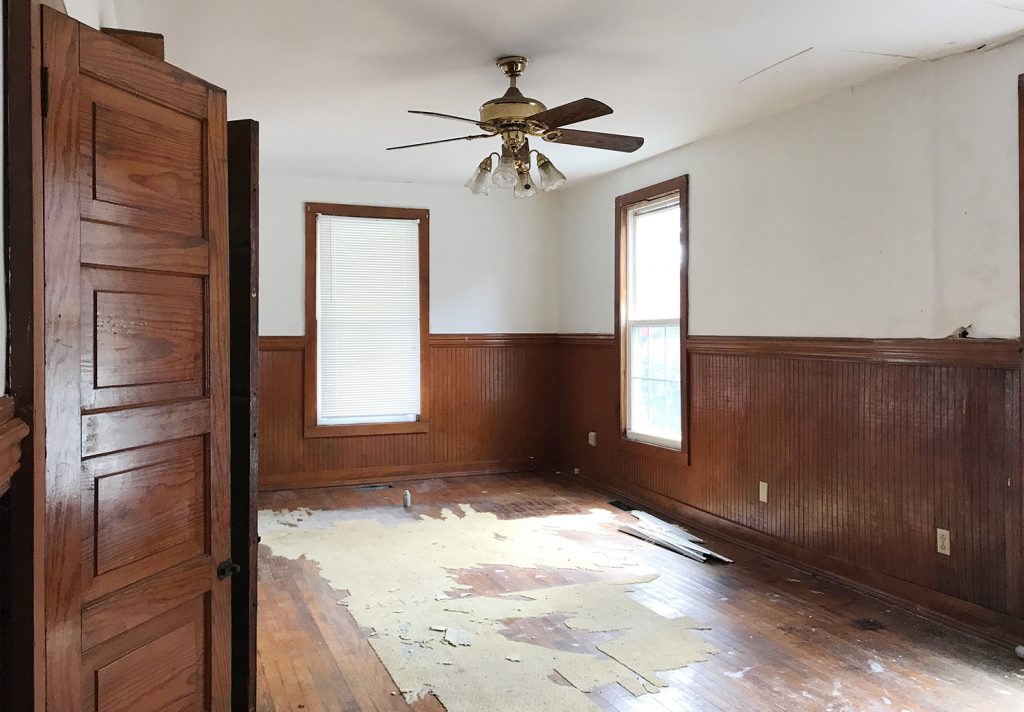
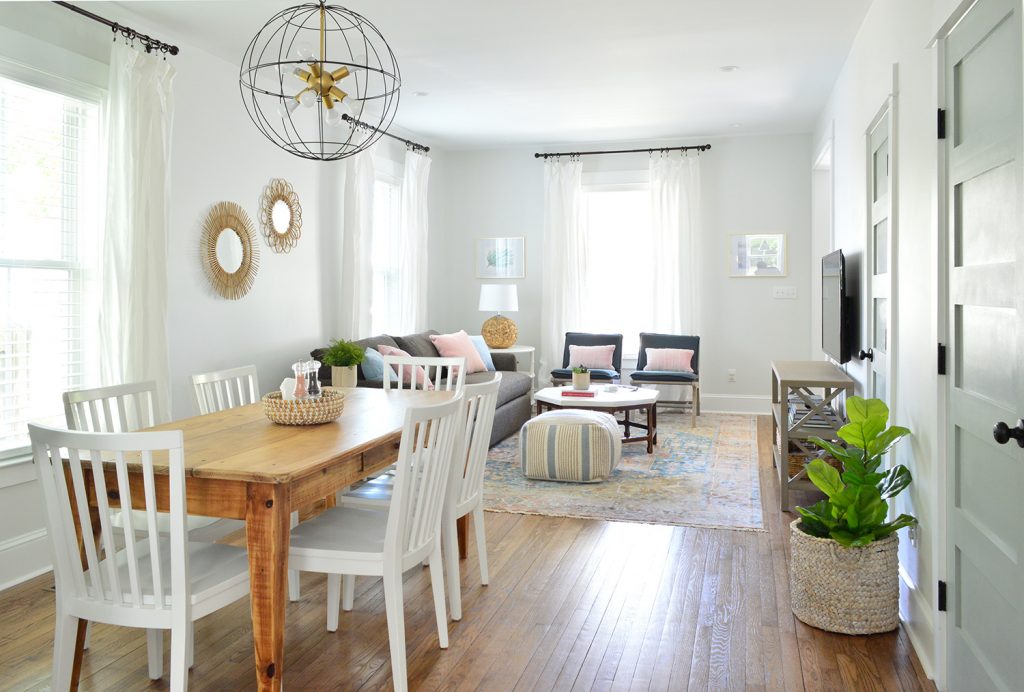
The story is pretty much the same on the other side, although the before pictures over here boasted less dark wainscotting and more multi-colored trim.
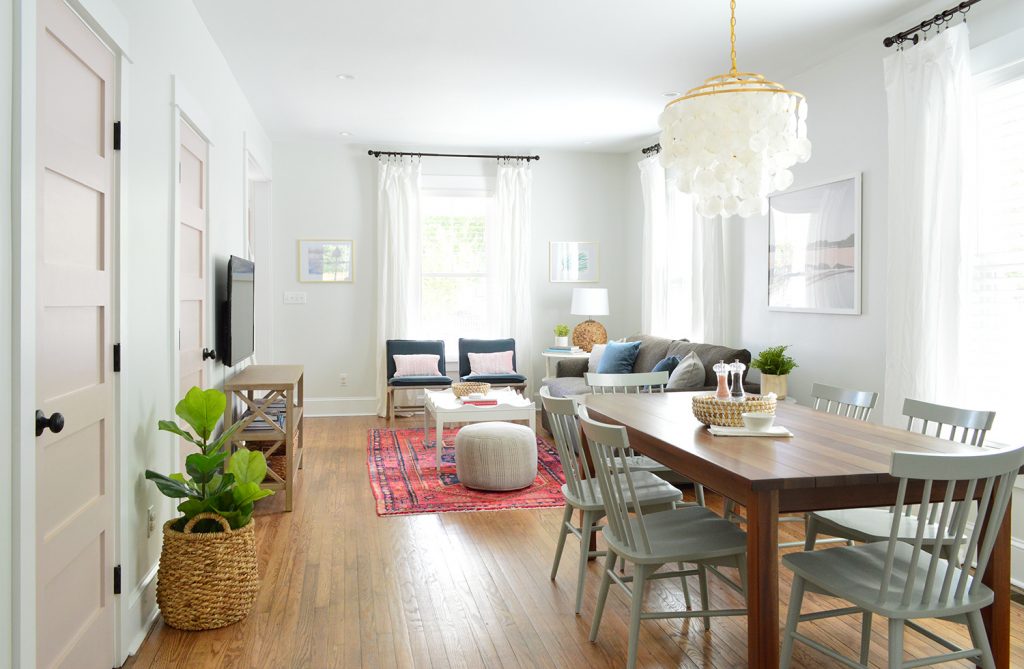
This side also got brightened and opened up thanks to some wider doorways, and we had fun giving it a distinct look with some simple decorating changes (like a different rug, table, chairs, chandelier, and coffee table – even though the sofa and the curtains are the same on each side).
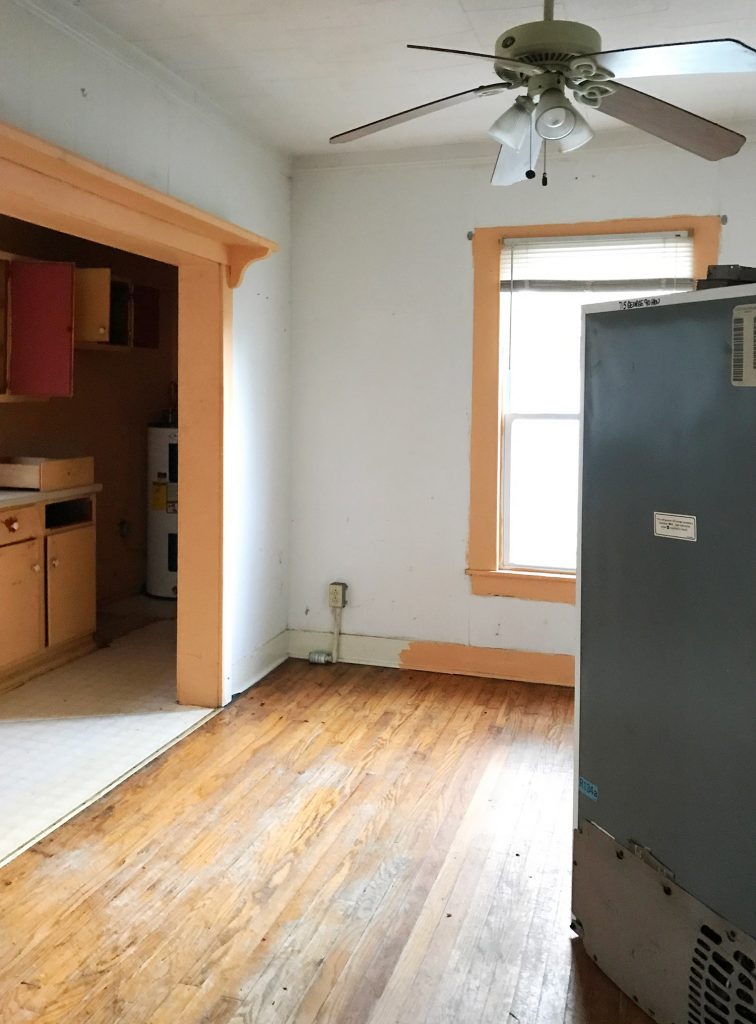
We don’t have a photo looking back from the other side, except for this one taken in the old dining space (which is now the kitchen). But this helps you appreciate how closed off the two areas were to one another – especially since this one had a big refrigerator just sitting in the middle of it.
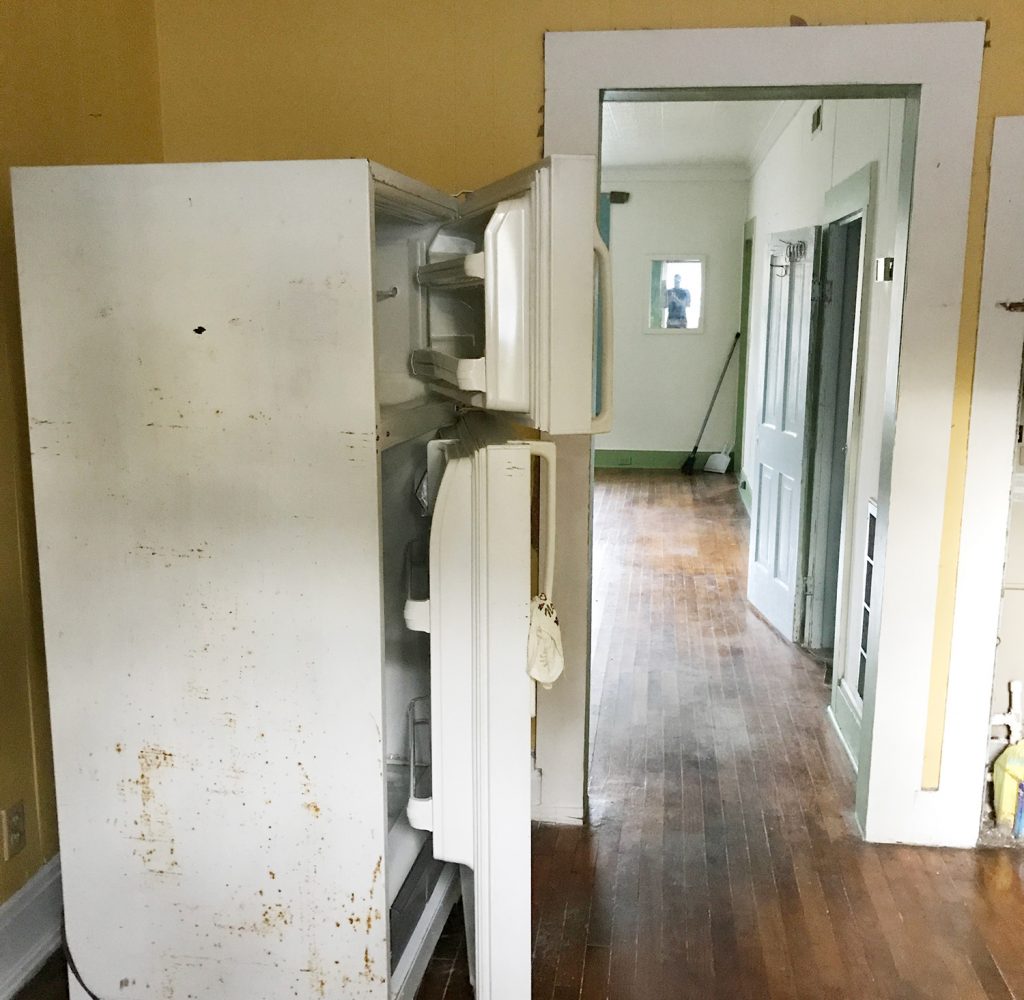
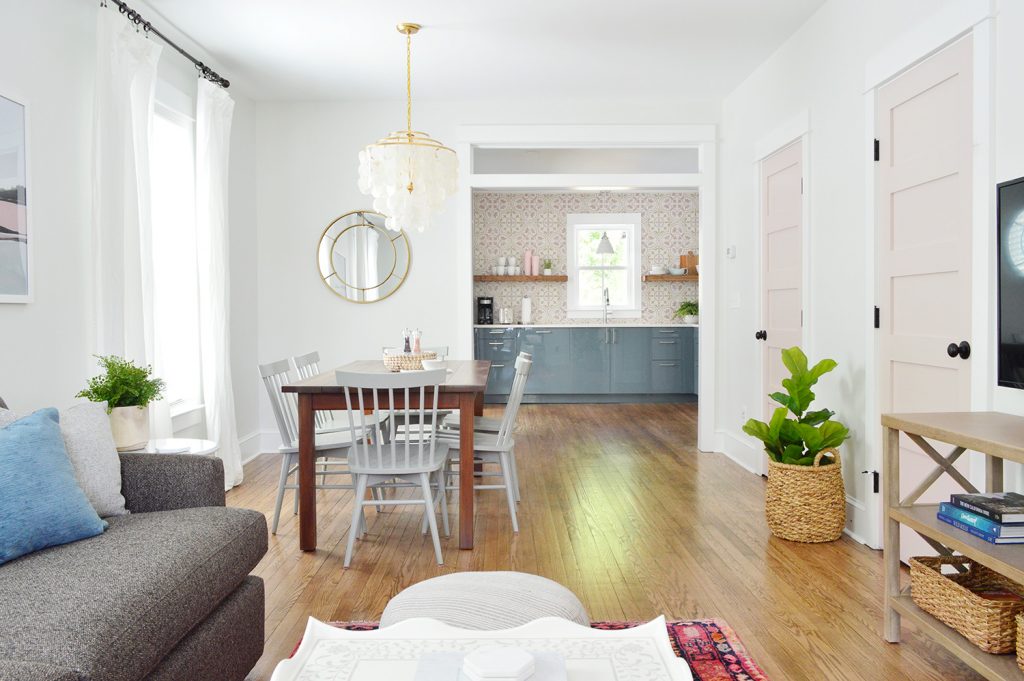
Now standing in that widened doorway, you get a totally unobstructed view through the main living area, right to the front of the house.
***See more about the living & dining rooms here***
The Kitchens
Before we dive into the kitchen before and afters themselves, let’s take another look at this angle to remember how separated the back of the house was from the dining area.
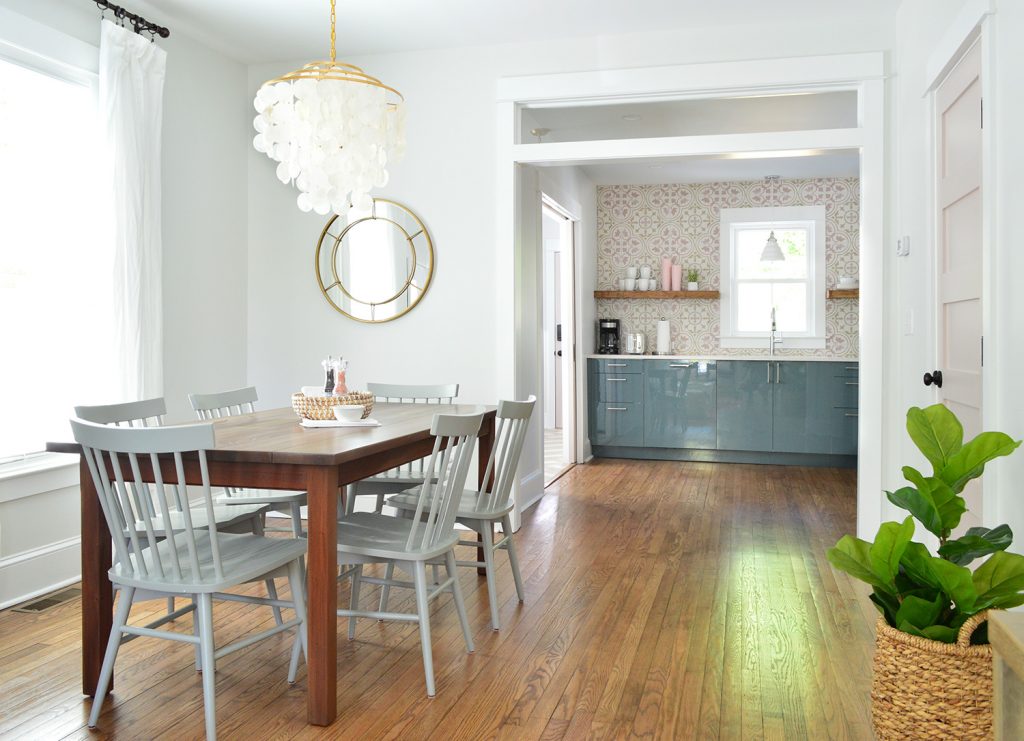
By widening that doorway the kitchen becomes much more of a part of the main living area. And because the kitchen isn’t big enough to have an eat-in area, it was really important to us that this nearby dining table felt convenient and open to the kitchen.
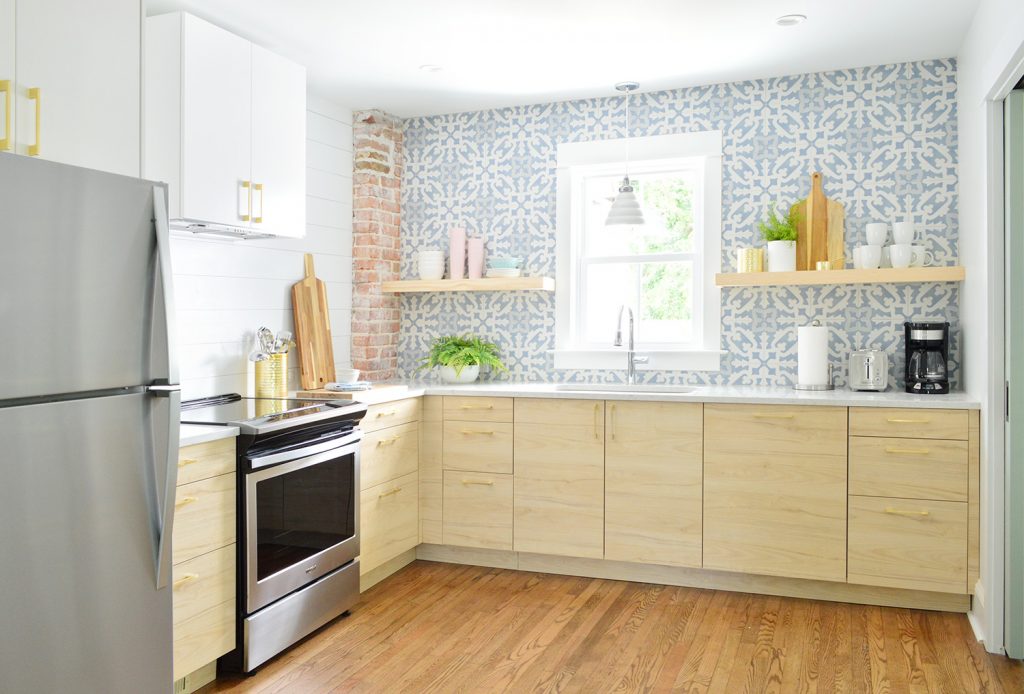
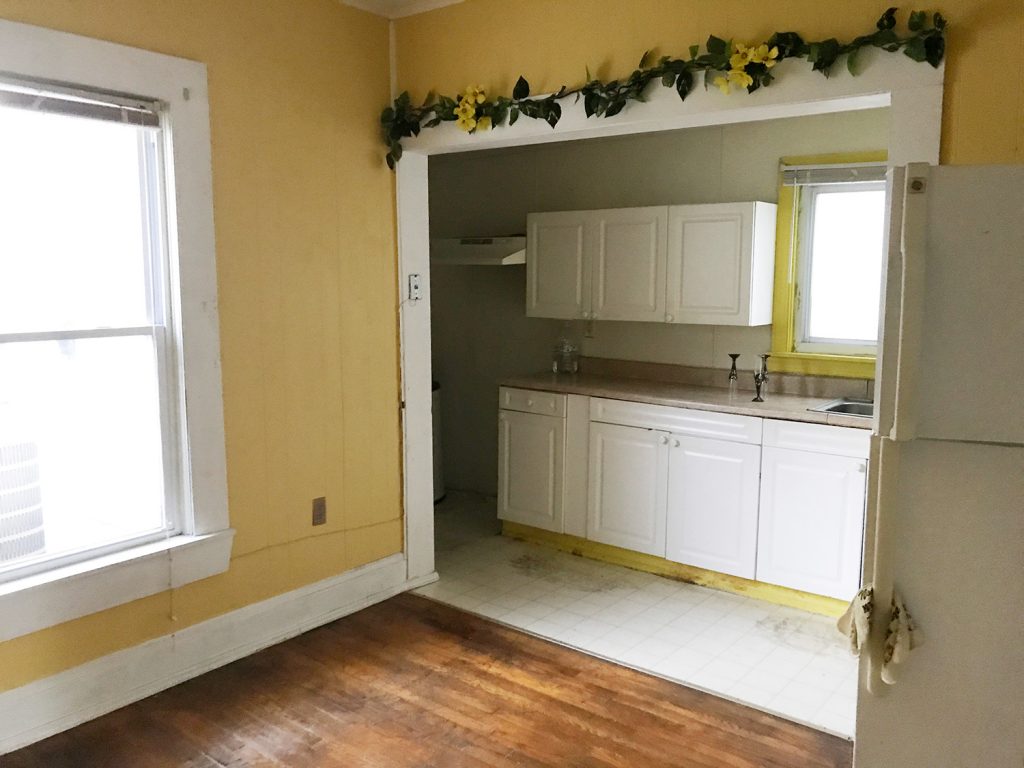
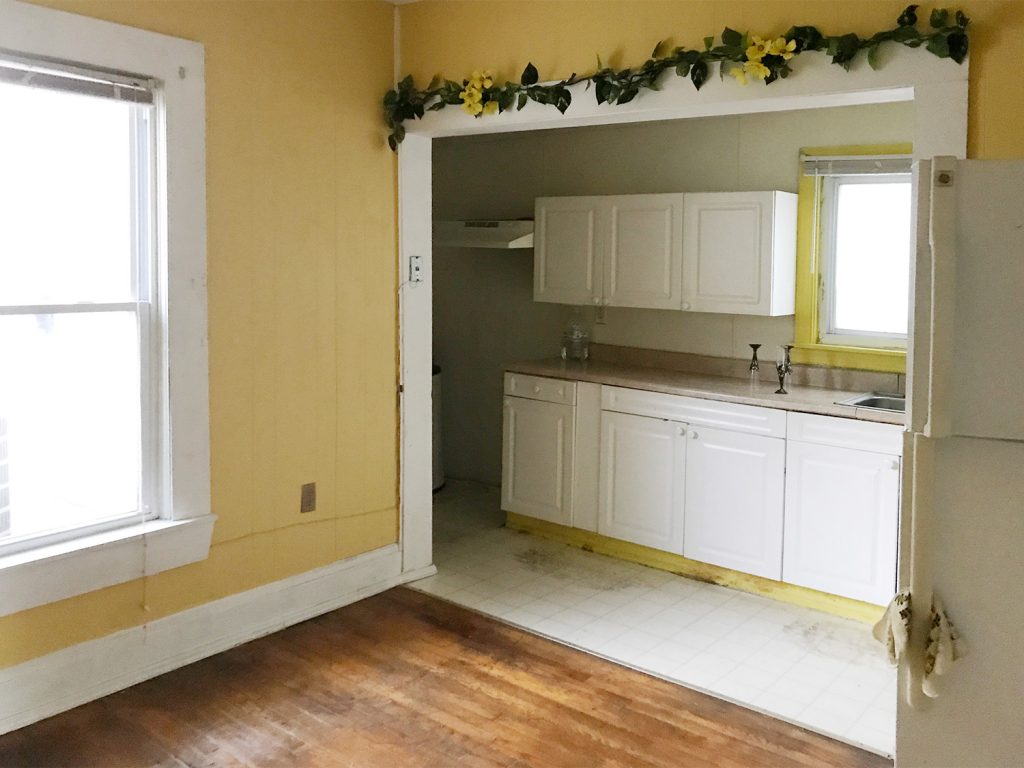
Spinning around and looking into the kitchen area itself, you’ll see that it wasn’t originally a kitchen. We think it was probably used as a dining area, although both sides did have that rogue refrigerator sitting in them so it’s hard to tell.
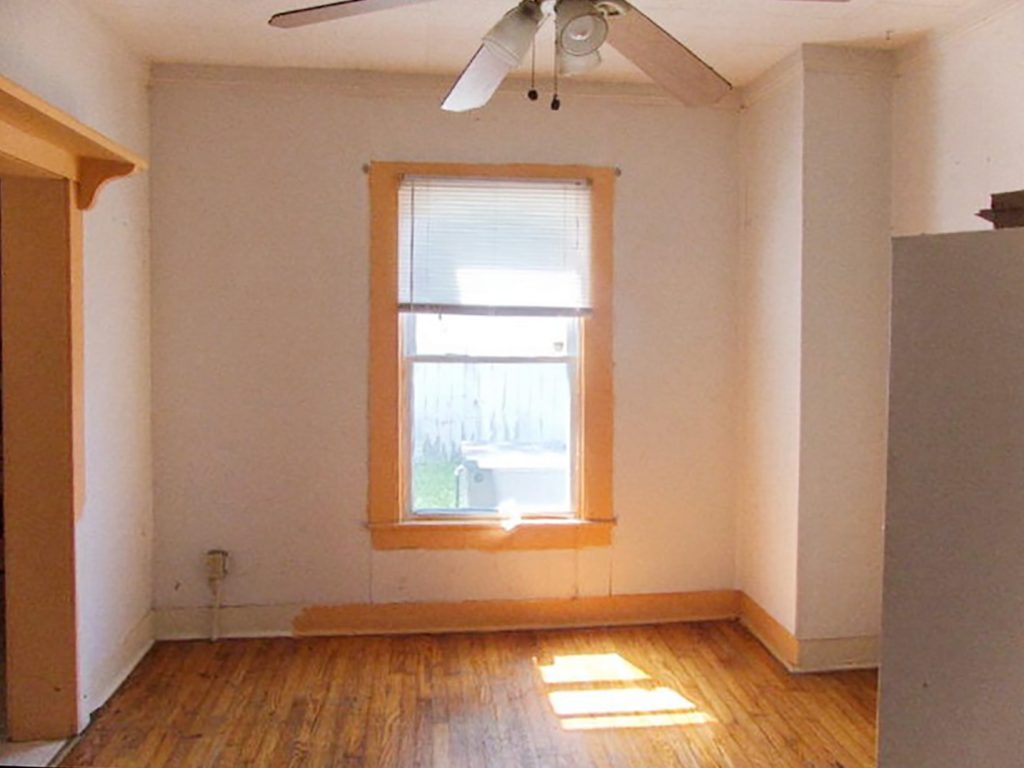
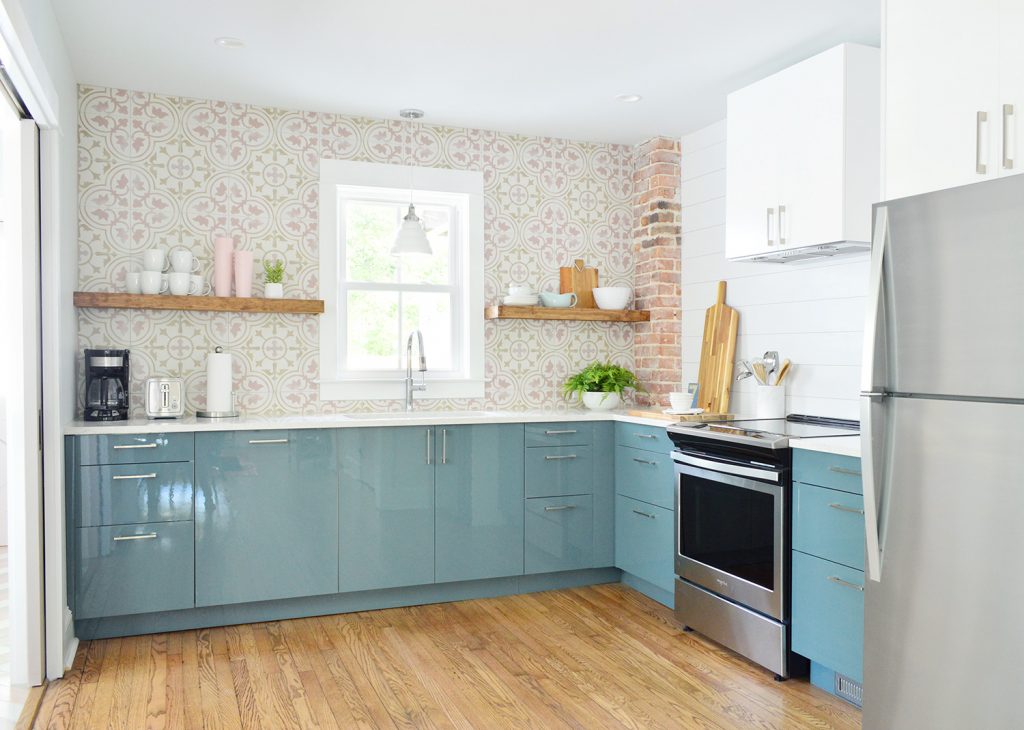
But by swapping out the window for a slightly shorter one, we were able to run cabinets along that entire back wall as well as the one on the right side of the room, which created a nice spacious kitchen full of more than enough storage (two of the cabinets are actually empty!). We also exposed the original brick chimney that had been hidden behind drywalled in the back corner – and we love the character and old charm that brings to the space.
If you’re wondering where the old kitchen was, it was just off to the side behind another doorway in what we learned was once a screened in side porch (so we know it wasn’t the original kitchen location). As you can tell from the photo below, it was a very narrow spot to squeeze a kitchen into – and it felt like it blocked off the back door in a really cramped way.
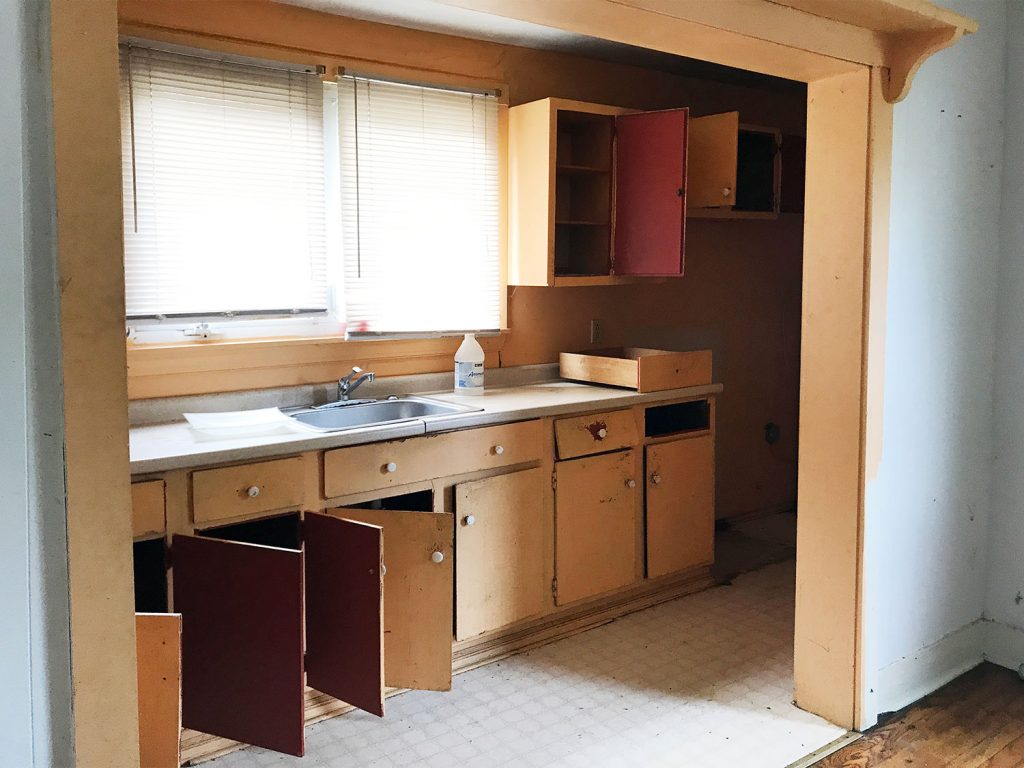
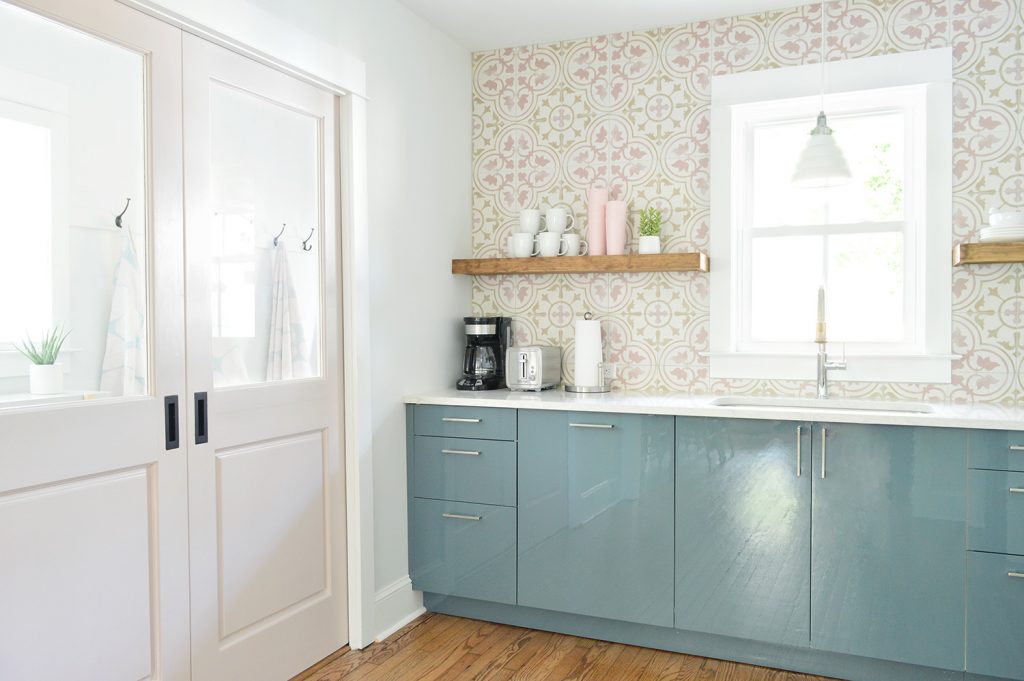
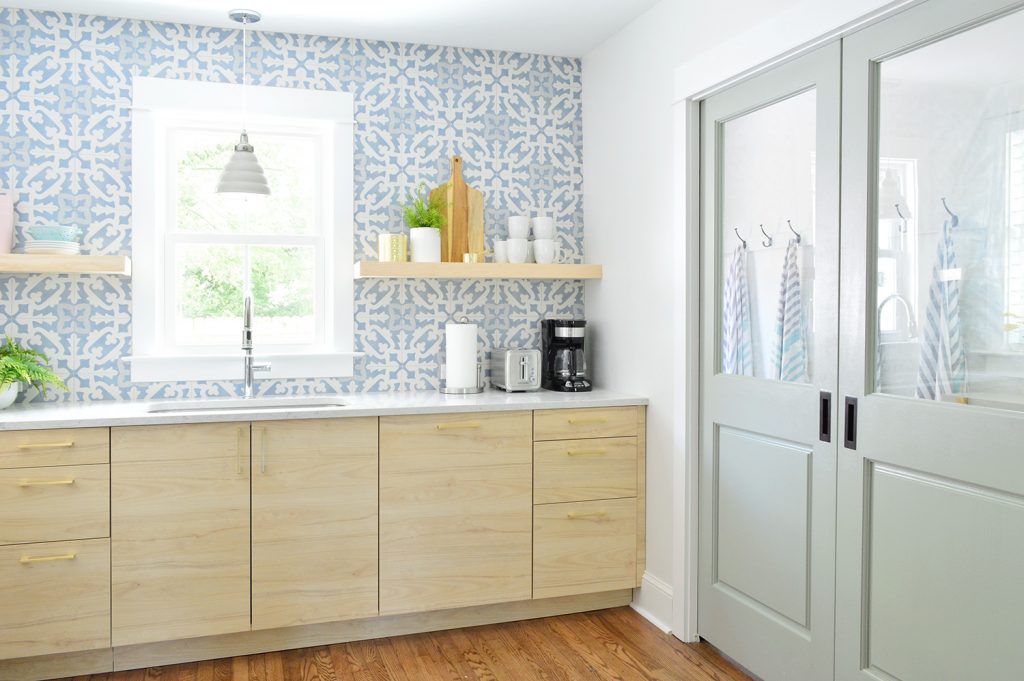
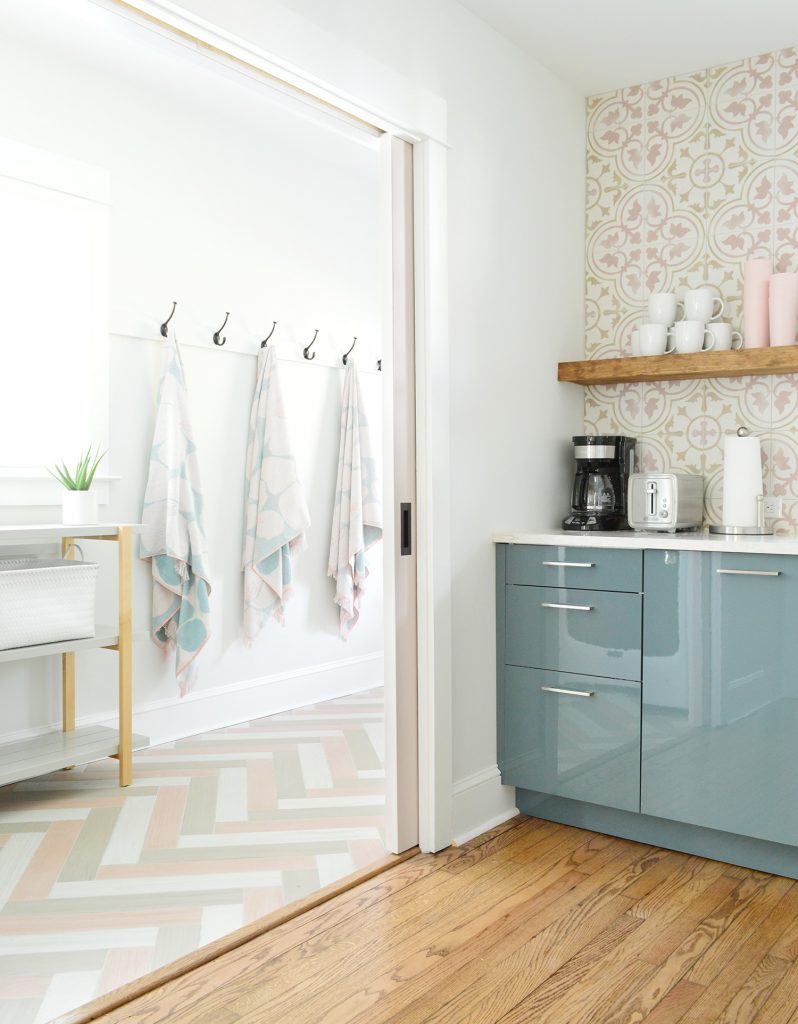
So once we moved the kitchen back into a larger area, that narrow room off to the side became a great laundry room/mudroom instead (more on that in a moment) and we added half-light pocket doors between it and the kitchen to let in light from that great window, but block laundry noise if our guests wanted to close them while cooking or hanging out.
Again, the story is virtually the same on the other side of the duplex – just with different finishes and design choices. So, remember this view with the old narrow doorway?
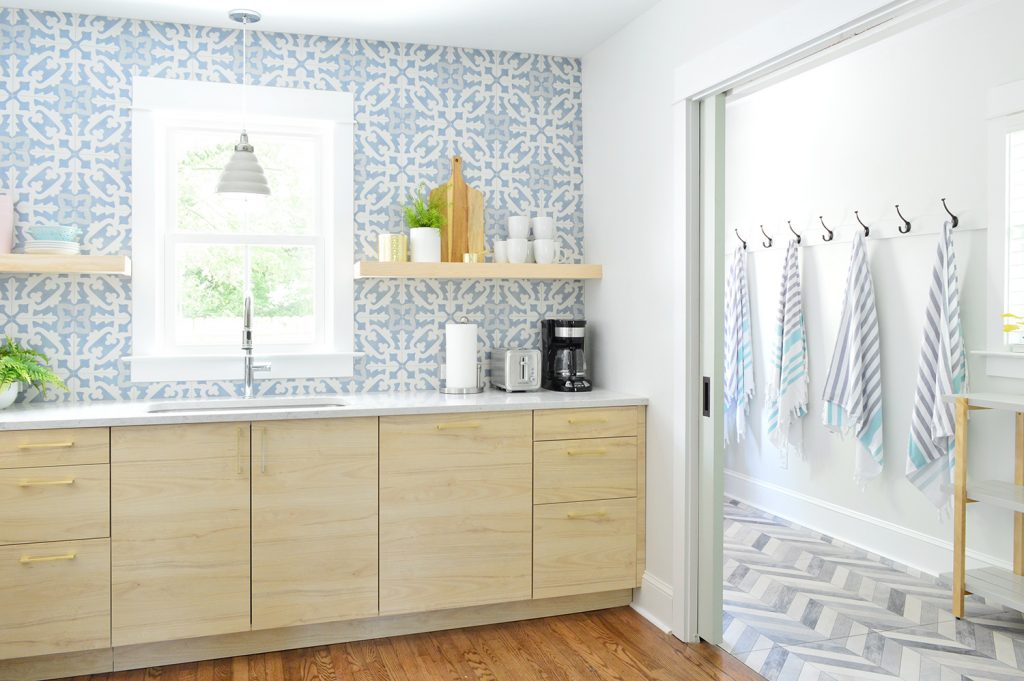
Here it is now that it’s wider and more connected to the dining area:
This other kitchen has the exact same layout (and the same exposed brick chimney that we dug out from behind the drywall) but we chose a different cabinet door style and backsplash tile so the two kitchens would feel distinct. One of the most fun things about renovating a duplex for us was making these “alter ego” spaces that were essentially identical in their layouts, yet completely different thanks to selecting different finishes, colors, tile, furniture, etc).
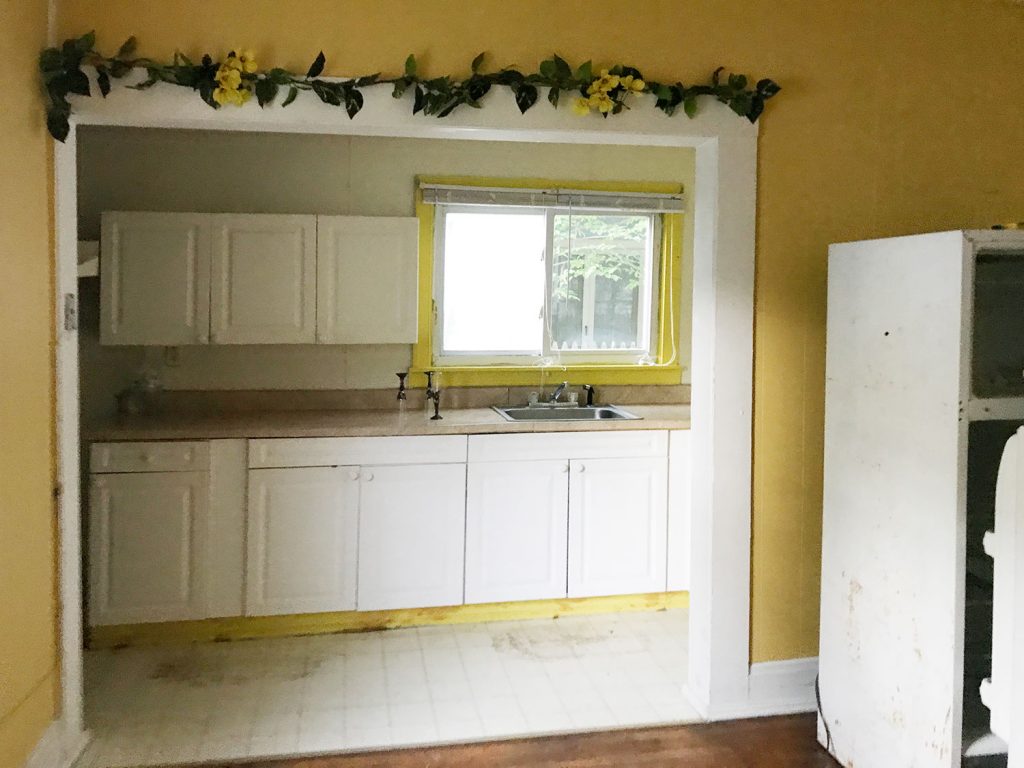
Just like it had been on the other side, at some point the kitchen was shoved into the former side porch area – although this one had yellow window trim and some faux greenery in the mix.
It sounds funny, but we actually shrank this doorway a bit compared to the old one. Partly to make the pocket doors possible (you need room in the walls for the doors to hide when open), but it was also so the doorway was perfectly centered with that large window in the laundry room/mudroom, which made it feel balanced and original to the house – like it was always meant to be this way.
***See more about the duplex kitchens here***
The Laundry / Mudrooms
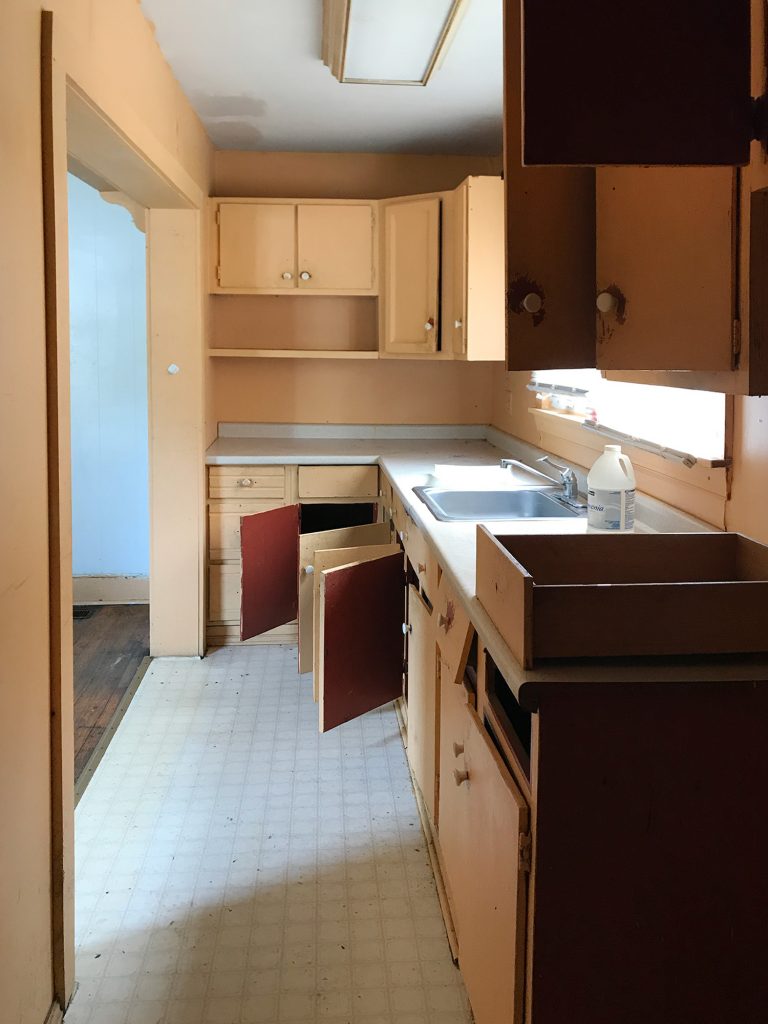
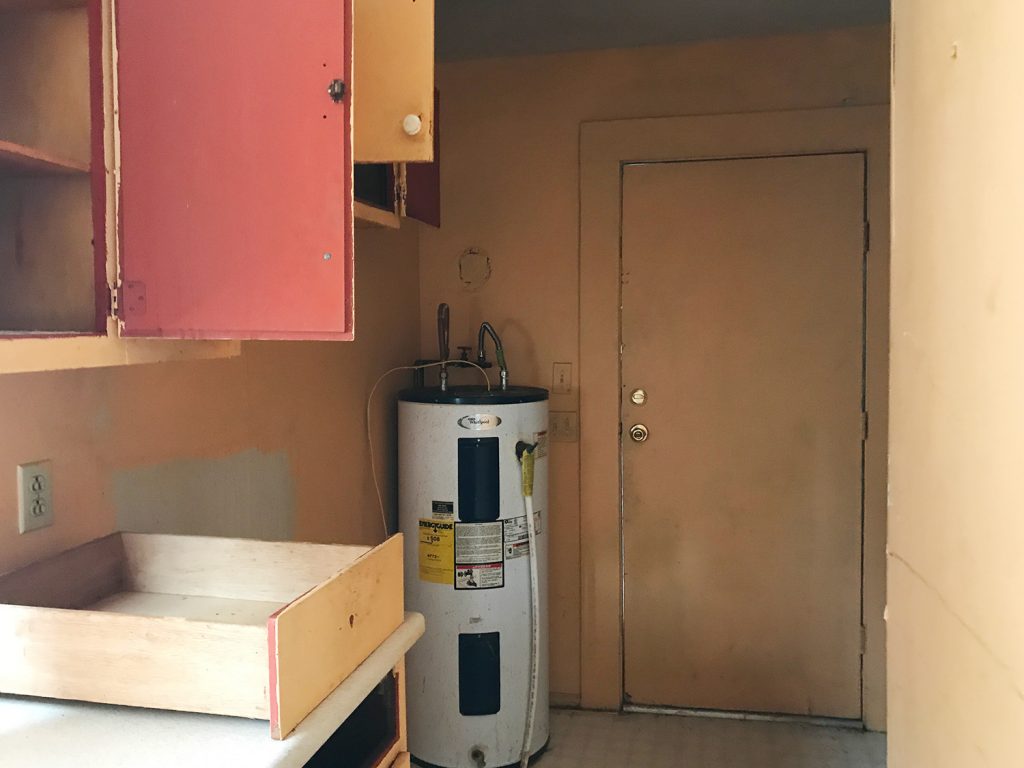
Diving into the laundry and mudroom areas more specifically, you can see from this before picture how the area not only housed the kitchen, but also some of the mechanicals (like the hot water heater) and – on the other side – this is where the rogue door-less toilet sat.
We moved the hot water heater into the locked owner’s closet under the stairs (tankless, so it’s much smaller!), ditched the orphaned toilet thanks to having a proper powder room, and really focused on making this a bright and functional space. The back doors of these houses get much more use than the front ones (the guest keypad is back here, along with the shed full of beach gear, outdoor shower, and other post-beach amenities) so we wanted it to be just as inviting as the front entryway.
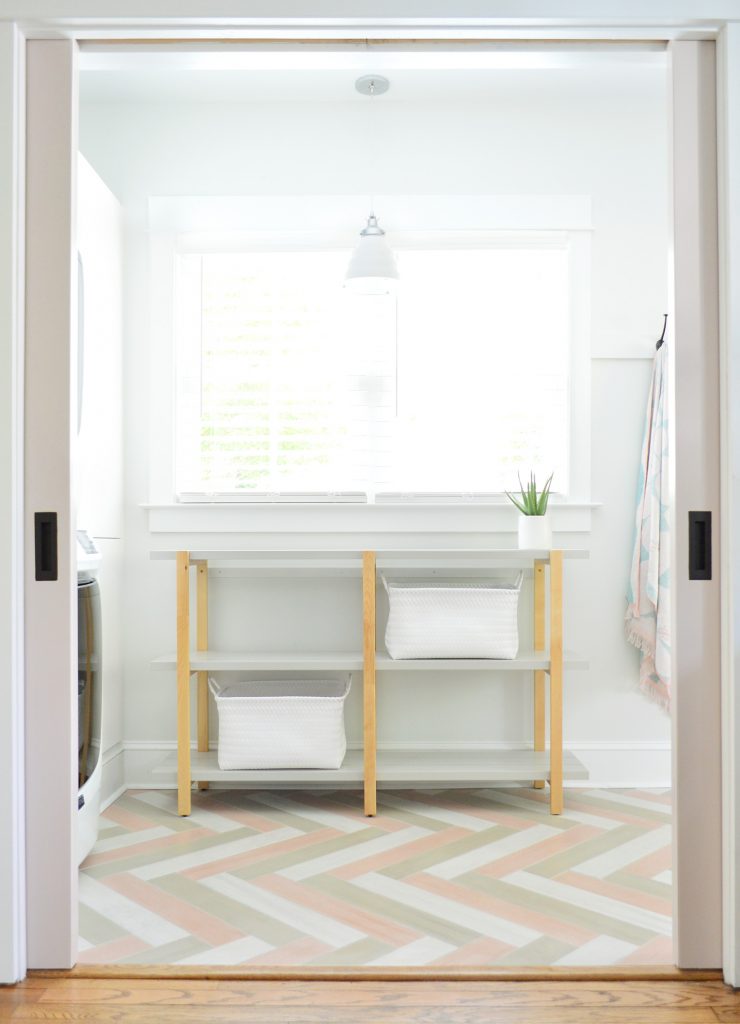
So now, instead of a whole wall of imposing cabinets…

…there is a simple, narrow shelf under that window, which we leave empty so that guests can store their pantry items or whatever else they want to use that area for.
Here’s another view of this area, taken with our backs to the back door. As you can tell, there wasn’t a great spot for a fridge in this original kitchen, which is probably why it was hanging out by itself in the adjacent room.
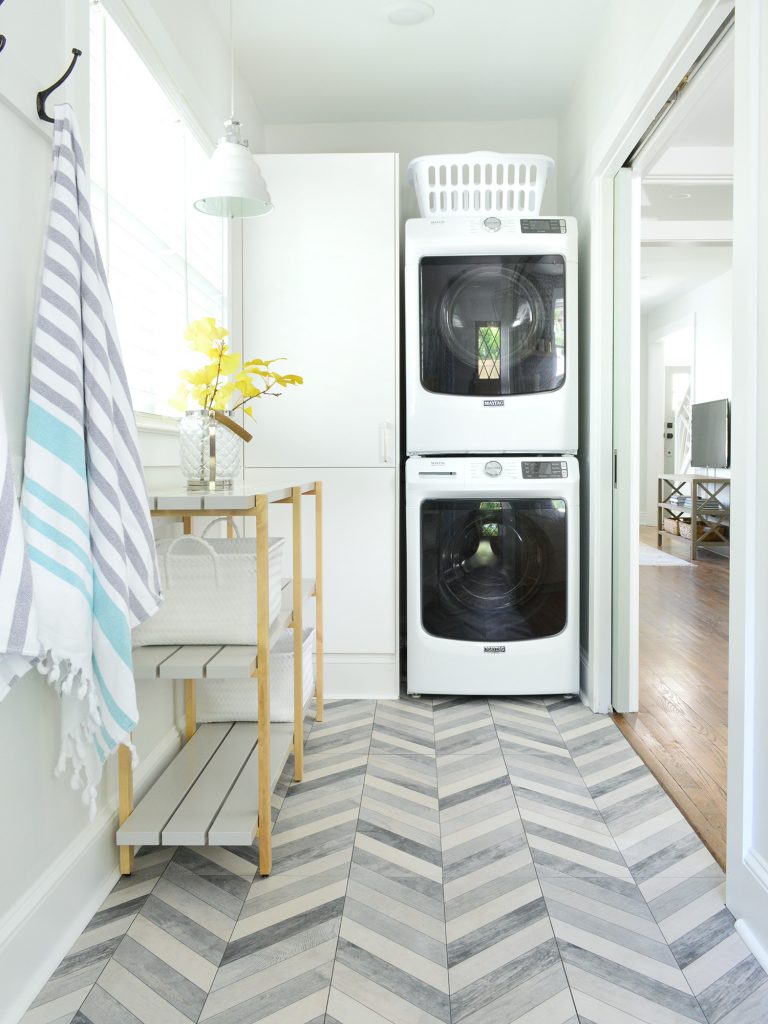
But now this area houses a stacked washer & dryer (the house previously didn’t have any laundry facilities) along with a tall cabinet that corrals the detergents and stuff, along with some extra guest storage space. This picture really gives you a sense of how much less claustrophobic it has become.
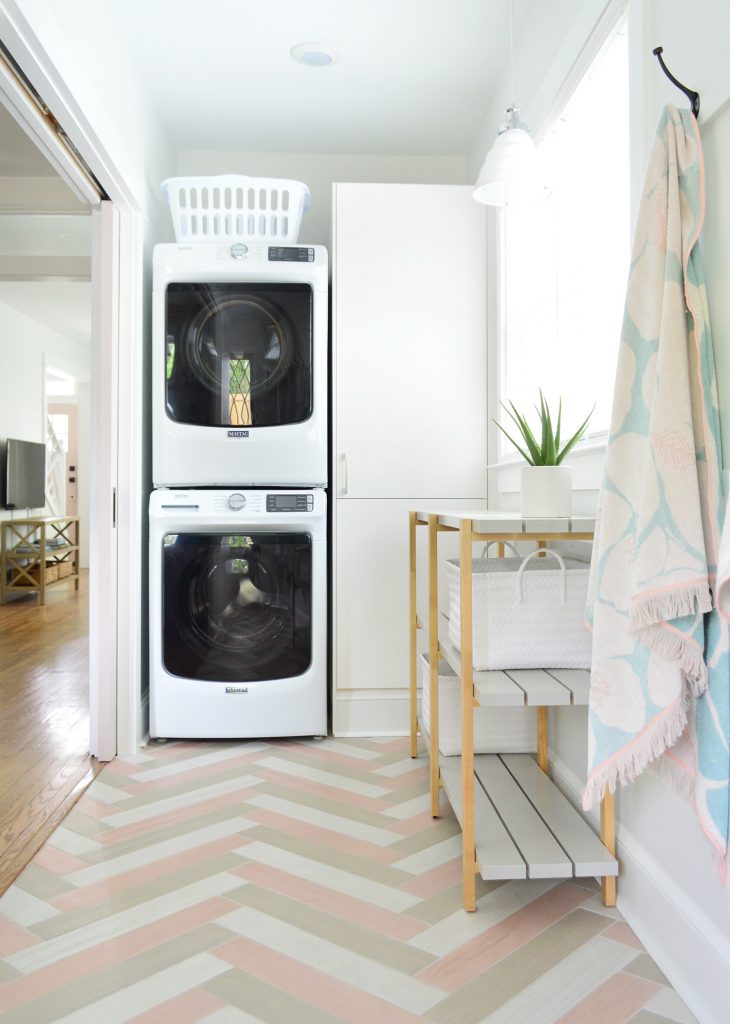
The other big issue with the space originally was sunlight. Besides that big double window, there was no other natural light in here – meaning this zone at the very back of the room was suuuuper dark.
We tracked down two matching secondhand diamond doors to replace the old beat up metal ones (they pick up the motif from those diamond windows on the front of the duplex!) and installed them back here to not only invite more architectural interest, but also to fill this area with a lot more natural light. It makes A HUGE DIFFERENCE.
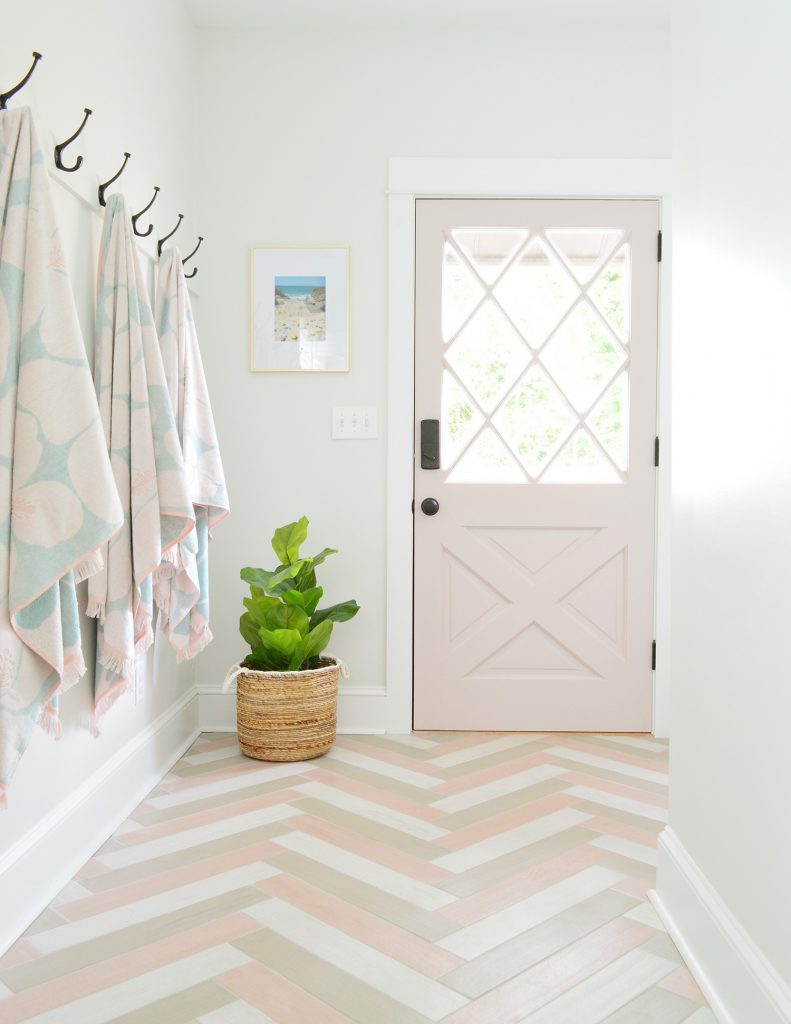
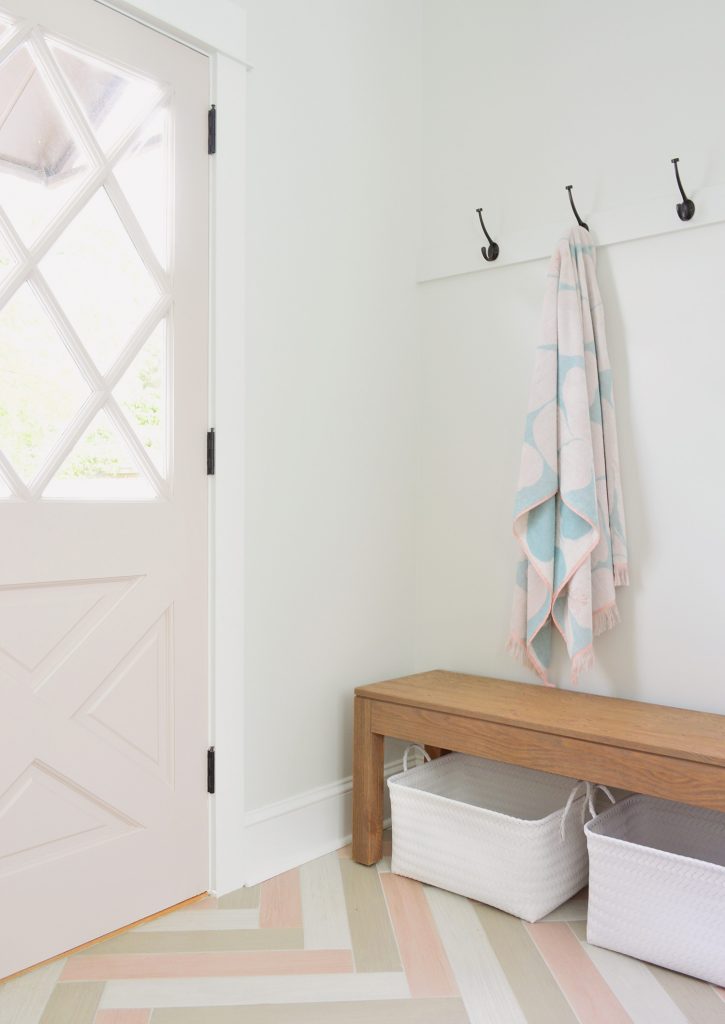
Off to the side we were able to tuck in a little bonus mudroom area complete with a bench and even more hooks (we’ve learned at the beach you can never have too many hooks for towels, bathing suits, beach bags, etc – there are over 10 in each mudroom alone!).
Jumping back to the other side again, here’s that former kitchen space…
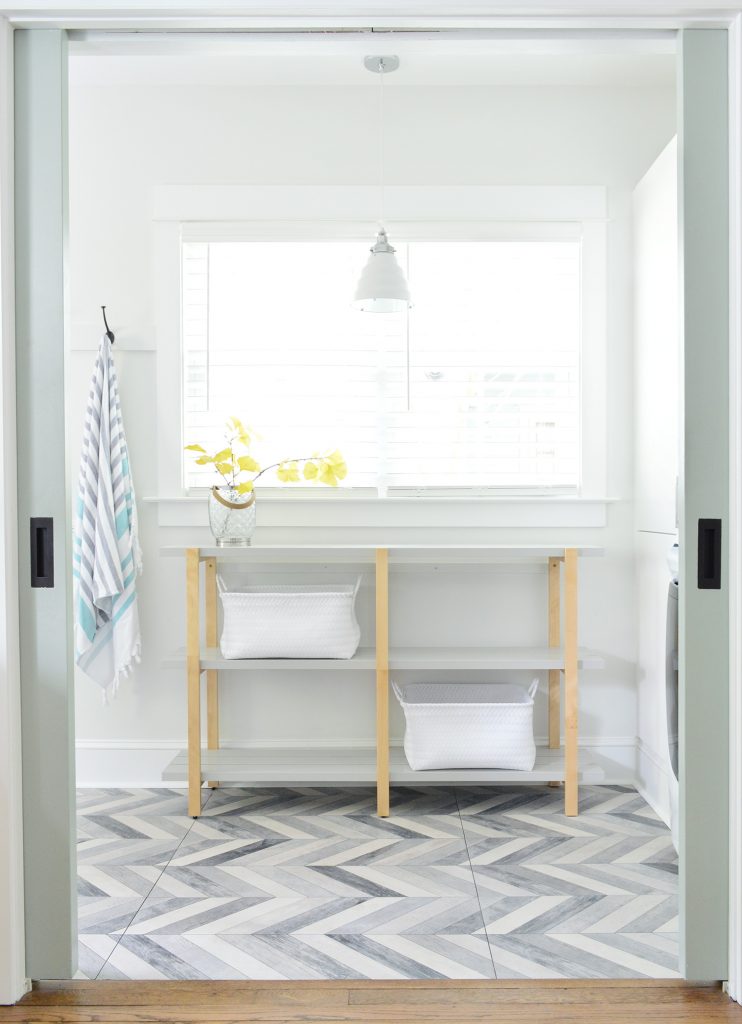
… and here it is all opened up as a laundry room / mudroom now:
This is a better view to show you how we were able to center the doorway better on that window so that it looks way more balanced and intentional. See how it’s all off to the side in the photo below?
And now it’s nicely framed by the colorful pocket doors which, by the way, we added blocking to so that they don’t fully disappear into the walls. This makes it easier for guests to see them and use them (since it’s a weekly rental we thought guests might not even know they’re there if they fully hid behind the wall), plus people get enjoy that little hit of color they provide.
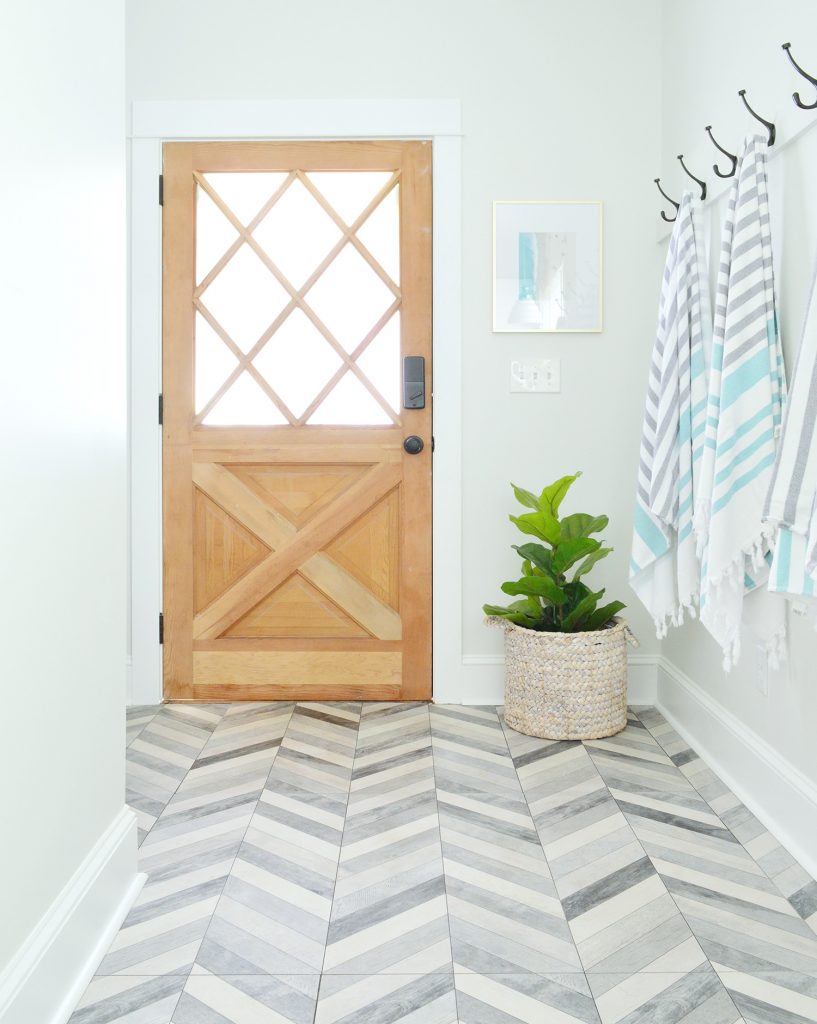
We don’t have any before photos of these angles, but just to show you what they look like now – here’s the washer and dryer we added, just like on the other side.
And here’s that diamond-door on the back that helps bring in so much light. We were able to leave this one wood (the other one was already painted) and the tile flooring is different on this side too. Once again it was really fun to make some different choices on each side while keeping a few other things constant (like having a whole lotta hooks and the same appliances on each side).
***See more about the laundry & mudrooms here***
The Main Bedrooms & Bathrooms
Now that you’ve seen all of the downstairs, let’s head up to the bedrooms – starting with the ones we turned into rooms with en-suite baths
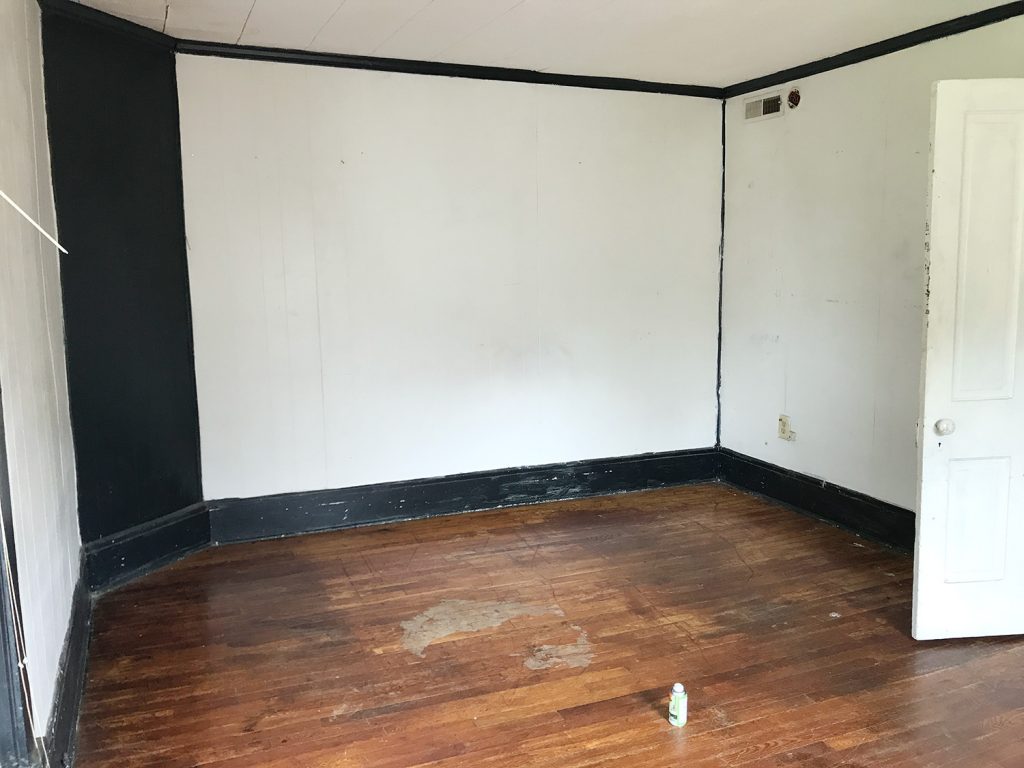
The rear bedrooms on each side weren’t very welcoming at first. This is what one of them looked like originally. And yes that is a roach bomb spray thing on the floor. Yes we did find dead roaches everywhere. Yes we bought the house anyway.
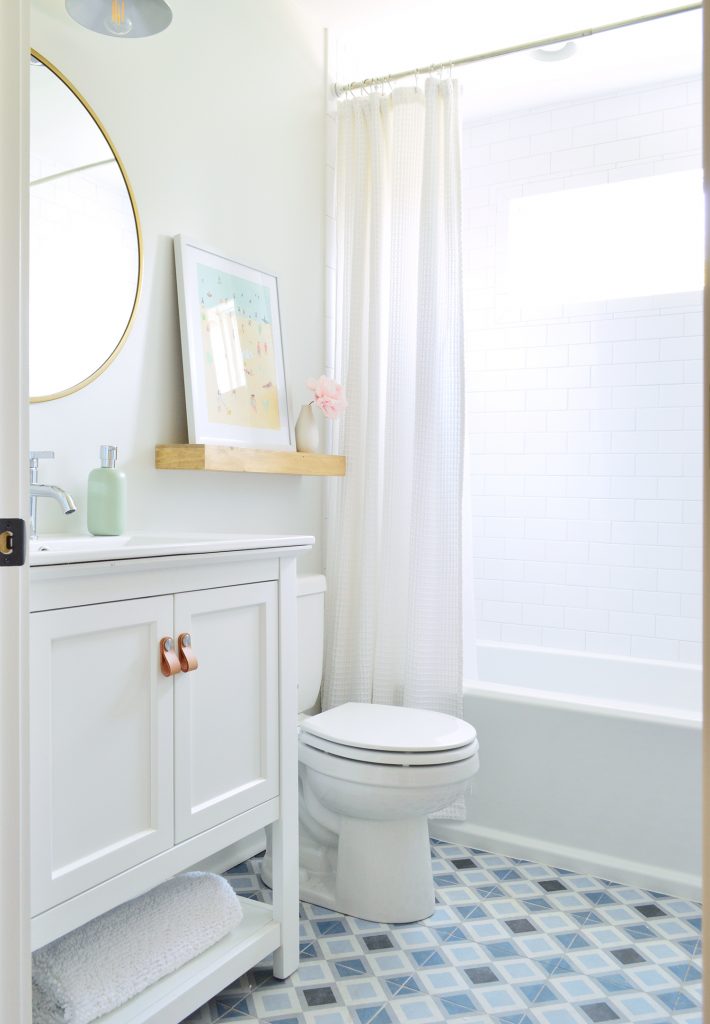
And here’s how that same wall looks today. We were able to move that window over in order to add a doorway to the (wait for it….) new en-suite bathrooms! They were extra straightforward (and affordable!) to add because there was already a bump-out on the first floor (where the mudroom is) meaning we didn’t need to pour footings for a new foundation.
The bathrooms aren’t big (there’s a walk-in shower behind the door) but it’s a HUGE upgrade to have these features accessible directly off the bedroom. Each side of the duplex went from having just one full bathroom upstairs in the hallway to having two full baths upstairs plus a powder room downstairs!

| toilet | photo art | wall: SW Spare White | trim: SW Extra White
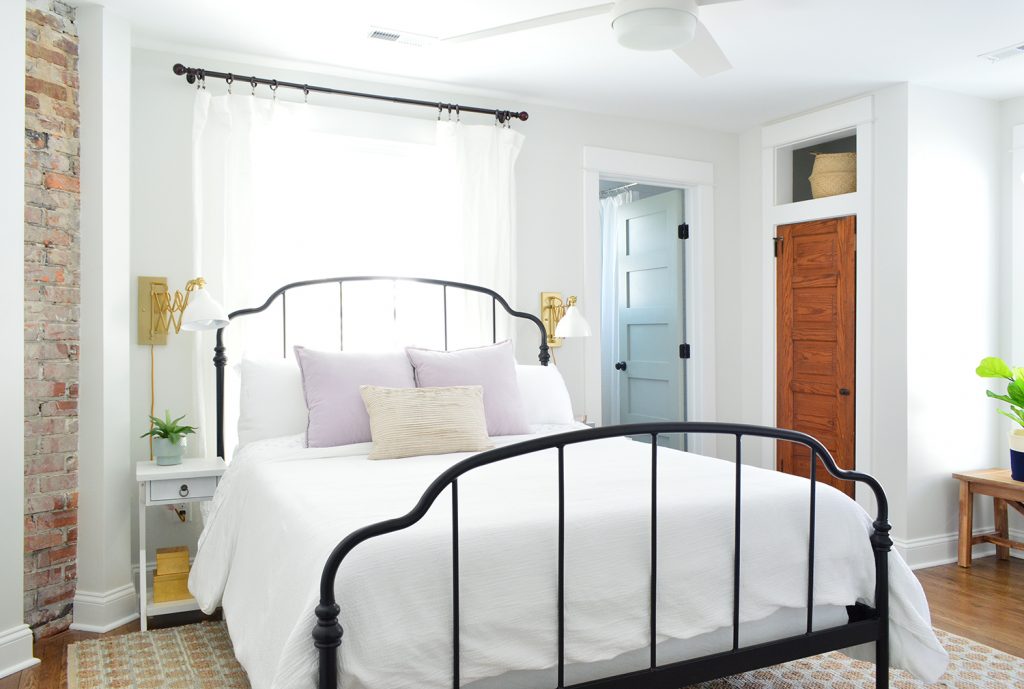
In the back bedrooms on each side of the duplex, we also exposed the brick chimney that was hiding behind the weird angled corners before. On this side it has been painted black for emphasis…
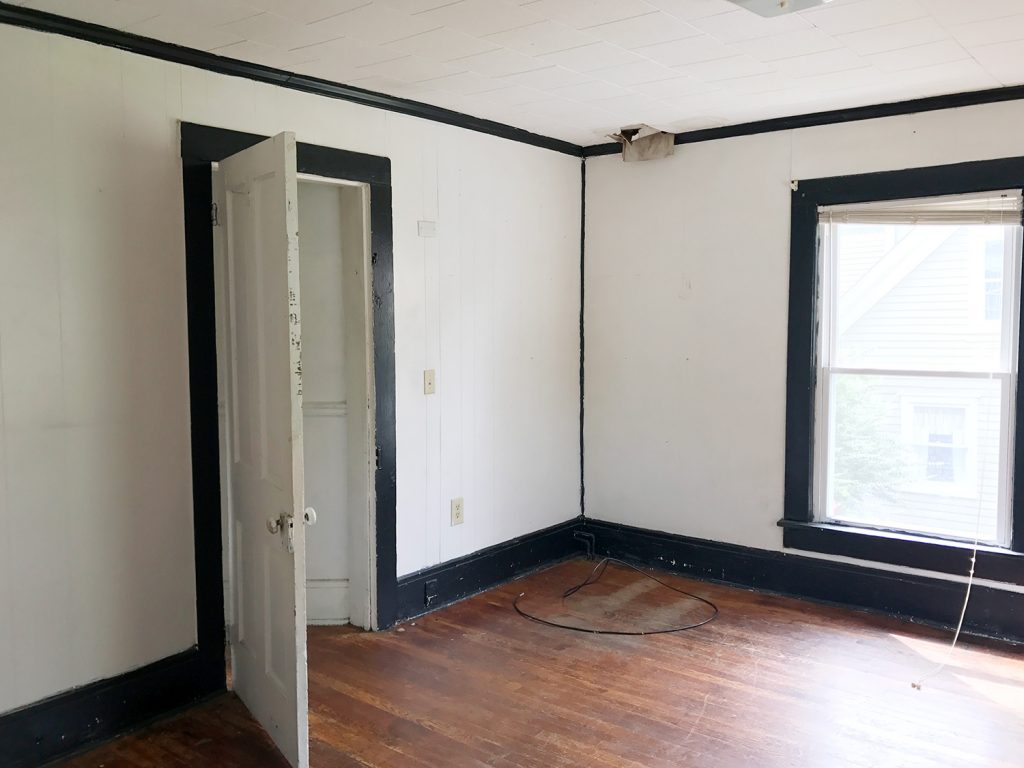
This next before shot was taken with our backs to the brick chimney, looking towards what used to be the door into the room (I know it looks like a closet – but that’s actually the hallway back there). We shifted that door to improve the flow of the room and make space for a better closet situation too (originally the closet was in a vestibule area right behind that door).
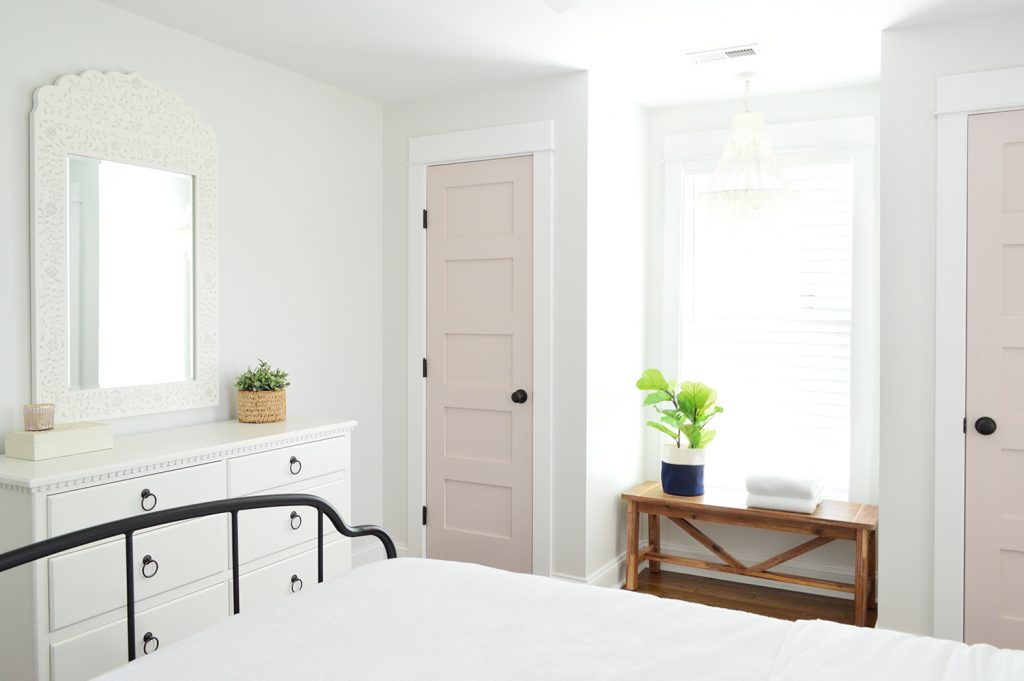
Here’s the after from the exact same corner. You can see we added two pink-doored closets that flank the window, making that side of the room a bit more of a focal point – along with creating some much-needed storage and some nice balance. The door to the room is just out of frame to the left of the dresser, which makes this room work so much better too.
***See more about this bedroom & bath here***
You’ve probably figured out by now that we did the exact same floor plan updates (new bathroom, new closets, moved the doorway, exposed the chimney, etc) but just switched up the finishes and colors to the equivalent bedroom on the other side. This one especially was in desperate need of some brightening up.

Some light wall colors, bedding, and curtains definitely made this room feel more airy, and we worked in the old wood closet doors from the downstairs living room that we mentioned earlier (I promised we’d come back to those!). They weren’t standard height so we couldn’t use them anywhere that people needed to walk through (like a bedroom door), but a small reach-in closet was the perfect application (especially since there are two doors and two closets!). It even gave us the opportunity to add some cubbies up top since they’re shorter than the average door, which ended up looking really sweet and customized.
The bathroom on this side is the same layout, just with a different floor tile (again, trying to keep things light and bright while choosing durable materials – so this isn’t real marble tile, it’s a porcelain lookalike).
***See more about this bedroom & bath here***
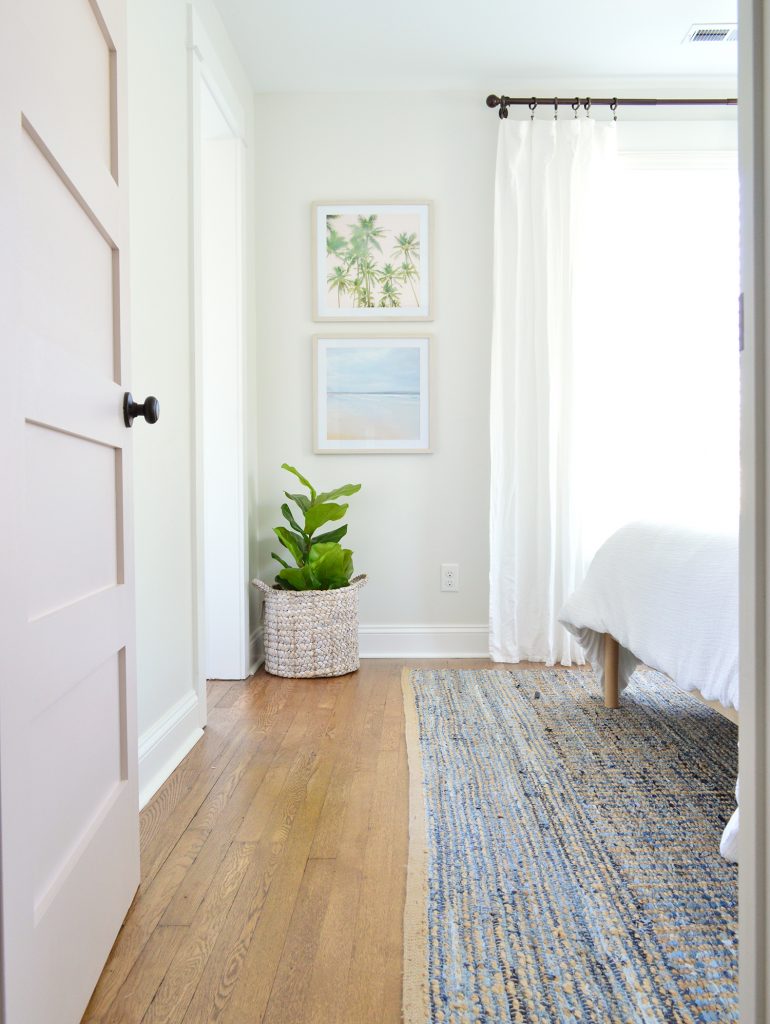
The Front Bedrooms
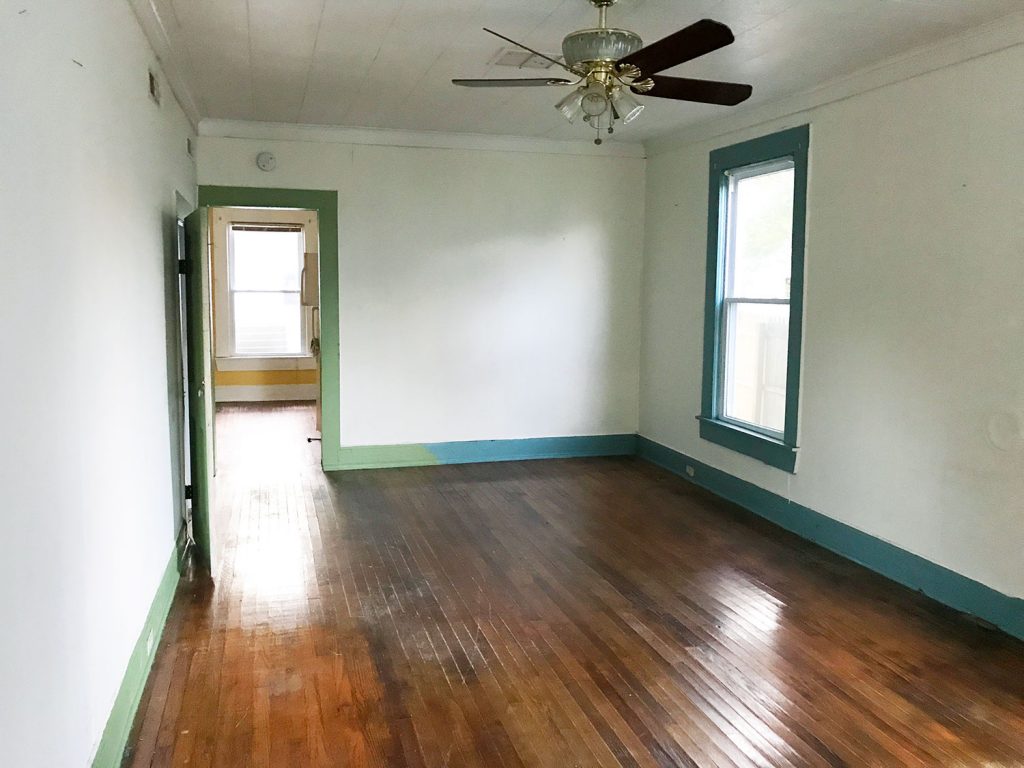
Each side of the duplex also has another bedroom on the front of the house. Like many of the other spaces in this house, the previous owner had added various coverings – like these drop ceilings and faux-wood paneling on the walls – to hide water damage and rot. So here’s one of the front bedrooms when we bought the house:
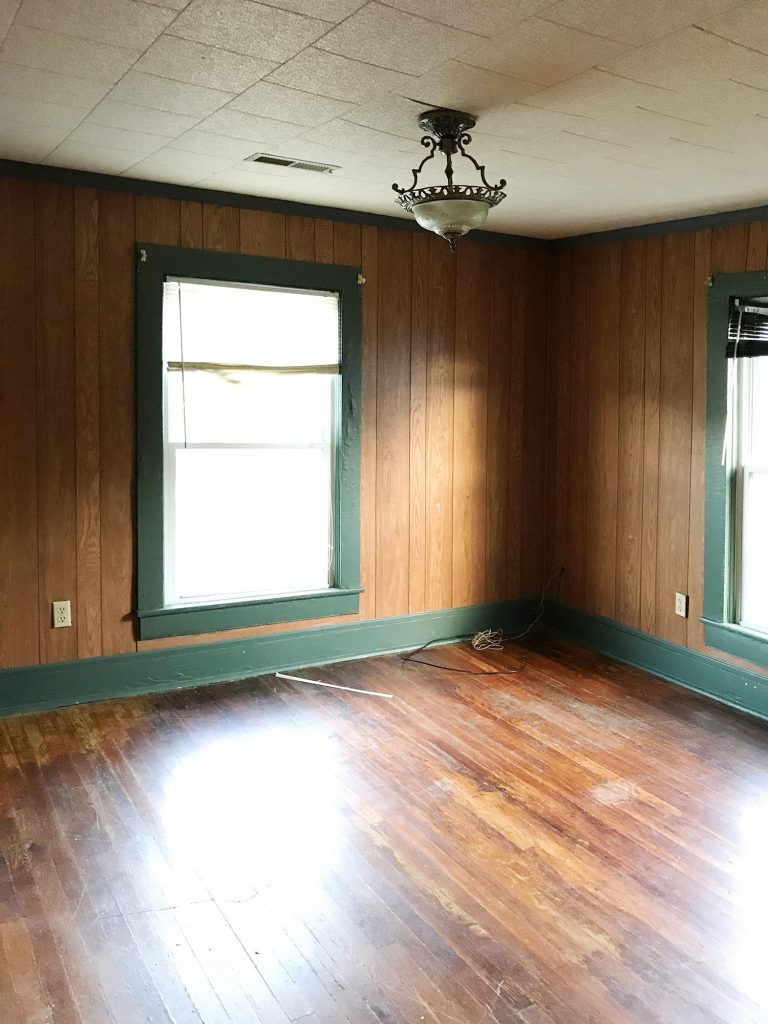
We were really able to brighten these spaces by peeling back those layers, refinishing the floors, and painting everything in the airy color scheme that we used throughout the house.
And originally that little front closet (with the blue door) was devoid of any natural light… but we quickly discovered they had covered those diamond-grilled windows in the front of the house with drywall. WHAAAT?!?!!!!!
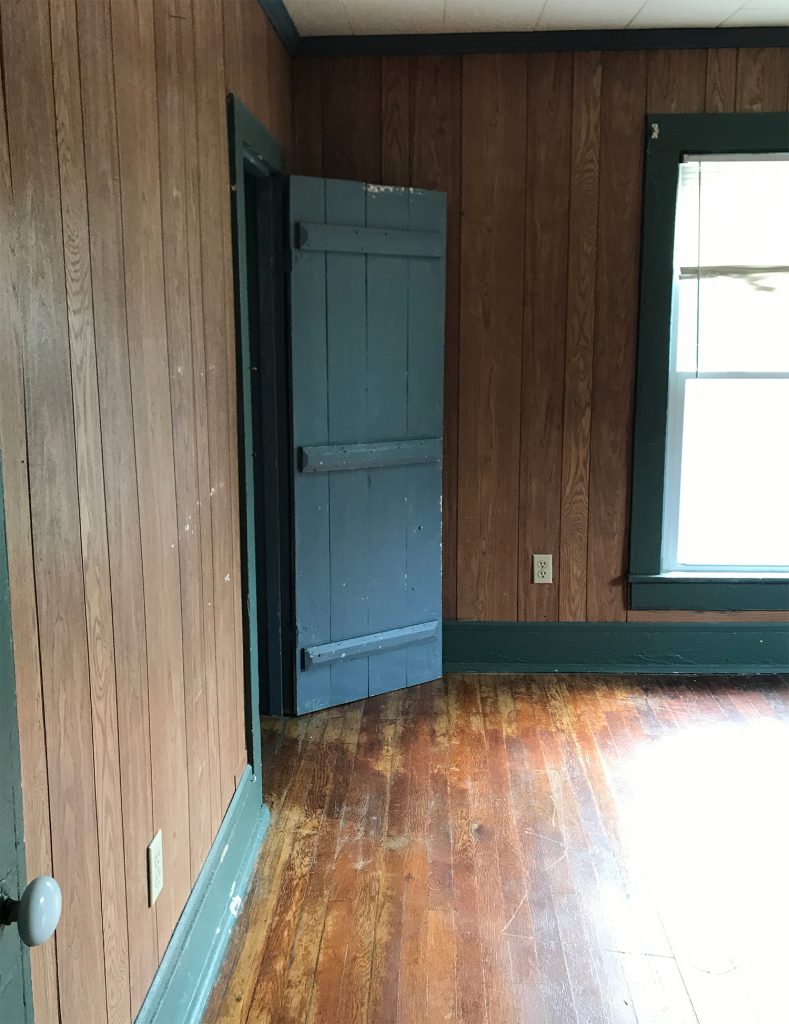
Ripping out that window-blocking drywall and exposing those window allowed soooo much light to flood into the room from that closet area as well. We actually ended up not adding doors to those closets so guests would be able to enjoy that light all the time (well, except for at night – there’s a blackout curtain on the diamond window that can be drawn closed to block the light).
***See more photos of this front bedroom here***
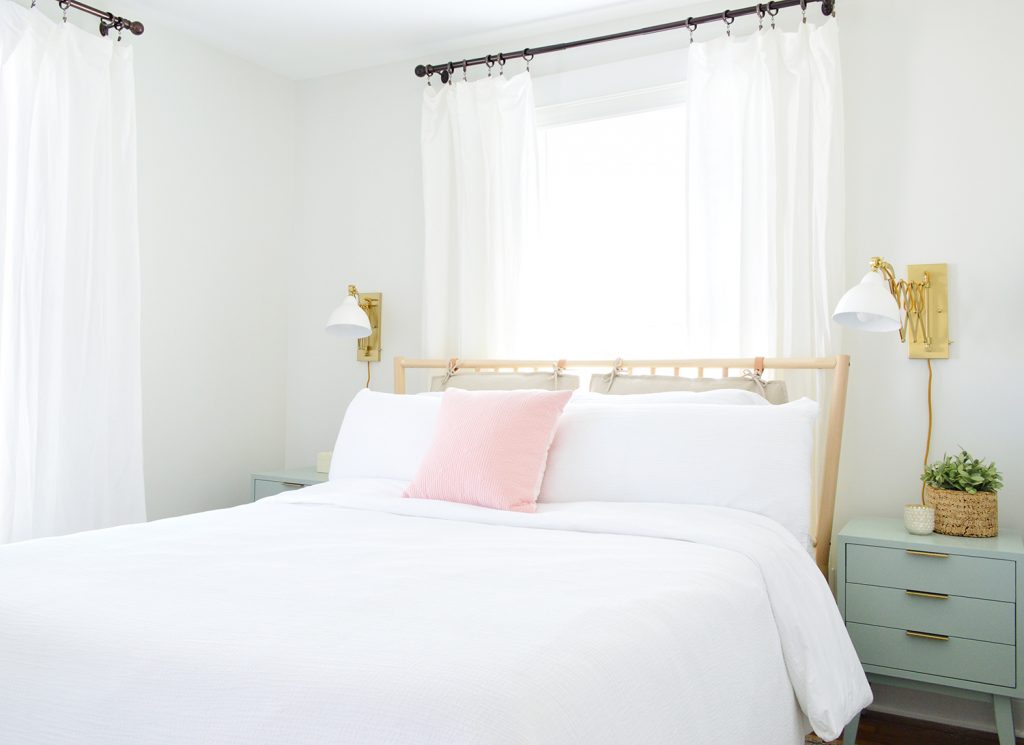
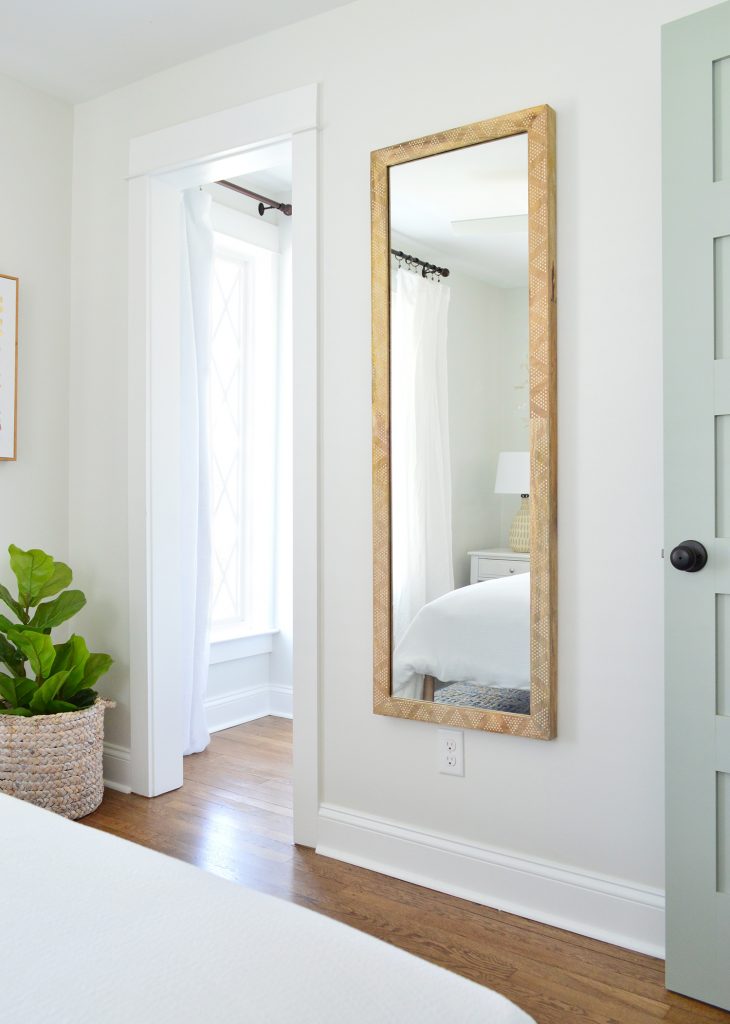
You can actually see the diamond-paned window that we uncovered a little bit better in this photo from the other side. Across from it we have a dresser and a hanging rod for easy-but-still-hidden clothing storage, since it’s tucked behind the wall enough that guests don’t see it from bed.
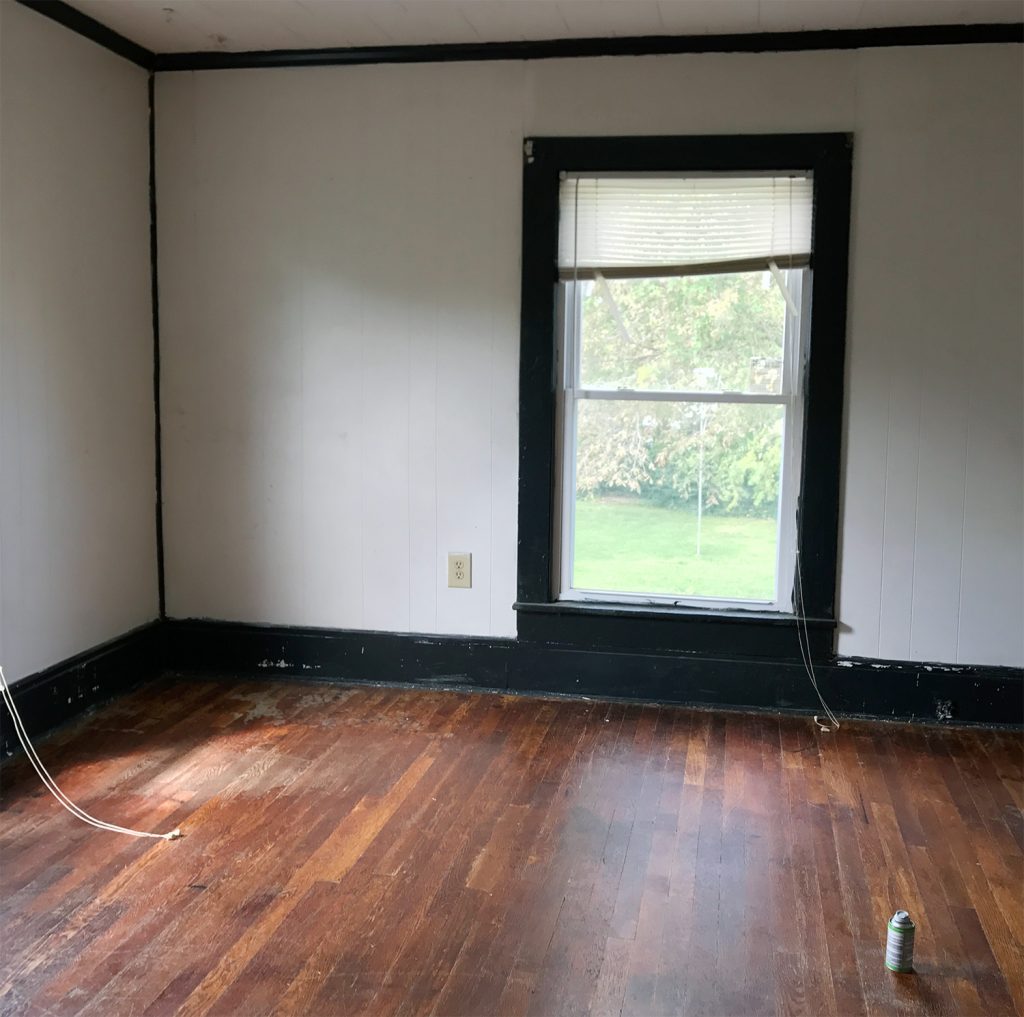
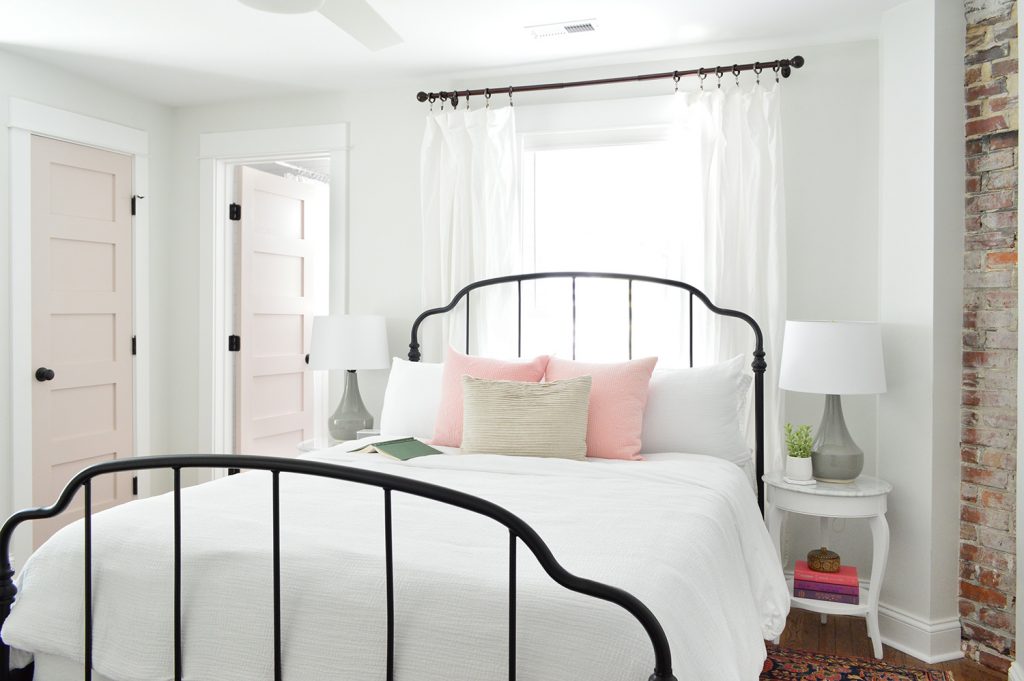
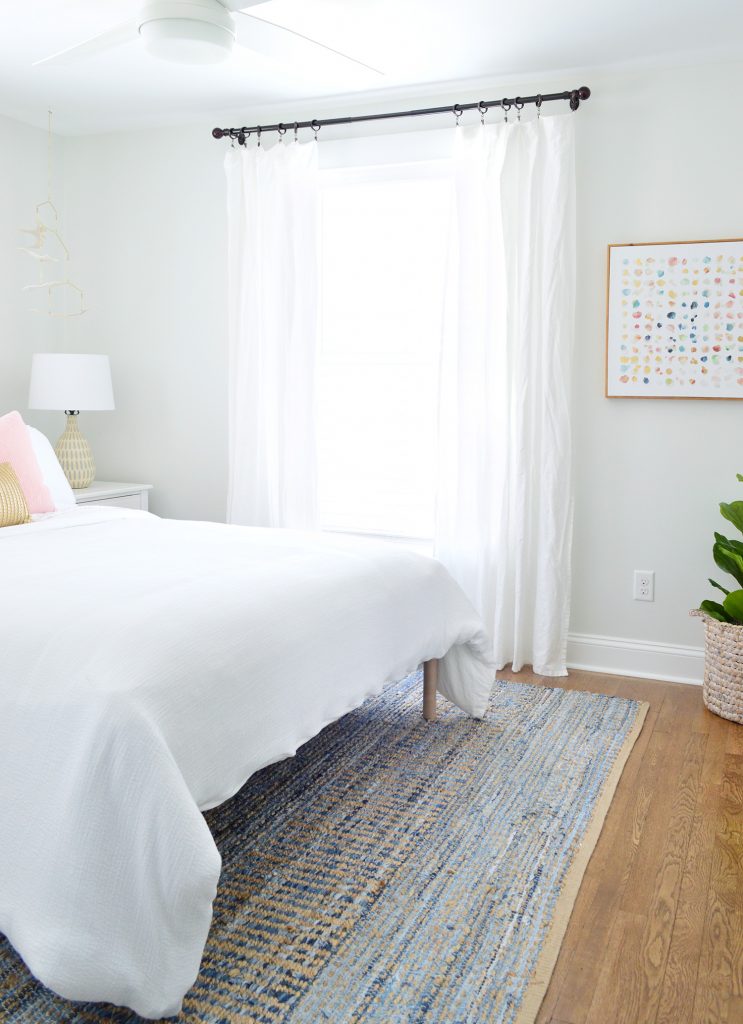
The rest of the front bedroom on this side started off in a similiar state as the other one. From rotting water-damaged drop ceiling and paneled walls that were also covering various issues, this room was a challenge. Also this floor. OH THIS FLOOR. Someone had put peel & stick tile all over half of it and then ripped it up before selling. But all the glue from the sticky tiles STAYED ON THE FLOOR. It was like a human-sized sticky trap.
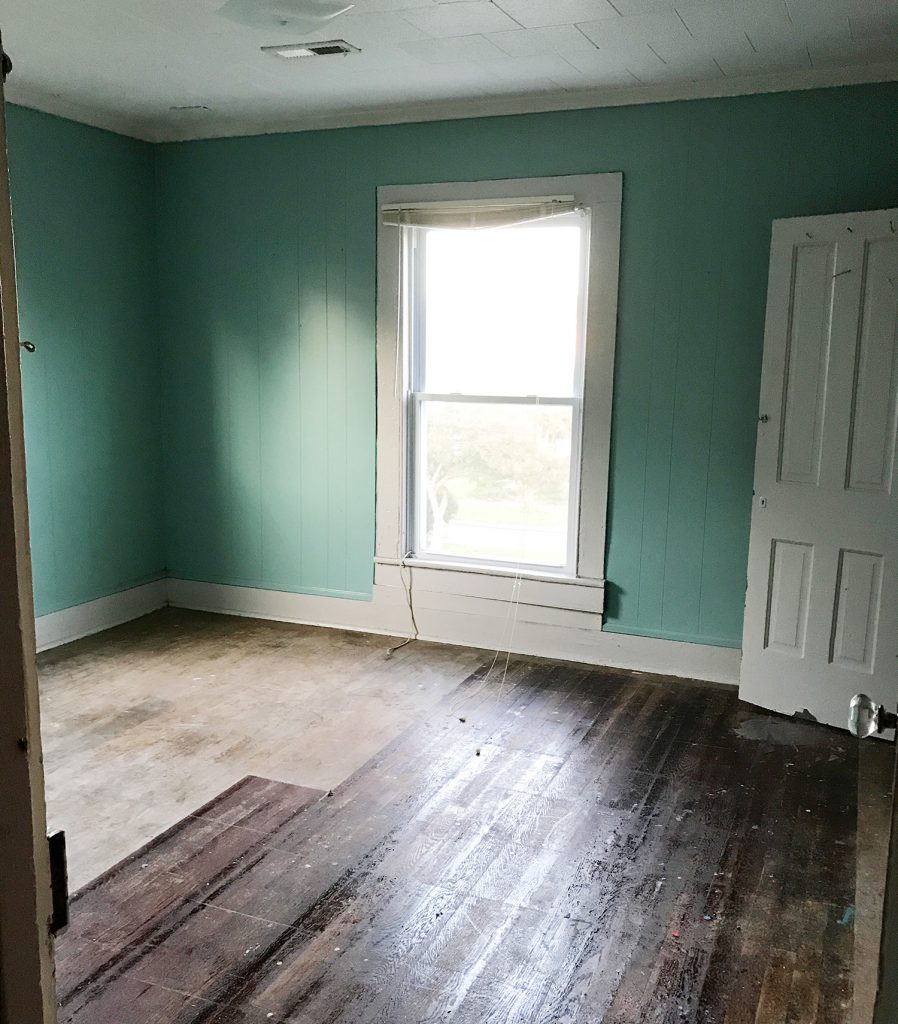
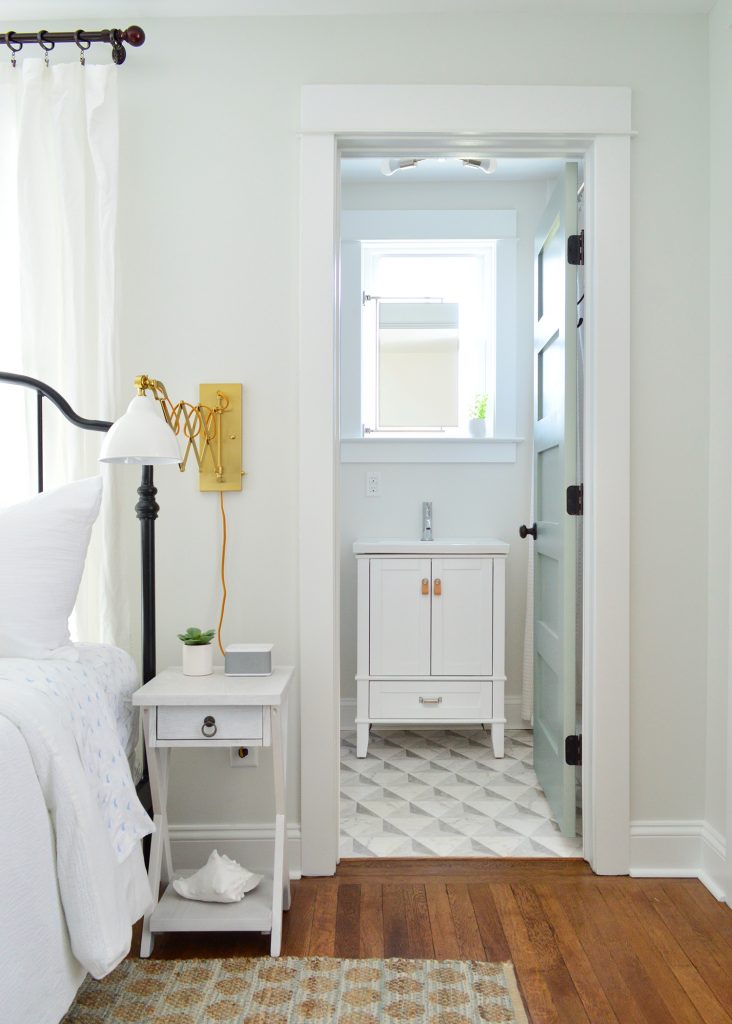
Here’s the room now, fully fixed up & furnished (and guaranteed not to steal your flip flops like it once had with all that sticky glue on the floor). A few things are similar to our choices for the other side’s front bedroom (we chose the same wooden bed and the same rug). But we opted for table lamps and slightly wider nightstands (they fit in here and wouldn’t in the other front bedroom due to slight measurement differences from side to side). Old houses are quirky for sure!
***See more photos of this front bedroom here***
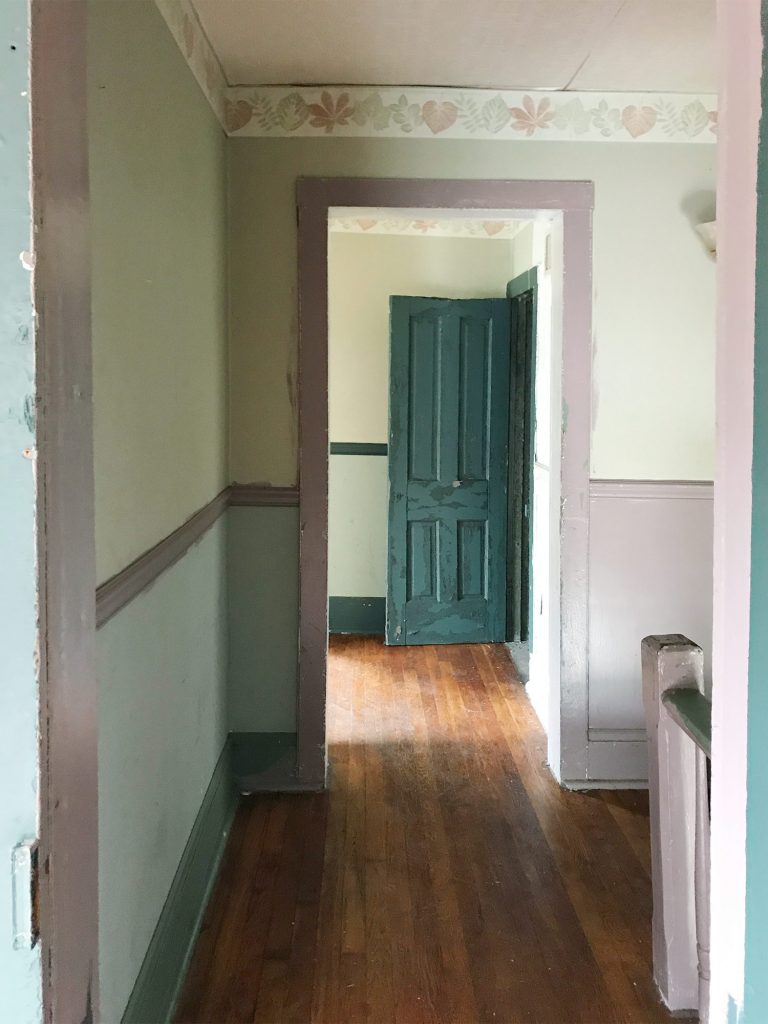
The Upstairs Hallways
These are some of my favorite before-and-after shots of the bunch. Check out that mauve trim and the leafy wallpaper border. The crazy thing is that we restructured the landing upstairs so much that the after isn’t very parallel at all. We actually moved the access to the main bedroom (over to where you see that wall sconce peeking into the photo below) and that doorway became a nice big hall linen closet instead.
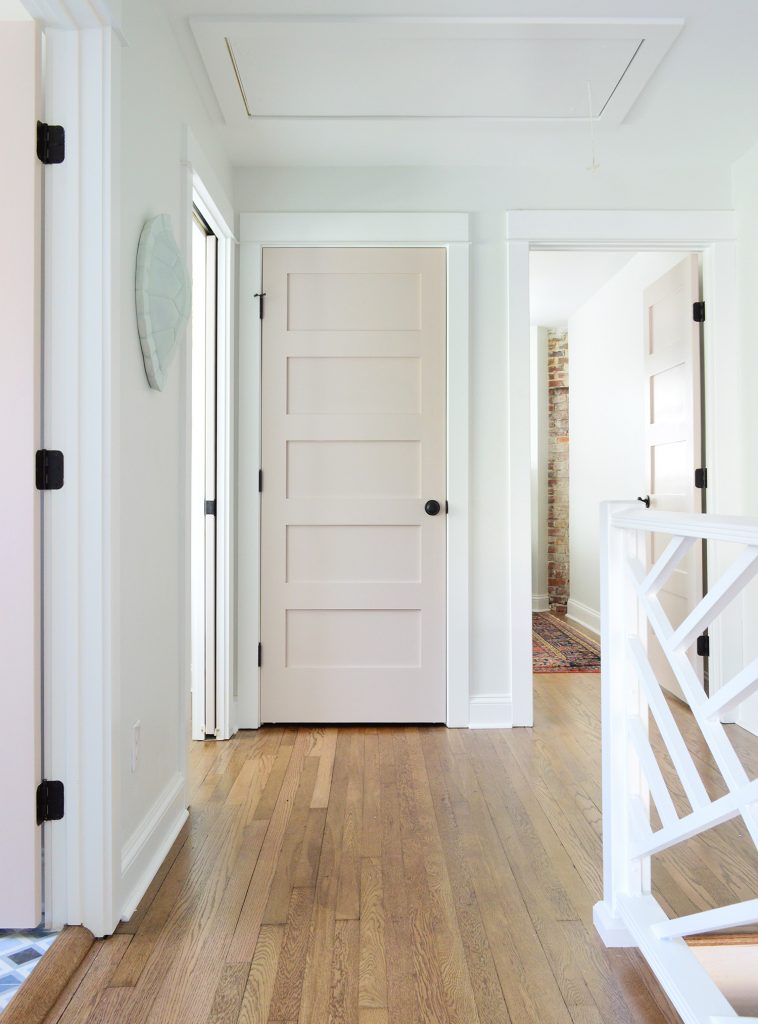
Here’s basically the same angle now. We also pushed the doorways back, so the landing at the top of the stairs is about twice as big (that way you don’t feel nearly as closed in or crowded). The big linen closet serves double duty by housing extra towels and a pack & play and other stuff for our guests, as well as providing extra clothing and suitcase storage for the nearby bonus sleeping nooks (more on those in a minute).
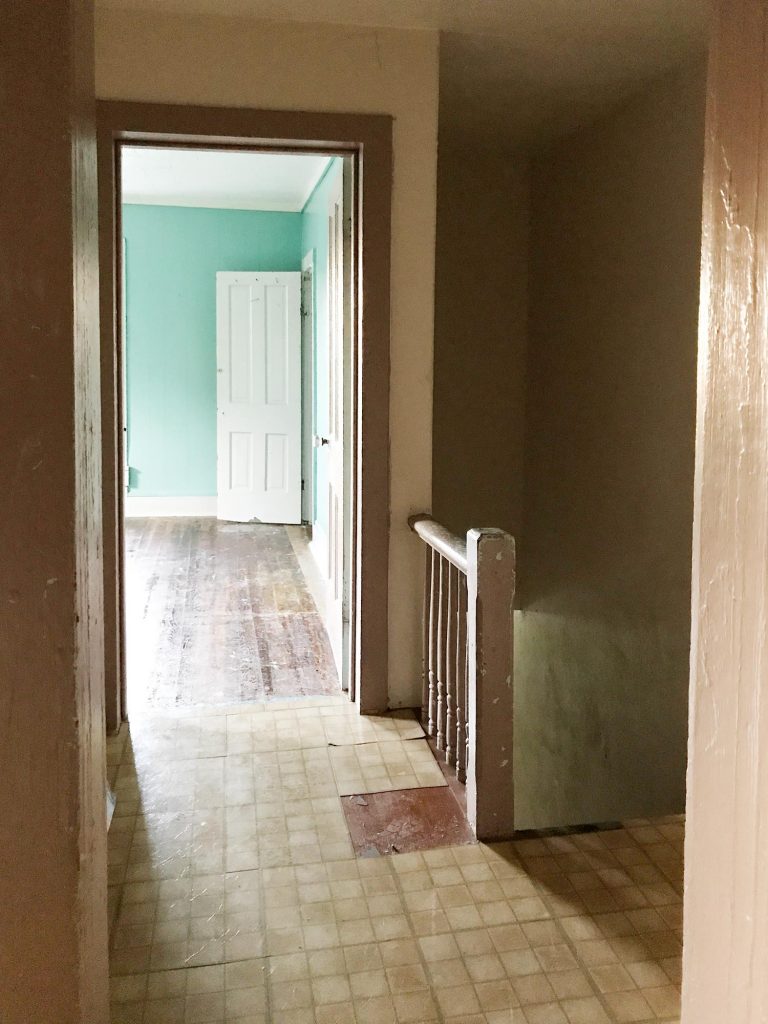
The hallway on the other side offers another great transformation when you spin around to face the front bedrooms. These landings at the top of the stairs were so dark and cave-like thanks to the dark stairwell that felt very much like a tunnel, and an odd door arrangement upstairs (which blocked a lot of the windows).
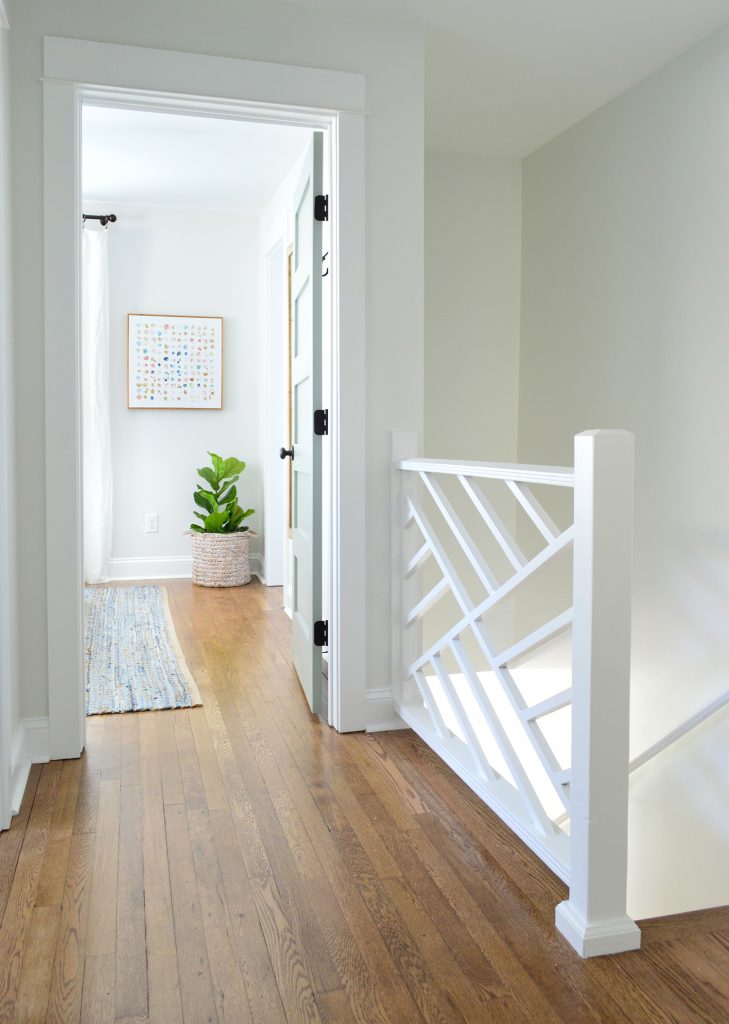
We were actually able to make this area larger (again, some of the bedroom doors moved back to make the landing feel less cramped) and brighter (now you can see four windows from the top of the stairs!). We were also able to reuse our old porch railings in Richmond as stair railings here at the duplex – these just needed to be shortened slightly to fit, but otherwise were perfect!
The Hall Bathrooms
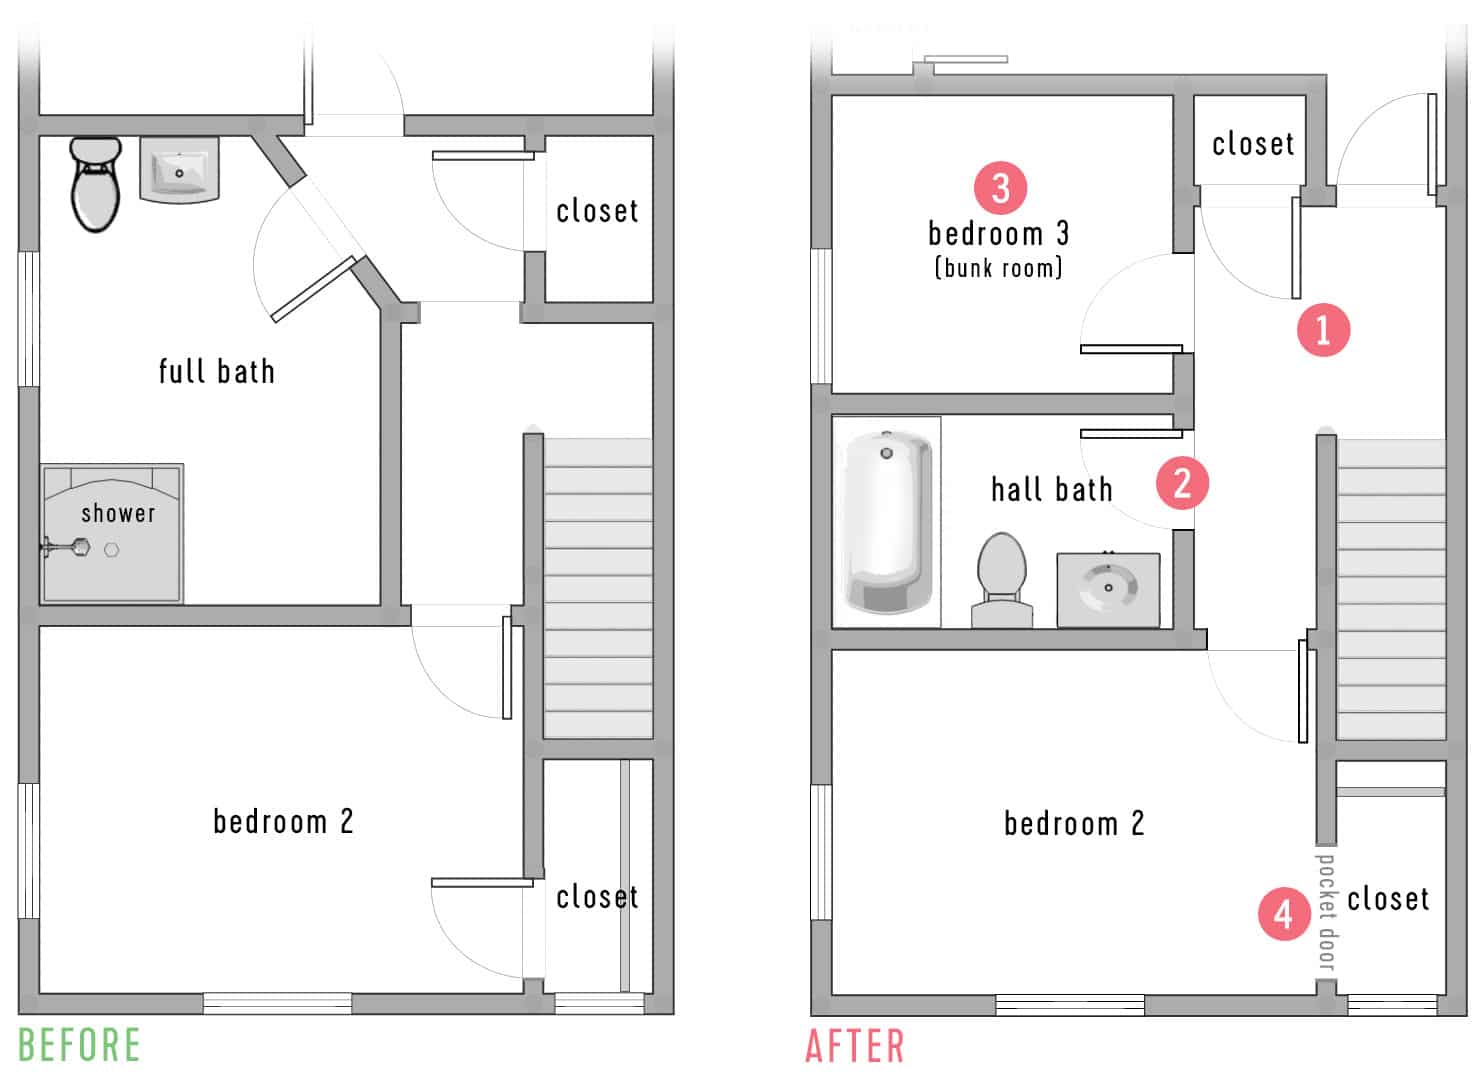
What became of the original bathrooms on each side of the duplex are perhaps the hardest thing to understand as a simple before-and-after photo series because they underwent the most dramatic floor plan change (you can read more about it in this floor planning post). But as you can see in the graphic below, we basically split the original large and poorly organized bathrooms into a smaller hall bath and an additional bedroom (which we originally envisioned as bunks).
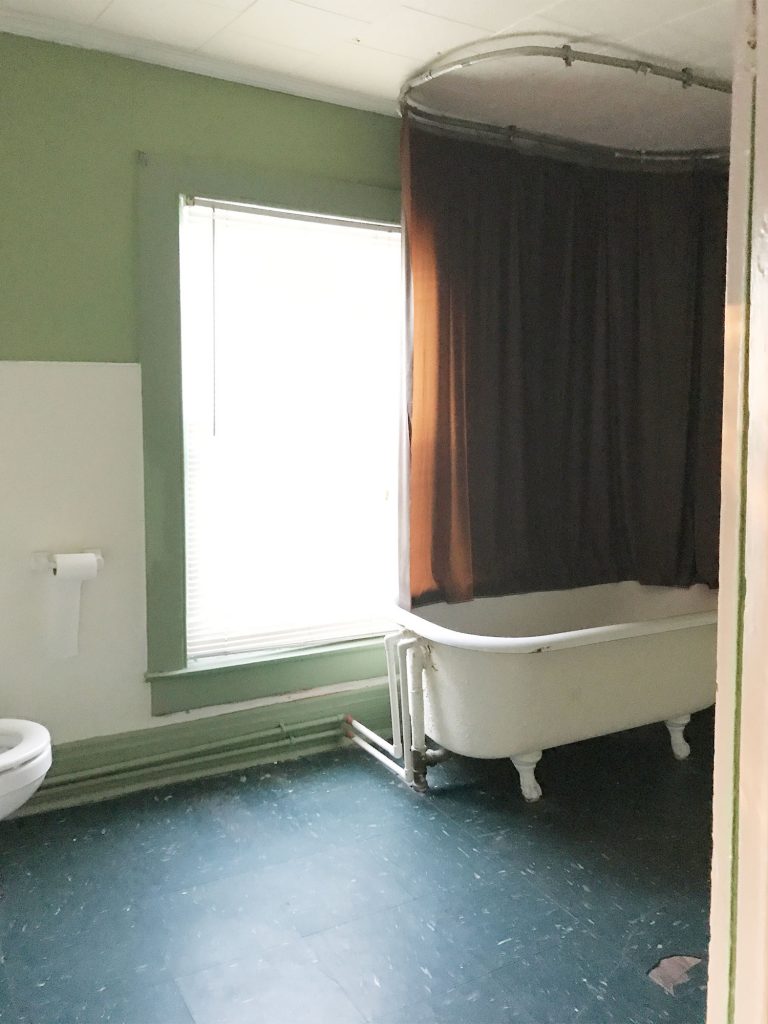
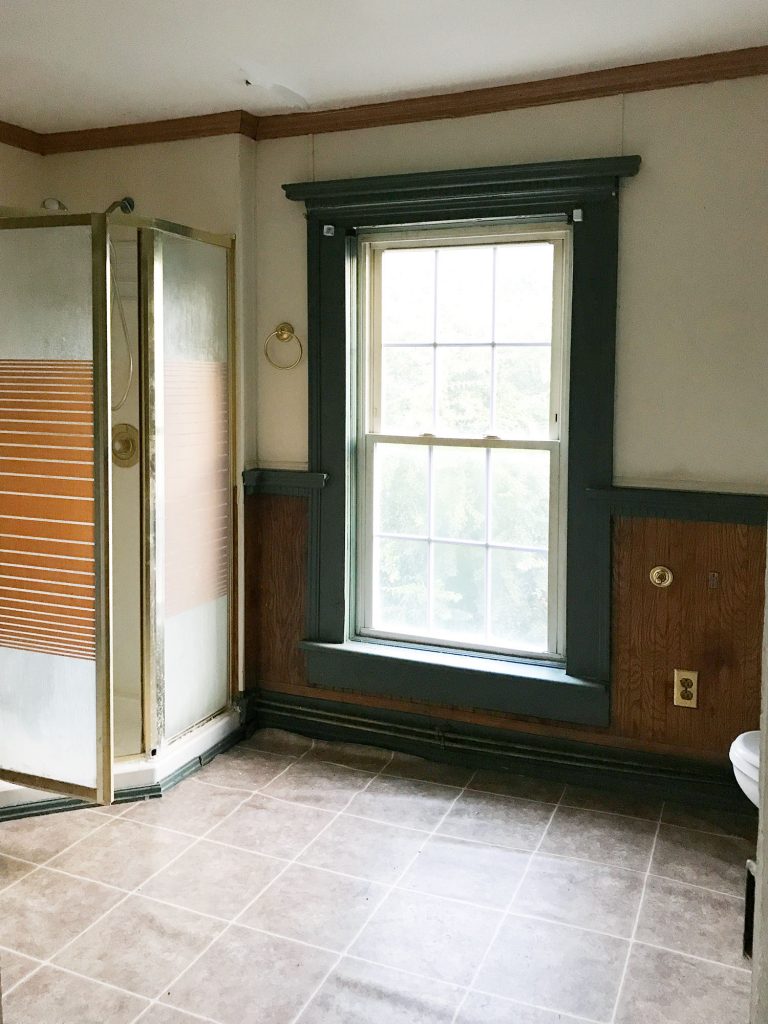
Here’s what one of the bathrooms room looked like before. We didn’t have space to reuse the freestanding tub but donated it to so it could live on.
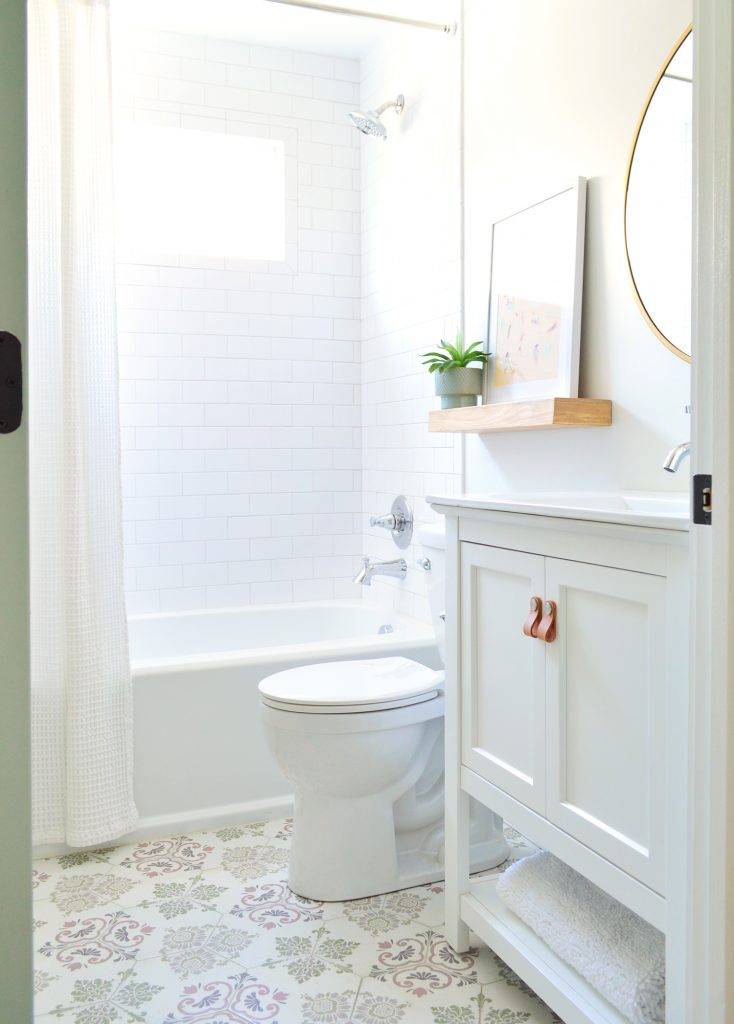
This is what the hall bathroom looks like now. It’s a more compact bathroom than the original, but still fits all the essentials – sink, toilet and tub/shower combo. The original bathroom window still exists (it’s just in the part of the space that we turned into sleeping nooks, which you’ll see in a minute) so we added a transom window to the shower to bring in natural light.
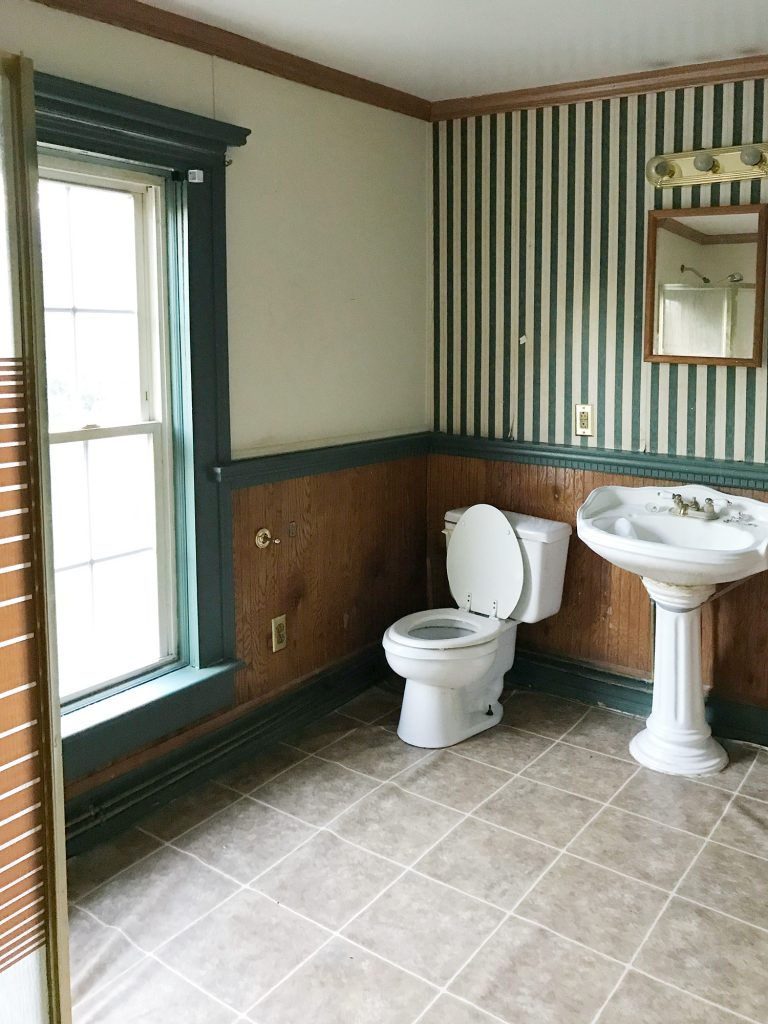
Below is the original hall bathroom on the other side. This before shot is yet another demonstration of the cover-all-the-rotting-things approach (don’t try this at home, folks). See how the vinyl floor is bubbled and loose? It’s because there were all sorts of water issues going on under there and someone was trying to mask them with sheet vinyl.
Here’s what the left hall bathroom looks like now. It’s very similar to the hall bathroom on the left side of the duplex, apart from the different tile floors but we used the same vanity and accents since they worked so well.
The Bonus Sleeping Nooks
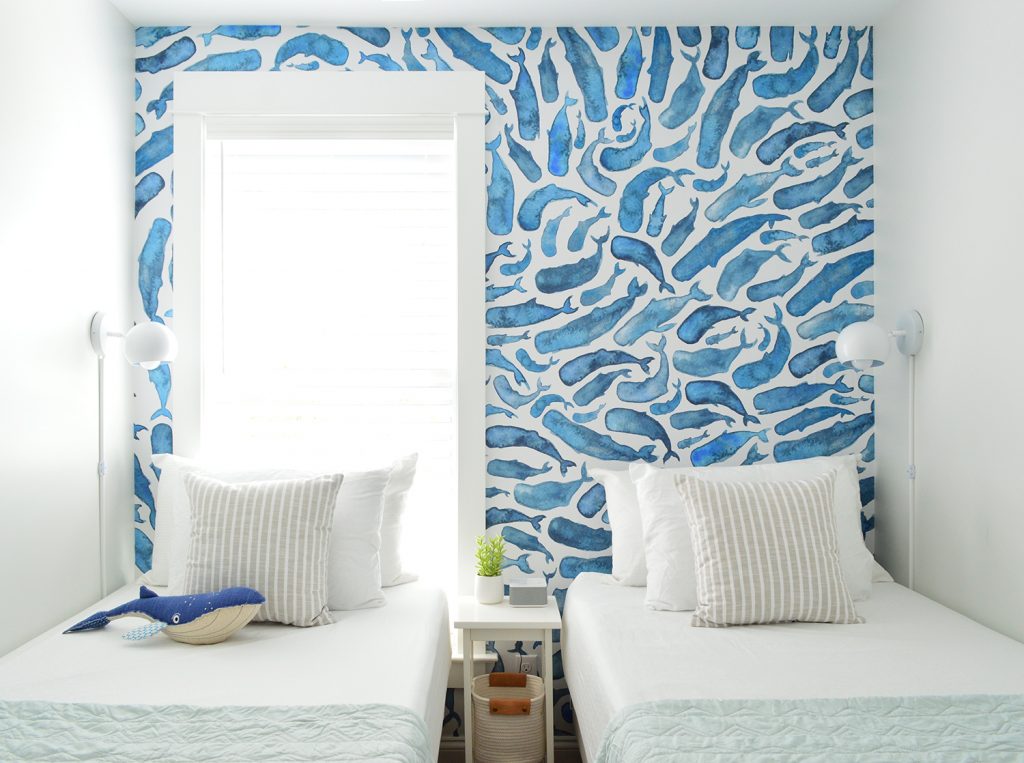
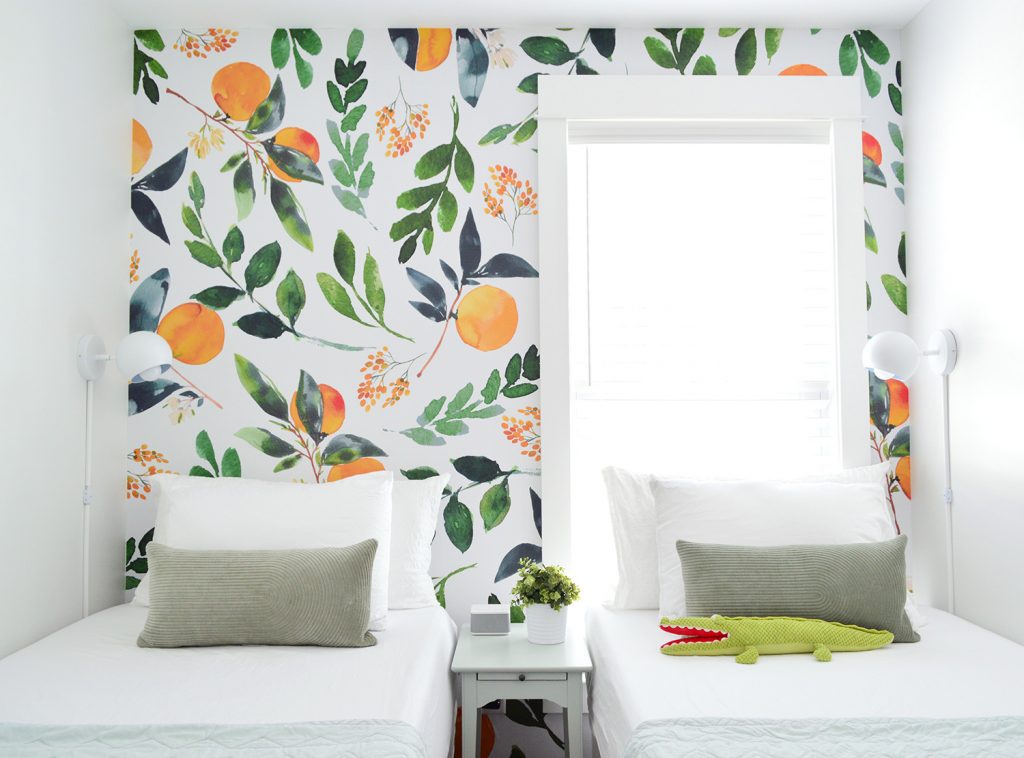
The rooms we originally planned as bunk rooms evolved into what we’ve dubbed “bonus sleeping nooks.” They aren’t officially a bedroom (the closet is outside in the hallway) but for a beach rental they proved to be the perfect spot to sleep a couple of extra folks, especially young kids or siblings who want a fun cozy space to retreat to. Again, since they were taken out of the original bathroom space, this is the closest shot that we have to a “before” of one of the rooms (the window stayed in the same spot).
So here’s the after, thanks to a fun wall mural we added (you can find more about how we hung them here). We also added cozy and comfortable touches like a ceiling fan, light-blocking blinds, a sound machine, and two wall sconces you can flick on & off without getting up. They’re small but mighty.
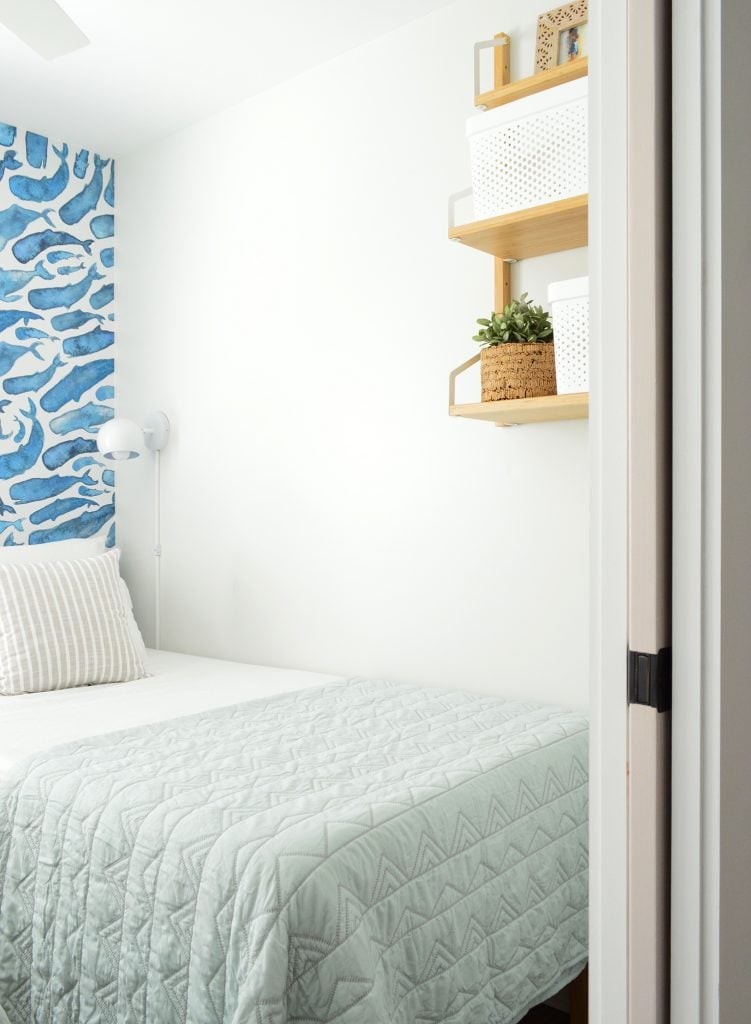
If you spin around in the space, there’s a pocket door (they make the most of small rooms since it doesn’t swing into the space). We also hung a handy little wall shelf with empty baskets that provide some vertical storage (you could store kids pjs, favorite books, or some clothes in them if you wanted those things within the room).
Back on the other side, this was the original window we stole from the bathroom space…
…which is now part of the bonus sleeping nook on that side. This room features a different wall mural and it was funny because we heard that some of our guests chose which side to stay on based on these murals (some wanted the “the whale side” while others booked “the oranges”).
***See more of these bonus sleeping nooks here***
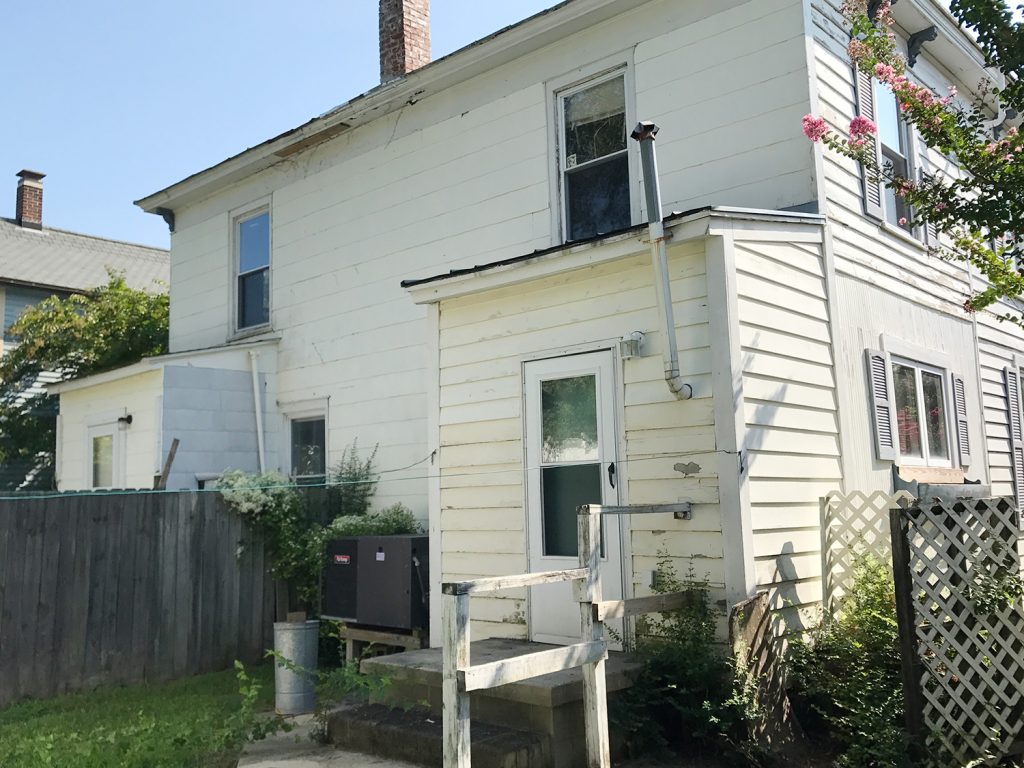
The Backyard Patios
The last space we have to show you are the backyards – and holy cow did they change! So let’s go back in time for a second to appreciate how far the back of this house has come. This is what it looked like when we bought it:
Let alone the structural changes we made to the back of the house (like adding those second floor bathrooms off of the main bedroom, which you can read more about here), it’s just amazing what some hardscaping, some metal awnings, and some string lights can do for ambiance.
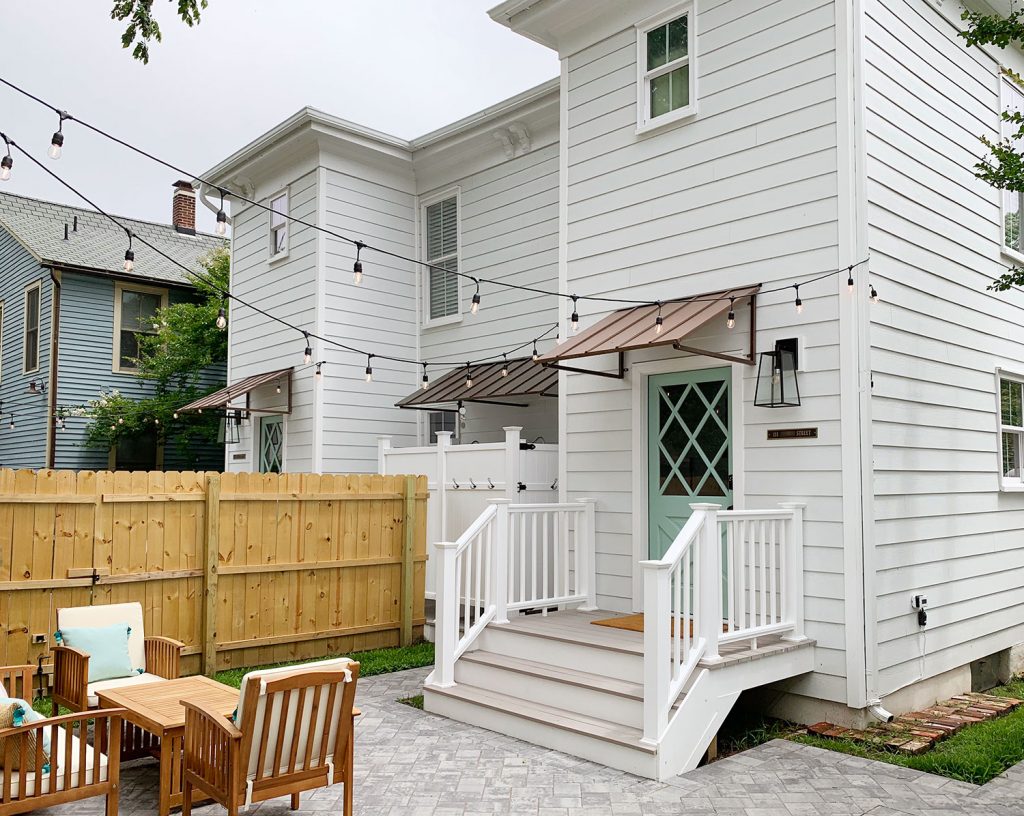
Here’s a shot that better illustrates where the en-suit bathrooms were added to the main bedrooms upstairs. Since there was already the mudroom bump-out downstairs, we just had that same area extended to the second floor – adding/moving windows along the way.
Not only did it make that huge improvement inside (the small widow there is in the new bathroom above the sink), it actually helped the back feel a bit more stately and created a nice inset nook for the outdoor showers that we added on each side for people to use when they return from the beach.
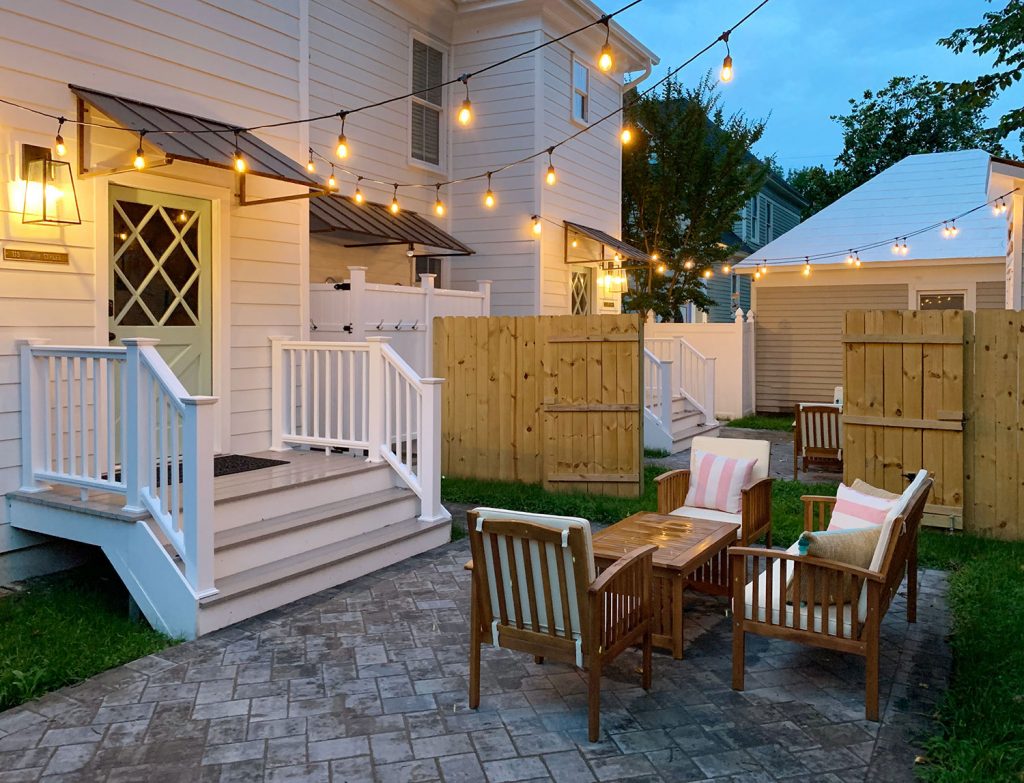
Here’s a before photo from the other side where you can again see the bump-outs as they originally were. But also take note of the cinder block steps, pipe railing, and half fence that offered only a little bit of privacy between the two sides.
As much as we liked an open fenceless backyard – we knew functionally that our guests would appreciate having some separation from the family staying on the other side. So we added a fence that extends the full length of the backyard BUT included a double gate in the middle that they could throw open in case they ever wanted to socialize with one another and open up the whole yard. (This pic was taken shortly after it rained, so forgive the spotty patio).
The backyards did have a shed before, but it was one long lean-to that was in pretty rough shape. It spanned the back of the property line, smack dab in the middle of the two sides, so there wasn’t much grass or patio space at all.
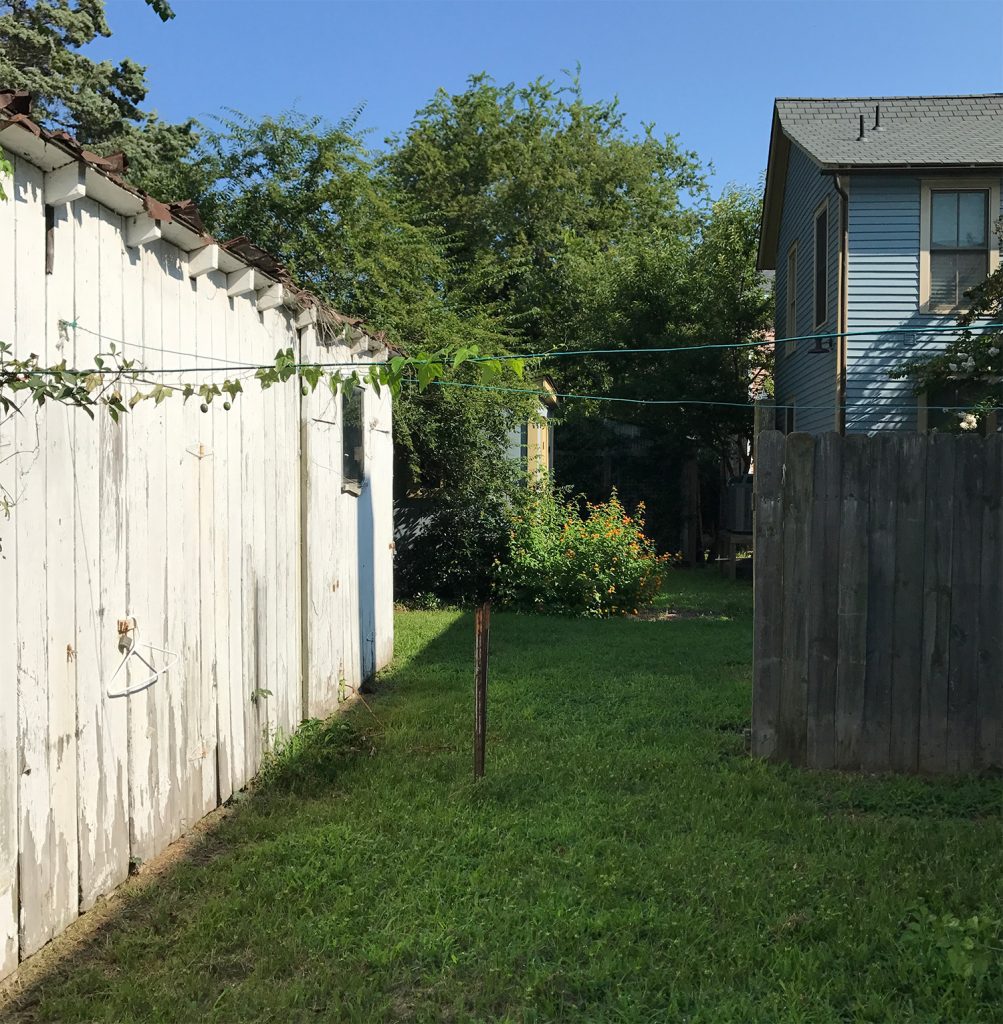
We replaced it with two separate sheds that now anchor each corner of the backyard (sorry, it’s hard to get them both in one shot). Now guests have their own private sheds to store their things and access the beach gear that we provide. And instead of a big long shed sucking up the more central space out back, we were able to turn that into a patio and a grassy area on each side – and expose a beautiful tree back there that once was blocked by the old shed.

***See more about the duplex backyards here***
A Video Tour Of The Entire Duplex
And finally, we have a full video tour of both sides of the duplex! It covers a bunch of our changes and choices throughout the reno, and we share some of our favorite decisions that upgraded the house in the biggest ways. The video is also just good for seeing how each room flows together, checking out what’s different from side to side, and basically “walking through” the entire project with us. Just click play to watch it below:
Note: If you’re reading this in a feed reader, you may need to click through to see the video. You can also watch it here on YouTube.
So we hope you guys enjoyed that duplex before & after journey. And remember you can find all the paint colors & furniture/accessory links on Our Duplex page – there are just some linked here in this post – but that page is much more exhaustive. And you can browse all of our duplex posts & projects here. And here’s the Airbnb listing for the left side & the right side. And you can see the before & after photos of our house in Richmond & our beach house too! It’s so much fun to look at all the pics.
And if you want more details or different angles of each room that you saw (as well as some pretty crazy before & after photos), the following posts should fill you in on all the details:
- The front porch makeover
- Before & after of the back of the duplex
- Some finished bathrooms & bedrooms
- More finished baths, bedrooms, & hallways
- Before & afters of the two living rooms & dining rooms
- The two finished kitchen reveals
- The duplex mudrooms & laundry rooms
- The bonus sleeping nooks, linen closet, & locked owner’s closet
- The duplex backyards: patios, sheds, outdoor showers, etc
*This post contains affiliate links*