Our first house evolved over four and a half years of blood, sweat, tears, and sledgehammering. And we’ve got plenty of photos to show how much it changed (hence the roundup of before and after pictures below). We also made an interior and exterior floor plan, along with a video house tour that we filmed right before we moved.
FRONT YARD
Our first before picture is a doozie. We inherited a yard full of trees and mulch… where’s the house?
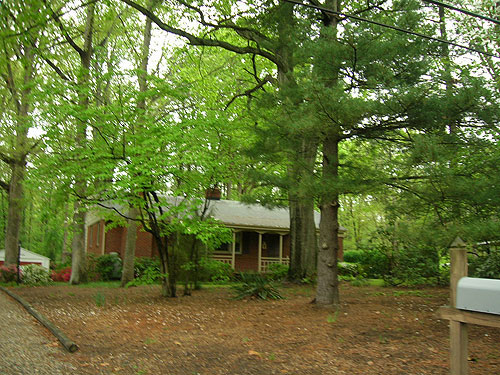
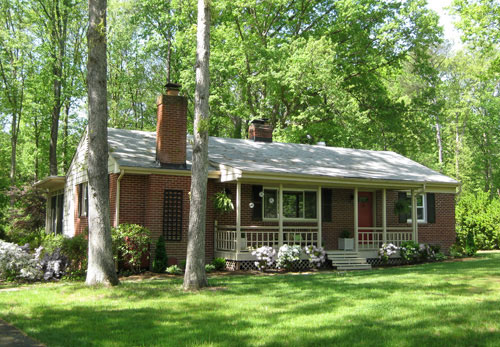
We did some major tree work, planted a ton of grass, laid a new stone path, ripped down some country details, painted our front door red, and upgraded the landscaping for the ultimate streetside transformation. Here’s the after:
FRONT PORCH
Our front porch was a big blank slate with a battered old wood floor and a sad, empty vibe. Here’s the forlorn before picture:
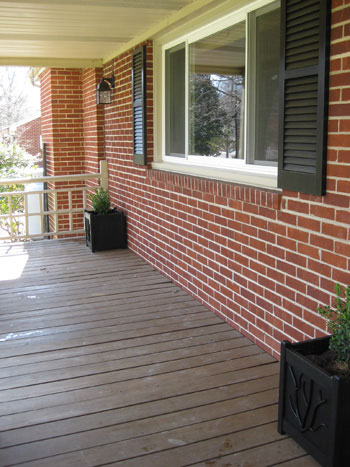
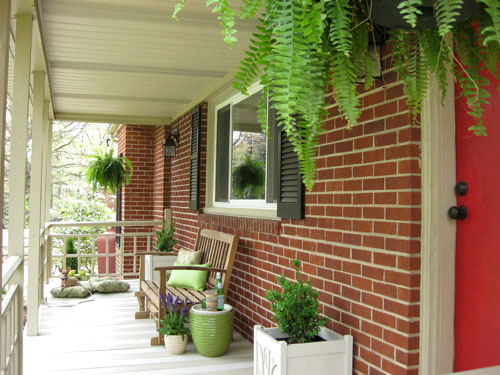
We lightened things up and added a welcoming cheerful vibe by painting the floor (in subtle tan and cream stripes) and creating a functional seating area (we even added a little dog corner for Burger).
LIVING ROOM TO LIVING/DINING ROOM
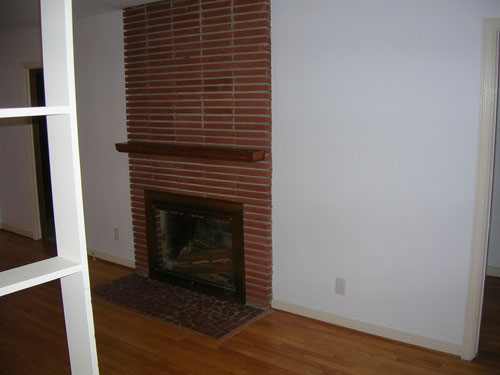
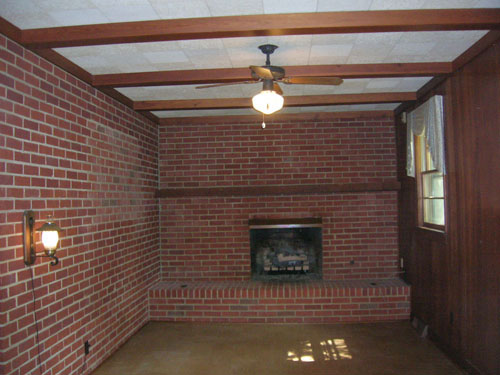
Our living room used to have a big red brick fireplace that sucked all the light out of the room and a strange divider by the door that made the room feel closed in. Here’s the before:
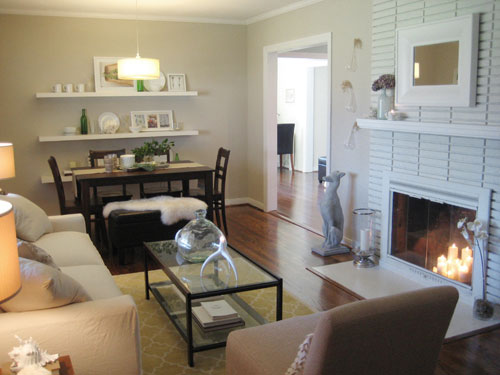
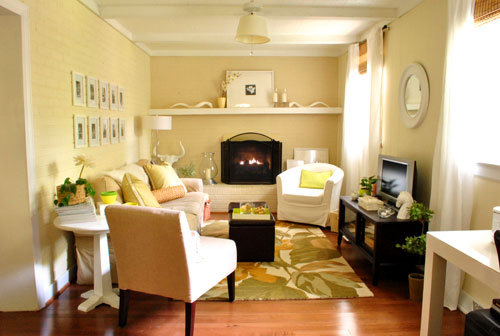
So we painted the fireplace and added a dining area to turn this expansive formal living space that went unused into a multi-functional living & dining room. Widening the doorway that led to the kitchen and adding crown molding completed the transformation:
LIVING/DINING ROOM – OTHER SIDE
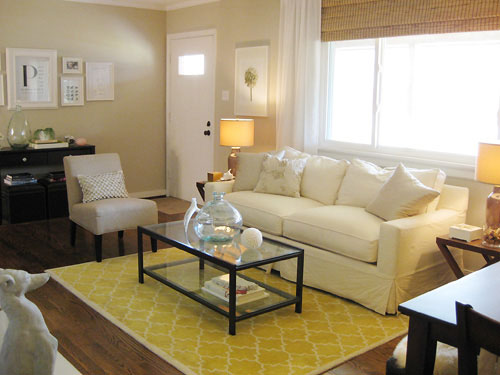
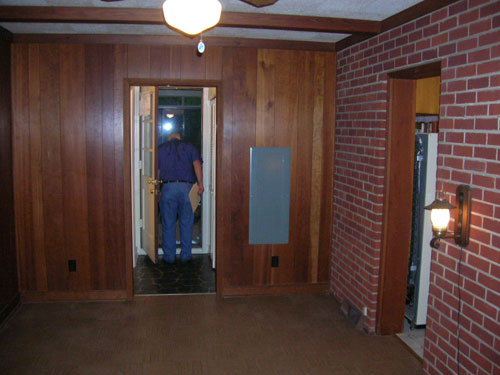
Here’s another before shot from a different angle to show more of that strange divider that we inherited along with some dated curtains and a square of faux-stone linoleum right in front of the door:

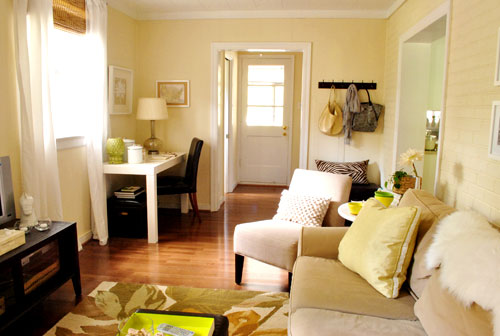
We ripped out the divider the day we moved in, and replaced the old lace curtains with bamboo blinds and floor length white curtains for a more current look. We also ripped up that square of linoleum by the door to find hardwood flooring running right underneath (which we later refinished to a rich mocha color):
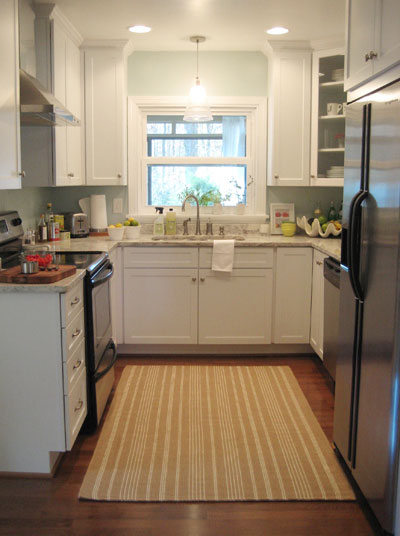
KITCHEN
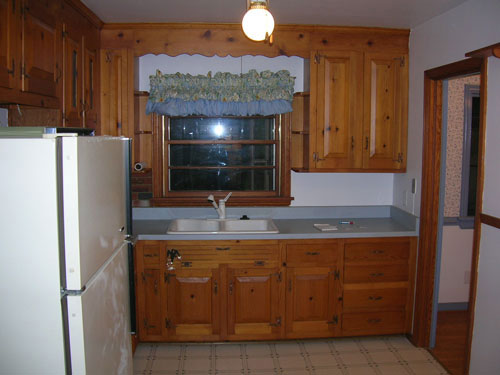
This before shot of our kitchen reveals the 50-year-old knotty pine cabinets, a low hanging fan, dated linoleum flooring and old appliances:
We completely gutted our kitchen, bringing in new hardwood flooring, stainless steel appliances, white cabinets, and granite counters. We also closed off the doorway that led to a formal dining room (which we converted into a third bedroom since we moved our dining area into our living room). This earned us a lot more cabinet space and a much more functional layout- here’s the after:
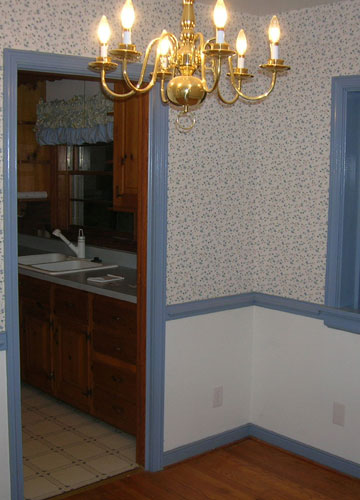
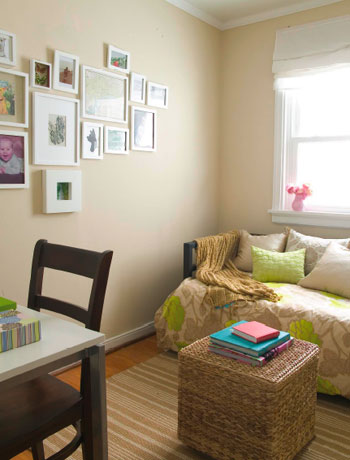
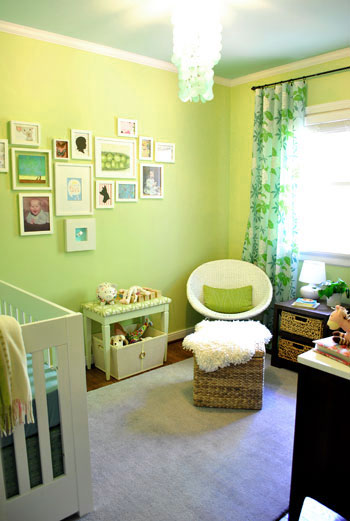
DINING ROOM to THIRD BEDROOM to NURSERY
Here’s the aforementioned dining room before we converted it into a third bedroom (it already had a closet!) by closing off the doorway to the kitchen. The dated wallpaper, brass chandelier, and blue chair rail had to go…
So we removed the chair rail and the wallpaper in favor of some warm tan paint, brought in a daybed and hung an asymmetrical frame collage so the modestly sized space still feels open and inviting. Here’s the after:
Then the room got completely reinvented as a nursery when we learned that we’d be welcoming a baby girl. Pear green walls and a light aqua ceiling along with some playful accessories and multifunctional furnishings made the small 8 x 10.5′ room up for the challenge. Here it is after the big transformation:
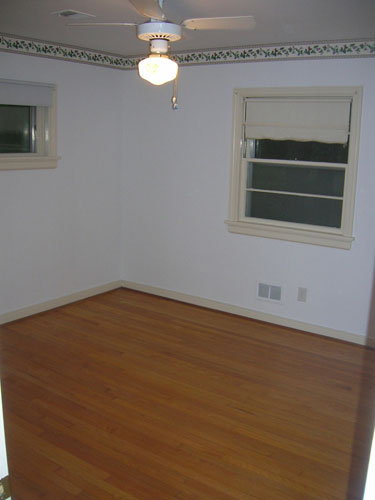
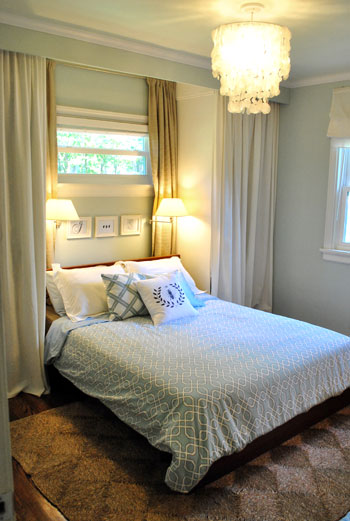
OUR BEDROOM
Our bedroom was a boring box with a grapevine wallpaper border and one tiny closet that barely held any clothes. Here’s the yawn-inducing before shot:
So we used Ikea wardrobes to build out the space on either side of the bed- creating two hidden closets– and added billowy curtains, swing arm lamps above the organic bed, and a capiz chandelier for a much more memorable (and functional!) place to lay our heads. Here it is after the big makeover:
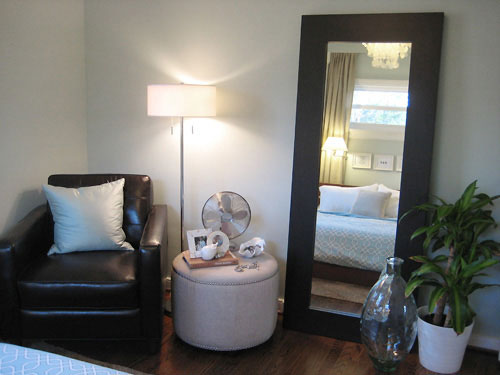
OUR BEDROOM – OTHER SIDE
Here’s another before shot taken from a different angle after we painted the walls and moved in our cheap-o furnishings…

After we added the concealed closets on either side of the bed, we no longer needed those Ikea dressers so we brought in a plush leather chair, a nailhead ottoman, and a large floor length mirror to bounce around even more light and create a much more welcoming feeling:
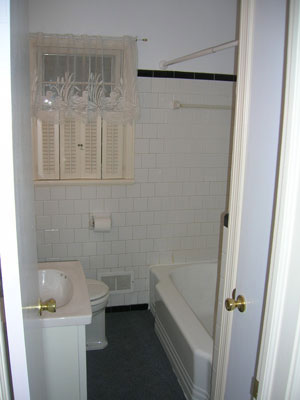
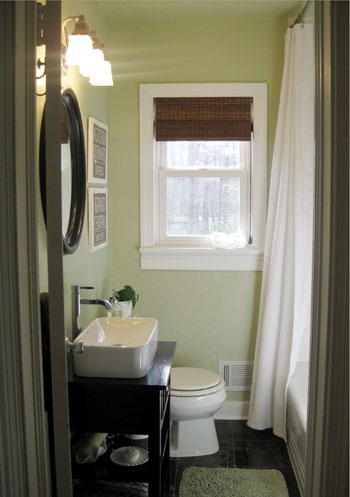
FULL BATHROOM
Before, the only full bathroom in the house had a ratty old carpet (!) covering vintage basketweave tile. And the dated curtains and interior shutters didn’t help…
Alas, we couldn’t salvage the cracked and stained vintage tile hiding under that nasty carpet and climbing the walls, so we gutted the entire room and brought in marble floor tile, soft taupey-green walls, and white subway shower tile for a total makeover. We also raised the shower curtain, removed the linen closet door, turned a night table into a vanity, and DIYed our own vintage-inspired art. Read about the whole $1819 project here.
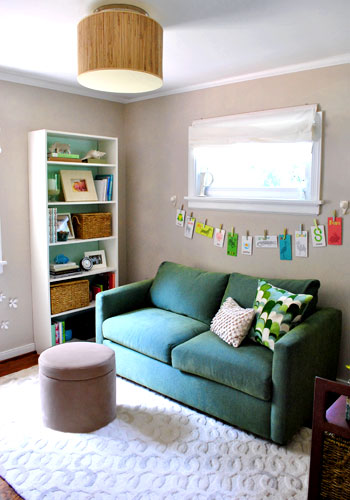
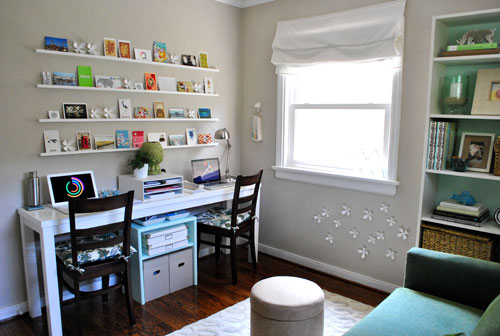
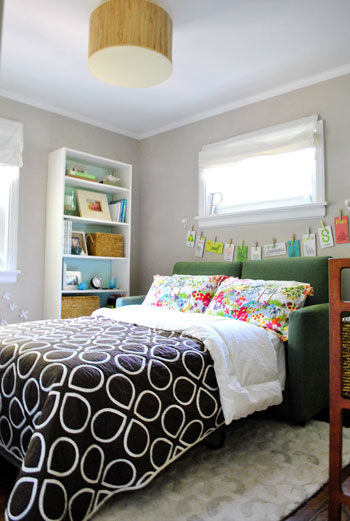
GUEST BEDROOM to OFFICE/GUEST BEDROOM/PLAYROOM
Much like our bedroom, the guest room was a boring white box with dated window treatments and pinky-beige trim. Here’s the ho-hum before shot:

And here it is after we painted the walls a nice sandy tone, went glossy white with the trim (and even added crown molding) to create a space that could easily sleep two people. Making our own art and upholstering the headboard ourselves saved us some serious dough.

When baby Clara came along and John and I needed a full time home office we knew the guest bedroom would have to become a multifunctional office, guest bedroom, and playroom of sorts. So we switched out the full sized bed for a comfy sleeper sofa and DIYed a desk (see the whole transformation here and here). Thankfully, we were able to squeeze everything in!
DEN
The old hunting lodge of a den that we inherited had dark brick, dated paneling, and heavy ceiling beams that created an oppressive dungeon-like feeling. Here it is before we moved in:
We brightened everything up on the cheap with a few gallons of cream colored paint on all that brick and paneling and then replaced the faux-parquet linoleum with mocha hardwoods so our entire house now has a seamless, open feeling that flows from room to room. Here’s the light and airy after:
DEN – OTHER SIDE
Here’s another before shot from a different angle to show just how much this room transformed with a bit of paint (and a whole lot of elbow grease):
We also widened the doorway that leads to the sunroom and the kitchen for a more open vibe, and created a functional little “mudroom” in one corner and a cozy little office nook in another.
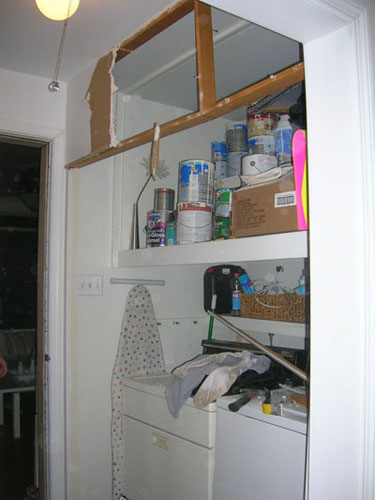
LAUNDRY NOOK
Before we bought the house, an ancient washer and dryer were hidden behind a rickety old bifold door (which actually blocked access to the back door when it was open- talk about bad planning). So we ripped out the bifold doors and the wall above them…
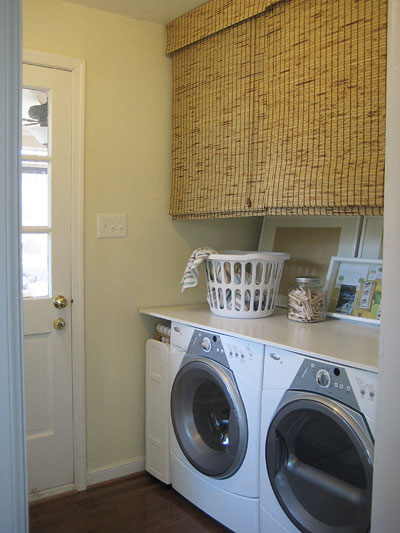
… to create an open laundry area that was functional and easy on the eyes. Other than the purchase of a new front-loading washer & dryer, this whole project was done on a major budget- from the bamboo blinds that we used as “cabinet doors” to the piece of plywood that we painted to create an inexpensive “counter.” Here’s the easily accessible after:
HALF BATHROOM – RIGHT SIDE
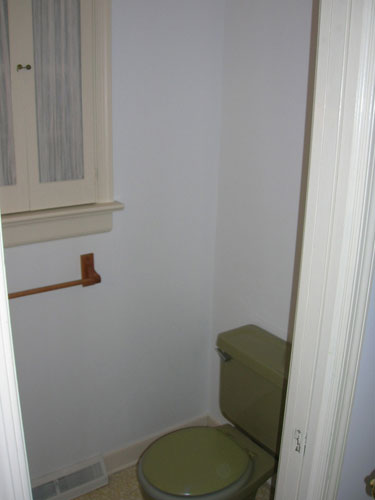
Our half bathroom was a sight for sore eyes, complete with a green toilet, yellowed linoleum floors, and some dingy fabric shutters:
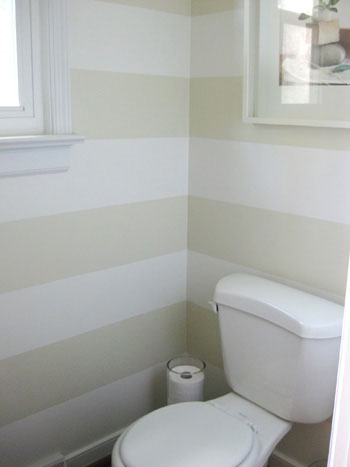
So we replaced the pea-green throne with a shiny white toilet and carried the wood flooring from the rest of the house into the room for a seamless look that makes it feel less cramped. Removing the shutters and adding a subtle tone on tone paint job brightened things up in no time:
HALF BATHROOM – LEFT SIDE
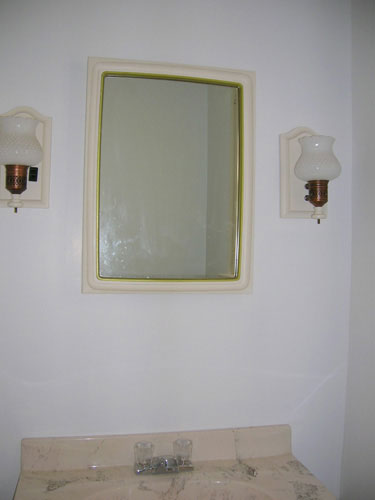
Before, the other side of the half bathroom boasted a dated medicine cabinet and some pretty old brass wall sconces, along with a huge faux-marbled vanity that took up half the room:
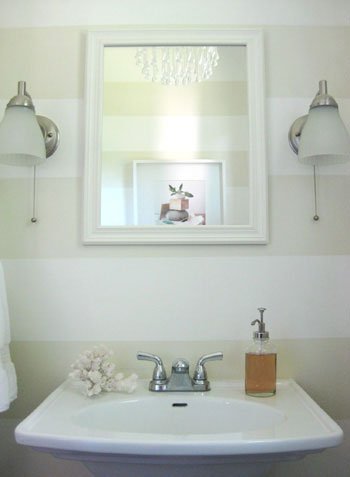
So we replaced the big vanity with an airier pedestal sink, which instantly made the whole space feel lighter and more open. Switching out the sconces and bringing in an inexpensive mirror to replace the old medicine cabinet finished the makeover- and a cheap teardrop chandelier added a bit of glitz:
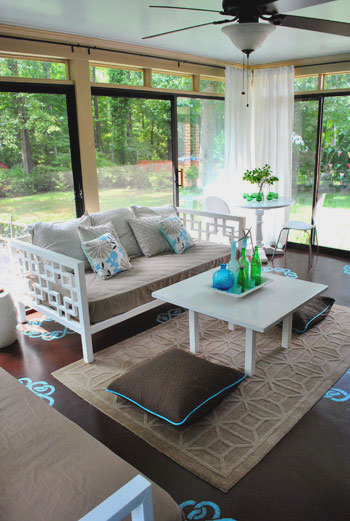
SUNROOM
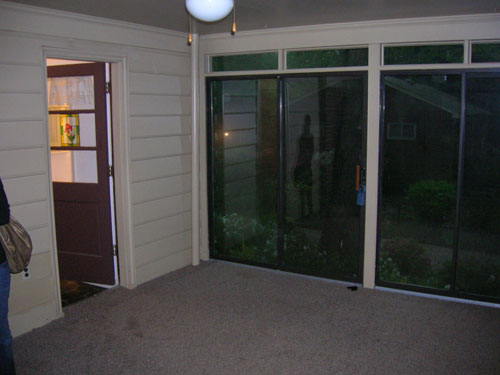
Here’s a before shot of the sunroom right after we moved in. The thin matted carpet was hiding a great concrete floor, and the room could definitely use a little softness:
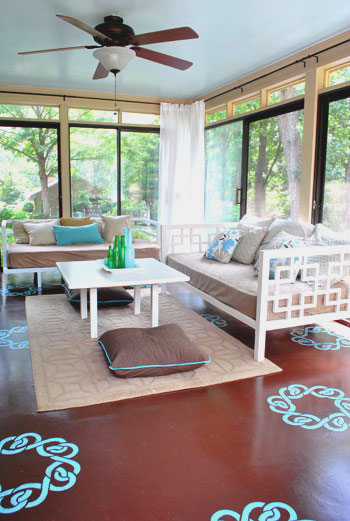
We hung some breezy white curtains in each corner and ripped up that old rug to reveal the concrete flooring underneath- which we painted a rich chocolate color to work with the mocha flooring throughout the rest of the house. Then for fun we added a playful stencil and painted the ceiling blue like the sky.
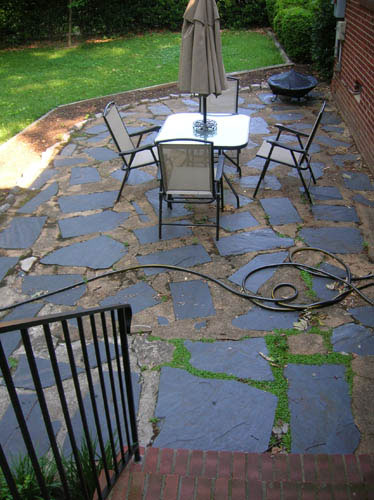
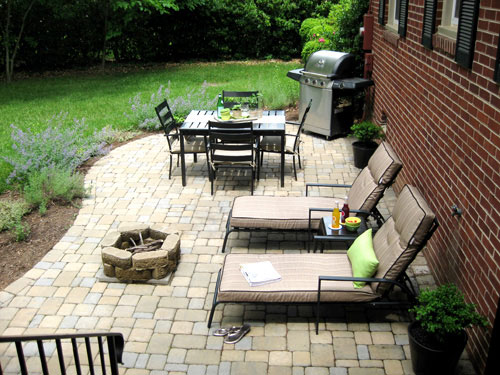
PATIO
Here’s a before shot of the jagged and loose slate patio that we inherited.
We replaced it with a curvy cobblestone patio that’s a lot easier on the eyes (and the feet). Adding some soft landscaping around the edge, bringing in some outdoor furnishings, and making a fire pit completed the overhaul.
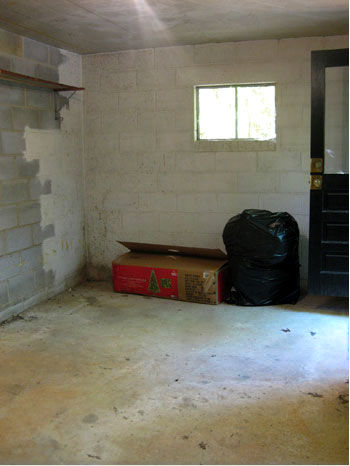
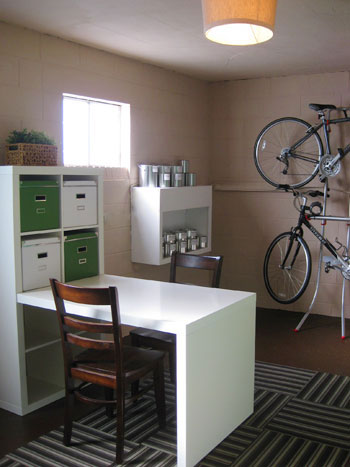
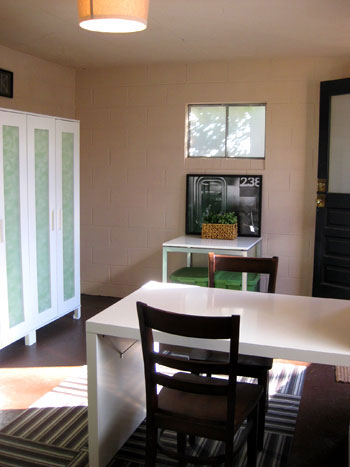
BASEMENT
The separate entry basement used to serve merely as a damp bug graveyard before we whipped it into shape.

We thought it was a shame to lose all that valuable storage space, so we sealed the cinder block walls, painted the floor, and brought in some affordable furnishings. The entire makeover came in at just $930 (including sealants, paint, two armoires, a desk, a bookcase, and a slew of accessories).
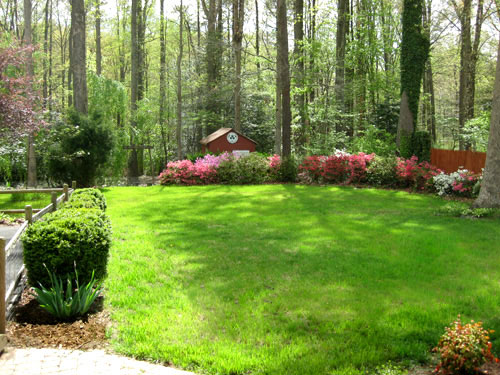
BACKYARD
Our original backyard was perfect for our wedding, but all that weeding and trimming was incredibly time consuming on a regular basis.
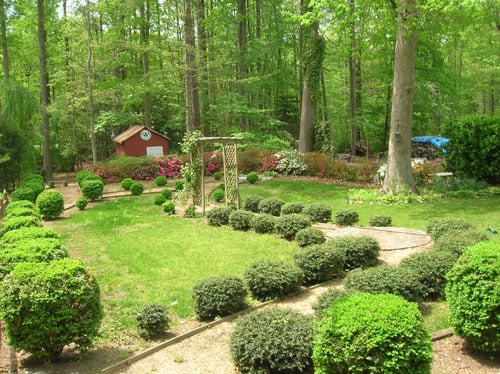
So we enlisted some free labor on Craigslist and had the yard cleared in an afternoon. Then we planted some grass for a simple and scenic area that’s a lot easier to maintain (see a full exterior breakdown here).
So that’s our beloved first house. Thanks for taking the tour with us.
Psst- Wanna know where we got something in our house? Just click on this button:
