Installing a toilet was one of the very first DIY projects we did as first-time homeowners in 2006. Now, nearly 2 decades later, we’ve done it so many times I’ve lost count. In fact, you’ll see photos from several different bathrooms in this post. Installing a toilet may feel complicated, intimidating, and… well, gross. But it is a remarkably straightforward project that anyone can do. You don’t even need to be named John like me (get it?).
This process is not only useful for replacing a toilet but can also be used to fix a toilet that may be leaking or rocking. You can also use these steps to reinstall your existing toilet if it’s been removed as part of a bathroom remodel.
Tools & Supplies Needed
It doesn’t require many tools or special supplies to install a toilet, but here are some important items to have handy.
- New toilet* (this Kohler model is our favorite)
- Measuring tape
- Wax ring kit
- Adjustable wrenches or groove joint wrenches
- Flathead screwdriver
- Spare rag
- Spare towels or blankets
- Sponge, paper towels, and/or small bowl
- Utility knife
- Hacksaw
- White silicone caulk
- Level (optional)
- Gloves (optional)
*If you are reinstalling your existing toilet, a new model isn’t necessary. We will include steps below for reusing the same toilet.
Steps To Install A Toilet
We suggest reading this full tutorial before beginning your project and buying your supplies. Below is a quick overview of the steps.
- Measure Your Rough-In*
- Purchase A New Toilet*
- Remove Your Old Toilet
- Prepare The Floor & Flange
- Add The Wax Ring
- Place The Toilet Bowl
- Bolt The Toilet Bowl
- Install The Toilet Tank
- Connect The Water Line
- Finish The Toilet Installation
*Again, some steps are optional if you are reusing your existing toilet.
Step 1: Measure Your Rough-In
Before purchasing a new toilet, you need to know your bathroom’s “rough-in” distance. This is the distance from the bolts on the floor to the back wall. Standard toilets are designed for 12″ rough-in, so use a tape measure to ensure you have at least this much space. Older or smaller bathrooms may have less, which may require a compact toilet designed for 10″ rough-ins.
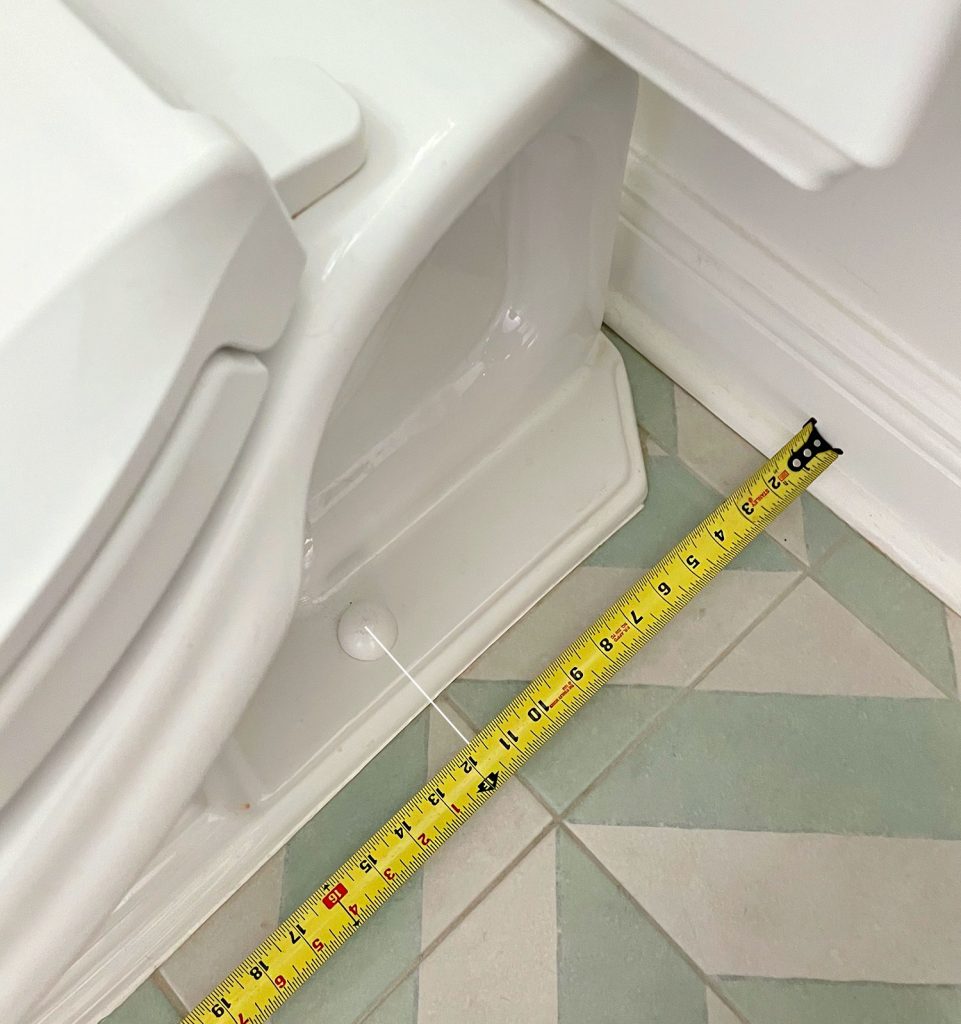
Remember to add the depth of your baseboard to your rough-in measurent. Most toilets (unless its skirted) come closest to the wall at the height of the tank, which is usually well above the baseboard. So don’t panic if the distance between bolts & baseboard is slightly less than 12″ like you see above.
Step 2: Purchase Your New Toilet
In addition to rough-in distance, there are a few other options to consider when selecting a new toilet. Here are some terms & options to be aware of.
- Round vs Elongated Bowl: The shape of an elongated bowl tends to be more comfortable to use, but some people prefer the more classic look of a round bowl. Round bowls also tend to be shallower, making them a good option for smaller bathrooms.
- Chair/Comfort vs Standard Height: Standard height toilets are typically about 14-15″ from floor to the bowl rim (not counting the toilet seat). Many find a higher toilet easier to use and these are sometimes labeled chair, comfort, or tall height and tend to be closer to 17″ high.
- One- vs Two-Piece: It’s easier to install a toilet built in two pieces (bowl + tank) because each piece is lighter and less cumbersome. However, some prefer the seamless look of one-piece toilets.
- Single- vs Dual-Flush: Dual-Flush toilets are considered more eco-friendly because they provide separate flush options for liquids vs solids, the former of which uses less water. You can also retrofit any toilet with a dual-flush kit.
There are smaller design choices (color, style, etc) or functional features (flush strength, lever location, etc) that may be important to you as well. As well as unique options like wall-mounted toilets, square bowl toilets, and even composting toilets. But if you’re looking for a nice, standard option, this Kohler Memoirs has long been our favorite toilet.
Step 3: Remove Your Old Toilet
Assuming you have an existing toilet in the way, you’ll first need to remove it. This is a great opportunity to familiarize yourself with the steps to install a toilet, just in reverse. It goes like this:
- Turn off & empty water
- Disconnect the water line
- Unscrew & remove the tank
- Unscrew & remove the bowl
- Plug flange with rag
Turn off & empty water
Start by turning off the water supply valve, usually located on the wall or floor behind your toilet tank. Turn it clockwise by hand until it stops. If it is hard to turn, try spraying it with a lubricant like WD-40. Avoid forcing it with a wrench, since this could break it and cause flooding.
With the water turned off, flush your toilet to empty the tank and bowl as much as possible. Use a sponge, bowl, and/or small cup to remove any remaining water.
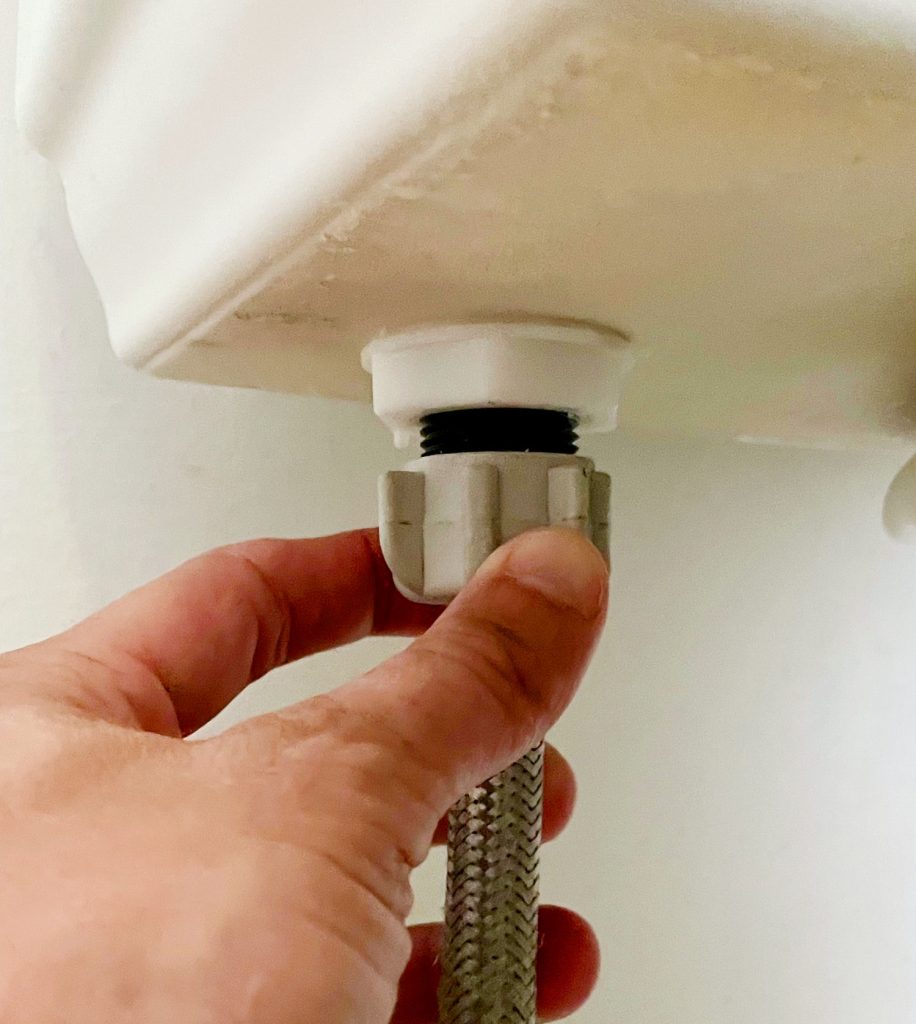
Disconnect the water line
Now disconnect the water supply line from the bottom of your toilet tank. Turn it counterclockwise by hand or with an adjustable wrench. Have a bowl or paper towels handy since some of the leftover water in the supply line is likely to spill out.
You can leave the supply line connected to the wall unless you plan to replace it too.
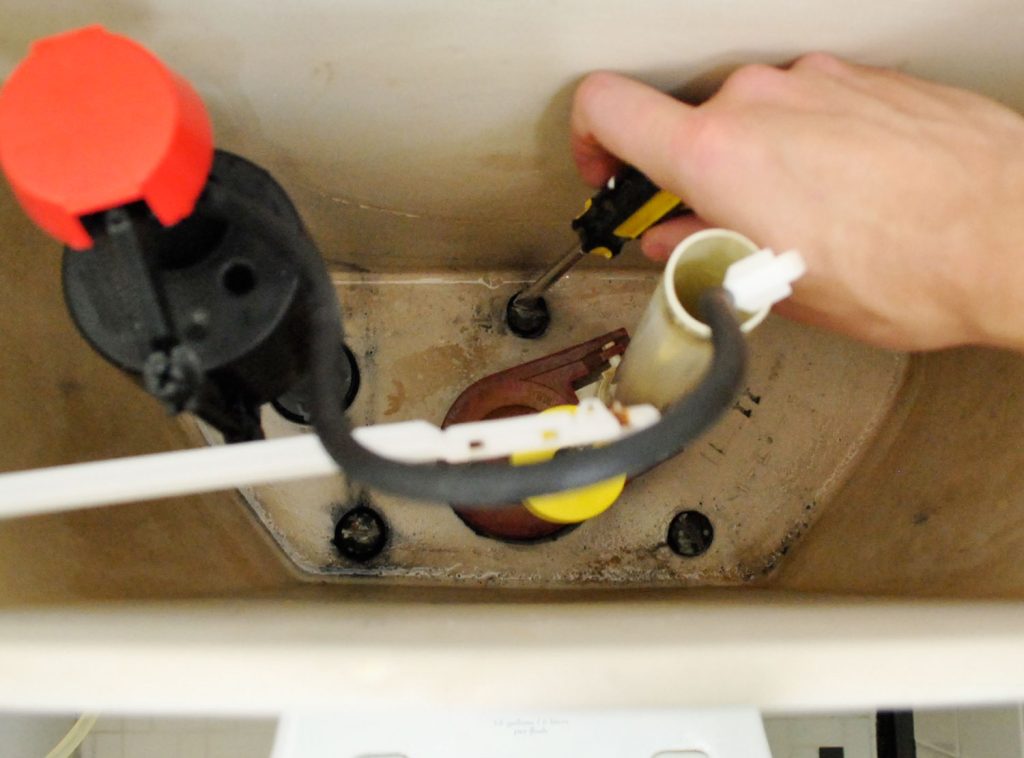
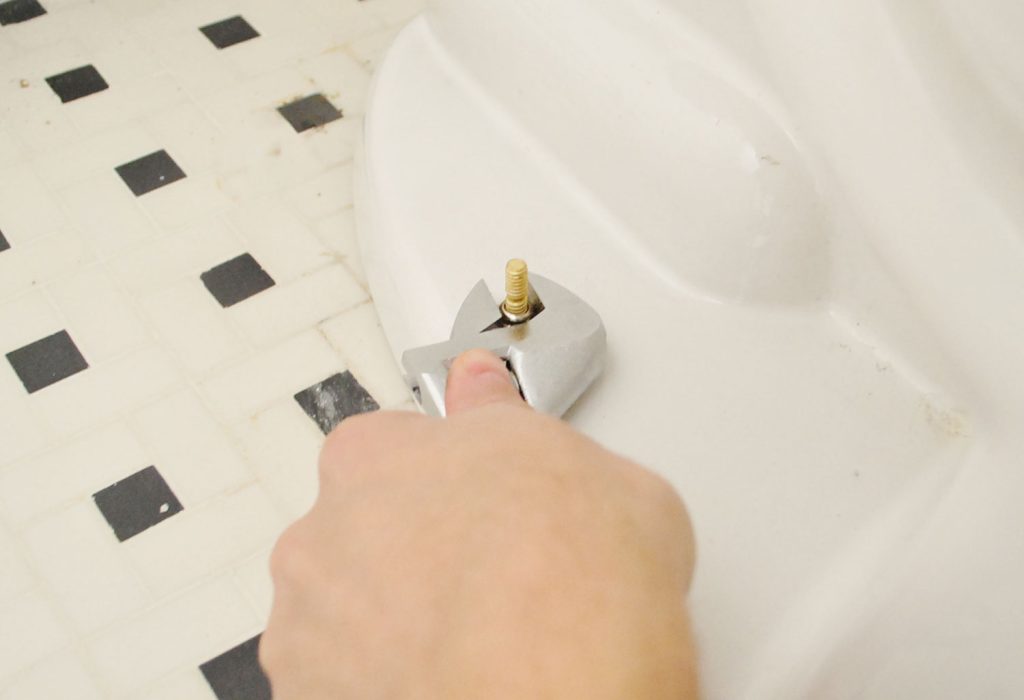
Unscrew & remove the tank
Assuming you have a two-piece toilet, the next step is to remove the tank from the bowl. This isn’t absolutely necessary, but I find it’s easier (and lighter) to work with the tank separated. The tank is held to the bowl by three tank bolts. Unscrew the nut on the underside of the tank with a wrench. You may need to use a flathead screwdriver inside the tank to keep the bolt from moving while you unscrew the nut.
With both bolts removed, you can lift off the tank and set it aside. We like to put it down an old towel or soft blanket to prevent accidentally cracking it on the hard floor.
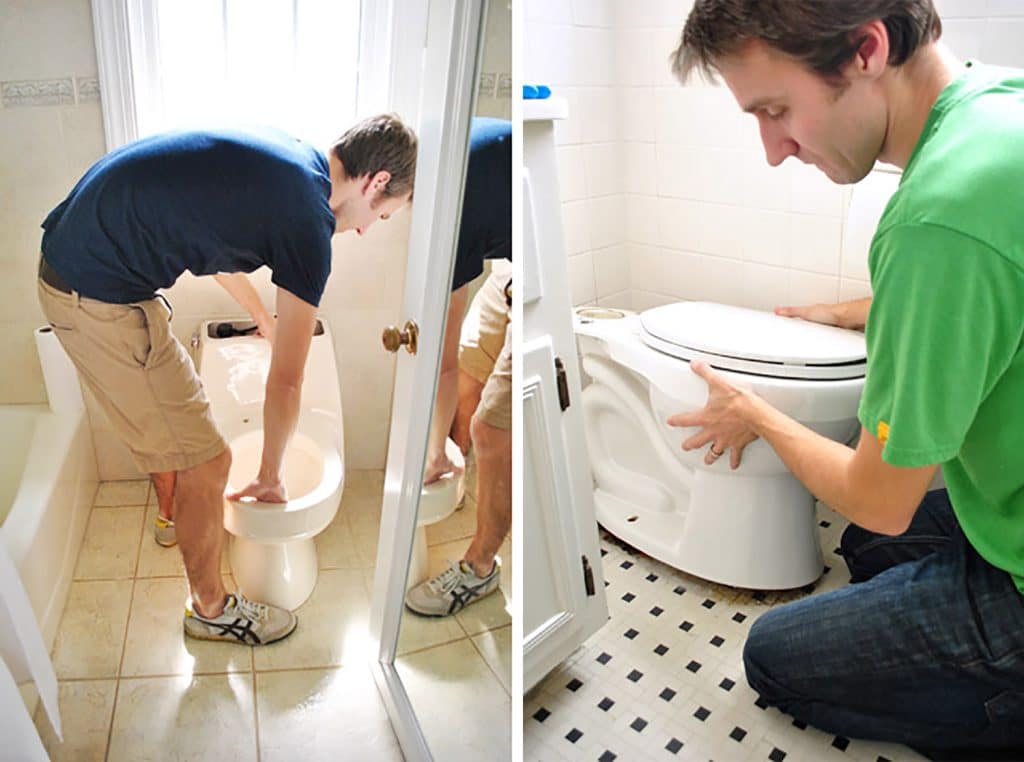
Unscrew & remove the bowl
The toilet bowl is held to the floor by two bolts on either side. These may be hidden underneath plastic bolt caps that match your toilet finish. Use your wrench or pliers to remove each nut (turning counterclockwise). If your toilet is caulked around the base, use a utility knife to score the caulk line. To remove the toilet bowl, we find it helpful to gradually rock it side to side a bit, which will loosen the wax ring.
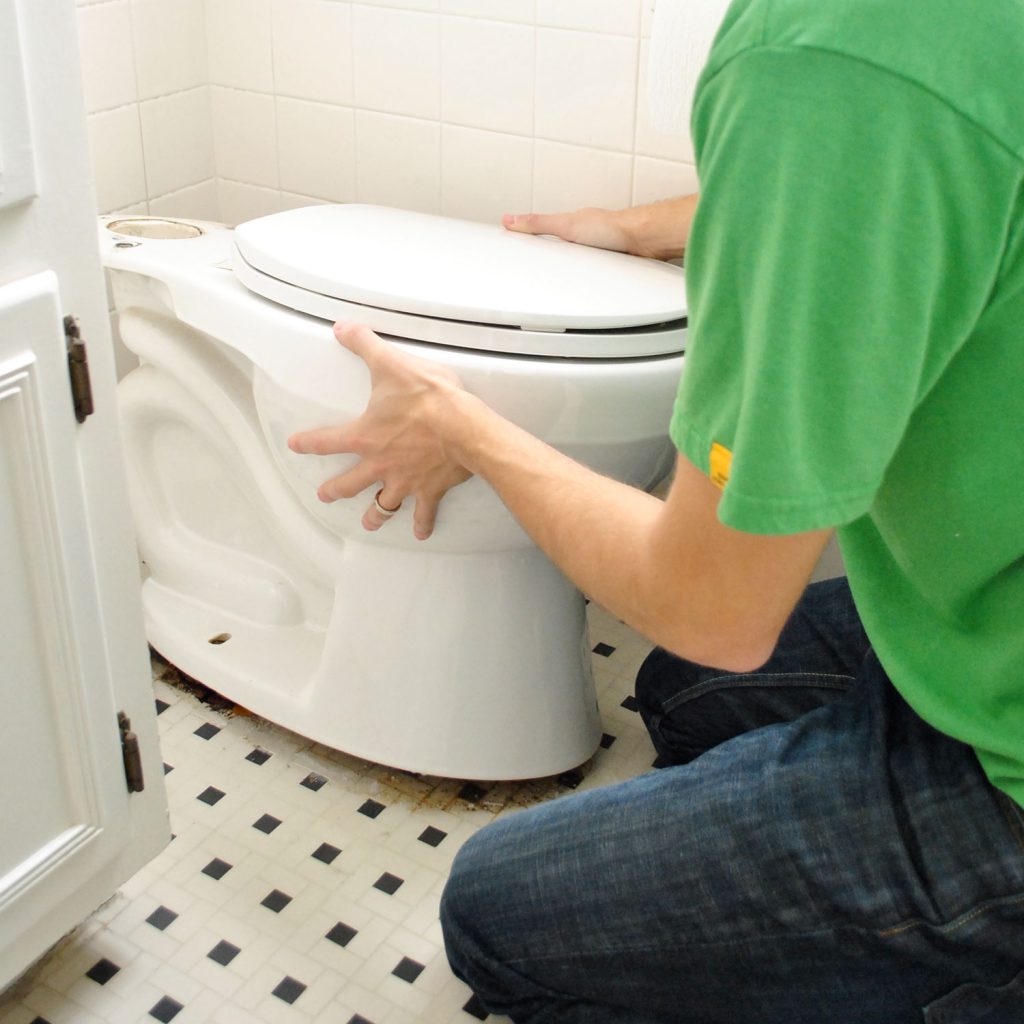
Once you feel it detach, carefully lift the bowl off the bolts and set it aside on an old towel or blanket. You may want to place it on its side or upside down to avoid getting the sticky wax ring on your floor or towel.
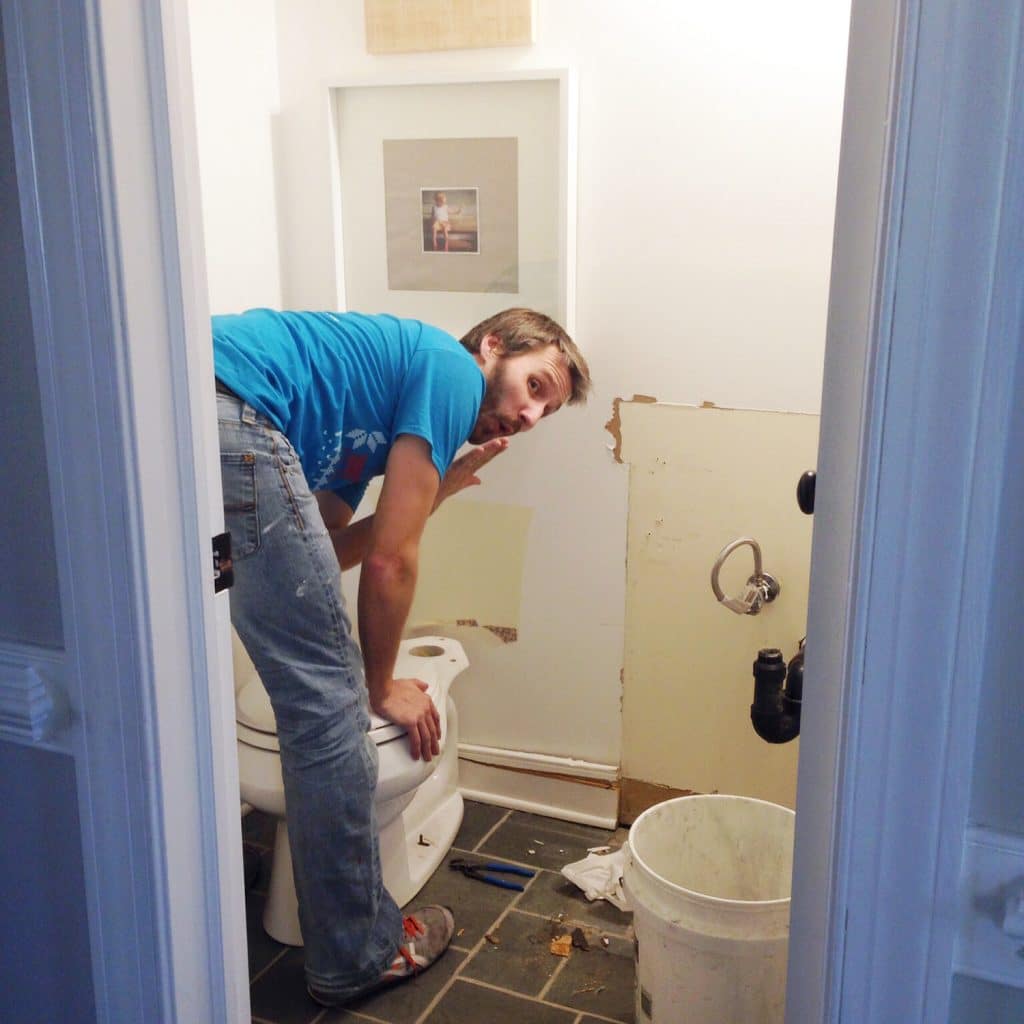
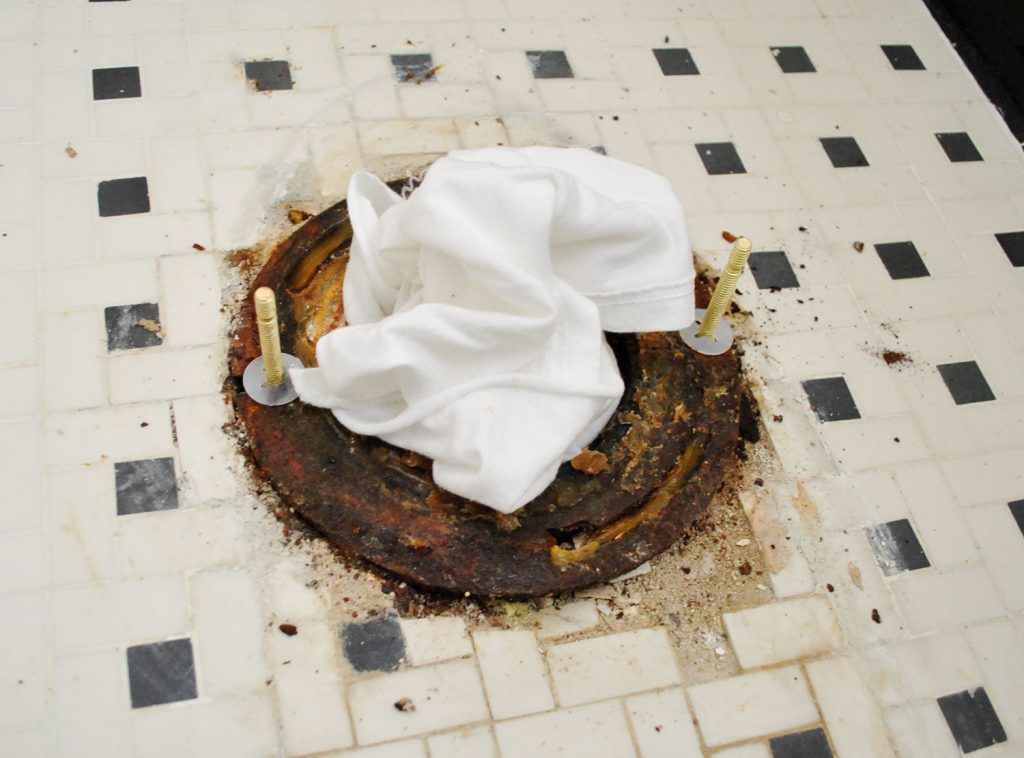
Plug the flange hole
As soon as the bowl is lifted away, stuff a spare rag or hand towel into the open hole in the floor where your toilet had been. This will prevent sewer gases from escaping into your home. It also keeps things from falling into the hole in the meantime. Just be sure to remove the rag before installing the new toilet.
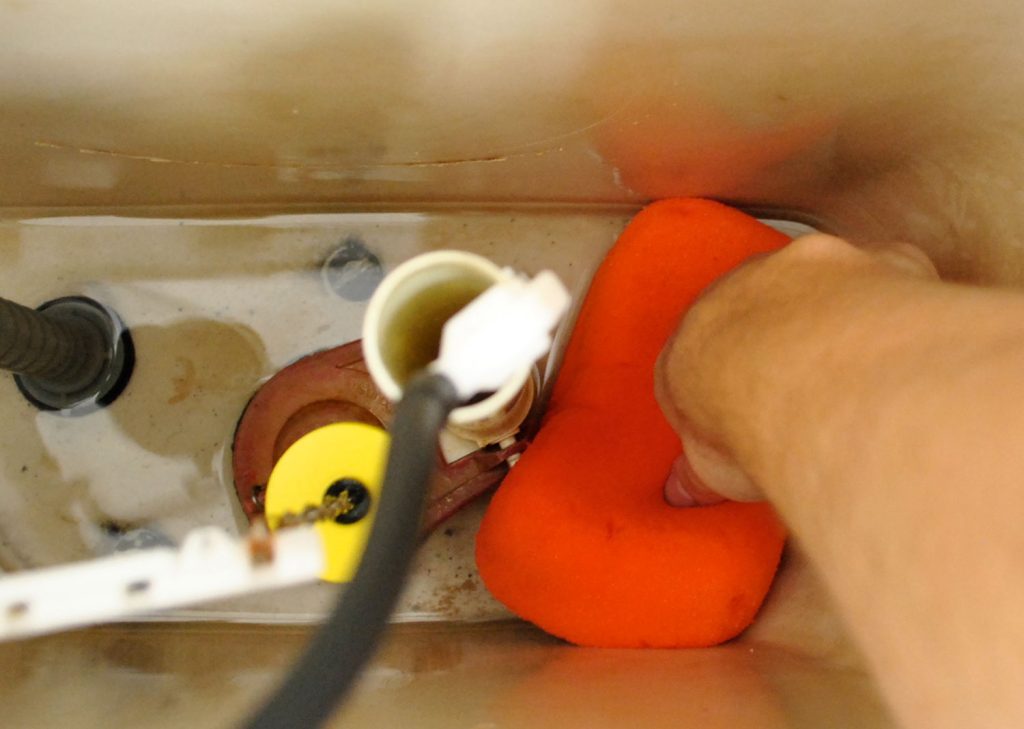
Step 4: Prepare The Floor & Flange
Before you install the new toilet, take some time to remove any old wax, caulk, and other debris from the area. The large metal or PVC ring in your floor is the toilet flange (sometimes called the “closet flange” as in water closet flange). You do not need to replace this, assuming its not broken or in poor condition. Just use a utility knife, flathead screwdriver, putty knife, or other tool to remove as much of the old wax around the flange as possible. Remove the rubber gasket as well. Sorry for the gross picture!
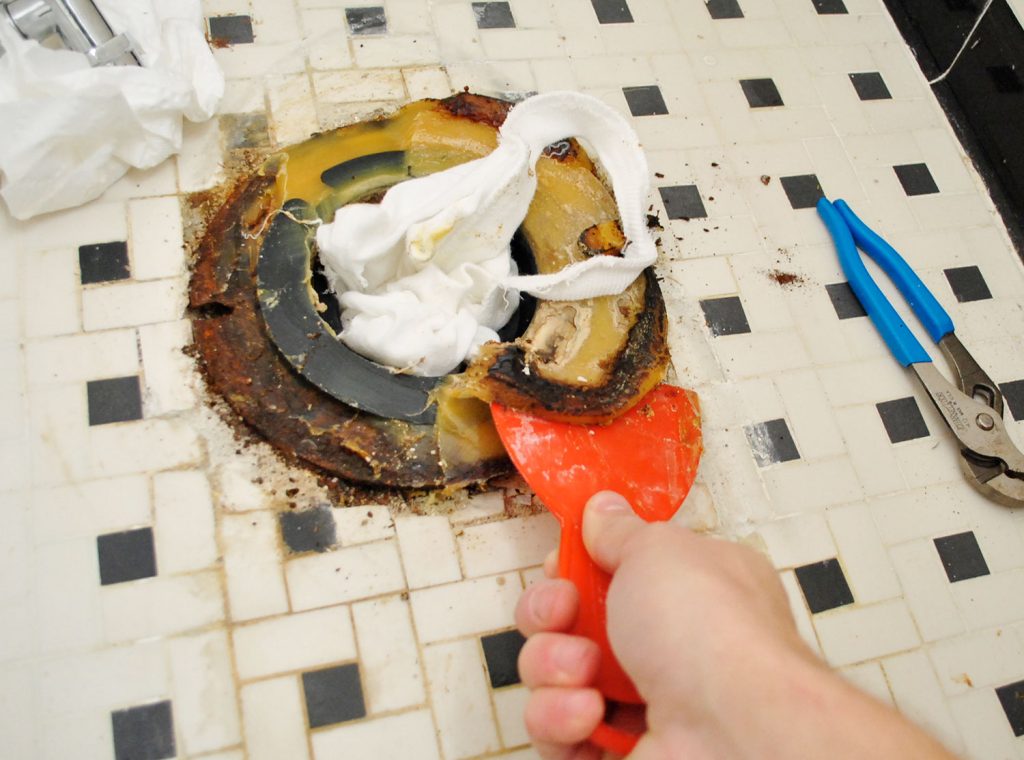
We also recommend removing the old bolts from the flange and using the new ones that come in your wax ring kit. These two bolts, which stick up from the floor, should easily slide out from a keyhole slot in the flange. With the area cleared of wax, slide the new bolts in their place. Many come with plastic clips to help hold them upright.
Also, if you are re-installing your current toilet (like we were in the bathroom pictured above) be sure to clean any old wax off of the bottom of the toilet bowl as well.
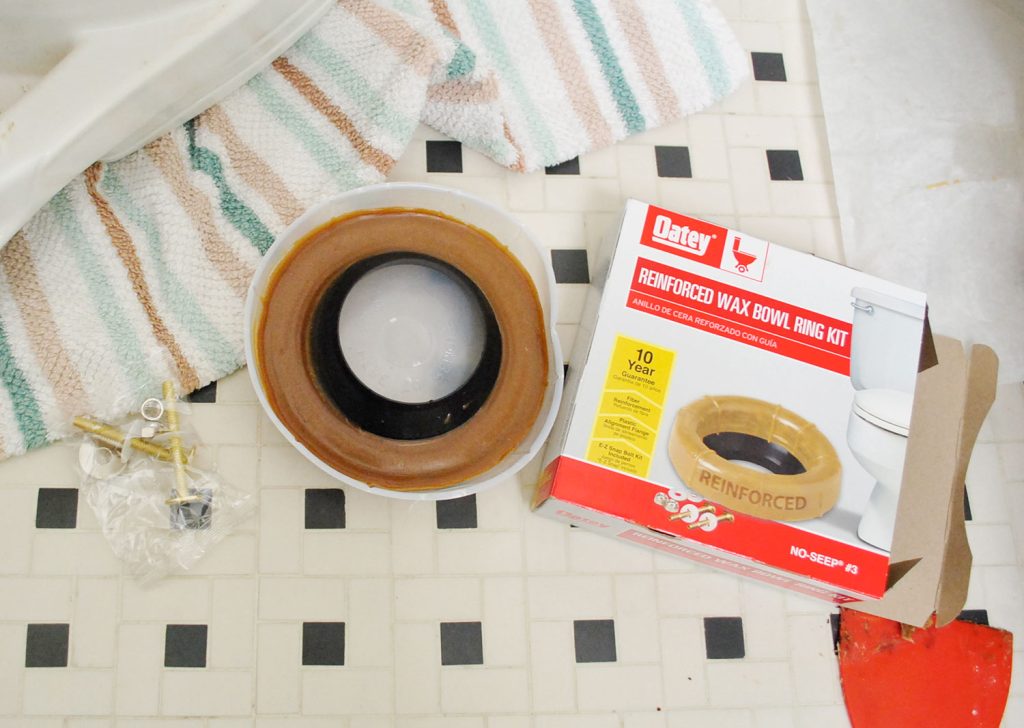
Step 5: Add The Wax Ring
The wax ring provides a tight seal between your toilet and flange. Most wax rings are reinfoced with a rubber gasket as well. It’s a relatively simple concept but can be a little tricky to get right on your first try. Luckily, many wax ring kits come with two wax rings. We also suggest having both a standard and extra thick wax ring kit on hand, since it’s sometimes hard to determine which is best before your old toilet is removed. Extra thick wax rings are good for bathrooms with thicker tile or deeper set flanges. You can always return what you don’t use.
While some people place their new wax ring on the flange, we recommend sticking it to the underside of the toilet bowl. This is easier and ensures a more accurate placement. To do this, lay your new toilet bowl on its side or upside down an old towel or soft blanket. Set the ring over the hole on the bottom of the toilet, wax side touching the toilet. Give it a slight press so that it will hold in place.
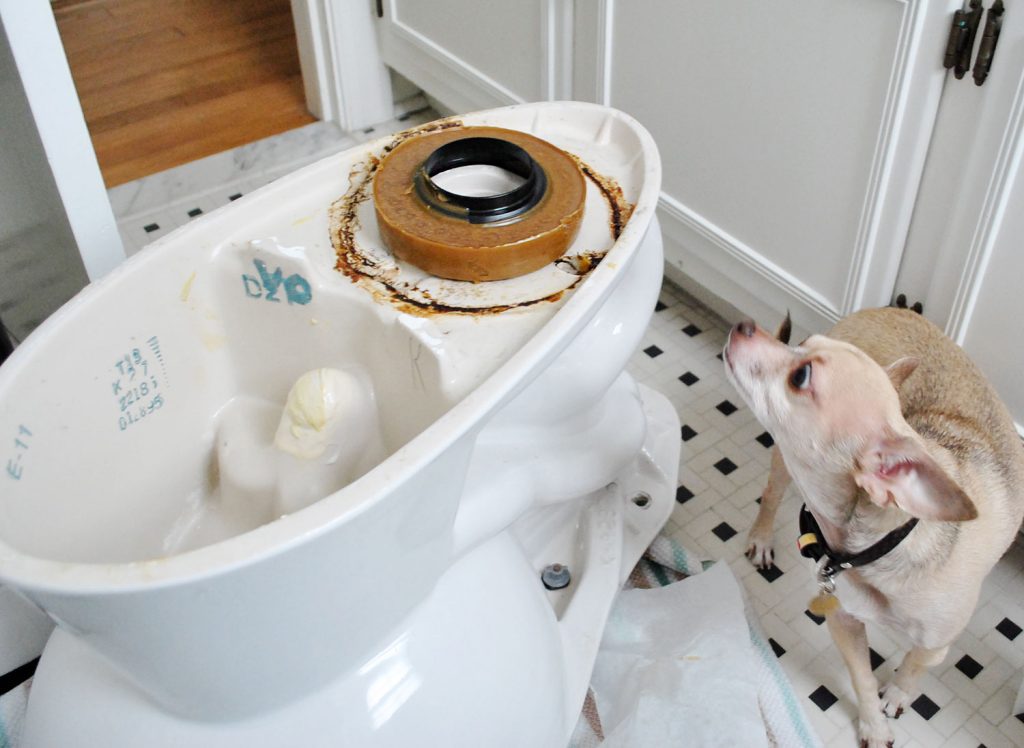
Feel free to let your chihuahua inspect it for quality control.
Step 6: Place The Toilet Bowl
This is the trickiest part of the process, but don’t worry. It’s not rocket science and you can easily do it again if you mess up. With the wax ring stuck to the bottom of the bowl, carefully lower it over the flange so that the bolts stick up through the bolt holes along the toilet base. If lifting the bowl is cumbersome, get a helper to help support the bowl or guide it onto the bolts. Don’t forget to remove the rag from the hole first!

A helpful tip we tried one was placin drinking straws over the bolts. This made it easier to see them and get the bolt holes lined up. Highly recommend!
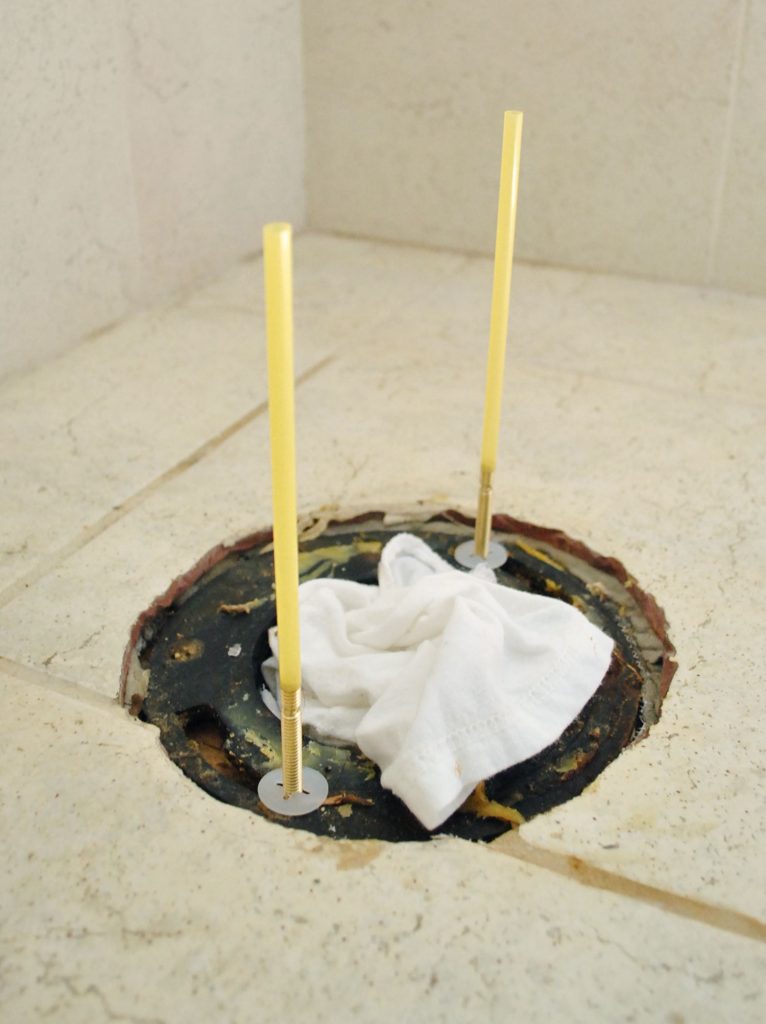
Once you’ve got the bowl placed over the bolts, press down to help the wax ring seal over the flange. If I’m happy with my placement, I also like to sit carefully onto the bowl so that my body weight helps seal the wax ring a bit tighter.

Troubleshooting Placement Problems
I’ve had to redo this step on more than one toilet installation because placement can be a little tricky, especially as your arms get tired from holding a heavy toilet bowl. Bolts can get knocked over or out of place. The bowl can go down crooked. Sometimes your wax ring is too tall. Sometimes it even falls off midair! The main thing to remember is that once a wax ring gets smooshed or deformed in any way, it should not be reused. So don’t try to twist, lift, or shift a misplaced bowl into place. Remove it, grab a new wax ring, and try again. This is why we suggest always having a backup ring or two handy.
Step 7: Bolt The Toilet Bowl
With your bowl set precisely over the bolts, you can now secure it in place. Place the provided washers and nuts over each bolt. You will also probably have a white washer that connects to the plastic bolt cover to slide on as well. Hand-tighten each nut as far as possible.
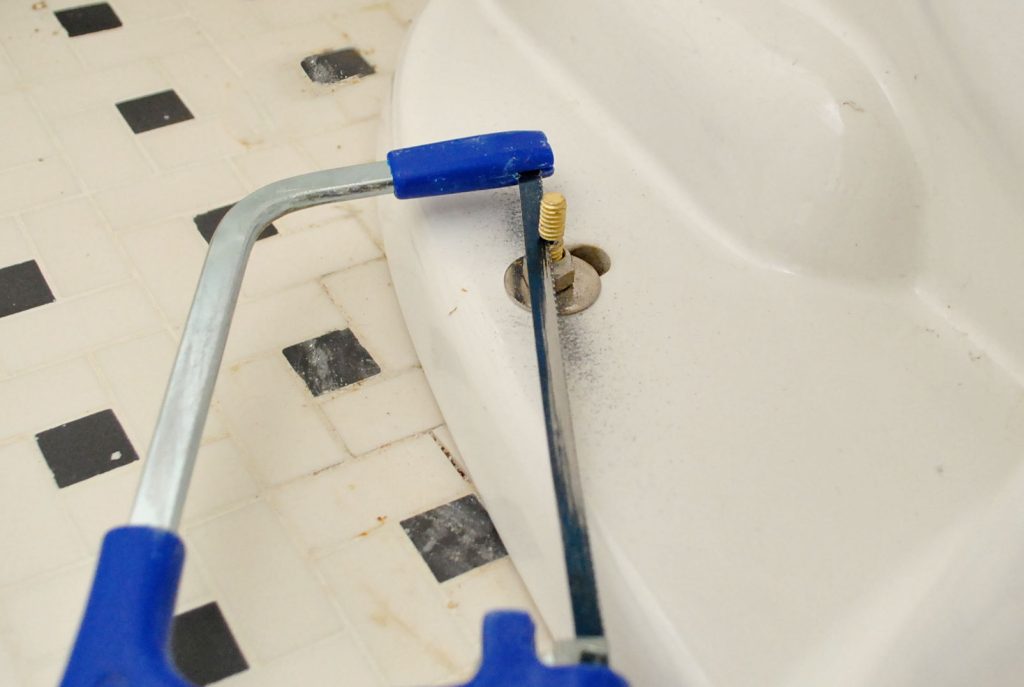
You can use your wrench to tighten each nut a bit further. Just go slow and don’t overtighten, as this can crack the porcelain. Go back and forth between the two bolts, tightening each bit by bit. This helps ensure an even and level result. Use a hacksaw to cut off any excess length of bolt so you can add your plastic covers.
Step 8: Install The Toilet Tank
Similar to what you did when removing the old toilet, you will need to secure the tank to the bowl using the provided tank bolts, nuts, and rubber washers. Just like with the bowl, lift the tank carefully into place so as not crack or damage either piece. The large rubber gasket under the tank should align with the hole at the back of the bowl. Hand-tighten the nuts on the underside as far as possible, then use a wrench and flathead screwdriver to secure them to prevent leaks.
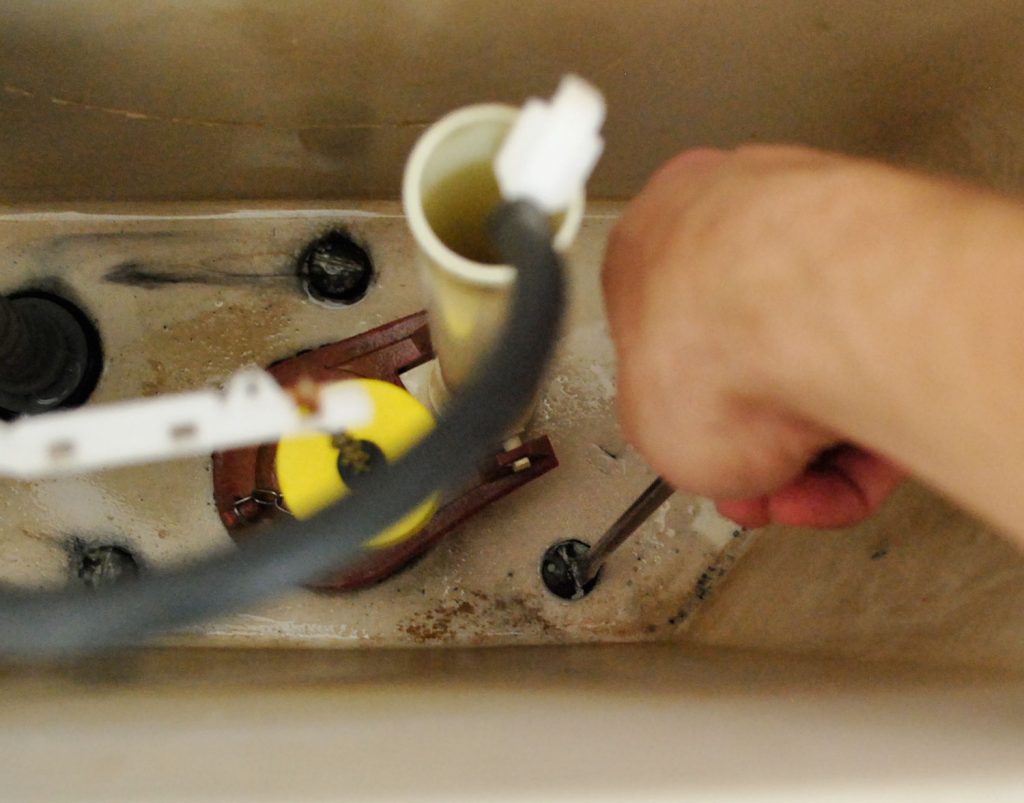
Like with the floor bolts, alternate tightening each bolt bit by bit (there are usually 3 bolts) being careful not to overtighten. I prefer to hold the nut stationery under the tank and twist with a flathead screwdriver form above. You may want to use a level to make sure the tank sits evenly on the bowl.
Step 9: Connect The Water Line
Reattach the water supply line to the bottom of the tank by hand. You can use some plumbers tape if you want to ensure a leak-free connection. Slowly turn on the valve and allow the toilet tank and bowl to fill with water. Flush a couple of times and inspect for leaks. These could appear in various locations:
- Where the water supply line meets the tank
- At the bolts or rubber gaskets between the tank and bowl
- Underneath the bowl around the wax ring
If leaks appear in the first two locations, try slightly tightening the connections. You also can try replacing the rubber washers or gaskets on the tank if they seem compromised. If a leak appears under the bowl (we sometimes slide a paper towel under the edge to check) you will need to replace the wax ring.
Step 10: Finish The Toilet Installation
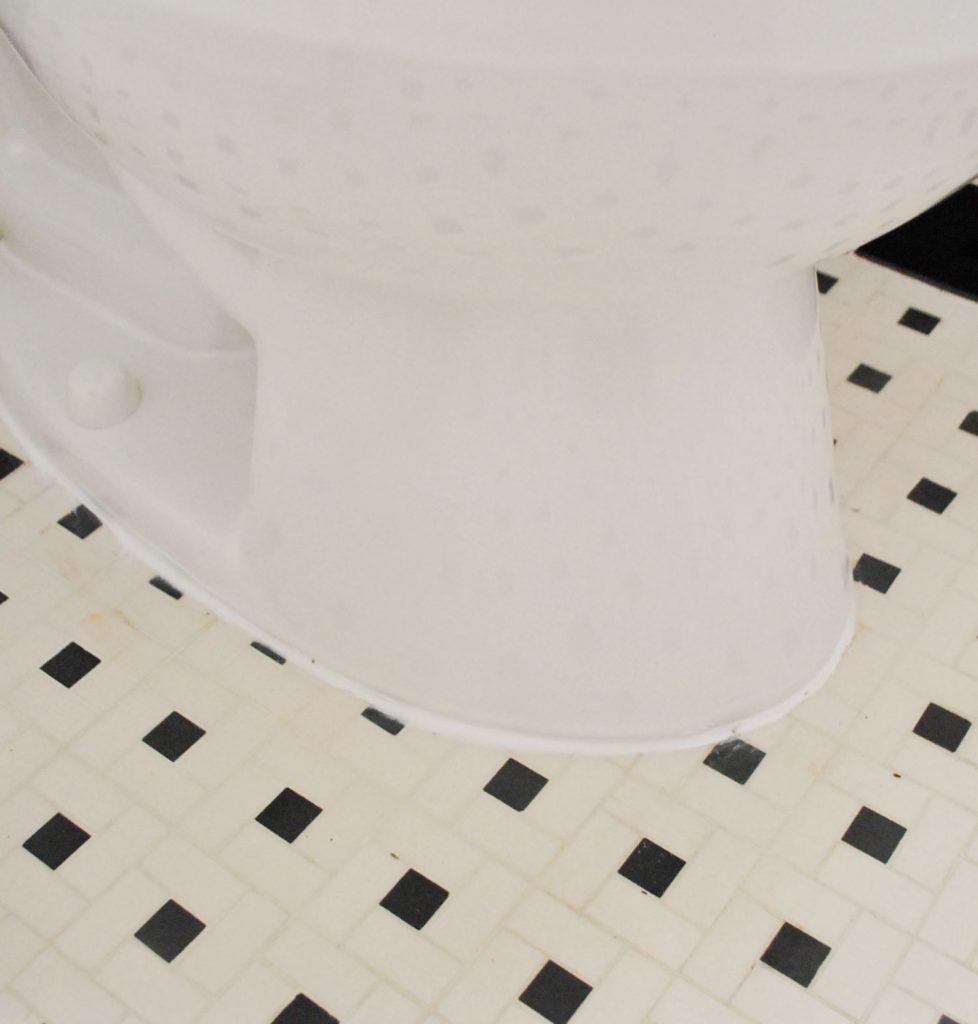
To complete your toilet installation you’ll probably need to attach the toilet seat (which may or may not come with your toilet) and possibly adjust the flushing mechanism in the tank to your liking. We also like to put a bead of white silicone caulk around the toilet base.
Bonus Step: Get Rid Of Your Old Toilet
Your new toilet is in. Great! But now what do you do with the old one? Don’t throw it in the trash (unless it’s damaged or otherwise unusable). Instead, we suggested either donating it or selling it. Charities like Habitat for Humanity are happy to take old toilets, just give them a good cleaning first. We also once sold an old toilet on Craigslist for about $80!
Toilet Installation FAQs
Can I install a toilet myself?
Yes! This is definitely a beginner-friendly plumbing DIY project and can be completed by one person, assuming they can lift the pieces without trouble. Most toilets weigh between 80 – 120lbs, but picking a two-piece toilet makes the separate bowl and tank pieces easier to maneuver. However, we do find the process goes smoother with a helper.
Do I need a plumber to install a toilet?
If any of the steps described above sound beyond your skill or comfort level, please don’t hesitate to call a professional. However, we have DIYed several toilet installations – even as brand-new, first-time homeowners. So as long as you can be patient and follow directions, we have confidence in you!
Do I need to caulk around my toilet?
Yes, it is recommended to caulk around the base of the toilet. It not only looks nicer, but it’s also more sanitary and can help keep your toilet from rocking. A bead of silicone caulk around the base keeps things from sliding or leaking under your toilet (think your kids’ potty-training misfires) which can lead to mold and unwanted smells.
Other Toilet How-Tos
Now that you’ve learned how to install a toilet, here are some other tutorials and information you might be interested in.
- Our Favorite Toilet (Yes, We Have One!)
- How to Fix A Rocking Toilet
- How To Unclog A Bathtub Drain Without Chemicals
- Convert A Toilet To Dual Flush
- Fixing A Backed Up Toilet Line
*This post contains affiliate links, so we may earn a small commission when you make a purchase through links on our site at no additional cost to you.

Benita says
Oooohhh!!! Just what I need! Thank you so much! I’ve been meaning to lay under floor heating and a new tile floor in the tiny upstairs bathroom and with that I obviously need to remove the toilet. Last time I had my neighbor help me but didn’t pay enough attention to what he was doing and he’s since moved… Now that I have your tutorial I can do it myself! Now I can’t wait!!! Yay!
Lindsay says
Thanks John! Perfect timing actually… my husband and I have started demo and the toilet is the last thing standing in the “old” half bath. I’m sure this will come in handy!
MaryB in Richmond says
I will never ever ever ever need to know how to install a toilet BUT I’m glad I read all the way through this or I would have missed the glamour shot at the end!!
Erin says
What great timing — I just picked up a new energy efficient dual flush toilet at Costco (for $179.99!) and asked my husband on our way out, “You know how to replace a toilet, right?” This will be most helpful — thank you for posting!
Teresa says
My dad is my toilet installer and he hates those wax rings….they are sticky and messy. He bought one this last time that wasn’t waxy (I don’t remember what they called it, though) and he thought he’d try it. Worked like a charm without all of the grossness. He got it at Lowe’s.
bungalow_bliss says
This was one of my very first DIY lessons, and it’s come in handy more often than I ever would have imagined. It’s kind of like changing a tire–not the most glamorous of tasks, but definitely knowledge everyone should have tucked away, just in case!
McGee and Mike says
Thanks for the advice! We are planning to replace both of our toilets, and this is very helpful! :)
Ryan says
When you’re at the store make sure to get new brass bolts (the solid brass are less than a dollar more), check to see of the new toilet needs a longer/shorter water supply line, and now is also a good time to replace the shut off valve if the old one is cracked, rusty or cruddy.
I’ve used the waxless rings before too and liked it but not all stores carry them.
John B says
Use a plunger in step 2 to push most of the water down the drain.
natalie says
Love this post! thanks for the advice! this is very helpful! and thanks for sharing this post keep it up! :)
denise says
curious – where did you find a toilet that wasn’t a 12″ standard rough-in? ours is an 11″ and no lowe’s or home depot in our area sells them. i’ve tried a local plumbing supply store as well, and no dice.
YoungHouseLove says
Hmm, we got ours from Lowe’s or Home Depot. So sorry you’re having so much trouble!
xo,
s
Kila Sprout says
Thanks for the tutorial. I just purchased my first house and have never had to these kinds of things before. The bathroom was my first fixer project :)
Liz says
I am going to be helping my mom install a new toilet in her bathroom pretty soon, but I am curious if we should install the toilet after we put down the new tile floor or before?
YoungHouseLove says
After! You want the tile to go under the toilet and to cover as much as possible (except the hole for drainage of course) so it’s seamless and the floor is protected against leaks under the bowl!
xo,
s
Daniel Rodriguez says
I’m going to have to do this at my in-laws in a couple of weeks. They’re also needing to put tile down on the floor. Should I change the toilet before or after the flooring? Or pros and cons to either befor or after? Thanks for the post!
Daniel Rodriguez says
answer given…lol good thing the wife reads you guys too…
YoungHouseLove says
Haha- hilarious!
xo,
s
Rob O. says
I’ve replaced 3 of the 4 toilets at our “new” place since we moved in 2 years ago and I’ve found the most harrowing part of it is when you’re placing the new toilet because, as you said, you get one shot at it – you’ve gotta scrape off the wax ring and replace it if you pull the toilet back up.
Something I’ve found that helps is to splurge an extra $3-4 on an extended or extra tall wall ring. These (slightly) more expensive wax rings (I like Oatey brand) have a slightly cone-shaped polyethylene sleeve that fits down inside the waste pipe opening and are a little taller so they make a better seal than the cheapy wax rings that are often included with the toilets. This was especially useful for us since the previous owners had installed thick tiles in the bathrooms which meant the toilet flange was about 3/8″ lower than the floor.
And finally, I’ve found that setting the wax ring into the toilet flange and then seating the toilet on top of that is much easier than trying to adhere the wax ring to the toilet and then maneuver that into place atop the flange. And here again, if you’ve bought a wax ring that has the sleeve (or some call it a flange) on it, this is that much easier.
YoungHouseLove says
Great tips Rob! Thanks!
-John
Stan @ Stair Treads says
I about ready to replace my “john”. Its a long time coming. I think I will have to replace the flooring underneath the toilet. Do you have any quick advice for that?
YoungHouseLove says
So sorry we haven’t tackled that yet!
xo,
s
Norm says
A very common reason to replace a toilet is by way of installing a new floor. To answer the above question, it is very necessary to make sure that the flange is level or near level with the floor surface. 1/4 inch plus or minus is the most you want to be off. For the person who was 3/8 off and for those who use the extra thick wax ring or sometimes double up on rings to make up for non level flanges are taking a big risk. They make flange extenders to allow for new flooring installation. Use them.
Another tip, never caulk around the toilet base after installation. If you should have a leak you want to be able to know about it. Sealing the base will just rot out the floor if its sealed.
I’ve replaced many toilets and I work i n a home improvement store.
Anne says
Oh my. So I went about installing a new toilet, armed with your tutorial, and I was so pumped that I could do it. After setting the bowl down on the bolts and pressing it to the floor, I let my 5-year-old help me screw in the bolts, of course tightening them after he had a crack at it. But when my attention was turned to that, he says, “Mommy, the little plastic piece just went down the hole…” He had dropped the cover for the bolt down the hole (from the tank to the bowl). I ended up having to remove the bowl to turn it over and try to shake the piece out, but I think it got wedged in there. Now I think I have to go buy another toilet, because I’m worried the plastic bolt cover will impair the flow of water to the toilet.
Just a nugget of warning for anyone who wants to let their little “Bob the Builder” try to “help.” Sigh.
Josh says
About to replace our (decades old?) toilet. Our first adventure. Thanks for the tutorial – helpful and practical, as usual…here goes nothing!
YoungHouseLove says
Good luck Josh!
xo
s
Michelle says
Hey all-
We have a decades old bathroom and the current toilet (cracked and no longer held down with bolts) is caulked around the base. When replacing, have you ever caulked around the toilet? Pros/cons to doing this?
YoungHouseLove says
We have always heard you should caulk all the way around since it will mask a leak and then the floor under the toilet will get all rotten without you even knowing it’s leaking under there. So either caulking just the front (and leaving the back open) or not caulking at all is the recommended approach :)
xo
s
Emily says
I wish I had found this post before we installed our toilet! I have a feeling it would have made life a little more easy. Here is few more words of warning for any newbies going to replace their toilet; make sure you measure the distance between the flange and the wall before buying a new toilet. We didn’t, thinking it would be a standard distance. This unfortunately was not the case, and the toilet cistern stood approximately 8 inches away from the wall with no support. This meant we needed to buy a second toilet… making the fun decision of buying a close coupled toilet suite, which turned out is one of the harder toilets for a first time DIY enthusiast to install, because it is streamlined with concealed pipes, making it really hard to put together when you can’t see what you are doing, and you need to measure perfectly to drill for the bolts. Also, find out if your existing toilet runs on a P (waste pipe through wall) or S (waste pipe through floor) trap, and try to buy a toilet that matches the existing outlet to make life easier on yourself, for less fiddling and connection changes.
YoungHouseLove says
Oh man, sounds like a big headache Emily! Thanks for the additional tips!
xo
s
Emily says
Oh My Goodness, Yes it was a massive headache! Believe me it was only the start for the toilet; what we thought would take a couple of days ended up taking a couple of weeks, but hey, you learn from your mistakes! And hopefully our mistakes will help others learn the way ‘NOT’ to do it! ;)
Adrian says
Wow! As a plumber, this is a bit of a worry – detailed guides like this will put us out of business, haha! Seriously though, it’s very rare to see DIY plumbing guides this detailed. There are a couple of things I would personally do slightly differently, but that’s more personal preference than anything.
So many people are also scared of replacing their own toilets because of a misconception around hygiene. As long as there are germaphobes, us plumbers will be ok!