Updated January 2022
Do your kitchen cabinets feel a little bit unfinished? Or maybe don’t quite reach your ceiling, leaving a weird gap? We’ll gonna show you how we installed crown molding to give our upper cabinets a simple DIY upgrade. It’s one of my favorite, easy kitchen projects – and we completed it in just 3 hours!
Why We Added Crown Molding To Our Kitchen Cabinets
When we finished our kitchen reno last year we decided to forgo any crown molding on the top of our upper wall cabinets because we decided we liked the clean, modern look of the square edge. Plus we had never installed crown molding before, so I think we were subconsciously too intimidated to try.
But after having learned to install crown molding on a ceiling, we decided it was time to add it to our upper kitchen cabinets.
Steps For Adding Cabinet Crown Molding
This is a surprisingly easy project with only 4 basic steps, so it’s something you can easily complete in a day. Here’s a quick overview of what you’ll be doing:
- Attach scrap wood above your cabinet to nail the crown into
- Measure and cut your crown molding
- Nail in the crown molding
- Caulk and paint
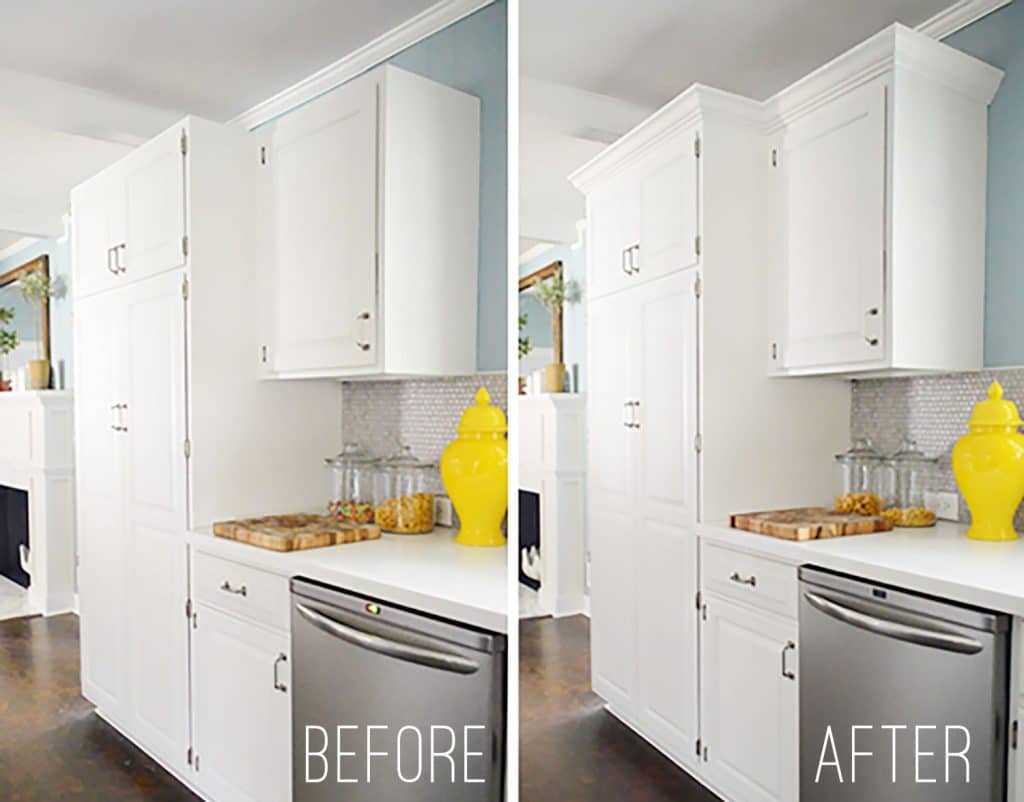
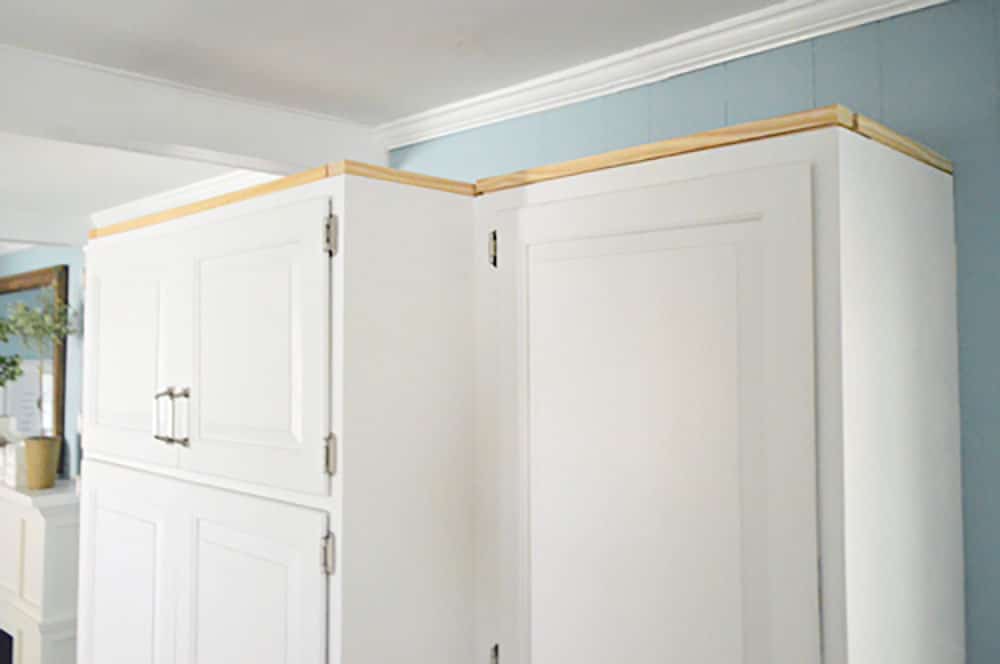
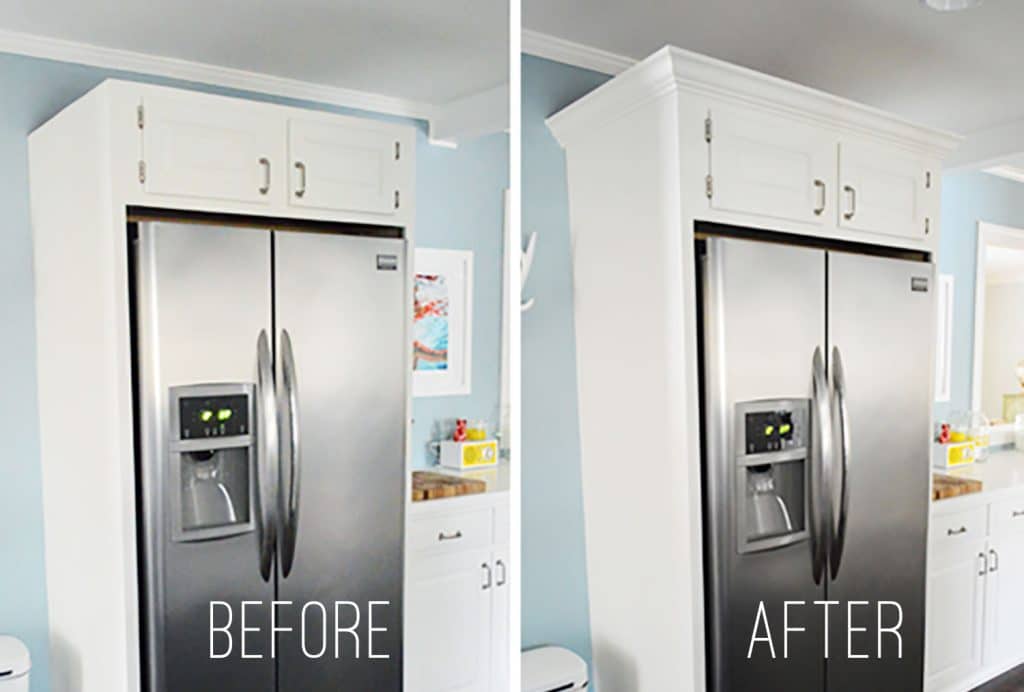
And as you can see above, it makes a big difference!
Tools & Materials Needed
To add crown molding or other trim to the top of your cabinets like we did, there are a few tools you’ll need on hand to make things go faster and more smoothly.
- Crown molding
- Measuring tape
- Nail gun (we currently use this one that doesn’t require an air compressor)
- Wood glue
- Kreg Crown Pro
- Miter Saw
- 1 x 2″ white wood or pine (scrap wood works too)
- Paintable caulk
- Paint*
- Short handle paint brush
- Painter’s Tape
*If your cabinets are wood, you’ll want to source crown molding in a stain color and wood grain that coordinates with your existing cabinets. Check with your cabinet manufacturer because they typically set an assortment of matching trims.
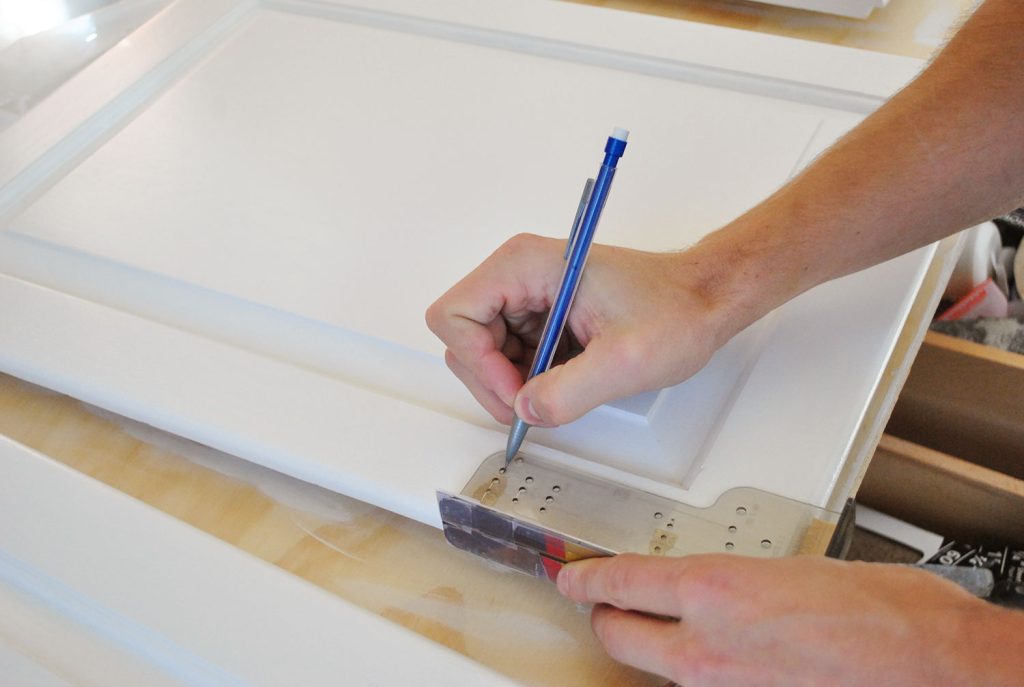
Step 1: Measure Your Cabinets
Before you even purchase your crown molding, carefully measure the top edge of your cabinets to determine how much you will need. Just be sure to buy more than the length of your cabinets. Since crown molding is cut at an angle, your cut piece will actually need to be longer than the top of your cabinets.
Step 2: Attach Scrap Wood Around The Top
We started off by attaching some scrap 1 x 2″ (leftover from the fireplace build) to the tops of the cabinets with our old nail gun and some wood glue, like so. This extra height provided more surface for the crown to rest against since our cabinet doors leave little space above them. Plus, we didn’t want to cover up any more of the cabinet box than necessary because it would only make them look shorter, not taller.
All of this will be hidden by the crown molding itself, so it doesn’t have to be particularly pretty (hence the use of scrap wood). Just be sure to add it along the entire perimter of your upper cabinetry.
Step 3: Cut Your Crown Molding
If you’ve installed crown molding on your wall before, then this part follows the same process. If you haven’t – check out our detailed how to install crown molding tutorial or watch the video below. The gist is:
- Measure (preferably twice!)
- Cut your molding
- Nail it into place
We make our cuts using our miter saw and love using a Kreg Crown Pro to help hold the wood in place as we cut. It makes this sort of process sooooo much easier because it holds your molding at the correct 45-degree angle while you cut. You can see it in action in the video below.
How to cut crown molding
If you’d like see the process of cutting a piece of crown molding on video, this tutorial below covers everything from measuring, cutting, and installing. It shows installation on a bedroom ceiling, but the same concepts work for adding crown molding to your kitchen cabinets.
Note: You can also watch this video on YouTube.
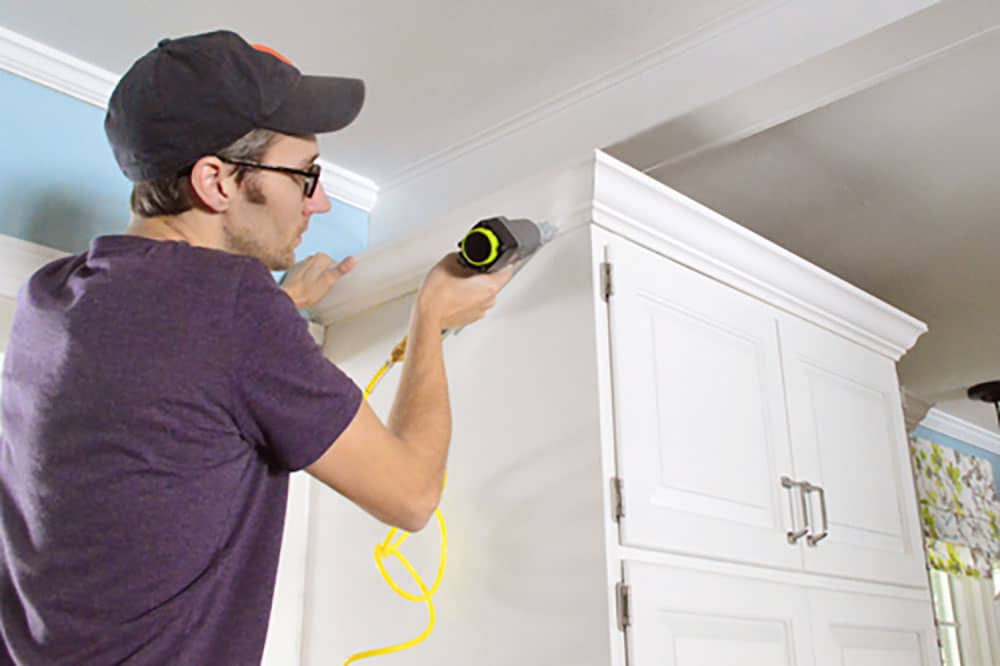
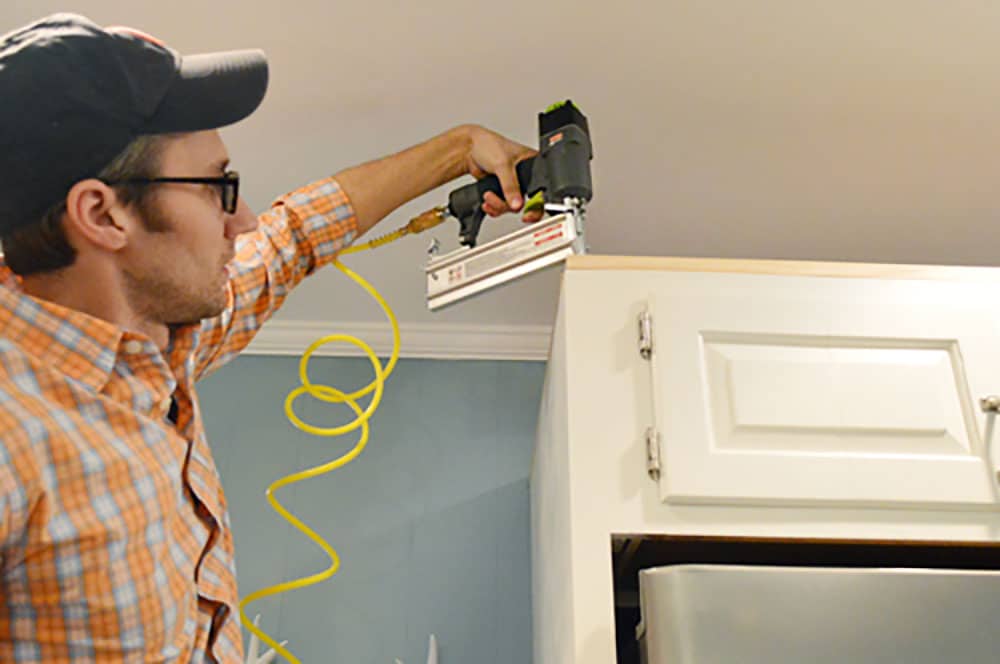
Step 4: Nail The Crown Molding Into Place
Once your molding pieces are cut, use a nail gun to attach the molding to the scrap wood that you added to the tops of each upper cabinet. Just a small nail every few inches should do.
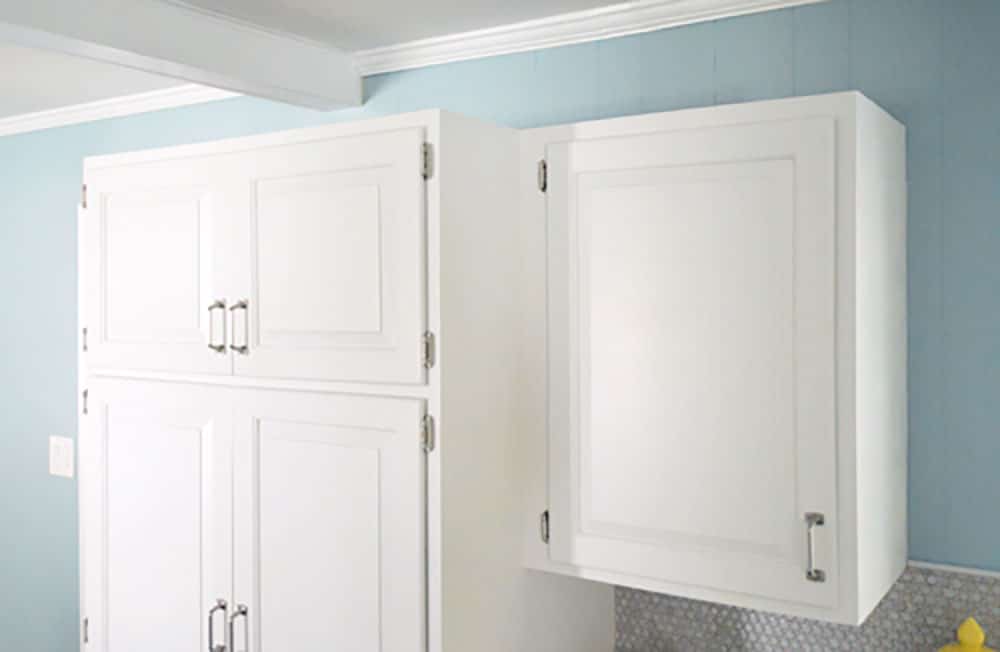
TIP: Tape & Glue Your Outside Corners
These outside corners can be a little tricky. You’ll want them to hold tightly together, but nailing such small corner might splinter or break your wood. Instead, we to squeezed a bit of wood glue between them and tape everything together while it dried. A few hours later we removed the tape and it worked like a charm. Whew.
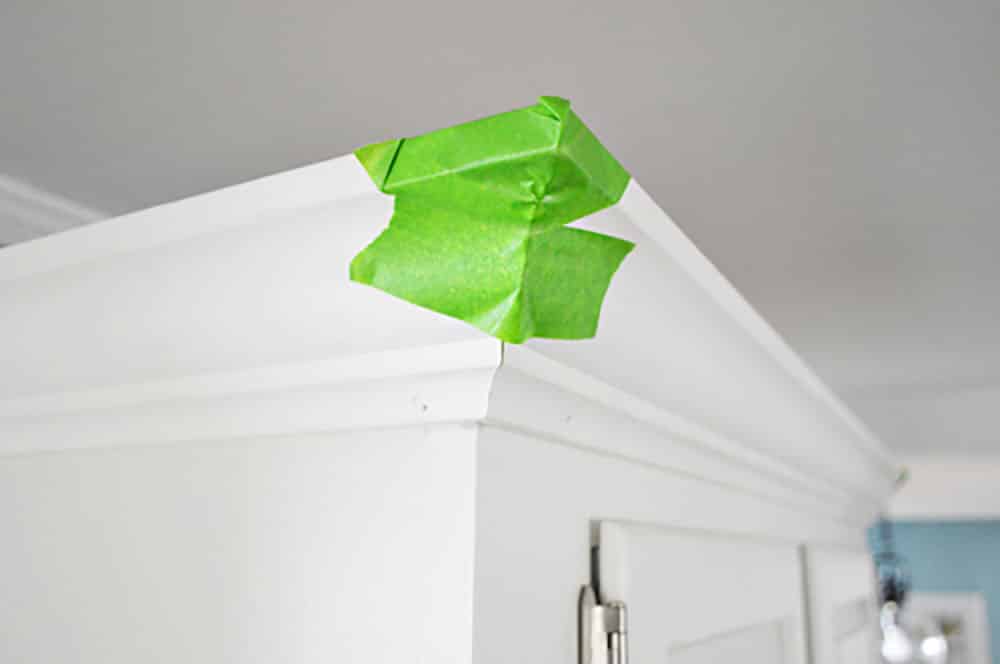
Alternatively you could also try clamping a small piece of scrap wood behind the corner and nailing both pieces of crown into it.
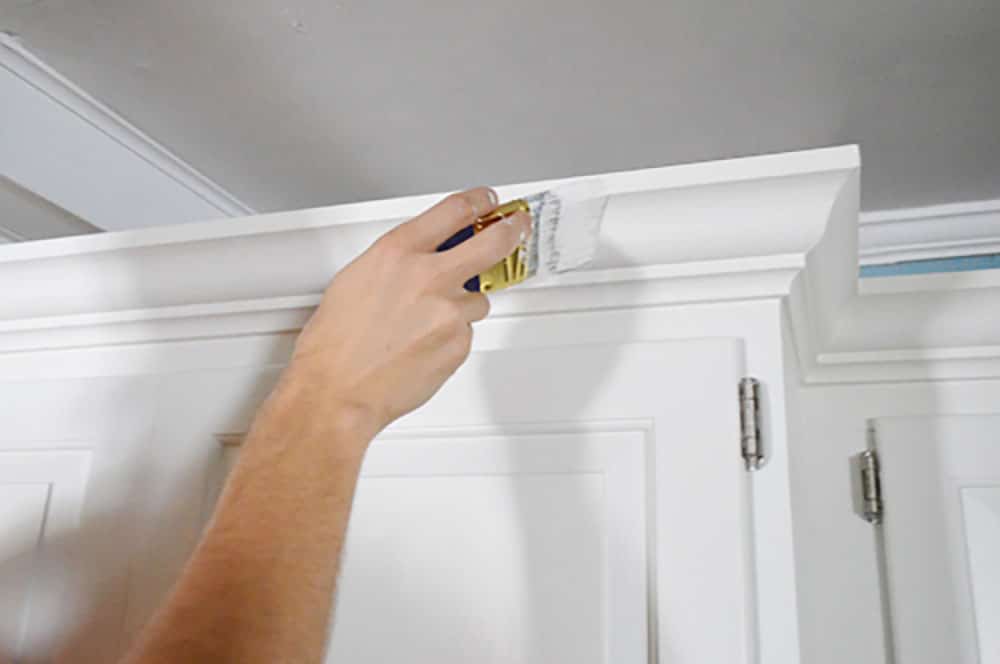
Step 4: Caulk & Paint Your Crown Molding
Once the crown molding was installed around the whole room, we broke out the ol’ caulk gun to fill in some of the seams and nail holes. We like to use the Alex Plus Fast Dry caulk because it is ready to paint within an hour.
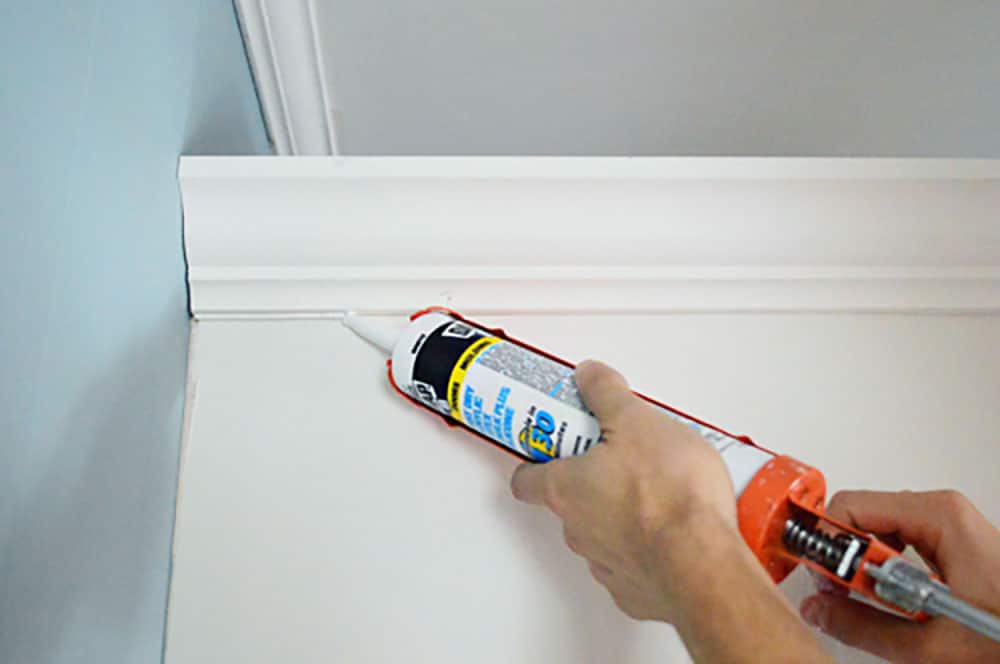
We waited about 45 minutes later and applied a coat of paint in the same color as the cabinets (Benjamin Moore’s Cloud Cover). Since the crown molding was already primed white, it only took one coat, but if you’re doing a darker color you may need two coats.
Once your paint is dry, you’re done! Woo hoo!
How Much Did It Cost?
In addition to this project being pretty easy – it was pretty darn cheap too. Our only expense was the three pieces of 8ft crown that we bought, so the grand total was about $35 for this entire project. Not bad, right?
It’s definitely one of those projects that Sherry and I are kicking ourselves for not doing sooner, but they do say better late than never, so we’re happy we eventually climbed aboard the S. S. Molding. Ahoy.
The crown molding has been a great way to help transition our kitchen from a modern space to a more traditional one, and we think the result is quite stately looking!
More DIY Molding Projects
Want to see more crown molding applications? Check out some other do-it-yourself fixes we’ve tackled.
- Cheap & easy DIY board and batten
- Installing crown molding around built-in bookshelves
- How to add “chunky” crown molding using baseboard
- Making base cabinets look built-in with trim
- Adding traditional trim framing to our bathroom
- A colorful planked accent wall
More DIY Kitchen Cabinetry Projects
Looking for some other ways to update your kitchen cabinets? Here are some other do-it-yourself solutions we’ve used in our kitchens.
- The proper way to paint wood cabinets
- Installing hidden hinges on old cabinets
- How to remove upper cabinets for a more open look
- Staining wood cabinets darker without sanding
- How to paint Ikea kitchen cabinets
*This post contains affiliate links, so we may earn a small commission when you make a purchase through links on our site at no additional cost to you.

Jeanna says
Really enjoyed reading this – thank you. I need to throw one more question out there. LOVING the blue paint color you chose to go with the cloud cover. Would you mind sharing? Thanks!!
YoungHouseLove says
Thanks Jeanna! It’s Benjamin Moore’s Colorado Gray (which is definitely blue and not gray, haha).
xo
s
Janice says
Love the crown molding! Beautiful! I will definitely be adding this to my kitchen board on pinterest! Because someday we’ll eventually get to our awful disaster of a kitchen that has not been messed with since the early 70’s at least! And that would really help blend it with the rest of our old house!
Carly says
We’ve doubled the storage in our kitchen – an ikea hack DIY island and a new pantry :) I adore kitchen renovations! It’s my new love!
Yours looks amazeballs! Also love the blue – I’m a major grellow hater. I painted over mine right when we moved in! Mine was pretty ugly though – I didn’t hate yours!
Sarah says
That was A MUST MUST! Kudos
Ellie says
So glad the glue trick worked on the open corner. But for when that does not: nail a block (say a square of 2×4) to the top of the cabinet to the corner (just so long as it does not stick out above crown). Now you have a nailing surface for the top of the crown – no ceiling required.
And for the poster who noted that her crown and cabinets are different woods/ stains. I have maple cabinets and floor in my kitchen, but dark cherry crown and toe kicks. Visually ties to my cherry furniture. Maybe you just need more contrast in the color of the stains.
YoungHouseLove says
So smart! Love those tips!
xo
s
Ann LaFortune says
We are doubling the size of our small kitchen…and adding a master bedroom, master bath and a half bath…here’s what we’re starting with…http://lamaisonlafortune.blogspot.com/…wish us luck!
YoungHouseLove says
Lots of luck!
xo
s
Nancy @ Artsy Chicks Rule says
Oh yes! Most definitely love the new look. :) (and the new name! ;) )
(and I keep the same hours as you! …as I type this at almost midnight! ;))
Nancy
hellodoorseven says
It looks so much better now! :)
Kelly says
Tool me!
Could totally use a nail gun to install some trim and quarter round!!
kelly says
Love the crown molding…makes the whole cabinet look finished. Will definitely do the same for my kitchen remodel once that gets underway!
Jenny says
Wow that was easy or at least looked that way. I’ll have to keep that project and tutorial in mind!
Jenny from diywithjenandb.blogspot.com
Ana Silva says
Wow! So much better. Great job as always.
Christy says
Quick question, did you guys use the same crown molding for the cabinets that you used for the top of your wall or did you use a different size? And what size did you use for both projects?
YoungHouseLove says
We used the same crown that we used on the fireplace and on the ceilings in the bedrooms and hallway that we did (we think it’s 3 3/4″ molding). The crown in the kitchen was existing molding, so it’s a smidge differently sized, but it’s not noticeable once it’s all painted the same color.
xo
s
Amanda says
Love IT! Of course, I loved it before, but this is like the cherry on top!! And I have to say that I like the blue color in the kitchen much better than the greenish/yellowish “doesn’t look the same in pictures than in real life” color! LOL
Laurie says
THIS. Absolutely one of those inspiring forehead-slappers. Thank you for jumping on this and letting us all know what it takes (the right tools!) to de-scarify the process.
Meanwhile, just got an ad that includes the name for your style: “New Traditional”!
YoungHouseLove says
Haha, so funny! We’ll take it!
xo
s
Lynn @ Our Useful Hands says
No lie. The night before you posted this, I was up till all crazy hours of the night (midnight oooo….haha) looking up crown molding and hemming and hawing with the man over whether or not to add some crown to our cabinets. I used your crown-less kitchen as Exhibit A as to why it can look good without, but then Pinterest was all like “Come in….lookie lookie….crown looks good, no?” and then you post this! I was aghast and thrilled. Crown it is! Sometimes to end our tiebreakers we let you guys decide. ;o)
My best, Lynn
YoungHouseLove says
Aw, thanks Lynn! You’re so sweet!
xo
s
Ada says
Holy moly, it looked nice before, and now GORGEOUS … kudos for having the eye to take it a step forward and bedazzling it :)
andrea says
looks absolutely fab! and goes so well w/your new fireplace facade too. amazing the difference that such a small addition can make
nick says
I checked this whole comment thread and not one “hear ye, hear ye, the cabinets have been crowned.” Unbelievable. Nice work though…as many have already intimated, it contributes a good vibe to the rest of the room.
Now, if you’ll excuse me, I’m off to pray, chant, and beg the garden seedlings to grow.
YoungHouseLove says
Hahaha!
xo
s
Marty Walden says
I love love the upgrade. I’m going to send this to my hubby. We are working on our kitchen, one piece at a time. Here’s a link that shows the totally cool fence board backsplash he made. And it was free!
http://www.martysmusings.net/2013/02/fence-board-backsplash.html
YoungHouseLove says
So cool!
xo
s
Bonnie says
The lack of crown moulding was the only thing I didn’t like about your kitchen before. What a difference. Nice job!
Lilly says
The crown looks fantastic–especially with the fireplace in the background. Way to go!
Sorry if other ppl have already commented to the following, but–the ability to paint your cabinets is a huge budget saver when it comes to trim, etc.! We just gutted/completely redid our kitchen, and chose “stained” cabinets. Thus, we had to* buy the matching crown molding, refrigerator panels, back-of-the cabinet-panels, etc. [*I know we could have bought and stained our own wood, but it would have been so obviously mismatched that, to us, it was worth it, to buy the matching.] I love our new kitchen–however, as we adjusted design elements throughout the renovation, there were times where I wished we could just go to a hardware store and buy the much, much cheaper, stock parts. You guys did an AMAZING job-the molding looks like it was always meant to be there. ;)
Mary says
Amazing how beautiful it looks!
karen @ paperfancy.com says
What a difference a little crown moulding can make! It looks more finished and even taller. Whoever buys your house after you will be getting an awesome place! karen
Deanna says
I like the crown molding and if you liked the clean lines of it without, you could’ve went with a much simpler design of the molding, however the style you chose matches the style of your house.
I wanted to suggest a light valence to your cupboards now. Just to finish it off. It’s the “crown moulding” for the base of your upper cabinets. If you thought your cabinets were missing something before the crown, you’ll have the same feeling after you install a light valence.
Look into it. I think you will be really happy with your kitchen after it’s installed. It really makes the kitchen look complete. I think the original intent of the light valence was to hide under cabinet lighting but you can still have the valence without the lighting….but maybe you’ll want lighting after it’s installed!!! ;)
YoungHouseLove says
Thanks for the tip!
xo
s
Stephy says
OMGosh! I’ve been begging my hubby to do this project for 4 yrs! Thanks for post-looks awesome. Gonna show to him.
QUESTION: do you think if you added some panel board to ceiling & capped it with another bit of ceiling crown, it would give appearance of cabinets that flow to ceiling?? Thanks for your fabness!
YoungHouseLove says
Oh yes, that’s a great solution if it’s what you’re going for! We have beams across our kitchen, so we don’t want those three upper cabinets to go to the ceiling because they’d awkwardly crash into the beams :)
xo
s
Anne says
Something about your pulls looks weird now with the crown moulding added. Like they’re too modern.
It could be that not only do we have similar white cabinets (with crown moulding), but we also have the same appliances in our kitchen. Oh yeah, and our kitchen is painted a gray/blue color. However our pulls are brushed nickel knobs.
I’m also wondering if it’s a lighting thing. It’s hard to see the detail of the cabinets with how white everything is.
Anyway, I noticed it in the video, too. Everyone has their own taste and ideas. I’ll stop babbling.
YoungHouseLove says
We like the pulls since they bring in a little industrial/modern touch (we’re more about the mix of a few styles than sticking with “all traditional” or “all modern” – it could be a lighting things too for sure (the video is a bit dark in the kitchen since it got cloudy for that part). Haha!
xo
s
Jackie says
I have cabinets like these– with the space between the top and the ceiling, and the crown molding for hiding things — and I recently put a strong of white Christmas lights up there. (The old school ones, not the blue-hued LED ones). It creates such a nice soft lighting in the evening.
Jackie says
*string
YoungHouseLove says
So charming!
xo
s
AmandaonMaui says
Oh yeah, they’re much better with the crown on top. They look more high end and complete that way.
Kathy says
Wanted to read the comments on this one cause I LOVE this change. Totally a custom look. The “without” looks like a box one nailed to the wall, while the “with” looks like furniture. The difference is amazing.
Rhonda says
Isn’t is amazing how molding can make such a big difference? We did the same with our builder grade cabinets when we bought our house and I’ve never regretted it…
Now – when will you show us the inside of your pantry? I have a deep cabinet like that for mine and it’s a pain to reach things!
YoungHouseLove says
Here’s a post with the inside of our pantry for ya: https://www.younghouselove.com/2011/09/never-before-seen-footage/
xo
s
Catherine says
That makes so much difference actually. Love it!