Last week Sherry and I got to see the freshly refinished floors at the duplex for the first time. And despite having just gone through this last year at the pink beach house, we were still taken aback by what a HUGE difference it makes. Which explains why we’re about to hit you with a bunch of before & afters right now.
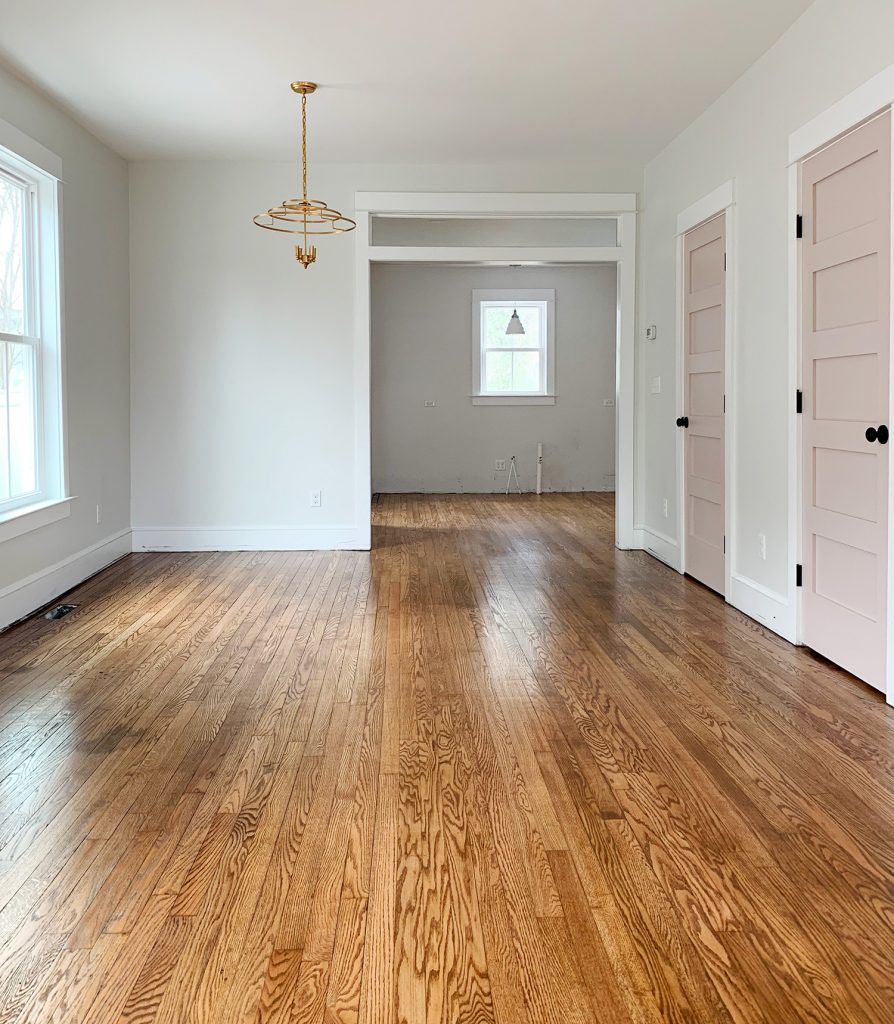
We can’t get over how finished it makes everything feel. It’s like changing this one surface suddenly takes the whole place from “renovation zone” to “move-in ready.” I mean, let’s just appreciate how far we’ve come for a second.
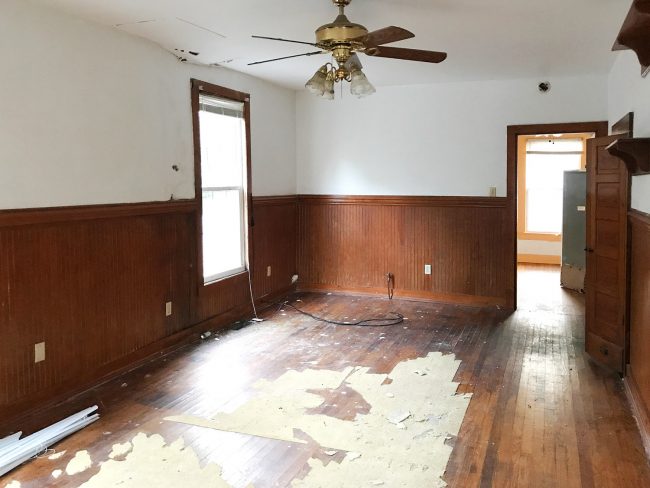
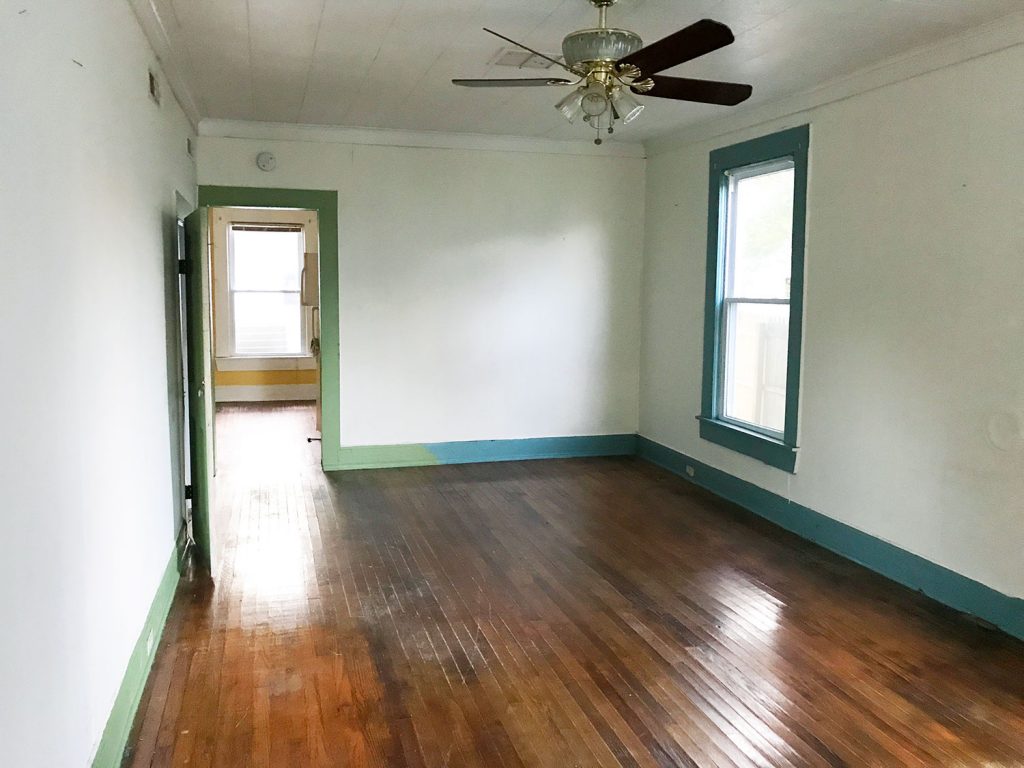
This is that same room (the living room on the left side of the duplex) when we bought it last September. That yellow stuff is an old carpet pad that was literally glued to the floor in a bunch of places and wouldn’t come off.
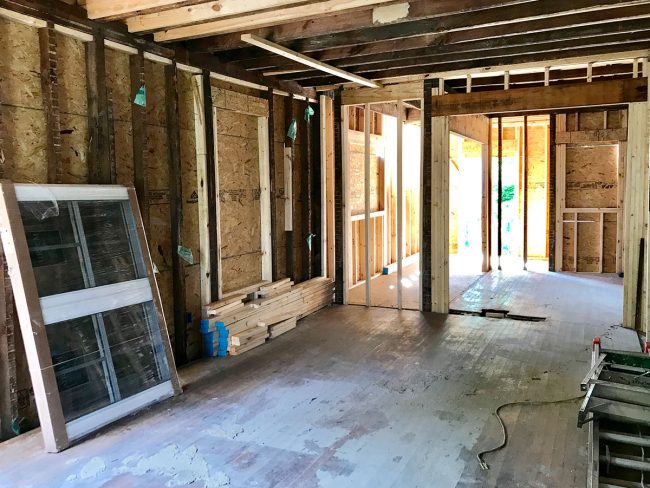
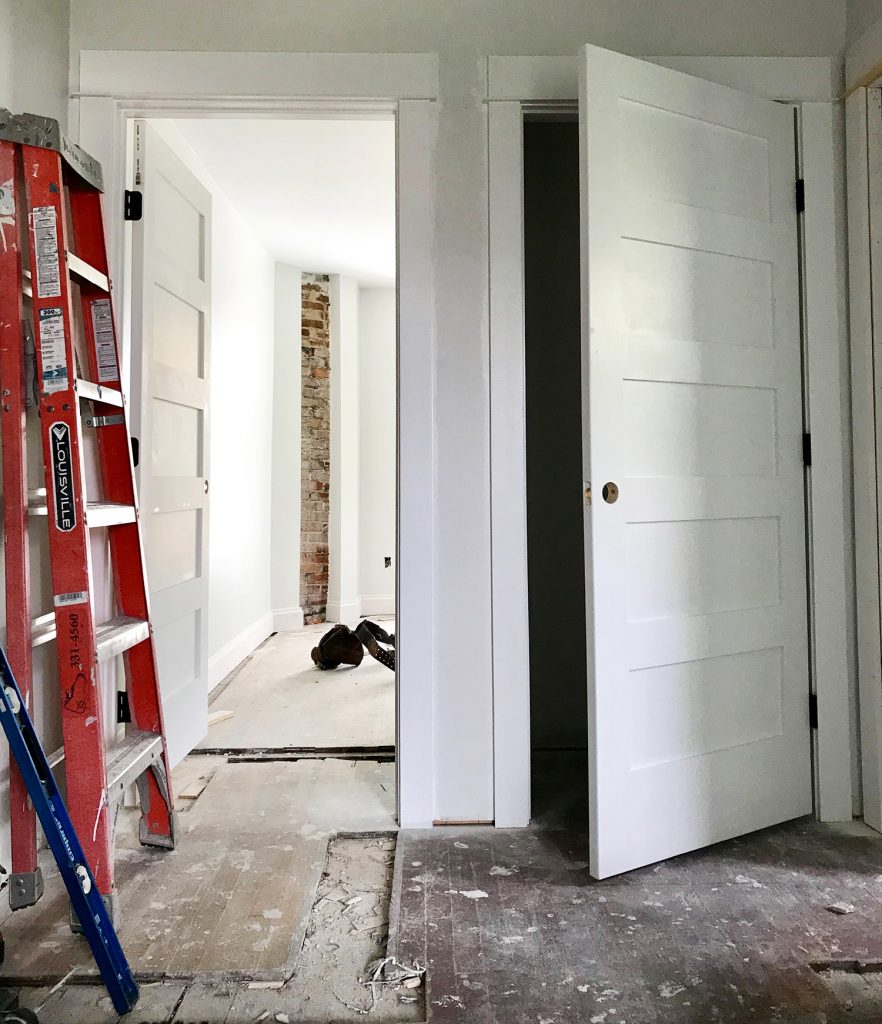
Here’s the same view in May during reconstruction. The floors actually look WORSE here because everyone knew that a full sanding/refinishing was happening later, so they were sporting a nice layer of dust that tends to build up during a reno.
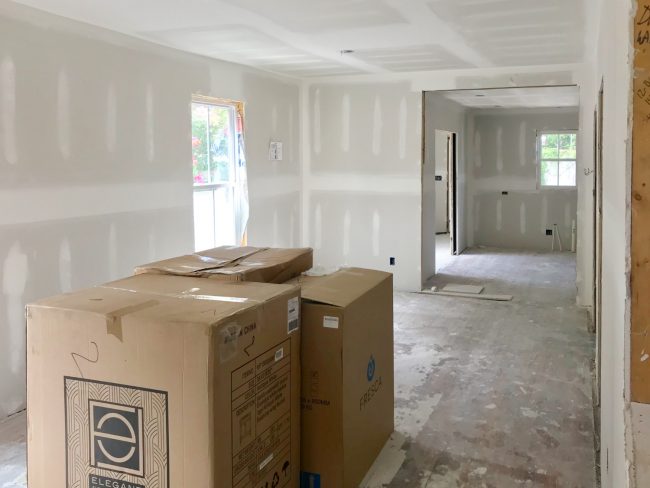
Even after drywall started going up in September, the place was still looking pretty rough. Especially the floors.
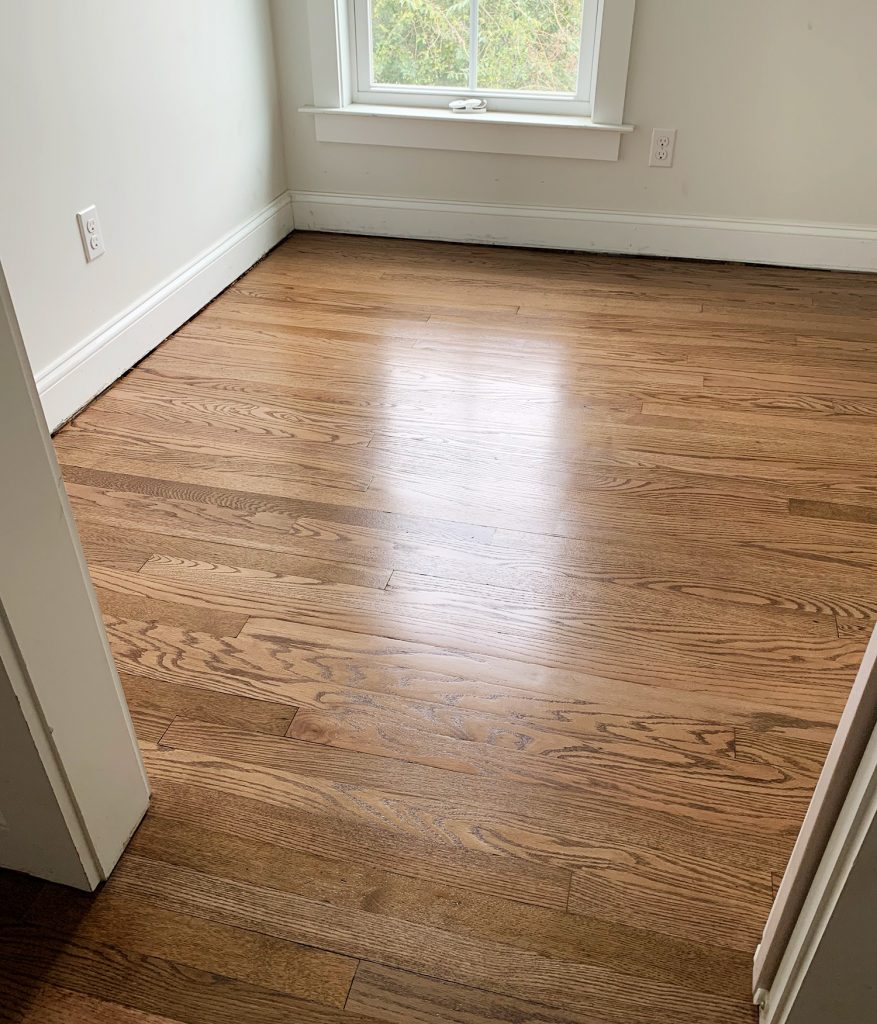
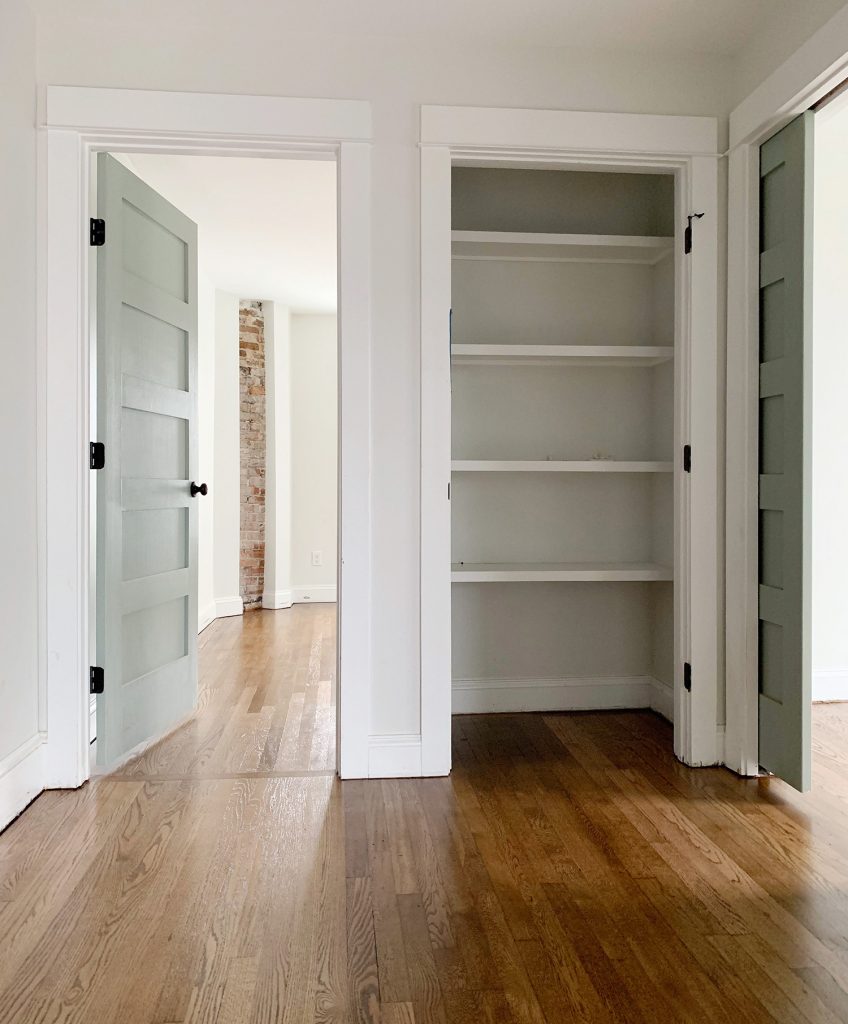
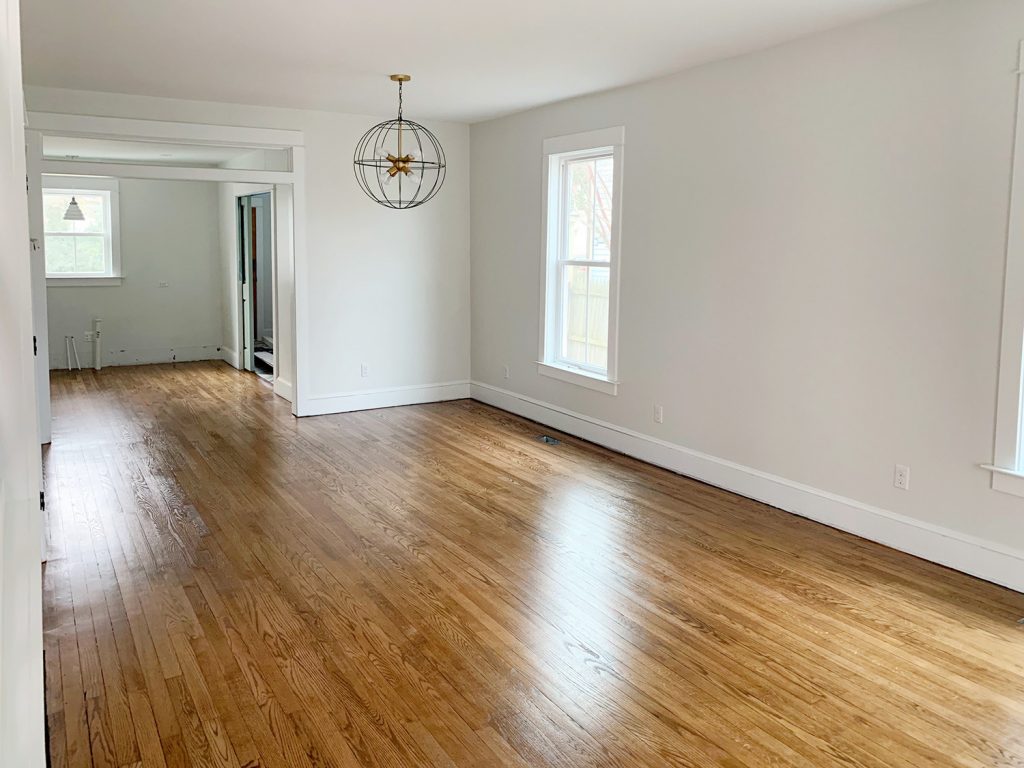
So it feels like a MASSIVE leap forward to suddenly walk in and see this shiny refinished oak underfoot. We still need to add quarter round trim along all of the baseboards to finish things off, but, woah. The difference is huge.
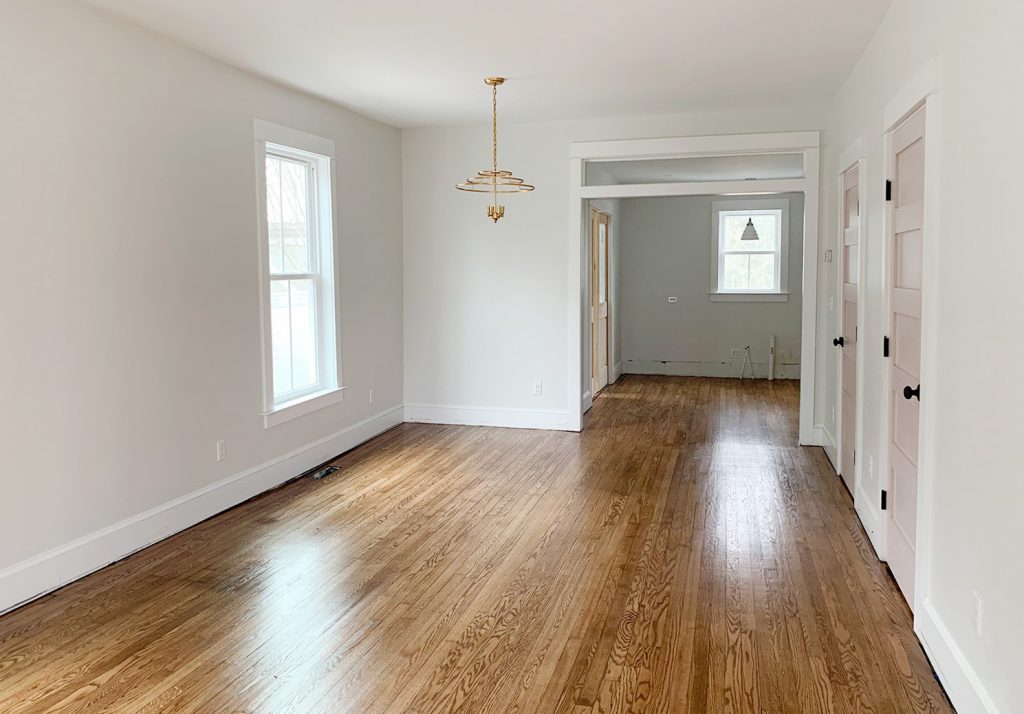
I’ll save you some scrolling and put the before picture right here just so you can see them right next to each other. The wider opening to the kitchen and the interior transom window that we added above it also make a pretty huge difference and really open up the space.
But back to the floors. Adding hardwoods (plank by plank) seamlessly into the giant holes and deeply water-damaged areas was above our skill set, so we hired the same crew who helped us revive the wood floors of the pink house last year. The company is called ShenValley Floors and they do work on the Eastern Shore and out in the Shenandoah
They’re great because in addition to sanding, staining, and sealing the floors – they also do great repair work (including sourcing and installing reclaimed old oak or pine – or whatever hardwoods you need for your project). And BOY did the duplex need lots of repairs.
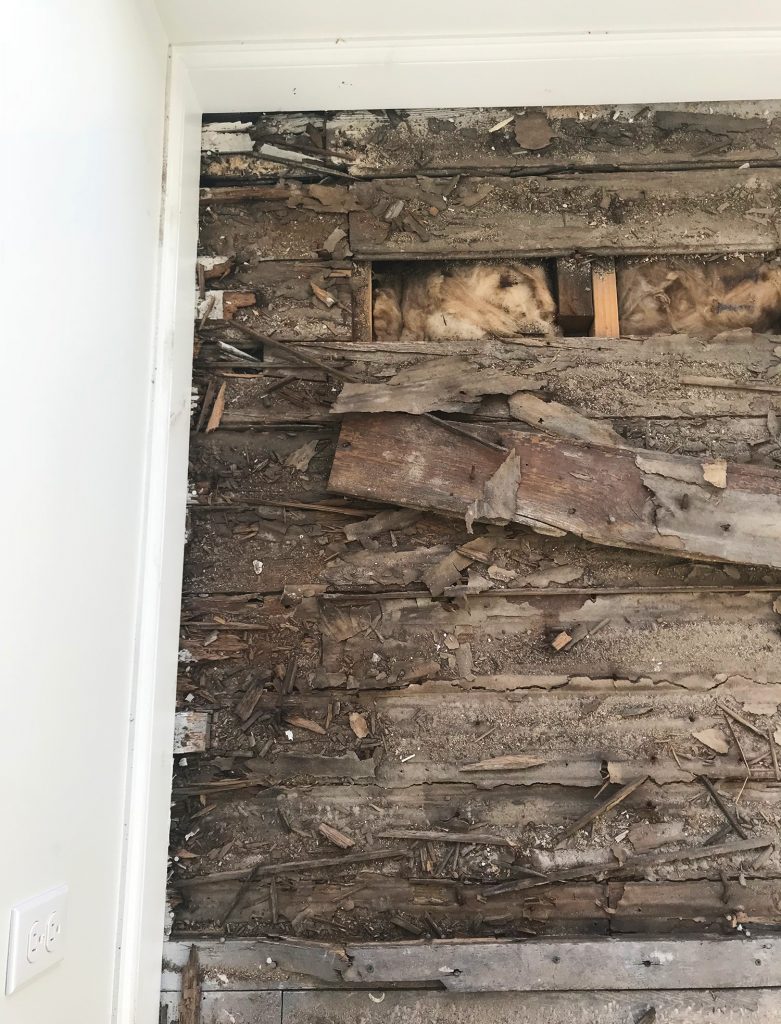
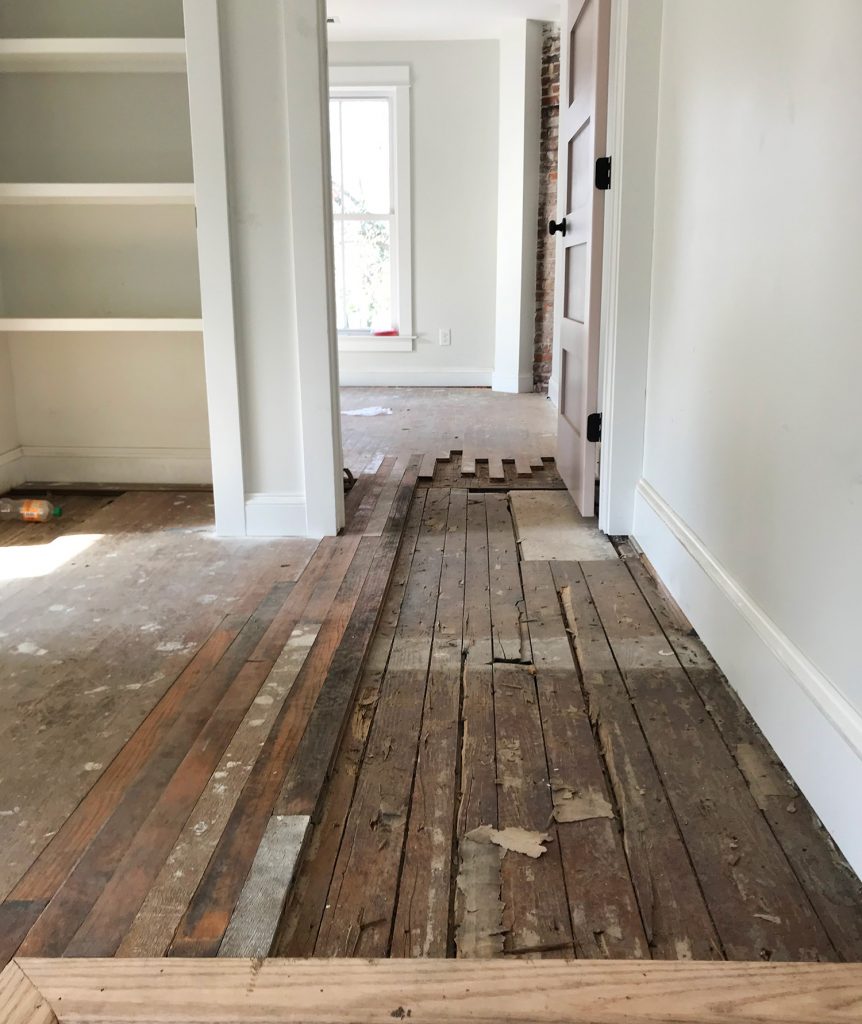
One big issue was rot, which we had in a few pretty large spots on each side. This particular area was in what used to be the upstairs bathroom. The water damage from years of a leaking pipe had rotted through both the original pine floor and the newer oak floor that had been laid on top of all of the original pine flooring at some point (the entire house has two layers of flooring, and we couldn’t pull up the oak to reveal the old pine because it was too far gone). You can see both layers of flooring better in the shot below:
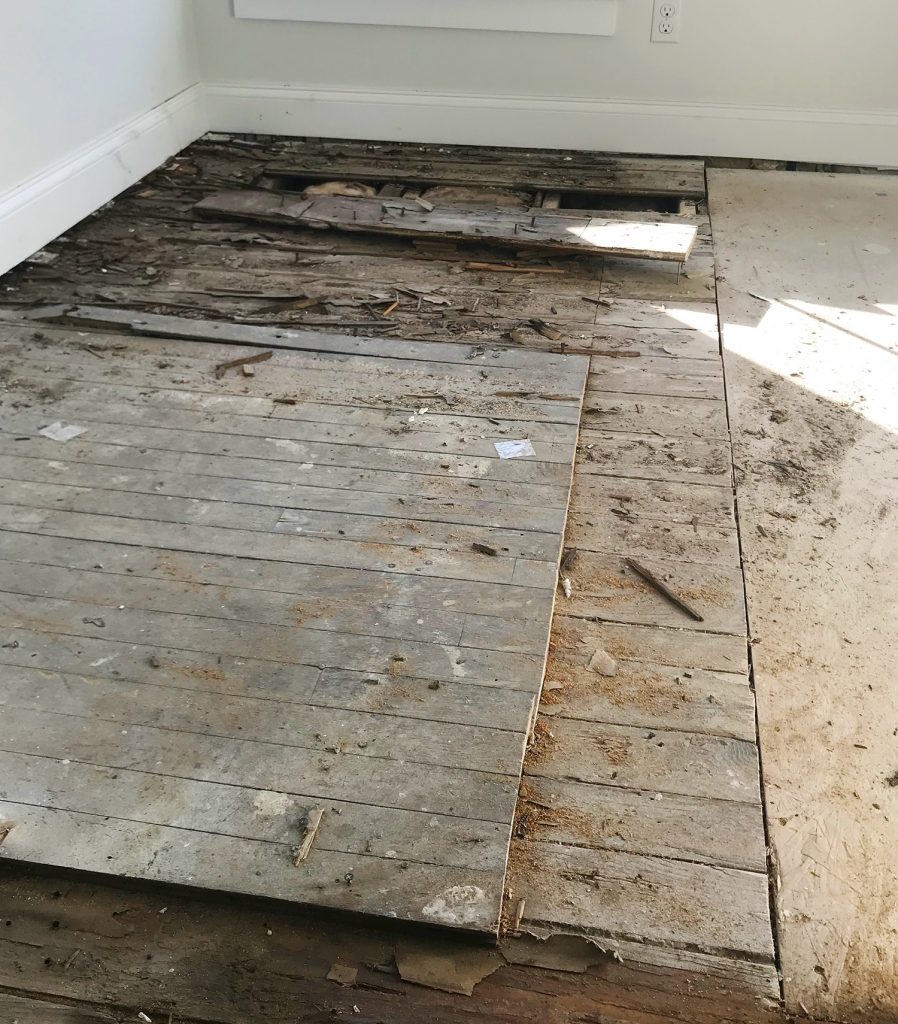
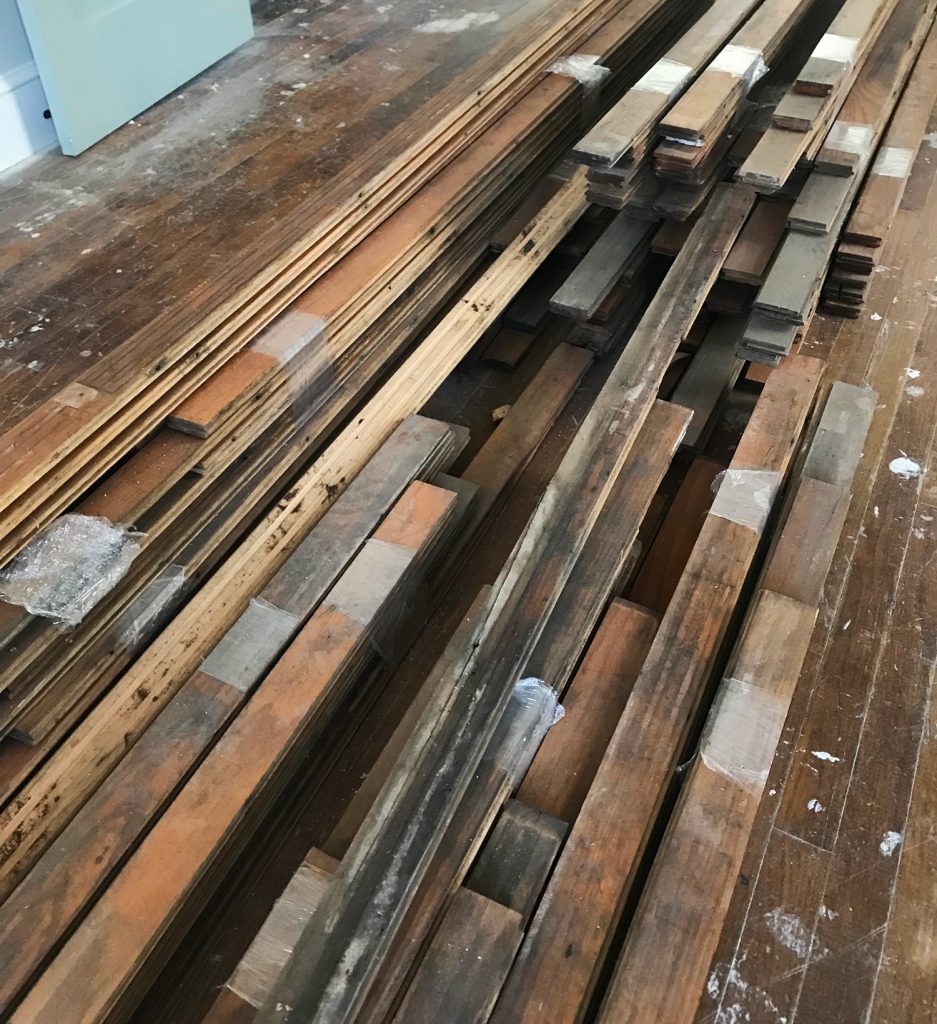
In addition to patching the rot, the changes we made to the floor plan had also left some gaps in the flooring. So ShenValley brought in 100-year-old oak flooring they had reclaimed from another project to fill the gaps and give us a nice seamless end result.
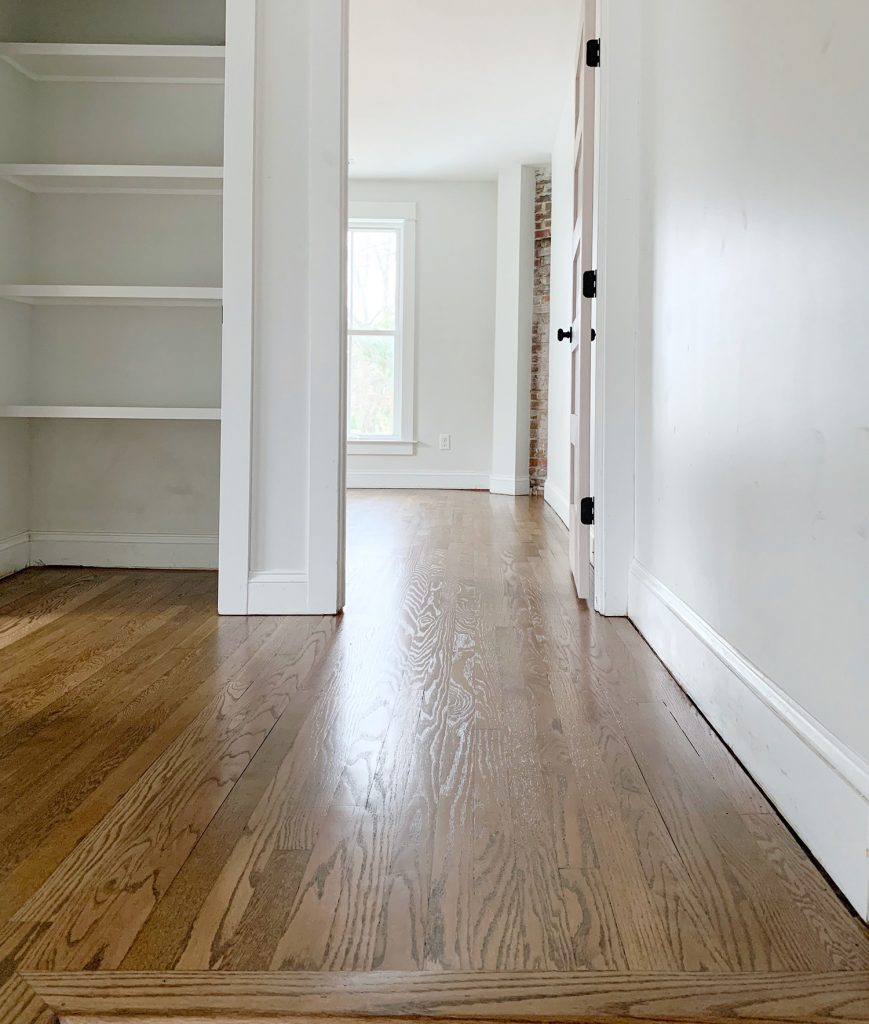
This is what that rotted area now looks like now that everything has been patched, sanded, stained, and sealed.
This is another view that shows how the patching works. Rather than just cutting in a small strip of new flooring, they actual pry up more of the existing floorboards so everything can be blended in seamlessly without a harsh straight line where the new boards meet the old boards. This staggered integration is key for hiding the transition between old and “new” boards (which might also happen to be old if they’re reclaimed).
It certainly is more trouble, but the final result is well worth it. You can also learn more of this process from this post about the floor refinishing at our own house.
And if you heard this week’s podcast, you know we got a little curveball thrown our way right in the middle of this floor refinishing project. Our original plan had been to clear seal the oak floors so their natural color would come through – just like we did with the pine floors at the pink house.
But after the crew finished sanding everything down, they called to say there were several areas with dark blotchy stains that wouldn’t lift (they were too deep to sand out) AND that the previous person who had worked on the floors – likely many decades ago – had used two different species of oak in the house. Both white and red oak. Yeah, it was a surprise to all of us – and we were warned that clear sealing them would further bring out those aforementioned stains AND put more emphasis on the variation in board color. So to help minimize both of these not-exactly-ideal issues, the pros recommended that we choose a medium stain to help unify everything.
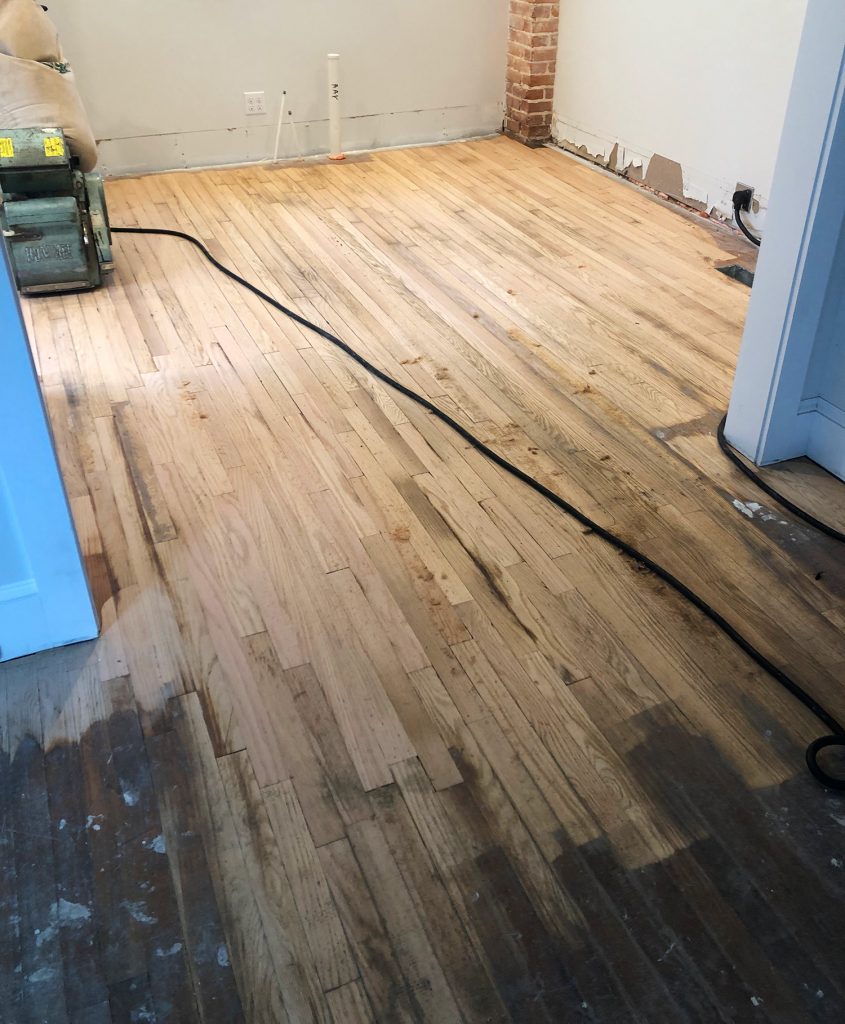
Looking back at old photos like the one below, you can actually see some of the color change that nobody had noticed until sanding (even the flooring pros missed it during our initial walk-through). Although part of this floor upstairs had also been painted at some point AND had had sticky tiles placed over it, so I’m not sure how much was caused solely by the different species of oak.
We chose one of the stain colors that the refinisher specifically recommended – Special Walnut – and it definitely helped a lot. In fact, this area shown is the only spot Sherry and I could make out any visible transition between the white oak in the hallway and the red oak in the bedroom. And thankfully it looks even less
It was a little bit of a bummer to have to adjust our plans away from the natural light-looking floor we’d always pictured, but that’s just how these things go. And in the end, how can we be mad at progress like this:
That’s the upstairs hallway on the right side, which is where those sticky tiles used to be (that whole front bedroom was like walking on flypaper). And now it looks like this (new railing still to come):
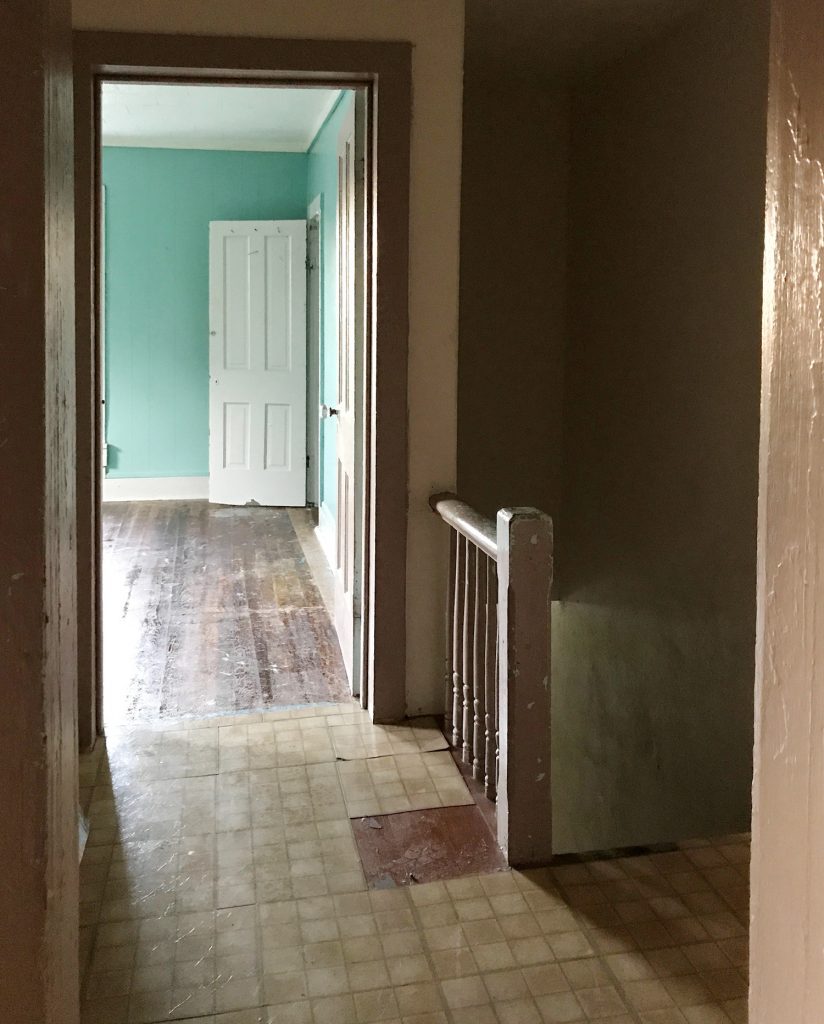
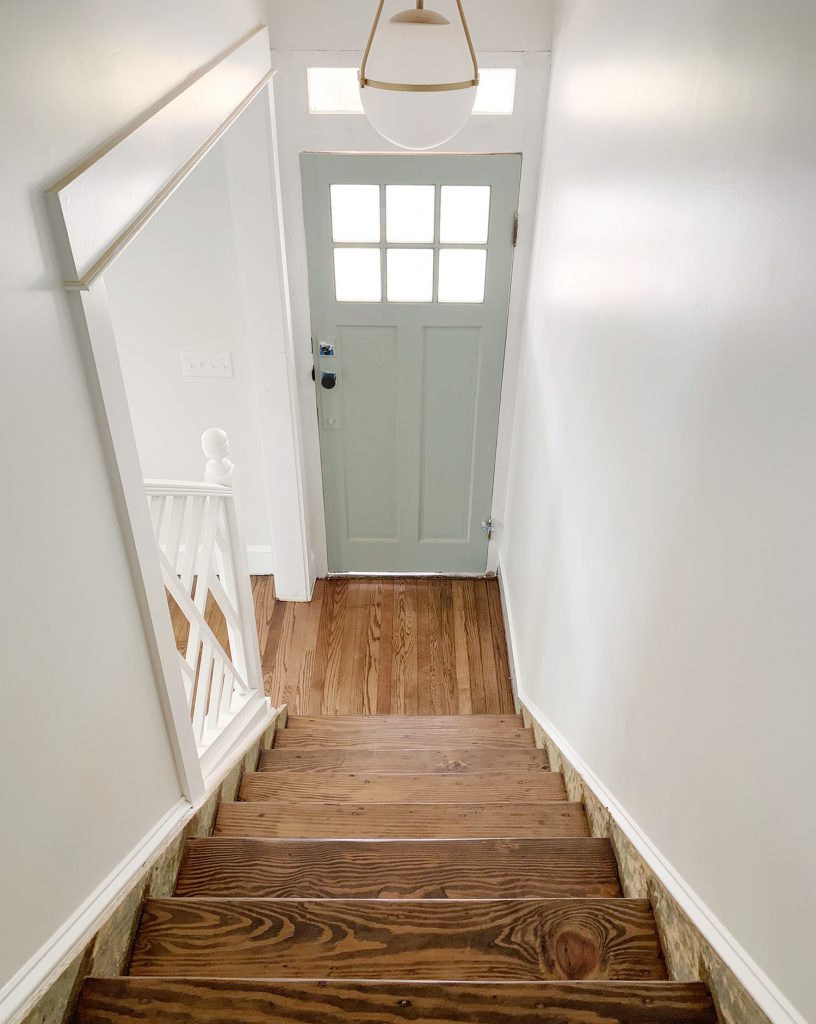
Here’s the view looking down those stairs towards the front door as it looked when we bought it…
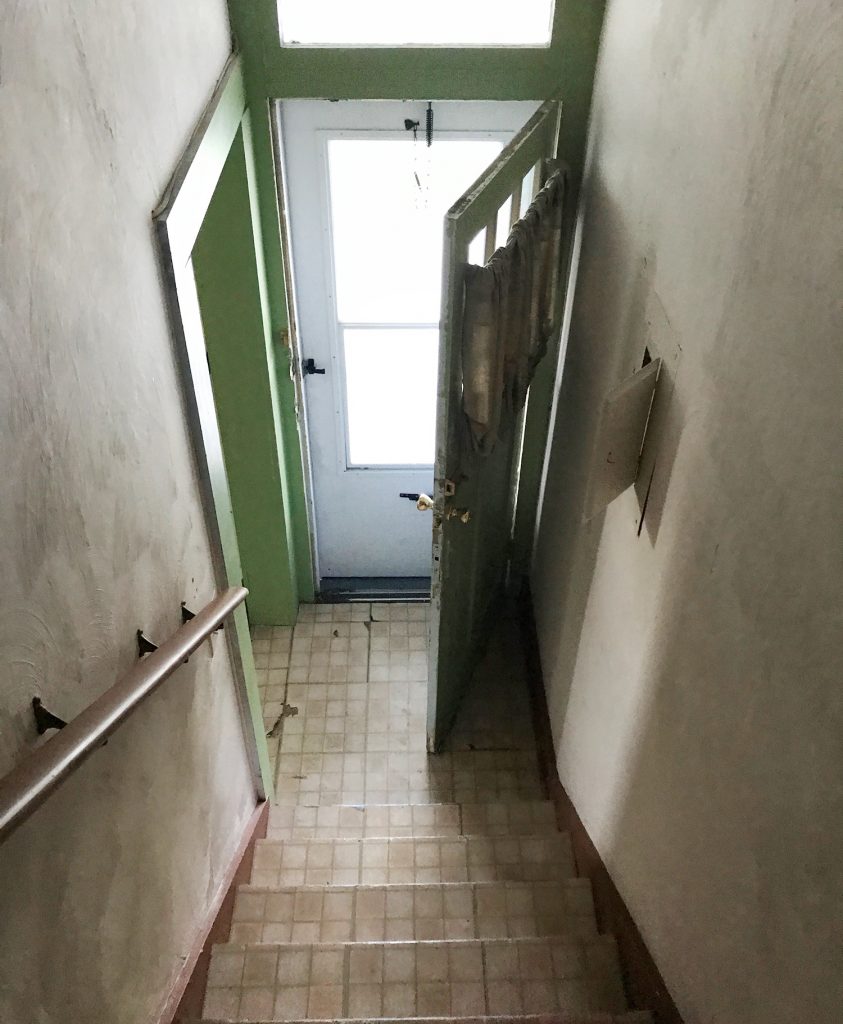
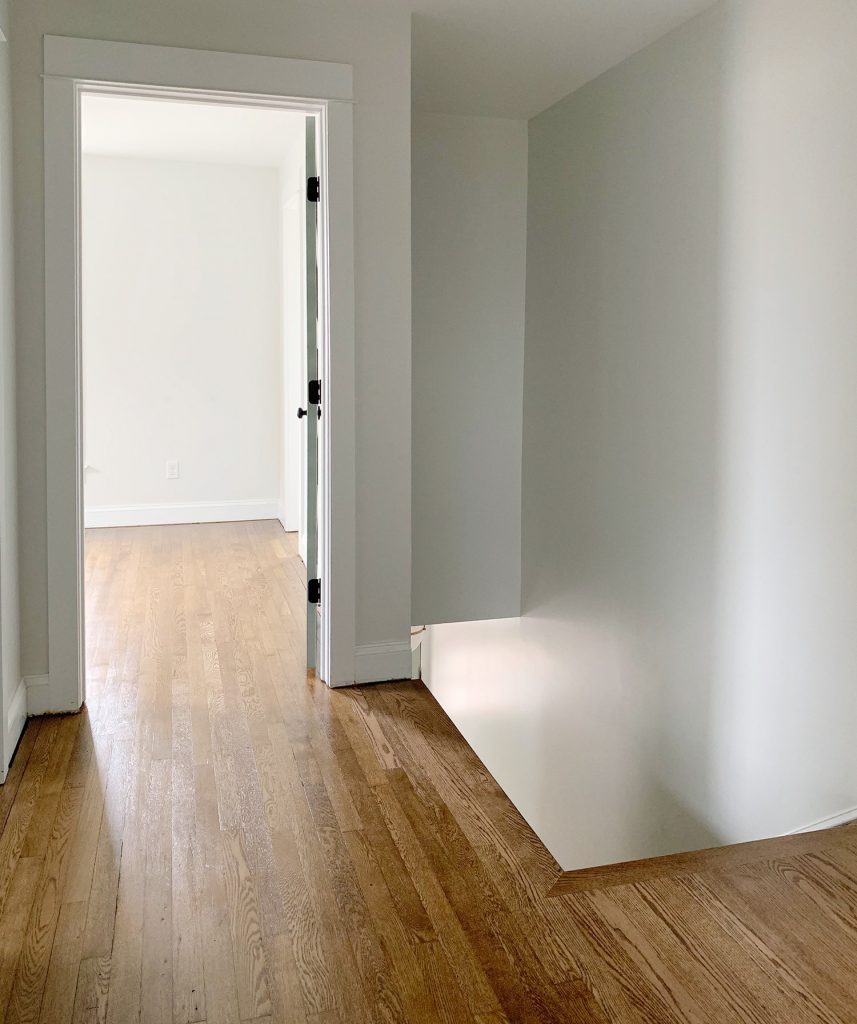
…and here it is now. We still need to paint the sides of the stairs (and there’s some dusting to do around the door frame), but man, this is progress, sweet progress.
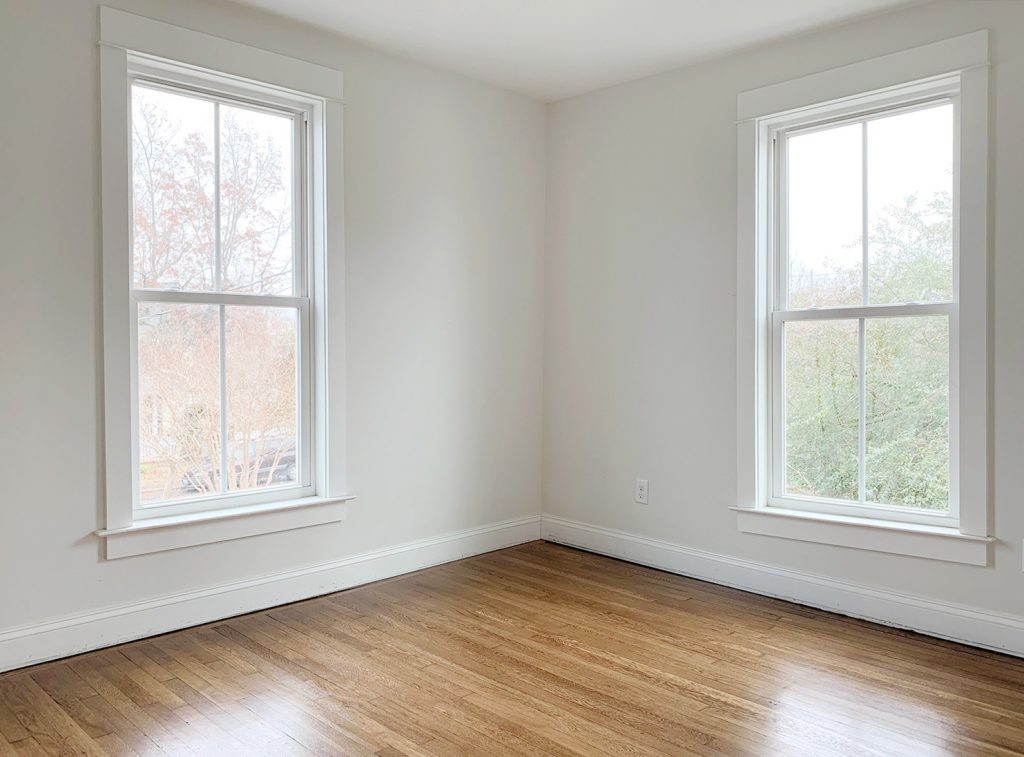
Sherry and I dug up this photo and it took us both a minute to figure out which room is was (neither of us remembered the carpet or the dark walls). Turns out it was the back bedroom on the right side.
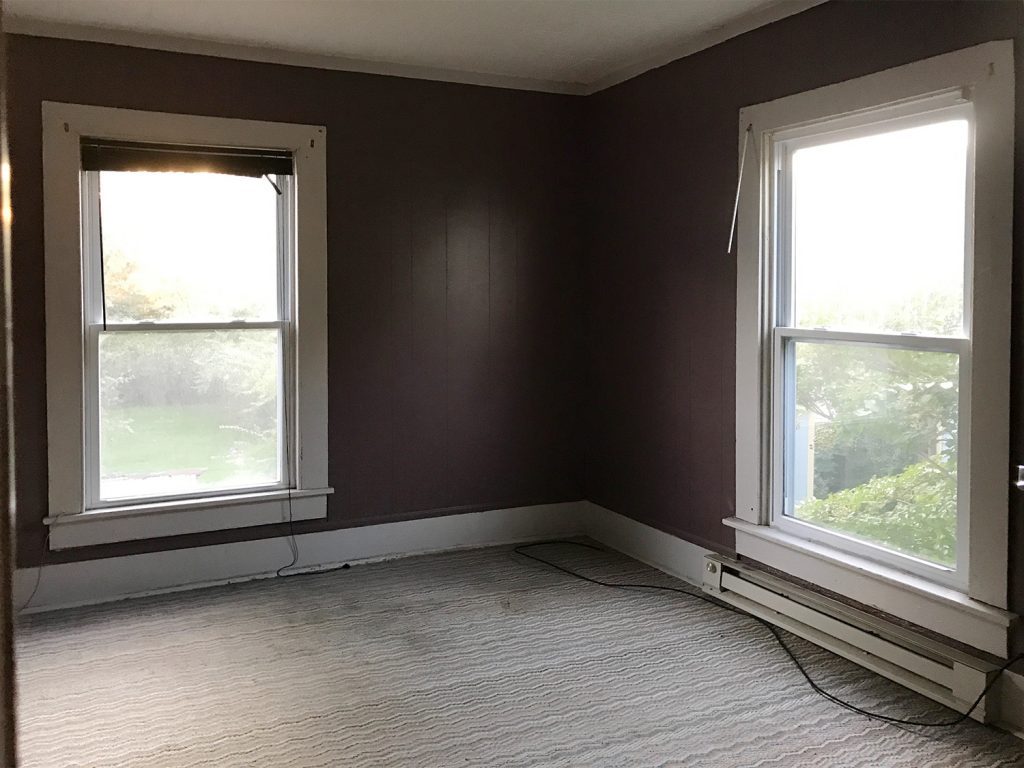
In fact, we had forgotten it so much that we first thought it was the front bedroom on the right side, and we took the after photo below of that room. Which looks super similar but is, in fact, a completely different room. Oh well, you get the idea.
I could dig up pictures like these all day, but I’ll force myself to stop – mostly because I know there’s even more fun stuff to come as we start to install the kitchens (this weekend!!!) and move furniture in (hopefully over the holiday break!!!). So I’ll leave you just like we started: with a before & after of the living room, this time on the other side:
The funny thing is that the floors aren’t that wildly different here (this was the one spot where they weren’t in terrible shape). So maybe the whole snafu with having to stain the new floors was just the house trying to reclaim some semblance of its former self.
Just don’t expect us to start painting the trim in shades of blue and green…
More Hardwood Floor Refinishing Projects
If you would like to read more about our specific hardwood floor refinishing projects, please see the posts below. They range from matching original hardwoods to new prefinished flooring to restoring 100-year-old pine floors!
- Refinishing Mid-Century Oak Floors in Our First House
- Matching New & Old Hardwood Floors In Our Third House
- Refinishing Historic Heart Pine Floors in Our Beach House
- Clear Sealing Our Refinished Floors In Our Florida House
P.S. You can catch all of our previous duplex posts and projects right here, and if you’re interested in going back to read all of our pink beach house updates and posts, here’s that category for you.
