We’re working overtime (so many trips to the beach these days!) to get all of the rooms in the duplex finished and photographed so we can get our rental listing up on Airbnb for weeklong summer bookings. Don’t worry, we’ll make a big announcement when that happens – you won’t miss it! So even though we still have a bunch of rooms that aren’t quite done yet (like 2 kitchens, 2 living rooms, 2 laundry rooms, and 2 more bedrooms and bathrooms), it feels extremely momentous to be 100% finished with the four rooms in this post. *Please imagine every single celebratory emoji here*
So without further ado, I’ll show you around the two bedrooms and two bathrooms at the duplex that are done, done, done! *Imagine that gif of Shaq doing the happy shoulder dance here*
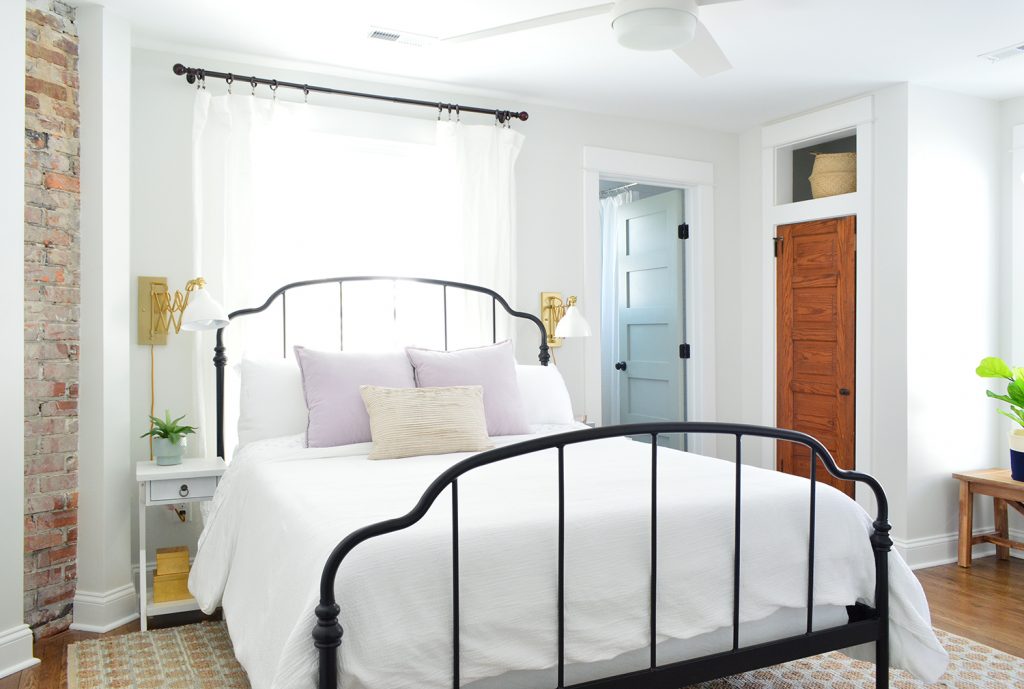
This is the completed main bedroom on the right side of the duplex. Each side of the house has some slightly different challenges and measurements, and this bed wall was slightly less wide than the one on the other side, which meant that hanging accordion sconces made the most of the space, and they can be flipped on or off from bed. Meticulously planning our outlets so they were placed right by each nightstand (and not behind the bed for example) means there’s a free outlet on each side for people to easily charge their phones right by the bed.
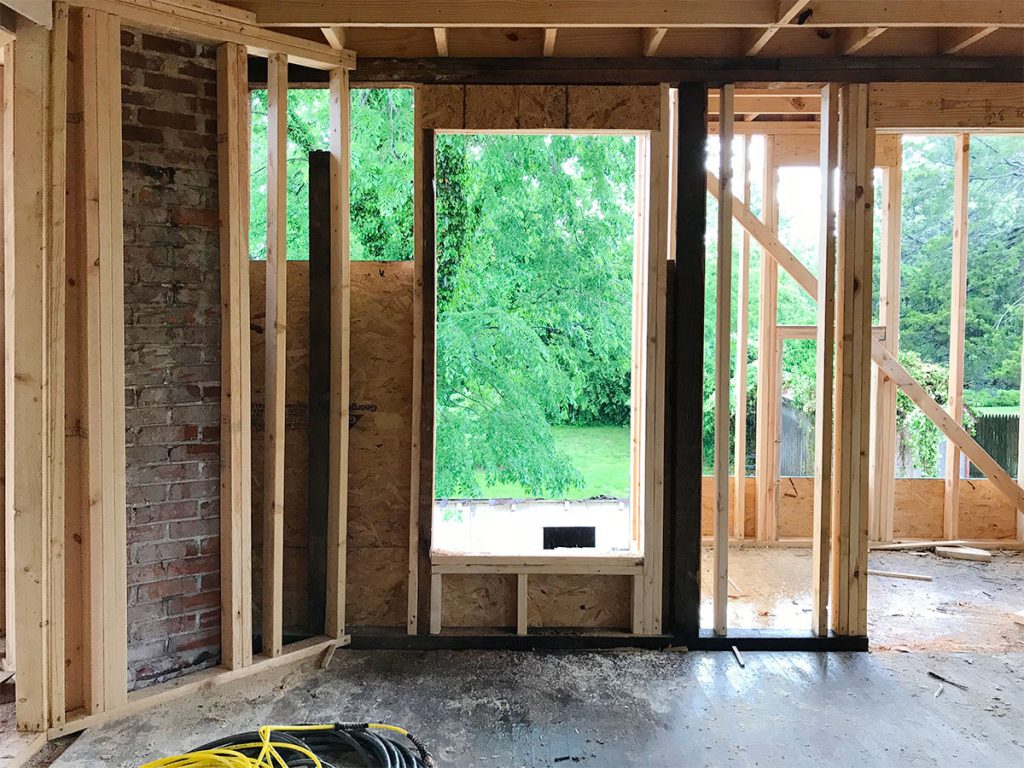
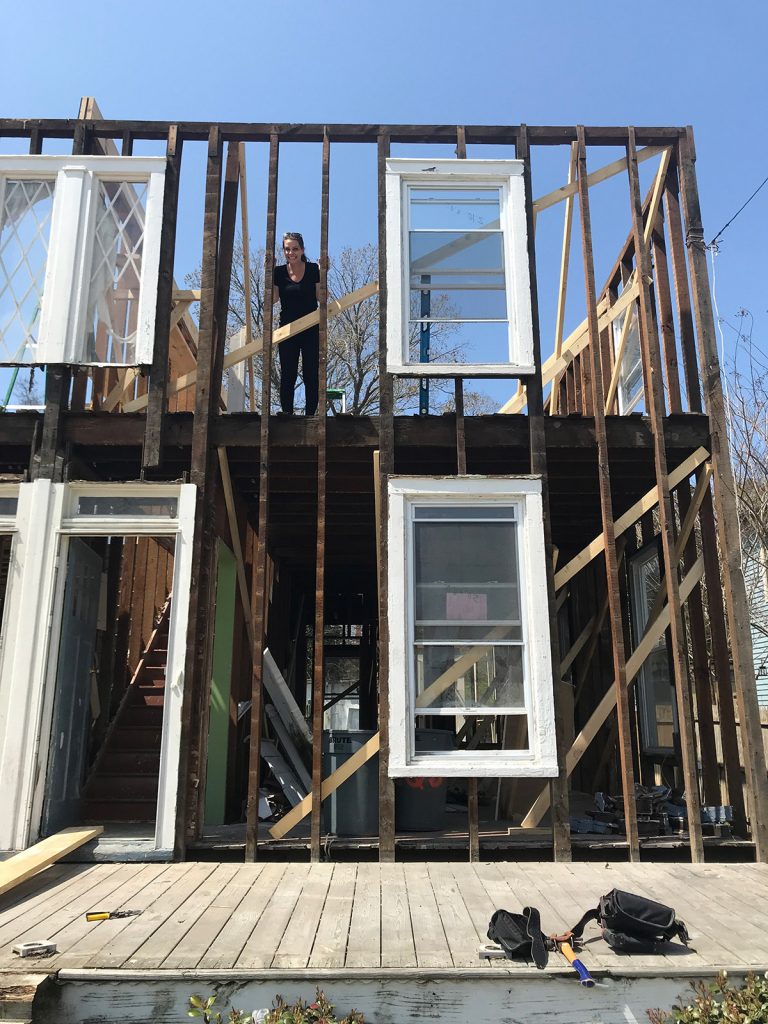
We aimed for as much function as we could, and as for the actual character of the room, we loved exposing that original brick chimney that was hiding behind the wall. And adding a window behind the bed made the room feel so much brighter and more welcoming. We had to appeal to the historic review board and get their permission to add it, so it wasn’t without effort, but it was well worth it! This is a picture we took during the framing stage of that window going in. We really have come a long way, huh?
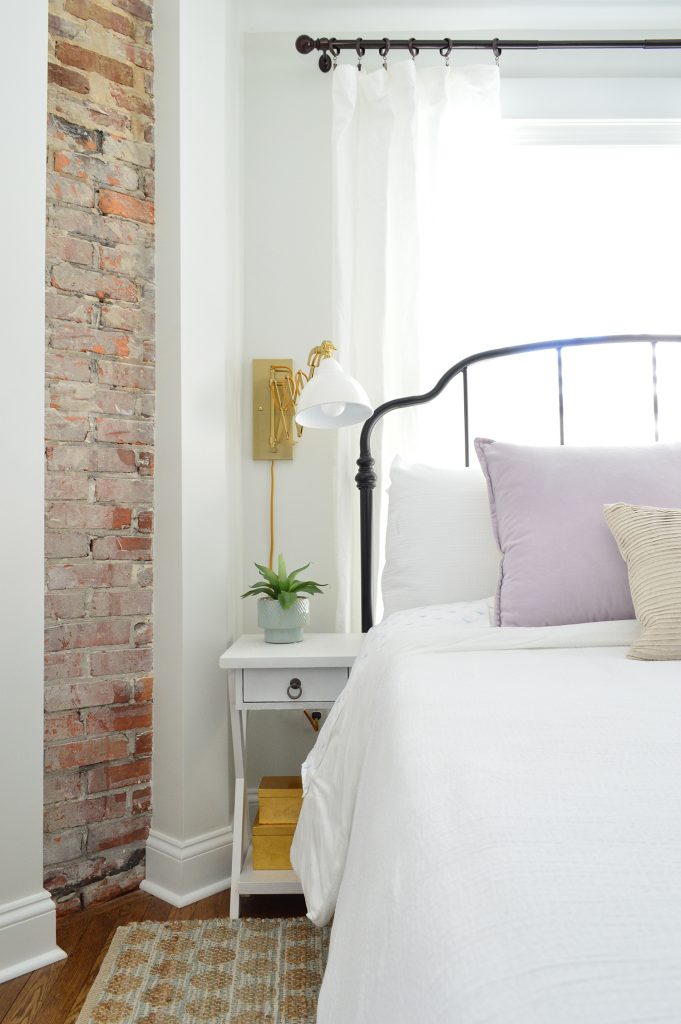
And we actually love a bed in front of a window (remember we have one in the front bedroom at the beach house!). Our tip is just to choose a bed that allows light to pass through it, like this metal one, so it feels like it layers into the room instead of sitting heavily in front of the window and blocking things off, if that makes sense.
You probably also remember that we added a small addition in the form of a full bathroom off of this room to make it a true main bedroom (another thing we needed permission from the historic review board to do – more on that process here – and you can see how that addition totally changed the back view of the beach house here). We think it’s one of the best things we did to add value and function to this house!
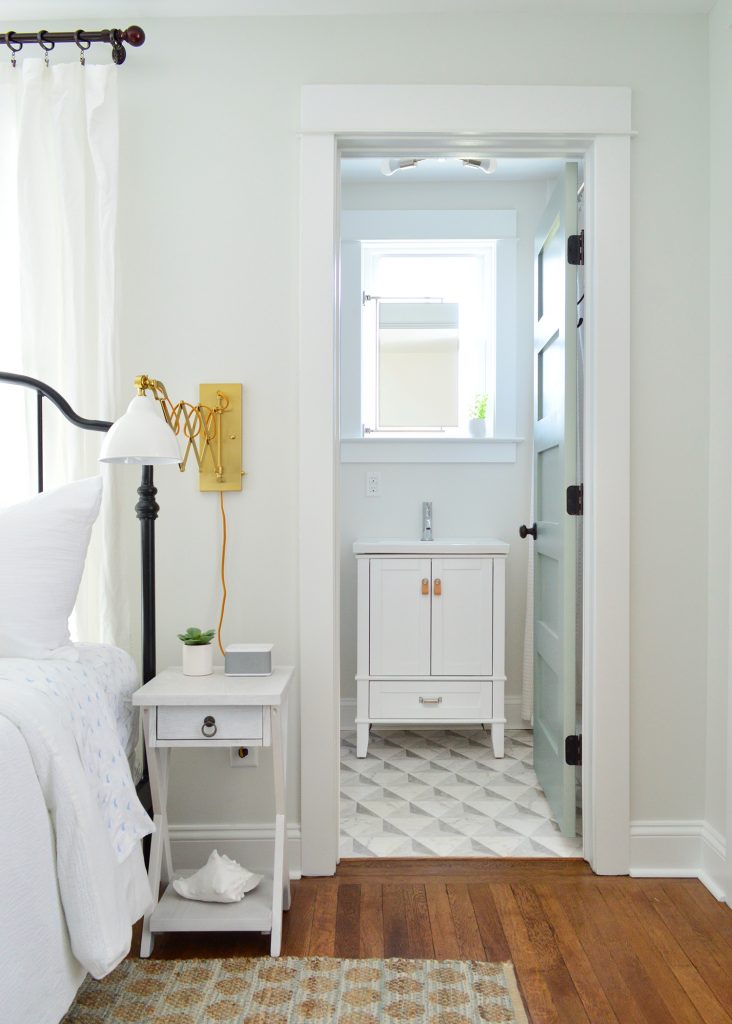
We’ll have to snap a few more photos when we can to capture it all (it’s a small room, so a video tour might be the best way to show you everything), but the bathroom feels airy and bright thanks to the tonal tile and the greeny-gray doors (Oyster Bay by Sherwin Williams – this entire side of the duplex has doors that color). They pair so nicely with the crisp bright walls (Spare White by Sherwin Williams, which is the wall color we used throughout the entire duplex).
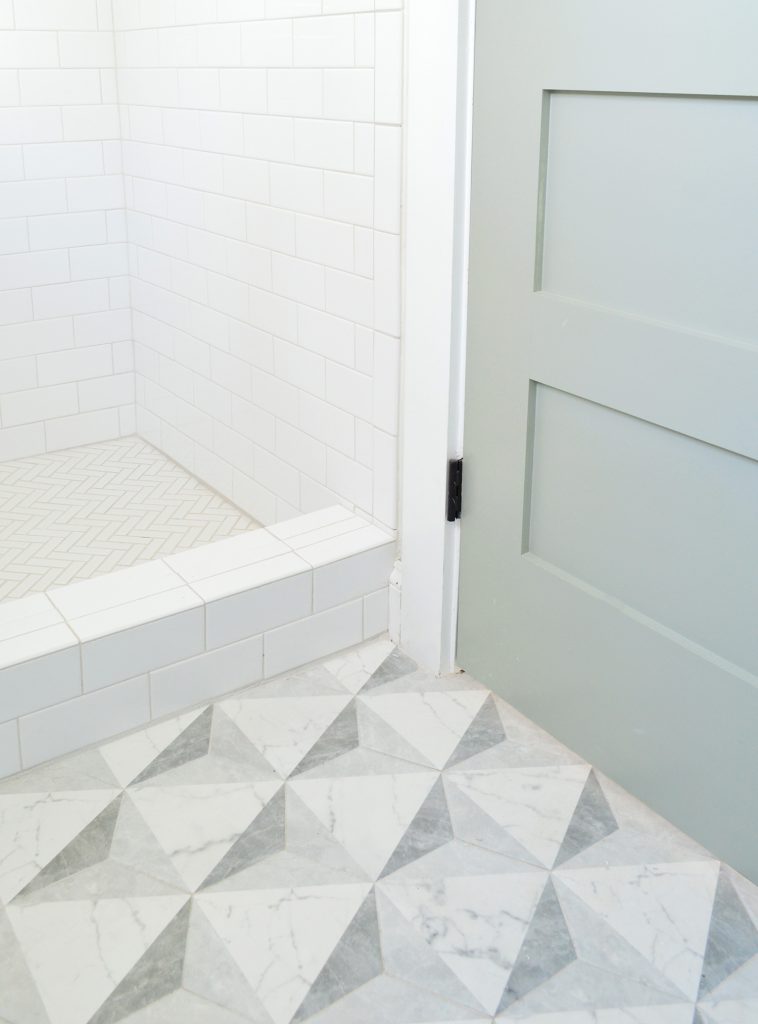
Bathrooms are some of the hardest rooms for us to tackle because we tiled all the floors ourselves, which takes significantly more time/sweat than just assembling some furniture like you do in a bedroom or a living room. But let me tell you, the final accessorizing is so easy and fun. It’s like they slowly come together for months with heavy plumbing and tile stuff and then bam, finished in a day when you’re at the “decorating” stage since they’re so small. YESSSS! We’ll celebrate that little victory!
We added a mirror, a few towel hooks, a long white shower curtain, our favorite toilet paper holder that we use everywhere, some leather pulls on the vanity, and a few frames for the wall and called it good. Oh and speaking of the mirror, we knew we’d have to find a somewhat unusual solution since there’s a window right over the sink, but we love how this cool hinged chrome one looks! It’s functional, and it still lets tons of light flood in from behind it. Oh and we frosted the glass so you don’t have to worry that someone is peeking in on you or deal with some weird blind-behind-the-mirror scenario.

I guess I should have said that all the doors on this side are Oyster Bay except for these, which were quirky old original doors that we saved! Many of the other doors, trim, windows, and light fixtures in this house had been replaced over the years, so we LOVE that we could save these doors and use them to create two built-in closets that flank the large window. The original charm that they add = priceless!
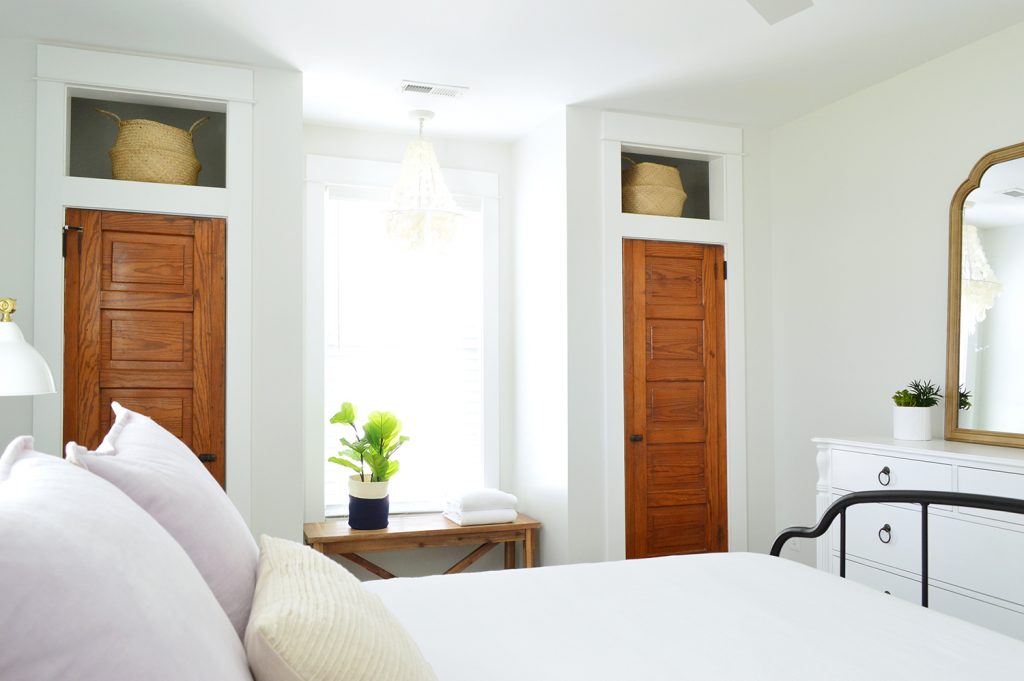
We added the cubbies on top to balance things out since the original doors are shorter than standard ones. And inside each closet there’s tons of nice storage space to hang clothes, put suitcases, etc – with bonus storage space up top in the cubbies. Sidenote: I love a wood hanger and a luggage rack, so we tucked them into each closet for people to enjoy (there are more hangers in the other closet in here too).
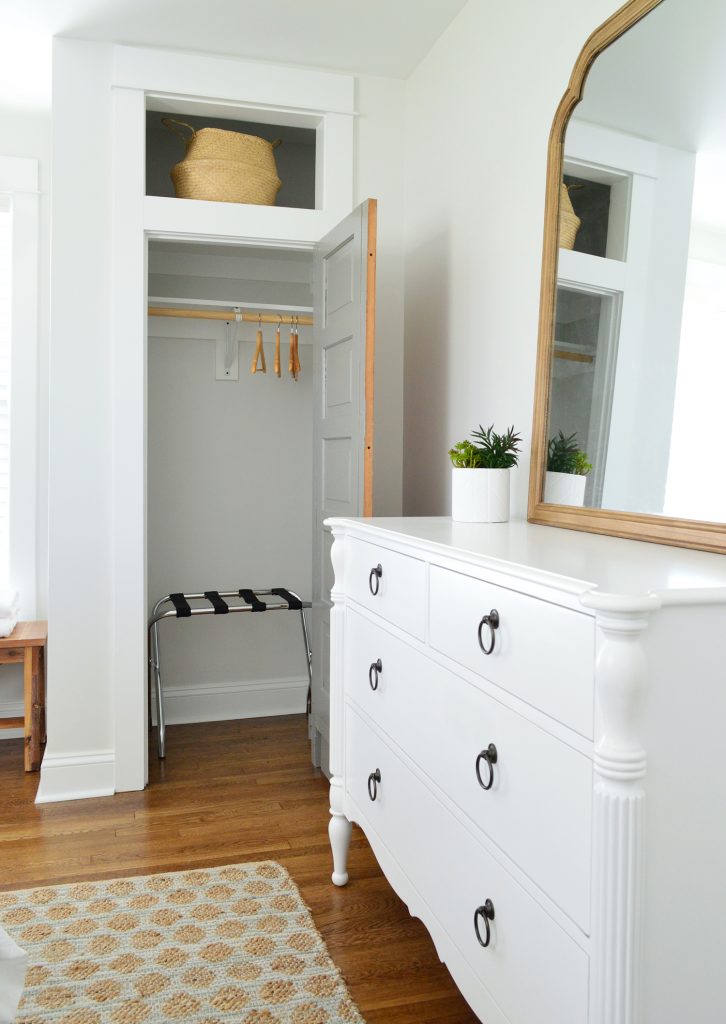
We also added a dresser across from the bed with a nice big mirror (this one that I LOVE!) for even more space to store clothes. The rug is also really cute in here – I love the beachy feeling and the soft color. It’s interesting but not too demanding, which helps the room feel serene (and the price was right!).
When I walk into that room it just feels so surreal to see it all finished! It has been a long road, and we hardly can picture what it used to look like back when we bought it. There was painted plastic paneling to hide the mold in the walls and a drop ceiling to cover rot from a roof leak that had been an issue for years. There was also threadbare wall-to-wall carpeting and baseboard heating that didn’t work (we redid the entire house’s heating and cooling systems, along with new electrical and plumbing to get everything up to code & safe). This is a before shot of the room from one of our first walk throughs (you can see the entire before tour of this house here).
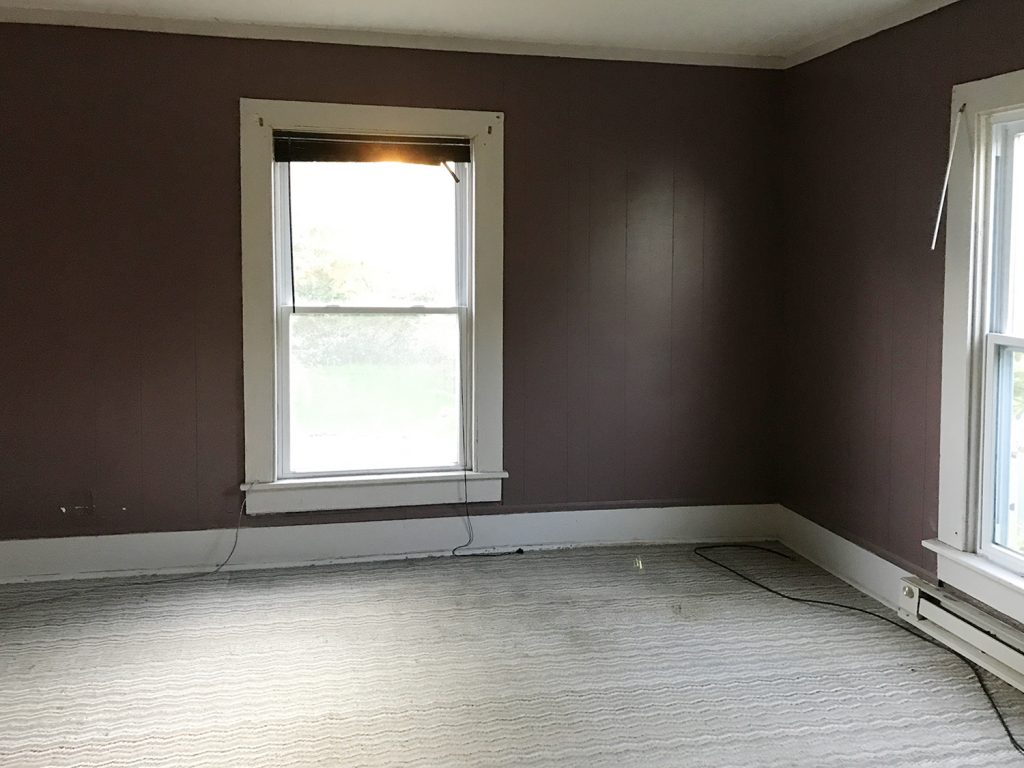
The window you see above is essentially where we placed the door that leads to the new bathroom addition, and then we added a new window further over towards the chimney on that wall, which you see behind the bed below.

Since before & afters are so much fun, let’s switch gears to the front bedroom on the other side of the duplex. This is what that room looked like before. The theme of this house was definitely add-coverings-to-hide-damage-in-the-walls-and-ceilings, so once again there were drop ceilings and plastic faux-paneling on the walls. And that little front closet (with the blue door) was devoid of any natural light. We quickly discovered that they had covered a window with drywall (!!!!!) so we dug it out of the wall and exposed it again – and it was one of the ones with diamond grills!
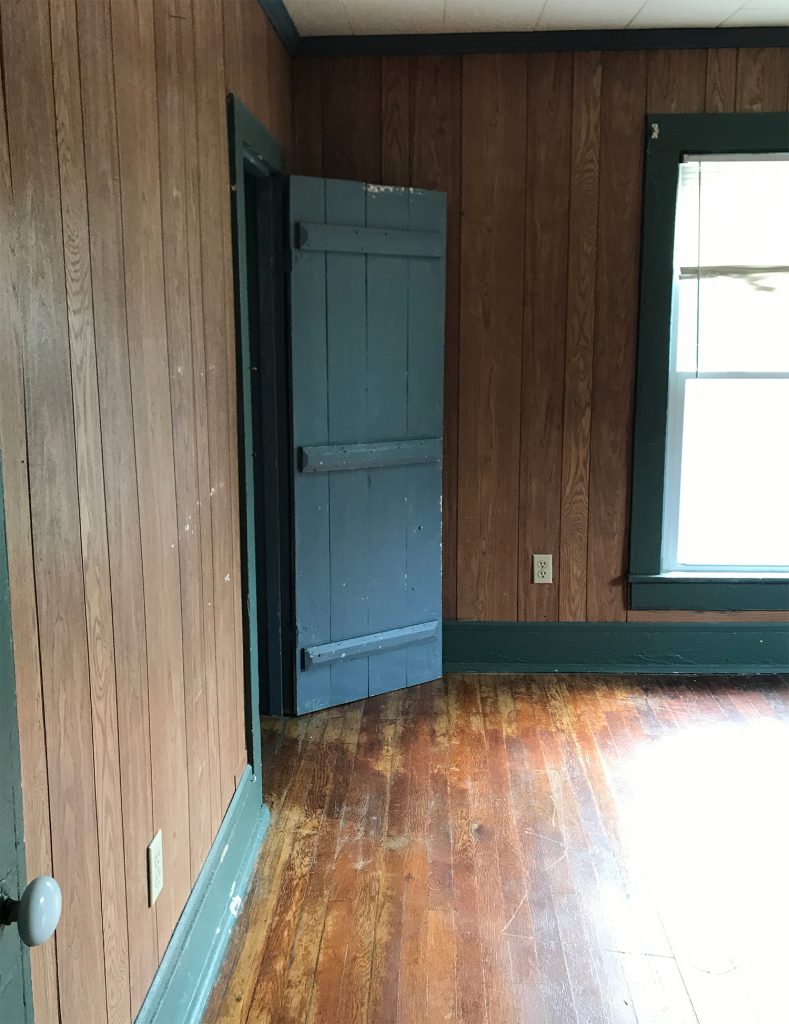
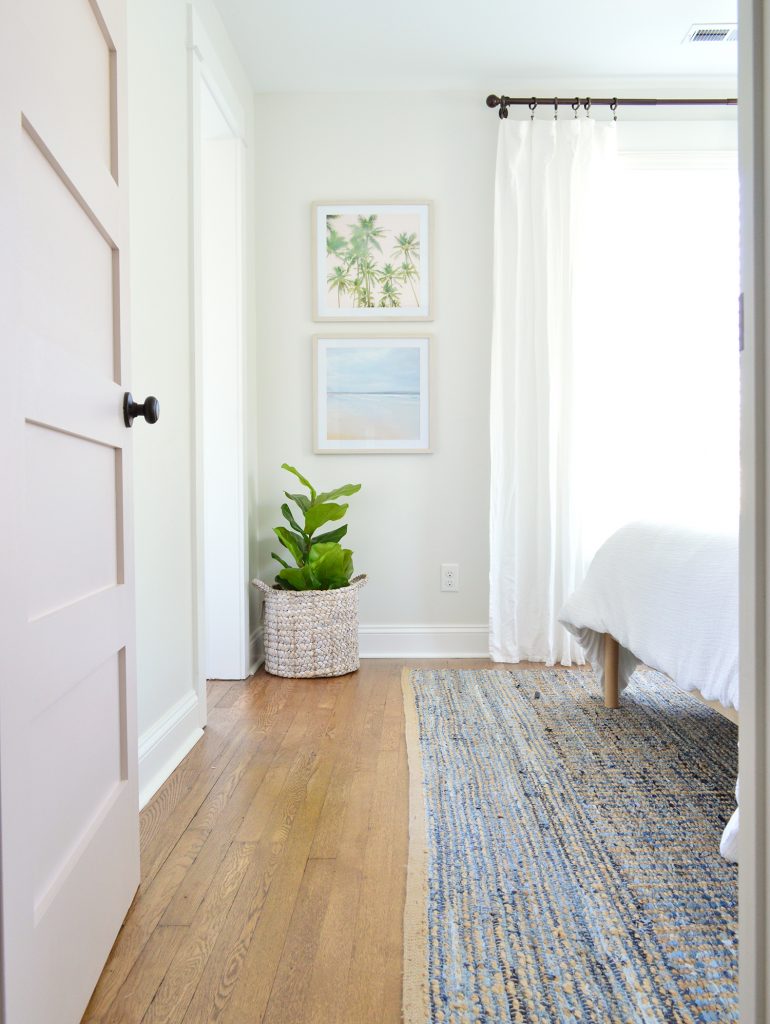
Ripping out that crazy window-blocking drywall and exposing the beautiful diamond-grilled window allows light to flood into the room from that closet as well – and lighter walls also help things feel airy and fresh. Again, this front bedroom is on the opposite side of the duplex as the bedroom we just showed you, which is why it has pink doors like all the other doors on the left side (White Truffle by Sherwin Williams). And the old floors look so much better since refinishing them (more on that here).
I always feel like before & afters skip a HUGE part if you’re doing a deep renovation because a ton happens between them. You go backwards, sometimes A LOT, before you can go forwards again. This house had so much rot that we had to strip things waaaaay back to get rid of it all and rebuild it. So just for kicks, the window you see above is almost exactly where I’m standing in this picture below. Did I mentioned we had to strip things waaaaaay back?
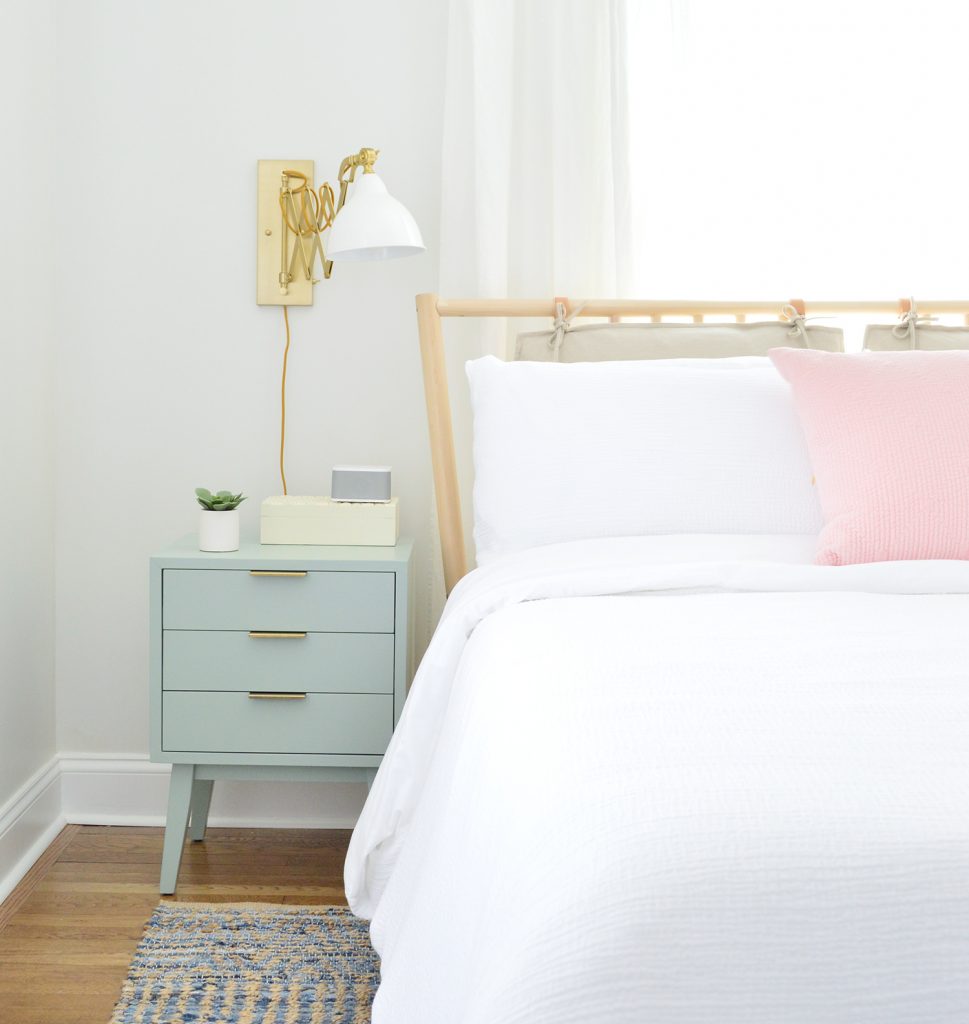
So that might explain why we’re feeling so good to be in the home stretch! If you walk through the bedroom door and turn to your right, you see this cozy bed that we found at Ikea and two soft greeny-gray nightstands with pretty gold hardware that ties into the wall mounted accordion lights. The hilarious thing is that we only have two sets of these lights in the entire duplex (one set per side, so someone renting one unit won’t even see the other set) but the two bedrooms that happen to be done both have them in there… which is why they’re all over this post. I promise all four of the other bedrooms have different lamps! Ha!
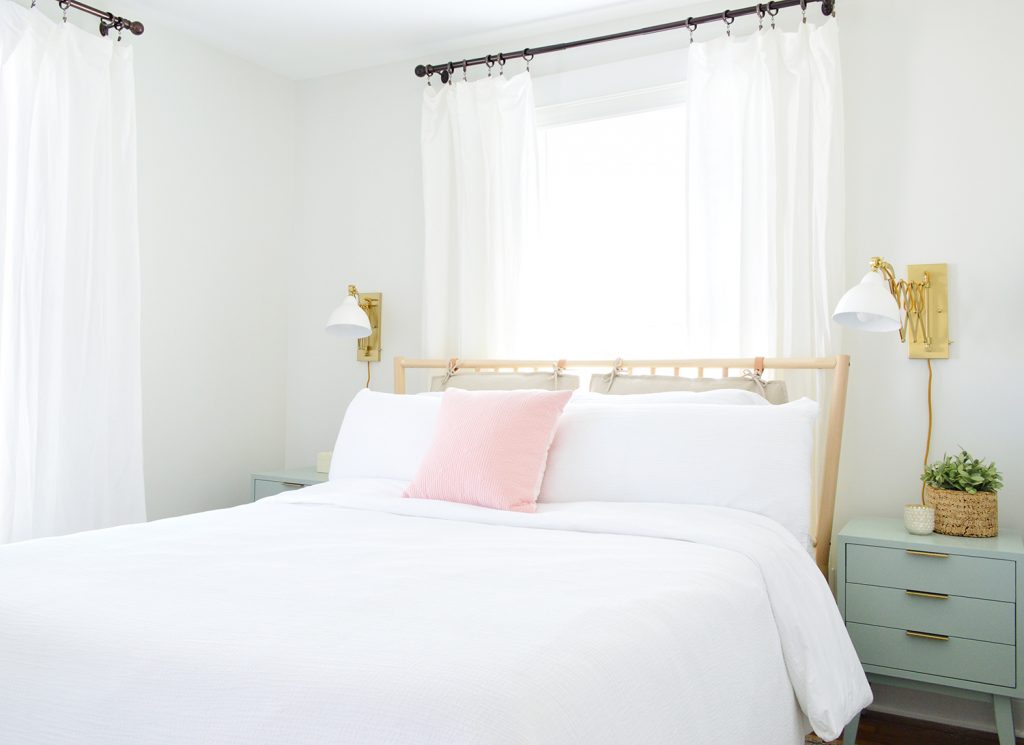
How cute are these nightstands though?! And the price is SO GOOD. I love that they’re super functional with three drawers each (yay storage!) and that they bring in some color. It’s actually a subtle nod to the other side of the duplex since they’re almost exactly the same color as the greeny-gray doors on the other side! #MintToBe
There’s also a nice little closet in this bedroom, complete with a dresser for folded clothing. Remember the room with the diamond-grilled window? That’s all redone and it’s such a sweet space. But we haven’t fully finished and snapped photos in there yet. Soon I hope.
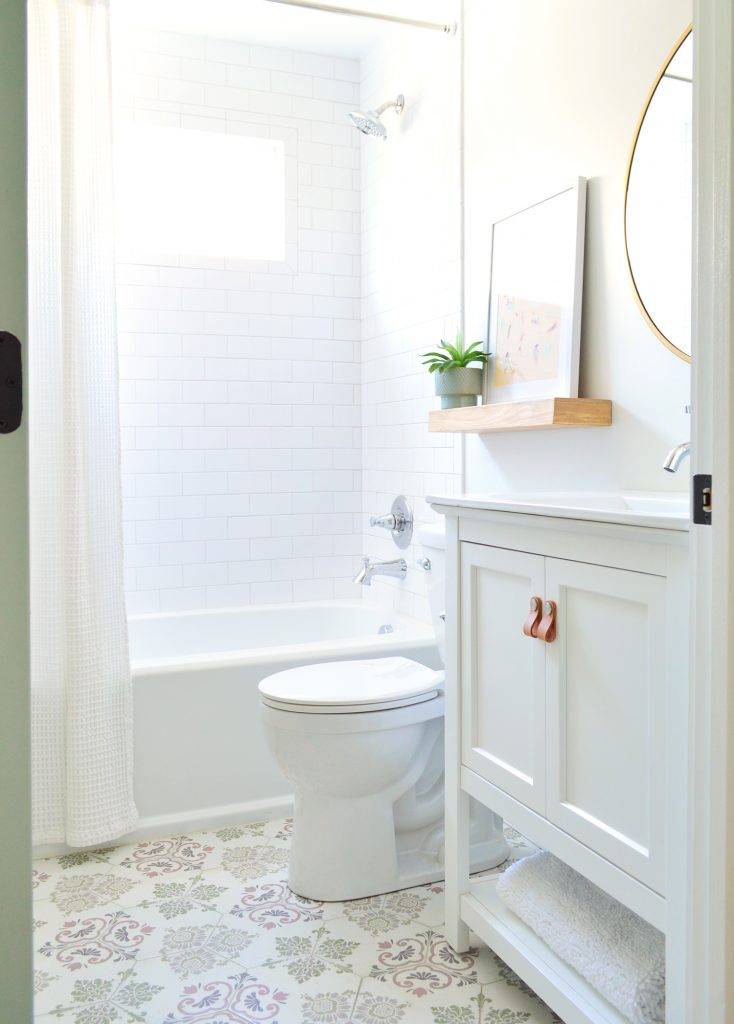
Now let’s skip over to the hall bathroom on the right side of the duplex (back to the side with those greeny-gray doors). The tile in here is one of my favorites (even though it was kind of a pain to lay), and we finished the room off with some natural touches, like some leather vanity pulls and a floating wood shelf. We rounded things out with a few other classic items, like an extra long white shower curtain, a round gold mirror, a simple white vanity, and some beachy art.
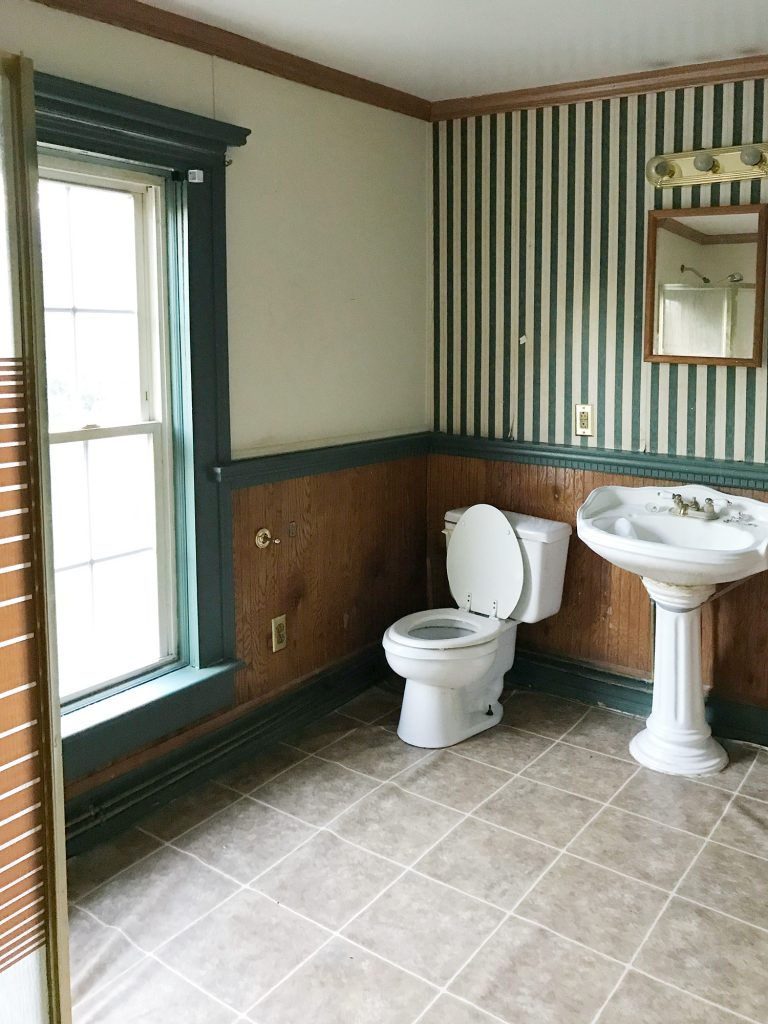
Each side of the duplex originally just had one full bathroom, but the upstairs of each side now has two full baths – along with an additional powder room downstairs, which is so nice. This before shot of the one and only bathroom on the left side is yet another demonstration of the cover-rotting-things approach (don’t try this at home, folks). See how the vinyl floor is bubbled and loose? It’s because there were all sorts of water issues going on under there and they were trying to mask them with sheet vinyl.
And now for the fourth room we’re completely finished with… which is pretty dang similar to the third, ha! It’s the hall bathroom on the left side of the duplex, which has different tile floors but the same vanity and accents.
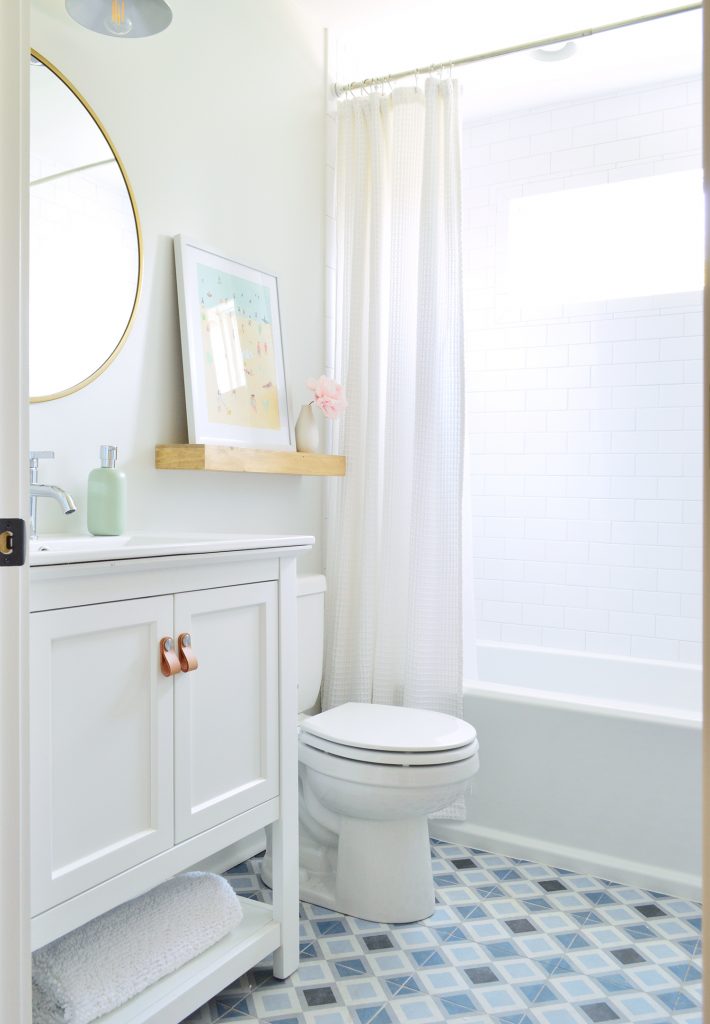
It’s kind of fun to just change one major thing and stare at both of these and try to pick a favorite. Is the bolder blue floor more your speed, or the scrolly pink & green hex? John’s favorite is the blue one and I love the pink one. Maybe when the whole duplex is done we should do a room by room duel and have you guys vote your faves in various polls (I know John’s data-lovin’ mind would enjoy all of those stats).

Oh and while we’re on the subject of sides, so many people ask me if I have a favorite side – even close friends lean in and say “whisper it in my ear, I won’t tell anyone” – and I honestly can’t choose! There are so many elements on each side that I love, so I just ping-pong back and forth. For example, I love the kitchen with the pink tile and the blue cabinets on the left side a smidge more than the wood one with the blue backsplash if you super twist my arm (it’s very very close though, you can see them both here), but my favorite twin bedroom by a sliver is the one with the oranges, which is on the right side. DON’T MAKE ME CHOOSE!
P.S. You can see the entire process of bringing the duplex back to life here From buying it and planning the layout to screaming into a pillow over a sad setback, it’s thorough.
*This post contains affiliate links*
