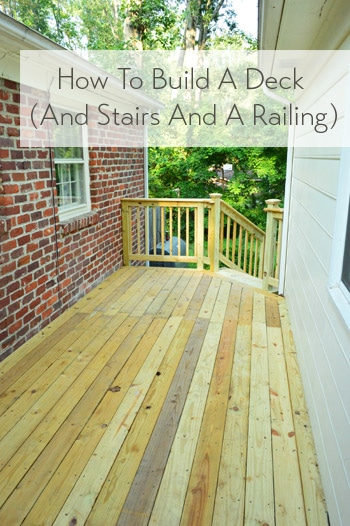
The deck is officially done. Sound the celebratory cowbells! I actually finished it on Friday and we’ve spent the last few days crossing all appendages and waiting for an inspection (I couldn’t bear to share my triumph until I was actually sure it was a to-code triumph). The inspection finally happened yesterday afternoon, and – ta-da! – we passed. Relief flooded over me like all the sweat that I put into building this thing (lesson learned: build decks in the spring or fall). Here she is in all of her wood-riddled, approved-by-the-county glory:
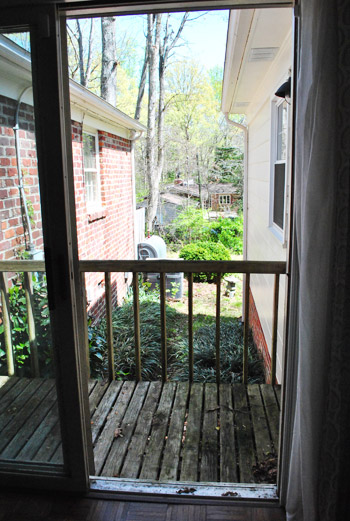
It’s definitely an upgrade from the tiny rotting balcony that we started with:
We thought it’d be great to have it done when Sherry’s mom came to visit from NY today, so I put my head down, powered ahead, and sweated through my belt for one last leg of this deck building marathon.
Admittedly it was a bit more of a marathon than I expected. We originally thought this deck would take us three or four weeks of on and off work to complete, but between the heat, thunderstorms, inspections, equipment rentals, material deliveries, summer travel (we ended up being gone more than half of the weekends since starting) and generally being a one-man show who has never built a deck before… it took ten weeks instead. But that doesn’t make the victory any less sweet to me.
I actually kind of enjoyed having an excuse to go outside (despite the extreme weather) and tinker around with something during the occasional Clara nap or Saturday morning. It was weirdly peaceful – getting to ignore emails and diapers for a few hours and just saw stuff. And of course having my dad’s help with the auger when it came to digging those post holes was the best. Nothing like a father/son project to get the serotonin pumping.
So if you’re wondering how long a deck project could take, I think an experienced team could knock something like this out in a week (you’d need a few days to pause for inspections in our area, so a weekend wouldn’t do it). But if you’re doing it almost entirely alone as a first-timer, and can’t work all day every day (maybe you can devote a few afternoons or evenings during the week and a day or two every other weekend like I did) it might realistically take you a month or two – depending how inspections go, if it’s raining for two weeks straight, etc. But I can promise you one thing: there’s an insane amount of satisfaction when you sink that last screw.
Now let’s rewind for a moment and I’ll try to breeze through how I got the stairs and the railing done. Once all of the decking was laid down, I cut and attached the remainder of my four posts (you can read more on how I did that in this post).
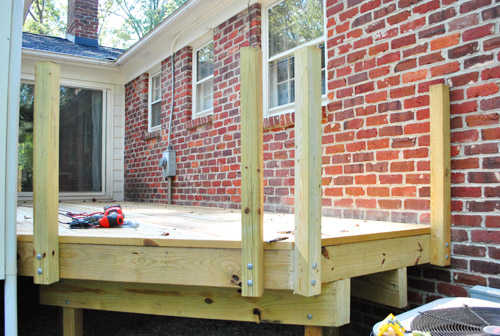
Even though the stairs were next on my list, getting the railing posts up was important to help me plan the stair stringers – which are the diagonal boards that run down the side of the staircase, where the steps actually rest.
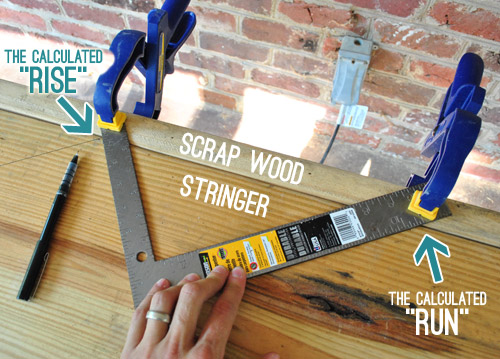
You can buy pre-cut stringers, but I tackled cutting my own (to save money and time since that’s the lumber they provided in our delivery). Figuring out the lengths and angles of everything was kinda scary until I found this website that did most of the math for you. Thank goodness for the world wide web.

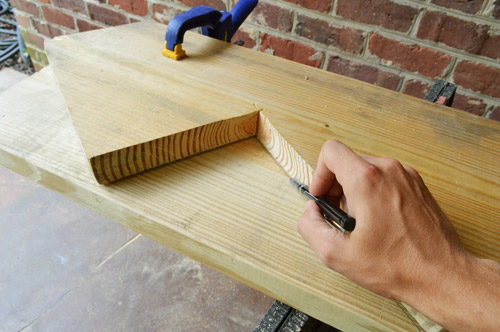
Once I had my rise (the height of each step) and run (the width of each step) calculated, I learned a cool trick from this video for marking your 2 x 12″ board for cutting. I basically clamped a straight edge (in my case, a piece of scrap wood) to a framing square (the L-shaped ruler) so it intersected at my measured rise and run. Then I could hold the scrap wood flush against my board and the framing square would create a perfect guide for marking my cuts:
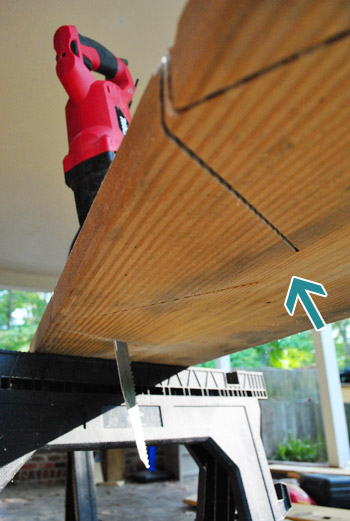
With the length of my board marked, I broke out my circular saw and carefully cut along the lines.
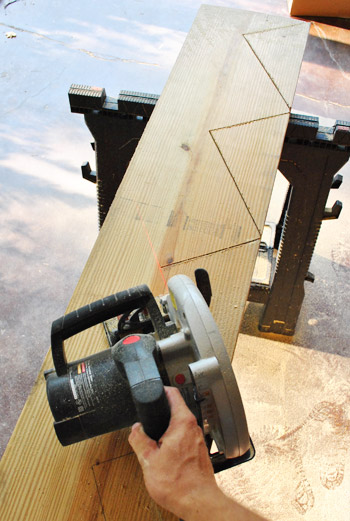
You’ll notice above that despite looking cut from above in that last picture, the triangular pieces weren’t falling away. That’s because the circular-shape of a circular saw doesn’t always allow you to reach those deep corners all the way through. So I went back with my reciprocating saw to finish the cuts all the way.
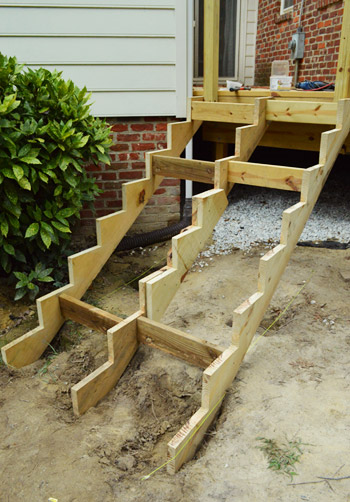
Once one stringer had been cut (and tested in place to make sure it fit) I used it as a guide to mark and cut two more 2 x 12 boards, since I’d need 3 total stringers for my 48″ wide steps.
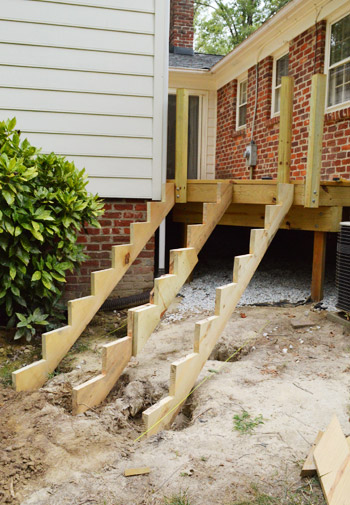
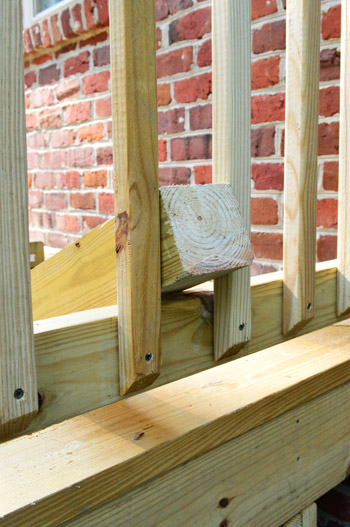
So here are my three cut stringers in place. You’ll notice the one in the middle has a weird extra piece in its center. That’s because a not-so-conveniently located knot in the wood caused the tip of one step to break off. Rather than go buy (and re-cut another whole board) I just patched it by cutting and screwing a short piece of wood to patch it (making sure it would be to code first).
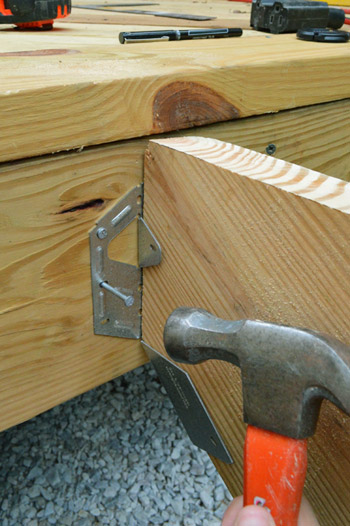
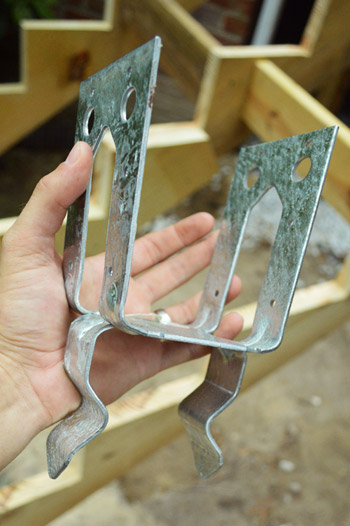
To attach the stringers to the deck I used these angled hangers that I snagged at Home Depot.
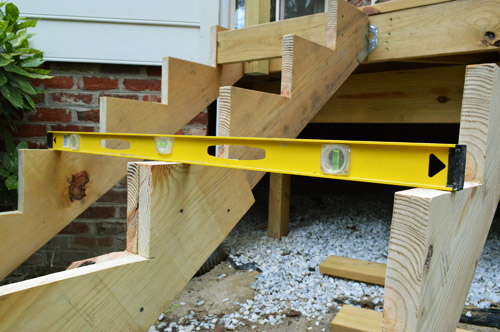
Oh yeah, and I was sure to check that the steps were level the whole way down. Don’t want wonky steps now, do we?
Speaking of wonky, I did install some blocking between the stringers. They weren’t perfectly level themselves, but they’ll be completely hidden, so that’s okay. The point was that by using equal sized scrap boards the blocks still served their purpose of keeping the steps an equal width the whole way down (we didn’t want the steps getting subtly narrower or wider on the way down).
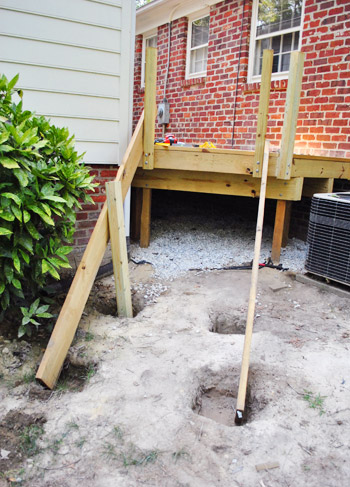
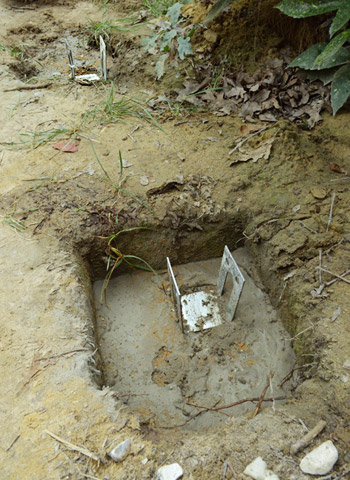
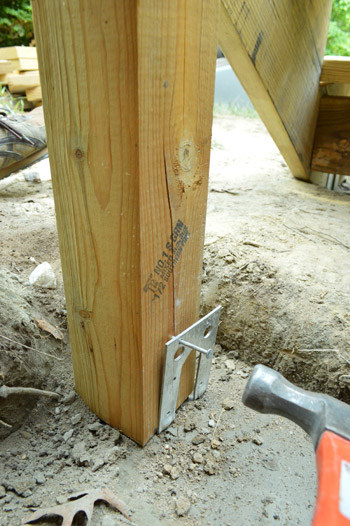
Next came setting the posts that would support the staircase in the middle and the bottom (using the footing holes that I dug back when I started the deck). To attach these posts, I decided to use these anchors I found at Home Depot this time around.
I basically set them in some wet concrete (after carefully marking where they needed to go to line up with my steps – which admittedly was a somewhat maddening process). Then I let them dry.
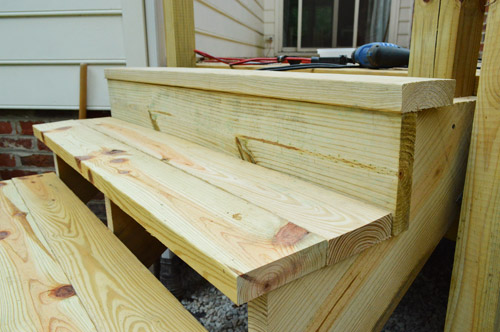
Since my concrete needed 4 hours to cure, I filled some of that time by beginning to cut the wood for the steps. We wanted the steps to match the decking, so we used two 2 x 6″ boards for the base of each step (which included a small overhang) and a 2 x 8″ board for the back of each step.
Once my concrete was dry and my post anchors were solidly in place, I set my posts, checked that they were level, and nailed them into place. You can see this anchor was not 100% exact in its placement – but that’s part of the reason they’re open on one end. That wiggle room was a lifesaver.
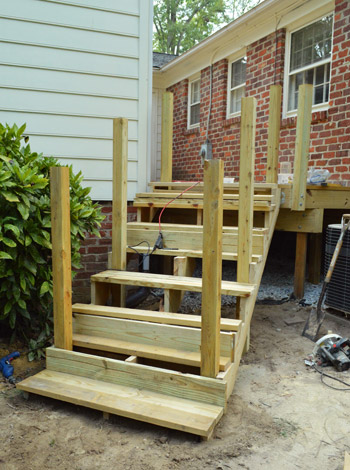
So here are all of my posts set (but not cut to size yet) and a random assortment of step boards just loosely laid in place. Looks kinda like a staircase. Looks kinda like a hot mess too.
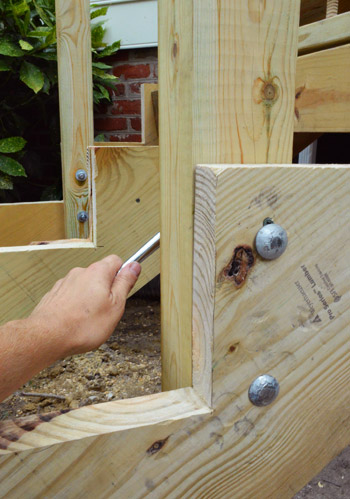
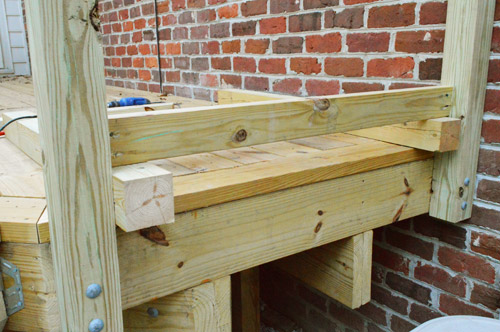
Oh yeah, and I bolted the posts to my stringers the same way I bolted the railings to the end of the deck.
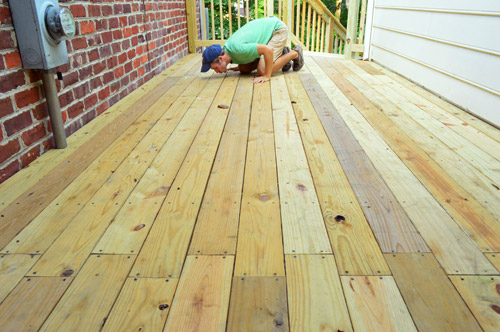
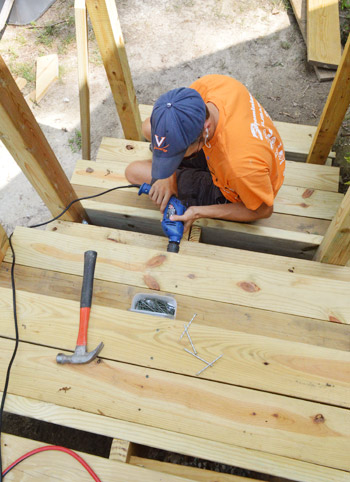
Then came the task of screwing all of the step boards into place. This task took surprisingly long and a surprising amount of screws.
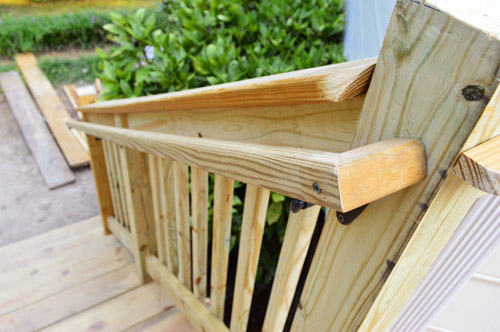
With all of the stair boards in place, I turned my attention to the guardrail. The first two parts of the guardrail were the 2 x 4″ rail boards that would span between the posts on the top and bottom. Our county requires no more than 4″ gap between the deck and the rail (it’s also known as a sweep space, so you can easily sweep debris off the deck). I saw someone use a 4 x 4″ post as a guide for this since it’s an easy way to keep the rail level so I did the same thing. Worked like a charm.
Attaching the railings to the stairs was a bit more involved since I had to make sure I was meeting several standards for how much of a gap was at the bottom and how high it had to be compared to the nose of each tread. Once I had figured all of that out, just cutting the angles and keeping things in place while I screwed it all together made my brain hurt a little. But eventually I got all of the railing pieces in place.
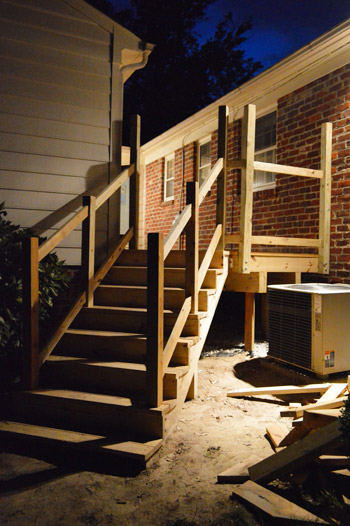
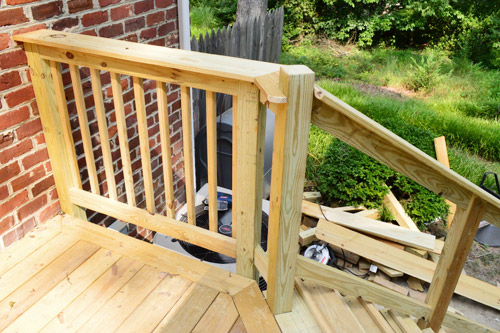
Oh, and you may notice that the four posts attached to the deck got significantly taller. I had to replace my original posts because I realized too late that I had cut them too short to satisfy the railing height requirements on the steps. It’s a long story so I’ll just leave it this: it kinda sucked and that’s why it’s nighttime when this photo was taken. Oh well live and learn. They weren’t going to be staying that tall, but after replacing them once I decided this next time that I’d cut them in place once I was certain my railing height would pass inspection – just to avoid any more surprise do-overs.
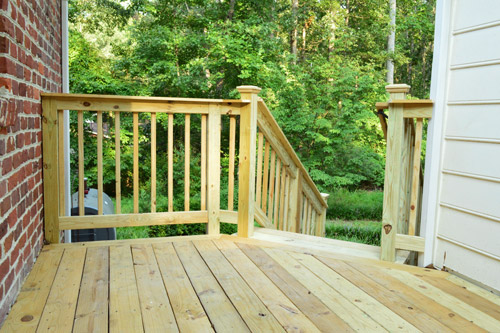
The next day I could finally start putting the balusters in. Those are the vertical pieces on a standard deck railing. We debated doing something more intricate or modern (like all horizontal rails or a built in planter) but opted for the traditional look because that’s what we have out on the patio side of the house (there’s a fence and a railing out there). Both that railing and this one are visible from the living room (out various sliding doors) so we wanted them to match. I’m also glad we went the traditional route because it was super easy to do (since I could use my post as a guide to meet the spacing requirements again).
The last part of the guardrail is the rail cap, which is the flat ledge on the top. It’s made from a 5/4 x 6″ decking board. Cutting those angles and notches around the posts was an adventure too, but I won’t bother you with the details. In short: I lived to tell the tale!
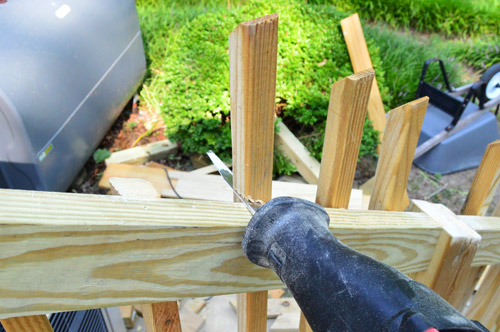
Oh yeah, and you can see now that I eventually cut all of my posts down to size when I was sure they all met code. Thank you reciprocating saw for that.
When it came to attaching the balusters to the stair railing, I didn’t even attempt to pre-cut them to size like I did on the other railing. Instead I temporarily removed the rail cap I had cut and screwed the balusters into place with the excess length extending out the top. Then I used my reciprocating saw to cut them down so the rail cap would sit flush again on top of them for a finished edge.
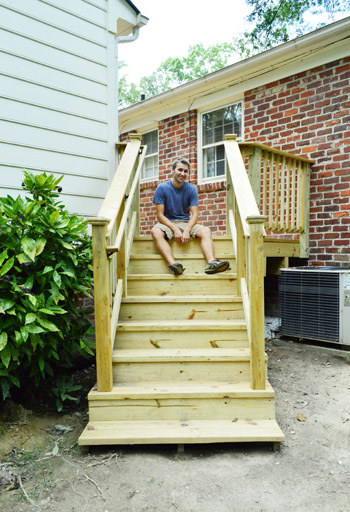
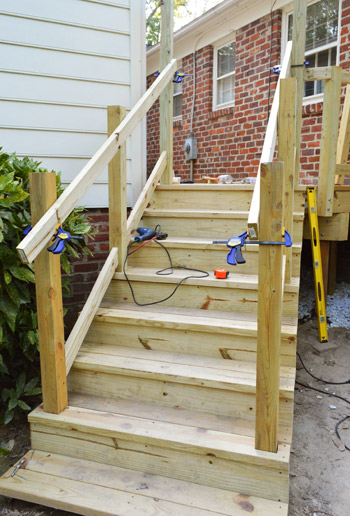
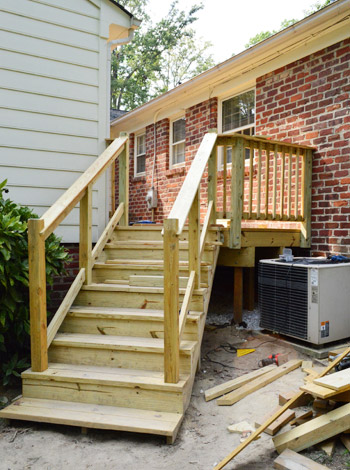
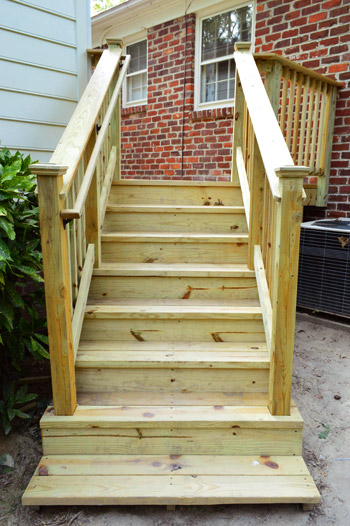
With the balusters in and rail cap back on, I started putting the finishing touches into place – like this handrail that we’re required to add since our stairs have more than three steps.
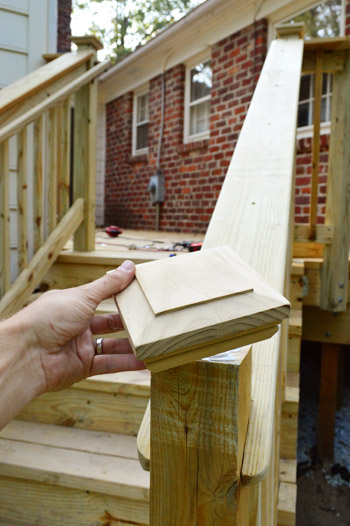
And we added these decorative wood caps ($8 at Home Depot) to the posts at the top and bottom of the stairs. They attached with just a little bit of caulk and definitely make things look nice and finished.
And with that, the railings – and therefore the steps – and therefore the entire deck itself… was finally done!
I have to admit, I’m still kind of impressed that I made this.
And what do you do when you’re proud of the deck you just built? Naturally, you text your mom.
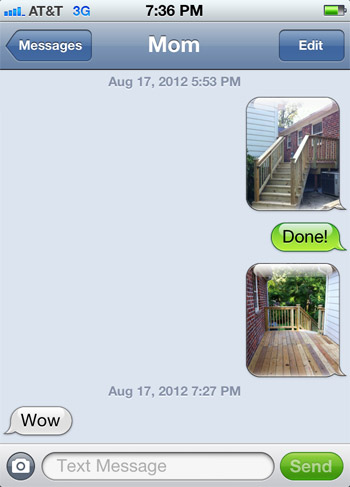
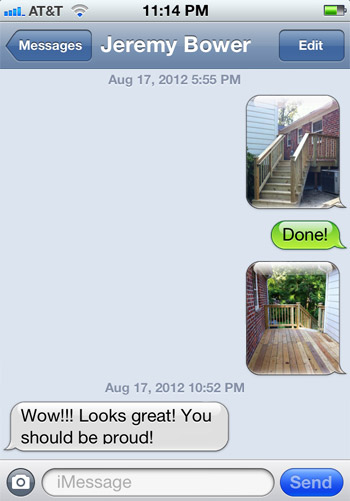
Well, your mom and your bro-friend.
Although being totally built and county approved doesn’t mean it’s totally done. We still need to seal it (we’ll be tackling that as soon as we catch our breath and research the right product for the job) and of course we need to furnish it. As for the budget breakdown, once we seal it we’ll share the full rundown. Until then, you can find me sitting out on the deck, sans furniture, drinking a nice cold soda. Or telling Sherry that I’m not building another deck for at least ten years. Yes sireee, I’m glad to have this done. Although to anyone wondering, I still think demoing our first house’s bathroom and rebuilding that from the studs was the hardest project I’ve ever done. But the deck is hanging in there at second place. Anyone else finishing a deck or some other project that took longer than you expected but is still intensely satisfying to have checked off the ol’ list?
Psst- Want all the deck details? Here’s where we shared our vision for the space, removed the plantings and the old balcony, selected our materials and documented our first day of building. Then we dug our post holes, failed our first inspection, revised our plan/dug more holes, and set posts. Then we installed our joists, did some last minute prep for deck boards, started laying decking boards, whipped up a mood board and finished laying deck boards.

Kay says
John – you totally rocked the deck! I know that you guys will enjoy relaxing on it after all of the hard work. Excited to see how the decor looks!
Jenn says
I believe the only phrase that properly captures what you have done is:
WOW! AWESOME!!!!
Seriously. I mean that. :)
YoungHouseLove says
Thanks Jen!
-John
Alice says
Amazing! I especially love the stairs. They look so grand…as if after you climb them at the other end of the deck you’ll find the ruler of all the land “decked out” in his/her royal cape.
YoungHouseLove says
Hahaha, too funny.
xo,
s
Meg says
The deck looks awesome, John! I can’t wait to see it sealed up and decorated. Is it wrong I’m quietly hoping you and Sherry snagged one of those big metal giraffes to have standing guard over your handiwork? I’m just sayin… Gee might like having a big brother or sister hanging out on the deck.
YoungHouseLove says
Oh my gosh, that would be epic! If only they weren’t like $500 a pop!
xo,
s
cherise says
Uber impressive John! Sherry must be gagging to start decorating. Dude get on that staining. ;-)
Sarah says
It looks so great! I can’t believe you did that yourself! The railings really make it. And the zippered seams/frame look so nice. Can you believe some people build decks for a job? Ugh that would be crazy.
YoungHouseLove says
So crazy! They must dream about measurements and pouring footers! We’re in awe of them.
xo,
s
Alison says
So awesome!! This was my driest time following along on deck building. Very interesting (and exhausting!) can’t wait to see it gussied up!
Christine says
You’ve taken a curious little space and turned it into a wonderful courtyard. It’ll be so cozy out there on fall evenings. I love it.
LizO says
This looks awesome! We are hoping to build a much smaller deck/porch soon, and your step by step is so inspiring! We have a big deck already existing in our backyard, and we recently refinished it with One Time stain… really expensive, but if it means we only have to use one coat every 7 years, it’s totally worth it. It’s made it through one rainy Oregon winter, and so far, so good!
YoungHouseLove says
That’s awesome!
xo,
s
Annette says
Awesome job! The deck looks great!!!
Candice says
Hip hip hooray for the completion of your deck. Too bad you kids don’t drink alcohol. If I had just completed that deck I would celebrate by drinking homemade margaritas on the deck! I am thoroughly impressed with John’s handiwork. I wish I had a house and a husband to make stuff for me like John does!
Victoria B. says
Congrats John, you did an amazing job! We’re still debating about a railing around our front porch but this last post has given all the details we need to get ‘er done! We used a great stain by Behr at Home Depot to seal the wood on our porch and went back to get more to do our Adirondack chairs, it was super easy and went on great. If you want to visit Indiana, you’re more than welcome to come help with our railing!!
YoungHouseLove says
Haha, good to know!
-John
Jules says
There was a discussion on a Washington Post chat today about you and the Bowers!
http://live.washingtonpost.com/web-hostess-120822.html
YoungHouseLove says
No way! How kind!
-John
Julie Montgomery says
Congratulations! It looks beautiful! Well done, John!
Mekenzie @ Interiorsbykenz.com says
FABULOUS! Now come built mine :)
Gretchen says
RIDICULOUSLY impressive! All I can say is WOW. I mean, I thought the kitchen was uber-impressive, but how the heck you managed to just “figure it out” and build yourself a deck is just amazing! You deserve more than a soda out on that sweet zipper seamed deck!
Jennifer G. says
Wow…your county DOES have a lot of regulations!!!
Maira says
Yay John! I did a happy dance for you finishing the deck!!
Michelle says
Well Done!
The sky is the limit :O)
Jill says
Way to go! It doesn’t seem like it took you 10 weeks. Can’t wait to see you all work your decorating magic.
Kirralee says
That look s absolutely fabulous! Well done, can’t wait to see how how decorate it!
Nora says
I was going to convince my husband to help me build a deck next to our garage for storage, but I don’t think we could pull this off! Phew, what an undertaking. I had to re-read a few sections just to understand the math/angles/ screws etc etc. John, what a great job!!!! Now, I can’t wait to see you trick it out!
A swag of lights, a funky table and chairs (egg chairs?!?), oh yeah!
Frances Favela says
It looks fantastic! Be REALLY, REALLY, Proud!
Katherine says
Looks great!! Congrats on getting it done!
Amanda says
Has anyone else noticed that both your mom and bro-friend took over an hour to respond to your text?!
YoungHouseLove says
Ha! Seriously. I just assumed they were both contemplating the perfect response for that long. :)
-John
how2home says
Amazing! Love how you did the stairs so proper too!
Sabrina says
Wow, the deck looks amazing! To my “4 months to narrow down the paint color choices” mind, 10 weeks to build a freaking deck is incredible.
Anne says
Wow, I’m so impressed you had the guts to make the stairs all by yourself! Kudos, John!
Can’t wait to see which wood stain colour you’re gonna do! Have you thought of going dark here, too?
YoungHouseLove says
I think we’re not going to go too dark because to some extent we like the look of the wood now, just maybe a smidge darker and richer looker.
-John
monica says
the deck looks beautiful!
It really is impressive and you guys should be proud of yourselves. it’s projects like this that really makes you stand out from all the other DIY blogs and you deserve any and all success you have!!! well done!
Sarah K says
I thought you were crazy to tackle this project on your own John, but you persevered and it looks AMAZING! I seriously cannot stop scrolling between the before and after pictures. What an improvement over that funny little balcony you had before! I can’t wait until Sherry gets her hands on this space. It’s going to look so great if your new table and chairs! Sarah
Stephanie Haworth says
I’m a new reader and have loved going through your site! You guys are crazy-talented. I just got married in May and have been looking for real inspiration from young marrieds with good eyes for home decor/design. I’ve certainly found it on your site. Thanks for sharing all the hard work you do! I can’t wait to receive your book—I preordered it!
Megan says
Love it! We are going to be tackling a deck and stairs this fall. We’ll have the help of my dad who has done it many times so that’s always nice. I’m just relaxing at the fact that my daughter’s swing set/slide/playhouse is all done and safe her to play up on! http://thebrickbungalow.blogspot.com/2012/08/lilys-play-yard-stairs.html
Sheri says
Wow, John! Well done!
Paula M. says
Woweeeeeee!!!!
Congratulations on an amazing job!!!!
At this point, I bet John would like to take a sleeping bag out there and sleep on the deck under the stars for at least one night, just so he can exult in the pleasure and pride of having created that baby!
I’d be kissing that deck, too (as in the one photo) if I’d made something like that. Just thinking about it makes me tired, whew! :)
Susan (Between Naps on the Porch) says
It looks great, John! Sometimes the more challenging the task, the sweeter the victory! I used Cabot on my deck and it’s held up well. It’s a one coat application. They warn you to NOT use two coats or it will be tacky and never dry. I went with the color Heartwood because it was a nice brown…not red. I know you’ll want to show off that gorgeous deck with the right finish. There are so many choices with clear sealers and semi-transparent stains. I had heard the semi protects it a little better and you don’t have to reseal it as soon as if you used a clear, so that’s what I ultimately went with. Plus, it created a nice transition from the hardwood floors on my porch out to the deck.
I know you’ll do lots of research before you touch it with anything after all your hard work. It looks fabulous! Can’t wait to see how you and Sherry furnish it. Time for fall deck party! :)
LindseyR says
Bravo, Kudos, yahooooooooooo! Awesome job John!!!
Susan (Between Naps on the Porch) says
Not sure if this is helpful…and you don’t need to post this comment, but I just wanted to give you a link to the post where I stained my deck in case you would like to see how Cabot Heartwood looks.
http://betweennapsontheporch.net/12-easy-ways-to-add-instant-curb-appeal-an-outdoor-do-it-yourself-party/
YoungHouseLove says
So pretty!
xo,
s
Tanya says
Such patience and such perseverance has led to such perfection! Very admirable, John!
Tanya.
AUSTRALIA.
Rosemary says
Hi there – for some reason your site is really messed up . The background is lines and lines of the word “SPONSORS”, and seems to be showing some private conversations. FYI
YoungHouseLove says
So sorry! That’s an Iphone or iPad glitch. Wish we could fix it but you have to clear your data/cache/cookies and it’ll clear up. Hope it helps!
xo,
s
Jessi says
Nice job- looks great! I love how your bro-friend was way more excited about it than your mom! haha.
michelle@decorandthedog says
Looks fantastic! Now fingers crossed for some good deck weather!!!
Jan says
You’ve done an amazing job John and should be very proud of yourself.
Heidi P. says
/WOW!!!! aMAAAzing detail work!! Great job John!
Georgia says
Awesomecakes! So impressed. Especially with all those fiddly angles. Even putting crown molding up does my head in. If it were me who built it, I’d be moving my bed out there so ai could admire it even more hours of the day. You will have to smash a bottle of champagne over it to christen it or something…or have an awesome deck party…how many people do you think you can fit on there????
Arli says
It’s done! It’s fantastic! It’s yours to ENJOY! I’m sure you will. Very, very impressed, John. That was a HUGE project, and it turned out fabulous!
Emma says
This is by far the most impressive thing you guys have ever DIY. Congratulations!
Erin says
it looks fantastic!!!!!! You did a great job!! can’t wait to see it all done and furnished!!!! LOL, I spoiled the “reveal” yesterday on FB when I commented on the pic of Clara on what I thought was the “deck.” :o)
YoungHouseLove says
Haha, it did look just like it! Love that restaurant.
xo,
s
Nicole says
Wow, it looks amazing, congratulations! I’m seriously impressed.
Dad says
John was a toddler for my first large project, the still-sturdy deck on his boyhood home. My current habit of unplugging saws each time put down began then to help protect “Baby John.” Adult John was much faster than dad, for whom the deck project is dated “1982-83.” Despite the heat, working with John on this project was a joy. Now, if I can get my tools back…
YoungHouseLove says
Thanks for helping make sure I didn’t cut off any vital body parts back then and again during deck build 2012, Dad. Couldn’t have done it without you.
-John
PS: What tools…? :)
Nancy says
WOW! That is incredible! Congratulations!
I’m really impressed how you did that all
by yourself (more or less). Now, what are
you going to name that baby? ‘Cause if
the couch and the bed and the light, etc
gets a name, after laboring with this guy
he needs a name!
YoungHouseLove says
Haha- I think so! Maybe he needs to be called Dexter. Say it out loud. Sounds right. Haha.
xo,
s
Nancy says
Dexter… :) Perfect. Love it.