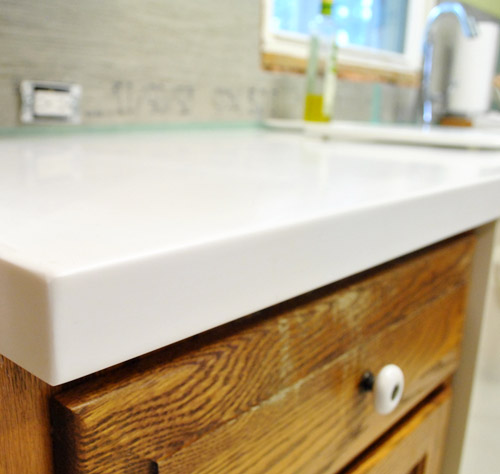
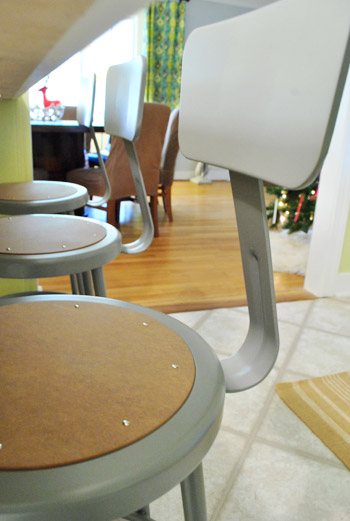
Archive for December, 2011
Puttering Around With Putty
I guess that title should really be “Puttering Around With Putty (aka: Wood Filler) And Sandpaper And A Spackle Knife And Deglosser.” But that was too long. In a nutshell, we prepped all of our cabinets for primer by:
- puttying all of our cabinet frames and drawers and doors
- sanding everything (to smooth the putty and rough things up for primer)
- deglossing everything (to further aid with adhesion)
- laying all doors and drawers out in the sunroom (on lifts) so we’re ready to prime
But that’s not enough detail for chatterbugs like us. So let’s get into the nitty-gritty. First we used Elmer’s ProBond Professional Strength Wood Filler (we asked around for a favorite filler among contractor friends and two mentioned this one) to fill any cracks, old hardware holes, etc. Since our new door and drawer handles will call for two holes instead of one, it was important to hide the old holes with filler so once they’re primed and painted they’ll be completely invisible.

After using a spackle knife to firmly scrape the putty into the holes and cracks to fill them, the holes from the old hardware looked a little something like this:

Then it was sanding time. This is John’s Dexter face (not as good as his impression here):

After carefully puttying and allowing for drying time (we just read the container to see how long to wait), we went to town with the hand sander (using 60 grit paper followed by 200 grit paper) to not only smooth out the parts that were puttied but to rough everything up so primer and paint would stick for the long haul. There are some folks who skip steps like sanding and deglossing but we’re Team Edward Team Super Thorough. Although shortcuts are tempting, we like to go the extra mile in the name of the best adhesion possible for more long-lasting durability (it might take us a day or two more on the front end, but if it gets us years or even decades more on the back end it’s well worth it).

Oh and you can see that the cabinet above is one of the ones that we retrofitted using a pro method (pocket holes with wood glue and a number of heavy duty hidden steel screws) – so these doors are just as durable & sturdy as the rest of the doors in the kitchen. Once we puttied and sanded it the seams were pretty smooth. So we’re still crossing our fingers that primer + paint will add up to undetectable door surgery. Which is always the best kind of door surgery. If not, we’ll buck up and pay for a carpenter to create perfectly matched doors since the half-sunk ones that we have are rare/impossible to find in the custom sizes that we need. We just thought attempting to reuse these solid oak doors was worth a try first (you know we like to use what we have to save money that we can then put towards other things to elevate the room, like new counters/floors/backsplash, etc).

Here’s a photo of another door that was retrofitted:

As you can see, the putty is lighter than the wood tone of the doors, but when you run your hand over the seams they feel nice and flush, which should be the key to a seamless finish. It’s easy to believe that primer and paint will fill gaps and hide flaws, but in our experience they DO NOT! They actually settle into fine lines and dings and cracks and emphasize them. So our big tip to you is before you get near the primer or the paint to get your doors as smooth and seamless looking as possible. Any inconsistencies in color (like the lighter putty) are ok, since primer and paint will cover that. But any inconsistencies in smoothness or dings/cracks won’t likely be hidden by primer & paint, and might even be more noticeable once the wood tones are gone and the door is one solid color.
Once those few retrofitted doors were puttied and sanded while the rest of the doors were just sanded (other than getting a dab of putty to hide the old knob holes) it was time for the liquid deglosser.

We like using Next Liquid Deglosser because it’s low-VOC and biodegradable (and still gets the job done). It removes any sort of oil or grease and strips down some of the shine on things (our doors weren’t too shiny after our rough-everything-up sanding session, but you know we like to be thorough). Especially in a grease-prone room like a kitchen, this step is a good one (the wipe-down also helps remove any sawdust that remains after sanding).

Oh and we also puttied the cabinet frames whenever necessary (like when there were dings, cracks, and screw holes that we wanted to hide). See this screw hole on the edge of the side of our pantry? That’s where another cabinet used to be attached, but since we reconfigured the layout that hole is now exposed, so we filled it and sanded it to make sure it won’t be visible once we prime and paint.

After puttying any areas of the cabinet frames that needed attention, we let them dry and then sanded everything (again to smooth any putty and rough everything up for the best possible adhesion). Then we deglossed everything for even more “adhesion insurance.” Are you sensing a theme? We want that primer and paint to stick for the long haul, goshdarnit. We’ve used this cabinet painting method in our first house’s kitchen, in John’s sister’s house (where it lasted over years until she moved – when it was still going strong), and I also used it to paint the cabinets that we used to make our built-in office desk, so we’re huge fans of how long-lasting & durable things end up being. Even though it’s a pain in the butt to get through since you’re dying to pick up the paint brushes and rollers already. But we’re there! We’re fiiiiiinally there!

Here’s how the kitchen was looking after all those goings-on. Not gorgeous – but lovely because progress is a beautiful thing!

Then it was back into the sunroom with all the doors where we laid them all out for the priming and painting phase.

Oh and see how they’re all sort of popped off the ground a bit? John cut down a bunch of scrap wood pieces that we had in the basement to make little “risers” for them, so we can easily paint the part that faces up AND the sides without worrying about any doors dripping/sticking/sitting in a puddle of primer or paint.

Enough chit-chat, there’s priming and painting to do! We’ll be back with a primer peek later in the week… and once everything is dry and ready to be re-hung we’ll share the full monty reveal with tons of details, photos, and even a video about the full priming & painting process for anyone who wants to tackle this project (hopefully sometime next week, assuming everything is all cured up and dry by then). Exciting stuff. What have you guys been up to? Tell me we weren’t the only ones puttying our pants off (figuratively speaking).
Fab Freebie: Gotta Hand It To You
***This giveaway is no longer accepting entries – see who won below!***
Thanks to random.org, we’ve got a Merry (belated) Christmas prize going out to… Kristin Aune (who made t-shirts for both of her kids, ornaments, buckeyes and has been trying to perfect her fudge pie recipe). Congrats!
Wahoo. Hope you guys all had an awesome holiday weekend (you can see a sliver of ours here). As we mentioned on Friday, we’ll be stopping in with one quick post each day this week (amongst family hosting, feverish book-deadline writing, and priming & painting all of our kitchen cabinets). But we couldn’t wait to share today’s giveaway that we wrangled after seeing so much amazing stuff at our local Handmade Holiday craft fair. So this week’s lucky winner will get:
- An 8×10 letterpress print (any choice of quote & color), a set of blueprint notes (airplane, boat, golfcart, knots, wave, or lighthouse) and a leather blank book from Almanac Industries. These Baltimore-based bookbinders and letterpress gurus bring a wonderful worn and masculine vibe to these printed prizes.
- $50 towards Funnel Cloud Studio on Etsy. Obviously we love her Virginia-themed art, but she also has a bunch of cheerful patterned prints and cheeky illustrations to choose from too.
- A 26-letter ornament set and this green vase from Turnerbots. And we thought our J, S, C and B initial ornaments were cool. Someone’s about to get a whole alphabet full of candy colored ceramics, along with a V-A-S-E.
- $50 towards Zou Zou’s Basement on Etsy. We loved the bunny print that we bought, and this $50 is enough to snag two of her colorful prints.

- PRIZE: Everything mentioned above
- TO ENTER: Comment on this post with the words “HAND IT TO ME” and tell us…
- BONUS QUESTION: … what you’ve made with your own hands recently. Did you bake something for the holidays? Did you give a handmade gift this weekend? Or have you tackled a DIY or homemade art project recently?
- GIVEAWAY CLOSES: Wednesday, December 28th at 8pm EST or at 10,000 entries (whichever comes first)
- NUMBER OF WINNERS: One
- PRIZE SHIPS: The 50 United States (although we do try to wrangle as many international giveaways as possible)
- DISCOUNT: 10% off any item in Turnerbots’ Etsy shop until January 15th, 2012 with the coupon code YOUNGHOUSE.
- USUAL STUFF: One entry per e-mail address is permitted. The winner will be selected using random.org and announced on Thursday as an update to this post. That’s right, come right back here on Thursday for the announcement of our winner. Good luck…
Note: We aren’t paid or perked for hosting these giveaways, we just do ‘em to thank you awesome folks for stopping in. See our Giveaway FAQ page for more info. Pics courtesy of Funnel Cloud Studio, Turnerbots, Almanac Industries and Zou Zou’s Basement.
Happy Holidays!
With family arriving tonight for our first ever Christmas in Richmond, we wanted to be sure we shared our holiday card with you guys first (you know we love ya like family). We couldn’t do this little blog-thang (look at me getting all twangy) without you. And we sincerely appreciate you for dropping in on us.

We shot this earlier in the month with the help of a bunch of ribbon snagged on clearance from Michael’s last Christmas (some of which later ended up on our tree). It’s actually two pictures photoshopped together, since getting Clara and Burger to sit still that close to one another without doing something weird (like synchronized diaper sniffing/tail grabbing) is beyond unrealistic. You can actually see a bunch of outtakes over on Young House Life today. Like this one we like to call “The Peeper.”

We hope everyone has a fun/joy/family/food/relaxation-filled holiday weekend! And although we figure many of you will be busy with miscellaneous chaos over the upcoming week between Christmas and New Year’s, we’ll still be dropping in with a quick post every day from Monday through Friday for ya (and yes – we hope to have some cabinet priming/painting peeks for you guys with a big reveal sometime around the first week of January if all goes well).
We just found out that we have a big book deadline of January 4th too (the entire final manuscript is due- yikes!!!) so at any point if you’re wondering what we’re up to, you can probably count on us to be holding a paint brush, a laptop, a toddler, a chihuahua, or a cookie covered in sprinkles. And maybe a few of those things at once (let’s find out if I can eat a cookie while priming, shall we?). Happy holidays to every last one of ya!
Psst- We announced this weeks giveaway winner, so click here to see if it’s you.


