Updated 2019
With Thanksgiving around the corner, we thought it would be nice to adapt Sherry’s daily gratitude journal habit for a fun holiday craft for the whole family. Rather than keep the things we’re thankful for stuck in our heads or on the page of a journal, what if we put the practice on display during the month of November? Who knows, maybe it will even inspire more gratitude!
Craft Supplies To Create Your Own “Thanks Jar”
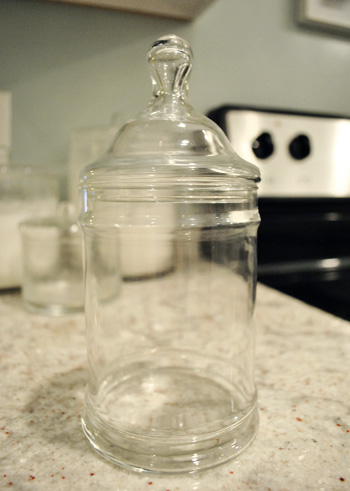
We got this idea after scoring this awesome 99-cent apothecary jar from the thrift store (it was originally $1.99 but we scored it during a 50% off glassware sale). But you can use any glass vessel you choose, even a regular drinking glass or flower vase!
- Small glass jar
- Glass etching cream
- Small paintbrush
- Craft knife
- Printer and printer paper
- Painter’s tape
- Colorful cardstock cut small enough to fit in the jar
Obviously you can also create a Thanksgiving “Thanks Jar” without etching your glass vessel, but we’ve been itching to try a glass etching craft ever since seeing this one on How About Orange.
Step 1: Design & Print Your Stencil
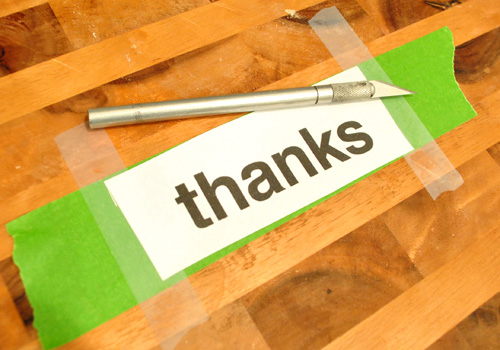
We ever-so-creatively (kidding) decided that we wanted to etch the word “thanks” on the base of our jar. So we used our computer to print it out on paper in a simple, blocky font (Helvetica) that was sized perfectly to our jar. You can create this in any word processing software (even a draft email!) just be sure to keep the design simple and stencil friendly.
Step 2: Tape Your Stencil Over Painter’s Tape
Since we really need to stick our stencil tight to the glass, we first had to transfer the design from paper to painter’s tape. So we taped a thick section of green painter’s tape to a cutting board and then scot taped our “thanks” print out over it. I promise this will make more sense in a moment.
Step 3: Cut Out Your Stencil
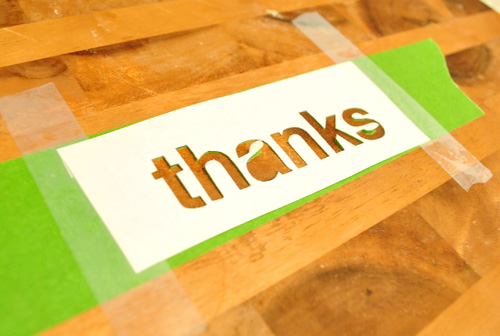
With everything taped down, we used an Exacto knife to cut out our letters one by one. Be sure to go deep enough to cut through the painter’s tape too. We decided not to be picky about preserving the hole in the “a.” But we did crack up when Sherry said “I don’t think we need to save the a-hole.” I know, we’re like fifth graders over here.
Step 4: Apply Your Tape Stencil To Your Glass
With the “stencil” cut, we then disposed of the paper print-out guide and slowly peeled the painter’s tape from the cutting board, being careful not to rip the tape or let it stick to itself. Once it was safely off the cutting board, we stuck it right onto the glass jar. Ta-dah! Tape stencil mission complete.
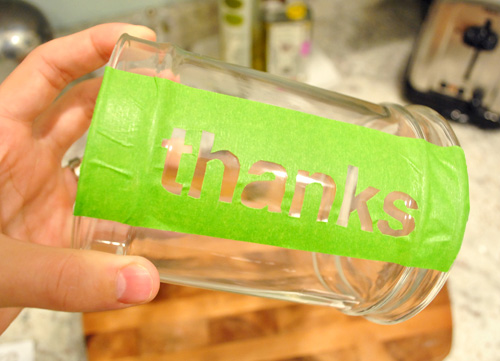
The hump in the “h” got a little wonky, but other than that we were pleasantly surprised by how well our makeshift stencil was holding up. And with a couple more strips of tape on the sides (just to be safe) we were ready to apply the etching cream without having to worry about getting it in the wrong places.
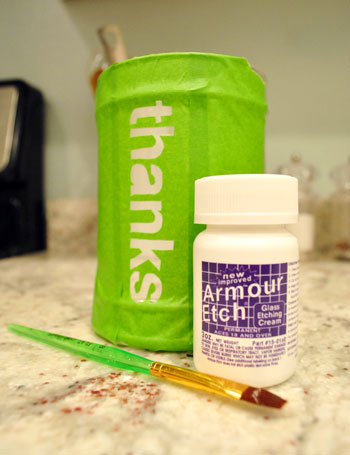
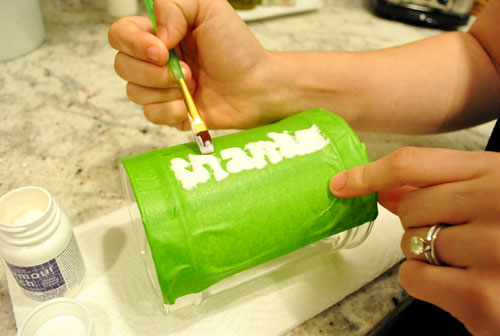
Step 5: Brush On Your Glass Etch Cream
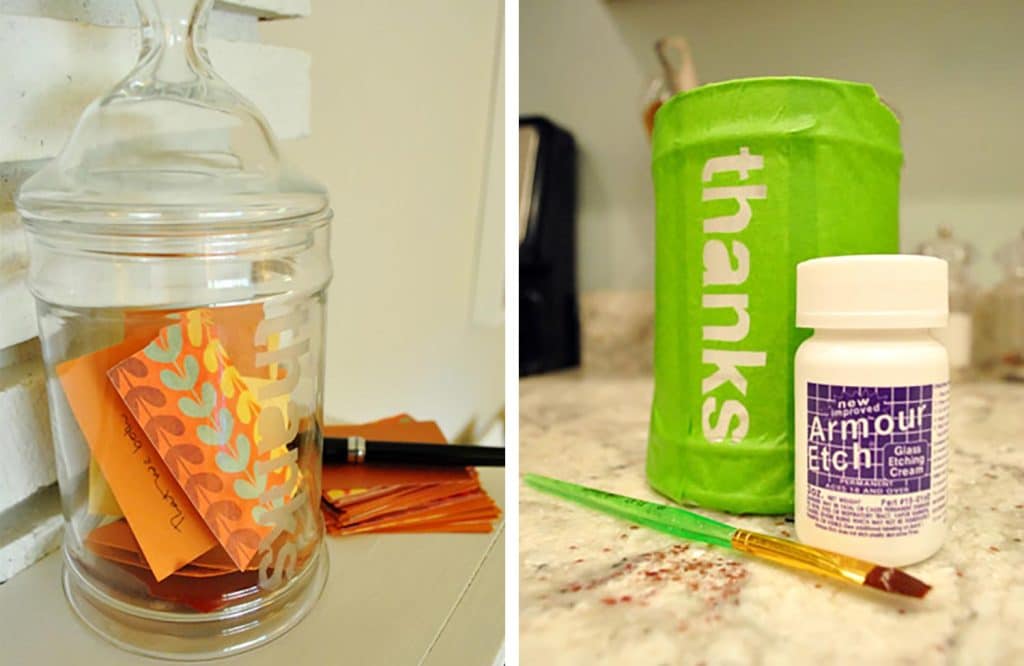
We picked up this Armour Etch cream for $6.50 at Michael’s (thanks to a 50% off coupon) and broke out this tiny paintbrush to apply it over each of the cut-out letters. The painter’s tape does the job of not letting it seep behind the letters.
Step 6: Wait!
The instructions made it unclear how long we should keep the cream on (since that depend son your “stencil” material). But since our tape wasn’t as durable as a vinyl stencil might be, we kept a close eye on the backside of the tape through the glass. We noticed after about 90 seconds that the edges of the tape weren’t looking as crisp as they had been (the etching cream was probably slowly degrading the tape). But the longer you leave it on, the deeper your etch will be.
Step 6: Rinse Off Cream & Remove Stencil
After letting the cream work its magic for about 1.5 minutes, we washed it off in the sink and removed our tape stencil. We had a tiny smidge of bleeding between the “k” and “s” but otherwise it worked out beautifully!
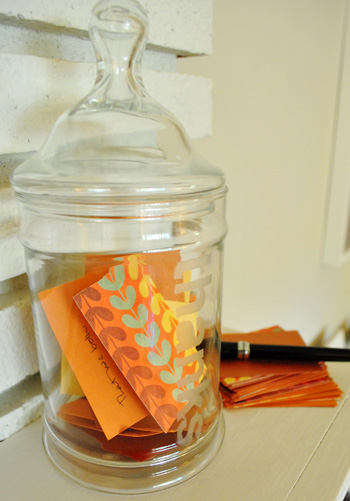
Step 7: Starting Filling Your Jar With Gratitude!
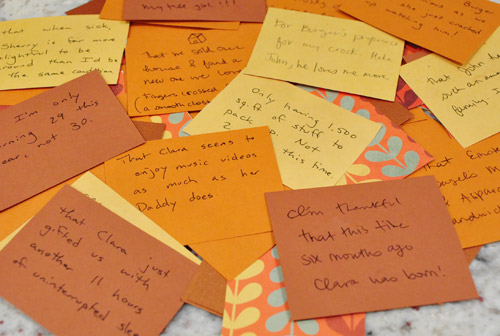
Sherry cut out several small notecard from Fall-colored scrapbooking paper from Michael’s. Our goal is to write one per day all month long so by November 30th we’ll have accumulated sixty notes of gratitude. Oh, and we have a no peeking policy so we won’t know what each other has written until the end of the month! That should be a fun little family reveal.
“Thanks Jar” Update
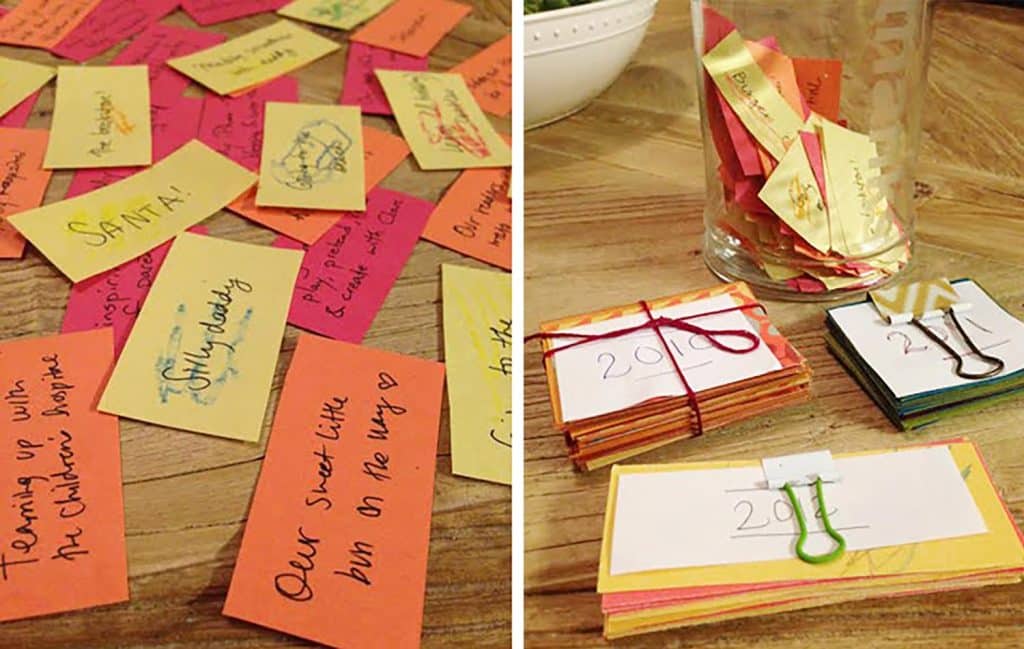
Want to see what we ended up writing? Here’s are the results of our inaugural “Thanks Jar” Thanksgiving tradition.
BONUS: Save Your “Thanks Jar” Notes
We’re also thinking at the end of the month we’ll punch holes in the cards so we can store the collection on a ribbon or a binder ring. That way when we break out our “thanks jar” next year we can relive all of the things that we were grateful for in 2010 and create another collection of things we’re thankful for that year.
Who knows, it could become a great little family tradition with Clara and future kiddo(s) adding their thanks to the pile when they’re older. And we love that we’ll have a yearly account of everything that we’re grateful for. Kind of like a diary, but less high maintenance since we only have to scribble one small thing down each day for a month.
Update: Our Continued Thanksgiving Tradition
We did end up keeping this tradition for several years and even blogged about it several other times, along with other Thanksgiving crafts and traditions we undertook. Check them out here:
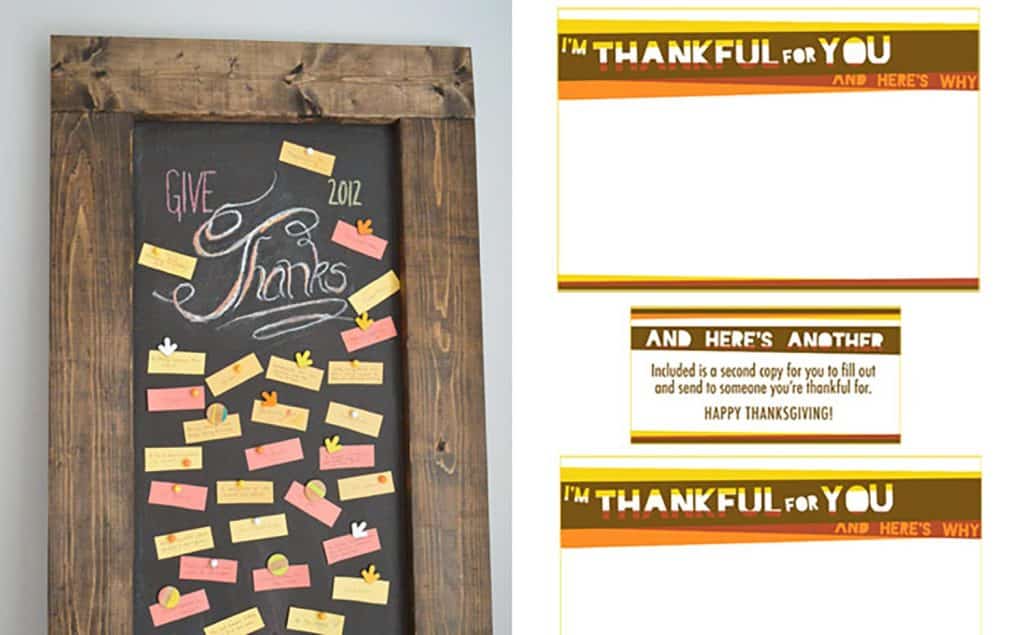
- A free Thanksgiving printable to mail messages of gratitude to friends & family
- Creating A Thanksgiving gratitude chalkboard display
- Our daughter’s first year writing Thanks Jar messages
Do you guys have any fun Thanksgiving traditions? Any glass etching stories of success or horror? An acute attraction to printed scrapbooking paper like my wife? She can’t be the only one who geeks out in the paper aisle.
Update: You can check out all of our favorite holiday decor finds here – many of which are under $15!

Tami says
Ooooooh. The wheels are turning. turning. turning. for other holiday projects that Etching cream could attack.
Leslie says
I love the idea and appreciate the instructions, and of course, the humor! Your blog is a must read for me :)
carolinaheartstrings says
Hello fellow journal addict. I love the jar. What a wonderful idea. I am starting a new journal this year (i have four different ones going now) and this one will be on our annual Thanksgiving trip to the beach. It will detail what we did, what we ate and what everyone said they were thankful for this year. Hop over to our website on November 19 and catch the posts about all my journals. I love IT!
Jess B says
I just gave this a shot recently and plan to pick up some glasses to etch once the holiday clearances start. For my template I used my cricut (www.cricut.com) with the vinyl they sell to make wall art. It worked really well since the vinyl is already sticky, although contact paper would work well in my die-cut machine too. I’m looking forward to a whole set of glasses with a monogram on them!
Julie says
I LOVE etching, and this is a great idea!
I do have one completely off topic question…. You have the Nikon d3000 right? First, do you love it? Secondly, does it record video?
Thank you!
YoungHouseLove says
Hey Julie,
Yes we love it! It’s a DSLR but it doesn’t do video or anything. We use a Flip HD for that. Love that too.
xo,
s
Margreet says
What a nice idea!
Btw, as little kids often like orange food, mine particularly loved mashed pumpkin when they started solids. Perhaps great for a baby thanksgiving dinner party? All the best to you!
Julie says
Solid food advice – not a ton that everyone else hasn’t given, but I LOVED making her food myself! Cost effective, and I knew exactly what was going into that perfect little body!
Kim says
yall are so cheesy! haha love it though
andrea p says
I would love to see a post about your adventures with Clara & solid food! What highchair does she use, how do you prepare her food, are you trying baby-led weaning, etc?? Do tell!
Thank you for another cool post (I have always wanted to try the etching cream)!
Kate says
I love the way your jar came out. I really love glass etching, but I haven’t done it in a while (I got a bottle as a gift and used it to make some gifts, but haven’t been able to find it since then). Maybe I’ll need to go search down a bottle.
A'Dell says
I like how in the post that you mention starting solids there is a big ad for Oscar Mayer Carving Board Meats right below it. HA!
YoungHouseLove says
Haha, maybe it’s the universe telling us to start Clara on meats first. Kidding!
xo,
s
Ashley W says
Love these jars. I have a small army of them collected from thrift stores over the years. On a totally unrelated note, I just saw a few pics of rooms from your house in an issue of the nest (not the one in your sidebar I don’t think) and I got all excited because I recognized them even without the credits. So cool to see your work out there in print!
Rachel says
I too have been wanting to join the glass-etching craze. Thanks for the great idea for a stencil. Much easier than others I have seen.
Kiran says
A simple yet smart way to personalize our belongings! This is super cool :) Thanks for sharing!
bridget b. says
how neat. you guys always come up with the most random, coolest ideas that i immediately want to go and try. thanks again!
KB says
Love it! Any idea if this works on colored glass as well?
YoungHouseLove says
Hey KB,
We would assume it would work just as well with colored glass. Maybe grab a colored glass for 50 cents at Goodwill and use that as a tester? Good luck!
xo,
s
Briel K. says
Cute idea! I laughed at the “a-hole” joke too so I guess I’m right there with you in the fifth grade!
Elizabeth Beattie says
Great minds think alike! I just ordered glass etching cream off of amazon.com (my Michaels didn’t have any – I was shocked) and plan on doing my first glass etching project as soon as it gets here. Love your idea and I might do that one too since I will have the materials.
xx,
Elizabeth
Julie at www.downtimeweblog.com says
I l.o.v.e. this! Great idea! Again!
gina says
Love the jar and etching tutorial but REALLY LOVE the idea of writing down what you are each grateful for during this season!
Kaitlin says
I am a fellow journal keeper too- its good for the soul : )
I love this idea, and I’m implementing it in my house TONIGHT! I even have some experience with the glass etching, its really fun and easy to do. My fiance and I made some really great personalized beer mugs using the same product, I”ll have to upload them onto my blog to share, I’ll be sure to link up in case you wanna check em out.
Thanks for the brilliant inspiration!
stacy says
first of all…thanks for including my placemats in your solid food roundup for clara! i would PAY to see pictures of her eating…she was the best expressions on a normal day, i can’t imagine what her sweet face looks like eating (especially if she really liked/didn’t like what she was chomping on).
secondly, what a GREAT idea about the thankful jar! i don’t have time to etch any glass, but i’m doing this with my boys starting today! love this idea! always need to remind them to count their blessings and be thankful and gracious for all we have.
you guys are the best!
xoxoxoxoxo
Jane says
What a cool idea! I don’t know if you guys have seen this, but I love checking out this thanks blog: http://thxthxthx.com/. The author writes thank you notes to things that happen in her life.
Sarah says
Awesome idea! Where do you come up with these great ideas?? You really inspire me.
YoungHouseLove says
Hey Sarah,
We definitely don’t think up anything no one else hasn’t done a million times! This glass etching project was inspired by the How About Orange site that we linked to in this post, but here’s another post all about how we find inspiration everywhere: https://www.younghouselove.com/2010/10/original-ideas-pish-pos/
xo,
s
Laura says
LOVE LOVE LOVE the idea!!
Christina says
You know what might work is using frosted glass spray pain to give that etching glass look. :)
Katherine says
For solids, we used “baby led weaning,” which involves making and buying absolutely no baby food. We just gave him graspable soft foods to “play with,” and then he started eating stuff when he was ready. Worked out great, and was soooooo much cheaper and easier! Here’s a link to the book about it: http://www.amazon.com/Baby-Led-Weaning-Essential-Introducing-Foods/dp/161519021X/ref=sr_1_1?ie=UTF8&s=books&qid=1289335487&sr=8-1
Good luck! It’s so much fun. :o)
Leslie Ann says
Sherry, where do you find your Michael’s coupons? Do you get them in the newspaper? I live in Richmond, so I can find a local newspaper!
YoungHouseLove says
Hey Leslie Ann,
We always get a 50% off coupon at the register when we buy something that’s usually good for buying one item the following week. So whenever we’re there getting something crafty we always are sure to save the coupon and go back for something else we’ve been wanting that’s half-price (in this case it was etching cream). Hope it helps!
xo,
s
shawna [of styleberryBLOG] says
Congratulations making it 6 months exclusively nursing! I wrote a make-it-simple post on homemade baby food that might help you get started! http://styleberryblog.com/2010/08/02/creating-a-new-normal-efficient-homemade-baby-food/
J'Anns Boutique says
Very nice guys! I did a similar project that I promised to show on my blog.
http://jannsboutique.blogspot.com/
Sarah@StyleandCentsability says
I love Etched glass. I need to pick this up. I am obsessed with the 50% coupons.
I just made this container…
http://styleandcentsability.wordpress.com/2010/11/09/new-use-for-pancake-mix-pitcher-craft-organizer/
Megan says
I was trying to focus on the cuteness of the project but, holy cow, that ring! Beautiful.
JenWoodhouse.com says
You guys are so creative, I love it! What a wonderful way to count your blessings. Happy Thanksgiving, y’all.
PS. I hope to see/finally meet you guys in person tomorrow night for my show!
Susan from Maryland says
You need a self-healing mat for your xacto-cutting projects. You won’t harm anything underneath the cutting. You can get one in the scrapbooking department or even in the quilting department at the fabric store. Great project, BTW.
Heather says
This is such a fantastic idea! Love it!
Roshni says
Love it!! This is probably a great practice to start for kids.. especially before the Christmas present madness. Its probably a good way to remind them (and us) that they (and we) already have plenty to be thankful for!!
Stephanie says
Love it! I especially appreciate the thriftiness of the glass jar find! I met you in Target today…thanks for not treating me like a crazy lady! I felt like I was meeting a celebrity but if I run into you again, I will fake it and act normal! :)
YoungHouseLove says
Haha, so nice to meet you too Stephanie! I felt like I was especially awkward (par for the course for me) so no worries about coming off as anything other than very normal and sweet.
xo,
s
Amanda says
This is too cute. And I love the idea of it all.
Now the question is, what will you do with the rest of the etching cream?
YoungHouseLove says
Hey Amanda,
We’re sure we’ll think of something! And of course we’ll blog about it when we do!
xo,
s
Tara @ Tara Being Tara says
What a fun idea – I especially love that you aren’t looking at them until the end of the month!
Jennifer says
Since you guys are DIY-ers, I am guessing you are planning on making your own baby food!I have done it with two kids now and I think it is so much easier than trying to figure out how many little jars of what I need for the week. And so much fresher! It is really really easy. I just steam the fruits or veggies and then puree them in my food processor. Then I freeze the purees in ice trays, pop them out and store them in freezer bags with the name of the item and the date. Once Clara has had as many single fruits and veggies as you can think of, then you can start mixing them. Blythe (my 9 month old) currently loves a combo of sweet potatoes, carrots, parsnips, and apples. Very seasonal! =) I did not buy anything special for it. Already had the ice trays, steamer basket, and food processor. If you don’t have a food processor, the kid-co food mill is a great choice, but it takes longer because you can only do small batches at a time. The kid-co food mill is great to have around for when Clara gets old enough to eat what you are eating for dinner. You can just put it in the mill and mash it up and voila! Family dinner. I love making baby food. Can you tell??!!
Irina@CanDoGal says
I never knew it was possible to etch glass on your own at home. It’s such a pretty effect, to boot. I’m filing this one in the memory banks for future accessories.
Kathleen says
Such a cute idea, just wondering why you didn’t have the word going horizontal?
YoungHouseLove says
Hey Kathleen,
We just thought it would be easier to read without rotating the glass if we put it on there vertically (otherwise it would have wrapped halfway around the glass or have had to be very small). Hope it helps!
xo,
s
Leslie Ann says
Thank you so much Sherry!!! Knowing I can save big at Micheal’s is a HUGE motivation to get started on making my christmas gifts!
mike @ the lil house that could says
very cool! I had no idea you can accomplish etching via cream!
Allison says
The etching looks awesome! I’m very impressed you were able to the use the exacto knife so steadily. That seems hard to me. And what a sweet idea about giving thanks.
Reading all these comments about making baby food makes me SO excited to make baby food….and we don’t even have (or want) a baby yet!
I’ve also read it’s okay to just give your baby what you’re eating…or whatever of the meal is soft and mushy. Have fun!
Jenn says
I wish I still had my etching paint! Grr! It’s buried somewhere in my mom’s garage back in FL *tear*
But on the bright side — awesome idea for a stencil! It seems almost foolproof!
xoXOxo
Jenn L @ Peas & Crayons
Torey says
We did tons of mirror etching projects in high school and always used contact paper for our stencil (just put over the entire mirror, trace on stencil, cut with exacto knife, and etch).
julie selby says
Hi! My family of 5 have been doing a Thanksgivings tradition I thought I would share. I take pretty color card stock and laminate it. I have a leaf die-cut that I use on the laminated paper. Instant laminated leaves!
Then beginning Nov. 1st, my children tell me or as soon as they are able, write what they are thankful for. We hang the leaves on branches as a centerpiece for the dining room table. I have them from years past on metal rings!
Gina says
Love this! We did something similar yesterday, except we made fall leaves and wrote what we are thankful for on each leaf.
Here are some photos of our “bowl of thanksgiving”
hdstoker says
Love it!! I took a cue from all of your personalized ideas and turned my spooky Halloween tree into a memory tree. Or a “spookemory” tree! Um, something like that. Anyway, I found little recycled tags at the store and tied them onto the branches at difference heights with raffia. Then my hubs and I wrote different little memories or quotes that would make us laugh… like, “trip to Vegas,” or “dacquiri ice” (we discovered on our first date we both loved the same sorbet at Baskin Robbins.) Thanks for the inspiration!