Updated 2019
With Thanksgiving around the corner, we thought it would be nice to adapt Sherry’s daily gratitude journal habit for a fun holiday craft for the whole family. Rather than keep the things we’re thankful for stuck in our heads or on the page of a journal, what if we put the practice on display during the month of November? Who knows, maybe it will even inspire more gratitude!
Craft Supplies To Create Your Own “Thanks Jar”
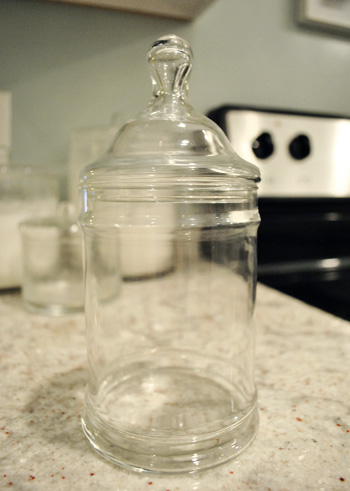
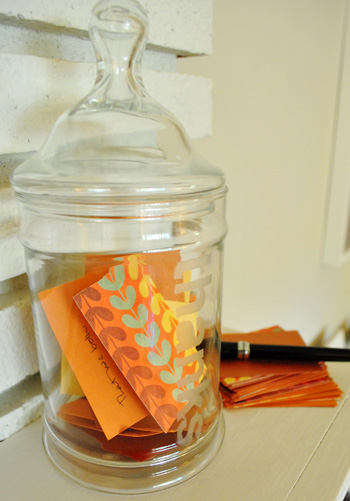
We got this idea after scoring this awesome 99-cent apothecary jar from the thrift store (it was originally $1.99 but we scored it during a 50% off glassware sale). But you can use any glass vessel you choose, even a regular drinking glass or flower vase!
- Small glass jar
- Glass etching cream
- Small paintbrush
- Craft knife
- Printer and printer paper
- Painter’s tape
- Colorful cardstock cut small enough to fit in the jar
Obviously you can also create a Thanksgiving “Thanks Jar” without etching your glass vessel, but we’ve been itching to try a glass etching craft ever since seeing this one on How About Orange.
Step 1: Design & Print Your Stencil
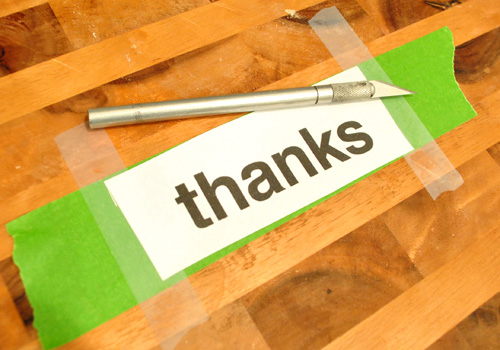
We ever-so-creatively (kidding) decided that we wanted to etch the word “thanks” on the base of our jar. So we used our computer to print it out on paper in a simple, blocky font (Helvetica) that was sized perfectly to our jar. You can create this in any word processing software (even a draft email!) just be sure to keep the design simple and stencil friendly.
Step 2: Tape Your Stencil Over Painter’s Tape
Since we really need to stick our stencil tight to the glass, we first had to transfer the design from paper to painter’s tape. So we taped a thick section of green painter’s tape to a cutting board and then scot taped our “thanks” print out over it. I promise this will make more sense in a moment.
Step 3: Cut Out Your Stencil
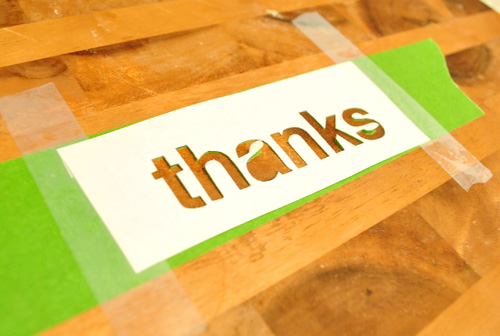
With everything taped down, we used an Exacto knife to cut out our letters one by one. Be sure to go deep enough to cut through the painter’s tape too. We decided not to be picky about preserving the hole in the “a.” But we did crack up when Sherry said “I don’t think we need to save the a-hole.” I know, we’re like fifth graders over here.
Step 4: Apply Your Tape Stencil To Your Glass
With the “stencil” cut, we then disposed of the paper print-out guide and slowly peeled the painter’s tape from the cutting board, being careful not to rip the tape or let it stick to itself. Once it was safely off the cutting board, we stuck it right onto the glass jar. Ta-dah! Tape stencil mission complete.
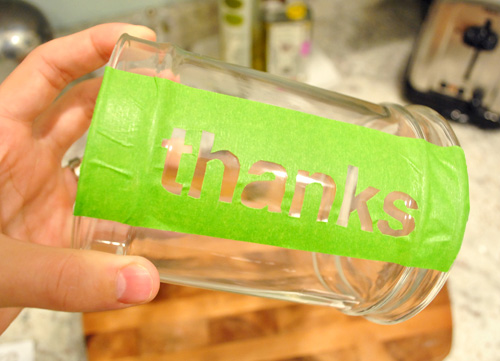
The hump in the “h” got a little wonky, but other than that we were pleasantly surprised by how well our makeshift stencil was holding up. And with a couple more strips of tape on the sides (just to be safe) we were ready to apply the etching cream without having to worry about getting it in the wrong places.
Step 5: Brush On Your Glass Etch Cream
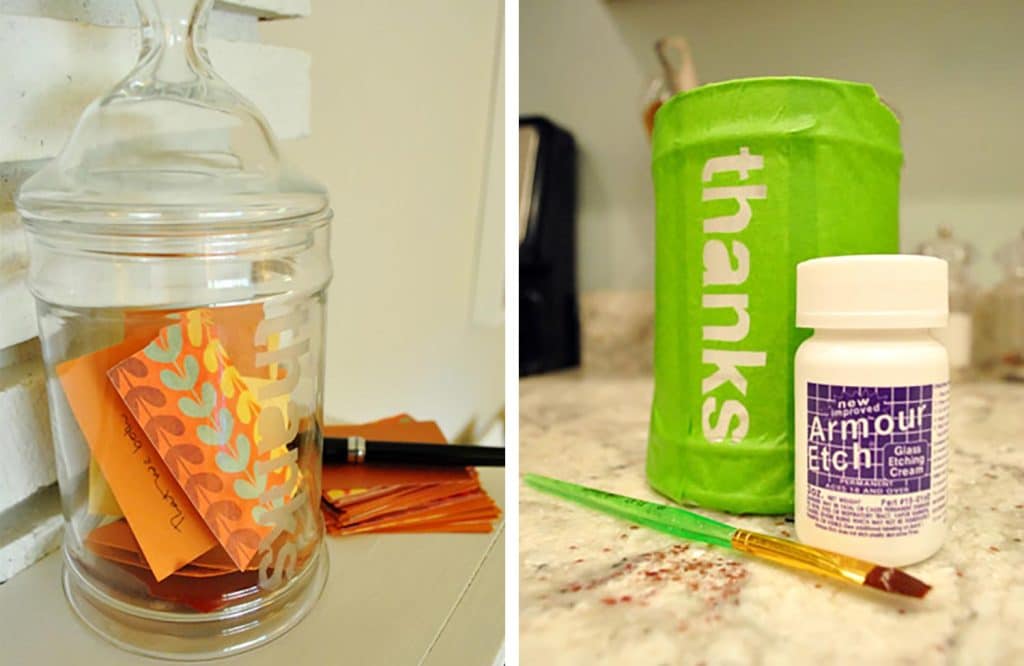
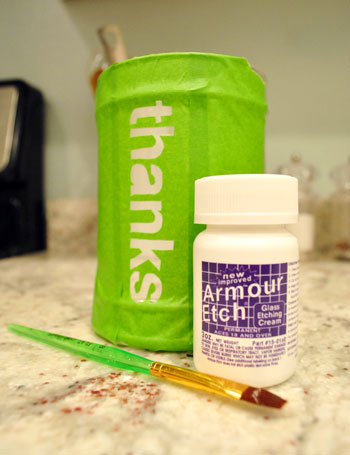
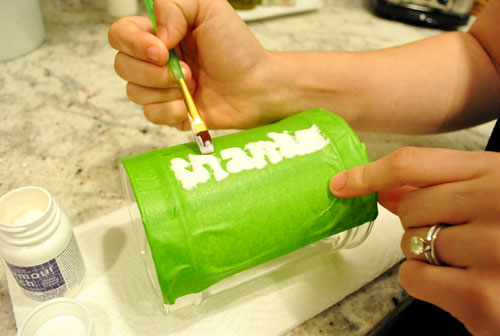
We picked up this Armour Etch cream for $6.50 at Michael’s (thanks to a 50% off coupon) and broke out this tiny paintbrush to apply it over each of the cut-out letters. The painter’s tape does the job of not letting it seep behind the letters.
Step 6: Wait!
The instructions made it unclear how long we should keep the cream on (since that depend son your “stencil” material). But since our tape wasn’t as durable as a vinyl stencil might be, we kept a close eye on the backside of the tape through the glass. We noticed after about 90 seconds that the edges of the tape weren’t looking as crisp as they had been (the etching cream was probably slowly degrading the tape). But the longer you leave it on, the deeper your etch will be.
Step 6: Rinse Off Cream & Remove Stencil
After letting the cream work its magic for about 1.5 minutes, we washed it off in the sink and removed our tape stencil. We had a tiny smidge of bleeding between the “k” and “s” but otherwise it worked out beautifully!
Step 7: Starting Filling Your Jar With Gratitude!
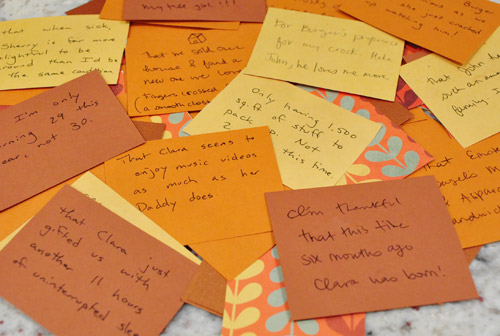
Sherry cut out several small notecard from Fall-colored scrapbooking paper from Michael’s. Our goal is to write one per day all month long so by November 30th we’ll have accumulated sixty notes of gratitude. Oh, and we have a no peeking policy so we won’t know what each other has written until the end of the month! That should be a fun little family reveal.
“Thanks Jar” Update
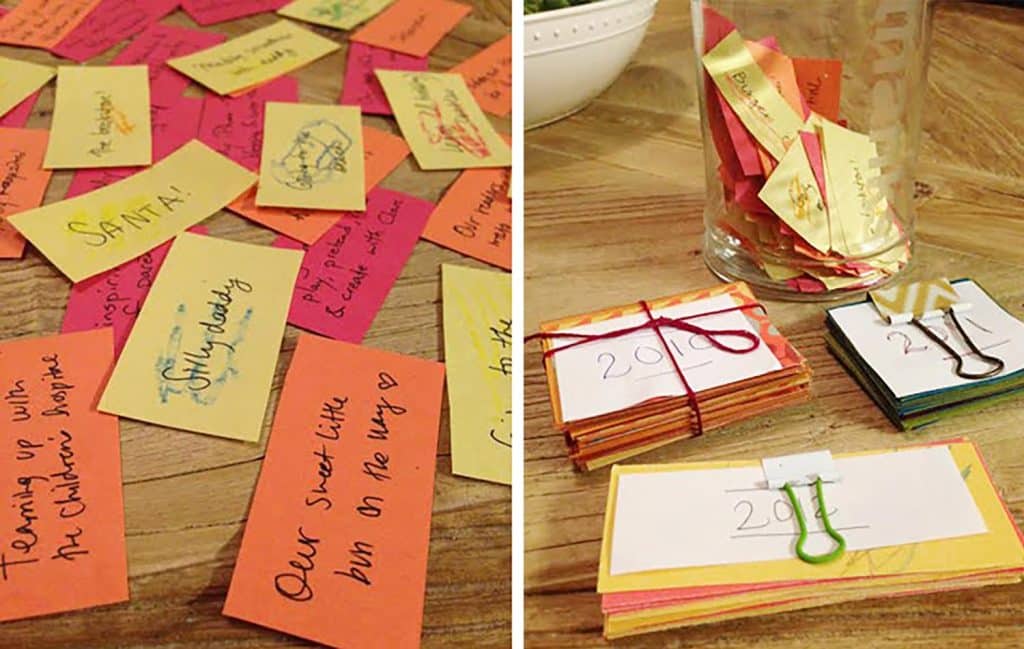
Want to see what we ended up writing? Here’s are the results of our inaugural “Thanks Jar” Thanksgiving tradition.
BONUS: Save Your “Thanks Jar” Notes
We’re also thinking at the end of the month we’ll punch holes in the cards so we can store the collection on a ribbon or a binder ring. That way when we break out our “thanks jar” next year we can relive all of the things that we were grateful for in 2010 and create another collection of things we’re thankful for that year.
Who knows, it could become a great little family tradition with Clara and future kiddo(s) adding their thanks to the pile when they’re older. And we love that we’ll have a yearly account of everything that we’re grateful for. Kind of like a diary, but less high maintenance since we only have to scribble one small thing down each day for a month.
Update: Our Continued Thanksgiving Tradition
We did end up keeping this tradition for several years and even blogged about it several other times, along with other Thanksgiving crafts and traditions we undertook. Check them out here:
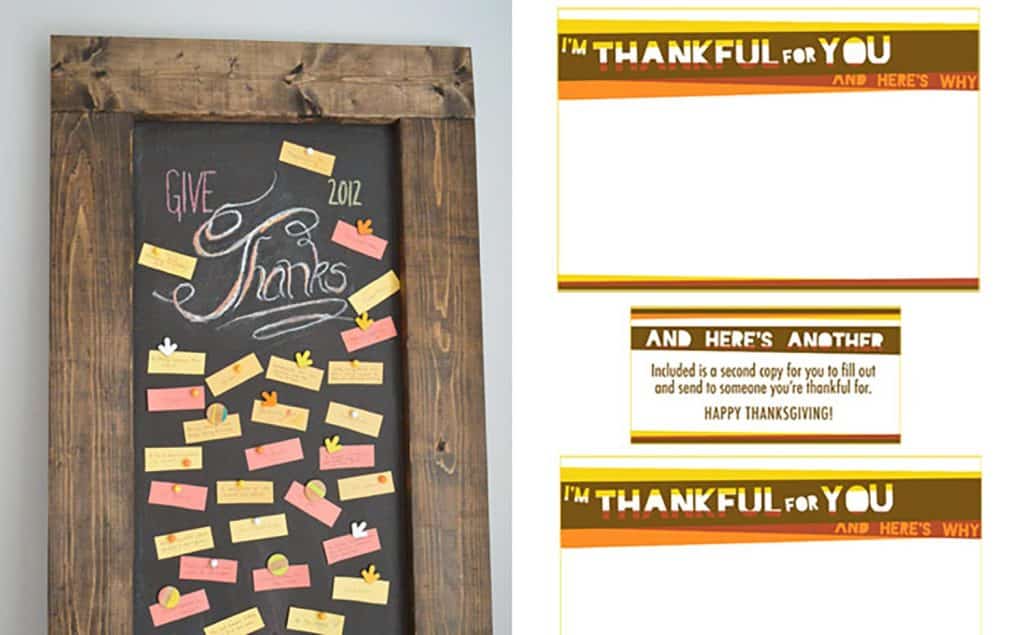
- A free Thanksgiving printable to mail messages of gratitude to friends & family
- Creating A Thanksgiving gratitude chalkboard display
- Our daughter’s first year writing Thanks Jar messages
Do you guys have any fun Thanksgiving traditions? Any glass etching stories of success or horror? An acute attraction to printed scrapbooking paper like my wife? She can’t be the only one who geeks out in the paper aisle.
Update: You can check out all of our favorite holiday decor finds here – many of which are under $15!

Alycia says
What a great idea! Even to make this into a year long project, to write down little notes throughout the year. A nice way to reflect. Thanks for sharing that idea :)
Ashley @ sunnysideshlee.com says
Cute idea!
Amanda @ Our Humble A{Bowe}d says
What a cool idea! I have been wanting to use the etching cream for a while now, too. Thanks for yet another great DIY project I’ll have to do :-)
http://ourhumbleabowed.wordpress.com/
Babs says
Ahhh! What a great idea to use tape! I’ve been wanting to get into etching (I’ve been collecting glass jars and votives) but haven’t gotten out to get sticky transfer paper. This is perfect!
Mandy says
Never knew etching was that easy! Looks good guys :)
Hayley says
Great idea! I’m going to do this with washing powder and cereal jars so we all know what goes where.
Karla @ {TheClassyWoman} says
I’ve done a few glass etching projects. I LOVE your thanks jar and it’s a great idea. I have the exact same glass apothecary jar in my bathroom. It has a small starfish inside it.
Here is the last glass etching project I did, It cost me nothing since I had all of the supplies on hand. It’s a set of dish and hand soap bottles (the handsoap bottle has since been completed):
http://theclassywoman.blogspot.com/2009/09/elegant-glass-etched-dish-soap-bottle.html
Jen says
I love that idea! If only Thanksgiving here in Canada hadn’t already passed us by! I would love to try the glass etching, though!
Cait @ Hernando House says
Love the jar, you two!
Oh, and I geek out in the paper aisle, too. Part of why we have our flat files, haha.
Liz says
Its official…I’m in love with you (and Sherry!)…you guys are the best.
p.s. will you adopt me?…and my two kids…and husband…we can just all live together in this amazing new house of creativity :)
Kayla says
You guys always have great (cheap) ideas for fun projects, but I would never have thought this would be so easy! Thanks so much, now you have me desperately searching for anything in my home that I can add a phrase or design to!!!! You guys rock!
Elizabeth says
Amazing! I totally want to etch something now.
Rachel @ The Avid Appetite says
Absolutely love this! I’m keeping a list in my notebook of one thing that I’m thankful for or plain old make me smile for each day of November. It’s such a mood lifter to break this out when I’m feeling a bit down!
liz says
fun post! i have to say, i cracked up at the a-hole comment… totally made my morning. great idea as a fun reminder for daily thanks.
p.s. maybe this is weird, but have you two seen the commercials for the hp printer where the baby zooms around in a play seat (to show that you can print pictures at a distance from your printer)? for some reason, that baby looks like clara to me – are you dabbling in baby modeling gigs now, too!? :)
YoungHouseLove says
We agree! We think it looks just like her and have heard that from others too. Probably because she makes the same hysterical expressions!
xo,
s
Nichole@40daysof says
I love your jar, but it’s not something I would naturally do. Maybe that means I should do it?
I was once forced to sing a strange turkey song in a round at someone else’s Thanksgiving. I have yet to come up with a similar torture for my guests. But I have time. ;)
http://40daysof.wordpress.com/2010/11/08/awkward/
Katie says
I absolutely love this idea! Are you sharing your gratitudes with each other when you put them in, or will they be a surprise when you empty the jar later?
Random question alert: When you decided the blog was big enough for one person to work on it full-time, how did you decide it would be Sherry?
YoungHouseLove says
Hey Katie,
We are trying to keep the gratitudes secret until the end of the month when we empty it – though we have to admit we’ve spotted a few of them already when taking the photos for this post. Oops!
Oh, and to your other question. Sherry became the blog’s first full-time employee because she was already working from home as a freelance copywriter, so it was a natural transition for her to phase out some of her client work and focus more time on the blog, rather than me having to quit my office job cold turkey.
-John
Patti says
Can I just say I love you guys? I’m grateful for you!
On Thanksgiving we go around the table and everyone says what they’re thankful for…always lots of laughs and sometimes a few tears. Oh and yes, I’m a stationary/paper geek! My favorite store is Papyrus.
liz @ bon temps beignet says
This is so cool… and cheap! Love it!
I used a similar stencil technique for a chevron pattern…
http://bontempsbeignet.blogspot.com/2010/08/quatrefoiled-plans.html
Brigid says
I totally agree about the HP printer commercial – I think of Clara every time I see it! Too funny. It’s definitely the expressions :)
I can’t wait to try this etching cream – this is a good way to make personalized gifts for the holidays/birthdays too!
Elizabeth says
I didn’t know glass etching could be so easy! Thanks for sharing.
Oh, and I must say that I cracked up when I read the “a-hole” line. I’m such a kid at heart. :)
bungalowbliss says
What a fabulous idea! The two of you never cease to amaze! :)
Zerique says
I love love love this!!!! I cant wait to try this at home!
Shaye says
I love the jar idea. Several years ago, I bought clear glass Christmas ornaments for my nieces and nephews and personalized them using contact paper and the glass etching stuff. The kids loved them, and it was cheap! The contact paper held up really well, and was still pretty easy to exacto–just FYI.
laura says
love this idea! i think i may have to copy you on this one and start a family “thanks” jar too!
Melody says
very cute idea!
Baby feeding advice…make your own! I have done it with both of my boys and will with my 3rd as well. It is so easy and SO much cheaper! I make my own until they are ready for 3rd foods and I usually buy those. This is the kit I bought when my first child was born…great buy!
http://freshbaby.com/buy_our_products/startkit.cfm
you really only need the cookbook and trays though..
Erin says
Such a simple, lovely idea. Seems like, in addition to being crazy talented, you guys are also super nice people.
Maggie Rose says
Eddie Ross had a tutorial for etching a mirror (with a silhouette!) ages ago and I’ve been wanting to try it. I think he did use vinyl for his cut-out so that might help with the bleeding next time you tackle this. And the sentiment of a jar full of gratitude is so sweet.
Jillian says
Would using cardboard instead of the cutting board work too? Or is it just a matter of being extra careful?
YoungHouseLove says
Hey Jillian,
Oh yes, any surface that you think you could remove the tape from without ripping the tape or having it stick permanently to it should work. So even a plastic stray or melamine plate should work (with cardboard just be careful it doesn’t stick to the tape instead of cleanly peeling off).
xo,
s
justjillian says
what a great idea, super cute!!!
jillian xoxo
http://just-jillian.blogspot.com
brandt @ New House on the Blog says
This is really a lot simpler than I thought. My wife has done this on a few of our Casserole dishes (etched our last name on the bottom), and it’s really nice and easy to find it when we go to a potluck, but this is definitely something I’ll pass on to her for other things in the house.
Also, Clara isn’t the HP girl. It’s her doppelganger.
http://en.wikipedia.org/wiki/Doppelg%C3%A4nger
robin says
i love this idea. it is such a perfect way to teach children (and adults) why thanksgiving is such a wonderful experience. also, as a former 1st grade teacher, i think it’s a fun way to sneak in some writing for young kids. i think i’m gonna “borrow” this idea for my 5 year old daughter.
to add to melody’s advice about making your own food. i did the same, using the fresh baby cookbook but the trays aren’t necessary if you have extra breast milk bags. fill the bags with food and freeze flat – they take up less room in the freezer. i always had a surplus of those bags and a limited amount of cupboard space to store those trays.
Kristen says
This is such a cute idea! We etched glasses for a friend’s birthday gift once. I’ve been wanting to try it again and this may just be the project to get my booty in gear!
Mandy says
I use glass etching to make personalized Christmas gifts last year on the cheeeeap. I bought super inexpensive glass platters and mugs at WalMart and Old Tyme Pottery, then for families put a Christmas stencil on platter or kids their initial on a mug. They turned out really well. I used contact paper and exacto knife to make my own stencil and reused it, worked pretty well. After awhile though the glass etch gave me a headache (I did about 20 pieces total), so I would recommend using in well-ventilated area and not around kiddos.
Lori H says
What a great idea! I am always looking for more thrift stores…which Sal Army shop was this?
YoungHouseLove says
Hey Lori,
It was the one on Hermitage near the SPCA. We always hit up that one and Diversity Thrift while we’re there. Love that place too!
xo,
s
Christy Grubbs says
Another way to ‘etch’ anything from stainless steel to glass is to use frosted spray paint. You can use a stencil and spray the ‘frost’ spray paint to get the same etched effect.
Lili says
Lol about the a-hole. Me and my husband are the same way… never fail to laugh at a dumb joke, or potty humor. On the subject, our kid came home with a joke collection they made at school, and we are still cracking up over this:
What do you call a fish with no eyes?…..
A fsh.
Hahaha!!!
(Sorry, lol, had to share it with someone).
Beth @ bethcooks says
I love this idea. I’m starting one too!
Chicago Cuisine Critique says
This is adorable! What a great idea. It didn’t seem too difficult to make either. Thanks for sharing. :)
Jen says
So much inspiration here, I really adore this project!
Thanks as always!
xoxo,
Jen
Rachael Ensom says
Love this idea! Im going to go to Michaels as soon as I can and try this! I’ve been itching to make a new project and now my mind is spinning with ideas to do with this!
Dottie says
LOVE glass etching! Made this glass for my Dad, last Christmas..maybe a set of Clara for the Grands? First pic is the one I used, made into shadows on photoshop and taped to the inside of the galss with contach paper outside. Second pic is finished project.
http://www.facebook.com/album.php?aid=2003880&id=1044113127#!/photo.php?fbid=1265385788456&set=a.1018561057992.2003880.1044113127
http://www.facebook.com/album.php?aid=2003880&id=1044113127#!/photo.php?fbid=1265386028462&set=a.1018561057992.2003880.1044113127&pid=30820573&id=1044113127
Courtney says
All the moms I know that were already on number two (or three!) advised us to skip the purees completely. Everyone has said their puree fed kiddos are SUPER picky eaters, and their table-food-from-the-start sibling (usually child #2, once the parents chill out a little) will eat absolutely anything. We did a little research, and after our pediatrician literally told us purees are a gimmick we were sold. So far we’re having great luck! Baby boy will eat everything, and now that he’s gotten the pincer grip down he is a one man show! Plus it’s soooo much easier and cheaper for baby to eat the same dinner as Mom and Dad (and gave us a great incentive to always eat healthy home-cooked meals!). Good luck!
Kate Burdick says
Wow!! Super Super love the idea! Can’t wait to try it!!!
Jessica says
Glass etching always amazes me–even more now that I’ve done it a few times myself–it’s such a classy, high-impact look.
A few weeks ago, I sprayed my office doors for privacy (I wanted to be able to remove it, so I didn’t use permanent stuff). For the words, though, I went with a vinyl company that would use my font because I could not see cutting out around each letter that meticulously. I’m really impressed with the way you tackled this, and am filing your approach away for next time.
Jenn from Much to My Delight says
You guys are so darn clever! I love the idea of keeping a gratitude jar around, and the fact that you made one look so stylish while spending so little is pretty inspiring. You guys rule.
Jennifer says
We have a large apothecary jar that we etched with the word “cards” and we put all the cards we get into it. I used the same etching stuff too. For the letters, I used the negative space from an old sheet of letter stickers (American Crafts makes good ones).
We also etched onto a smaller jar with a lid, like yours here, but I used the actual letter stickers, and just used painters tape to create a border around the word. That one says “Bermuda” and we put in some pink sand, some shells/rocks, and other memoribilia from a trip.
Ever since that ER visit with an X-acto knife sticking out of my hand….I steer clear from them!
Looks great.
katie says
When I was growing up, we had a Thanksgiving Tree. Every day for the month of November, we would write something we were thankful for on a colorful leaf, punch a hole in the top and hang it on a branch with yarn. It was such a fun family tradition because we would choose the perfect “tree” (branch), help cut out the leaves and yarn, and string them on the tree. On Thanksgiving day, we set our table with a leaf for each guest as a place card and they could write something they were thankful for and hang it on our tree. Any guests who came to our home during the month could make a leaf as well. As an elementary school teacher, I have been able to continue this tradition with my students!
Gina at Temporary Nest says
I could spend hours in the paper isle!! I love this idea too. I admit that sometimes, I focus on how “bad” my day was and forget to shift the focus on the good things in life. I think I might need to do this project by myself. Thanks for the inspiration as usual!
Alicia says
I know this is from the babycenter post… BUT the cute eco-friendly bamboo plates you found are not like the reusable kind. They are disposable. I bought them for my daughter at http://www.oompa.com they have a good selection of eco-friendly baby gear and it didn’t really specify that when ordered. I was really disapointed when I got them but I should have figured that out based on the price!
Elisa says
“An acute attraction to printed scrapbooking paper like my wife?”
OOH, ME ME ME!! Seriously just finding pretty paper makes me happy. I have oodles of gorgeous scrapbook paper at home that I haven’t even done anything with yet. I am going to use it to make cute little festive garland.
I am also in love with pages from old books. Have you been in West Elm lately?!! It was like I died and went to heaven… Recycled Christmas! I never wanted to leave the store!! You guys would LOVE it!