Storage is useful in any closet, but it’s especially important in small ones like our laundry closet. That’s why we built some suuuuuuper simple DIY closet shelves as soon as we moved in. It’s an easy project that anyone can tackle! They require very few materials, take only a few hours, and can be customized to fit your closet and storage needs.
And as a bonus, we’ll even show you how to build a laundry counter that matches your shelves. It’s even removable so you can easily access your washer and dryer when they need servicing.
Our shelves have been going strong for nearly 4 years now and they look & function just as well as the day we installed them.
Steps For Building DIY Closet Shelves
The process for adding these DIY shelves is very straightforward. It consists of a plywood or MDF top resting on wood support pieces secured to the wall in 3 places (along both sides and the back). It’s a system we’ve used over and over again, like in our DIY pantry shelving and built-in bookcases, because it’s easy and the result is super strong!
We’ll go into each step in detail, but here’s a quick overview of what you’ll be doing:
- Step 1: Measure & Mark Your Closet
- Step 2: Install Shelf Supports
- Step 3: Add Shelf Tops
- Step 4: Add Face Piece
- Step 5: Add Cross Support (Optional)
- Step 6: Stain, Seal, or Paint.
It’s really that simple! Plus, the final result is super sturdy.
Materials & Tools Needed
To build these closet shelves you’ll need two types of wood (1×2″ pieces and 3/4″ plywood) plus some basic DIY tools and fasteners.
- 1×2″ pine for shelf supports (or pre-primed wood if you plan to paint)
- 3/4″ plywood for shelf tops (or MDF if you plan to paint)
- Miter saw
- Circular saw
- Stud finder
- Long level
- Measuring tape
- Nail gun
- Electric drill
- Cabinet screws
- Wood glue
- Sealant, stain, or primer/paint
- Brush or rag to apply
But before you go shopping, make sure to complete the first couple of steps below!
Closet Shelf Ideas
We’ve implemented A LOT of different shelf solutions over the years, so the first step is evaluating your needs and your space to determine the best solution. So let’s show you some of our previous laundry storage solutions to show you a range of ideas.
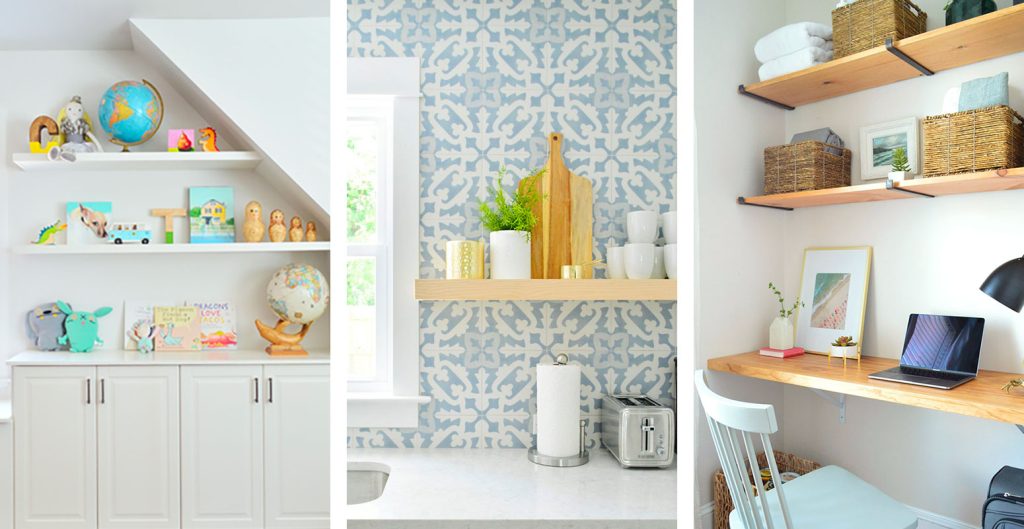
Sometimes you’ve got a blank space to work with, like in our beach house mudroom. There we added some decorative floating shelves using heavy-duty brackets. The Ikea cabinet (a PAX closet) we added next to the washer offered concealed storage and even hid the water heater!
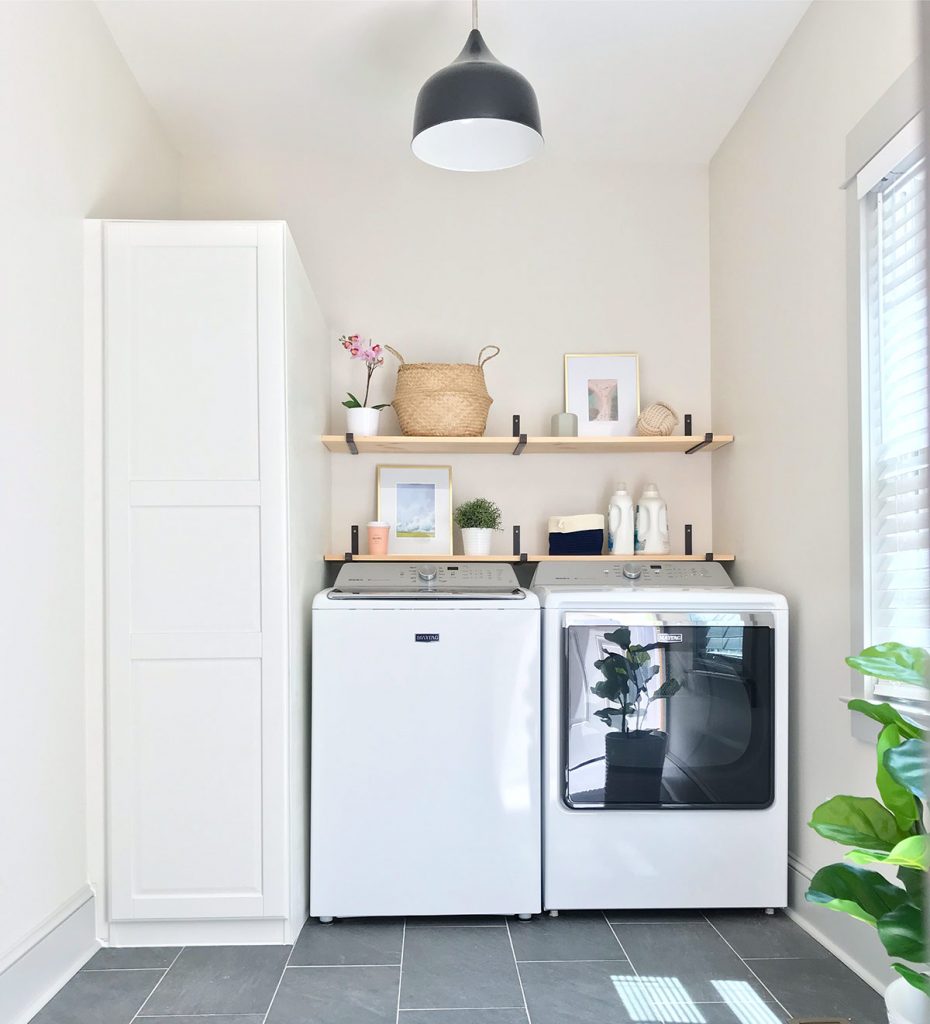
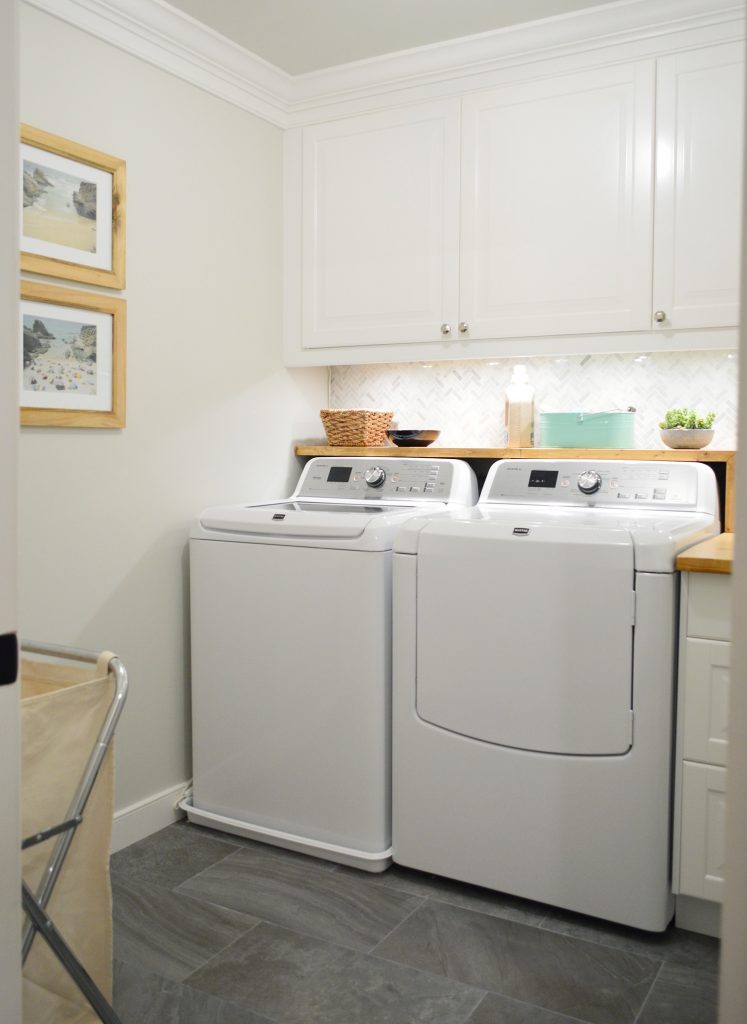
For our last home’s big laundry room makeover, we installed upper cabinets for concealed storage. But we still created a single shelf behind the washer & dryer that cleverly connected to the butcher block counter nearby.
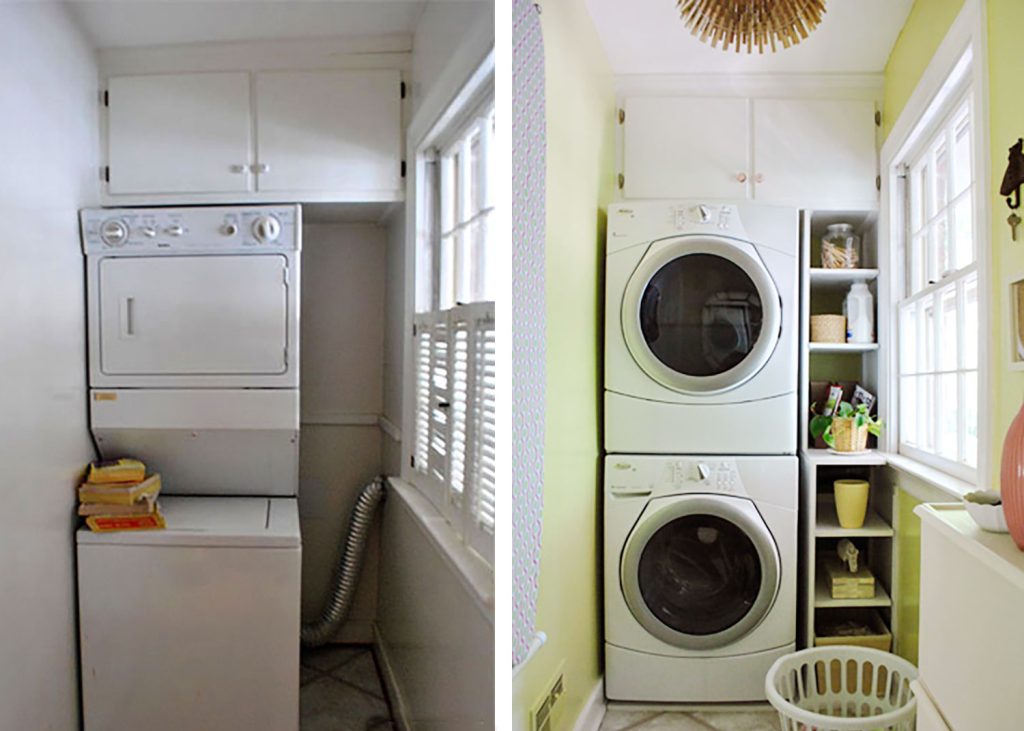
And in the home before that, we built some skinny shelves next to our stacked washer & dryer. The space was narrow, but we didn’t want it to go to waste!
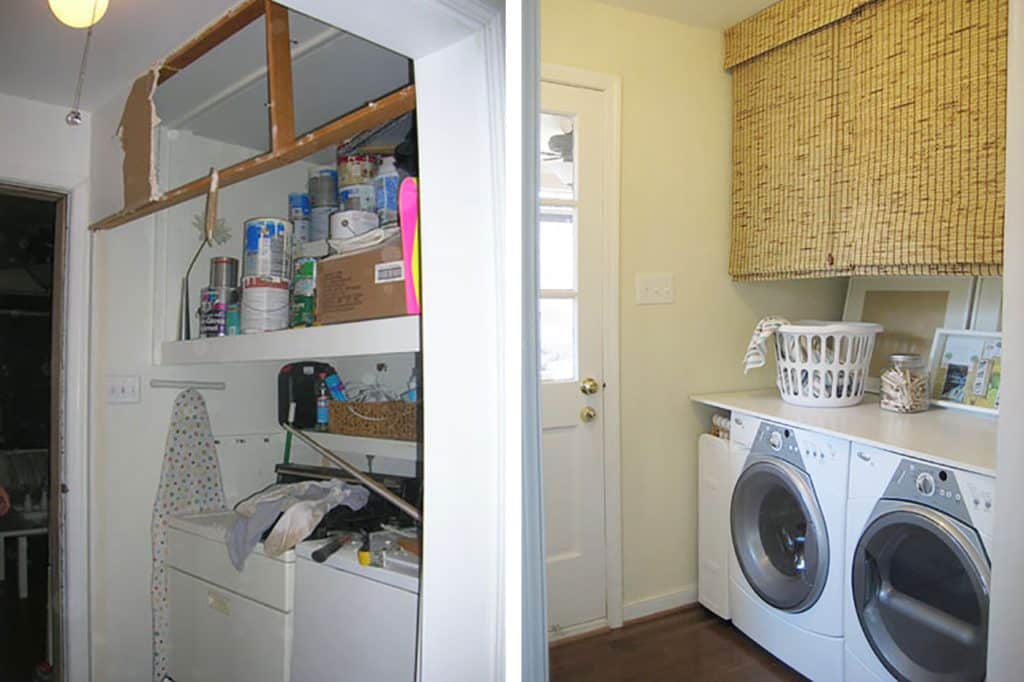
Lastly, in our first home, we busted out the ugly bifold doors to open up the cramped hallway by our back door. That exposed the existing shelving above our laundry appliances, so we used bamboo blinds to conceal all of the storage. It was unconventional, but it worked!
And beyond just laundry rooms, we’ve done dozens of other DIY shelf projects. So if you need more ideas, we’ve rounded up 17 of our best DIY shelving ideas all in one spot, including the laundry shelves in this post.
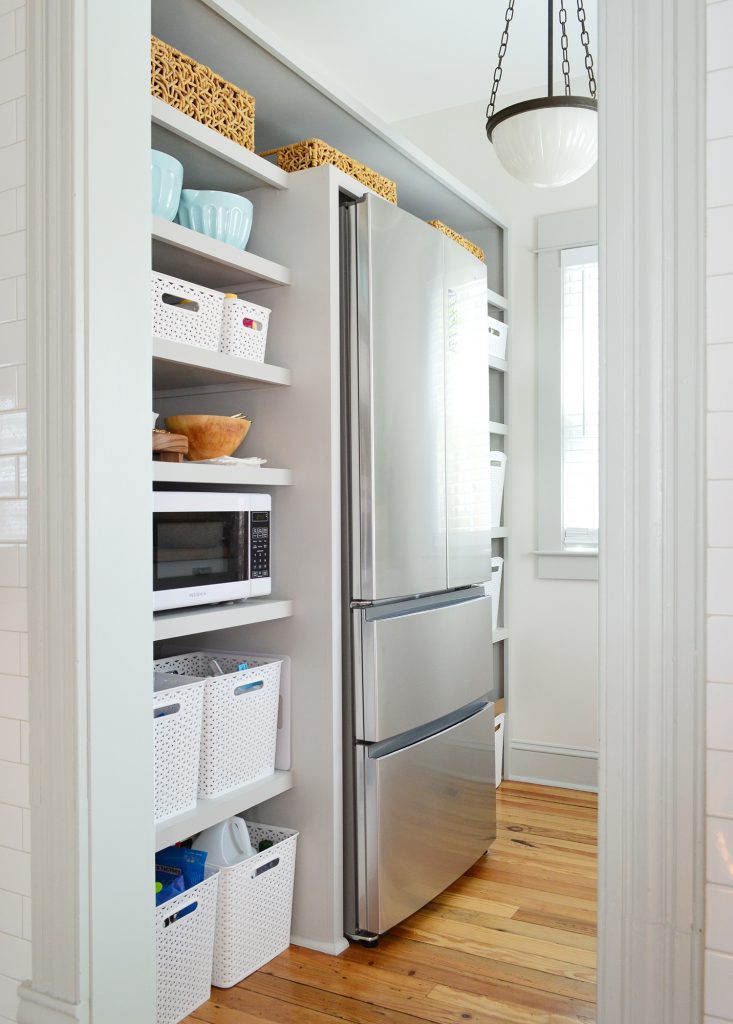
In particular, another great DIY closet shelving solution is the custom pantry we built for our beach house. This is a straightforward system that can would be great for building shoes shelving, cubbies for folded sweaters and pants, and even large boxes with a bar for hanging clothes.
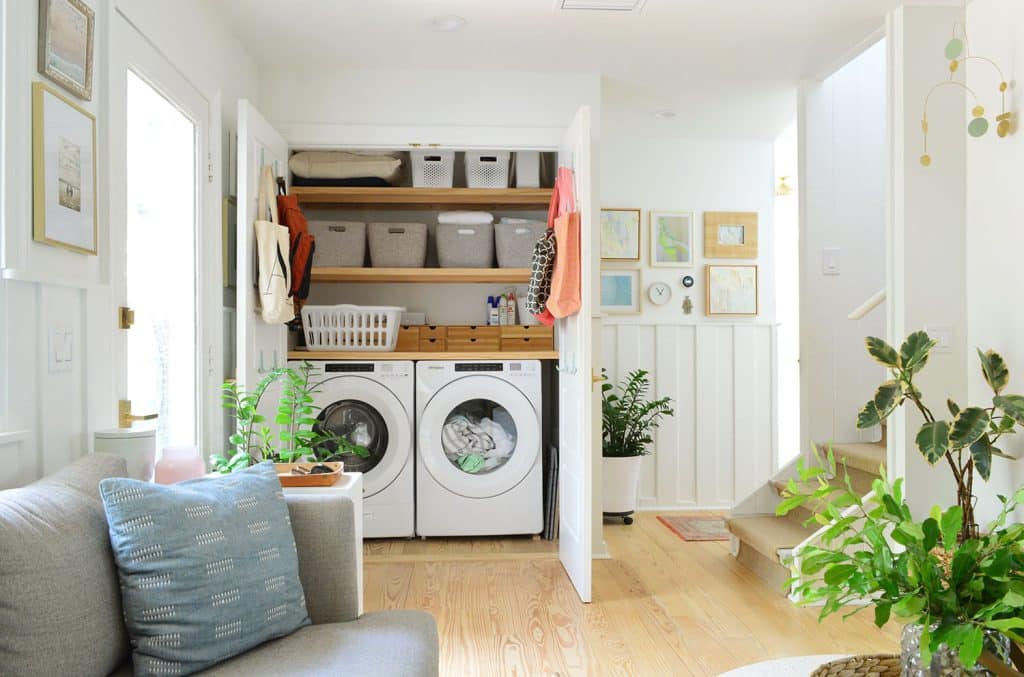
So as you can see from these examples, sometimes the space will guide your decisions and sometimes you’ll have free reign to build any laundry shelves you want! Our current home was somewhere in the middle. We had a blank wall, but the space was defined as the area within the closet.
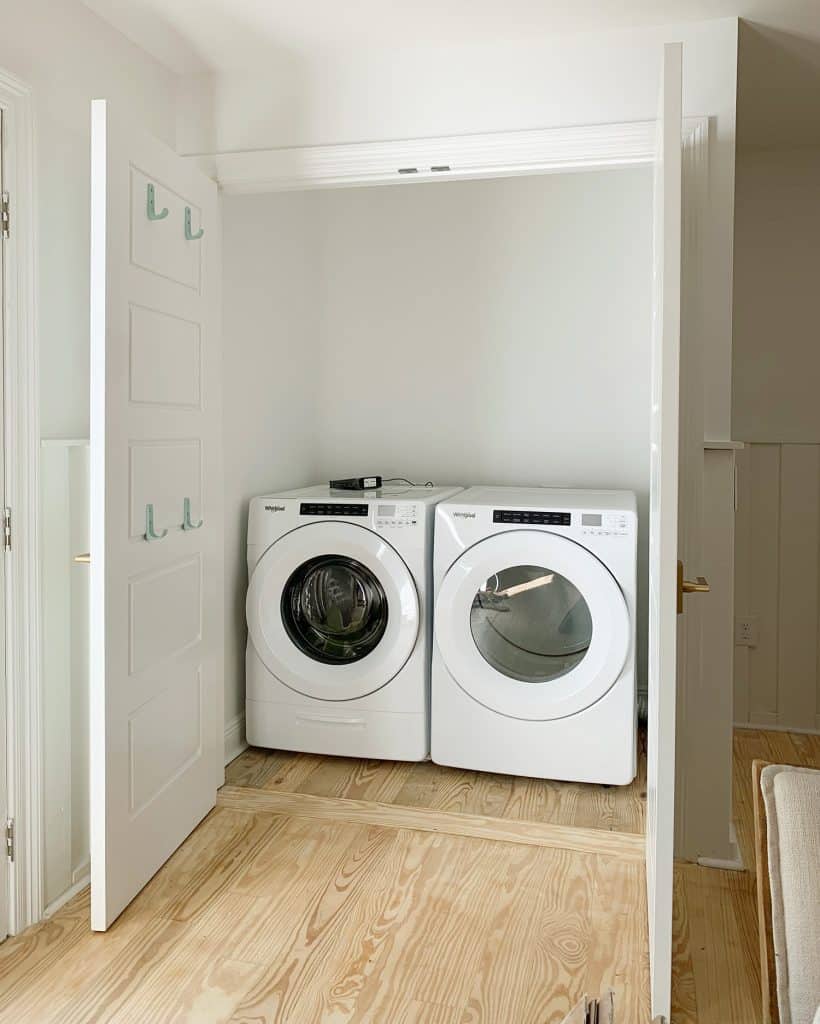
We also had to plan around an attic access that’s (inconveniently) located right in the middle of the closet ceiling. So we couldn’t build anything so deep it would prevent a person from climbing up in there.
Step 1: Measure & Mark Your Closet
First, measure your closet to determine the size and number of shelves you’ll be adding. This will also help you plan the wood you’ll need to buy. You’ll need to account for:
- Enough 3/4″ plywood or MDF to make each shelf top without cuts or seam
- Enough 1×2″ pine to support all 4 sides of each shelf, plus an extra to provide additional support lengthwise in the middle
So, for example, each of my shelves measures about 5 ft by 1.5 ft.That means each needed:
- One 5′ x 1.5′ piece of plywood (I was able to get two of these out of one 4′ x 8′ plywood sheet)
- Three 5′ and two 1.5′ sections of 1×2″ pine (I was able to get this out of three 8′ pieces)
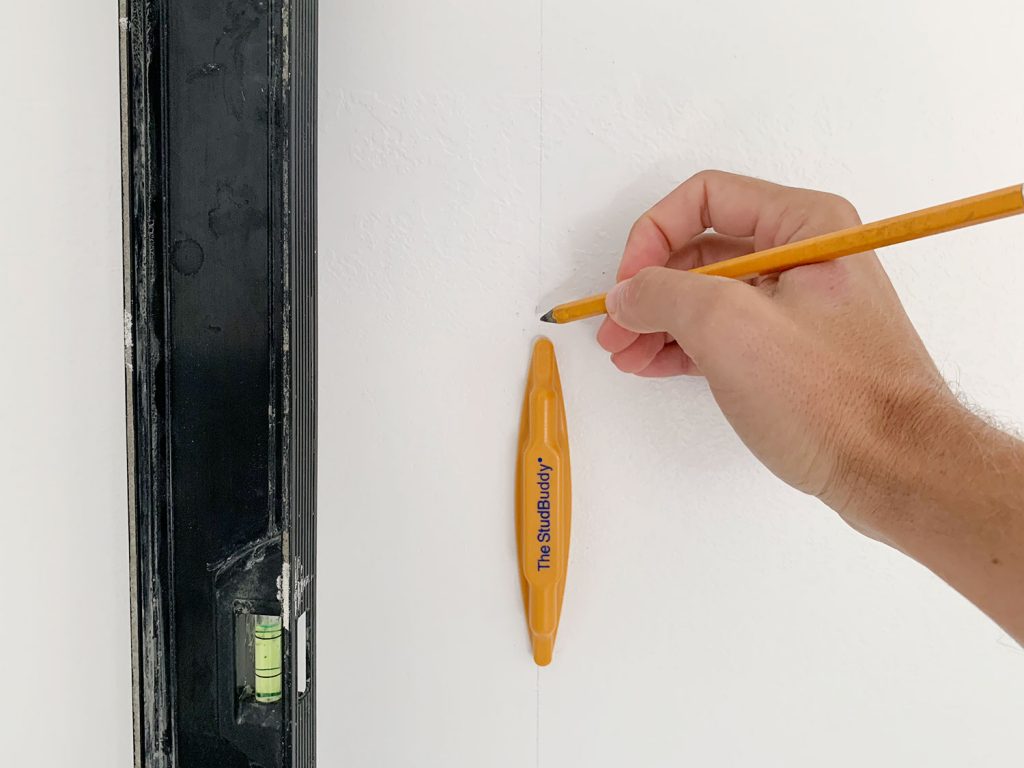
While measuring my space, I also like to mark my studs using this magnetic stud finder. Once you begin attaching your shelf supports, it will be important you know exactly where these are!
Step 3: Install Shelf Supports
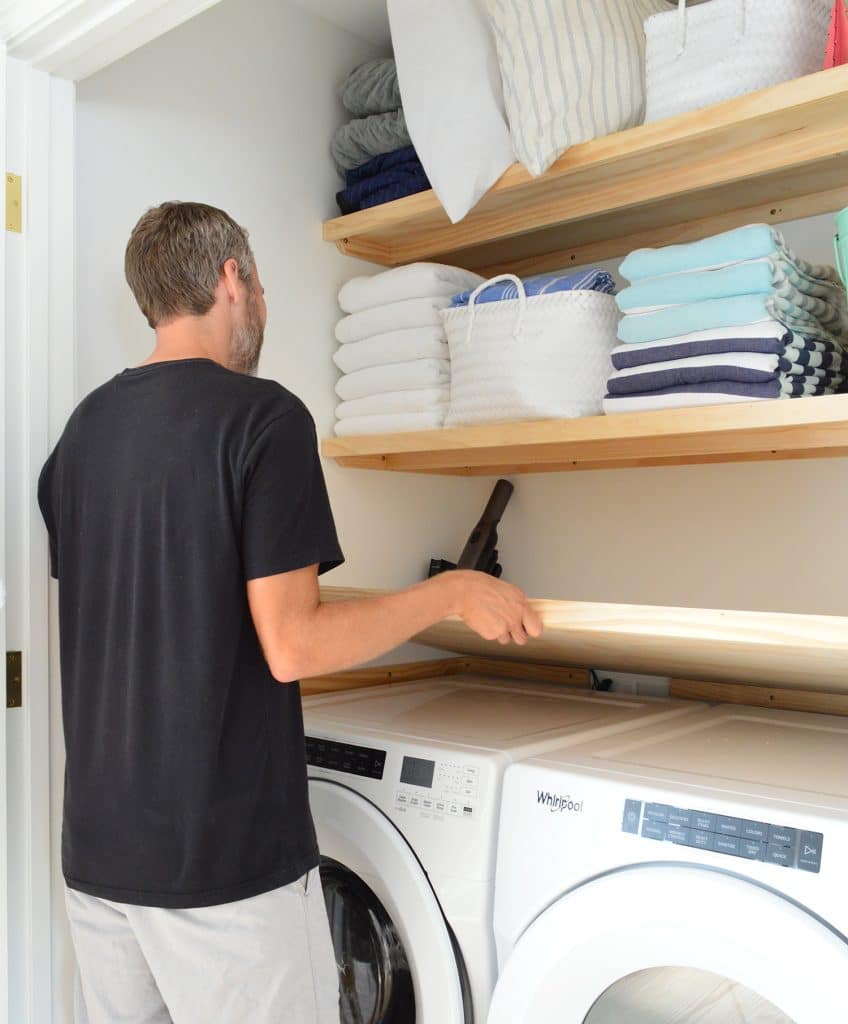
To start, you’ll be installing one long support piece along the back wall and two on each side wall. These are the 1×2″ pine pieces cut to match the size of your desired shelf using a miter saw. You can see how ours looked for the counter shelf below. We had to make breaks for the laundry plugs, but use a full piece if you can. Use a level to carefully mark their placement and remember to account for the 3/4″ thickness of the plywood that will go on top!
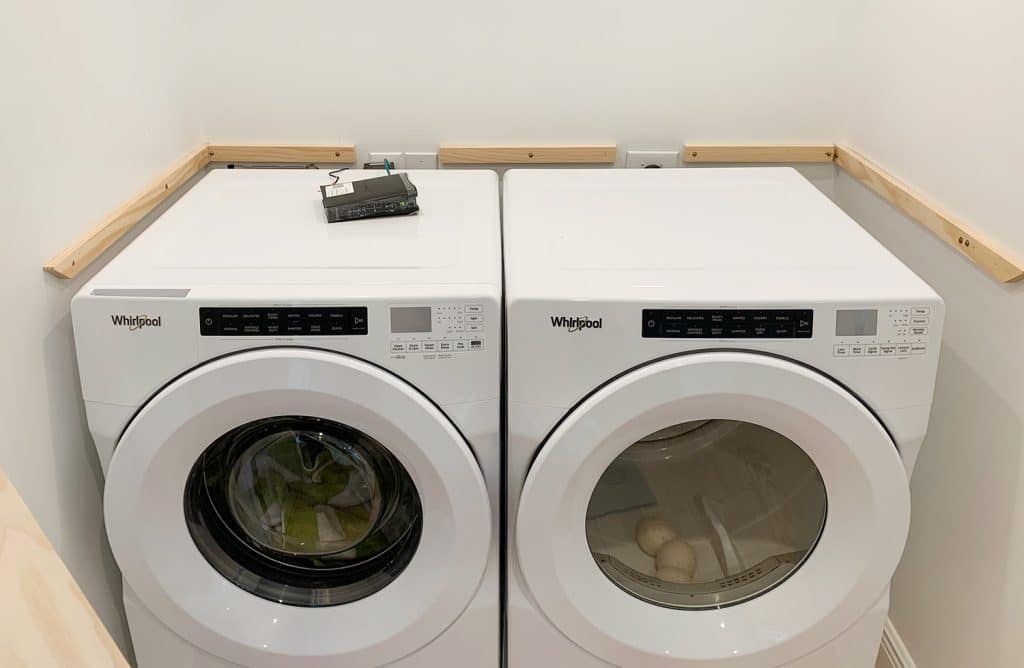
We secured them to the wall with our drill using these heavy-duty cabinet screws, going right into the stud marks we had made earlier. I like them because their easy to drive in securely. Plus, we like the look of the visible brass screw head. But you can use a countersinking screws as well if you’d rather hide them.
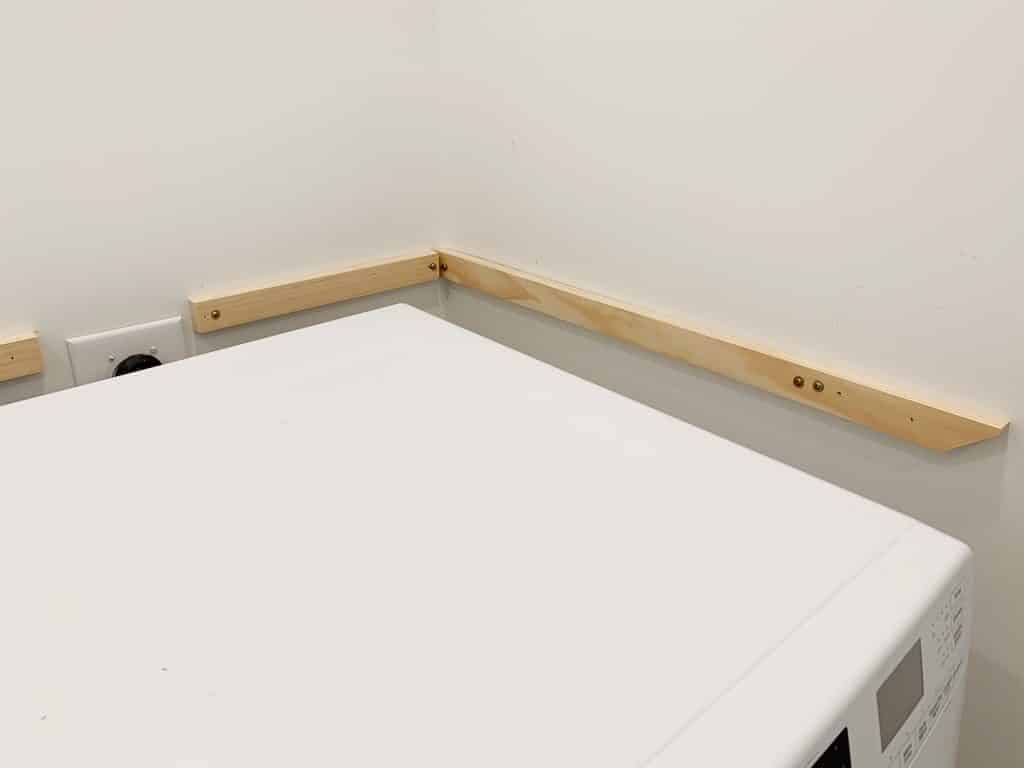
You can see that we also chose to cut our end pieces at an angle. You’ll see why we made that call in a minute.
Step 4: Add Your Shelf Tops
Once your supports are secured to all 3 walls, you can simply lay your plywood shelf top in place. If you haven’t already had it cut to size in the home improvement store, you can use a circular saw to cut it at home.
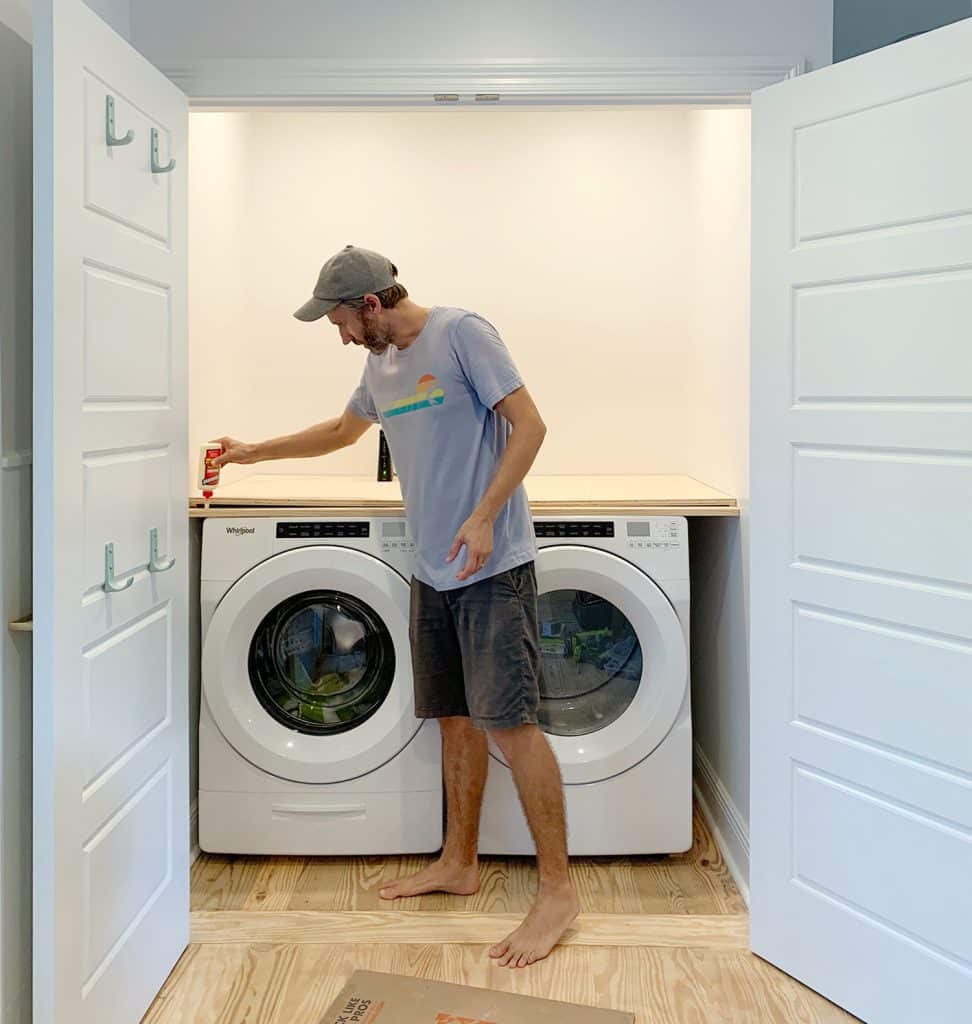
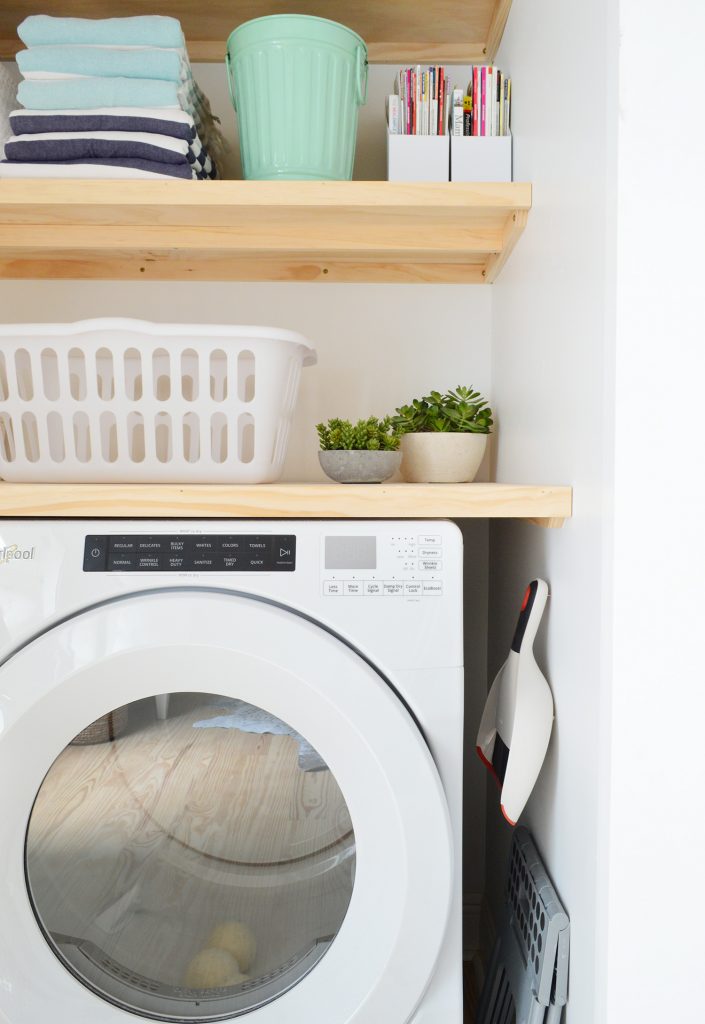
We left the plywood counter loose so we could remove to access the appliance plugs. For the top shelves, we used our airless nail gun to attach them to the brace pieces below using 1.5″ finish nails. You could also screw or wood glue them in place.
Step 5: Add A Face Piece To Each Shelf
At this point, you will still be able to see the raw edge of your plywood. That’s why we cut another piece of 1×2″ pine to nail and glue across the front. It also serves to make your final closet shelves look twice as thick as they actually are!
You can see below how they look with the face pieces added. They really help make the shelves look a bit chunkier than they really are.
You can also see why we cut those front sides of the support pieces at and angle. It helps them hide behind the face piece a little bit. Otherwise you’d see the cut end of the 1×2″ support.
Step 5: Add Cross Support To Each Shelf
This next step is optional depending on the size of your shelf and how heavy-duty you’d like them to be. At one point we considered storing paint on ours, so we thought an extra cross brace under the middle of each shelf couldn’t hurt. You can see them on the underside of the shelves in these photos.
To add them, we simply cut another long piece of 1×2″ pine and attached it into the side supports with a screw driven in at an angle. Just be sure to drill a pilot hole if you do this so that you don’t split the wood. Alternatively, you could add bracket under these shelves for extra strength, but we personally wanted to make the floating shelf look.
Step 6: Seal, Stain, or Paint Your Shelves
We chose just to seal our closet shelves with a clear water-based sealer (applied with a brush), but you could also stain or paint yours a color. For us, we like how the plywood color matched other wood tones in our house. Oh, and don’t forget to fill your nail holes before you paint!
Whatever you choose to do, just be sure to give it time to fully dry and cure before you load them up with all of your laundry stuff!
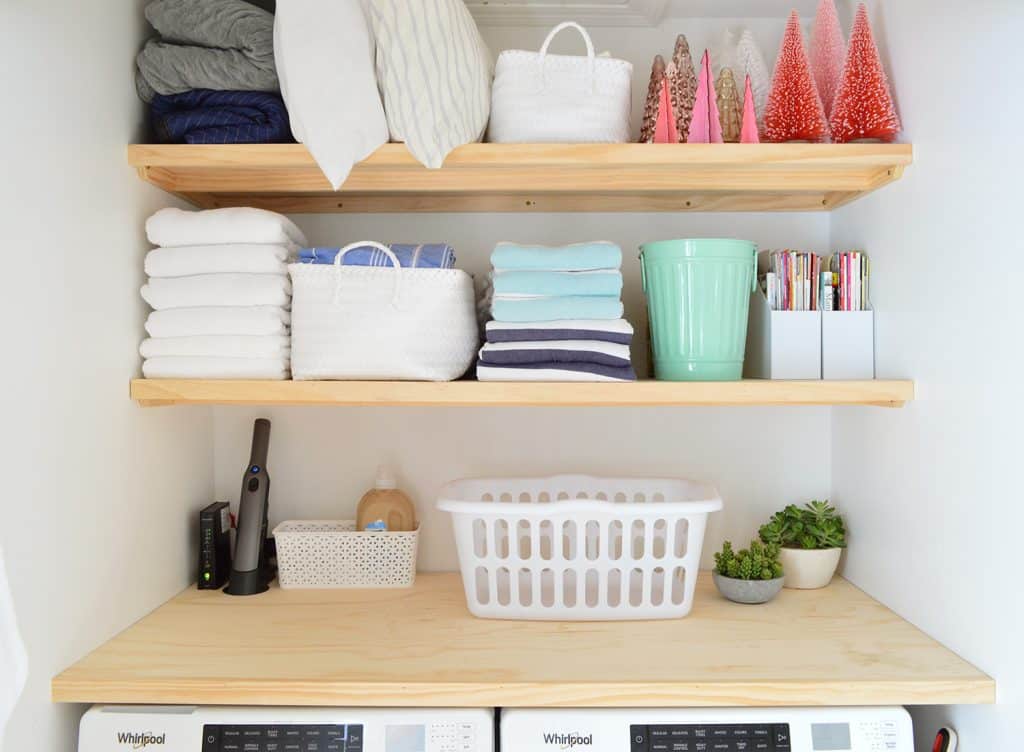
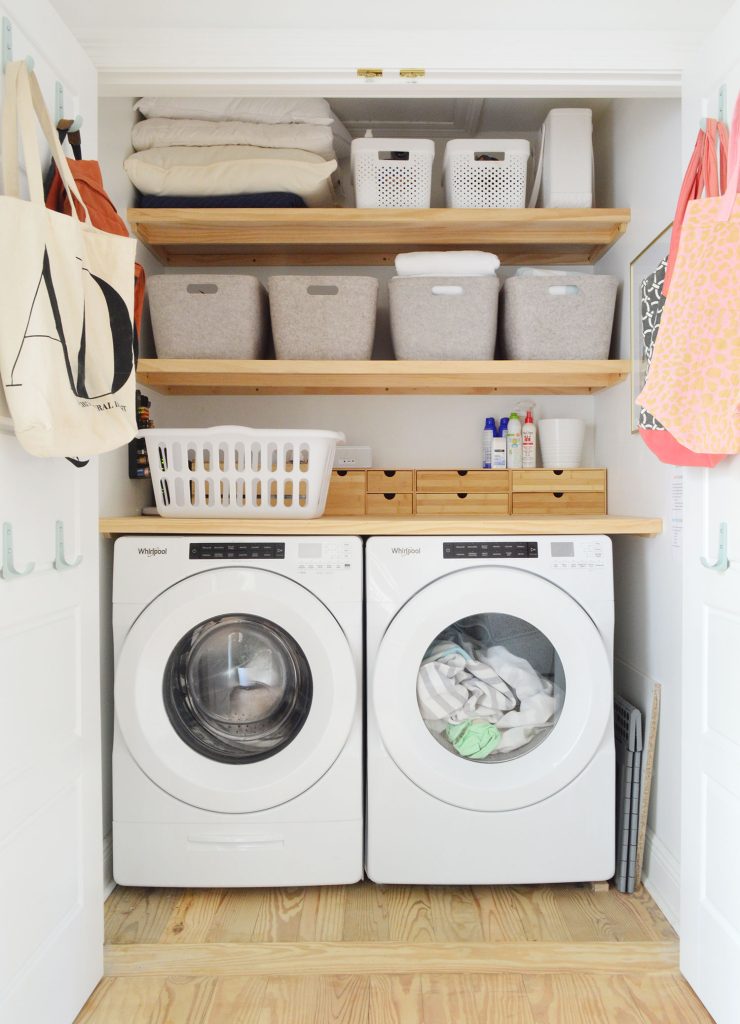
You can see from these photos that the actual items we’ve stored in here has rotated over the years – even playing host to Christmas decorations at one point!
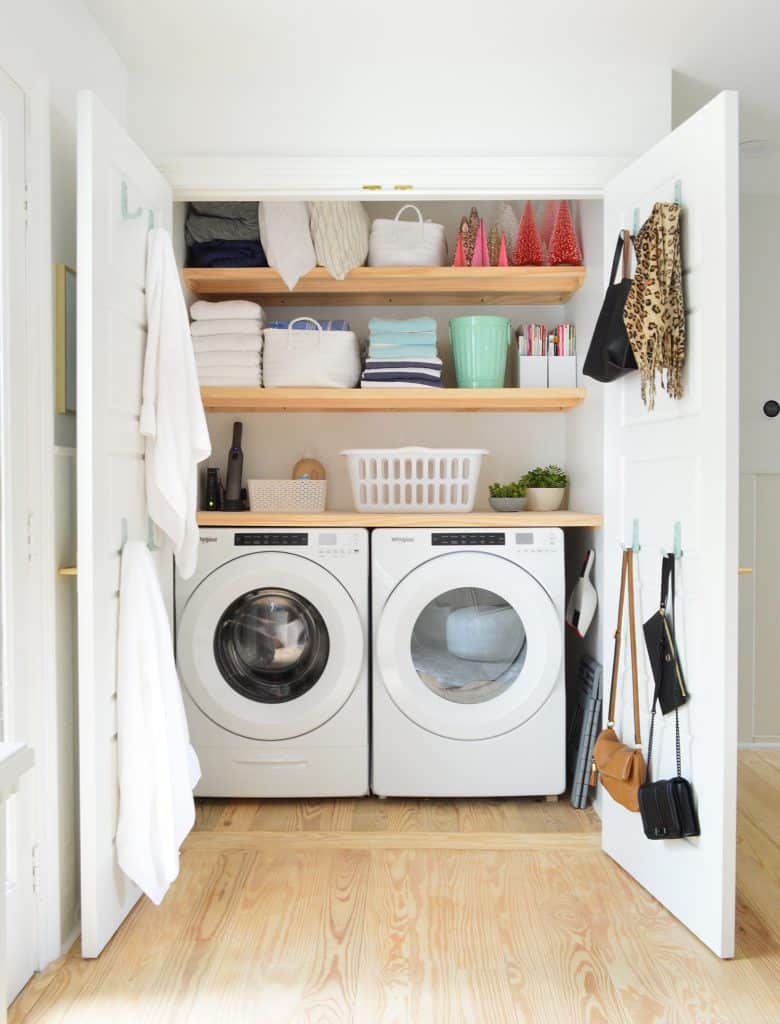
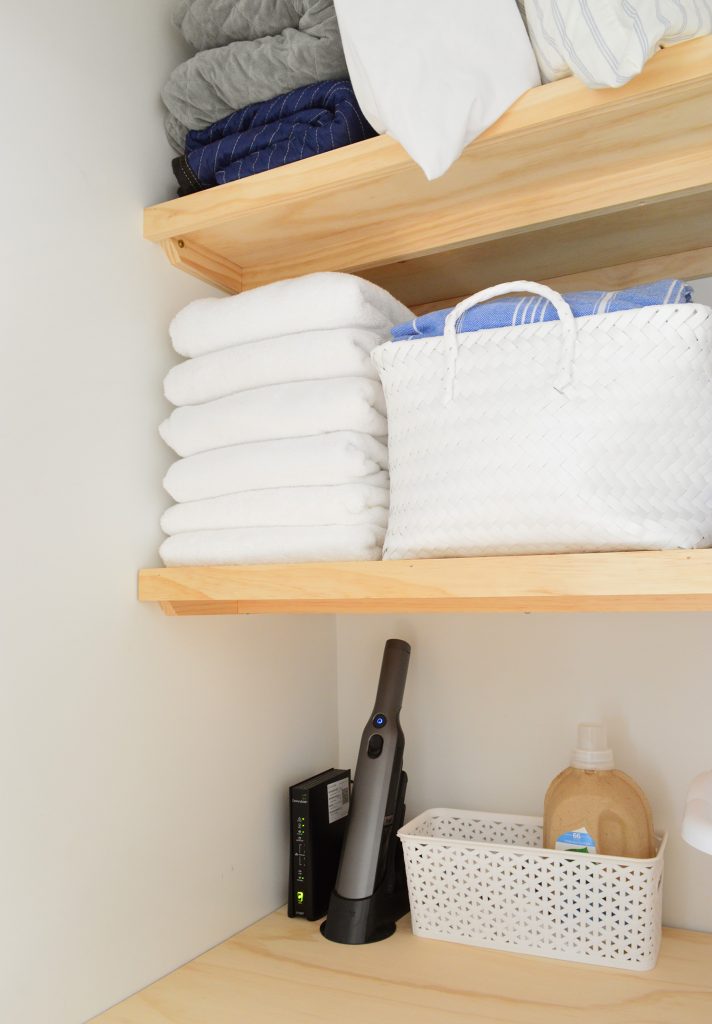
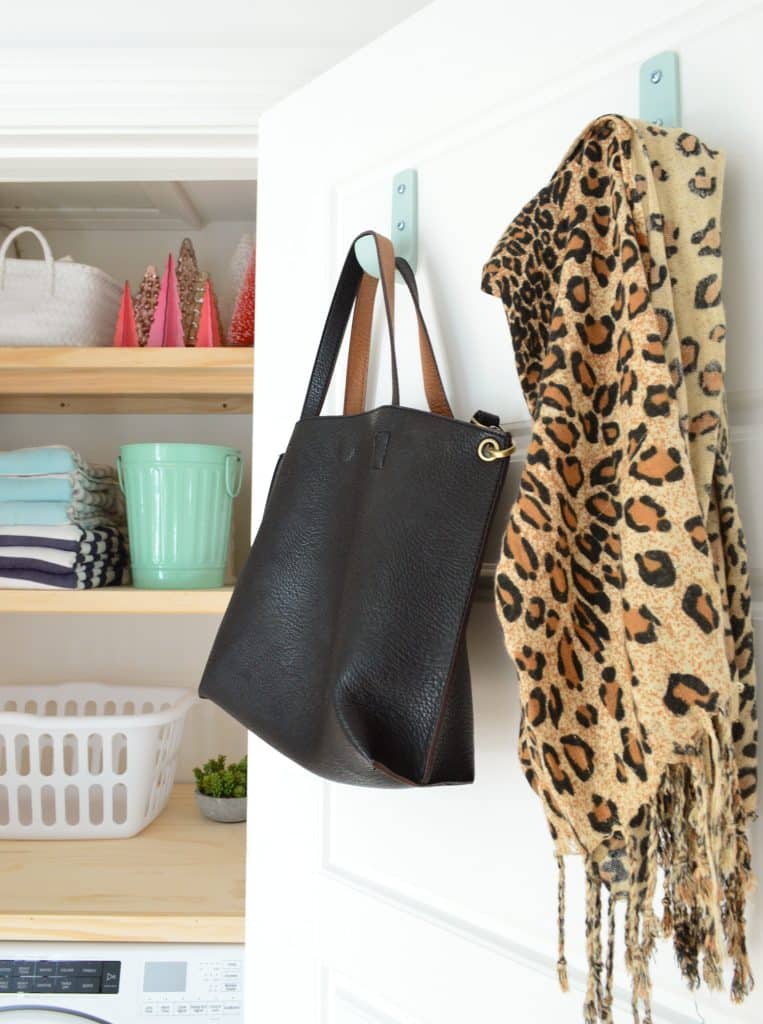
Now that it’s been nearly 4 years of using these, we can confidently say they were a perfect solution for this small closet. They store everything from linens and towels, to tools and extra light bulbs. We also are able to use the space as a mini mudroom, thanks to these cheap plastic hooks that we added to the doors for backpacks, coats, and other bags.
The other heroes of this space have been those big felt bins and bamboo wood desk organizers we added along the back.
*This post contains affiliate links, so we may earn a small commission when you make a purchase through links on our site at no additional cost to you.
