We built these DIY pantry shelves for our beach house, and it’s one of our favorite DIYs ever! They’re surprisingly straightforward to construct and can be easily customized to any size pantry. You can also easily adapt them to any space that needs custom storage or shelving: bedrooms, living rooms, playrooms, etc. They’re made entirely of two things: MDF sheets and pine boards (well, and some screws, nails, and paint) that cost us less than $200! So even if you’re a beginner, you can do this. Seriously.

Also, if you’re looking for more shelf ideas & DIY shelving projects, this post has 16 shelf DIY projects for you to check out. It covers everything from heavy-duty garage shelves to decorative display shelves and more.
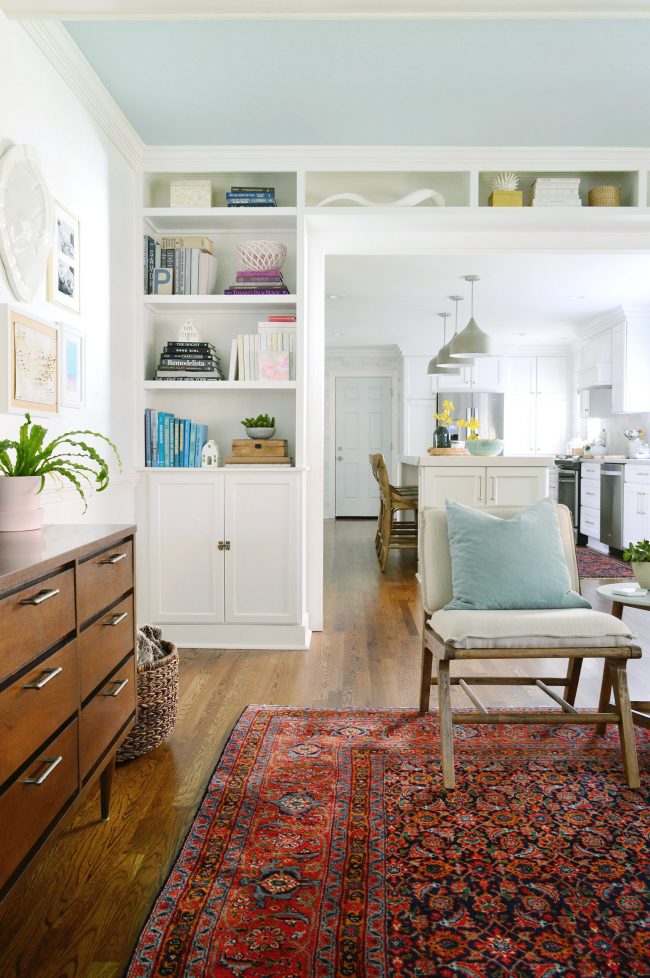
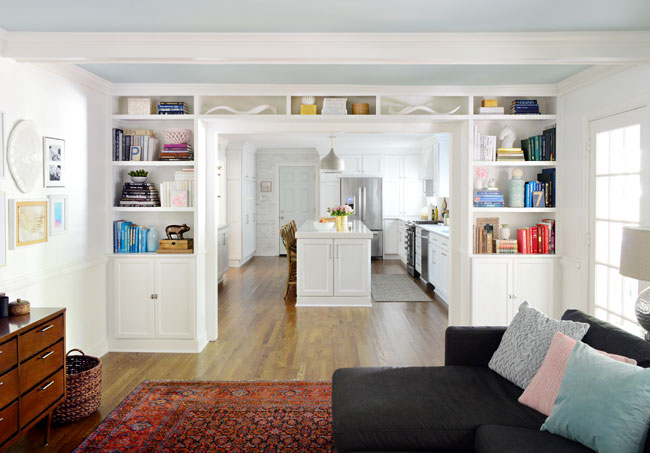
The technique we used for today’s pantry shelves is one we’ve used twice before: first in our son’s room and later for our living room built-ins (shown above). Call me a creature of habit, but this method is easy to execute and we’ve always loved the finished look.
A Video Of Our Pantry Build
We documented the construction of our DIY pantry shelves on Instagram Stories, so I’ve compiled all of the clips into one video below. You’ll see some of these steps in action and get a look at our thinking behind what goes where on the finished shelves. But you can still read a more detailed step-by-step tutorial below.
Note: If you’re viewing this in a reader, you may have to click through to our website to see the video, or you can watch it here on YouTube.
Tools & Materials Needed:
- 3/4″ thick MDF panels* (I’ll show you soon how to determine how many)
- 1×2″ pine boards for finishing the front of your shelves
- 3/4″ x 3/4″ wood boards for shelf supports (or just cut your 1×2″ in half using a table saw)
- Circular saw
- Miter saw (optional)
- Finish nail gun
- Power drill
- Tape measure
- Levels (large and small)
- Studfinder (this is our favorite)
- Crowbar or hammer
- Clamps (optional)
- Wood screws
- Wood glue
- Pen/pencil
*I like working with MDF for projects like these because it’s cheaper and it finishes smoother than plywood. But MDF has to be painted, so obviously use plywood if you want a stained wood look for your project.
Steps To Build Pantry Shelves
Here is quick step-by-step overview of how to tackle these DIY pantry shelves. There is more detail on each step below.
- Plan Your Shelves
- Purchase Materials
- Remove Baseboards
- Attach Vertical Panels
- Add Top Panels
- Cut & Add Shelves
- Finish The Shelf Fronts
- Caulk, Prime, and Paint
- Fill & Organize Shelves
And if you need help with that last step, we’ve got a whole video about how to organize and decorate a bookshelf!
Step 1: Plan Your Pantry Shelves
Like all good DIY projects, start by making a plan. Measure the space, assess your needs, identify any constraints (space, budget, etc), and sketch out your ideas. Here’s what this step looked like for us:
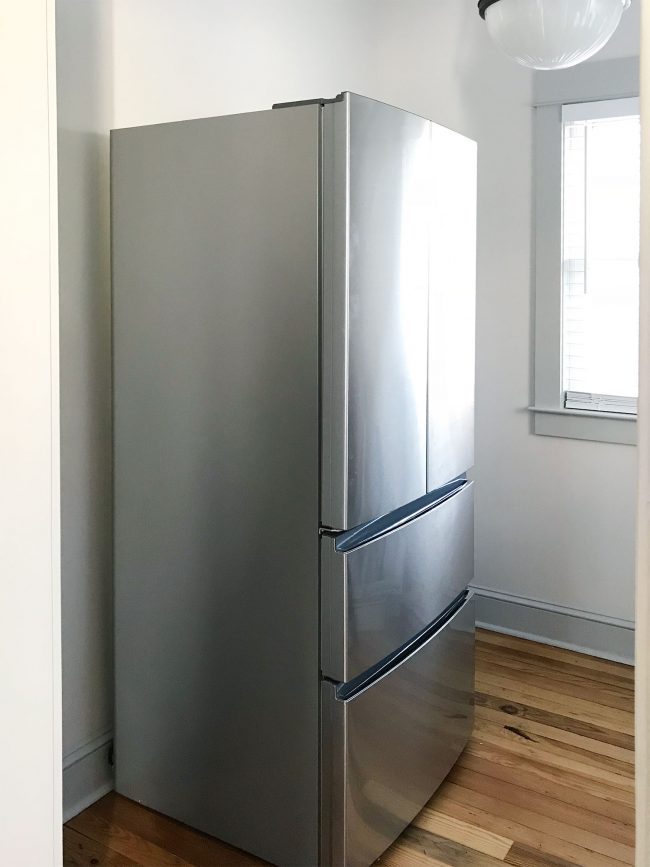
Our pantry was originally planned as a breakfast nook, but we realized it would work better as a walk-in pantry with our counter-depth refrigerator. So this is the space we started with:
With measurements of the room in hand, I Picasso’d sketched an idea of what we wanted to create. We figured out the MDF shelves could be 20″ deep before hitting the door molding around the room’s door. This would also leave room for the 1×2″ pine board we’d be nailing to the front of each shelf. Knowing that, we could also determine how many MDF sheets we needed to buy.
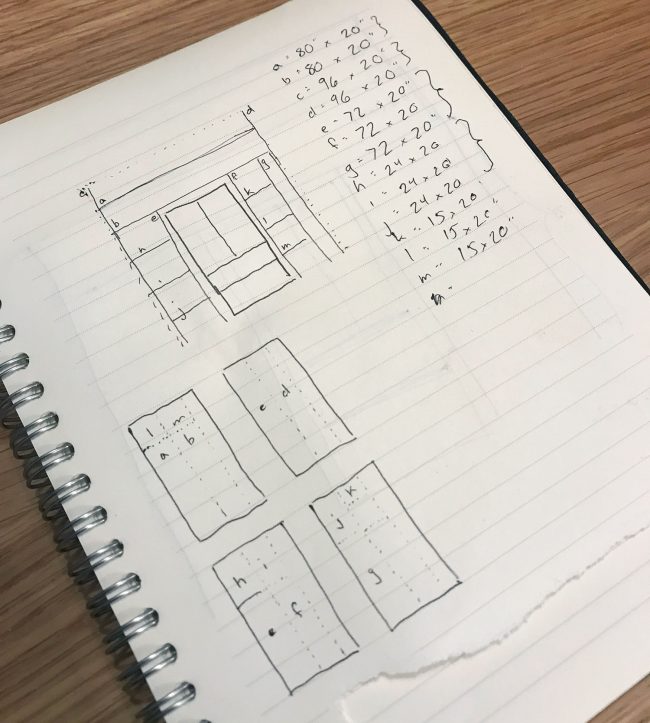
I assigned each piece a letter and used their accompanying dimensions to map out how many 4′ x 8′ sheets of 3/4″ MDF I needed. Tthose are the rectangles you see at the bottom of the page. We originally planned a skinny vertical cubby for the broom/mop/vacuum, but later nixed it. So ignore the long skinny cubby that’s labeled “G” above.
Step 2: Purchase Materials
Careful planning also makes purchasing materials easier. It also meant I could have the MDF panels cut into 20″ strips at the Home Depot store. Their big saw is MUCH faster and more consistent than what I can do at home… and they do it for free!
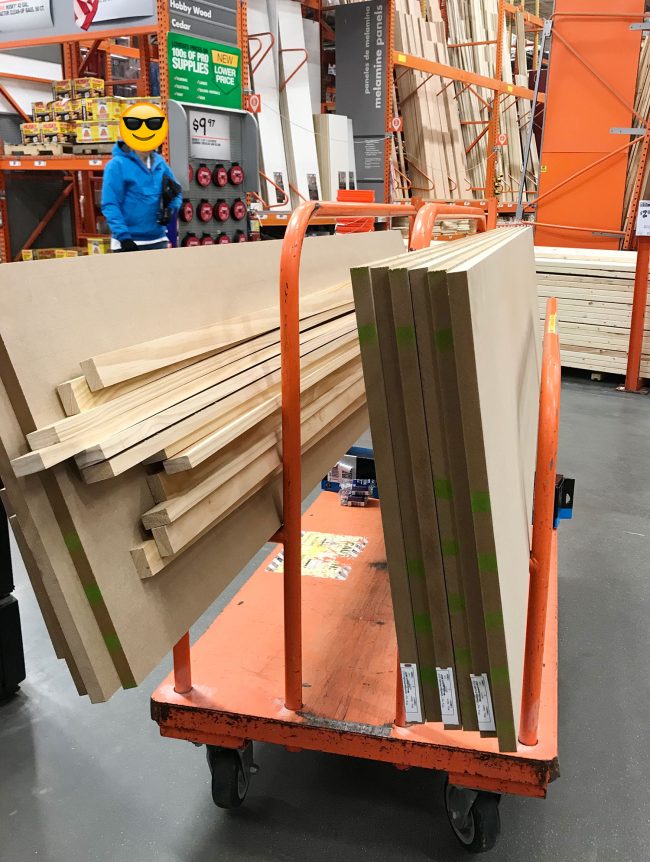
We also picked up a whole bunch of 1×2″ pine boards. There’s enough to cover the exposed front edge of every shelf and some extras to cut in half as skinny “support pieces” along the back wall (more on that in a second). All of my wood and MDF, plus some screws and wood glue, cost me less than $200!
Step 3. Remove Any Existing Baseboards
Before building anything, pry off any existing baseboard or other molding in the way. You’ll want the shelves to sit flush the wall, after all.
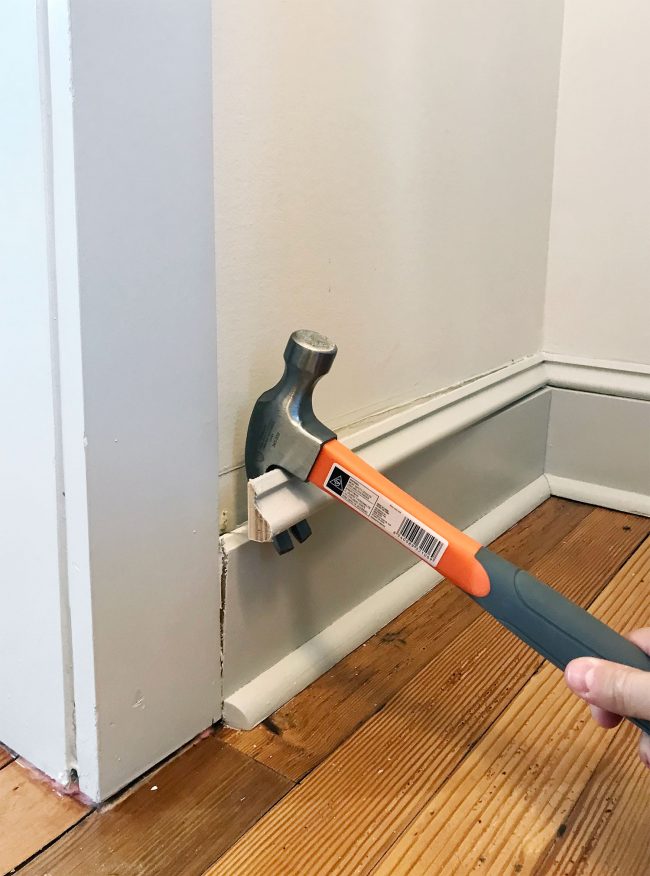
Save everything to put back on later as needed, so try not to damage it. Easier said than done when you forget your crowbar!
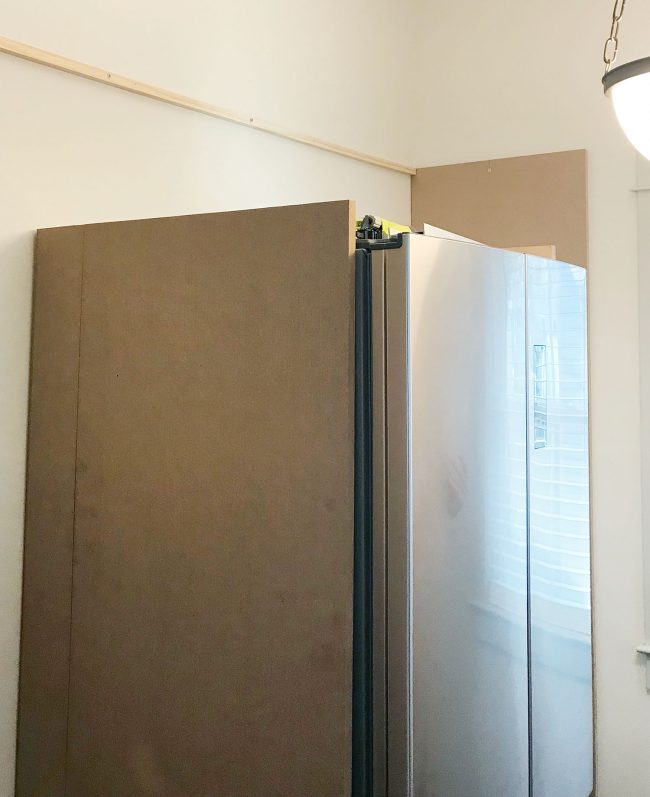
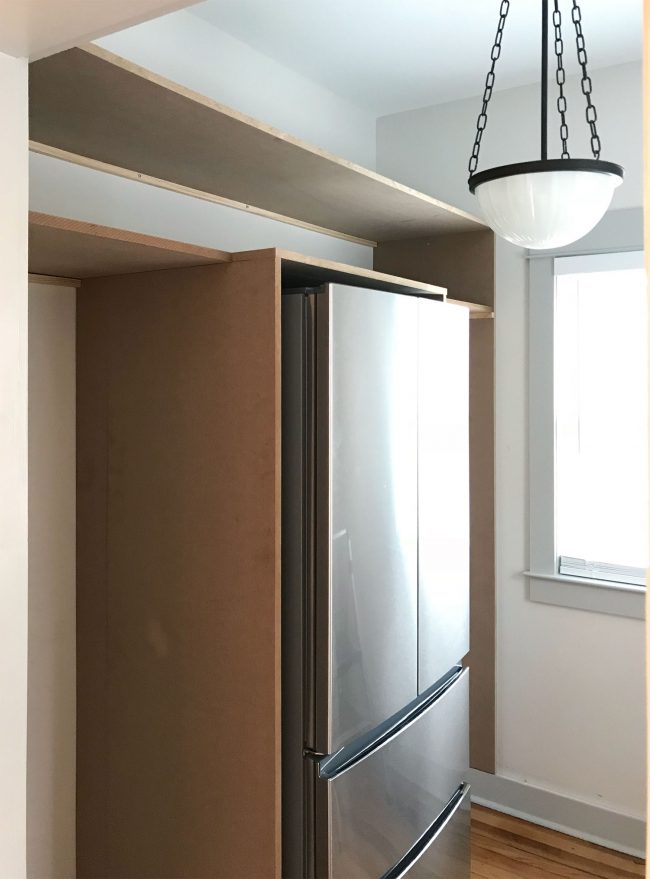
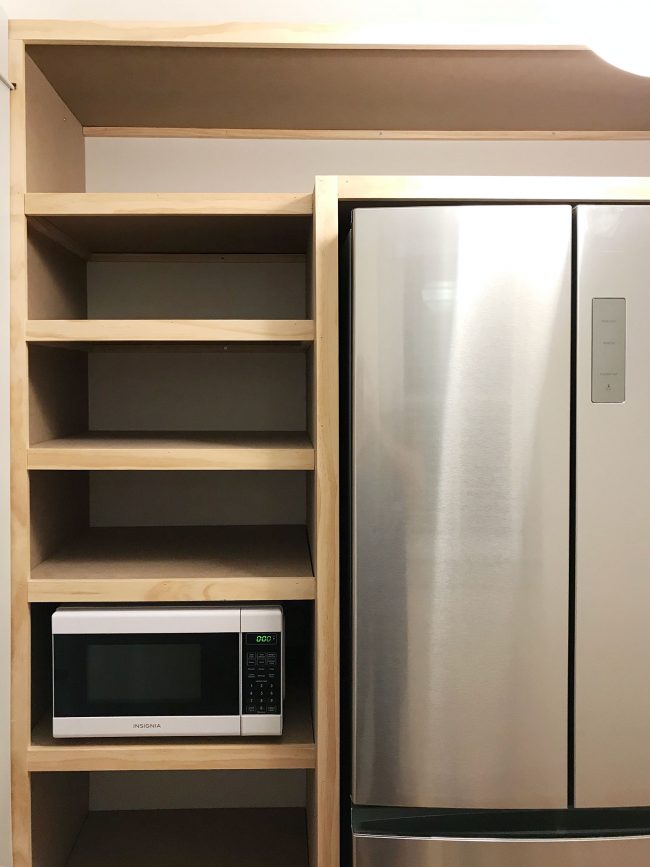
Step 4. Attach The Vertical Panels
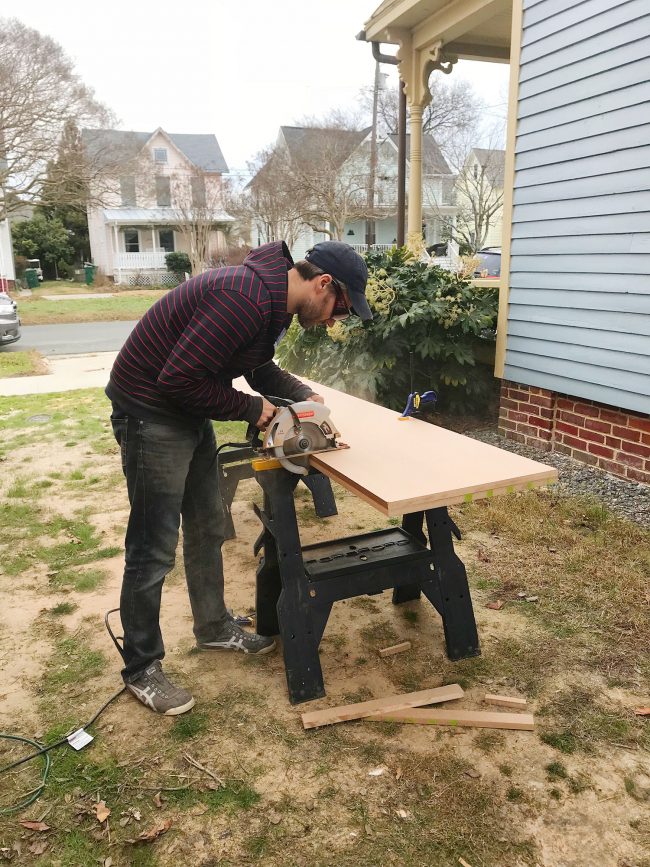
We started by installing the 4 vertical pieces: 2 panels against the side walls and 2 flanking the fridge. We cut them to the right height outside with our circular saw and temporarily leaned them in place. We went into this knowing the fridge would stick out a bit, but figured we wouldn’t mind. SPOILER: we did mind, so we adjusted our plan so the center section would bump out a little further around the fridge. Luckily, I had some scrap MDF from another project that was wide enough.
The 2 panels against the walls were screwed directly into the wall studs in several spots. The 2 panels that “float” next to the fridge were a little trickier since you (a) can’t screw directly into your refrigerator and (b) you want to leave enough gap so the fridge easily slides in and out and has some side ventilation.
To accomplish this, we screwed some skinny “support pieces” of wood into the wall and floor, giving us a secure place to attach the MDF panel.
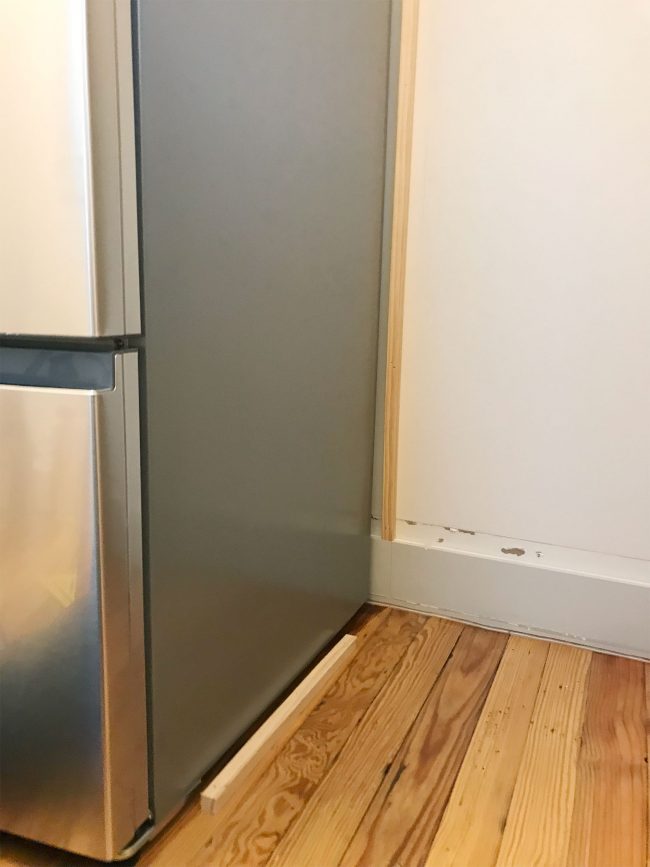
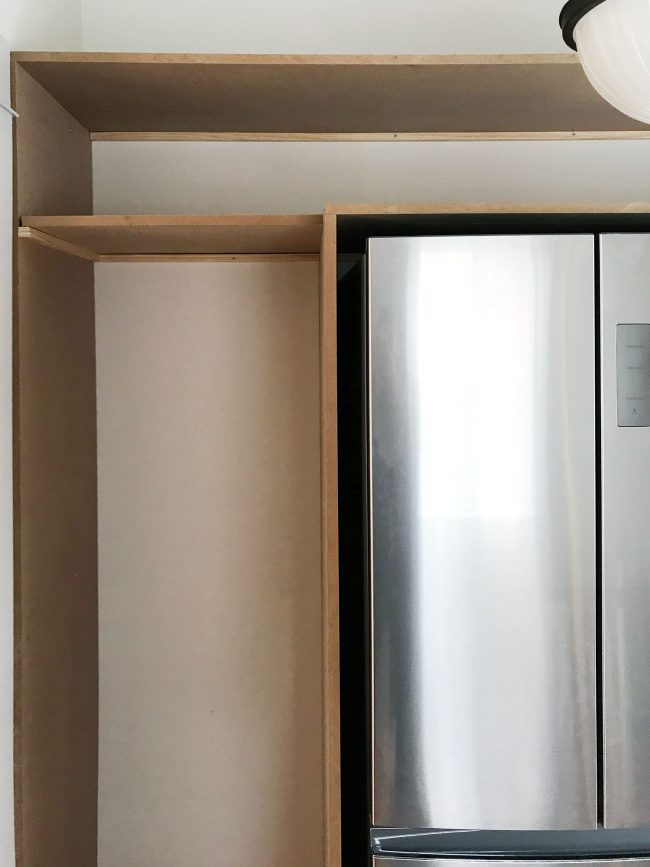
We made those support pieces by ripping 1 x 2″ pine boards in half on my table saw. You could also use spare MDF or buy pre-cut pieces instead, but it’s a little more expensive that way. We use a fair amount of them in this project (you can see another long brace piece above my head below) so for us, it was worth the trouble to cut our own.
Also, try to put the cut edge against the wall so the visible sides aren’t raw.
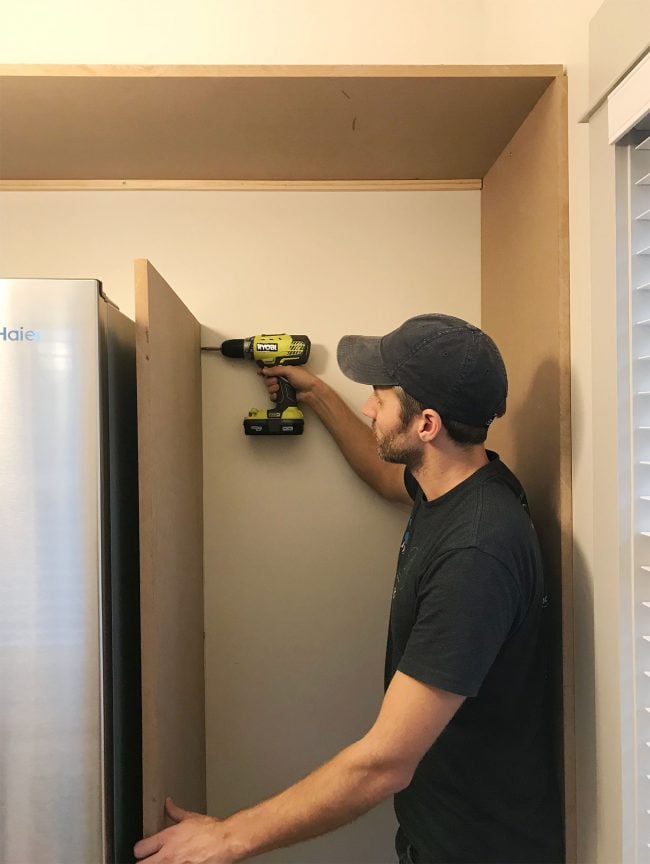
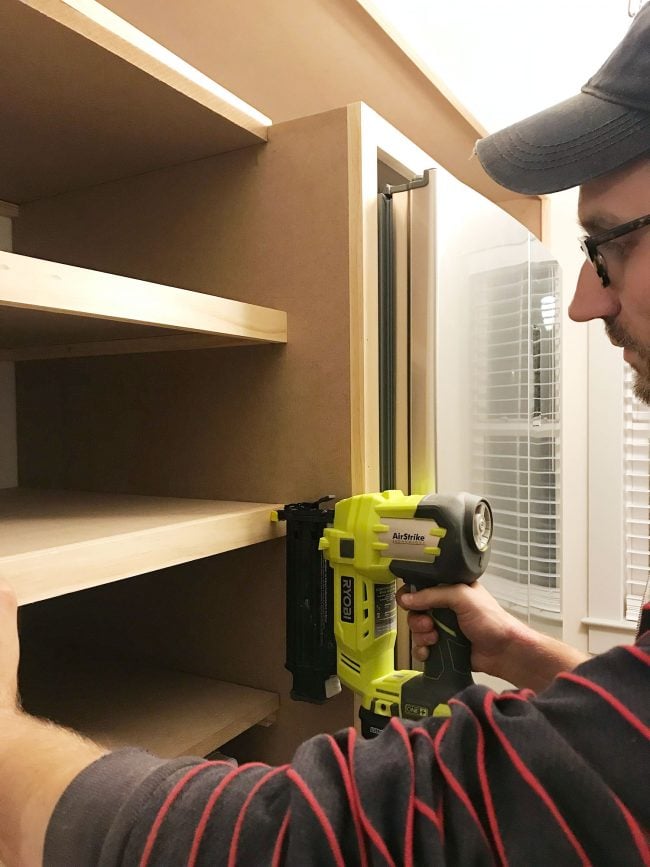
Step 5: Add The Top Pieces
With all four vertical pieces secured, we added 2 long horizontal pieces across the top of our design. This included the long top shelf and the long shelf across the top of the fridge. Each was held up by the vertical panels from the preview step, and some skinny support pieces secured to the back wall. We used a long level throughout to keep things square and screwed everything in place.
The angle below shows the support pieces a bit better. To install these, I’d hold one in place with a level and then fire a nail or two in with my nail gun. That held it in place while we secured it with screws into studs. We suggest drilling pilot holes first so you don’t split the wood.
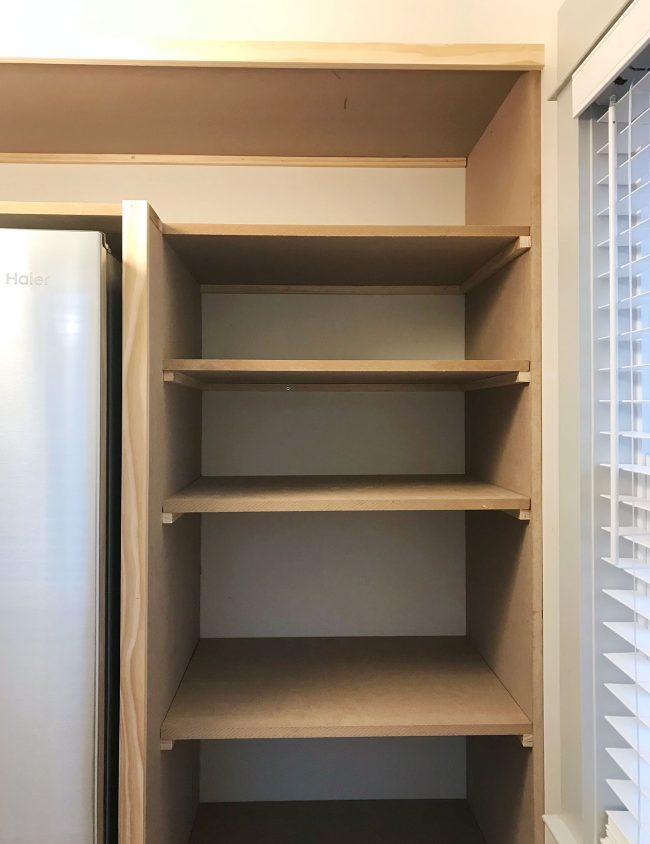
Step 6: Cut & Add The Shelves
From here, it was just about repeating that process for all of the smaller pantry shelves down each side. We cut all of our shelves first, using our circular saw outside. If you can, try to double up your boards so you get two shelves out of each cut. Just be sure to clamp them together firmly first so they don’t shift while you saw.
To determine the shelf heights, we brought actual objects into the pantry (like cans, storage bins, cereal boxes, etc) to see what we needed. We landed on a combination of mostly 8″ and 14″ high shelves, plus some larger ones at the bottom to accommodate things like a beach cooler. Once we measured and marked each shelf, we leveled/nailed/screwed all of our brace pieces along each side.
Just remember that you want your brace piece to be attached 3/4″ lower than the top of your final shelf height (since you’ll be resting the 3/4″ MDF shelf piece on top of each brace).
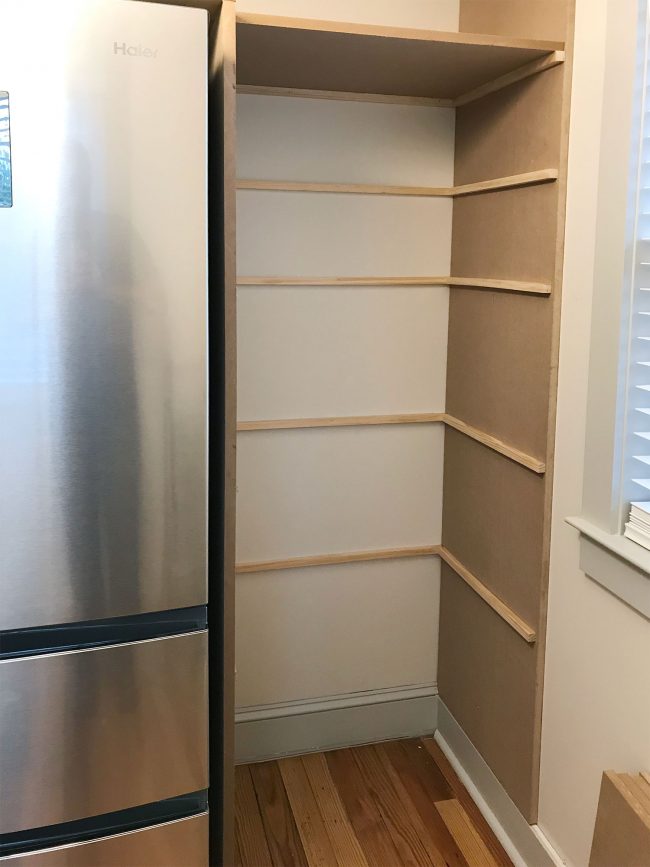
Next, slide each of the shelves into place and secure them in each corner with short screws. You could also nail or glue in place.
Step 7: Finish Off The Shelf Fronts
The last building step is adding 1×2″ face pieces across each exposed edge. You can see below how much more finished they look with the face piece. They’re basically triple threats: (1) they cover the rough MDF’s cut edge, (2) they hide the brace piece under it and (3) they make the shelf look thicker and more substantial. Win-win-win.
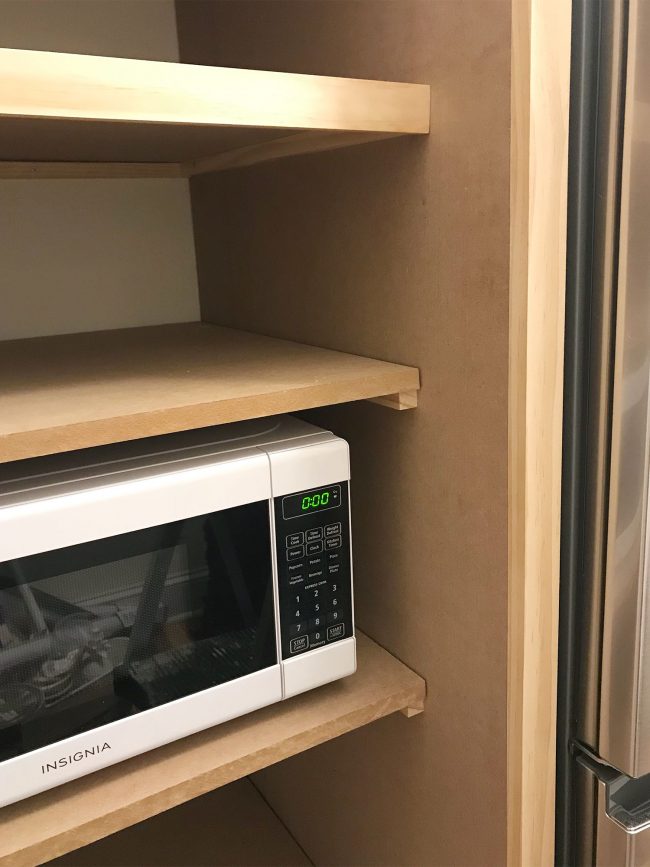
We attached these with some wood glue on the back and a couple of finish nails, since we didn’t want big screw heads visible. The little nail holes will need to be filled with spackle later.
Note: Since our only outlet on that wall is behind the fridge, I just drilled a 1 1/4″ hole in the side of the microwave shelf so we could snake the plug through there, behind the fridge, and into the other outlet back there.
Step 8: Caulk, Spackle, Prime & Painting The Shelves
Like with any construction project, your last steps are to caulk seams (like where the shelves meet the wall), spackle nail holes, and then prime & paint. Since we were painting ours gray to match the rest of trim (SW Stone Isle) we had our primer tinted gray to get better coverage.
Alternatively, you can prime and paint one coat on everything BEFORE you build. You may find it’s easier to paint everything laid out flat on a drop cloth. You still will probably need to do touch up or a second paint coat in the end. This will cover up caulk, spackle, and any scuffing made when we assembled things.
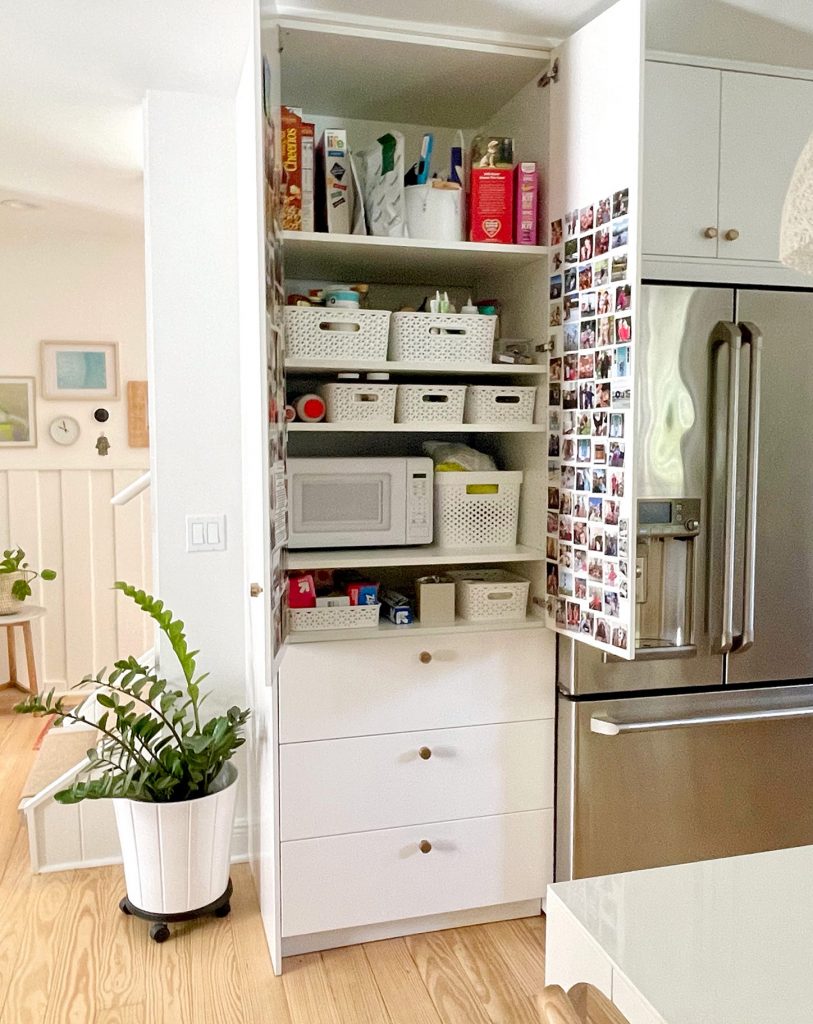
Step 9: Fill & Organize Your Shelves
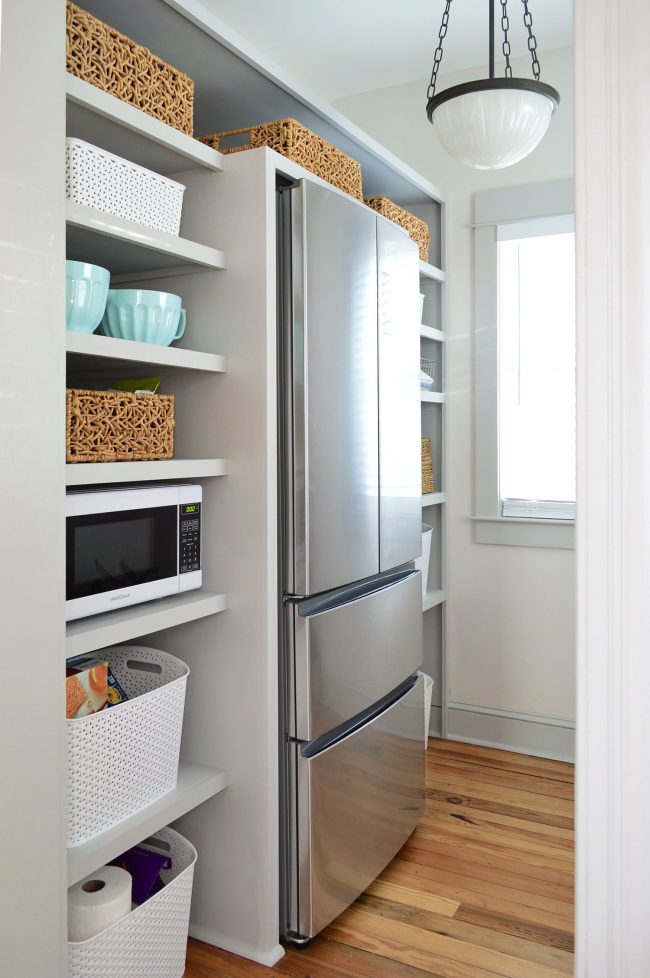
We love open shelves, but they do take a bit of organization to not look messy. So we relied on a lot of baskets in this pantry to wrangle things and keep the open shelving looking clean. You could also use plastic containers, jars, and other storage accessories you see fit. If you have these before your build, you can also use their measurements to make your shelves the perfect height to
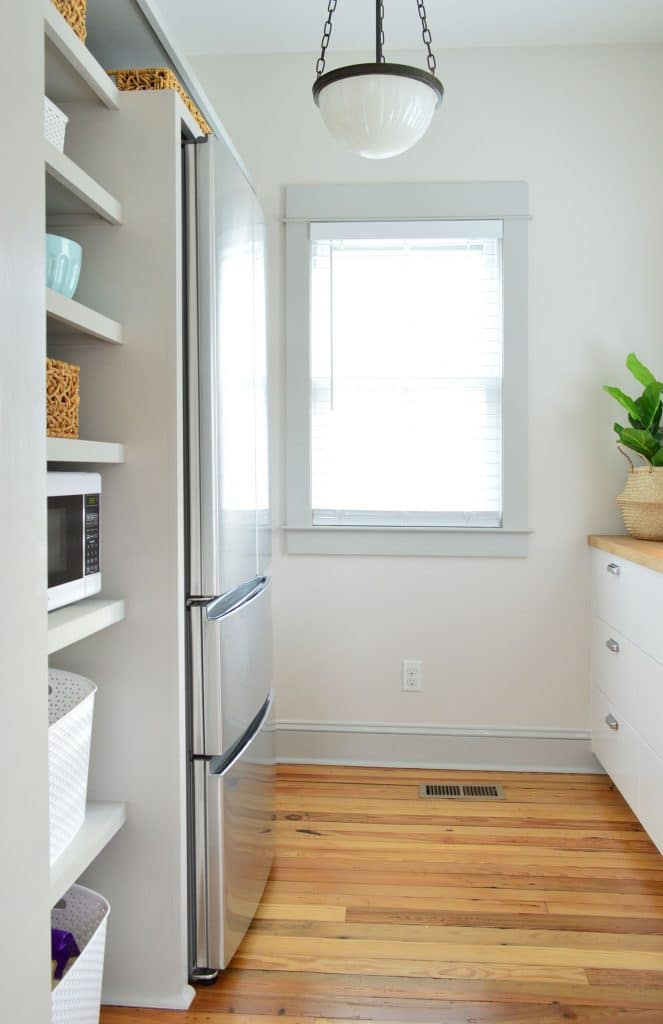
You can see how we organized our built-in pantry as part of our beach house kitchen organization post. It includes a video walk-through of the kitchen and pantry where we open every cabinet and drawer! You can also see how we added some shallow storage cabinets on the opposite wall along with a convenient counter space for putting things down when they come out of the fridge.

We’re so grateful for all of the storage we were able to squeeze into this room thanks to these custom shelves. We’ve got room for everything from food and cleaning supplies to kitchen essentials like small appliances like a toaster and blender, mixing bowls, dishtowels, that beach cooler we mentioned, etc. If we were into cookbooks, I’m sure they’d look great up there too!
More Resources
If you’re looking for more detail, we constructed our son’s built-in shelves using the same method and offer a closer look at some of the steps. Plus, in that post and the one about our living room built-ins, you can see how we included some closed drawer/cabinet storage into the plans as well. They’re both still some of my favorite DIY projects to date, they’re holding up really well, and they’re extremely functional for our family. And now this pantry is about to be welcomed to the club.
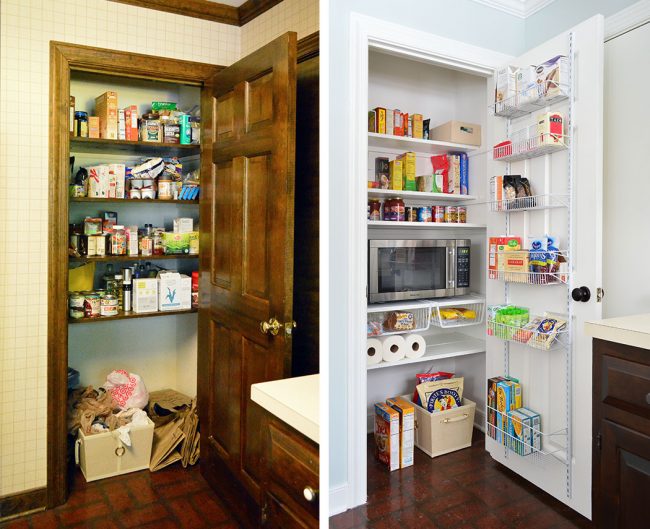
And If you want to see another pantry makeover project we did, check out how we made over our old kitchen pantry by adding some smarter organization (and lots of paint!).
UPDATE: We also more recently added a large pantry cabinet to the kitchen in our Florida home. So if you’re not interested in fully DIYing your way to a new pantry, here’s how we added lots of food storage using ready-to-assemble cabinets from Ikea.
*This post contains affiliates*
Originally published January 2018. Updated 2022.
