Updated 2019
We just swapped out two old fluorescent light fixtures in our kitchen and they each required slightly different techniques becausfe – surprise! – one of the didn’t have a fixture box in the ceiling behind it. Yep, just wires coming out of the drywall! So we’ll show you two ways to replace your fluorescent lighting with a more udpated pendant or flush mount fixture.
Removing A Large Fluorescent Light Fixture
First we replaced the big fluorescent light near our stove. It was incredibly simple to do so we’ve outlined a step-by-step process below:
Step 1: Turn Off The Power
Whenever you’re working with a light fixture, it’s always good to turn off the power to this light at the circuit breaker in your electrical panel box, not just at the light switch. Doing this will make sure someone doesn’t flip the switch back on while you’re working. And doing it first makes sure you don’t forget about it later. If you want to be super, extra careful, you can also use a voltage dector to make sure there’s no current running to any wires before you make contact with them.
Step 2: Remove the Plastic Shade & Light Bulbs
Next, I took off the plastic shade cover, which was just snapped into place. Then I took out the long fluorescent bulbs and placed them aside, just to make sure the fluorescent tubes didn’t get broken in the process.
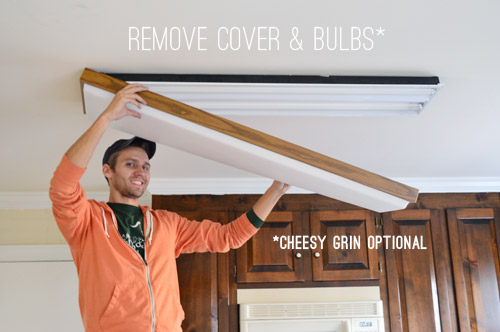
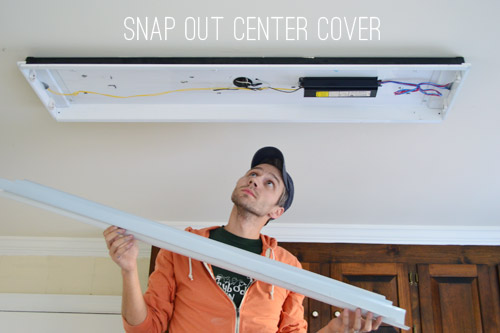
Step 3: Detach The Metal Panel
Then we snapped out the metal cover that concealed all of the wiring in the back of the fluorescent fixture. We were very relieved to see that the wiring came through the center of the fixture. In our last kitchen, the wires came through the ceiling at one end of the fluorescent light. Had that been the case here, it would’ve required more complex wiring to move the fixture box to the right spot.
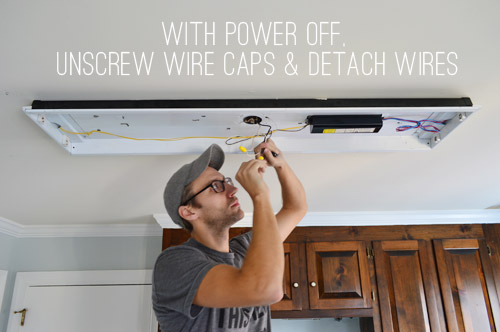
Step 4: Disconnect Wires In The Old Fixture
Then, with the power still turned off, I unscrewed the wire caps so that we could detach the fixture wiring from the ceiling wiring. You don’t need to mess with any of the wiring within the fixture itself (aka, those blue and red wires on the right side of the photo below). Also, you can see this step was actually done after we painted the walls.
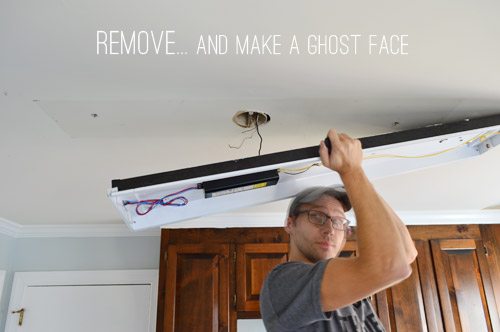
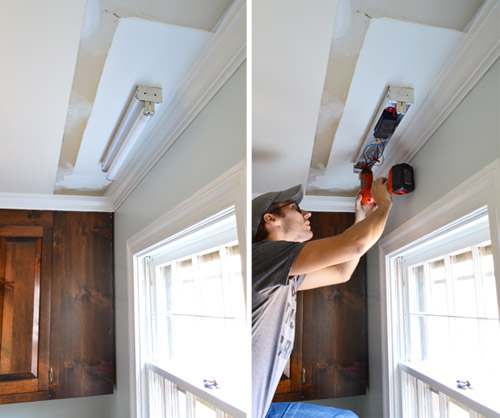
Step 5: Unscrew The Fixture Box & Remove It From Your Ceiling
Now the only thing holding up the fluorescent fixture were two big screws on either end. Once I unscrewed those with my cordless screwdriver…

…I could finally remove it entirely. Apparently I was so excited to have it gone, I blurred my face.
If you’re old fixture is in good enough condition still, we highly recommend donating it somewhere like a Habitat for Humanity Restore.
Step 6: Spackle Holes & Paint The Area
Since your new light fixture likely won’t cover the same spot, you’ll need to spackle any holes (like the ones from the screws), repair any other hidden damage, and also paint to blend the area with the rest of your ceiling. You’ll see us get to that later in this post, but this is an important step to make sure there’s no lingering evidence of your old fluorescent fixture!
Installing A Pendant Light Fixture In Its Place
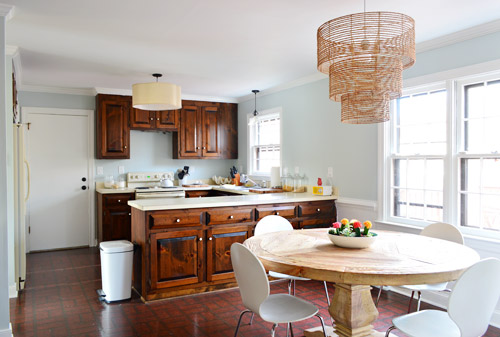
With your fluorescent fixture gone, now you can turn your attention to installing your new pendant, semi-flush, or flushmount light. We planned to install a burlap quatrefoil shade from our local Decorating Outlet that we mentioned here, which is hung from the dual-bulb pendant below.
Note: If you’re not comfortable with this step, you can always hire an electrician (and also pat yourself on the back for saving the cost of removing the old fluorescent puppy). But if you made it this far, it’s pretty straightforward to finish the job yourself.
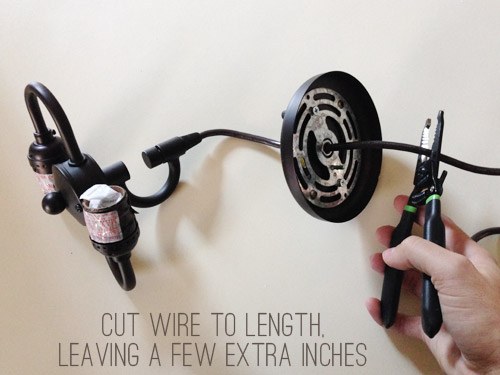
Step 1: Trim Any Excess Wire
We wanted it to sit nearly flush to the ceiling so we had to cut off a lot of excess wire before hanging it. This can be done to shorten any pendant fixture, or even to convert a plug-in light to a hard-wired one.
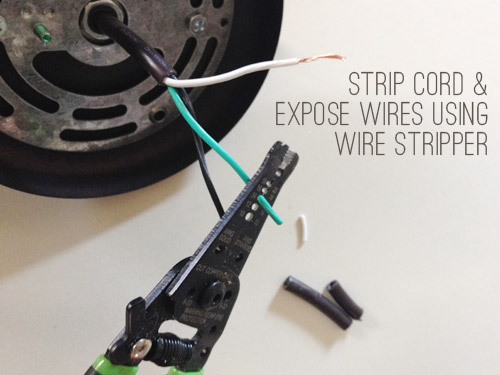
Step 2: Use Wire Strippers On The Cord To Expose Wires
Next, I used wire strippers to expose the tip of each individual wire, creating a place for them to connect to the wires in the ceiling. This wire stripper I bought a while back (similar to this one) has been a great purchase, in case you’re planning to hang any light fixtures soon.
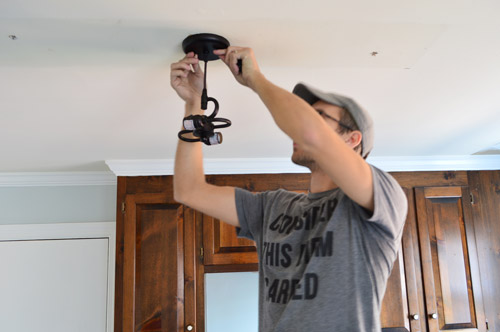
Step 3: Install Your New Fixture
With my cord shortened and my wires ready, I could complete the installation per usual. First I attached the mounting bracket to the ceiling fixture box and then connecting the matching wires together with wire caps. Once those were secured, I tightening on the ceiling cover with the two small screws that came with it.
Here’s our new pendant once the shade was installed – and after we’d painted and patched the ceiling too (notice how the holes and discoloration are gone from the photo above?).

With that project completed, we turned our attention to the smaller fluorescent light above our kitchen sink. It had been hidden behind the cabinetry on that side, but now that we removed it (in favor of some open shelving that we can’t wait to add) – well, it’s super visible. So we repeated some of the same steps above, although this one didn’t even have a plastic cover to remove first.
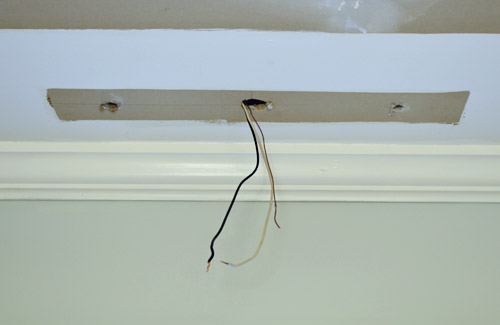
While it was a relief that the wires were centered over the window (again, this wasn’t the case in our last kitchen) it was kind of a bummer to take down the old light and discover that there was no fixture box in the ceiling. Just a big hole where the wires poked out.
Installing An “Old Work” Ceiling Box
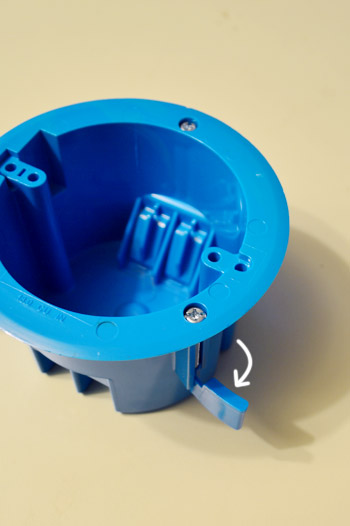
We’d need a fixture box to install the new glass funnel pendant that we’d planned for the space. I felt around near the wires to see if there was a beam that I could attach a fixture box to, but came up with nothing. So it meant installing one of these “old work” ceiling boxes. They’re designed to slide into existing walls or ceilings, where as “new work” boxes are attached to studs or joists before drywall is installed. Since we didn’t have a stud nearby, this old work box would just be held tightly to the drywall by three little wings on the side (see below). Once you’ve placed the box in your drywall, you tighten the screws on the face of the box which swing the wings out and pulls them forward – eventually hitting the back of the drywall and pinching the box in place.
My research revealed that these aren’t technically meant to support light fixtures (something that nails or screws into the frame of the house is recommended), but plenty of reviewers on the Home Depot site reported using them to hang lightweight fixtures like ours, so we felt comfortable giving it a try. Update: It held in place with no trouble for a couple of years, at which point we finally remodeled the entire kitchen and replaced with with a recessed light.
Step 1: Make Sure Your Power Is Off!
If you hadn’t already turned off the circuit breaker at your electrical panel box, make sure you do it before you continue.
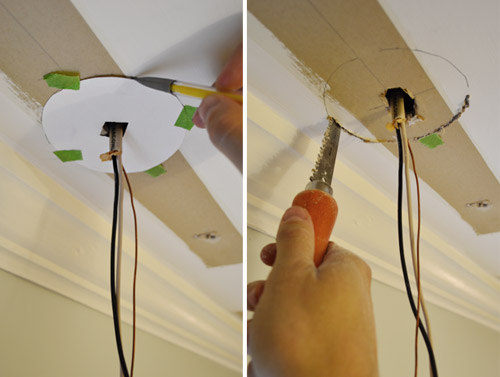
Step 2: Mark The Placement Of Your New Fixture Box
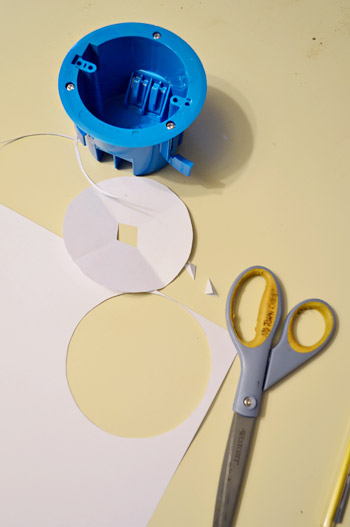
To install the box I first had to cut a hole for it in the ceiling. It had come with a template, but somewhere between checkout and home we lost the sheet. So Sherry made me one of my own – making sure it was a little bit smaller than the largest part of the box (since that’s a lip that needs to rest on the drywall).
Step 3: Cut Your New Hole
Next I traced that template onto the ceiling, making sure that my wires were coming out through the center. The I cut the hole out using a drywall jab saw. I kinda felt like I was in the middle of an old school cartoon where one character cuts the floor out from underneath another.
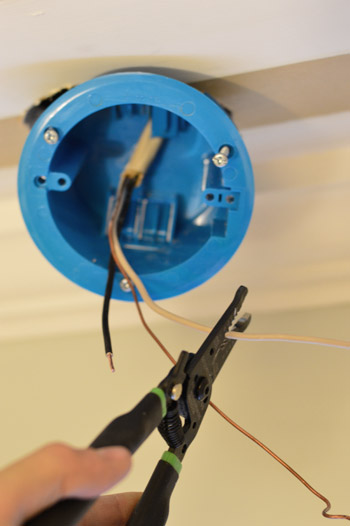
Step 4: Feed The Wires Through The Box
With my hole cut, I could feed my wires through the back of the box and trim them to size (they had been surprisingly long!). Again, make sure the power is off before doing this.
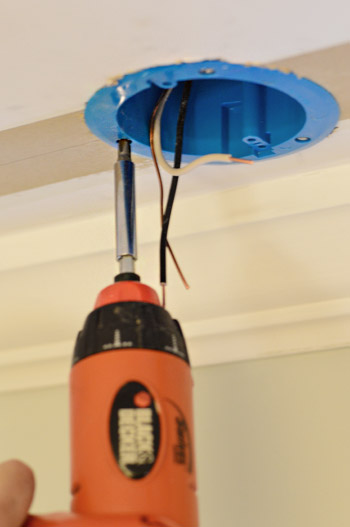
Step 5: Tighten The Screws To Secure The Box
Then I tightened the screws on the face of the box with a screwdriver to secure it in place with those wings.
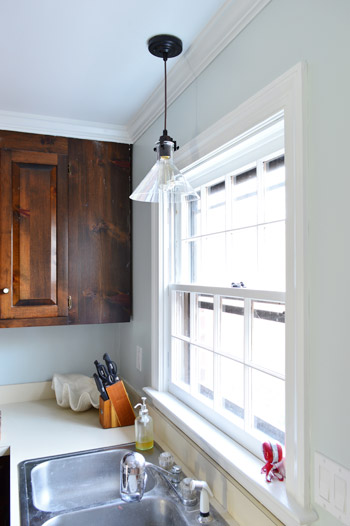
Step 6: Install Your Lightweight Fixture
From there, the actual fixture install itself was straightforward (connect the right wires, secure the canopy, turn on the power, and watch it glow). We like that it’s simple and doesn’t command too much attention visually (since the other two lights in the room do) and that the view out the window isn’t obscured by a big heavy shade.
UPDATE! We’ve finally transitioned our entire house to LED light bulbs (they save tons of energy & money, and they’re a lazy person’s best friend because you never have to change them). For anyone wondering, these are our favorite interior LED light bulbs. Their glow is warm & natural (not weird/blue like some of the others we’ve tried) and they use around 90% less energy.
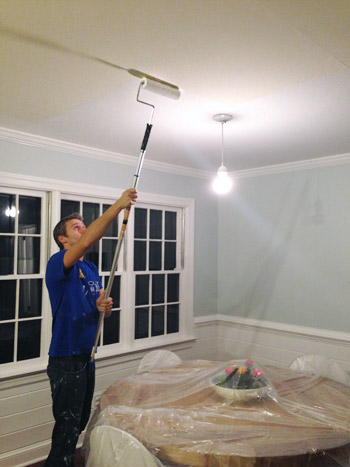
With the fluorescent fixtures finally gone, we could finally break out the primer and paint to make the ceiling look new again. We just primed the areas that were raw drywall, then we painted the whole thing in BM Simply White (same color as the trim) in a flat finish. As is our usual MO, Sherry did all the cutting in around the crown molding, and I was the resident roller man.
The difference of the painted ceiling is somewhat subtle in pictures, but in real life it makes the whole room look a lot fresher (the glossy white painted crown next to the old yellowed ceiling was no bueno in person, so we’re glad that’s gone for good). Oh and the two larger fixtures are sporting different colored cords at the moment, but we might spray the white one ORB like we did with this pendant in our previous kitchen if it bothers us after we paint the cabinets. We generally like an oil-rubbed-bronze cord for some visual contrast, but in this case we appreciate how the white one becomes kind of invisible over the dining area, so we’ll have to keep you posted if we alter anything as the room comes together more.
It’s nice to have three more items checked off the list, but it means we’re dangerously close to the task that we’re simultaneously psyched about and dreading: painting the cabinets. But man oh man, what a difference that will make (especially when they look like this up close).
Remove wallpaperMove fridge cabinet forwardRemove upper cabinets on window wall to prep for open shelvesReinstall crown molding(you can read about how we did those first four things here)Prime & paint the pantry and the door to the garagePrime & paint the trim, crown molding, & baseboardsPrime & paint the paneling(you can read about how we did those last three things here)Prime and paint the wallsRemove the existing microwave (craigslist it?) and get a countertop one we can eventually install in the pantry(here‘s the post on those last two bullets)
- Install a cheap range hood (we found one for $25 on craigslist that we can’t wait to hang) to lighten up that wall
Patch, prime, and paint the ceilingReplace the florescent light in the cooking area and the pendant over the sinkReplace and center the light over the dining table- Hang floating shelves on the window wall
- Paint the cabinets (you can see the colors we’re leaning towards here)
- Update the old cabinet hinges and knobs
- Get a rug for eat-in area? Possibly install peel and stick tiles everywhere?
- Curtains for windows?
Has anyone else checked off a few things on their to-do list? We know it was an interesting weather week for lots of you, so maybe you were able to accomplish your “drink hot cocoa” and “go sledding” to-dos? We’d be a bit jealous of that, considering that all that we got was ice and freezing rain.
Update – Wanna know where we got something in our house or what paint colors we used? Just click on this button:

*This post contains an affiliate link

Laura B. says
Hi. I know you like to use the semi-gloss simply white paint from Benjamin Moore. There are several different types of paint though. Which do you prefer?
YoungHouseLove says
We like Natura since it’s no-VOC.
xo
s
sarah says
Love how it’s all coming together. Outs amazing what a fresh coat of paint on the ceiling will do. We just gutted our kitchen in a major reno project that had us out of our house for 5 months. But it was worth it! Our kitchen it’s a similar soft blue. Martha Stewart “bakers box”. I love it most of the time except around 4pm when the light makes it look greenish. Otherwise out looks beautiful with our grey cabinets. Looking forward tho seeing what color you choose for your cabinets.
Jessica A says
I love that your scissors still say “no John cuts”. I remember when you first did that post and I found it so funny because I am the one who ruins scissors in my house! I will try to use a pair of scissors to do anything!!
In more relevant news – I love that twine chandelier. I can’t wait until we get to the point where we can trade out our ugly builder spec chandelier for a beautiful, unique one.
YoungHouseLove says
Those scissors might outlive us! Of course they’re the bad ones now (John ruined them opening a box I think) so he sweetly got me new ones, which I didn’t mark with “no John cuts” but so far they have survived. Ha!
xo
s
Shaina says
Would love to see a night shot or even a gloomy day shot (since it’s rainy and snowy today) of the kitchen. I know we have a hard time with light in ours with a similar 2 light fixture over the main area.
Also, did the pendant light come with various lengths of cord? I’m just curious if you picked the length or if there was just one option.
YoungHouseLove says
Oh yes, that came with a long cord so we just held it up to see what looked best. In general with standard height ceilings we always tend to lean towards the shade just grazing the top of the window and poking down a bit more (into the top pane, but never hanging low enough to be centered on the window since that looks like a lot of cord). As for a night shot, there have been a bunch of requests for that, so we’ll share one in the next post!
xo
s
Tania says
We were iced in our house for 4 days (Dallas does NOT handle snow & ice well!) and we kicked our to-do list in the face!!!! We did a ton of finishing touches on our kitchen- grouting, cabinet pulls, lighting- we removed all the wallpaper & painted ceiling and walls in 2 bedrooms plus a hallway, we put together 4 bookshelves and installed lighting in our bathroom and unpacked a room FULL of boxes!! And put up christmas decor and drank wine. So excited- after 18 months it feels like we actually have a real house again!! :-D
YoungHouseLove says
Haha! I love that you kicked your to-do list in the face. Go get ’em girl.
xo
s
Shannon says
Loving all the changes! Im absolutely on the edge of my seat waiting for the next few steps! Painting those cabinets will feel so dang good!
Michele says
Absolutely LOVE LOVE LOVE the piece over your table! What a great centerpiece for the room!!! STUNNING! (I simply cannot put enough !!!!! in this comment post! LOL)
Sarah says
Ha! The only way I ever get anything crossed off my to-do list is to add smaller, simpler projects. I read your blog because it’s proof that someone, somewhere in the world can actually get stuff done. ;)
Love the chandelier!
YoungHouseLove says
Haha! I love that! Put in easy things like “wake up” and “brush teeth” so you can cross those suckers off!
xo
s
Gaelle says
Love that when it was time to get serious about wiring John rocked the nerdy look :D Makes it look very professional!
Your commitment to slowly turning a space into something miraculous forever amazes me. I know it’s your job, but boy I could’ve thrown the towel a million times. It’s inspirational and helps me think about the new place I’m about to move in as many little things to improve, and not one big old piece that I don’t know what to do with.
Hillary says
Oh, the fresh ceiling paint makes SUCH a difference. I really like the pendant over the table…it wasn’t my taste when you originally linked to it but I think it works really well with your table and is a great scale for the space. The over-sink pendant is darling, too. I have to say the kitchen fixture is a little off for me. Too big/low maybe? Or the open shade seems not quite right? But I’m sure you will either love it and live with it or figure out a way to make it work. In any case, great phase 1! It must be so refreshing to walk into the space after living with it in its original form for a few months.
Kel says
Love the difference the painted ceiling makes and love the light over the table…not too sure about the other 2 lights? 3 different lights in the one room is kind of taking my focus away from the whole room and seems a little too much. I hope you don’t take offence as pics can be totally different to how it looks in person x
YoungHouseLove says
Yeah we feel the same way (that it looks unfinished) but we hope when it comes together more (painted cabinets, art, window treatments) it’ll hopefully come together and make a lot more sense!
xo
s
Shannon [Our Home Notebook] says
They look great in there! I love the rope chandelier.
Nikki L says
Hey you guys!
This is kind of a weird question, but where did you guys get your trash can?
Love your blog!
Nikki
YoungHouseLove says
Thanks Nikki! It’s from HomeGoods. I think the maker is Oxo?
xo
s
Kathy S says
I love your kitchen fixtures! Maybe I missed it, but what kind of pendant did you hang over the sink?
YoungHouseLove says
That was from Home Depot (it’s in stores but there’s no link to an oil-rubbed bronze one online for some reason).
xo
s
Izzy coric says
Your kitchen is really starting to look great!!! And I’m so excited to see the cabinets get painted and I wanted to tell you that another really inexpensive redo tip is lazy granite! It’s cheap but changes the look of the kitchen drastically. You just lay it over your current counter tops!!!
YoungHouseLove says
Never even heard of that! Thanks for the tip!
xo
s
alexandra says
How did you patch the fist-sized holes in the ceiling?
YoungHouseLove says
Here’s a post with a bunch of details (and a video) of our method! Hope it helps.
xo
s
Joseph says
So I realize this is a little late but I missed this post before and I just had to say that carpe diem shirt is awesome.
YoungHouseLove says
Thanks Joseph! I bought it from Fab.com if you’re in the market…
-John
Joseph says
Oh my goodness. I’ve never heard of that site before, but now I must buy all the things! I never knew I needed a bread board with a dipping bowl and slicing lines before but now I do.
Amanda says
Thanks for the tip on the old work fixture box. We had the same issue above our kitchen sink and just installed one today. We have a gap between the ceiling and the light fixture. Did you notice that with yours or did it sit flush? We are brainstorming a way to minimize the gap.
YoungHouseLove says
Oh no! We didn’t have that issue, but maybe you can try caulking to fill the gap so it looks more seamless? Or can you try resetting the box so it’s more flush?
xo
s
Ingrid says
Does the rope chandelier cast “wiry” shadows?
YoungHouseLove says
We have a frosted bulb in there, so it doesn’t – but I think with a clear bulb it could.
xo
s