When we last left off in our deck saga, our hero (that’s me in this case) was avoiding battling the heat as he tediously valiantly drilled in screws across the middle of our deck. Since that chapter of this drawn out harrowing tale, John The Weary Daring continued this mind-numbing history-making task.
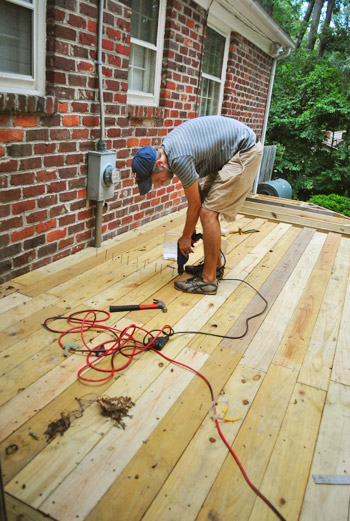
Since that’s about as exciting as I can fake my latest day of deck work, I’m just going to skip to this part where you can see the middle of the deck all laid down and screwed into place. Let’s just say I was glad the deck was finally more solid surface than it was holes for me to fall into.
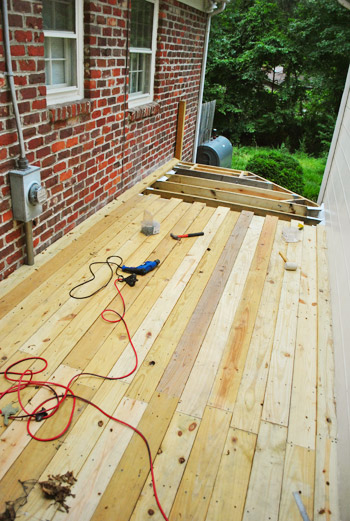
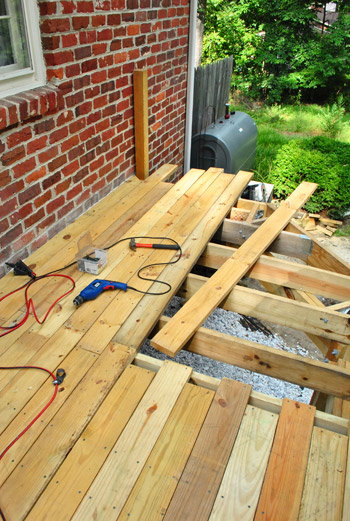
I could just fast-forward through this next part since it was, in essence, just more board screwing. Er, ahem – board attaching. But of course, since I was at the end of the deck there was some special planning / measuring / calculating I had to do. So let’s dive into those details for a second…
Luckily I didn’t have to worry about cutting the boards right away. I learned from several tutorials that when you get to an open edge – especially when you’re doing the “picture frame” border, you’ll want to cut all of your boards with a circular saw once they’ve been placed. That way you get a cleaner and more even edge than if you were trying to measure and cut each board independently and then placing them all.
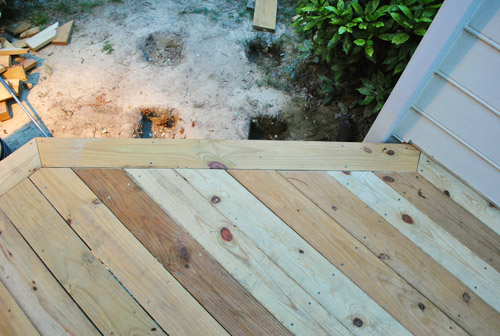
So once my jagged little edge was all screwed into place, I brought out my miter-cut frame piece and used it to mark where the edge of my boards needed to be sliced with a nice clear pen line. Like so:

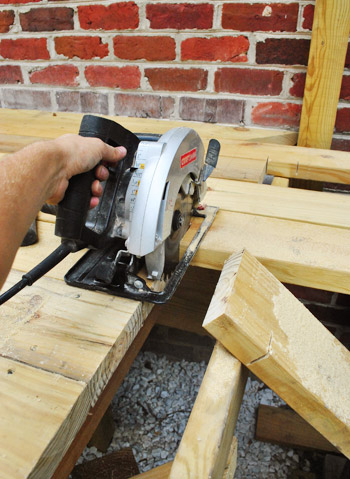
Before cutting, I was sure to set the depth of my circular saw to 1 and 3/4″ so that I’d only cut through my deck boards and not into the girders below.

Then I revved up the saw, started cutting – momentarily stopped to fake a photo op (I’m no good at keeping a straight cut line with my left hand, but my right was occupied pressing the shutter – another task my left aint’ so great at) – and then finished down the line, stopping before I got to my last board (which is part of the “picture frame” design, so it was already pre-mitered before I screwed it in).
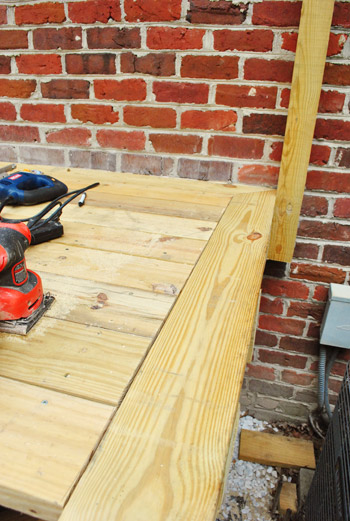
Here’s my end piece dropped into place (after sanding my cut edges to smooth them out). Not too shabby, right?
Cutting that half of the end was pretty easy, actually. It was cutting the next part that took me some time because it was on an angle. My geometry is pretty rusty so it took me a few test attempts on scrap wood to figure out what angle the two picture frame boards should meet at.

But once I got it right, I repeated my process of marking my cut with a nice obvious pen line, and then broke out the saw again.
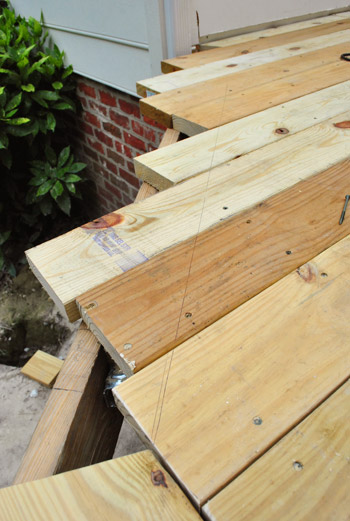
Here’s the clean, cut edge looking all pretty… and sawdusty too, I guess.
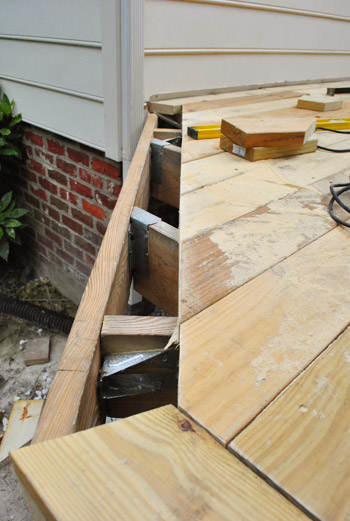
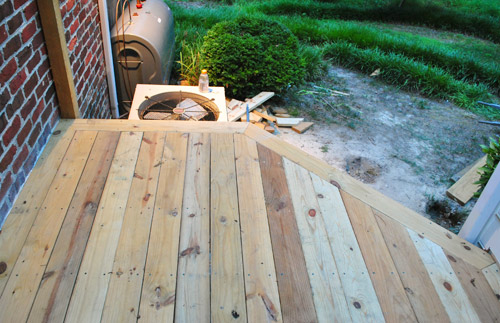
Here’s the final frame once I got everything screwed into place. I have to say I’m pretty darn proud of myself for figuring this out and not ruining any boards in the process (minus the test scrap pieces that volunteered as tribute).
And here’s that end all finished up. Looking at this makes us REALLY glad we opted to do the picture frame. Just that little touch seems to make it look a lot more “pro.”
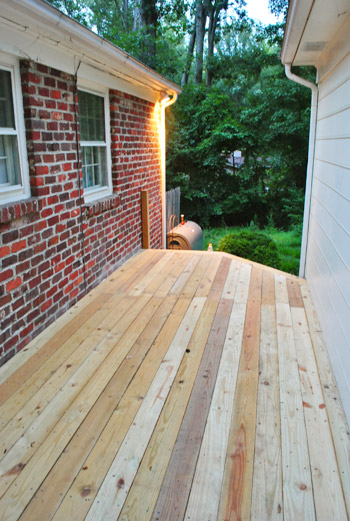
So with that, my friends, all of the deck boards are officially down. Can I get a woo to the friggin hoo? Because there were moments in this process where I never thought I’d get to something that actually looked and felt like a deck. In this picture you can also see that we ended up with two zippered seam details, and we’ll be centering the dining table between them like Sherry did in the rendering here. We’ll share more close-up seam photos soon (we think it’ll really pop when we seal the boards and furnish things so that they’re sort of a built-in detail around the table once everything’s in place).
The only bummer is that now I have to deal with the things that I’ve been back-burnering in my brain this whole time: the railing and the stairs. Something tells me they’re not only going to require a lot of math, but that they’re also elements of the deck that the inspectors will be especially mindful of. Could this spell disaster for our hero? To be continued…
Anyone else perform some DIY project heroics lately? Even if they’re just heroic in your own mind?
Psst- Wanna catch up on all of the deck action? Here’s where we shared our vision for the space, then we removed the plantings and the old balcony, followed by selecting our materials and documenting our first day of building progress. Then we dug our post holes, learned that we failed our first inspection, revised our plan and dug more holes (which got approved) and proceeded to set posts. Next it was time to install our joists, do a bunch of last minute prep for deck boards, get started laying decking boards, whip up a mood board with our design plan and continue laying deck boards. Whew, all caught up.

Belinda says
Woo to the Hoo!! Great job. Love the Hunger games ref too. :)
Tina Bland says
I VOLUNTEER AS TRIBUTE!!! LOL!! That Hunger Games reference (was it intentional?) was all I could think about (scream in my head) after reading this. Happy deck finishing! Can’t wait to see how you guys furnish/decorate it!
Chaucea says
The deck, it is Teh Sexeh!! :-D
Beautiful work, John. It looks fantastic.
Btw, what IS the name of your deck? Dexter, perhaps? (Get it? Deck…ster…*rambles…*)
YoungHouseLove says
Oooh, that is a good name for it! Sold.
-John
Nicole says
Nice job John! Really coming along nicely! Wanna come to New Jersey and do mine?? Hah :)
Tirsa says
Great job!!!! it looks really beautiful. I’ll say you’ve earned a full month of back rubs to be given twice a day plus a gift card to a massage therapist for a deep tissue massage or something that will take care of a very achy back. :-)
Jenny says
Right on! Looks awesome! So, you guys realize you can never move right? Seriously. My older brother by ten years built a tool shed in my parents backyard one summer while he has home from college and my other siblings and I were so excited to watch it all happen that we crowded around him in the backyard everyday while he tried to measure and cut and hammer and pour the floor. It was a quite an event; major big brother pride, and my mom and dad were super pumped too. Anyway, would you believe that at 31 I still drive by that house (my parents sold it about 7 years ago) when I am down in my hometown and get warm and fuzzies when I turn the corner and see the shed in the backyard? “Aw, there’s the shed!” My husband just shakes his head and gives me one of those little leg squeezes. (He totally gets me.) I think it has something to do with our family’s mark on the house being visible there even though we’ve all moved away now. Clara is going to want to live in the YoungHouseLoveHouse forever what with all of the hard work you two have put in and the “you” all around. I think you are in Father of the Bride territory- just sayin’. Congrats on the deck!
Ann says
Congrats!! That is a HUGE accomplishment!
Cara says
Beautiful! I hope you had a cold beer out there tonight.
Ideas Woman says
Brilliant job John. What a lovely place to hang out.
Hannah says
I hope I can say this without being offensive, but I am now finding this blog a little too “slick.” There is just no way two people can do all you say you do without a lot of outside help. You are no longer just two geek do-it-yourselfers. I wish you luck and success, but your blog is now no different than reading any of the myriad of decorating mags. I will stick to the ones that are truly just regular people finding a way to make their homes better on a budget.
Again, best of luck on your endeavors.
YoungHouseLove says
So sorry something’s given you that impression, Hannah. We’re sorry to see you go and wish you best of luck on your endeavors also. Happy DIY-ing!
-John
kmeenakshi says
Amazing work by you. The deck is looking really nice with the perfect measurement. Like it!!!
Christy B says
Looks so good! I tell ya, watching your process, I’m glad to have a civil and mechanical engineer for a father in law and husband to do all this so I don’t have to think about it at all.
Cindy says
I’ve been tired just reading about this brave saga, and can’t imagine ever being talented enough to do something like this myself. Amazing work!
YoungHouseLove says
Thanks Cindy! You guys are so encouraging!
-John
Amy @ PaintWineRepeat says
Looks AMAZING! All your hard work is paying off!
Julie P. says
Great work, John! I’ve loved seeing all the updates on this project and, as always I admire the perseverance that you both have in completing projects in your beautiful home.
I remembered your “harrowing tale” yesterday as I was removing the worst carpeting-over-hardwood I have ever seen; I even had to rent an industrial floor scraper! Eleven hours into my project, I remembered all of the wonderful projects that you two have completed and reminded myself that I could do it, too!
Thanks as always for your blog–the great inspiration that you provide to people like me (a young, newer homeowner)–and for the heartwarming and incredibly addicting stories and photos that you share from your life! Good luck with the railing and stairs–I’m sure you’ll exceed your own expectations. :)
-Julie
YoungHouseLove says
Aw, that makes me get all clammy (that’s what I do when I’m happy, haha). It’s awesome that you got ‘er done yesterday- and although it’s not always easy- it’s always worth it! Good luck with everything!
xo,
s
Jeff Patterson says
The deck looks fantastic!!
Keep us all posted on the railing and steps.
We used Wet n Forget to keep our stone patio clean and prevent grime from accumulating on it. I’ve also used it on wood siding that’s been painted and seen good results.
My latest hero project involved installing cement board in my brother-in-law’s bathroom :) I’ve documented the renovation on my blog in case anyone is interested
YoungHouseLove says
Thanks for the tip Jeff! Never heard of Wet N Forget, so we’ll have to look into it. And your cement board install definitely sounds heroic!
xo,
s
Susan says
Looks great! And safe. You know when Clara has her prom pics taken on that deck it’ll hold them all! (they were talking about deck safety on the Today show this morning and showed the clip of one collapsing, no one was hurt.)
YoungHouseLove says
Aw thanks Susan!
xo,
s
Jennifer says
Woo to the friggin hoo! Yes you may! Nice work.
Kate says
Looks grrrrrrrreat! I want one…
Georgia says
Looking awe-some! Surely our hero will live to fight another day and defeat the evil deck inspector.
Rita Rozenbaum says
You might check this site
http://www.casadecrepit.com/archives/002158.html
YoungHouseLove says
Wow- that’s gorgeous!
xo,
s
Arianna Davis says
Great pictures! It’s really turning out nicely.
R says
John and Sherry,
I check your blog everyday and I love it over the moon and back! But, I have been waiting and hoping everyday for what you are going to do to your deck whether it will be paint or stain? Pretty please post about it soon! Thanks so much for opening up your life so people like me can get the best ideas ever!
YoungHouseLove says
More deck updates are on the agenda for today! As for paint or stain, we’ll actually be sealing it but aren’t sure we’ll stain it since the rest of the wood around our lot is natural toned (and it supposedly is less maintenance if you skip stain and just seal things). Will keep you posted for sure!
xo,
s
jessie says
did you guys ever provide a budget breakdown of the deck if so where is it. thanks!
YoungHouseLove says
We’re waiting to stain/seal it and then we’ll break it all down. As soon as it gets warm enough it’s next on the list!
xo
s
zach says
Split your seams more. It looks like there is an addition at the end of your new deck.