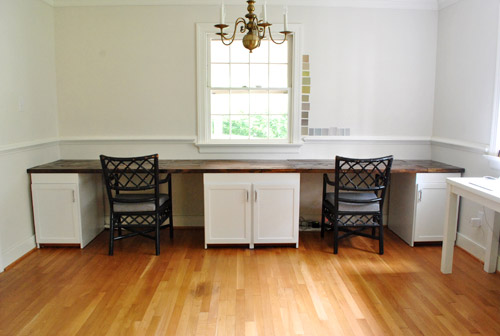
So our built-in wall-to-wall desk already made some good progress this week with the painting and making-taller of our cabinets. But something was missing.
Yes, remember the view from before?
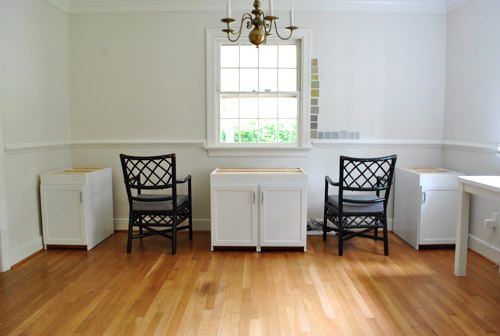
Yes, we were devoid a counter (aka, the desk top). John and I were actually quite indecisive about what to do when it came to that part. And whatever we did, we needed about thirteen feet of it (a length that we learned most kitchen counter suppliers wouldn’t even deliver since 12 feet was usually the max before you ended up with a seam). At first we considered ordering a legit kitchen counter top (maybe butcher block, maybe silestone, maybe this from Ikea – although they would all have a seam). I think after having saved so much with our $6 cabinets we thought that maybe the top could be our splurge.
But, then again, we’re not very good splurgers. Also, I was leaning towards something white (to keep things light, and to tie into the top of the nearby built-ins in the dining room) but John was Mr. Hesitant about white overload (and worried that the white tone of the counter could clash with the white of the cabinet). I know, it’s shocking to hear a guy worry about clashing white tones (especially when he usually can’t tell one white paint chip from another) but he can own it. In short, we were stuck.
But after seeing this DIY-ed desk that Aubrey and Lindsay built, John won we both realized that wood was the way to go.
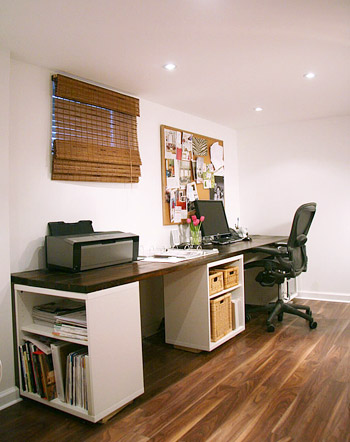
We’ve always loved the combo of white and deep wood (we did something similar but flipped when it came to refinishing Clara’s dresser), so why not? And rather than “matching” a white counter to the tops of the built-ins in the dining room, we thought referencing the rich wood tabletop in there could really look great.
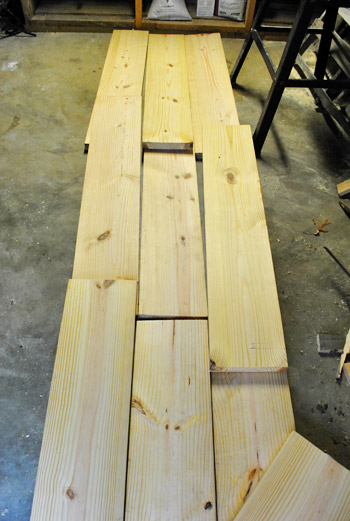
So with the “rich wood finish” decision made, we tracked down our materials. We wanted something thicker than the 3/4″ console table top (just to stay proportionate with the four chunky cabinets below and the thirteen foot length), so we picked up some 2 x 10″ untreated framing lumber. It was as thick as one of those jumbo cutting boards and I walked around the store talking lovingly to it, which was completely embarrassing but I could. not. help. it.
While there we had the guy at Home Depot cut a bunch of eight foot pieces in half so we could fit them in the car (it would also make maneuvering them at home much easier). And this is the most exciting thing. Total cost: $27.30. Yup, it came to less than a dollar a square foot (which is a heckova lot cheaper than most other countertop options, even butcher block or laminate from Ikea).
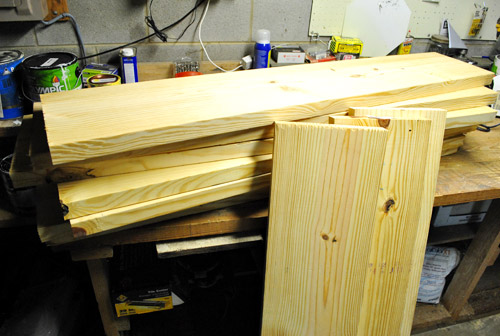
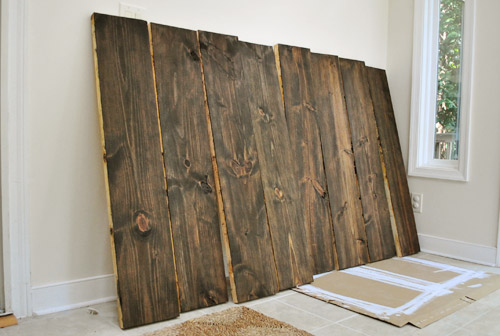
So with everything home, we did a rough layout on the floor of our basement workshop to figure out which pieces had the nicest edges (for the front lip) and which ones should be hidden in the back. We didn’t have 13 feet of floor space to work with, hence the overlapped look.
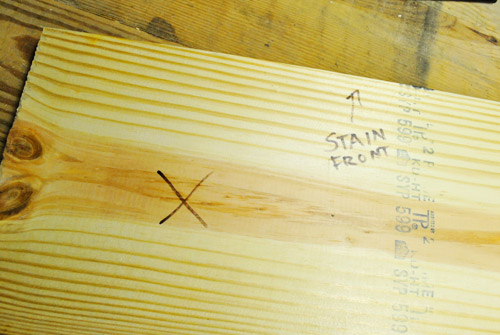
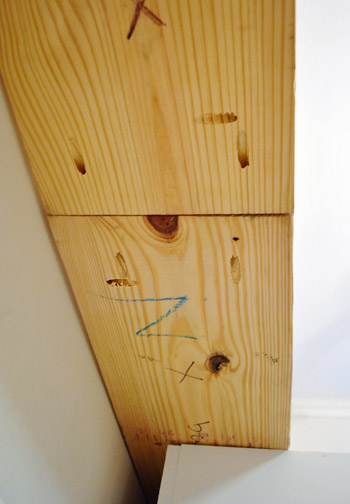
Since I was going to do the staining, John helped me label the back of each piece with clear directions so I didn’t end up staining the wrong side. The X meant “don’t stain this side” and STAIN FRONT meant, well, “stain the front edge” since it would show on the outer boards if it was a front board.
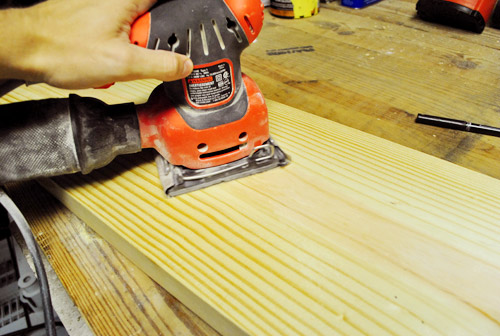
John’s duty (besides cutting a few end pieces to size) was sanding (since I still had memories of my vibrating hand from sanding the cabinets in the priming step of the process). John used the same cheerful little mouse sander to go over each piece thoroughly with some coarse 60 grit sandpaper first (to smooth out any big imperfections) and then went over things again with some finer 150 grit paper afterwards – just to give it an even smoother finish.
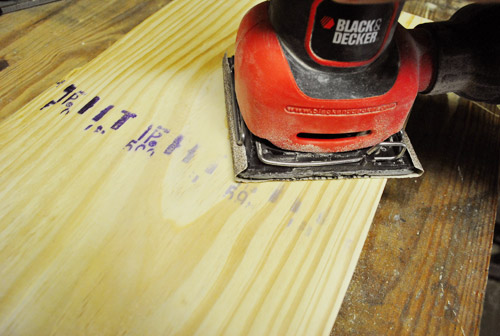
One potential challenge with lumber like this is the prints and stamps that come on them. We ended up using only the sides without marks, but if that weren’t the case we could’ve just used some extra sanding elbow grease to buff out the ink. But thankfully the other sides were just fine.
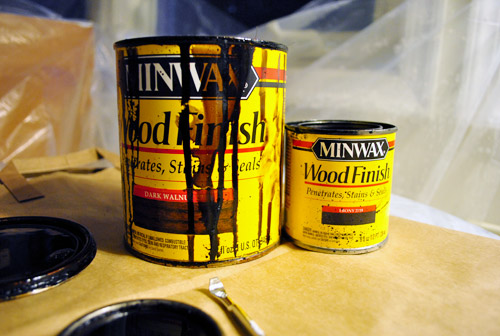
With everything sanded, we brought the boards into the sealed-off sunroom so I could stain them. We decided to use stain we already had on hand (leftover from the console project, actually I think it was from another project before that one) and ultimately decided to use the dark walnut and not mix in any of the ebony this time. Although we had done a combo of the two for the console, we weren’t really going for that same weathered / distressed look. Instead, we were trying emulate the deep, rich finish of our dining table.
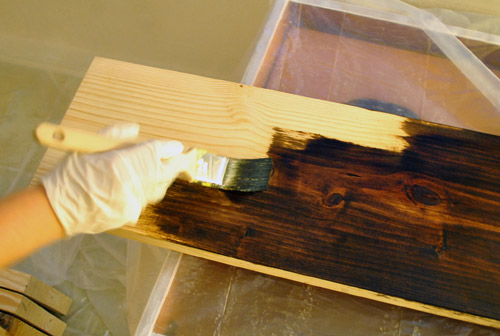
So as usual, I brushed on a coat of the stain with a paintbrush (and a mysterious gloved hand)…
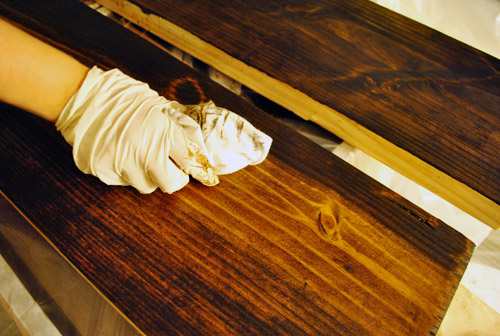
…and then wiped it off with a rag after letting it soak in a for about a minute.
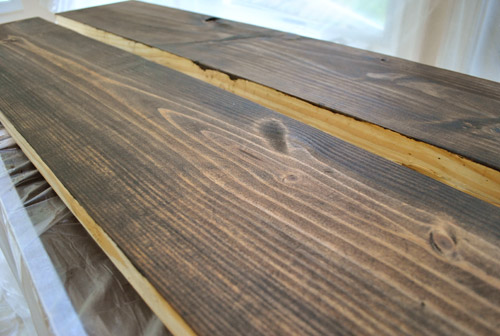
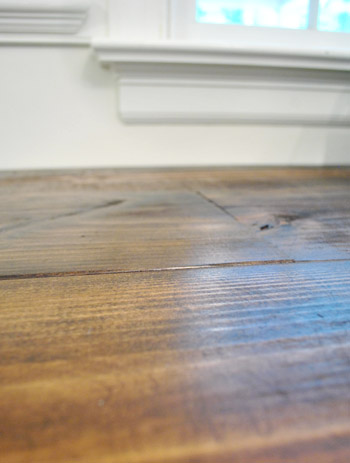
Once they dried overnight, we were left with these beauts (I did the staining at night and shot these after photos in the morning, hence the different look/undertones – you’ll see the actual finished look later in the post though).
John’s original plan for building the counter was to recreate his process for the console top, just on a larger scale. That meant using his beloved Kreg jig to screw the boards into one another side-by-side so they became larger sections that he could then piece together on top of the base cabinets. But after going to town with his jig on a few boards, he realized these heftier boards weren’t gonna jive with that plan – especially when he had a seam straddling two cabinets. You can’t tell from this picture, but this set up was a bit wobbly. And a wobbly desktop (or something uneven that made our laptops wobbly) wasn’t the goal.
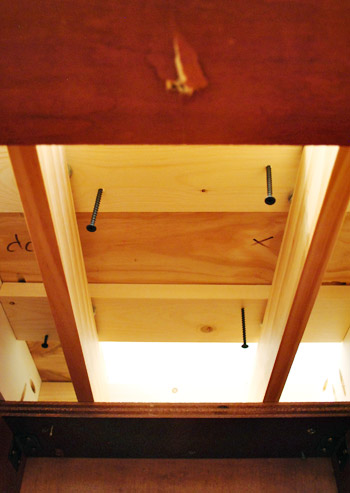
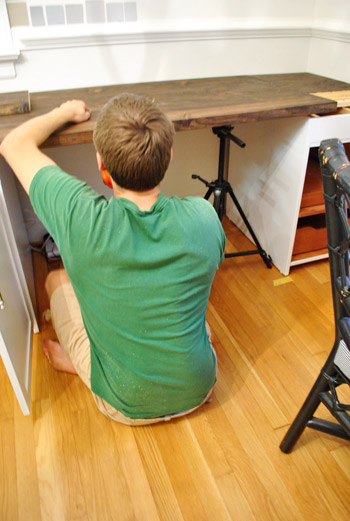
So he adjusted his approach to focus on screwing the boards to the cabinets first, and then to each other wherever necessary (for added support). It wasn’t a bad alternative, it just meant a lot more cramming his body into the base cabinets to drill screws up into the bottom of the counter planks while I leaned on things to keep them in place from above.
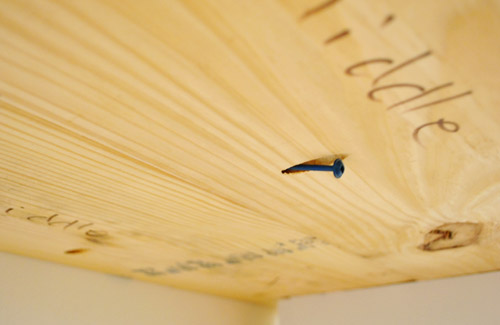
True to form, wherever he could, John used his pre-drilled pocket holes to secure the pieces to one another for added strength (did I mention the man loves his jig?).
Perhaps our favorite discovery of the day was realizing that our camera tripod could double as a great jack-substitute to keep the boards level while John screwed them together (this was a lot more precise than me standing there and trying to hold them at a consistent height). They make a good counter-building team, John and his trusty tripod.
The brevity at which I’m recounting this process makes it seem like it was fast and easy. It wasn’t. You know we like to keep it real, so the counter install (not counting a few hours of sanding/staining) took us the better part of an evening – maybe around four hours? And it was relatively exhausting, especially to poor John who was doing the bulk of the lifting and contorting himself into the base cabinets to drill. The most frustrating part was realizing that our boards, like most, weren’t all perfectly straight. So we had to do our best to counteract/deal with the whole slightly warped thing (once we screwed them down/together in a few places they seemed to level out, but it took some finessing to make sure the tops stayed level as we went).
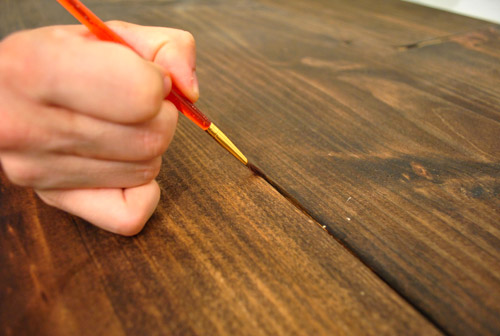
But eventually it got done. Though it did teach us a lesson in staining: be sure to stain about a centimeter over each edge, even if you don’t think it’ll be visible, since some of the tiny cracks between where the boards met revealed slivers of unstained wood. Luckily it was nothing a little stain touch-up with a small brush couldn’t fix (I dabbed it in there and then wiped the seam with a rag to blend it).
With the touch-ups dry, I later added three thin coats of our favorite non-toxic low-VOC poly alternative (Safecoat Acrlacq). This is the can that we originally bought for our bathroom vanity project over a year and a half ago and it’s still going strong (we use it for almost everything).
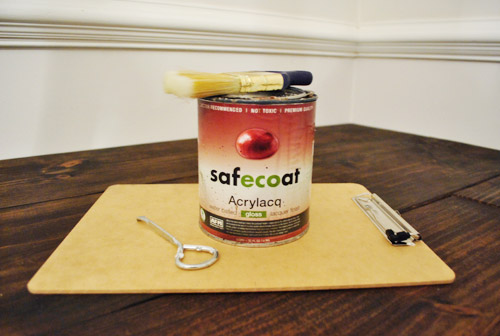
The Safecoat seal will not only protect the finish and add lots of long-tern durability, but it also gives the wood a richer glossy look – just like our nearby dining table.
Once we’d given the whole thing 24 hours to dry, it was time to take her for a spin. This is what our new desktop looked like empty…
…and here she is with some “styling” (come on, do you know me at all? I love to put a bunch of stuff on newly completed projects – just to help us get a sense of what it might look like when it’s in use). Of course everything was just shoved there in four minutes so it’s safe to say that nothing is permanent and I obviously want some larger art to actually hang on the wall (which we still have to paint, hence the swatches) and a bunch of other things will likely change/evolve as we actually get into using our new desk.
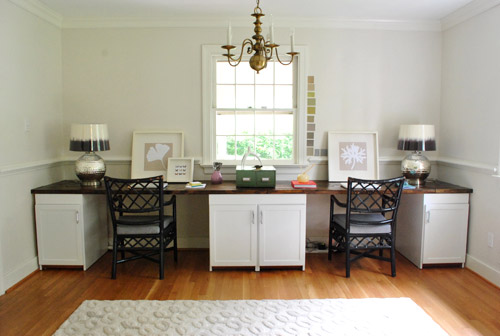
And yes, I borrowed the lamps from the console table in the living room and added some fun shades that I spotted at Target (they still have the wrapping on them, which is why they’re so shiny). But eventually we’ll have to grab two more lamp bases for in here (where we might keep the two-toned shades – we’ll see).
We’re so happy with how the office looks from the dining room. The wood top ties right into the wood table and doesn’t look weird with the white topped built-ins in the foreground. Whew.
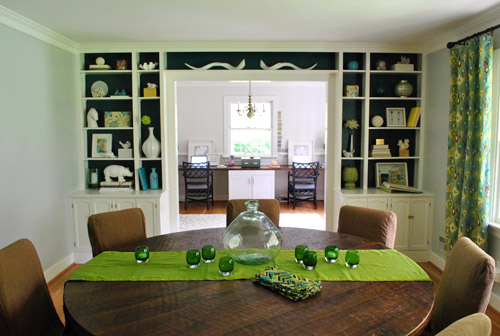
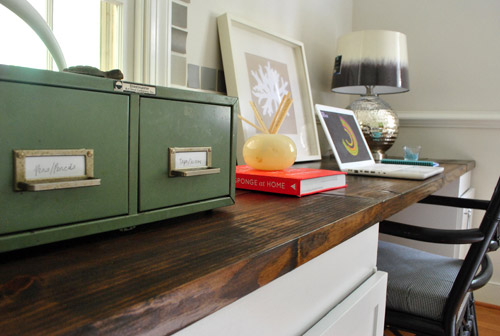
And the chunky wood top is such a rich counterpart to the white cabinets, we really couldn’t be happier. Oh and see that vintage green library box (found for $4 at a thrift store a while back)? That’s our new drawer system for pens, pencils, tape, and scissors – so the file cabinets are full of larger things (like the shredder, some storage boxes, etc). So far it’s all really functional- so I owe you a photo of the insides of those cabinets once we’re more settled in.
Oh and as for writing things down atop a wood plank counter, there are a few seams, but they’re four feet apart and the boards are nice and thick. We also generally use notebooks and notepads anyway, so getting bumps and lines when we write isn’t an issue. In fact in the square foot of counter space to the right of each of our laptops there’s not a single seam cutting through – so any pad or piece of paper could be written on easily without any seam-conflicts. Which is a nice accident because we just laid the boards in a staggered zig-zag pattern and they happened to fall without any seams to the right of our computers. Holla.
Overall, the current setup (although the “styling” is ever so un-permanent)…
… is definitely an update from the old office setup (you can read more about the floor-planning process here). Only now do we realize how cramped that desk really was:

Of course we’re not 100% done with things. We still want to put some sort of molding around the bottom and sides of the cabs to give them a more built-in look. Plus we’re still not sure if we’re gonna stick with the shiny silver hardware finish that came with the cabinets (of course I’ve thought about ORB, but don’t know if that’ll look too matchy with the black glass pulls on the file cabinet nearby- I’ll keep you posted though). Even with those little things still on the to-do list, our budget’s looking pretty darn good for the ol’ wall to wall built-in desk project:
- Cabinets (from Habitat For Humanity ReStore): $6.30
- Kilz Clean Start No-VOC Primer$0 (leftover from painting the kitchen paneling, but it would be around $20 to buy for those wondering)
- Electric sander & sandpaper: $0 (already owned, but would be around $25 to buy)
- Benjamin Moore Advance paint (in Decorators White, satin): $40 (thanks to 10% off haggling/begging)
- Pre-primed & unprimed wood to build up cabinets (from Home Depot): $51
- Framing lumber for counter (from Home Depot): $27.30
- Stain & poly for top: $0 (already owned, but would be about $8 and $20 respectively if you didn’t have any)
- TOTAL: $124.60
We’re psyched, especially since a white laminate counter from Ikea that would span the 13′ length would be around $125 on its own (not counting any cabinetry, paint, etc). But of course just like any upgrade, our new desk is making the rest of the room look terrible. Haha. We need wall paint. And window treatments. And to actually update the chipped navy chairs that we grabbed for $35 a while back. And art. And a chair for the corner. And a lighting upgrade. And about a million other things. But thinking about everything at once gives me hives. One step at a time is the mantra these days.
Has anyone else out there gone with a wood topped something (be it a desk, dresser, kitchen counter, etc)? Do you do things backwards (like build a desk before you paint the walls)? Do you find it hard to resist stroking and talking lovingly to lumber at the home improvement center? I gotta get a handle on that.
Psst- To follow our desk makeove from the beginning, here’s the post about office floor planning, the post about finding our $6 cabinets, the one about other places we looked, the post about sanding and priming the cabinets, and the post about painting and building up the cabinets before adding the countertop.

partyofsix says
Love the new counter!
I don’t have any pictures, but we did something very similar for a double desk set up in our last house. We wrapped a painted white strip of 1×2 around each of the bottoms and visible sides and added a 1×4 above the doors to trim out the cabinets. We ran the 1×4 below the full length of the counter. But we built in ‘hidden’ shallow slide-out pencil drawers as part of the 1×4 for the sections between the cabinets (where you sit)–you couldn’t see them, but it made functional space and it aesthetically joined all the cabinets together and give it more continuity.
We nailed the 1×4 on the cabinets, and for the 1×4 between the cabinets, we screwed & glued those onto slide out computer keyboard trays.
You could do the same if it weren’t for clearance for the chairs.
Jessica says
Desk is gorgeous. If you can take an “aerial” shot of the desktop (if it’s ever bare again!), I’d love to see how the boards lay out all together in completion, only got a sense of it when unstained on your basement floor…
Also, I couldn’t help but wonder both in this post and in the post when you decided to go down to 4 cabinets from the original 6, if the extra 2 could now be used in the opposite corner in place of the Ikea one (and retrofitted for your files). It was nice, and functional, at the time, but now it pales in comparison to these desk cabinets. Having the other 2 here (if they fit) would really add consistency to the room. The Ikea piece, functional as it may be, doesn’t jive aesthetically now that you’ve ramped things up so high with this beautiful desk!
~ Jessica
YoungHouseLove says
We actually love the difference in height so the room doesn’t feel like a kitchen with cabinets all around the perimeter. It makes our desk special since it’s the only place those cabinets occur (and I have big plans for the other two in another room- more details on that as soon as I get to them!). As for an aerial shot of the desk, you’re one of many to request it! So we’ll definitely have to snap one or two for the next desk post we write (maybe about the lamps we end up going with, or the paint color, or…).
xo,
s
Caitlin @ Desert Domicile says
AMAZING!!! I love how the room is coming along so far :)
Do you think it’s possible to DIY a butcher block countertop for kitchen cabinets? I have a u-shaped kitchen set up identical to your first house’s kitchen and even though it’s a tiny space with only 33 sq. ft. of counter space, I’ve been getting quotes for $35 sq. ft. for counters (not including installation) which would be over $1,100 for the counters alone!!!
YoungHouseLove says
Ouch! I definitely think you could DIY it this way with success, just take it slow and make sure to get it as level as possible. Also, Ikea sells butcher block in long counters (maybe 10 feet long) for something like 50 bucks, so that might be a nice alternative to the $35 a square foot stuff!
xo,
s
Jessi says
The desk looks great! Can’t wait to see the organizational magic inside. And I still can’t believe you got those cabinets for 6 bucks. I’m basically stalking my ReStore now because of you guys. :)
As for the counter, I’m glad I’m not the only cheapie who embraced basic wood. We did something similar when we made part of our spare bedroom closet into a desk/convertible future storage area. We did an all white look –painting the closet, then the desktop ;) — and decorated with black accents to match the printer we couldn’t hide. We poly-ed, too, and it’s really held up. (Kinda like our bathroom floors. I no longer underestimate the power of paint and polycrylic.)
Anyway, another great project. Congratulations!
Anna P. says
I seriously LOVE this desk. The dark wood is perfect. And, thanks for including the would-be prices of the materials you already had on hand. That was super helpful!
Alice says
I kid you not, the first thing that came to mind when I saw your gorgeous new desktop was to quote Miss Clara Petersik by whispering (I wish I could shout it but can’t since I am at work)”sah pretteh!”
YoungHouseLove says
Hahahahahhah, comment of the day. Anyone who quotes Clara = awesome.
xo,
s
Karen J says
Or how about articians?
Karen J says
Uh, that was supposed to be after the “magitists” (sp?) comment. oops!!!
YoungHouseLove says
Haha, I knew what you meant. Too funny.
xo,
s
Audrey says
can hardly wait for those walls to get painted!!! debating on painting my house (well.. my girls will do most of the painting since my ankle still swells up like a balloon if i’m on it too long… thanks to breaking it last year). i love the bright bold colors… but them i also like more earth tones. decisions decisions……
katharine says
OOOOOOOOOO AHHHHHHHHH
kristen f davis says
fannnntastic! i was coming here to look at something that you guys did a while back, regarding staining old wood…turns out, you were staining today! love it. great job..and love all the symmetry involved in the dining room/office photo…symmetry makes me way too happy.
YoungHouseLove says
Aw thanks Kristen! Coming from an artiste like yourself that means a lot!
xo,
s
Megan says
LOVE the turn out!!!
This might have already been answered, but have you thought about removing the chair railing around the room? I feel like it would help you get more of the built–in you’re wanting. Just a thought!
YoungHouseLove says
We’re not sure what we’re going to do with it, but we lean towards keeping it for the architecture it will hopefully add once the room is a bit less unfinished. We’ll definitely keep you posted!
xo,
s
Chris H says
I am just amazed at how energetic and “just-do-it” you both are. I love the idea, but I think I would spend so much time thinking, deciding, procrastinating, etc. that it would take forever. You inspire me to get it done!
Angie says
Looks fab! You guys make things look so easy (even though you say they’re not and I believe that). Also, I totally, TOTALLY, understand the hives comment…and it made me laugh out loud. Such a pleasure to read about your projects!
Kate S. says
I envy your ability to do this. I desperately want to build in office furniture for our home office, but the room we use is actually a bedroom . . . I’d be willing to sacrifice it’s potential future return to being an actual bedroom, but there are three floor-to-ceiling windows on the only two walls that could be used for a desk! I guess we’ll be continuing to live with our back-to-back desk set up for a long while: )
Torrie @ a place to share... says
I think I say this on all of my comments, but WOW.
Just wow.
Jennifer says
I’m super impressed! Great job!!
Angie says
This reminds me of my own desk! Basically, we used the same system: storage units supporting the table top. Just that I simply used two of the small expedit units from Ikea. I didn’t have to build the table top myself, though.
shannon says
looks gorgeous!!!
Tara says
Lovely – what a transformation It’s especially striking how the dark stain and the white play off against each other. Quick question – I have an L-shaped desk that I would love to top with 2 solid wood pieces. If I dont own a Kreg and if my wood working knowledge is virtually zero, what would my easiest options be for attaching those two pieces of wood?
YoungHouseLove says
Hmm, maybe just use metal flat brackets underneath to attach them to each other or just screw up from the desk into them?
xo,
s
Nikki says
Geesh everyone commented on the same things. Guess they don’t read all the comments before they post :-p
I was thinking the teal/blue that is in the back of the dining room built-ins would be good for below the chair rail in the office but I see John wants a blue-catation. hahahaha I love that color and I think the cabinets and new top would really pop while tying in the two rooms. I’m sure it will look fantastic whatever you do. Nicely done!!
Sheila says
That top color chip looks promising.
karen says
looks so so so good!! I also read Aubrey and Lindsey and was happily surprised you referenced them.
I was thinking…what if you built two thin ‘cubby’ area’s flanking the center cupboards (like 6″ wide”)…with maybe 3 or 4 shelves…and you could store some mini baskets or cool office eye candy. I think it would give it a more ‘chuncky’ appearance and add some cool character.
YoungHouseLove says
Always another possibility for down the line! I think we’re happy to wait for the rest of the room to come together before tweaking the desk/cabs since once we layer in art and paint the chairs and upgrade the chandelier and add window treatments and wall paint it might all be too much, ya know?
xo,
s
Jen @ The Decor Scene says
GORGEOUS!!! YHL stikes again. Love how the desk turned out. So are you leaning towards one wall color over another yet? I can’t wait to see what you pick. That will really finish off the room…..well expect for decor of course. ;)
YoungHouseLove says
We don’t really like any of them, sadly. So we’re hoping to find something else entirely that we love…
xo,
s
Steph @ Birdhouse says
Wow, it looks so great! And you can’t beat the price! I love that it spans the whole wall and looks so fabulous from the dining room.
I used that same color combo for a small desk/bedside table makeover in our guest bedroom and I still love it!
http://birdhousefamily.blogspot.com/2010/08/desknightstand-makeover.html
YoungHouseLove says
So pretty!
xo,
s
Karina says
absolutely beautiful!
Mollie says
i think you guys made the right decision in not going w/ the white top, as i have a white-topped ikea desk and while it looks awesome from far away, it marks up and gets dirty SO easily. putting a cold drink (even though i know better, you just dont think about it sometimes when you’re gabbing or busy!) on anything that is inked = permanent smudge. so that’s my long way of saying i love your choice!
pattilouwho says
I LOVE it! We have a similar set up in our office – my husband and I both work from home…only our space is more an ‘L’ shape. But I love the idea of making your own table top. Ours was put together using pre-made IKEA table tops that we mounted to the wall -which we were super proud of for the first year but unfortunately they are starting to look worse for wear with the edges starting to peel and the finish (espresso) starting to wear off where our wrists rest. I might have to see if we can adopt this type of method to an ‘L’ shape. And I love the idea of the cabinets too. Great job!
Cori says
Beautiful! And smart choice on tying the table and desktop together.
Sorry if this has already been addressed (you have so many adoring fans and comments), but why did you not add to the bottom of the cabinets? It seems like with the height of the baseboards you could have continued them on the cabinets for more of a built-in look?
YoungHouseLove says
With the legs that were already there it was a lot more complicated and expensive than building them up from the top, and it allowed us to make them super level so the counter could lay nicely on them.
xo,
s
Sheela says
Looks terrific! What a nice improvement for you both to have so much space to work now!
Bobbie Brown says
Ohhh! I think I might be jealous! I love it!
Ally says
Amazing. You are my heroes yet again. This looks amazing, and it looks like a place you can get lots of work done!
April was in CT now CA says
I love you guys, seriously…L-O-V-E. I’ve been trying to come up with a desktop solution for some file cabinets I got a while back from Craig and his list. I tried a stainless desktop from Ikea (also from Craig and his list), but not only was it just too large once we got it in place I also didn’t like the look as much as I thought I would (back on CL it will go). I’ve been wanting to do some type of dark wood (the file cabinets are distressed white shabby-ish looking from Pottery Barn) and this post certainly helps give me some ideas. I’d like it to sit atop the cabinets without being attached (we move every few years and it would be easier that way) so hopefully after I send hubby your way to read this post he can brainstorm a solution for me! This will be my craft/office area and I am dying to unpack my crafty crap since we moved in a couple months ago!!!
It looks awesome and I bet it will be so nice to have some space to spread out. Love those lamp shades, too!!
Linda says
You two have inspired me enough so that on my Wal Mart run, I actually looked at sanders this morning. (Gulp!) Do you recommend one type over the other: the “square headed” one vs the “round/orbital” one vs the “mouse/tip headed” one. Do any have definite advantages/disadvantages? Is there some feature (other than the little dust bag) that I should be sure to look for when purchasing a hand-held sander?
Thanks for your advice and for your inspiration (I think!) ;0)
YoungHouseLove says
We have heard that round orbital ones can leave circles in wood sometimes, so I like the square or mouse-tipped ones to go with the grain of the wood and get into the corners. Hope it helps!
xo,
s
patty says
So, I have a question about the infamous jig… is there an adjustable screw size? Width and length? For instance, you went with a thicker desktop (2”) instead of a thin, so how do you control how far to sink the screws if you would have done thin vs. thick. I’m just picturing myself creating a hole that perforates through the desktop. Wow, there has to be a better way to ask this… hopefully you get what I’m ATTEMPTING to ask.
YoungHouseLove says
Oh yeah, everything can be adjusted that way.
xo,
s
Alison Moreno says
Wow that looks awesome!!!!! A good plan for our future house!
Ashley says
Looks great! I love white + dark wood. I love the idea of paint on one side of the chair rail and paint on the other side, Sarah Richardson style. Seems like a good way to make the backdrop of the room interesting without having to add bold color and pattern that would compete with window coverings, the chairs/cushions, etc.
One example from Sarah: http://www.theglobeandmail.com/life/home-and-garden/decor/living-spaces/sarah-richardsons-family-friendly-living-room/article1748127/
Ashley says
I meant *grasscloth wallpaper on one side and paint on the other side
YoungHouseLove says
That definitely looks fun! Might have to look at some wallpaper options…
xo,
s
Alice H says
the desk looks great! you guys are awesome. I personally like the paint color on top or the 4th color down. Not that you asked :)
sarah k says
The desk looks so great. You may have covered this already in a previous post, but where did you get (or did you make?) the two prints that are propped up next to each of the lamps? They would look great in our living room! Thanks!
YoungHouseLove says
Those are prints we used to sell in our print shop (which sadly closed around the time that Clara was born). I made them in photoshop if it helps though (just scanned in a burlap texture and drew the leaves and used the paint tool to fill them with white).
xo,
s
Carrie f says
The desk looks amazing!!! I love the top and geez, what a steal for everything!
Erin says
I heart this desk. I too just finished a two-toned project for a small table in my attic. I just happened to give your love for paint and Clara’s dresser a shoutout in the post. ;)
http://grandmagreatstreasures.wordpress.com/2011/09/06/refinished-table-for-awkward-attic-space/
YoungHouseLove says
Wow- that looks awesome!
xo,
s
Nan says
It looks great! As I was reading, I was thinking, “oh no, she needs to stain the sides so they don’t show when it’s all put together,” so I’m very happy that you could fix that with a little paint brush. Genius! I also think it would look very finished and polished for you to paint the underside of the counter the same white that you painted the cabinets. It would not be easy to crawl up under there and do it, but it would look so finished and professional, well, at least to Clara and Burger and anyone else who might be on the ground under the desk at some point!
YoungHouseLove says
Haha, I could always go back in and do that when I’m itching to paint something. I get in those paint-anything moods sometimes…
xo,
s
Mina says
Great job guys! I am inspired to do this for our home office space/wall. May I ask what the “leg room” size is? Thanks!
YoungHouseLove says
The leg room size is 30″ deep and 44″ wide. Hope it helps!
xo,
s
Christina Marie says
The desk looks amazing, also I’m a little jealous of your Design*Sponge at Home book… mine is still in the mail.
YoungHouseLove says
It’s so good! Worth the wait!
xo,
s
Ami says
Wow wow wow!! Great job!! I love it!
Christi Davis says
Hi John and Sherry!
LOVE LOVE LOVE the desktop! My husband and I just finished our master closet this past weekend and did all the shelves ourselves. We also went for the Dark Walnut stain! However, we did some of the shelves with Rustoleum’s Dark Walnut stain and then we did a few other pieces in the MinWax Dark Walnut stain. You can’t tell a difference unless you know it, but for future projects, we will ONLY use the Rustoleum one. It went on much smoother and had a more even look when it dried. It also came out a little richer in color than the MinWax. Just thought I’d pass on the tip. I’m definitely going to have to try the Safecoat Acrylacq!
YoungHouseLove says
Thanks for the tip! We’ll have to check that out!
xo,
s
DeeJay Conley says
Oh holy cow you guys! Super amazing! Great work and I really love it!!!!
Danielle says
Love the finished product! You guys are so inspiring – thanks, like always, for sharing! :)
Lauren Johnson says
You guys are awesome! Love the desk!
Kaitlin says
If you find that you want something even smoother for your arms to rest on rather than the wood, don’t forget that IKEA sells these desk pads http://www.ikea.com/us/en/catalog/products/30129964. That way too, you wouldn’t have to avoid the seams! This turned out beautiful, and you couldn’t have bought something better.
YoungHouseLove says
Thanks for the link! We’ll definitely look into them if we get bothered!
xo,
s
tjack432 says
It turned out pretty cool!
Have you thought about putting an artful design on the white part above the doors? The part that you buit up to make the cabinets the right height? When you showed the picture from the dining area I immediatly thought recreating the design of the white snake looking things onto the center office desk would look so cool. Or just continuing that blue color to the office room on that little section. Just a thought.
YoungHouseLove says
We’re definitely open to that if we add art and window treatments and wall paint and update the chairs and chandelier and things can still stand a little more “flair” – we just don’t want to overdo it when the room is so plain and then add that stuff in and think it’s too much, ya know?
xo,
s