
Reader Redesigns
Check out hundreds of amazing home makeovers, DIY projects, and awesome ideas that talented readers shared with us. We can't pick a favorite - they're all so inspiring!

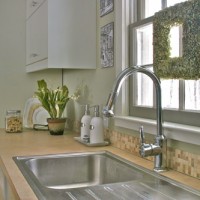
An Affordable Kitchen Overhaul
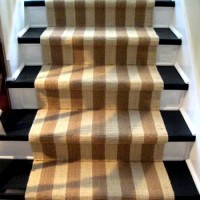
Adding A New Runner And Molding To Stairs

A DIY Baby Mobile With Folded Moravian Stars
An Amazing Kitchen Reno For $8000
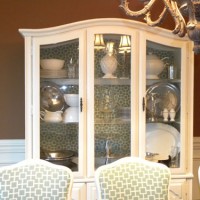
Painting A Wood China Cabinet White And Adding Fabric To The Back Wall

Making Graphic Art Prints With A Paint Pen

A Budget-Friendly Home Office Makeover

Updating A Living Room With A Mood Board

How To Stencil A Pillow Or Curtain Panel
Painting And Reupholstering A Chair With Ikea Curtains

A White Kitchen With Black Counters And Open Shelves
- « Previous Page
- 1
- …
- 7
- 8
- 9
- 10
- 11
- …
- 20
- Next Page »