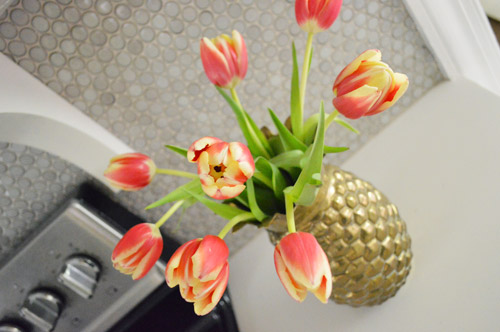
Archive for August, 2012
Finally furnished!
Well, our goal was to get to enjoy our deck by Labor Day and we squeaked in with just a few days to spare. And in case you couldn’t tell, I’m jazz hands excited about it. Don’t ask me what this move is called. John just picked up the camera and aimed it at me and this happened. It’s a pose straight out of Kids Incorporated.

We probably would have taken a rickety card table and some metal folding chairs, so we’re psyched to have found actual end-of-season discounted furniture to put out there for the long haul – but we definitely have more in mind for finishing things off (more on that in a minute). Oh and we mentioned that we have to wait a bit to stain or seal this baby (more on that here) so that will definitely add a lot more richness to the wood so it looks a lot more polished.
As for the process of bringing furniture out there, first we plopped our freshly sealed World Market table down in the middle of the deck (centered between our two zippered seams, which will be a lot more obvious when the wood shrinks up a bit and gets sealed/stained so it’s a richer color). You can see from the pic below that there’s not a giant amount of room on each side of the table, but it’s almost three feet (on each side), which is thankfully workable for us. Each board is 6″ wide, so it’s around 32″ of clearance.

Now let’s fast-forward to the fun part. Not only did we add our acacia wood chairs from Joss & Main (which we think will be a similar color to the deck once it’s stained or sealed), but we brought in some pillows, a runner, and some other accessories. Come on, you guys know I couldn’t resist that stuff if I tried. It’s a sickness. I have pillow problems.

Let’s get close enough to lick that yellow chair, shall we?

On the table we have a runner we’ve had for about three years along with a yellow thrift store dish that I use to hold our napkins and some other outdoorsy items (like our yellow gurgle pot, a woven decanter, and some woven cups – all found at HomeGoods over the years). And as for the fun ikat-ish outdoor seat cushion, that’s from Garden Ridge. They have like three giant aisles full of outdoor seat cushions for anyone who’s on the hunt.

And although the space on either side of the table looks a little tight in the shots above, I was just cropping those tighter so my accessories could shine. Haha. And we’re back to pillow problems. Anyway, here’s a better shot from the side so you can see the room behind the chairs (which are pulled out a bit in this shot, but not all the way):

If someone’s in them it usually leaves around a foot and a half for scooting behind them (with someone in the chairs they usually bump out to the other end of the board that they’re on in the pic above, which leaves around 16″ behind them for scooch-age). It’s not enough room to do a pirouette, but it works for slipping by. Whew. We’ve also talked about pushing the table up against either side of the house if we ever want more clearance, but so far it has been all good. You know we’ll keep you posted if we rearrange things though!
But enough layout chitchat. Let’s focus on the important stuff. Like this yellow ceramic fish that makes my heart sing.

Oh yeah, and we still have those bird napkins from Ikea that we used for Clara’s party. They keep making them so every time we slip through we stock up on more. Can’t. Leave. Without. Bird. Napkins.
Here’s a little makeshift just-for-now corner that I tossed together (mostly for Clara since it’s a nice little play-zone over there). Eventually we’d love to add a larger seat (preferably something plush) along with some large potted plants to lush up that hard little corner of wood and brick (and keep any children from trying to climb over the chair / hop that railing). And of course that woven toy basket does best indoors, so it’s something I just tote in at the end of the evening.

I borrowed the green drum stool from the guest room (originally from HomeGoods for $39), and actually found that rabbit at Marshall’s last week for $12. I think he’s thoroughly enjoying the new deck. Oh and that cactus thing is Clara’s toy but I totally play with it too (it’s by Plan Toys). And this outdoor pillow is also from Garden Ridge.

We set everything out on the deck yesterday afternoon while Clara was napping, so when she woke up we got to do a big reveal for her. Not surprisingly she said “ooh the pretty pretty deck!” and ran over to the little basket of toys that I had dragged out there and went nuts. That’s my girl. And Burger followed right behind her. See him lurking in the bottom corner? He’s just waiting for his turn with the giant orange ball.

Wait, how have we not talked about the yellow chairs?! They were my dream from the very beginning (back when I made this mood board) and although I heard a few tips that they sold them at Menard’s for something like $39, the best I could find (there sadly isn’t a Menard’s in our area) was $51 with free shipping through Joss & Main. But they came painted with outdoor automotive paint (read: durable) and were sealed and ready to be put out (wahoo! no additional prep work like the table and chairs!) so here’s hoping they hold up for a nice long time.

I worried they wouldn’t be comfy at the table since they might be too low or bulky, but with the added seat cushion they’re just the right height (they were a tad too low without it) and the arms actually tuck under the table, so they can even be pushed in. In the end, they’re the best seats in the house on the deck. Here’s Burger demonstrating their comfy-factor. Rough life he has.
Oh and remember how we mentioned that we were required to add a little extra railing to meet our county’s code? Well it’s actually super handy since Clara uses it to get up and down. Wahoo. Although last night we ended up digging out her old baby gate and setting it up in front of the stairs to keep her and Burger hostage on the deck instead of worrying about them running up and down while we’re out there. Worked like a charm.

And as for our deck plans down the road, we’d love to:
- add big bulb string lights draped overhead for the length of the deck
- bring in a lot more planters/plants to soften the harsh angles and edges
- add that big plush chair for the play corner that we mentioned, along with more Clara-friendly stuff like a sand & water table
- paint that darn electric meter (more on that in a second)
- build a small paver patio at the bottom of the deck steps for the BBQ (since it’s currently over on the patio where we play but never eat)
- build a gate that’s prettier than the old baby gate we’re using now (we rented a beach house once with a deck gate and it was awesome for kids/dogs)
- stain/seal the deck once the wood has dried out/is ready for it
- we’d even eventually love to paint the siding a medium gray tone that’s in the brick/mortar so it feels more balanced someday
So there you have our freshly furnished deck (at this point the patio is totally complaining because he was completed last year but still only has two adirondak chairs to his name, haha). Someday we’ll get back to that side of the house again. In the meantime, let’s all just take a moment to soak up one universal truth. The weird little alley that we inherited with our house is no more:

Ding, dong, the alley’s dead!

Oh and see that ugly electric meter on the left of the shot above? Ugh. I’m totally planning to paint it to match the brick like we did back in our first house when something similar was cluttering up our patio. It seems like it wouldn’t make much of a difference, but it’s kind of amazing how much paint can help things like that blend. Check out this pic from this old post back in 2009. They’re not invisible, but they’re a lot less “look at me!” than they were when they were all gray. And in our county you own those boxes, so it’s ok to paint them (it’s always good to call your county and check if you can before you have at it).

Oh and since we’re on the subject of what once was, here’s the old view from the hallway off of the living room and kitchen before Project Deck The Alley began. A nice little rotting balcony complete with some weeds and a straight shot at the air conditioner.

And here it is now. Wahooo! No more weediness, rotting wood, or air conditioner in sight!

We’d love to switch those sliders out with french doors to swank things up – in fact we’re pricing out a few options to see if it’s something we can do now (whee!) or something we need to wait and save up a bit more for (womp-womp). Will keep you posted! And as for what big project we’ll be tackling next, we’re debating between whipping our crazy not-even-functional-anymore basement into shape or adding some wainscoting/board & batten to our yawn of a hallway (not our frame one, the one that leads to Clara’s room). We’ll let you guys know where we land as soon as we… land. Haha.
But let’s end this little deck dalliance with the what’s your favorite part game. I’m the most obsessed with the yellow chairs and the ikat cushions. John loves the giant table that he can’t wait to “fill with food.” Perhaps there are gurgle pot lovers out there? Or you’re like Clara and you’re the most into the $2 ball from Target?
Psst- You can see how we planned, sourced, and built this beast of a deck here and see how we planned to furnish things a while back in this little mood board post.
How Do You Decide What To Post About?
Q: How do you decide what to post about every day? I’m new to blogging and feeling a lot of pressure. I worry what I write will be boring. Do you ever worry about that? Do you have a checklist that you go through to see if something is good to write about? Do you ever worry that people won’t like what you share? Do you ever skip a post if you think it will be poorly received? Do you try to pace things out in a strategic way? – Nina M.
A: Aw, I’m sorry that you feel any pressure at all, Nina. Figuring out what to post about sounds like it could be complicated, but to us the key is not to over-think it. When we started this whole blogging thing back in 2007, no one was reading (seriously we could hear crickets) so the pressure was nice and low. Sometimes we chatted about big stuff (like our four month kitchen renovation) and sometimes it was small stuff (like a baseboard-related conversation, discovering old wallpaper, or someone accidentally selling our washer).
Slowly our blog grew to what it is today, and so did our commitment to sticking to what got us here: blogging about whatever’s going on in our lives (big or small – random, housey, or otherwise) like it’s our job. Because it actually is our job. Yup, from weird dreams to DIY haircuts and pretty much everything else, it all has a place in our weird little slice of the internet. So our advice in a nutshell would be to chat about whatever you’re genuinely excited to share and the majority of your readers will hopefully connect with your authenticity and feel your excitement right through their computer screen.

And you know I’m happy to be that hyper little cheerleader on your shoulder shouting high-pitched borderline-annoying things like: “you can do it!” and “go get ‘em!” – so here’s my humble advice in a nutshell:
- Find a pace that works for you.
- Learn what topics you like to tackle.
- Look for unconscious clues along the way.
- Skip any post that you’re not excited about.
- Nothing is too small if you’re psyched to post about it.
- Try sharing more of yourself, no matter how random.
- Relax, it’s only blogging.
- Do. Your. Thang.
- You can’t win ‘em all.
- A happy blogger = happy readers.
Allow me to do what I do best and elaborate the heck outta those:
#1. Find a pace that works for you. It’s probably one of the biggest “discoveries” that you’ll make along the way. Don’t worry, it’ll happen. Figuring out a pace that works for you will do two things: it’ll help your readers understand what to expect (thereby hopefully reducing your fear of the unknown as a new blogger) and you won’t feel rushed or bored (two things that can quickly kill a blog). We usually share about 2-3 projects a week along with a smorgasbord of other random house/family related stuff. You can see from our monthly round-ups that although some weeks are busier than others, at the end of each month we’re always surprised at how much we’ve done. Sometimes the projects are big and sometimes they’re just small updates. That just tends to be the DIY way – you ebb and you flow. But hey, that’s real life (with real budget constraints, snafus, & timeline challenges) so don’t get discouraged! This tip is probably one of the most important ones since it can easily determine the longevity of your blog (our pace is probably the only reason we’ve been able to blog/DIY non-stop for the past 5 years without burning out).
#2. Learn what topics you like to tackle. Then give yourself free reign in all of those areas (no fear allowed). In the past five years of this blog we’ve been all over the place, which is actually how we like it. And in all of that time, we’ve only renovated one bathroom and two kitchens along with building one patio and one deck, so it’s hardly major work that’s going on at all times. Most of the time we’re just noodling or making small/affordable tweaks (painting something, making DIY art, window shopping, sharing budget blooms, buying/thrifting something, doing small upgrades, rearranging furniture, re-organizing something, sharing Dude Get On That Already & Pinterest Challenges, etc). And sometimes we do full weeks of posts on a certain theme, like our wedding or our blogiversary. Heck, we’ve even had an entire week devoted to organizing! Just chat about whatever you’re loving or doing.

#3. Look for unconscious clues along the way. If we look at our monthly round-ups for the last 1.5 years, we notice that we usually have the same smattering of big and small projects going on each month. There are rarely months with all large things or all small things. We don’t consciously plan it that way, but that just seems to be what works for us. I think if you blog for a little while, the right pace for you will hopefully make itself clear.
#4. Skip any post that you’re not excited about. If it feels like work and you’re not psyched to share it, just let it go. We definitely do things around the house that we decide not to blog about. For example, we don’t always feel like blogging about re-organizing our drawers every time we do it – so we might skip that if we don’t feel like writing it up. That being said, sometimes posts are hard to write (for example, this personal one about my aunt’s passing) but I actually really wanted to write that to honor her memory and for Clara to look back on. It was hard, but it was worth it. So the posts that feel pesky, annoying, and not-worth-your-trouble are the ones I’d actually consider skipping.
#5. Nothing is too small if you’re psyched to post about it. Try to have a no holds barred / no rules policy if you’re excited to share something (people can tell when you’re holding back and blogging can be a lot less satisfying if you are). We love that nothing is too big or too small to chat about with you guys. Thank goodness. I think if there were rules we probably would have checked out about 4.5 years ago. Sometimes we do something really small and we’re so excited by the difference it makes in our home/life that we’ll share a quick little post about it. And sometimes those posts actually get the majority of our readers the most excited (so if we were to leave them out we’d never know that 200 folks would comment about how they liked a tiny/free clipboard project that we shared, while fewer people commented about some much more “hardcore” deck demo that we posted a week later).
#6. Try sharing more of yourself, no matter how random. Occasionally we chat about random things like running and breastfeeding. Sure, we wonder how the heck they’ll go over before hitting publish for a second – but then we just say “whatever!” and click the button. My breastfeeding post actually got over 1,000 comments and John’s post about running earned nearly 500! We never know what will be a hit, so we just share whatever’s going on that we think is fun – big or small, housey or random, kid-focused or grown-up related. Just try to let go of the pressure that you put on yourself (I know, that’s easier said than done) and you’ll be a happier, more enthusiastic blogger. Sometimes it’s hard to remember that you’re not decorating your house or blogging for the entire world, but in our opinion, the blogs where people decorate their house and blog for themselves are the ones that are the most compelling and fun to read. So that might be our biggest tip.

#7. Relax, it’s only blogging. Personal home blogging (and almost any other type of blogging, actually) is loosey-goosey in a great way – whether it’s your full time job or just a hobby. Either way, the goal is to be real and share “yourself and the way you live” – whatever that might be. We truly believe it’s why we’ve loved doing it pretty much nonstop since 2007 (with no more than a few days off in a row). It’s definitely our job and we are hugely devoted to it, but it was born from a passion, so we gotta keep that passion going. If we only wanted to talk about step by step tutorials every day we’d hire a staff of people to churn out seven projects a week or start a business-y website without “us” in it – but we’re just not into that. That’s why we call this our DIY diary, and not an e-zine or a home improvement database. It’s just life through our lens. Our little rose colored DIY glasses, if you will. Or our Photoshop plastic wrapped glasses…

#8. Do. Your. Thang. The truth is that every post that you write will probably be enjoyed by some folks and some people will just scroll on by or click over to another blog that happens to catch their eye a bit more that day. Heck, that’s how we read blogs (skimming or skipping things that aren’t our style and stopping to soak up the posts that call our name). I think getting comfortable with that is really one of the keys to blogging, since it’s impossible to even attempt to make every last post appeal to every last person who stops in (you entire blog will end up being so generic/safe due to Trying-To-Please-Everyone Syndrome or it’ll be so infrequently updated since your standards for posts will be impossibly high). So just do your thing! That’s hopefully why people read your blog – for what YOU bring to the table. Even if it’s photos of yourself in airbrushed jeans that make your butt wink.

#9. You can’t win ‘em all. If there’s one thing we’ve learned in five years of doing this, it’s that no matter how hard you try, you can’t please everyone. In fact trying to please everyone can lead to a slow painful blog death. There’s just always going to be someone who wants you to go slower so they can keep up or faster so they’re more entertained, or to post about more giant projects since they want to see something major while someone else might want more small/free projects since their budget is lower. One person’s least favorite post will be someone else’s favorite. Heck, we’ve even gotten requests for more family/Burger/Clara stuff within days of getting requests for less of it. Everyone is different, so you just have to “do you” as $herdog likes to say (third person $herdog = jackpot).

Let’s get mathy for a second. Usually once every 10,000 comments or so we get someone saying they’re not into a certain post (here’s a post about how we deal with criticism in case that helps). Thankfully when you do the math, that works out to less than .01% of comments being in that vein. Those odds aren’t that bad, right? By sharing your life with the internet at large, there’s so much encouragement and good that comes from it. And while there are definitely a very small percentage of people who might take the time to say “this post was so boring” or “I think you’re running out of things to do” – just know that someone has been sporadically saying that to us for years. Yet we’re still here blogging our pants off, following the exact same “formula” that we always have, and gratefully soaking up words of appreciation and encouragement from the vast majority of our readers.
#10. A happy blogger = happy readers. They can usually sense when you’re upset or nervous – and your blog is a lot more magnetic when you’re just being your happy-go-lucky self. So throw caution into the wind and blog to your little heart’s content! When in doubt, try picturing an imaginary bumper sticker that says:

I like that Burger weaseled his way in there. Such a ham. Anyway, that’s my brain dump. I hope it helps at least one or two of you out there who might be starting a blog or struggling with what to post about. And I’d love to hear from you guys on the subject of post subjects! Any advice for Nina? Is there anyone else out there who feels pressure before clicking that “publish” button? Do you have a mental checklist that you go through before you write about something or just share whatever’s banging around in your head? Tell $herdog all about it.
Psst- Wondering how we decide what project to tackle in what order? Here’s info about how we prioritize our home projects (it’s at the bottom of this post).
T-Minus Twenty Four Hours…
… until we have furniture on the deck!!! Woah nellie, I’m excited about it. Hence the use of three exclamation points and the term woah nellie. Heck, I’m about to break out some coordinated and not at all bizarre dance moves. Watch out now.
We still have to choose what stain or sealer to use on the deck (some require a waiting period for pressure treated wood to dry out/acclimate while others can be used sooner) but we decided (read: I prodded John until he agreed) that putting some furniture on the deck in the meantime just means that we can start enjoying this baby. It’ll only take about twenty minutes to clear it when the time comes to seal it, and we purchased the table and chairs a while back (when we wrote this post) so I just didn’t want to wait a second longer. Yes, I’m playing the role of Veruca Salt in Charlie & The Chocolate Factory (I want it now! I want a bean feast!).

So by this time tomorrow we’ll have furniture out there (along with outdoor pillows and other accessories because you know I can’t help myself). But the reason this post isn’t full of furniture pics is that prep work is a pain in my backside sometimes keeping outdoor furniture looking good for the long haul includes some pre-putting-it-out work. Boo. But it really does add up to longer use (and better looks down the line) so we’re down. Sure beats having to buy new furniture in a few years…
For starters we learned that the amazing couldn’t-have-built-one-any-cheaper table from World Market that we bought for $73 (more on that here) called for at least three coats of protective water-based poly to keep it from cracking and peeling in a year or two. So we broke it out of the box, assembled it in the carport, and ran out for some poly that would do the trick.

We landed on this guy:

Why? Well, for starters, it’s water-based and distinctly says that it dries clear (which is very important if you’re polying something that’s white since oil-based varieties can yellow over time). It’s also made for being outside (it’s not a water-based poly that’s meant for an indoor dining table that never gets wet) and it actually sports one of the highest durability rankings out there (it has “maximum weather resistance” and is often used for wooden parts on boats, so it can stand up really well to water, sun, and the elements at large). Although it mentions that it’s great for boats, I also liked that it specifically mentioned outdoor tables in the description on the back since sometimes it’s scary to buy a product that’s made for one thing (boats) and wonder if it’s not so good for other things (wood patio furniture). It even said that it worked on painted or unpainted exterior furniture, which was great since our table is painted.
As for the application, here are my tips:
- I set each of the legs on cardboard, just to protect the floor of the carport
- I used an extra wide brush that I picked up for a few bucks at Home Depot so it would get into the slats between each board with each swipe

- I followed the directions to the letter, applying three thin coats at two hour intervals (the first one went on at 4pm, the next at 6pm, and the last at 8pm by the light of the carport)
- I gave it all of the drying time it allowed (I plan to carefully carry it over to the deck later this afternoon so I can set things up and shoot some pics for tomorrow’s post in the morning)

So there are those pesky DIY maintenance details for our deck table. Onto the chairs that I tackled yesterday!

We also mentioned in our mood board post that we bought a set of these affordable wooden outdoor chairs from Joss & Main for around $40 each with free shipping. They’re made from acacia wood (it’s a material that’s sort of like teak, which does really well outside and in moist conditions) and the other awesome thing about acacia wood is that it has an awesomely rich tone that’s especially gorgeous (and durable) when it’s oiled. So for ten bucks we grabbed this Teak Oil from Home Depot (which also works well on acacia wood).

Here are a few wood-oiling tips:
- I set things on cardboard to protect the carport floor and wore clothes I didn’t care about so I didn’t have to worry about grease stains
- Per the directions on the container, I applied one coat of oil, let it sit for thirty minutes, and then applied another coat of oil and let that sit for fifteen minutes. Then I wiped it all down with a dry cloth as directed. Look how serious I am about it:

- Actually, instead of using cloths to apply it, I used a pair of old socks (one to apply the oil, and one to wipe things down later in the process)

- I gave them all ample drying time (it called for 8-10 hours) before sitting in them or touching them, so I’m planning to move them over to the deck this afternoon along with the table, at which point they should be ready to use. They sure are purty, eh?

There you have it. Annoying before-the-fun-stuff maintenance that we hope will make all the difference when it comes to enjoying our deck for years to come. What are you guys polying or oiling to keep it in tip top outdoor shape? Any other acacia wood fans out there (it’s such a pretty finish!) or end-of-the-season outdoor furniture purchases?
Psst- You can see how we planned, sourced, and built this beast of a deck here – and you can read about how we prime, paint, and poly indoor furniture so it doesn’t yellow or peel here.


