Archive for December, 2011
December Superlatives
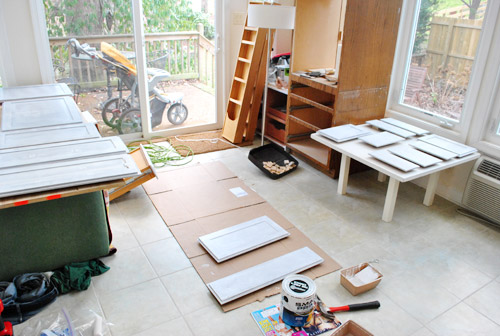
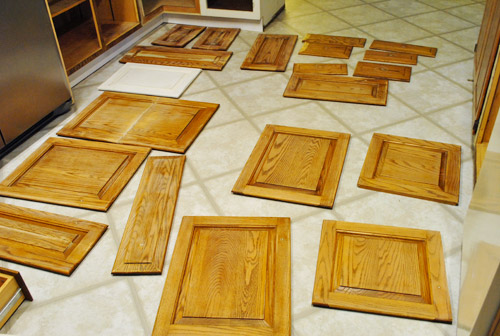
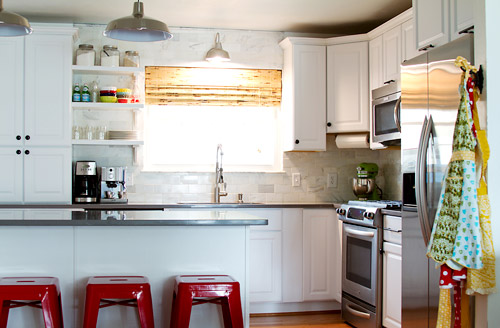
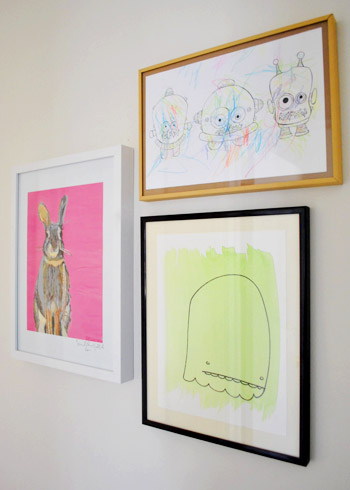
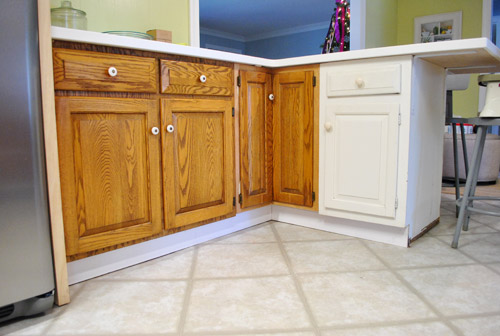
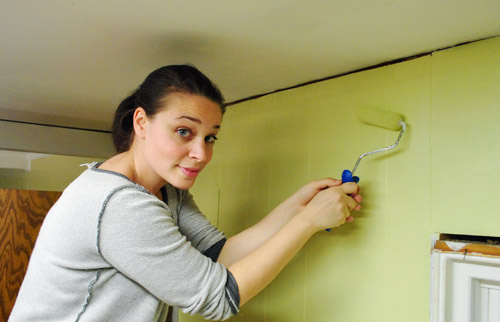
Holy cow, is it really going to be 2012 on Sunday? December flew by. So before it scoots away for good, we like to take a moment to look back on all that we’ve done at a glance (and gather all the links in one handy place for ya). And of course we tossed in some never-before-seen stuff for kicks. This month we were all over the place as usual, but focused a lot of our time on the kitchen along with tackling a few other projects in rooms like the living room and the hallway while shoving a decent portion of holiday fun in there too. So let’s take a walk down memory lane, with yearbook-esque superlatives, shall we?
Most Improved: The three switcheroos in our living room that made a big difference (a larger rug, square ottoman, and more refined office chair).
Most Memorable: Looking back at moving day 2010 in celebration of our one year anniversary of living in this house. Oh how far we’ve come… and oh how far we still have to go.
Most Artistic: Clara, after we repurposed our old desk into a toddler-sized drawing table for her.
Most Artistic (Runner-Up): Sherry’s Dad, who sketched this owl back in the 1970′s and sent it to us so it could be framed in our hallway.
Least Artistic: Us, since doing some minor paint touch-ups in the kitchen before the counters arrived required little artistic talent. At least there was a paint brush involved.
Craftiest: The vendors at the Richmond Handmade Holiday event that we hit up (which explains why we didn’t leave empty handed).
Most Advent-urous: Our homemade advent calendar that turned an Ikea scarf hanger into an ornament-a-day countdown to Christmas.
Cheeriest: The ribbon covered stars of our 2011 Christmas card. Burger should also win the award for “Best Tongue”… if there were such an award.
Merriest (Tall Edition): Our toddler-friendly Christmas tree that’s decked out in paint swatches, ribbon, and other unbreakables (see updated photos of it here as the added advent ornaments filled things in each day).

Merriest (Short Edition): Our lil’ table-top tree that brought some sparkle into the living room, loaded up with the Pinterest Challenge ornaments that we made in November.
Brightest: Our first go at exterior holiday decorating. Hello candy cane lights, Moravian stars, big glowing lanterns, and some all-red (you know, as opposed to just red-nosed) reindeer.
Brightest (Runner-Up): The twenty-something tweaks to our hallway frame wall to bring a bit of the holiday cheer to this tiny space.
Brightest (Second Runner-Up): Our new countertops! Bright white Corian landed in Casa Petersik before we knew it. Though “landing” involved a few crazy contraptions, including this device that eliminated seams.
Most Free Spirited: Okay, it’s not really spirited – but this microwave was basically free (we bought it for $84 after selling our kitchen’s original over-the-cooktop one for $90). And working with our existing cabinets (like repurposing this one to house it) allowed for splurges in other areas – like new counters, backsplash tile, a giant wall opening, and cork floors.
Diciest: Cutting up a few leftover cabinet doors so they’d fit a few rebuilt or secondhand cabinets that we added to tweak the layout. It was a bit touch and go there for a moment, but after some pro pocket holes and some heavy duty screws, they turned out totally solid. The jury’s still out on the final result (we don’t want to jinx ourselves, so we’re waiting until all the paint is cured before saying they’re seamless).
Best Backside: Our new industrial-inspired stools for the peninsula scored for $33 a piece at a school supply site (they’re actually meant for a science lab). Geek is the new black.
Most Tedious: Little pre-painting projects in the kitchen, like recreating the windowsill, adding some toekick and trim, cleaning the sunroom, and finally picking a cabinet paint color.
Sandiest (TIE): John and the kitchen, after going on a putty-sanding-deglossing spree in preparation for priming and painting.
Biggest Tool: Our tool-tastic list of gift ideas for the DIYer in your life. Maybe it’ll help you spend some holiday cash or those lingering gift cards.
Most Date-d: Our homemade 2012 calendar (you can still download a free template of it if you want to customize a version for your family).
Most Resolute: Tossing a few 2012 resolutions out there into the world, in the hope that it’ll light a fire under us to get ‘em done!

Most Transformative: Priming the cabinet doors and frames. Sing it with me: it’s beginning to look a lot like Christmas a new kitchen…

Cutest Hat: Clara, who after opening this leopard print cap from my godmother on Christmas morning, refused to take it off for the rest of the day. Once we get around to posting Christmas photos on Young House Life, you’ll be seeing a lot of it. In the meantime you can check out Clara’s fun with letters and numbers here.

So there’s our last month of 2011 at a glance. Can you believe it’s about to be ’12? What did you guys eke out in December? Have you ever made a list of accomplishments to look back on? Feel free to use the comment section of this post to list what you’ve done (or just toss out a few highlights). It’s so nice to take a break from adding things to the ol’ to-do list for a second, just to look in the rear view mirror and appreciate the crossed-off tasks. HAPPY NEW YEAR TO EVERY LAST ONE OF YA! We love you. Really. We do.
Psst- You can check out July’s superlatives here, August’s here, September’s here, October’s here, and November’s here.
Priming In Progress!
Between finalizing our 260+ page book manuscript (due Jan 4th- ack!) and hosting/enjoying family time (and lots of delicious food), we’ve also been priming! Can I get a “holla!”? Or more likely, a “you’re crazy.”

Thank goodness our guests are so understanding! Oh man, and it feels great to be seeing some progress.

The beauty of primer is that it always looks a little rough (so you don’t have to stress about getting it to look perfect). By nature, it’s just a sticky sub-layer that helps grab paint and hold on for the long haul, so as long as you apply things thinly and evenly (drips = baaaaad), you’re all set to just follow the recommended drying time and then get right to painting!

You definitely want to use a stain-blocking primer when painting wood cabinets (especially when they’ve been stained and exposed to kitchen grease like ours). We chose Zinsser’s Smart Prime (a super high quality low-VOC primer sold at our local Benjamin Moore store that was recommended by two different pro cabinet painters). The nice thing about it is that it’s “open” a bit longer than some other primers, so it doesn’t dry right away while you’re still trying to work it into the cracks and smooth it out to make sure it’s not drippy or bumpy. And it’s nice and durable, so it should definitely help with those decades-of-great-results that we’d like.

Oh and we use a small foam roller and a 2″ angled brush for the smoothest application. Of course there are a million other primer steps to share (and even a video to show exactly how we apply it), so we’ll be back to detail every last step (arms. too. tired. to. type.) next week.

You know, after the painting’s done and our sweet and extremely understanding house guests bid us adieu. Until then, picture us painting / doing the happy dance / book editing / asking everyone if they’d like something to eat or drink (in the dining room or living room since the kitchen’s kinda out of commission).
Oh man, this is totally the exciting part though. And we’re inexplicably excited to add hardware once everything cures up. Yes, we’re strange birds. New hardware = beyond thrilling. Especially when the room used to look like this:

Wahooo progress!
Psst- Check out this kitchen post all about how we prepped our cabinets for paint and this one about how we picked hinges and a cabinet color.
Psssssst- We picked this week’s giveaway winner. Click here to see if it’s you!
Twenty-Twelve Resolutions
Every year we publicly proclaim a few of our resolutions in the hope that it’ll light a fire under our arse (arses?) and help us “get there.” So without further ado (except for this gratuitous and very much in-progress pic of the cabinet doors being primed)…

… here they are:
Resolution #1 – To Get Around: We’re excited for 2012 to be a good travel year for us, since we have been invited to speak at the Portland Home & Garden Show in February (really? us?) and at the Haven Conference in Atlanta in June (we’re the keynote speakers, which makes us excited and nauseous all at the same time). So we’ll hopefully get to meet a lot of you guys at those events. And when our book comes out this fall we hope to get to do some touring just to thank as many of you for reading our blog right to your face as possible. You know and be awkward and blushy and say things like “that’s so weet of sou” instead of “that’s so sweet of you.” True story.

Resolution #2 – To Make Our Archives Easier To Navigate: With 2,000+ posts that have been written over 4+ years, we completely understand how hard it is to find things, especially all of the projects that get buried as we go! So we’d love to revamp our Projects page with photos and easier to use archival systems. You know we like to DIY things, so that means learning some coding stuff as we go. Should be fun…
Resolution #3 -To Find More Balance: This guy’s a repeat because we haven’t conquered it since declaring it last year. We mentioned that “since the internet is 24/7, and we work from home, sometimes it’s hard to resist working nights, weekends, and even on vacation, so we hope to get a handle on that.” Especially with Clara around, some healthy family-friendly balance seems like a good idea. Here’s hoping 2012 is the year that we get it down!
Resolution #4 – To teach Clara how to prime & paint: Ok, maybe that’s not very age appropriate, but at least let me teach the girl how to caulk. Kidding again. Hmm, maybe we can show her how to peel painter’s tape? Seems like something she’d love! This resolution is just about keeping Clara involved and hopefully raising a little DIY lover like ourselves. I mean, we won’t force it on her, but including her in some toddler-friendly projects or steps could be fun for the whole fam. The girl does love her tape measure (more on that here), so we’re off to a good start…

Resolution #5 – Simplify, simplify, simplify! Sometimes it seems like we should say yes to every opportunity (why not?) or try to tackle ten projects at a time (gung-ho!) but we’ve learned that keeping things simple and staying focused on one task at a time might just be the key to sanity. So we have to fight that “little voice” that pushes us to do more/attempt to be super-human/cater to everyone else. Just sharing whatever’s going on in our little world is what got us here (over four million hits a month is both humbling and mind-blowing). So we have to fight the urge to keep piling more on our plate or attempting to please everyone on the planet. This is just a good old fashioned DIY diary. And simple = a beautiful thing.
Who’s ready for 2012? What are your resolutions? I’d love to hear what you guys would like to accomplish this year (either in list form like ours or just a sentence or two about whatever you plan to focus on). Do you have any personal resolutions going on? I’d love to drink more water, eat more veggies, read more books, and get back into painting (on paper and canvas – since I have wall and cabinet painting covered already). Oh yeah and to Netflix Homeland since so many people have recommended it. Is that resolution-worthy? From what I hear, it is.
Psst- We’re over on BabyCenter sharing a cute handmade-with-love nursery that’s gender neutral, modestly sized, and packed with DIY ideas! Check it all out here.
Puttering Around With Putty
I guess that title should really be “Puttering Around With Putty (aka: Wood Filler) And Sandpaper And A Spackle Knife And Deglosser.” But that was too long. In a nutshell, we prepped all of our cabinets for primer by:
- puttying all of our cabinet frames and drawers and doors
- sanding everything (to smooth the putty and rough things up for primer)
- deglossing everything (to further aid with adhesion)
- laying all doors and drawers out in the sunroom (on lifts) so we’re ready to prime
But that’s not enough detail for chatterbugs like us. So let’s get into the nitty-gritty. First we used Elmer’s ProBond Professional Strength Wood Filler (we asked around for a favorite filler among contractor friends and two mentioned this one) to fill any cracks, old hardware holes, etc. Since our new door and drawer handles will call for two holes instead of one, it was important to hide the old holes with filler so once they’re primed and painted they’ll be completely invisible.

After using a spackle knife to firmly scrape the putty into the holes and cracks to fill them, the holes from the old hardware looked a little something like this:

Then it was sanding time. This is John’s Dexter face (not as good as his impression here):

After carefully puttying and allowing for drying time (we just read the container to see how long to wait), we went to town with the hand sander (using 60 grit paper followed by 200 grit paper) to not only smooth out the parts that were puttied but to rough everything up so primer and paint would stick for the long haul. There are some folks who skip steps like sanding and deglossing but we’re Team Edward Team Super Thorough. Although shortcuts are tempting, we like to go the extra mile in the name of the best adhesion possible for more long-lasting durability (it might take us a day or two more on the front end, but if it gets us years or even decades more on the back end it’s well worth it).

Oh and you can see that the cabinet above is one of the ones that we retrofitted using a pro method (pocket holes with wood glue and a number of heavy duty hidden steel screws) – so these doors are just as durable & sturdy as the rest of the doors in the kitchen. Once we puttied and sanded it the seams were pretty smooth. So we’re still crossing our fingers that primer + paint will add up to undetectable door surgery. Which is always the best kind of door surgery. If not, we’ll buck up and pay for a carpenter to create perfectly matched doors since the half-sunk ones that we have are rare/impossible to find in the custom sizes that we need. We just thought attempting to reuse these solid oak doors was worth a try first (you know we like to use what we have to save money that we can then put towards other things to elevate the room, like new counters/floors/backsplash, etc).

Here’s a photo of another door that was retrofitted:

As you can see, the putty is lighter than the wood tone of the doors, but when you run your hand over the seams they feel nice and flush, which should be the key to a seamless finish. It’s easy to believe that primer and paint will fill gaps and hide flaws, but in our experience they DO NOT! They actually settle into fine lines and dings and cracks and emphasize them. So our big tip to you is before you get near the primer or the paint to get your doors as smooth and seamless looking as possible. Any inconsistencies in color (like the lighter putty) are ok, since primer and paint will cover that. But any inconsistencies in smoothness or dings/cracks won’t likely be hidden by primer & paint, and might even be more noticeable once the wood tones are gone and the door is one solid color.
Once those few retrofitted doors were puttied and sanded while the rest of the doors were just sanded (other than getting a dab of putty to hide the old knob holes) it was time for the liquid deglosser.

We like using Next Liquid Deglosser because it’s low-VOC and biodegradable (and still gets the job done). It removes any sort of oil or grease and strips down some of the shine on things (our doors weren’t too shiny after our rough-everything-up sanding session, but you know we like to be thorough). Especially in a grease-prone room like a kitchen, this step is a good one (the wipe-down also helps remove any sawdust that remains after sanding).

Oh and we also puttied the cabinet frames whenever necessary (like when there were dings, cracks, and screw holes that we wanted to hide). See this screw hole on the edge of the side of our pantry? That’s where another cabinet used to be attached, but since we reconfigured the layout that hole is now exposed, so we filled it and sanded it to make sure it won’t be visible once we prime and paint.

After puttying any areas of the cabinet frames that needed attention, we let them dry and then sanded everything (again to smooth any putty and rough everything up for the best possible adhesion). Then we deglossed everything for even more “adhesion insurance.” Are you sensing a theme? We want that primer and paint to stick for the long haul, goshdarnit. We’ve used this cabinet painting method in our first house’s kitchen, in John’s sister’s house (where it lasted over years until she moved – when it was still going strong), and I also used it to paint the cabinets that we used to make our built-in office desk, so we’re huge fans of how long-lasting & durable things end up being. Even though it’s a pain in the butt to get through since you’re dying to pick up the paint brushes and rollers already. But we’re there! We’re fiiiiiinally there!

Here’s how the kitchen was looking after all those goings-on. Not gorgeous – but lovely because progress is a beautiful thing!

Then it was back into the sunroom with all the doors where we laid them all out for the priming and painting phase.

Oh and see how they’re all sort of popped off the ground a bit? John cut down a bunch of scrap wood pieces that we had in the basement to make little “risers” for them, so we can easily paint the part that faces up AND the sides without worrying about any doors dripping/sticking/sitting in a puddle of primer or paint.

Enough chit-chat, there’s priming and painting to do! We’ll be back with a primer peek later in the week… and once everything is dry and ready to be re-hung we’ll share the full monty reveal with tons of details, photos, and even a video about the full priming & painting process for anyone who wants to tackle this project (hopefully sometime next week, assuming everything is all cured up and dry by then). Exciting stuff. What have you guys been up to? Tell me we weren’t the only ones puttying our pants off (figuratively speaking).
Fab Freebie: Gotta Hand It To You
***This giveaway is no longer accepting entries – see who won below!***
Thanks to random.org, we’ve got a Merry (belated) Christmas prize going out to… Kristin Aune (who made t-shirts for both of her kids, ornaments, buckeyes and has been trying to perfect her fudge pie recipe). Congrats!
Wahoo. Hope you guys all had an awesome holiday weekend (you can see a sliver of ours here). As we mentioned on Friday, we’ll be stopping in with one quick post each day this week (amongst family hosting, feverish book-deadline writing, and priming & painting all of our kitchen cabinets). But we couldn’t wait to share today’s giveaway that we wrangled after seeing so much amazing stuff at our local Handmade Holiday craft fair. So this week’s lucky winner will get:
- An 8×10 letterpress print (any choice of quote & color), a set of blueprint notes (airplane, boat, golfcart, knots, wave, or lighthouse) and a leather blank book from Almanac Industries. These Baltimore-based bookbinders and letterpress gurus bring a wonderful worn and masculine vibe to these printed prizes.
- $50 towards Funnel Cloud Studio on Etsy. Obviously we love her Virginia-themed art, but she also has a bunch of cheerful patterned prints and cheeky illustrations to choose from too.
- A 26-letter ornament set and this green vase from Turnerbots. And we thought our J, S, C and B initial ornaments were cool. Someone’s about to get a whole alphabet full of candy colored ceramics, along with a V-A-S-E.
- $50 towards Zou Zou’s Basement on Etsy. We loved the bunny print that we bought, and this $50 is enough to snag two of her colorful prints.

- PRIZE: Everything mentioned above
- TO ENTER: Comment on this post with the words “HAND IT TO ME” and tell us…
- BONUS QUESTION: … what you’ve made with your own hands recently. Did you bake something for the holidays? Did you give a handmade gift this weekend? Or have you tackled a DIY or homemade art project recently?
- GIVEAWAY CLOSES: Wednesday, December 28th at 8pm EST or at 10,000 entries (whichever comes first)
- NUMBER OF WINNERS: One
- PRIZE SHIPS: The 50 United States (although we do try to wrangle as many international giveaways as possible)
- DISCOUNT: 10% off any item in Turnerbots’ Etsy shop until January 15th, 2012 with the coupon code YOUNGHOUSE.
- USUAL STUFF: One entry per e-mail address is permitted. The winner will be selected using random.org and announced on Thursday as an update to this post. That’s right, come right back here on Thursday for the announcement of our winner. Good luck…
Note: We aren’t paid or perked for hosting these giveaways, we just do ‘em to thank you awesome folks for stopping in. See our Giveaway FAQ page for more info. Pics courtesy of Funnel Cloud Studio, Turnerbots, Almanac Industries and Zou Zou’s Basement.


