Remember when we tiled the floor out back earlier this month? Oh yeah, we barely do either.
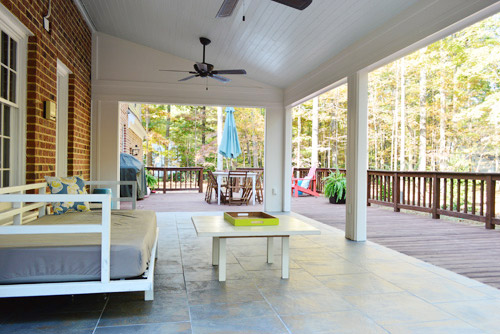
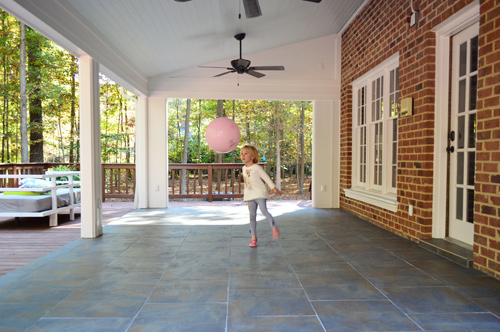
It has been such a drawn out process thanks to various battles with cold and rain that I can’t believe it’s taken this long to finally get to this: a (mostly) finished floor! Don’t mind that light looking grout (it’s actually charcoal gray – but we’ll get to that in a minute).
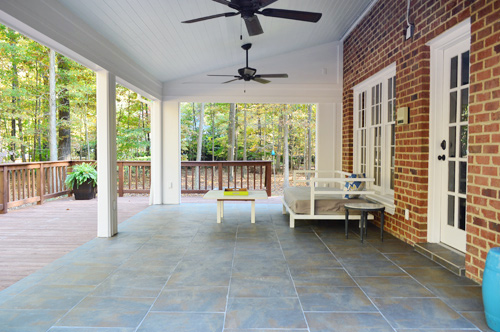
We’re really happy with how it turned out – especially compared to the stained cement floor that we started with (you can read more about why we opted to tile rather than just paint or stain the existing cement floor, and how we picked our tile here). But getting from then to now was definitely one of those DIY journeys with a few unexpected speed bumps, so throw on your most comfortable shoes, because we’re gonna cover lots of ground today. And it all ends in a budget & time breakdown for this entire project so far. Hooray numbers!
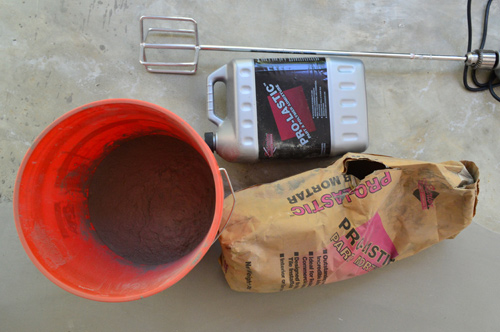
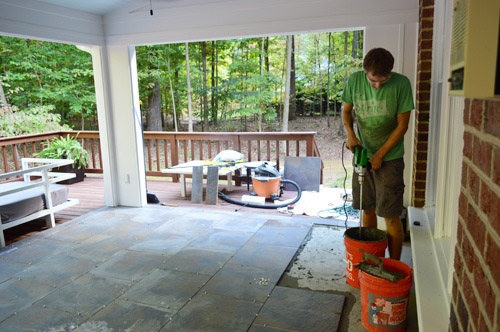
Let’s rewind to October 4th, I think it was. I had just finished prepping the floor with some self-leveling concrete so I was finally ready to bust out our tiles and tiling supplies. Basically mortar powder (brown bag) + liquid admixture (gray bottle) = thinset (aka the stuff that holds tiles in place). Since we were using large tiles, I mixed large batches at a time so a big bucket and paddle mixer were crucial.
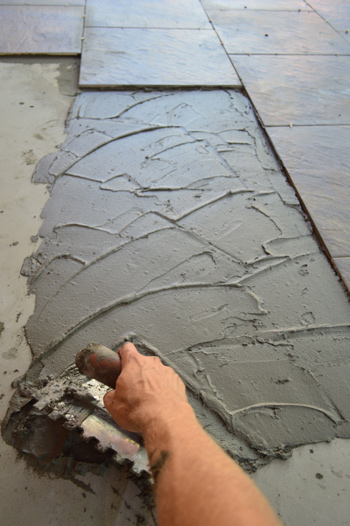
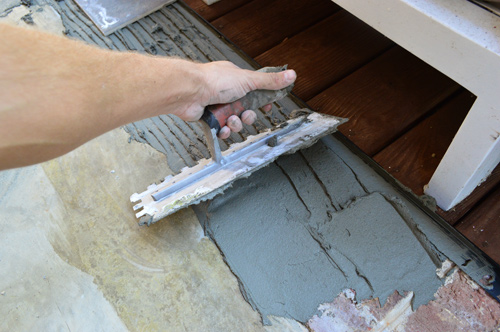
I used my trowel to spread on a thin layer of thinset (which I like to be toothpaste-y in consistency). I did enough for about two tiles at a time, since I didn’t want to do too much and have it dry out before I could get the tile down.
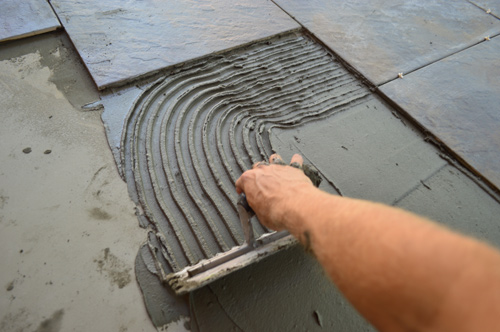
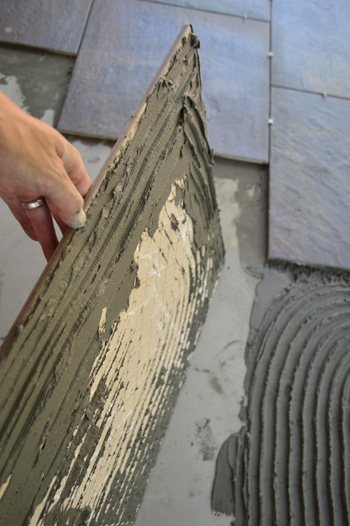
Once it was spread smooth with the flat side of my trowel, I flipped the trowel over to the notched side and at a 45-degree angle I scraped grooves into the thinset. This helps to make sure your thinset is at an even depth before placing your tile. With big tiles you need a wider notch, so this a 1/2″ trowel. Oh and you can see the little x-like white spacers that we used between the tiles in this shot too. We went with 1/8th inch ones since the tile folks said those would work well with these tiles in an outdoor environment, and we tend to prefer small grout lines whenever possible.
I quickly learned that one of the main challenges to installing tiles this large was keeping things level, since you want to avoid one tile from sitting higher or lower than the ones around it. And since we were doing a brick-layer pattern, it meant each tile was touching 6 other tiles. So trying to keep everything flush to everything else took some concentration and futzing. I “back buttered” whenever I needed to raise one corner slightly higher – basically applying some additional thinset to the back of the tile. Note: check out this post and this post for even more tiling info and additional pictures of other projects we’ve tackled.
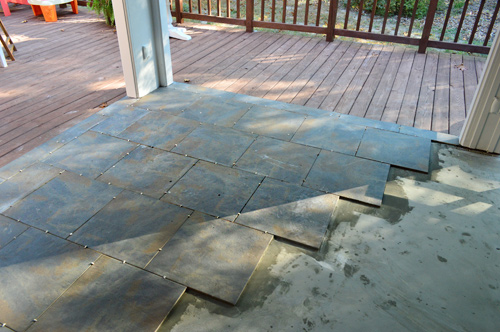
This is what I accomplished on that first afternoon spent tiling. It was definitely taking me longer than I had hoped. Not just because of the leveling-larger-tiles thing, but little tasks like mixing up batch after batch of thinset, lugging boxes of tile out from the garage, and making cuts here and there with the wet saw really ate up the day. You definitely can go faster with two people, but seeing as the lady-wife was dealing with some pretty gnarly morning all-day sickness, I went it alone (as she wistfully peered out the window between bathroom breaks).
Thankfully, I was able to finish up the tile job the next day. It took me from about 9:30 – 6pm, but piece by piece and hour by hour that floor was coming together. And I was slowly mummifying my hands with thinset splatters.
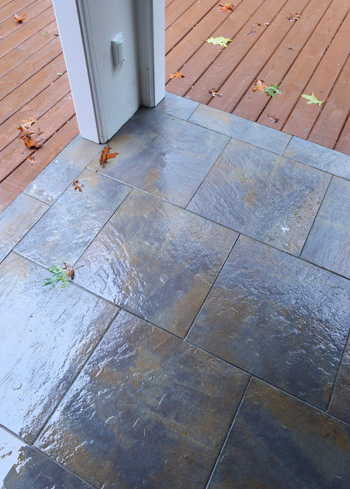
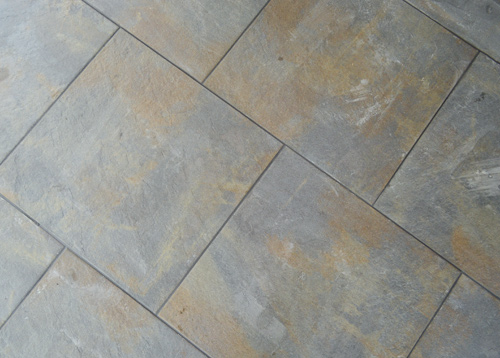
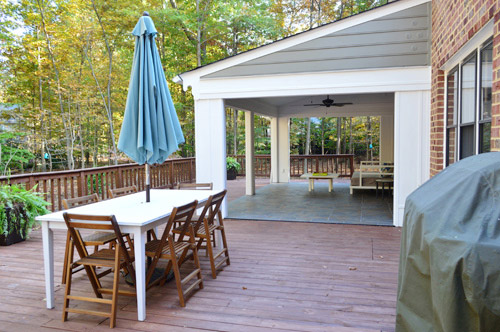
In the end, we’re really happy with our slate-like porcelain tile choice. Even when it’s wet it’s not slick like the smooth concrete floor used to be, which was a major concern of ours, and we also like how it goes with the deck and how the tile border that we added really elevates the look (more on how we planned that border here). My original hope was to grout a day or two after finishing things up out there, but Sunday was a wash because I could barely move (thanks to so much lifting, bending, hunching over the day before) and Monday was literally a wash because of rain. As was Tuesday, Wednesday, Thursday, Friday, Saturday, and Sunday of that week.
When things finally started to dry out on Monday, it revealed something that a week of rain had hidden: splotches of dried thinset all over the surface of the tile. Despite my best efforts to keep the surface of my tiles clean (I used a damp cloth to wipe off any drips or excess as I went) – it’s a dirty job. Not helping matters was the natural texture of the tile (which is one of the things that makes them so gloriously non-slip) – it was apparently also great at capturing bits of thinset AND the color of wet thinset just happened to blend in with the color of the tile. So while I might have expected a bit of a haze on the tiles, these larger dots and smears weren’t apparent until the tiles dried out for a couple of days.

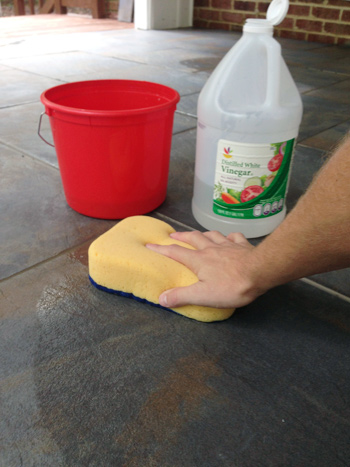
I was pretty frustrated, I’ll admit. The tiles that had looked so sparkly and new in the rain suddenly looked dirty and gross. But I found a tip online about washing them with a 50/50 mixture of water and vinegar to get rid of that thinset residue.
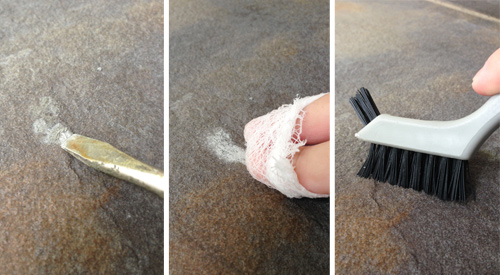
That worked really well for removing the haze on the tiles, but the actual spots of dry thinset took a bit more work. With some combination of chipping things with a screwdriver, rubbing with some cheesecloth (damp with vinegar), and scrubbing with a nylon brush, I was able to get the spots off. Well, that and a lot of elbow grease. If you find yourself in the same spot (ha, pun!) I definitely recommend testing any of these methods in an inconspicuous area before assuming it won’t damage your particular tile. I was a bit worried about my screwdriver technique, but it worked out just fine – although I doubt it would have on something glossier like marble.
But I don’t want to downplay how tedious this unexpected cleaning task was (sometimes online DIY = look how simple this thirty step project was!). I think I spent a full morning and then some… and I still have some spots that I need to go back over. But on the bright side, my Cinderella impressions is pretty killer, no? I just need some cartoon mice and a cranky stepsister or two.
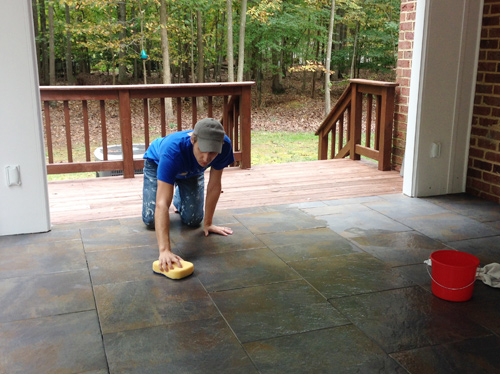
But you can see how much things improved from this extra bit of effort (and it’s definitely a kick in the pants to be more vigilant next time I tile).
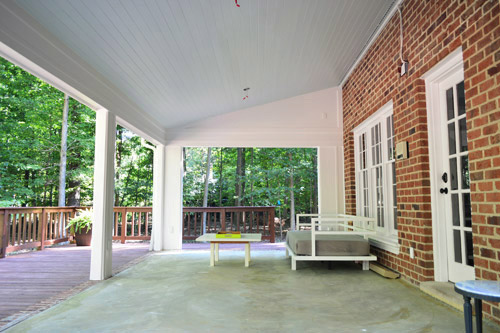
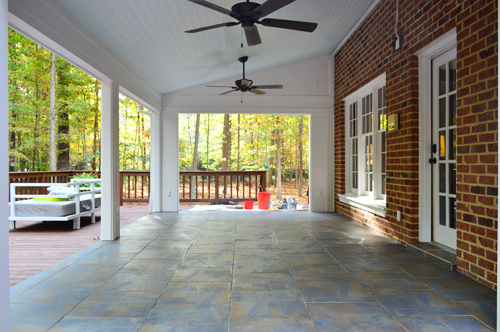
Since that whole cleaning adventure was about two weeks ago, you’d think I could jump right into grouting… but since we had to wait for the tile to be fully dry, my cleaning shenanigans put us back to square one (the tile needs to be completely dry for three solid days in order for those cracks between them to dry out and be ready for grout). And then, by the time everything was dry again, we had entered a cold snap and the grout bag said not to apply it in temperatures under 50 degrees. Kinda felt like a cruel joke that Mother Nature was playing on me. Which is why as of Monday morning (as in October 27) it still looked like this. Groutless and alone.
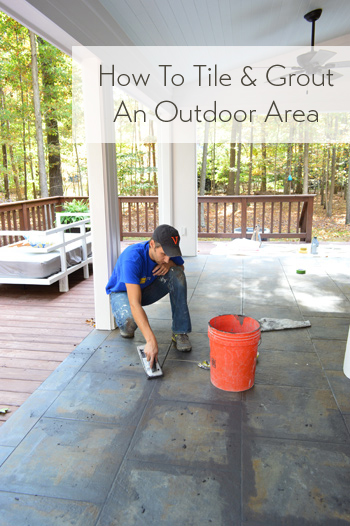
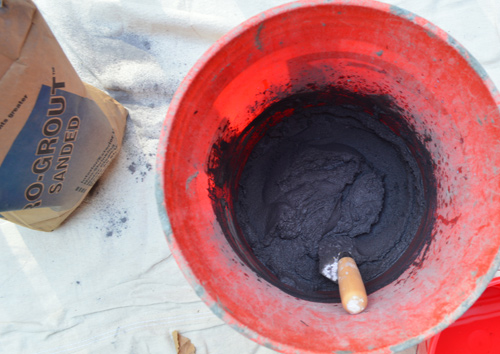
But that was soon to come to an end. Yep, this very week kicked off some serious grouting. Here’s what we used:
- Sanded grout (we chose a “charcoal” color which was inspired by liking the look of our dark thinset between the cracks)
- Flexible Grout Admixture
- Bucket for mixing grout
- Trowel for mixing grout
- Float for spreading grout
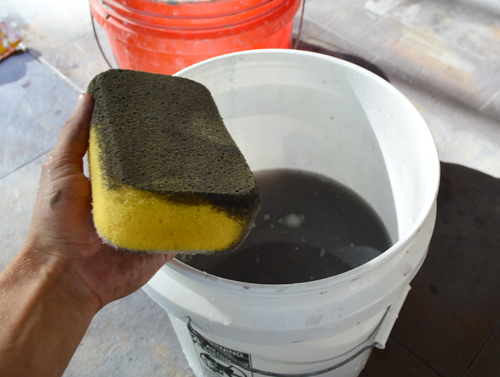
- Sponges for wiping off excess grout
- Bucket of water to keep sponges damp and clean
- & 9. Towels and paper towels for helping to keep things (including me) clean
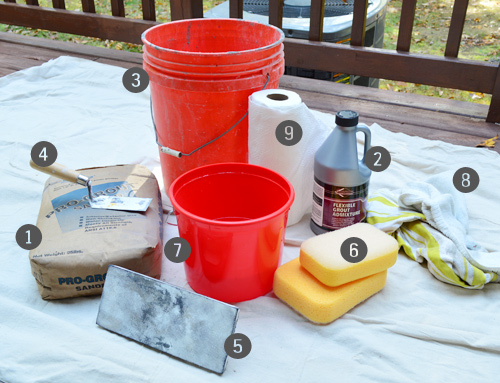
Thanks to the massive amounts of thinset this job took, it wasn’t going to require much grout (since it was just for the cracks). Which is why I only mixed up very small batches at a time, so it didn’t dry out in the bucket before it could be spread. That’s also why I used a simple trowel, not a paddle, to mix my grout. Note: Since we used 1/8″ spacers with our tile, we actually could have used nonsanded grout for that sized gap, but the tile guys said sanded grout should add more durability since this is an outside area, so that’s why we picked it.
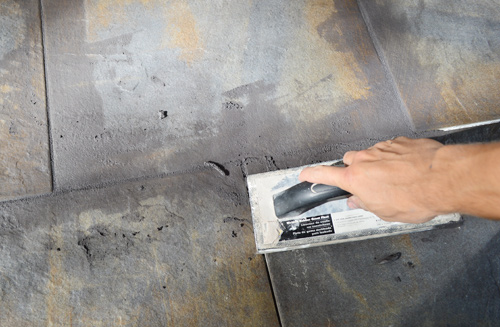
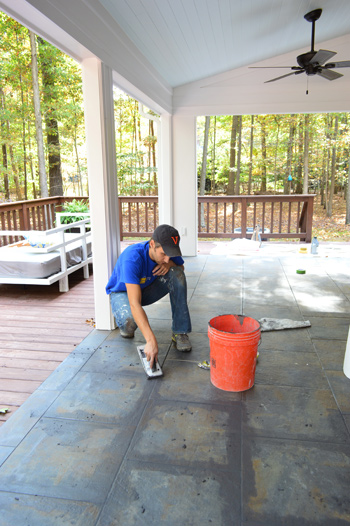
I usually enjoy grouting because it’s so satisfying to see a job come to completion, and it’s not really what I’d describe as a challenging job (Clara could probably do it). Basically you use the float to smoosh grout into all of the cracks, trying to scrape off as much excess as you go.
Then to smooth out the grout and further remove some of the excess, you use a slightly damp sponge to wash over the area you just grouted.
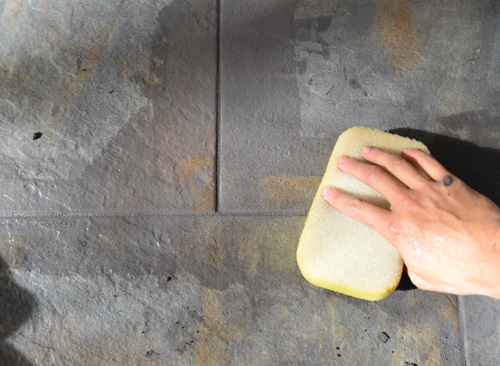
Since I was still reeling from my previous thinset mess, I paid close attention to trying to keep as much grout off my tiles before it dried as I could. It’s somewhat of a Sisyphean task (SAT word alert!) because pretty soon you’re just spreading it around. I tried refreshing my water frequently to keep from undoing my wiping too much, but it seemed that my sponge and bucket were black after just a wipe or two.
But I trudged along and managed to complete the task in about 3 hours.
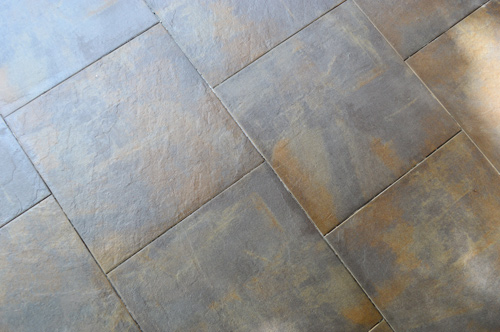
And just as I suspected, when things dried out we were left with that nice grout-y haze over the tiles. At least this time I was kinda of expecting it, since a post-grout film is something we’ve dealt with before.
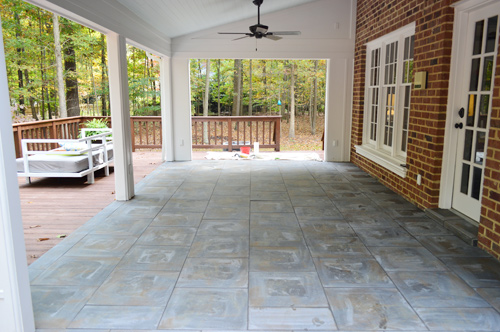
Since I knew I wanted to share this project in as complete a state as possible today, the picture above wasn’t going to do as an “after.” So later that afternoon I went over the floor again with a very damp sponge and some towels to try to wipe up as much of the haze as possible. It made a huge difference. And we really loved the grout color (this is a better depiction than that lighter-looking photos taken later).
See what I mean about the grout looking lighter in this shot? According to the internetz, it’s probably just haze, and I’ve read a few suggestions that I’m going to try once I give the grout a few more days to fully cure and show its final color (hitting it with too much rinsing/water before it sets can permanently lighten it, so I don’t want to over-scrub it prematurely).
One trick involves another 50/50 water & vinegar solution, and if that doesn’t work, there are some grout sealers we can use to boost its color (and even some grout colorants that we could take for a spin if we’re feeling so bold) so I’ll have to keep you posted.
But those little lingering tasks aside, it feels pretty darn good to have this dang floor finally done… ish.
The room as a whole still has things we’d like to attend to, like:
- boxing in those wires that snake down the brick
- hanging sconces on each of the columns around the room for eye-height light
- doing something about that groovy intercom on the wall
- adding more appropriate furniture (it’ll eventually all be outdoor-safe like deck furniture)
… but this is actually the closest it has looked to a finished space since we started this makeover back in August! And since we’re not sure how much more we’ll accomplish out there this season, we thought this was as good a post as any to drop a budget breakdown on y’all. Warning: it’s a lotta cheddar.
- Wood to finish raw sides where sliding doors were removed: $194
- Contractor to remove ceiling beams: $200
- Electrician to move wires, create 2 fan fixture boxes: $318
- Tongue-and-groove planks for ceiling: $297
- Plywood to fill large triangles on either end: $85
- Trim, paint, primer and caulk: $197
- Fans & downrods: $260
- Self-leveling cement & supplies: $150
- Tile: $680
- Thinset, grout and other tiling supplies: $490
- TOTAL: $2,871
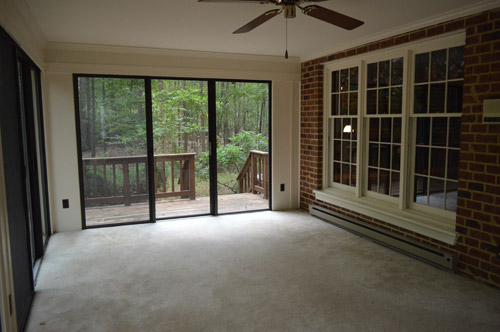
I know, it makes me wince, but what puts that budget into perspective is that just to replace the old foggy & broken extra-wide sliding doors would have been around $3,200 – and that’s without even lofting/planking the ceiling or tiling the floor. In the end, I think we would have been thrilled to spend less, but neither of us wanted to cut corners or cheap out mid-project. So once we got those broken sliders out, things like lofting the ceiling and tiling the floor became let’s-do-this-right choices that we made as we went (instead of shorter term solutions like painting the concrete, which we learned would mean we couldn’t tile it down the line).
And the difference is pretty exciting for us…
Actually, if there’s anything I could take back, it’d be some of the time we’ve poured into the sunroom.
Not because I don’t like the outcome, but just that a lot of these tasks seemed to eat up big chunks of time. So here’s a very rough breakdown of time spent working in here over the last two and a half months:
- Removing old sliding doors (more on that here): 5 hours
- Trimming & caulking openings (more on that here): 3 hours
- Demo-ing the ceiling (more on that here): 3 hours
- Coordinating with the contractor & electrician (more on that here): 1.5 hours
- Adding triangle panels (more on that here) and trim, twice (more on that here): 6 hours
- Priming, painting, installing (more on that here) & caulking the ceiling (more on that here): 21 hours
- Installing the fans (more on that here): 1.5 hours
- Prepping the floor by scrubbing it, using self-leveler, and determining the pattern (more on that here): 2 hours
- Tiling, cleaning & grouting the floor: 26 hours
- TOTAL: 69 hours
I’m really bad at keeping track of time stuff, so take that number with a grain of salt. I’m also not sure where I mentally drew the line in terms of including / excluding tasks like cleaning, shopping for, driving to pick up, and photographing for the blog – all tasks that can quickly add up to lots of minutes that aren’t necessary representative of how the task will go for everyone. But the point is, it has definitely been a time intensive project – especially since morning sickness has kept us from being the dynamic working duo that we usually are. Thankfully it has completely been worth the effort (and the sweat, and the mumified thinset hands). Plus, look how much our offspring loves it out there…
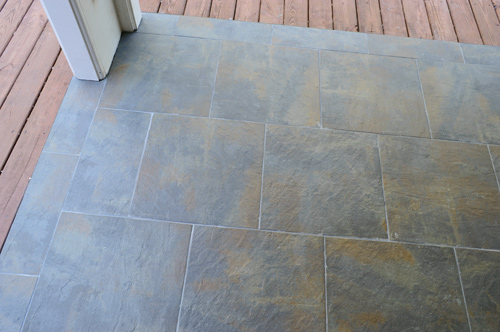
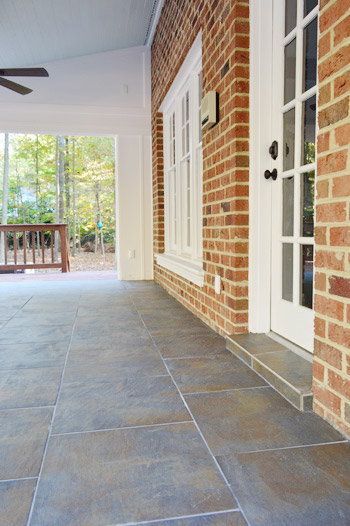
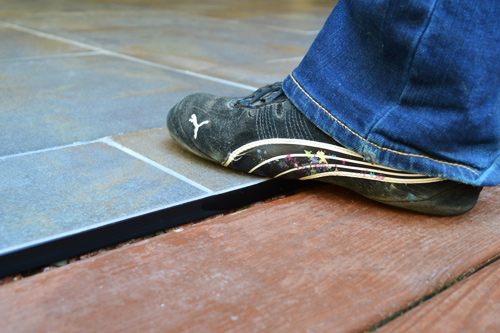
Aaaaand since this post isn’t long enough already. Sherry asked me to address two details that were asked about the last time we talked about the floor. First, here you can see how I installed those metal edging pieces. I put them and place and then thinsetted right over them before placing my border tile. A few folks asked if they held the tile in place. They don’t (that’s the thinset’s job) – they’re just aesthetic in providing a nice clean edge to the tile job and, in our case, helping your eye see the slight step up from the deck to the tile.
Which leads me to my next follow-up. The deck has always been slightly lower than the cement sunroom floor, and that distance has always varied slightly around the perimeter of the sunroom, but the metal sliders for the doors that encircled the entire room actually used to bump things up higher than they are now. So since removing those thick metal door slides and tiling, the transition between the two spaces is actually less dramatic. After living with it for a while now (the room has been open for over two months and tiled for nearly one) we haven’t had a single tripping incident, even with tons of kids/relatives/neighbors over, so we don’t think we’ll need any sort of additional transition or step, which we’re grateful for. We actually think the new tile makes the situation a lot less hazardous since the change in flooring is more obvious now. Here’s Sherry foot-modeling it for you.
Congratulations, you’ve made it to the end of this post! That’s basically like defeating a White Walker or winning the Hunger Games. And speaking of hunger, we’re sticking a fork in the sunroom conversion project for the year since the weather is becoming cooler and the thing we’re most excited to do next (new furniture!) will probably have to wait until our bank account stops yelling at us – although Sherry trolls Craigslist every night on her phone like a crazy person.
What are you guys hoping to check off your list before winter comes a’ knockin? Or have you had weather (or other) pesky conditions interfering with a project’s progress recently? Boy can I relate.

Ginny @ Goofy Monkeys says
Oh, I am quite familiar with tiling after my husband and I recently did our kitchen floor. The grouting was such a job. Worth it in the end, but buckets and buckets of water to clean the haze off the tiles.
Jake says
Guys, I think you did a grout job on the floor. I recently bought a house and my fiancee and I are planning a bunch of projects, including ripping up linoleum in the kitchen and bathroom and replacing it with tile. Having a resource like this post, well… let me just say that I’m truly groutful.
Re: craigslist searching, I’ve had a lot of success with using IFTTT recipes to monitor a bunch of different searches and email me when there’s something new. I set a gmail filter to put the alerts into a particular mailbox and set an alert on my phone when something arrives. It’s similar to what the apps can do, but I find it easier to create detailed customized searches directly on the CL website and paste the search URL into IFTTT. Hope that helps!
YoungHouseLove says
Thanks for the tip Jake!
xo
s
Irene says
I’ve never done a project like this, but would it ever be a viable option to save all the clean-up of thinset smears and drips, plus grout haze all together until the very end? Congratulations on a fabulous job, it looks beautiful!
YoungHouseLove says
We asked the tile guys that but they said trying to clean as you go is usually best (the longer thinset sets, for example, the harder it is to get off, especially if it gets grout over it later in the process).
xo
s
Emily @ Life on Food says
Come spring and summer you won’t think twice about the 69 hours. It looks marvelous!
Sacha (@zigged) says
DUDE. You gotta stop calling it a cement patio. It’s a concrete patio. (Or was.) I grew up saying cement instead of concrete, and so did everyone around me, but it drives my engineer husband CRAZY. “Cement is a component of concrete. You don’t call bread ‘flour’, right?” Now I notice it all the time and catch myself (before) saying it, too. Since you run a highly respected DIY site you should probably use the right technical terminology.
Just lookin’ out — nothing but love for y’all. Really.
YoungHouseLove says
Thanks Sacha! We have both been schooled on that a few times but the wrong term slips out sometimes. Will try harder!
xo
s
Cheryl says
Absolutely gorgeous! Guess I missed the post about removing the screens. I love the open, covered outdoor space. What a great entertaining space and that tile makes is look so elegant yet inviting! Sounds like a beast of a job, but the end results sure look worth it!
stephanie says
Did you find a solution to the variation in the haze on the grout lines? I was unable to find an update about it. Thanks!
YoungHouseLove says
We just left it alone and over time it wore down a bit. It’s still not perfect so we might do something in the future and share our results :)
xo
s