Updated 2019
With Thanksgiving around the corner, we thought it would be nice to adapt Sherry’s daily gratitude journal habit for a fun holiday craft for the whole family. Rather than keep the things we’re thankful for stuck in our heads or on the page of a journal, what if we put the practice on display during the month of November? Who knows, maybe it will even inspire more gratitude!
Craft Supplies To Create Your Own “Thanks Jar”
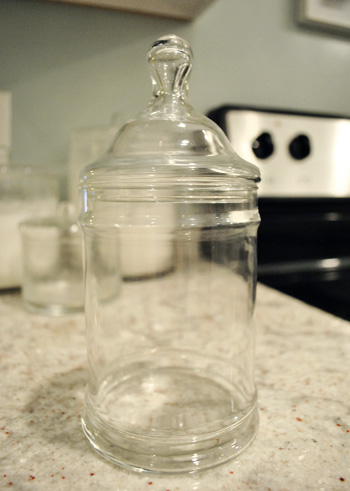
We got this idea after scoring this awesome 99-cent apothecary jar from the thrift store (it was originally $1.99 but we scored it during a 50% off glassware sale). But you can use any glass vessel you choose, even a regular drinking glass or flower vase!
- Small glass jar
- Glass etching cream
- Small paintbrush
- Craft knife
- Printer and printer paper
- Painter’s tape
- Colorful cardstock cut small enough to fit in the jar
Obviously you can also create a Thanksgiving “Thanks Jar” without etching your glass vessel, but we’ve been itching to try a glass etching craft ever since seeing this one on How About Orange.
Step 1: Design & Print Your Stencil
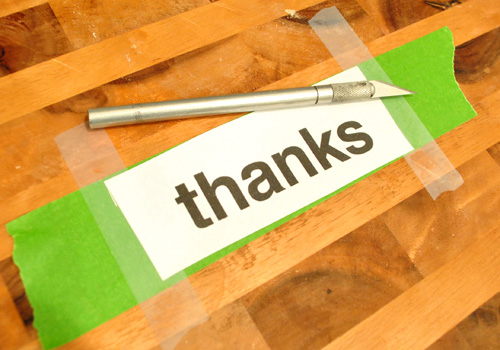
We ever-so-creatively (kidding) decided that we wanted to etch the word “thanks” on the base of our jar. So we used our computer to print it out on paper in a simple, blocky font (Helvetica) that was sized perfectly to our jar. You can create this in any word processing software (even a draft email!) just be sure to keep the design simple and stencil friendly.
Step 2: Tape Your Stencil Over Painter’s Tape
Since we really need to stick our stencil tight to the glass, we first had to transfer the design from paper to painter’s tape. So we taped a thick section of green painter’s tape to a cutting board and then scot taped our “thanks” print out over it. I promise this will make more sense in a moment.
Step 3: Cut Out Your Stencil
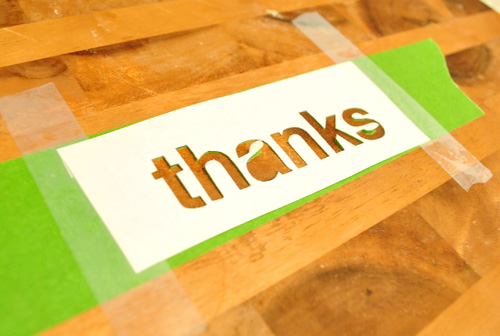
With everything taped down, we used an Exacto knife to cut out our letters one by one. Be sure to go deep enough to cut through the painter’s tape too. We decided not to be picky about preserving the hole in the “a.” But we did crack up when Sherry said “I don’t think we need to save the a-hole.” I know, we’re like fifth graders over here.
Step 4: Apply Your Tape Stencil To Your Glass
With the “stencil” cut, we then disposed of the paper print-out guide and slowly peeled the painter’s tape from the cutting board, being careful not to rip the tape or let it stick to itself. Once it was safely off the cutting board, we stuck it right onto the glass jar. Ta-dah! Tape stencil mission complete.
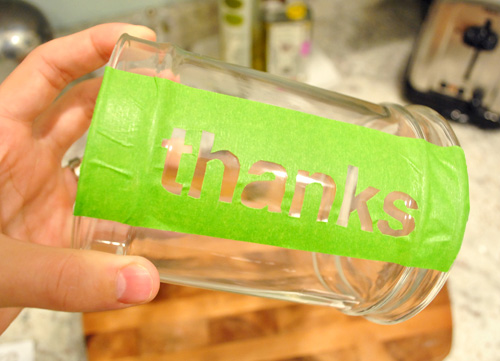
The hump in the “h” got a little wonky, but other than that we were pleasantly surprised by how well our makeshift stencil was holding up. And with a couple more strips of tape on the sides (just to be safe) we were ready to apply the etching cream without having to worry about getting it in the wrong places.
Step 5: Brush On Your Glass Etch Cream
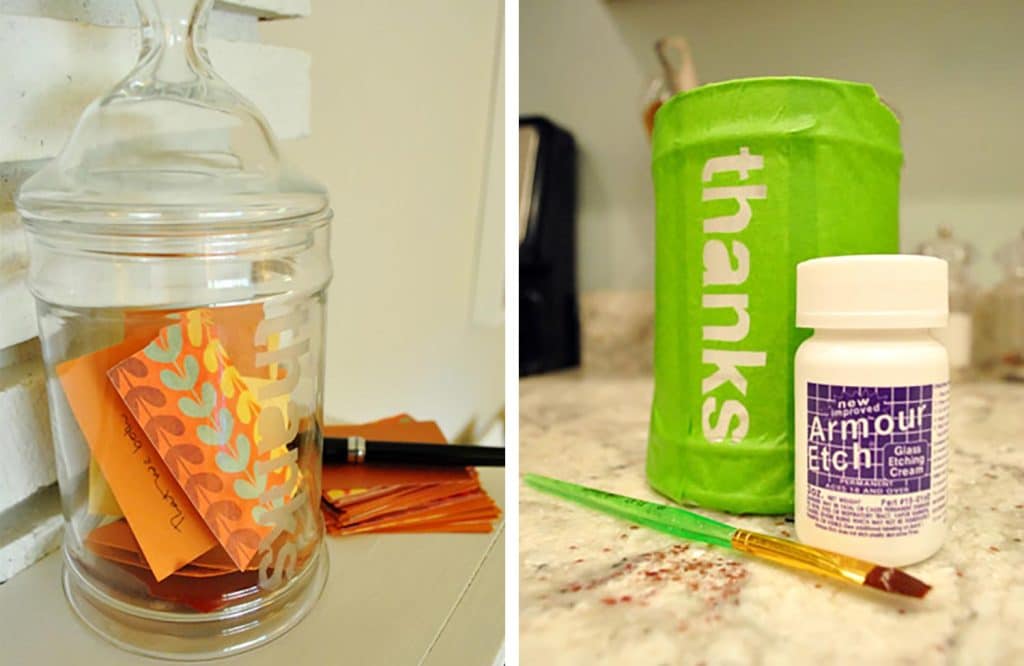
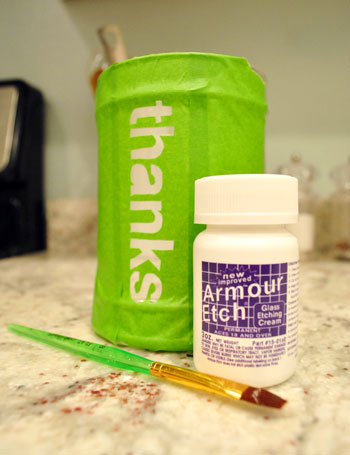
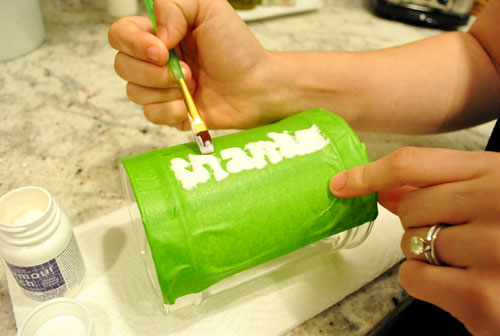
We picked up this Armour Etch cream for $6.50 at Michael’s (thanks to a 50% off coupon) and broke out this tiny paintbrush to apply it over each of the cut-out letters. The painter’s tape does the job of not letting it seep behind the letters.
Step 6: Wait!
The instructions made it unclear how long we should keep the cream on (since that depend son your “stencil” material). But since our tape wasn’t as durable as a vinyl stencil might be, we kept a close eye on the backside of the tape through the glass. We noticed after about 90 seconds that the edges of the tape weren’t looking as crisp as they had been (the etching cream was probably slowly degrading the tape). But the longer you leave it on, the deeper your etch will be.
Step 6: Rinse Off Cream & Remove Stencil
After letting the cream work its magic for about 1.5 minutes, we washed it off in the sink and removed our tape stencil. We had a tiny smidge of bleeding between the “k” and “s” but otherwise it worked out beautifully!
Step 7: Starting Filling Your Jar With Gratitude!
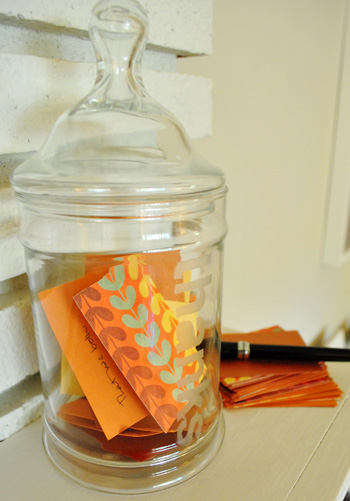
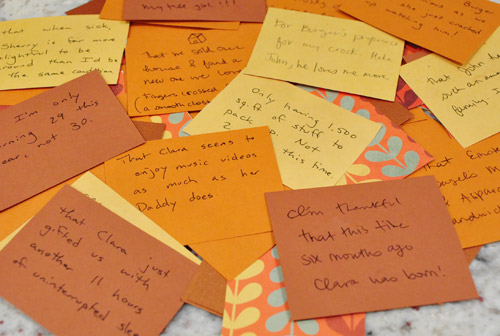
Sherry cut out several small notecard from Fall-colored scrapbooking paper from Michael’s. Our goal is to write one per day all month long so by November 30th we’ll have accumulated sixty notes of gratitude. Oh, and we have a no peeking policy so we won’t know what each other has written until the end of the month! That should be a fun little family reveal.
“Thanks Jar” Update
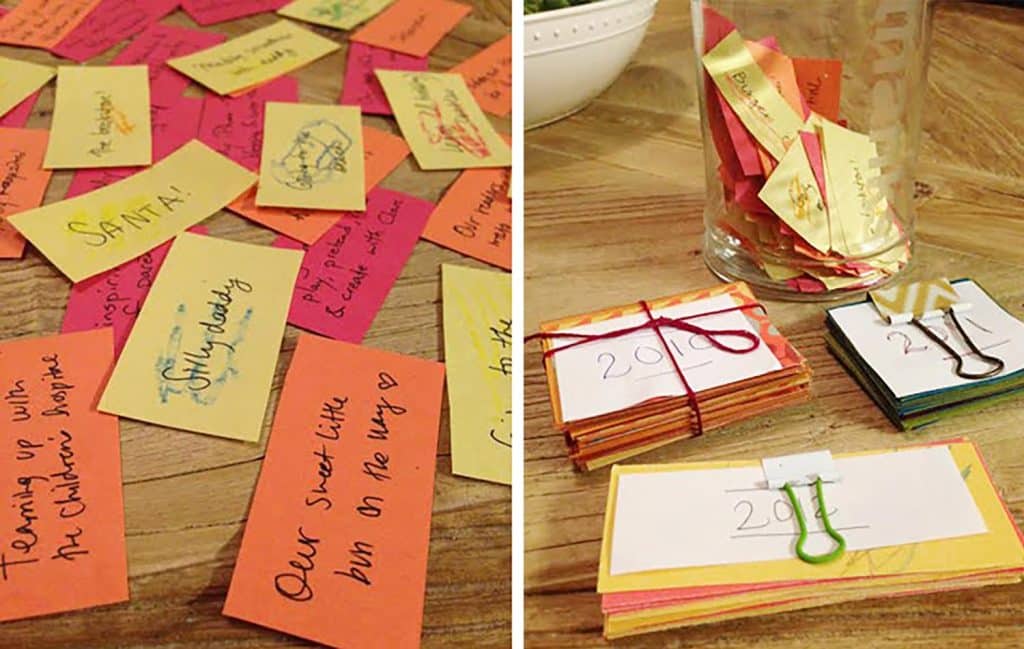
Want to see what we ended up writing? Here’s are the results of our inaugural “Thanks Jar” Thanksgiving tradition.
BONUS: Save Your “Thanks Jar” Notes
We’re also thinking at the end of the month we’ll punch holes in the cards so we can store the collection on a ribbon or a binder ring. That way when we break out our “thanks jar” next year we can relive all of the things that we were grateful for in 2010 and create another collection of things we’re thankful for that year.
Who knows, it could become a great little family tradition with Clara and future kiddo(s) adding their thanks to the pile when they’re older. And we love that we’ll have a yearly account of everything that we’re grateful for. Kind of like a diary, but less high maintenance since we only have to scribble one small thing down each day for a month.
Update: Our Continued Thanksgiving Tradition
We did end up keeping this tradition for several years and even blogged about it several other times, along with other Thanksgiving crafts and traditions we undertook. Check them out here:
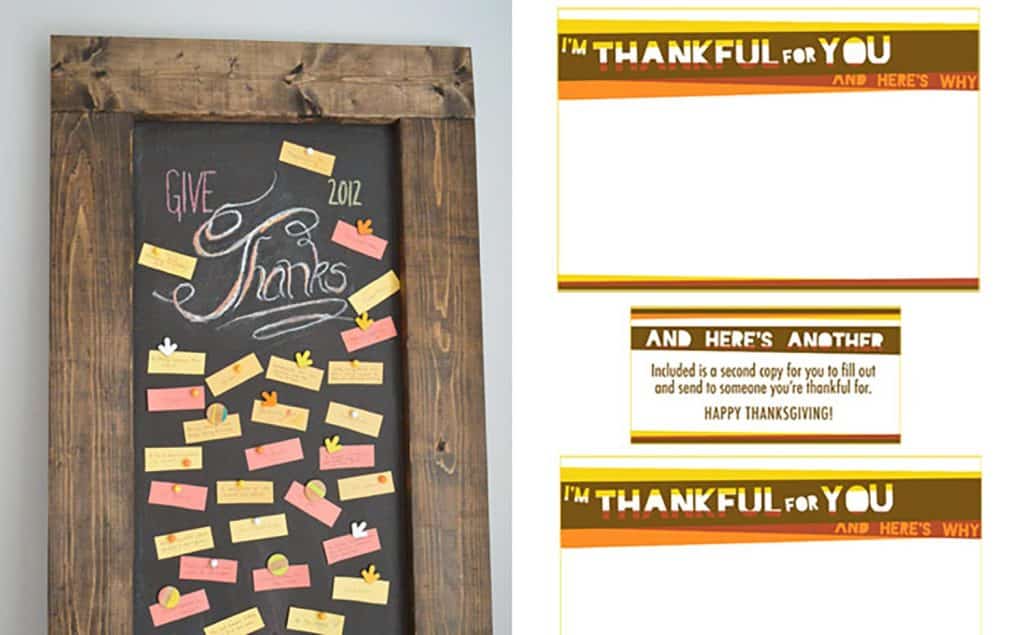
- A free Thanksgiving printable to mail messages of gratitude to friends & family
- Creating A Thanksgiving gratitude chalkboard display
- Our daughter’s first year writing Thanks Jar messages
Do you guys have any fun Thanksgiving traditions? Any glass etching stories of success or horror? An acute attraction to printed scrapbooking paper like my wife? She can’t be the only one who geeks out in the paper aisle.
Update: You can check out all of our favorite holiday decor finds here – many of which are under $15!

Sherry says
You joked that you would start with meat first but that is actually new information that paediatricians are giving in Canada. Baby iron stores are decreasing at the age of 6 months so all three of my kids ate rice and then chicken puree as their first foods. Followed closely by something that would mix well, like apple because that meat puree is rather gross.
http://www.cps.ca/caringforkids/pregnancybabies/Feeding.htm
And homemade is very easy, I recommned checking out “Super Baby Food” by Ruth Yaron from the library.
Best to you all,
Sherry
alice says
You MUST MUST (MUST!) do a follow up with the cloth diapers once she starts on solids… I have my fingers crossed that all goes well because I want to cloth diaper too.
Krista Haws says
I love glass etching, and I have used tape to make a stencil before, it works wonderfully! Actually, I made a jar for my puppy’s dog treats with a weenie dog on it and I etched some martini glasses for my mom for her birthday. I love personalized gifts, they are so special!
Cher says
My doctor advised starting our baby on vegetables first as they are less sweet than fruits and babies are more likely to continue to like them if you start them first. He advised starting with the orange vegetables since they are least allergenic (carrots, squash, sweet potatos, etc.) Then move on to green vegetables. Also only start one new food at a time to be able to identify if there is a digestive problem or allergy. He also told us kids take a long time to adjust to new tastes and textures and not to stop offering a food if they do not like it the first few times. We have always had the “one bite rule” and now our kids eat just about everything and are not afraid to try new things.
What a fun stage in her life! Enjoy!!
Love, love, love your blog!!
Megan L says
Love it! Now I know what to get everyone for Christmas…Thanks guys!
Ashley @ According to Ashley says
I really love this project! Thanks for the great idea!
Jessica says
Oh that’s really nice! I really like that. Seems very simple to do.
Sarah McB says
For baby feeding we LOVED the Beaba babyfood maker. Don’t let the price put you off, it’s worth every penny!
Jenna says
Oh, I LOVE the idea of have a thankfulness jar! I would really like to give that a try with me family. What neat memories to create. :) (And the etching is pretty sweet too.)
pamzella says
Try the etching next time with contact paper… it might “hold” a bit longer than the tape. It sticks rather permanently to shelves, etc. but not to glass or mirror.
Katie Truelove says
I wondered if I could DIY it with a variety of materials, and I’m glad to know it is possible:) I’ll tackle a glass etching project one of these days! ps- I LOVE the paper aisle too! Sherry, did you have any favorite paper spots in NYC? I splurge every once in a while but it is tough to find pretty paper for cheap here!
YoungHouseLove says
I always loved Papyrus, but you’re right- it’s expensive!
xo,
s
Erin says
The jar looks cute!
I did the project at the link below about a month ago, but it’s theme was “gratitude” so I thought I’d share–very similar in that my husband and I wrote down separately all of the things we were grateful for, but then I made a collage-type thing for the wall.
http://as-for-me-and-my-rented-house.blogspot.com/2010/09/post-in-which-we-display-gratitude-on.html
Rhiannon says
Awesome idea. This is sure to be a great tradition! By the way, I caught your console table and old corner desk in the last The Nest Magazine! Love you guys, I went running to my husband, “look honey young house love is in here! Woo hoo!”
James says
John, you’re a 28 year old dude. Do you *seriously* get excited about writing gratitude notes and putting them in a jar?! Or is this just for blogging purposes?!
YoungHouseLove says
Hi James,
I probably wouldn’t take on as many crafty projects if I were a single guy, but I’m not only a 28 year old dude, I’m also rocking the husband and father status. So anything I can do to show my family that I appreciate them and the life that we’ve made together is fine with me. I guess I swing the ol’ sledgehammer around enough to have the occasional Martha Stewart moment.
-John
r8chel says
When I was running errands this afternoon, I stopped in at a thrift store to see if I could find something to etch. I didn’t find the right thing yet, but I’m excited to try this out sometime. Maybe I’ll etch some Christmas gifts…
Jennifer Burch says
Not sure if anyone mentioned this or not since I didn’t have time to read all the comments but the best thing that I have found for cutting stencils, and I have cut a lot of them, is a piece of glass with the edges all masked off so you can’t cut yourself. You xacto never accidentally digs in like on a cutting mat and causes you to go off course and you can easly spin your design around for smooth curves. Works great.
Carolyn says
Great idea, and a lovely family tradition you’ve started there! (btw, Sherry, I love scrapbook paper too…not a scrapbooker, but just love the cute patterns)
Oh, and happy 6 months old to Clara! since you guys said to “chime in with any starting solids advice”…mine would be:
1) try to be patient! 2) remember to have a sense of humour! 3) do not feed near a wall! (unless you want her to paint it with sweet potato) 4) consider trying one of the bibs with the built in catcher thingys. I have tried a number of cute cloth bibs, but the one with the food catcher has helped save my sanity! Of course it doesn’t get everything, but it does prevent some mess hitting the floor.
Sara @ House Bella says
I totally geek out in the paper aisle. I’m with you Sherry.
And etching cream?! I had no idea that such a thing existed. And I’m really, really excited about it.
Marci says
Just this morning I was thinking of starting a good deed jar in my house since my daughter is learning about it in religious school. I was thinking that for every 20 good deeds that our family did, I would let my 5 year old choose a charity of her choice to make a contribution to and then we could turn the papers into a book or something. Imagine my (pleasant!) surprise to see your post about the jar and now I’m very excited to make this jar with the word “mitzvah” on it which is a good deed in the jewish religion since this project is for hebrew school. I’m looking forward to a future post on how you put them together in a book too. Talk about a meant to be project for me : )
Rose says
I would never be so lucky to find a jar like that in any of my local thrift stores……but great idea….
ashley25 says
What a great idea!! We’re all short on cash these days and this gave me such a wonderful idea for personalized Christmas gifts! I can’t wait to get started. Thank you for all of the amazing inspiration.
anna says
I really really like how you answered James. You sound like a great husband/father.
Merritt says
What an awesome idea, truly inspiring. With your inspiration I made my own version of a “thanks jar”. We’re hoping it becomes a Thanksgiving tradition!
Romantic says
Love this! We did something similar yesterday, except we made fall leaves and wrote what we are thankful for on each leaf.
Julie says
Okay, first of all, I know I’m completely missing the point of this entry, but Sherry, your ring is GORGEOUS!! Secondly, you’re not alone in your fifth-gradery. My husband and I always say that we’re a couple of twelve year old boys–we would find “we don’t need to save the a-hole” absolutely hilarious. And I am the least crafty person you will ever meet, but I love, LOVE this idea–you may have inspired me to give it a shot!
Sheila says
I too love the way you answered James-who-doesn’t-have-a-clue.
Jennie says
John, thanks for being so sincere in your answer to James. I think it’s wonderful that you take the time to show your family how much you appreciate them. The mainstream definition of masculinity is terribly skewed anyway – who says that a true manly-man can’t express love and gratitude?I think it shows a real level of maturity. Thanks to both of you for reminding everyone how important it is to practice thankfulness! I am thankful for both of you and your drama-free approach to blogging and life. A breath of fresh air!
Melody says
What a great idea! i love it!
Kate M says
Hi Sherry! I have followed your blog for quite a while and I love all your DIY project, and this one is no exception – so cute! But I was wondering have you guys every had DIY’s gone wrong? I had one recently (posted on my blog) and I am just hoping that Im not the only DIY crafter that has had projects end up in the trash…
http://olivesanddaisies.blogspot.com/2010/11/when-diy-becomes-di-dont.html
YoungHouseLove says
Oh yes! Check out this epic fail: https://www.younghouselove.com/2009/05/if-at-first-you-dont-succeed-make-lanterns-out-of-bulb-covers/
And this one too: https://www.younghouselove.com/2010/08/dont-try-this-at-home/
Oh well, you win some, you lose some.
xo,
s
OwningSingle says
What a great idea! I may just steal this.
bungalowbliss says
Just an update: I tried this last night, and it really is as easy as you make it look. I love it! Thanks again! :)
YoungHouseLove says
Wahoo! So glad!
xo,
s
Alicia says
I posted this before but just wanted to make sure you got it. That CUTE bamboo plate (#5) with the dinosaur shouting on your babycenter post is actually disposable. Just and FYI for you to keep in mind if that’s not what you were going for when buying plates. I was so dissapointed because it wasn’t made very clear when I purchased it.
YoungHouseLove says
Thanks for the heads up Alicia!
xo,
s
Kim says
Just want to vindicate “James” a little bit – I totally laughed out loud at his comment. Guess there are only a few of us sarcastic humor-loving commenters here.
Kristen says
What a cute project! I saw the same post on How About Orange and have been trying to decide which piece of glassware will be my first victim.
As for starting solid foods: Duck and Cover is my advice to you. ;-)
Claire @ Claire K Creations says
I must admit I had a little giggle at the ‘a-hole’ comment. What a great idea. I’m very jealous of your 99c jar. I’ve been looking for some in Australia for so long. I can’t find one under about $35!
Lauren C says
THANK YOU for giving me an EXCELLENT idea for inexpensive Christmas presents! WAHOOOOO *skips away with an armful of glass jars*
tricia says
A few months back, I stole your idea of putting a bunch of postcards (from places we’ve been or places our family and friends have been) in a glass vase on display. I have gotten so many compliments on it:) Anyway, I am going to steal “jar of thanks” idea but instead of storing them in a jar, I will take the postcards out for now and just drop the “thanks” in! It is really such adorable idea that will be such a treasure to look back on in the future! My husband and I are excited to try this!
FaithofAllCrafts says
Love that you use a glass jar. We have a cardboard box (painted pumpkin orange)with a hole in the top that we call our “Blessing Box”. Every November hubby, kids & I write down our blessings to be read on Thanksgiving day.
I love this tradition.
Katie says
We just started a tradition this year, called the Thankful Tree. My 3 year old daughter loves helping cut out leaves and coming up with things to write each day, and my 19 month old son loves climbing onto the couch and ripping the paper! :) What can I say? It may not look perfect, but it’s perfectly us!
http://theazkahles.blogspot.com/2010/11/thankful-tree.html
Suzie @ cupcake monkey says
I love your jar!! It looks great! We started something every so similar at the beginning of this month and I am so excited to have this new tradition for my little family. [And yes, even my husband is excited about doing this…likely not as excited as I am, but he has done one every day since November 1st and makes a point of grabbing my attention with a silly little dance before dropping his paper into the box]
As a fellow gratitude-journal keeper, this type of family project is such a great thing! You guys are great!
If interested, you can read more about our thank-you box here:
http://www.cupcakemonkey.com/2010/11/starting-new-family-tradition.html
Suzie
kim says
love it. love it. love it.
this is my first visit to your site… looks like you guys are up to some awesome stuff!! <3
Gilly says
First of all I want to say I just fou d ur blog and I am so excited about this craft. And then I got to thinking. I think you could buy baseball card clear protective sheets for a binder to make a thanksgiving book. Instead of putting holes in ur paper. Or if bb sheets don’t work maybe business card size!!!!!! Just an idea. Thanks for all ur great ideas!
YoungHouseLove says
Great suggestion!
xo,
s
Tracy says
Another idea: get Christmas decor paper and make ’em into ornaments for the tree!!
YoungHouseLove says
Love it!
xo,
s
laura says
Hi guys!
Love your blog – so inspiring and entertaining, keep it up (and looks like you’ll have no problem doing just that now that you have a brand new house – congrats)
I tried this Thanks Glassing idea – check it out!
http://www.youstirme.com/2010/11/thank-you-jar.html
Diem says
I love this! I have been reading your blog obsessively since I found it a week ago (we moved into an older home). So, I have a lot to learn. I was just telling my husband we should just use glass jars (from pasta sauce, salsa, etc…) as drinking glasses. Well, now I can decorate them! Oooh, I think I’ll make the word “change” and use one of them as a change jar! Thanks for all the hard work and dedication to this blog. You have given me so many great ideas and have saved me a bundle too.
Suni says
I was SOOO excited to try this! Inappropriately excited, actually. But it just didn’t work out as well as yours did! I had a couple of ideas for my stencils, so I chose a test jar to try two of them on. The etching just didn’t come out very even or strong. I put it on quite thick, so I wasn’t sure what else to do. So I decided to try leaving it on longer. I found another little junk jar around the house that I could test on, and tried a new stencil (which worked much better) and this time I left the cream on for the full 5 minutes (if not more). When I washed it off it wasn’t very even or strong, so I put more cream on for 10 minutes this time… It still didn’t turn out all that great. Darn… I had such high hopes! You two are the masters, I don’t know how you do it!
Becka says
Great Idea. I love all your creative ideas.
It is always great to stop and think about what we are thankful for.
Where did you get the Helvetica font from?
Or do you have a recommendation where I could safely download it for free?
YoungHouseLove says
Ours is from Photoshop (they also have it in Microsoft Word). Not sure where else you could get it, but maybe try googling around for “helvetica free font” or just “free font” to see if you can find something like it.
xo,
s
CURLY + NERDY says
WHAT A NEAT IDEA! I HAVE TO TRY THIS OUT!
Carla says
What a cute idea. I also love keeping a gratitude journal. So much so that I made one, I shared the how to and pdfs on my blog : http://www.smallfriendly.com/small-friendly/2010/11/giving-thanks.html
Thank you for all of your inspiration. I love your blog!
Grace says
Trying this on glass Christmas ornaments. Fingers crossed it goes well!