Offices are inevitably full of wires and cables. And if you recall from this post about building some under desk storage, ours is no exception. But we were determined to make our mess o’ cords look somewhat more presentable. Because if you know us at all, this random under-desk chaos was not going to fly here at Casa Petersik. Plus we realized that once Clara gets a little more mobile she might even get into trouble under there, so we wanted to put the kabosh on that from the start.
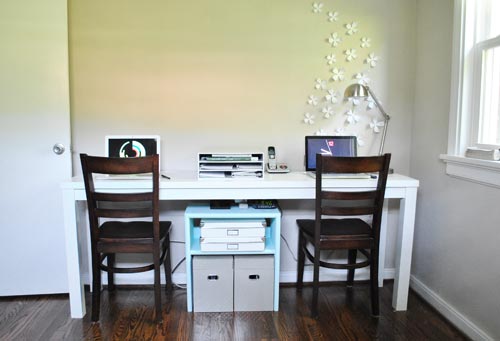
In addition to making things safer and more visually appealing, I also had two other functional goals. The first one was to get us down to one powerstrip / surge protector. See, we had one hidden behind the file storage (where we plugged in things like our modem) and one sitting on top of the storage shelf itself (which meant that the two wall outlets behind the desk were completely used up, each by a powercord plug). And since the only other outlets in the room are behind the couch on the opposite wall, we often found ourselves doing things like plugging the vacuum in all the way in the bathroom and running the cord down the hall. Annoying!
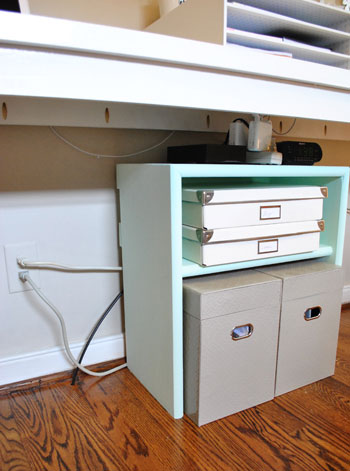
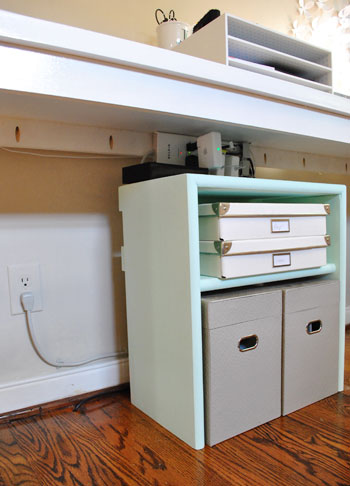
Our second goal was to clear off the top of the file storage shelf so that we might actually be able to use it for something other than resting a powerstrip on it (along with our external hard drive and clock radio).
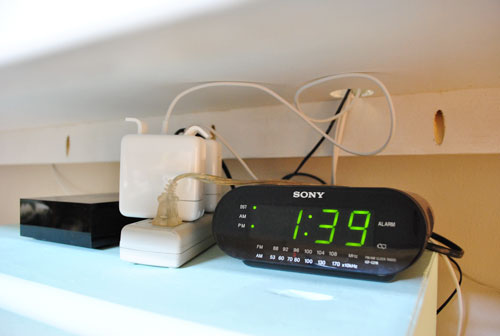
So with those goals in mind it was time to take inventory before getting started. The first question I asked myself was if I wanted to squeeze everything into one powerstrip, how many outlets would that strip need? So I unplugged everything and laid it out to count. We also used this as an exercise to see if anything could be eliminated (the radio ended up getting the boot because we could easily use our computers to both check the time and listen to music- and you know we like our devices to multitask). Here are the lucky seven plugs that we were left with:
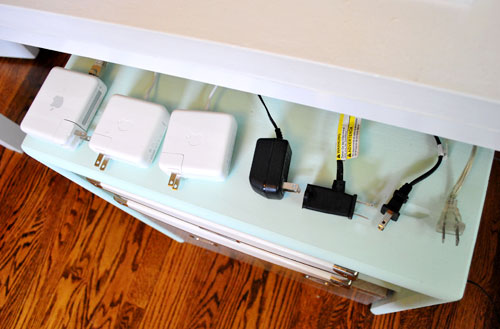
In case you’re curious, from left to right they are: our Airport Express wireless station, our two MacBook plugs, our landline phone, our modem, our Lacie external hard drive and a desk lamp plug. So off we went to hunt for a powerstrip with seven outlets (preferably eight which would provide an extra). If we could find something like that, not only would we have an extra outlet on the strip, but we’d also have an extra outlet on the wall for the vacuum since we would no longer have two powerstrips going on. We were daring to dream. Here’s what we came home with:
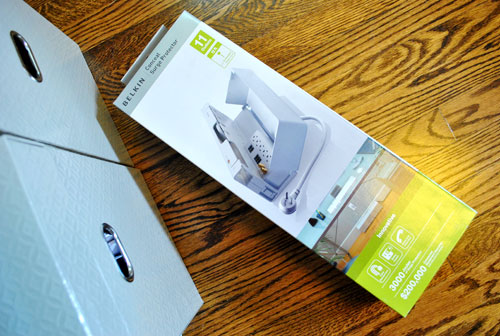
This Belkin Concealed Surge Protector was actually recommended to us by our friend Heather who recently used it in her home office. She told us that she got hers at Home Depot, which wasn’t a place that we expected to find such a product, but they actually had a larger selection than Office Depot (the first place we looked). Thanks for the tip Heather! And although this sucker was a semi-steep 49 bucks, we figured it was worth it to be able to close the entire mess of plugs in a concealed case that was kid-safe. Not to mention that we would gain eleven whole outlets plus the extra one that we’d be freeing up on the wall!
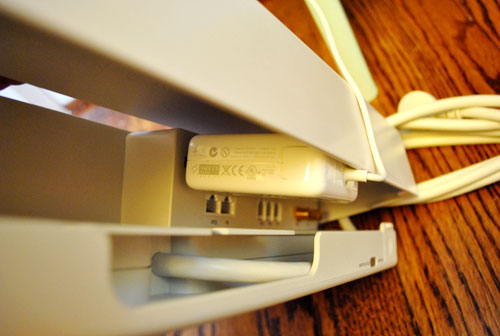
We were very excited until this discovery…
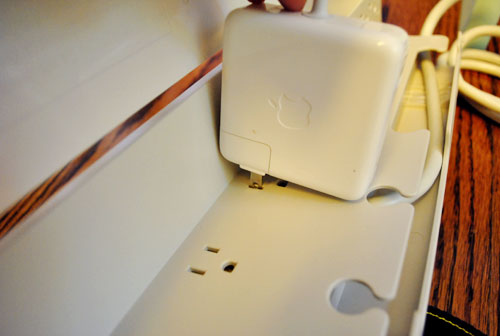
It doesn’t play nice with Macs. Not only were the MacBook AC adapters too big to fit into the slot that was especially built for big adapters, they blocked the cover from closing when plugged into the normal outlets. FAIL!
A bit disappointed, we trudged back out to Home Depot for a second time that day (and a second time ever for Clara) to find a replacement. Enter this guy:
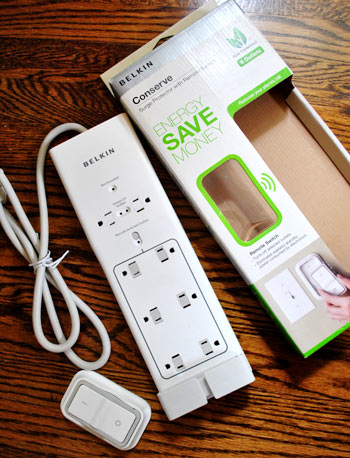
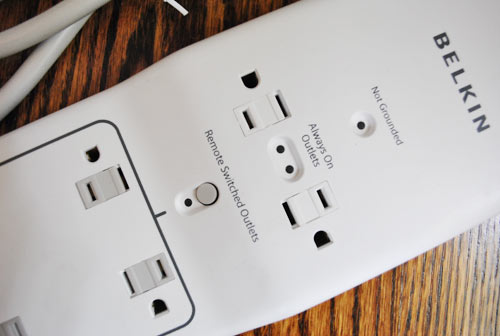
We hadn’t even noticed him the first time we went powerstrip shopping, but this Belkin Conserve (which came in cheaper than the last one at Home Depot: $39 to be exact) met our minimum eight outlet requirement, plus it offered a cool eco-option. It comes with a remote switch to turn off six of the eight outlets when you’re not using them (doing away with the dreaded vampire power effect to save energy and money). After some quick plug scheming in our heads we realized this could be the perfect option. See, we really only needed our modem, phone, and Airport to stay on at all times – and the modem plug has an extra outlet in the back of it meaning that those three items could easily be plugged into the two always-on outlets. So off to the register we skipped (well, it was probably more of a happy walk).
Like most surge protectors, this Belkin guy has holes on the back that make it ready for mounting (meaning I could finally achieve my second goal of getting everything off of the top of the file shelf). Our mounting spot of choice was actually the back rail of the desk (since we didn’t want to mount it to the underside of the desk for fear that gravity wouldn’t help those plugs stay in as much as it would if we mounted it on its side). So off I went to mark a few tiny pilot holes for a few small screws.
In case you’ve ever had trouble marking for holes on an item like this (perhaps when hanging a picture frame) I thought I’d share my odd-but-it-works system. It involves wrapping a little bit of blue painter’s tape from the backside right through the middle of the holes and back around to the front side where I can see it. Oh and I draw the little arrow to remind myself which edge of the tape I should be looking at.
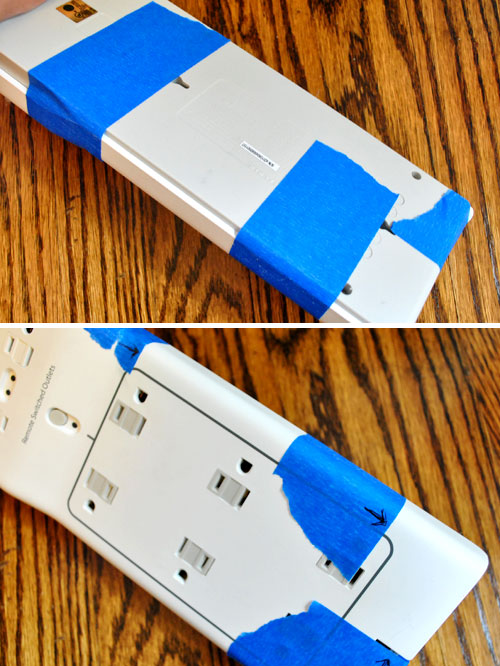
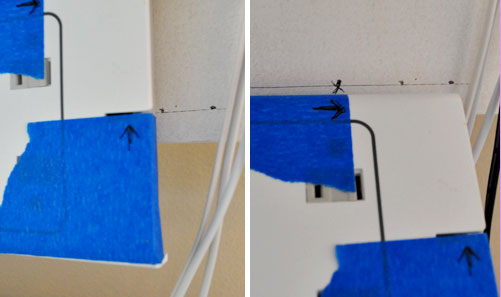
Then I can hold the item against the wall (or in this case, the powerstrip against the desk) and mark how far down my holes should be. Next I draw a line, and then mark on the line how far over I should drill. It’s not the most clever thing in the world, but it has always worked for me!
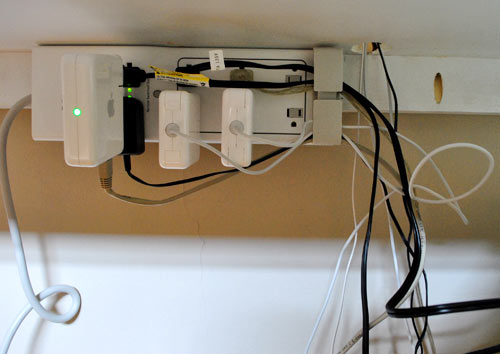
Anyway, with my two holes drilled and a bit of manhandling I finally had the powerstrip mounted securely to the back rail underneath the desk. Ta-da! Note: Those long holes on either side are leftover from constructing the desk. Since they were hidden I didn’t bother to fill them in. Yes, I get lazy sometimes.
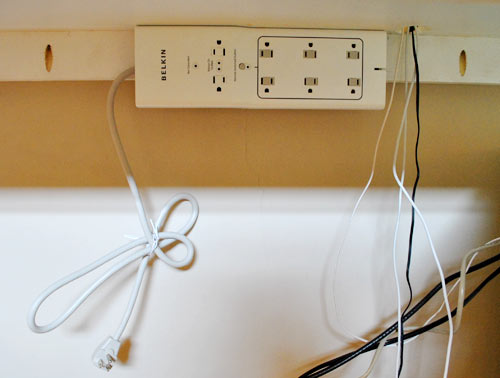
With the strip in place, I plugged everything in and watched a new mess of cords unfold before my eyes. Boo! Even with the cord wrangler that Belkin provided (at least it pulled all the wires off to one side… see that folded flat tan ring on the right?) it wasn’t looking too hot. I guess I was finally getting a look at the jungle I created by plugging all seven cords into one surge protector. Sheesh.
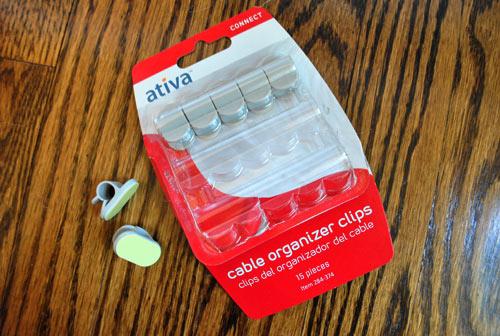
Not to worry, I still had a few more tricks up my sleeve when it came to making the excess cordage disappear. Such as these cable organizer clips that we snagged at Office Depot for just a few bucks. They have a small adhesive strip on the back so you can stick ’em anywhere that cords need wrangling.
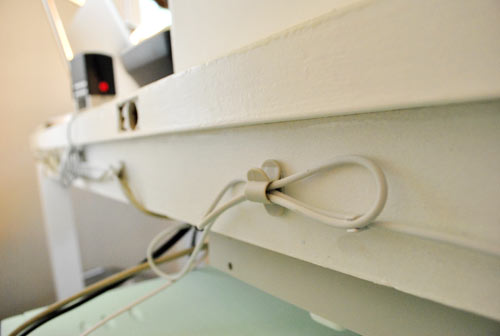
I started on the backside of the desk. By placing one every foot or so, I was able to guide all of the cords for our desktop items (the computers and the lamp) so that they were hidden behind the desk until the very spot that they were needed (i.e. my computer cord now pops up right next to my laptop) and by wrapping some of them I eliminated any sagging excess from making an appearance under the desk (which Clara could have someday tugged or nibbled- you never know!).
For the rest of the wires (most of which were going straight down towards the modem hidden in one of the white storage boxes on the blue shelf) I just used a twist-tie leftover from the surge protector packaging to at least corral everything into one thick strand. Beyond that, I let myself relax a bit knowing that everything else would be hidden behind the file shelf (not to mention that unless you were sitting on the floor under our desk you’d never see anything to begin with).

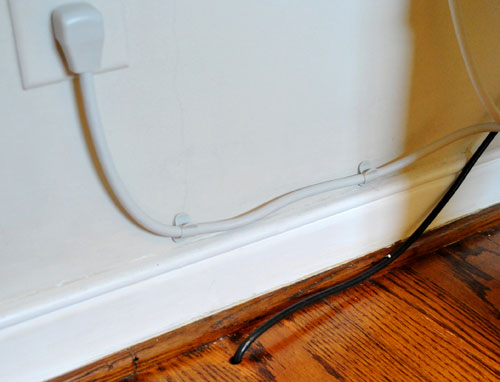
Of course one other eyesore was the cords coming from the wall outlet. I already helped that issue by eliminating one plug (since we no longer needed a second powerstrip) and I solved the remaining loose cord issue with my handy cable clips. Thank goodness both the cord and the clips were basically the same color as the wall. Oh, and for the ugly black coaxial cable that connected to our modem (which the previous owners so lovingly fed through a drilled hole in the floor) I just hammered a small nail into the quarter-round molding to keep the black cable hidden against the dark brown floor.
Then we just pushed the blue shelf back into place so the cords looked nice and clean and parallel.
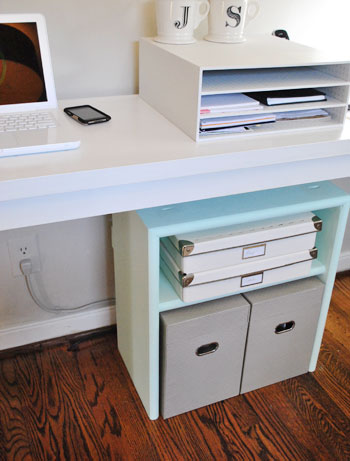
While I’m completely pleased at achieving two of my goals (#1 – freeing an outlet, #2 – making room on top of the file shelf), I was kinda bummed my cram-all-plugs-into-one-surge-protector tactic left me with that mass of plugs hanging from the back of the desk (even though no one will ever see them unless they’re sitting under the desk). But, with goal #2 completed, Sherry and I plan to further obscure the whole thing with a small tray for keeping things like her paint fan decks on hand, which will truly hide that gang of plugs once and for all. And I shouldn’t forget to point out that the whole thing looks great when viewed from a normal sitting or standing angle:
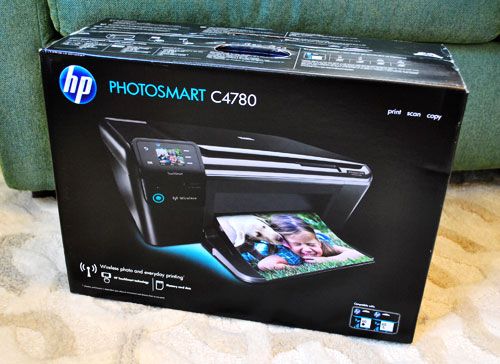
Before we leave this topic though, we wanted to share one other wire-related project that we tackled this weekend: going wireless with our printing. Our four year old HP printer/scanner/fax that sat under Sherry’s old desk was still kicking, but the fax component made it a bit bulky for this office and it of course it didn’t have any wireless functionality. But while shopping at Office Depot for our other cord-y goodies, we spotted this HP PhotoSmart C4780 printer/scanner/copier on sale (down from $100 to $79). And it definitely was an upgrade thanks to the wireless capability, the sleek and much easier to use scanner pad, and the smaller and thinner footprint. So as much as we had initially wanted to hold out for a shiny white Mac-esque printer/scanner, we couldn’t pass up the deal, the shelf-ready size, and the fact that it would add tons of wireless printing and scanning function to our office. Woo hoo!
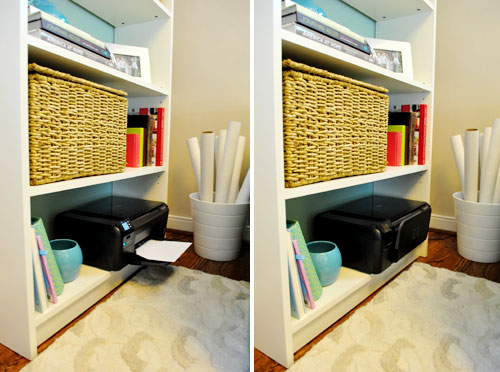
I’ll skip the details of setting up and installing the printer itself, but just know that the wireless function works (thank goodness- and yes, we held our breath during the test) so there’s no need to keep it within cords’ reach of our computers. And the power cord actually slipped nicely through the small space between the bookcase and wall, making it easy for me to feed it to our other outlet behind the couch without creating any sort of messy wire chaos in the process. Perfecto!
Thus concludes our tale of wires, cables, and cords. And since we know that no two cord situations are alike, we’d love for you guys to share any techniques that you’ve used, products that you’ve relied on, or tricks that you’ve pulled from your sleeves to make your wild wires behave.
P.S. Oh yeah, and thanks to everyone who suggested collecting reader postcards for our postcard art wall in the comment section of the last post! We’re happily accepting them at PO Box 36665, Richmond, VA 23235. And a big thumbs up to those who already sent us cards from their home states (and countries). We can’t wait to share our progress on that next week!
Psst- Wanna follow the entire office/guest bedroom/playroom makeover? Click here for the intro post, here to read about the big sleeper sofa hunt, here for the DIY desk play-by-play, here for the homemade light fixture project, here for our hacked Ikea bookcase, here for how we built some file storage, here for how we added some toy storage, and here for how we picked out some DIY art that we could agree on.

- Sarah :-) says
Wow – I’m SO going to have to buy some of those cord hooks!!
and PS: clara should have a package headed her way by the end of the week. :-) So excited to give her the finished “Welcome to the world” project!!
YoungHouseLove says
Sarah- That’s so exciting! Clara is drooling with glee!
xo,
s
Tara says
I HATE looking at wires. Our TV stand is open shelves so we have to look at the wires all day. I may have to look into getting some of those wire organizers to solve the problem. Love the way your desk looks!!
KCatGU says
We have the 1st power strip you bought in our living room and man does it make my heart swoon. It is so easy on the eyes. I had to have it after seeing it in staples one day. I told my husband about it and he was kind enough to gift it me, but yours with this remote switch is appealing as well. Is it wrong to get excited about power strips? ha ha
Lisa says
I love this post on Gizmodo by Jesus Diaz about embracing those cords that just absolutely cannot be hidden by turning them into mini art pieces. I’ve used his idea as inspiration several times in my home, and now I don’t get stressed when I see cords running willy-nilly across certain places–I even smile!
Link to his post:
http://gizmodo.com/5480174/decorating-cables-instead-of-hiding-them
Nicole says
I know you’ll be glad you bundled everything together once Clara is mobile. I was vacuuming the other day and saw our mess of cords around our TV and my husband’s computer and thought, “Wow, we’re going to have to figure something out when this baby begins to move”. I need to keep this post in mind.
We are actually hoping to upgrade our printer as well – looking for something wireless. We are kind of lost for space but thought about our bookcase from IKEA. So happy to see you chose a bookcase for your printer’s home as well! I think it should work!
Sarah says
Great job hiding your cords! I’m so lazy about that.
I know this isn’t a tech support blog, but I have a question about your new HP printer – have you tried scanning to your Mac(s) using the printer yet? Does it work? I have 2 HP printers and neither will scan to my Mac after various reinstallations of the drivers.
YoungHouseLove says
We haven’t actually tried that yet but we’ll keep an eye out for any issues. Thanks for the heads up!
xo,
s
Wendy says
Hi youngsters!
I have the power strip you ended up with in the end, and I love it. I plugged my two lamps that sit on the dresser across the room from my bed into it, and I used a Command adhesive strip to inconspicuously mount it to the back side of my headboard (which no one can see). I prefer the lamps to the overhead recessed lighting, and it’s nice to be able to simply reach over my shoulder to flip the switch when it’s time to go to sleep.
Also, I have a weird method for marking holes that’s faster and easier than your tape method. I just grab a tube of lipstick or lipgloss from my makeup stash and smear it around the hole for which I need to drive a screw. Then I just press the object (a power strip, in your example) against the surface to which I want to mount it in the desired location, and voila, I get a mark that clearly shows me the outline of where I need to drill. If any excess lippie is left after I drive the screws, I can just wipe it off with a damp cloth.
YoungHouseLove says
Genius! Thanks so much for the lipstick tip! If only I wore lipstick. Maybe it’ll work with lip balm.
xo,
s
Wendy says
Whoops–In my comment above, I meant to say that I mounted the remote control to the back side of my headboard. I hope that makes more sense. ; )
Renee Smith says
Awesome! I love the solution, and I have really enjoyed having a wireless printer! You might have to rethink the placement of the printer in 5 months or so when Clara starts crawling. My mom had to put a door on the cabinet with her printer because my son (18 months now) and brother (16 months) were wreaking havoc on the poor printer (broke one, which prompted her to move to a wireless option). Just a little food for thought in the baby-proofing arena… or maybe it is more of a money saving strategy… either way! I love the office progress!!
Lisa says
Love the blog you guys! Can you tell me about the cool flower art on the wall above the desk? What is it exactly? I love it!
YoungHouseLove says
Hey Lisa,
The flowers are Umbra’s Wallflowers. You can read all about it here: https://www.younghouselove.com/2009/06/push-it-push-it-real-goo/
-John
Anna says
Loose cords are a huge pet peeve of mine, as well.
For mounting powerstrips to the wall, I always place a piece of paper on the back of the strip, then with the a pencil, I shade over where the holes are (as if making a rubbing). Then I can just tape the paper to the wall where I want the strip, and put in the nails or screws right through the paper. When I tear the paper off, there are no pencil marks on the walls, and everything is perfectly placed.
YoungHouseLove says
Another awesome idea! Thanks so much for sharing Anna.
xo,
s
Amanda@Our Humble A{Bowe}d says
I was lucky enough to get an outlet inside my built in desk: http://ourhumbleabowed.wordpress.com/2010/06/02/office-progress-2/
I still keep my cords tied up and I’m such a geek that I labeled each cord with a label maker. it definitely makes unplugging much easier.
Christy Q says
Love what you did! I’m going to show my husband this post so we can do something similar once we set up our little office corner. Maybe it’s just me but I’m just not getting the tape trick… :( I may have to try the lip balm/lipstick one that Wendy suggested but I’m curious to understand the tape better as I don’t think lipstick’s going to fly with my husband. LOL
Carolyn says
Great idea on the cord control method. I will add this project on my growing list of things to do!
P.S I hope you don’t think I’m a lunatic/crazy lady with my comment on your table display post yesterday. I’m really keen to see what you guys do with baby proofing your home as Clara gets more mobile.
You guys actually inspired me yesterday when I went to get some little paintbrushes for my daughter to use when we do art/craft projects together. The little, red handled brushes are sitting pretty in a glass cup on our study nook desk. Aaah..life is good!
– Carolyn (queen of the long comments!)
YoungHouseLove says
Haha, no worries! We love those long comments! Keep ’em coming! And we look forward to babyproofing the house as Clara grows (we’re all about learning as we go- it’s how we made over our entire house up to this point!).
xo,
s
Rachael says
Love the desk, love the whole set up, and good riddens to those darn cords! On a side note, where did you get the J & S mugs? We fight over mugs in our house, my partner and I have a common favourite – the only way to beat it is to personalise!
YoungHouseLove says
Hey Rachael,
They’re from Anthropologie for $6 a pop. Hope it helps!
xo,
s
Deb says
We’ve used little hooks and surge protectors at our place but I will always remember a flatmate’s solution to her cat playing with cords. She platted her tv/dvd player cords with ribbon that had bells tied in it. Whenever her cat played with it she’d hear the bells and run away (a little scardy cat).
Mike and McGee says
I haven’t read the other comments, so I’m not sure if someone else has mentioned this or not, but you should plan on moving the printer when Clara is mobile. It’s way too tempting for tiny little hands!
YoungHouseLove says
Thanks for the tip! We’re excited to reconfigure nearly every inch of our house when Clara is more mobile. Stay tuned!
xo,
s
Bunny says
I was totally going to suggest the Belkin Conserve when you mentioned your specifications. It just screams YHL to me – white and shiny (ceramic-y!), eco friendly, safe as anything, and gadget-y enough to fulfill Johns self-admitted geekiness ;P – shame you had to do an extra trip for that, but at least you found it! ^___^ Also glad to see your two choices were Belkin – no other powerstrips exist to me, haha!
Kathy Lou says
On another blog (and I wish I could remember where) I saw someone solve the cord dilemma by building a drywall box that fit behind the table. When it’s painted the color of the wall you can’t even see it. I think it might have been about 3 or 4 inches deep and the height and width of the desk. It had a lid with holes to drop in the cords and they disappeared completely from sight. I don’t even think it attached to anything, it just stood between the desk and the wall.
YoungHouseLove says
That sounds cool! Thanks for sharing the description.
xo,
s
lana @ make a house a home says
we have that printer and LOVE LOVE LOVE it!
YoungHouseLove says
So good to know!
xo,
s
Andrea P says
How many inches tall is your Ikea white planter you have on the office floor? I would love to buy one for my wrapping paper! Thanks :)
YoungHouseLove says
It’s 11″ tall, Andrea. Hope that helps!
-John
Younee says
YOU GUYS ROCK!!!. Your Posting is always inspiring
sharonB says
thanks for this post. you have no idea how many arguments I get in with my hubby of 25 yrs over wires/cables. I HATE THEM – THEY DRIVE ME KRAZY & he acts like they are a normal part of life. seeing them is pure evil!
Carole G says
Hi guys, wonderful post, and fabulous Clara pics & video. Thank you so much for sharing your beautiful baby girl with us.
I puzzled over the blue paint tape tip for some time. Looks very clever but I can’t quite figure it out. Perhaps some day you’d do a video of it – perhaps bundled in with several other clever tips.
Continued happiness & success to you – Carole
YoungHouseLove says
It’s so hard to explain- we agree that a video would make more sense of it! A few commenters shared other quick & easy tricks if you scroll back through the comments to read about those in the meantime. Hope it helps!
xo,
s
katie @ k+b says
i was just beginning my search for a good printer and of course googled your site to see what you have… how are you liking the new printer? in addition to general printing, i may be using it for things like invitations and some DIY art (like sillouttes and other randoms).. do you think it would work well for that ?
YoungHouseLove says
Oh yeah, ours works great for those things.
xo,
s