Last week when we showed you our DIY flower mobiles, we intentionally didn’t reveal the full wall. Why? Because it was looking a bit unbalanced. But first we’ll refresh your memory about how the entire wall looked before we started the mobile project at all. In the words of Ke$ha, it was pretty blah, blah, blah.
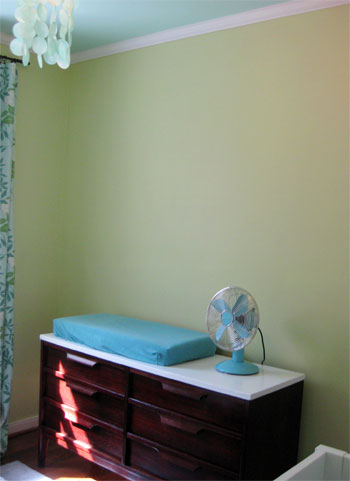
We realized early on that we wanted to DIY a mobile for above the changing pad, but that would leave about half of the wall above the dresser totally bare. So we decided to address the temporary imbalance with some big plans for the other half of that wall: shelves. We knew we’d need some sort of shelving in the nursery for miscellaneous storage and display (especially after realizing how much space a changing pad takes up on the top of our newly refinished dresser). Luckily, our inspiration-filled trip to Charlotte back in February sparked an idea thanks to a stop at a store called Nesting. We loved these deep pocket, floating bookshelves not only as a great way to display kiddie reading material but also a perfect way to avoid any object-rolls-off-of-shelf-onto-baby incidents (I hear that’s a big no-no in the parenting world).
But as much as we loved those shelves, we didn’t buy them. Instead, I figured this was a perfect opportunity for me to flex discover my carpentry muscles and actually build the shelves myself. Gulp.
I figured building my daughter’s first library would be a sweet, symbolic gesture of my grandfather’s woodworking skills combined with my mother’s love of books (she worked at a library for three decades)… assuming I could pull it off. Plus, since I’d be building them from scratch we’d be able to customize the measurements to exactly what we needed in the room.
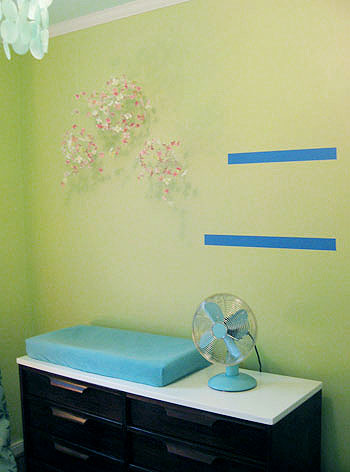
To figure out the desired size and placement for our shelves we simply broke out some handy blue painters tape. We tore off a few strips and began lining the wall in various configurations: three equal length shelves, two staggered shelves, various heights, various widths, etc. In the end, we landed on one shelf above one slightly longer shelf (both aligned on the right side and a bit uneven on the left):
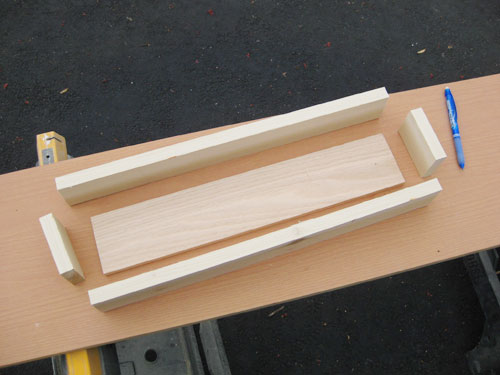
With our concept visualized via blue tape, we took measurements and figured out how much wood we’d need to create box-y pocket shelves inspired by the ones we’d seen in Charlotte. We knew we wanted our version of the shelves to be bit wider (to accommodate a few toys along with some books) and shallower (so less of the books would be hidden behind the shelf). So we headed to Home Depot, surveyed the wood selection, and came home with the right lengths of 0.75″ x 2.5″ poplar for the sides (it was light and inexpensive) and 0.5″ x 3.5″ maple for the bottom (it was a bit sturdier and less likely to bend and warp under the weight of the objects that we’d be storing on it). All-in-all, we spent less than $14 for the materials for both shelves.
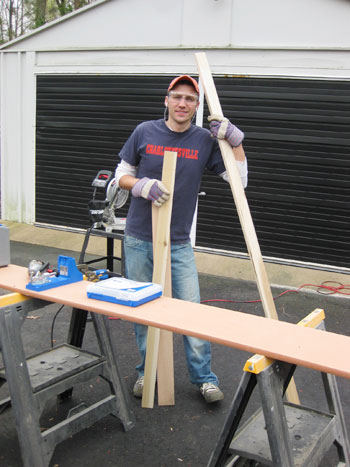
So here I am last Sunday ready to rock (literally, notice the iPod earphones) at my makeshift workbench:
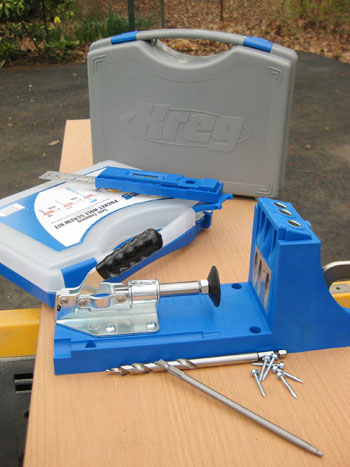
As for my weapons of mass construction? Lucky for me I had connected with a company called Kreg on Twitter a few weeks ago (and lucky for you, they’ll show up later today in this week’s giveaway!). They sell a whole slew of gadgets to make woodworking projects easier, so I jumped at the chance to take them for a spin. After all, my original vision for this project involved a lot of wood glue and L-brackets (feel free to laugh) so the guys over at Kreg (in my head they’re all named Craig, btw) sent us over a sampling of their make-you-feel-like-a-master-handyman products.
Admittedly, I stared blankly at them for a while wondering what kind of craftsman the Craigs mistook me for.
But before long I found myself actually using (and understanding how to use – thank you instructions!) several of the tools. Clamps? Yes, please! Multi-mark measuring device? Why not!
Before I could say “it’s tool time” I had the pieces for my first shelf measured, marked and cut (thanks to my brotha-from-another-motha: the miter saw I befriended during the bathroom trim project). Note: if you are sawless, don’t hesitate to ask your home improvement store to cut things down while you wait. Just be warned that they may charge you a few cents after the first cut, but this project is totally doable for those without a miter saw- really I was just showing off for my adorable pregnant wife. What can I say, I feel like a man when the sawdust flies…
Anyway, here’s how my first shelf was starting to come together after all of the cutting was done. Is it looking shelf-y yet?
Now here’s the part where the Kreg tools were really going to do some heavy lifting. The centerpiece of the Kreg set was the Kreg Jig. It’s their entry-level tool (phew) for “anyone new to Pocket-Screw Joinery” (pardon my French). Basically, it helps you join pieces of wood together by guiding the placement of holes and screws for a solid, trusty-enough-to-hang-over-your-baby joint. And it all worked with my existing drill, so I didn’t need any fancy stuff beyond the Jig itself.
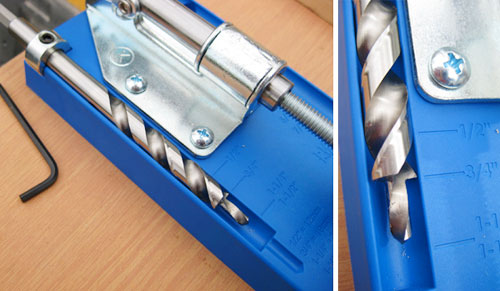
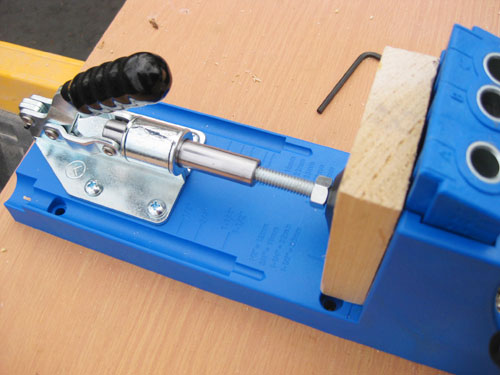
First I used their guide to set the depth of their specially-designed drill bit to match the 3/4″ inch thickness of my side pieces. It just took tightening the nut at the end of the bit (see upper left corner below) with an allen wrench to later keep me from drilling too deep. And you can see how it narrows at the end, which creates a guide hole for the screw.
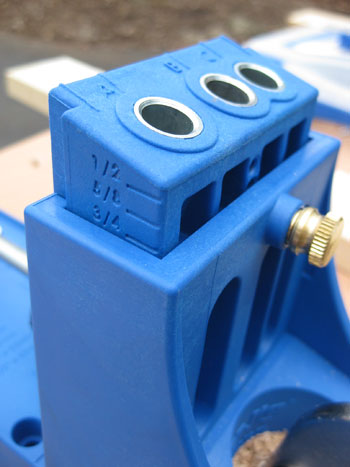
Next came setting the drill guide to the same 3/4″ measurement, so I wouldn’t drill straight through the wood and into the jig itself (I may or may not have done this on my first try – fortunately a tester piece of scrap wood was the only thing harmed in the process).
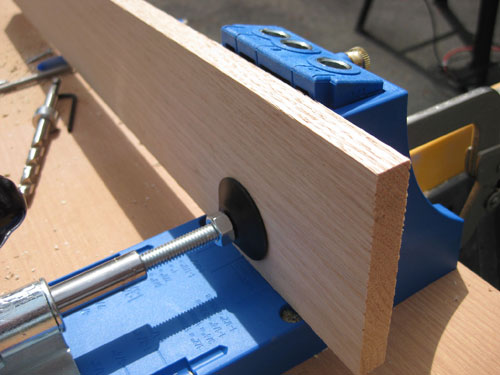
With my drill bit and drill guide set, I put my first piece of wood into the jig and clamped it tightly in place using the adjustable toggle clamp.
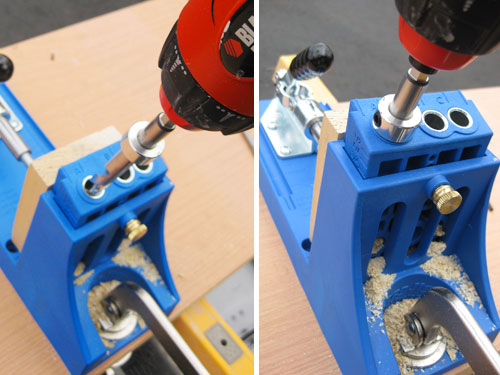
Then it was time to drill (cue that manly sawdust I mentioned earlier). Despite my initial nerves and confusion, it was really simple. I just drove the specialty-bit into the guide hole until the nut prevented me from going any further. Oh, and I totally appreciated how the jig sent all of the sawdust out of the back (and out of my manly eyes). Smart! Not that I didn’t have safety glasses on (which also contribute to that I-feel-like-a-pro effect). So I highly recommend those as well.
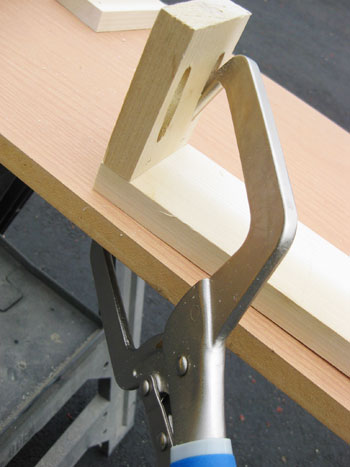
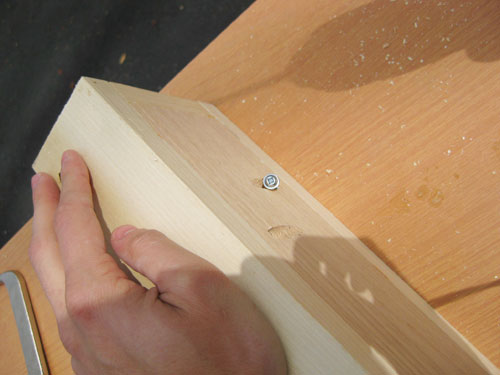
After drilling a second time, I was left with two perfectly sized pocket holes that were angled just right – ready for me to attach the short sided piece to the longer front piece. So with my holes drilled, I used the right-angle clamp Kreg included to hold my two pieces firmly in place. You can see how one side of the clamp fits nicely inside the pilot hole, while the other sits flat against the back of my workbench.
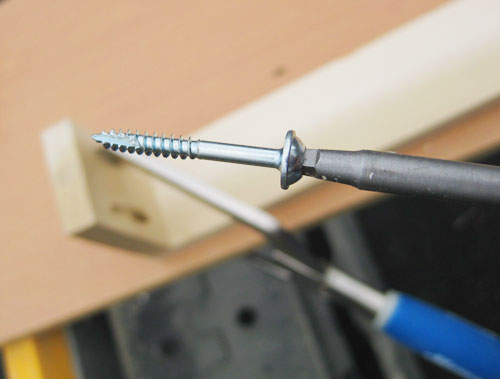
Then I was ready to screw everything into place. Kreg includes special self-tapping screws (and an accompanying screwdriver bit) that are designed for these types of joints, which definitely came in handy. I realized later I probably should’ve used their coarse thredded screws for my soft poplar, but I guess I’ve learned for next time. But hey, pretty sweet that the bit is magnetic, no?
Here’s where you miss a bit of the action because I couldn’t play Tim The Tool Man and take photos at the same time. But trust me that it was a pretty smooth, easy and quick process. And boy was it satisfying to immediately have a tight joint that didn’t involve gluing or clamping things for hours. Plus all of the screws were hidden from sight.
So before long I had my four sides screwed together and it was time to install the bottom of the shelf. I adjusted my bit and drill guide for the thinner 1/2″ maple base, clamped ‘er in place and drilled two holes in each direction, each about 8 inches apart.
With the pocket holes drilled, I shimmied the base into place at the bottom of my four-sided box and got back to screwing everything together. You can see a bit of what that looks like below – though I mainly shared this shot for the ominous, Psycho-esque screwdriver shadow looming over its victim.
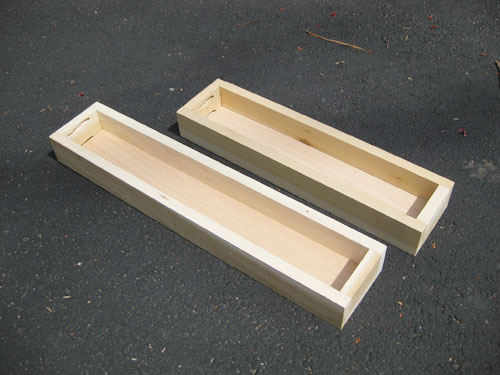
Through the miracle of the Internet, I’ll spare you the boring details of repeating the process for the second shelf. But believe me that it took just about 20 minutes to whip together a slightly-longer cousin for my first bookshelf baby.
Here’s the pair in all of their glory. Yes, I know they just look like two simple boxes, but please humor me when I explain how pleased and proud I was of myself. I was beginning to feel like a real carpenter-like person!
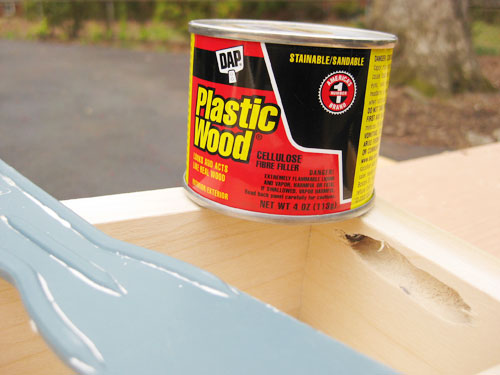
As far as “finishing” touches, it was pretty straightforward. While Kreg does offer wood and white plastic plugs that can cover all of those open pocket holes, we opted instead to go the wood filler route since we already had that on hand. We always have good luck with Dap’s “Plastic Wood,” so we applied a generous coat, let it dry for a couple of hours, and sanded it down for a smooth finish.
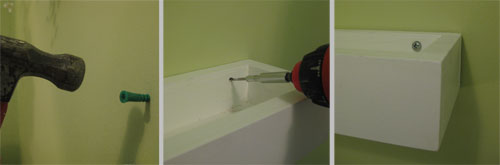
Once it was all lightly sanded down to a smooth finish, we – prepared to be shocked – painted our shelves white with two coats of FreshAire semi-gloss off-the-rack white paint (which we also use for all the trim in our house). And once everything dried they were ready to hang on the wall. While I had concocted many crazy schemes for hanging them securely, we opted for the most straight forward solution: screw straight through those suckers and right into the wall. It involved just a couple of pilot holes through the backside into the wall, hammering in some anchors and then screwing them tightly with some monster screws. This created two small shelves that could probably support up to 100 pounds of weight each- which is nothing close to the actual amount they’ll be bearing as small book and stuffed animal holders.
With everything secure, we brushed some white paint over the screwheads inside of each box (since the books and toys would obscure the screws even more) and Sherry began her favorite part: accessorizing.
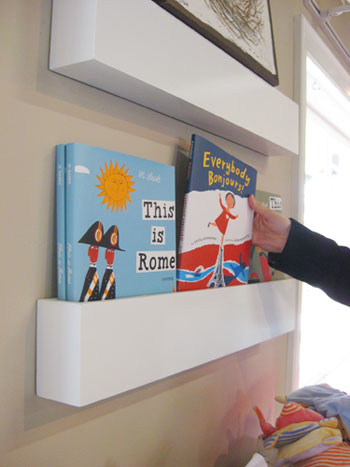
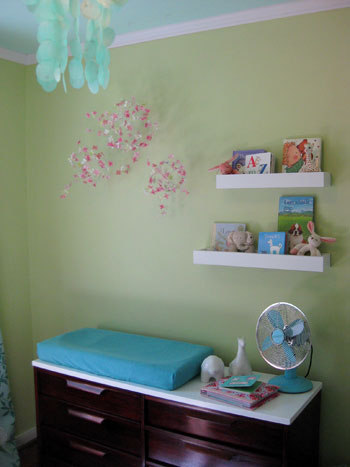
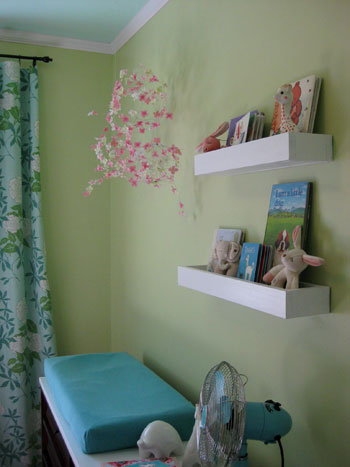
So… drumroll please… here they are!

We’re crazy pleased with how our under-fifteen-dollar-DIY shelves turned out, and we love that we earned ourselves some homemade bonus book storage and display space. We were even able to introduce some crisp modern lines to balance out the abstract flower mobiles nearby, so it really was a win-win-win solution.
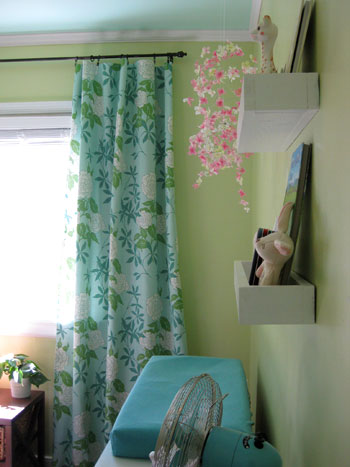
Plus it’ll be fun to have an easy way to mix up the look of that wall by swapping in the bean’s latest favorite book, rotating which toys or tchotkes are displayed, or even leaning a monogram letter up there once she officially has a name in May.
Thanks again to the Craigs- er, the guys at Kreg- for the confidence boost when it came to DIYing this project. And don’t forget to stop by later today to enter to win your own starter set of Kreg tools. ‘Til then, we’d love to hear about any construction or carpentry projects (big or small, beginning or expert) that you’ve tackled or are currently contemplating. Perhaps you’ll inspire us to build something a bit more complex next time around…
Psst- Wanna see our nursery progress from the very beginning? Here’s our painting post, our big shopping spree, our crib hunting rundown, our curtain-making tutorial, our fun little chair search, our mirror-painting extravaganza, our DIY faux sheepskin project, our big dresser makeover (and subsequent drawer lining project), our closet makeover, our homemade crib skirt undertaking, and our DIY mobile. Good times.

Shan says
“I love you through and through” is such a great read! My 18 month old loves to point out the body parts and mimic the emotions of the little boy in the story. Super cute, have a great time reading it together!
christine says
when is your exact due date? everything looks amazing!!
YoungHouseLove says
Hey Christine,
I’m technically due on May 19th, but we’re thinking I’ll be at least a week late since that seems to run in the family. We promise to make a big announcement when Baby P is here though. Stay tuned…
xo,
s
Laura says
I could definitely use a jig to keep my drill holes square–but here’s a small DIY trick for making sure you don’t go in too fra with the drill. Just measure the distance you want to drill from the tip of the drill bit, and mark the stop line with a piece of tape (masking, painter’s, even scotch–whatever’s handy). Then you know when you’ve completed the hole and won’t go too far.
YoungHouseLove says
Love the tip! Thanks for sharing.
xo,
s
carolyn says
Let me just say again that your site ROCKS! I’ve been looking for some display shelves for my dining room and with a couple tweaks these will fit the bill perfectly!
tiffany says
Hi there! What a crafty and neat idea on the bookshelves! Due to the fact that I don’t know a carpentar to help me make these, I was wondering where you saw those bookshelves for sale? I would love to buy them for my nursery!!
Thanks :)
YoungHouseLove says
Hey Tiffany,
We spotted them at a store in Charlotte, NC called Nesting. If you scroll up in the post you’ll see a link to their website. Good luck hunting some down!
-John
christy says
I love these shelves. Do you think I could make them thinner, yet deeper for magazines instead of books? The hubs and his NatGeo, PC Gamer, and Discover mags are all over the loo. Not a good sight for a borderline OCD-er!
:o)
YoungHouseLove says
Absolutely! They definitely can be modified with different sizes of wood. Good luck!
xo,
s
Anita says
For Tiffany: I called Nesting and the bookshelves are called Book Bound by Jennifer Delonge. If you do a google search you’ll find multiple retailers. Sadly, they seem to be unavailable until February.
Marisol says
I think this is an awesome idea?. Would a nail gun with glue work for this project, or do you think the strenght will not be as substantial as the drilled in screws?
I would love it in my kids room, since they are all stashed in the closet…THANKS! ?
YoungHouseLove says
Hmm, we think screws would be stronger than a nail (which can work its way out) so that would be our recommendation if you can swing it!
xo,
s
Paddy says
I really want the Kreg Jig. they are practically unheard of in Ireland.
YoungHouseLove says
Hmm, maybe you can get it from amazon.com?
xo,
s
Paddy says
Thanks Sherry. Ordered it there. Won’t deliver to Ireland but getting it sent to a friend in NYC. He said he post it over. Dying to make use of it.
You guys are great by the way
P x
http://paddyclifford.wordpress.com
YoungHouseLove says
So glad! Congrats!
xo,
s
Supermom says
Amazing project! Wanna make a simple bookshelf for my kids too but I don’t have power tools like yours! The last time my husband and I made our daughter a play kitchen, it took us forever to finish and drained our energy. Haha!
Jamie Acosta says
Not entirely sure how to send you a pic of it…. although i would love for u to critique our work. my husband and I made our daughter her own shadow box. Unfortunately we kinda forgot to put hinges on it in case we wanted to put different stuff in it later. If theres a way let me know. I love feedback.
YoungHouseLove says
Aw that sounds awesome! Feel free to upload it to our Young House Love facebook page to share it or set it to “public” on a free photo sharing site like Flickr and link to that in the comments!
xo
s
rachael says
Hi John,
Just wondering if your Kreg is the Master system or just one of the smaller kits. I want to get my husband this for his birthday but I`m unsure of which one to get.
Thanks!
YoungHouseLove says
Its the 99 dollar one and we got some clamps on top of that. Hope it helps!
xo,
s
Summer says
Okay, I’m going to try to build the console table and I guess after reading this I have to buy a Kreg thingy. However, while reading your post I was scratching my head like “What’s wrong with Gorilla glue and L-brackets????” Seriously, is something wrong with that?? Oh well, I guess I have to get all serious and buy some kregy thing. Rats!
YoungHouseLove says
Gorilla glue and L brackets would work I think! The kreg just helps you make pocket holes like a piece of furniture you’d buy at Target or Ikea or Crate & Barrel, so it makes you feel fancy. Haha!
xo,
s