Alternate post title: Look how domestic my wife is.
I don’t know why I’m writing this post since Sherry is the mastermind/executor of this project. Maybe just to brag about her mad ironing skillz? I just watched the baby and approved comments while she did her thang for the better part of the day yesterday. The first step was cutting our 12.5 yards of our on-sale $8.49/yard yellowy green fabric (more info on that here) into perfectly sized panels for each side of the two bedroom windows (leaving enough leftover for one closet panel). Lucky for us, the living room rug made a great guide for keeping our cuts straight and our corners square. Especially since it’s 8′ long – so it was easy to lay a tape measure next to it so Sherry could cut five 90″ panels without breaking a sweat. As for the width, we left them the same width as the bolt itself, which was around 61″ wide. This means two panels can easily be drawn to cover each of our 39″ windows without feeling too taut or stretched.
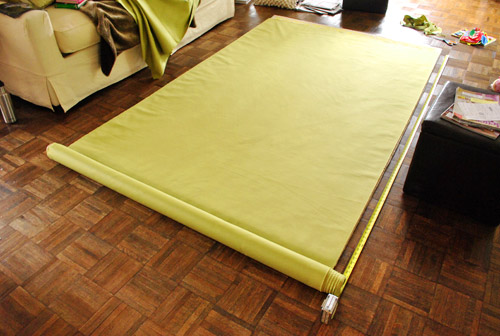
Within about fifteen minutes she had cut all five 90″ x 61″ panels (two for each window and one for the closet) and we realized that we apparently cut it very close when buying those 12.5 yards (pun intended). This is all that we had leftover:
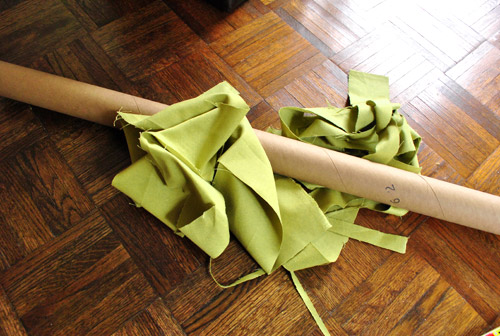
Not necessarily a bad thing (since we’d hate to dole out cash for more yardage than we needed).
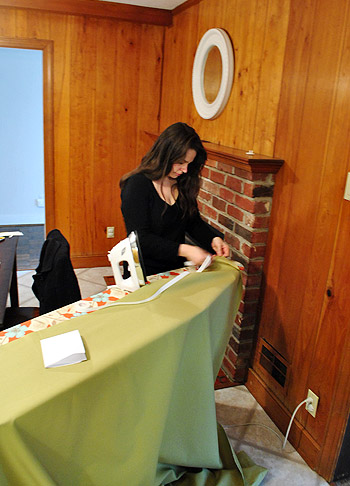
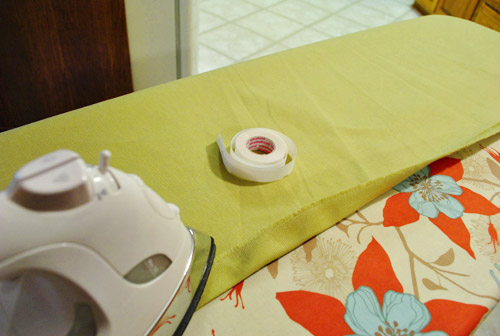
Then came hemming, which Sherry tackled using her favorite trick: heavy duty no-sew hem tape. Read more about that process and learn how to make DIY curtains in general right here (for even more iron-on hem tape info, we made a video of the process here and we have even more in-depth pics of its use here). It basically involves ironing, peeling, folding, ironing, and moving onto the next seam.
It wasn’t exactly a quick task to hem all four edges of all five panels (Sherry kept yelling out “1 down, 19 to go” which got old by about “3 down, 17 to go”) but getting that nice finished edge is certainly worth it. Plus, Clara and I kept the ol’ ball and chain company in the kitchen by singing, approving blog comments, and, um, eating while she ironed the day away. Quick, everyone freak out, Sherry’s hair is down:
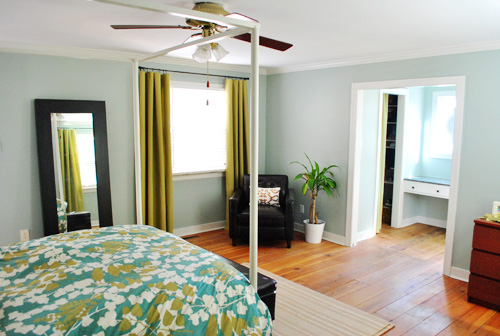
But let’s fast-forward through all of the tedious stuff (the ironing, the clipping of curtain rings to each panel, and the hanging of all three curtain rods, which you can learn more about in this post of yore) and get to the fun stuff: the finished product.
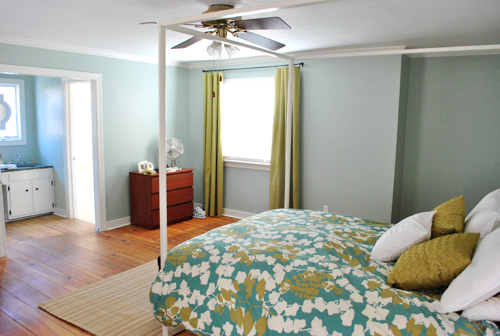
Oh and don’t mind the dresser or the fan or the lack of wall art and everything else that’s amiss. This room is definitely one of those works-in-progress that we’re taking one day at a time.
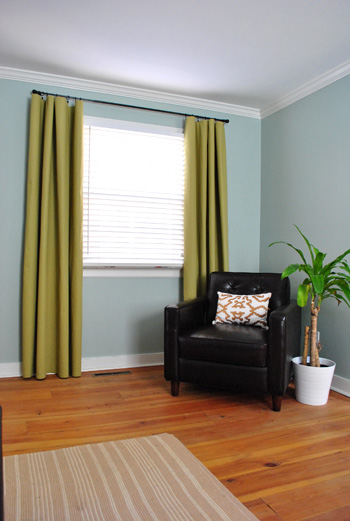
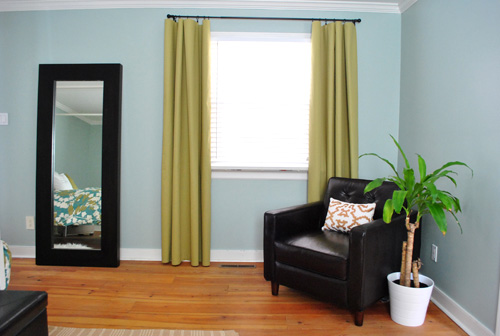
We’re really happy with how our DIY curtains turned out. And it should be no surprise that we chose to hang them higher and wider than the window itself to give the whole thing a bit more height and presence. We’ve actually had a reader tell us that she dreamed about us and Sherry mentioned something about hanging curtains “high & wide” in the dream. How crazy/hysterical/awesome is that? Nice catch phrase, babe. Who wants a “high & wide” bumper sticker?
Sometimes we like curtain fabric to “pool” a bit on the floor, but after looking at it both ways we decided to let these babies barely graze the floor boards. It kept them looking crisp and modern (and created that cool loopy draping effect, which didn’t happen as much when I held the rod lower and they bunched up on the floor). So that would be our tip. Clip your panels to the rod and then move the rod around on the wall to pin down the perfect placement. That way you can raise it and lower it by hand and eye everything until you find the perfect height. Then just mark your curtain brackets and hang them right where you like them best – so your panels graze or pool to your heart’s content. It definitely beats hanging the rod and then clipping up the curtains only to find out they look all dorky and short.
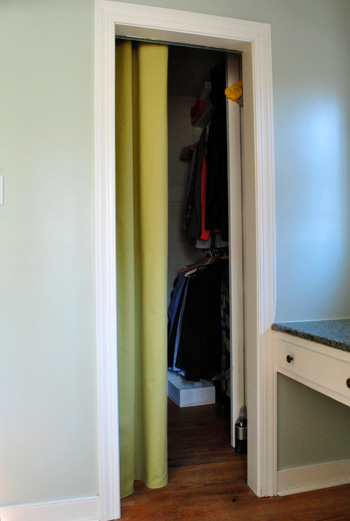
We also hung one panel on the inside of our closet to act as a less-intrusive alternative to the bi-fold door that used to be there. Most of the time it’ll sit pulled to the side like this:
But if we ever need to conceal our mess (or duck in there for privacy if someone’s over but we need to make a quick change) we can pull it closed like this:
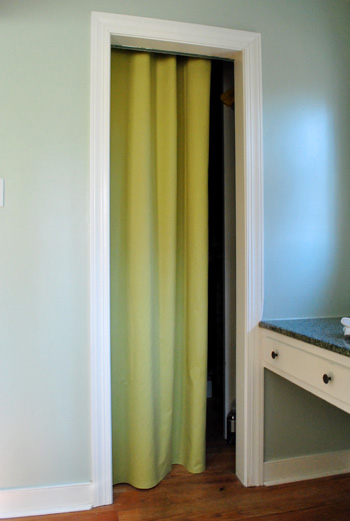
It’s kinda like a mini dressing room in there now- there’s even a light. And Sherry gets a kick out of picturing Clara doing puppet shows and other stage-related things from within the closet when she gets bigger and has that amazing imagination that only kids have.
Oh and if you’re wondering, here’s how it’s hung from the inside. We placed the rod high enough so that it’s not seen from the outside, and wide enough so the curtain can be completely closed (for privacy) or fully opened (so it’s not in the way of anyone walking in or out). It’s kinda the best of both worlds.
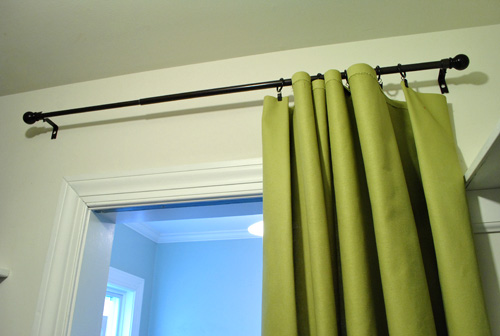
Oh and we got our oil-rubbed bronze curtain rods and ring clips from Target (aka Tar-hay) for cheap. It was around $40 for all three rods and all five packs of ring clips thanks to a few sales going on in the curtain aisle (and the 5% off we get for using our Target card). We love ring clips because they make curtain-creating a lot easier (no grommets or sleeves or pleated details to deal with, so you can literally clip up bedsheets or tablecloths as curtains if you’d like, or just hem fabric on four sides like we did). We also like ring clips because they’re particularly kid-safe. Should Clara decide to go crazy and try to swing on them like a monkey, the clip will release the fabric, which will fall to the floor while the rod and the rings will remain on the wall. Gotta love a safety feature that looks this good.
As for the finish, Sherry prefers oil-rubbed bronze rods (even in a nursery) because she says they’re “like eyeliner for the window.” And I have to agree that I like the look too- especially with the deep wood furnishings that we gravitate towards (along with some white things and even some painted pieces). But again I ask, why am I the one writing this post? Makeup references & hemming aren’t exactly my forte.
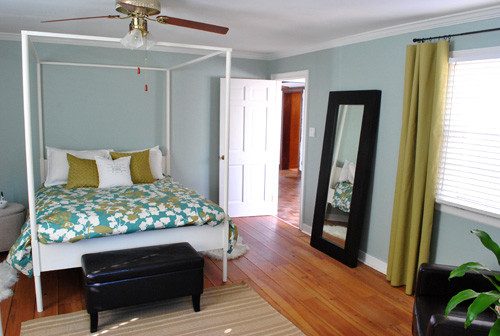
Anyway when it comes to the panels, beyond the function, height, and softness they add, we’re really happy with the color. Which means those three days of fabric hunting were all worth it. The yellowy green tone does exactly what we wanted it to do – it brings out the golden-green color of the bedding without matching it exactly (Sherry has this song she likes to sing called “Matchy-Matchy, Tackly-Tacky” which came about when she was imitating her sweet Italian mom, which is always amusing). But getting back to the curtain color, we’re glad we went a bit greener (instead of browner or yellower) than the bedding, because it looks nice and fresh against the Caroline Went Clubbin’ Aqua Carolina Inn Club Aqua wall color (get that joke here) while still obviously relating to the color in the duvet.
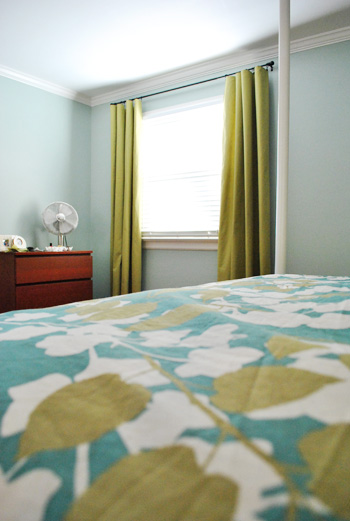
The curtain color also goes nicely with the new pillows that we snagged purloined for the bed too. So between them, the curtains, and the bedding we feel like we’ve got that golden green color sufficiently injected into the room. Now we can start layering in some other colors and textures for a little dimension and interest. Eggplant? Navy? Charcoal? Inky blue? Who knows where we’ll end up. But let the fun begin. Oh yeah, and pardon the missing nightstands, bedside lamps, etc. They’re also on the ol’ to-do list.
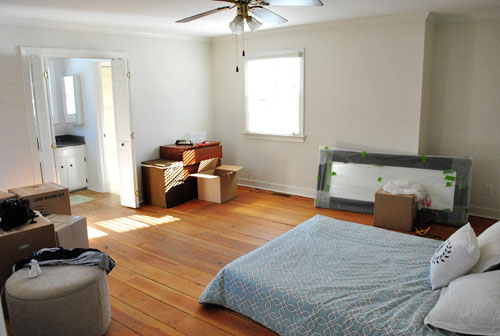
We definitely still have a lot more things to do in here (and we’re happy to take our time), but it really has come a long way in the past seven weeks or so. We almost don’t recognize this bedroom shot taken right after we moved in:
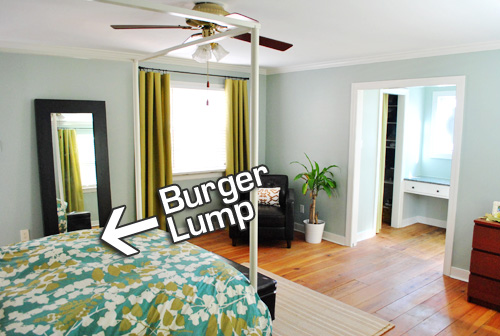
Oh, and last but not least, we thought you might appreciate a little “behind the scenes” tidbit. Sometimes we have to work around a sleepy chihuahua who refuses to get out of bed. Such a diva. But at least Burger doesn’t mind when I make the bed right over him. And our new fluffier duvet makes him nearly invisible. Yup, he was hiding in bed the entire time we shot these after pics.
And so ends the curtain diatribe that is this post. The whole process – as long as it was – has given us a bit of curtain fever. At least that’s what Sherry’s calling it when we drive by fabric stores and she presses her nose against the car window and says things like “I’ll never let go” in her best Rose-from-Titanic voice. We need them in a bunch of other rooms and we’re determined to choose bold and patterned textiles to add some serious interest. Because we definitely don’t want to end up with white Ikea curtains everywhere again (not that we don’t love ’em, but we’re just ready to have some fun and take some risks). So don’t be surprised to find us posting about our fabric store adventures again sometime soon. A guy can only listen to those Rose-from-Titanic impressions for so long before parking just to make it stop.
Psst- Burger’s totally letting fame get to his head. Check out his big DogMilk interview here.
Psssst- We just announced this week’s giveaway winner, click here to see if it’s you.

ashley c says
Love the way they look in your room!
Tiffany says
The curtains really look great. I love it!!
Gretchen says
You’re new curtains look lovely! I noticed that you don’t position the end curtain clips on the outside of the bracket so that when the curtains are drawn closed the ends are held neatly in place. Is there a reason you don’t?
YoungHouseLove says
Never thought of that. But it sounds smart to me!
xo,
s
kate says
Nice job – the curtains look great!
And, for the record, I had to scroll back through the photos just to see the Burger bump, and it made me chuckle. Our basset hound does the same thing, although the lump is not so inconspicuous with her! :)
Jen D. says
You guys make moving into a brand new place that needs a little work to make it home look so easy. Seriously. We aren’t ready to buy a house just yet but I find when I am perusing websites looking at houses with terrible paint colors and bad curtains that I can imagine how it will look with a little TLC. Thanks for inspiring me (and so many others!). I love all your projects. Thanks for sharing them with us.
Sarah says
Isnt it crazy what kind of change some fabric around a window can do?? Looks very nice!
Ps. Sherry, you have great hair. Seriously. Glamor while ironing. Who knew!?
Holly says
Awesome job Sherry!!! I might of peed my pants when I saw the Burger lump!! We have a Lucy lump all the time!! She is in bed more than I am! I am so jealous of her!
I can’t wait to get into our new house we have a million windows and this is what I will do. I am worried about the corners. Do you just do one side then put the iron stuff right over that side? Maybe I am just being a blonde and not thinking it through hahaha
YoungHouseLove says
Yes! That’s exactly how it goes. Sort of like how you’d fold a corner over itself. The fabric is a bit thicker in those corner areas where it’s overlapped like that, but once the hem tape sticks it looks nice and seamless.
xo,
s
Sarah K says
Those curtains look great! All the hunting was definitely worth it – the color is divine in that room.
I have a little confession to make – all our curtains are straight from Ikea – which has surprisingly affordable options in bright colors btw – but I haven’t hemmed ANY of them. We have 8′ ceiling (and the windows go almost right up to the ceiling) and the panels are just more than 8′ long, so I’ve just let them puddle on the floor. Perhaps someone should buy some hem tape …
Elizabeth says
Right there with ya! Hemmed? HA! I haven’t even gone back and IRONED mine after washing them because I was so excited to see them up on the window.
Krista says
Your Master Suite is starting to look fantastic! Can’t wait to see what you tackle next!
The Orchard says
Your bedroom looks fantastic! You guys rock!
Jess @ Sweet Potato says
I love the color of those curtains with the wall color. I love bold color statements that are still “grown up” and sophisticated!
Lauren says
The curtains look great! I was wondering how you put on the ring clips. Do you evenly space them on the fabric or do you pleat the fabric and then put on ring clip on. I laid out my fabric flat and put the ring clips on that way but I think I may have done it wrong. Thanks for your help!
YoungHouseLove says
We didn’t pleat anything and we just evenly spaced them, so it sounds like you did it just like we did!
xo,
s
LauraC says
When I hung our living room curtains up with clips I measured and divided the fabric evenly. Nerdy! But then I did teach math . . .
YoungHouseLove says
Haha love it- I knew you would!
xo,
s
Melinda says
I loved the color from the start, and now seeing the curtains up on the wall, I think it really makes the walls look more saturated. Love that effect! Can’t wait to see what other colors you decide to add!
KarenC says
Okay… I have to admit that I wasn’t a huge fan of the comforter. The odd greeny/gold color of the curtain fabric didn’t wow me. I wasn’t sure about the wall paint choice until I actually saw the finished results.
But now? WOW! I love it. It’s really starting to come together. I can’t wait to see it when you get a rug and some art on the walls.
You guys amaze me with your ability to envision the finished product. I wish I could do that. I tend to be one of those matchy-matchy people Sherry sings about. LOL
Also… I’ve got some fabric I’ve been wanting to make curtains out of for the last two years, but I’ve been procrastinating because I hate dragging out the sewing machine. I’m so stealing your curtain making ideas!
Great job, you guys.
Jessica says
Wow! Sherry did such an amazing job with those! They really pull the room together!
Elisa says
1) Sherry, you have wonderful effortless-looking hair. Lucky!
2) The room is already looking fabulous and pulled together. Those curtains are the perfect color choice to play off the duvet.
3) Burger Lump = love.
Megan says
Man, that was FAST. I’m working on curtains, but the material hasn’t been moved since I brought it home on Saturday. They look great!
rebecca a. says
Love it!!
Sara @The Fat Hydrangea says
I believe how amazing your house looks after such a short period of time! Everything you are doing just makes your house look so HAPPY! I love it and can’t wait to see more!
Ally says
Looks great! I must say, when I saw that fabric all rolled up next to the window I was like “ew, greeny yellow next to the nice light teal?” But of course, it looks awesome after all! I can’t believe how much it pulls out the gold in the duvet and makes it pop.
I’m actually no-sew curtain-ing 6 panels as we speak and I am totally over the tedious ironing!
YoungHouseLove says
Just don’t get all crazy-hyper and write a post like I did yesterday afternoon. Haha. I was going stir crazy from all that ironing, and it showed!
xo,
s
Felicity says
Ok Sherry, if you ever come to Arlington for a house crashing, please bring your curtains and I will sew them for you. Or your sewing machine and we’ll have a quick tutorial so I can show you that it’s easier to sew than to iron on the tape. Seriously, it really is and you’ll get addicted, I promise!
Congratulations on your Homies nomination; it’s an honor to be nominated with yours and other such wonderful home blogs.
xo
YoungHouseLove says
Haha thanks Felicity! It’s a plan! And as for the Homies, we’re bowled over at all the good company. What an amazing blog love-fest!
xoxo,
s
Amy says
Felicity,
Do you happen to have a tutorial on your blog? I would love to see one. I can sew but I still need some guidance.
Rene says
Loving the whole room!!! And love all the info, but just a teeny tiny little grammar error – sorry I am OCD about that so I can’t let it go…Anyway, “taught” should be “taut” in this instance. I definitely would not have thought to pick a chartreuse color, but it looks amazing!
YoungHouseLove says
Good catch! Thanks for the correction! All fixed.
xo,
s
Rebecca says
BEAU TY FUL!!! Thanks for sharing! So inspiring! Appreciate all of the great tips!
Heidi says
*swoon*
Melissa S. says
Love the curtains! Do you use the hem tape on all four sides, or just the top and bottom?
YoungHouseLove says
Yup, all four sides for a nice finished look.
xo,
s
Riane says
The curtains look FAB! Love the pop they bring to the room (along with your purloined pillows).
Stephanie says
Love, love, love ya’ll! I have been reading your blog for about a year and am so excited to watch you start from scratch with this new casa. Anyway, I am about to FSBO and came back to take a glance at your flier…. where did it go? Am I totally imagining having seen it a few months ago? Would love to see it if it is available!
Thanks for all the help, inspiration and ideas!
YoungHouseLove says
Hey Stephanie,
We linked to it in the comments on one of the earlier for sale by owner posts. Here it is for ya:
https://www.younghouselove.com/wp-content/uploads/2010/10/Brick-Ranch-FSBO.jpg
Good luck with everything!
xo,
s
Megan says
Completely random – but where did you get your cute ironing board cover? I need a new one!
YoungHouseLove says
It’s from here: http://www.etsy.com/shop/citychiccountrymouse
Love it so much! We’re actually hoping to line up a giveaway with them (fingers crossed).
xo,
s
Jessica says
LOVE the curtains!!!!! Not sure if you posted this before, but just wondering what your plans for your bedroom floor are? Are you planning on leaving them the same or staining them a darker richer color?
What about the living room? Do you plan on refinishing or replacing those?
YoungHouseLove says
Hey Jessica,
Yup, all of the wood floors in our house are splintery and mismatched so we someday hope to refinish them in a deep mocha color (or even ebony, or dark gray…). Who knows where we’ll end up, but it’s definitely a down-the-road project!
xo,
s
AshleyM says
Wow! I guess I never realized what a difference curtains make. I mean, I have them all over my house, I just never paid any attention to the before and after. Pretty amazing, though. And they look awesome. I have to admit, I was not a huge fan of the WE duvet (mainly the green- just not my color), but I think it looks really fabulous all together. You two (four?) certainly have an eye for design!
Sarah says
The room is looking so good already!
Young House Love is doing so well in the Apartment Therapy awards! But I notice you haven’t mentioned it at all on this blog. Did you consciously decide not to ask for votes?
Sarah xx
YoungHouseLove says
Hey Sarah,
So exciting. We’re so honored to be in such good company! We didn’t want to specifically ask for votes, but of course we’re enjoying the fun.
xo,
s
susan says
FABULOUS!!! susan
pennyrounds says
Wow, it’s amazing what a huge transformation these curtains make!
Oona says
They look amazing! Good choice on the fabric. Usually I like the look of pooling curtains, but with all this modern colorfulness you’ve got going on the shorter length looks surprisingly great!
Sarah says
There’s a typo in the last paragraph – i think it should be ‘choose’ rather than ‘chose bold and patterned textiles’?
Keep up the good work! xx
YoungHouseLove says
Thanks so much Sarah! Off to fix that!
xo,
s
Alli F. says
As always, so fabulous. Just one question: How did you hang the mirror to the wall that’s baby friendly and invisible?
Okay, maybe two. Can you sell me that ottoman? Haha. Seriously, it’s probably my favorite thing in your house, I hope you put it to use again soon :)
YoungHouseLove says
Hey Alli,
Check out this post for the baby-friendly mirror hanging info: https://www.younghouselove.com/2011/01/claras-room/
And as for the ottoman… no way it’s mine!! Haha. We actually have big plans for that guy.
xo,
s
Debbie says
Found another idea board with your same bedspread. Cool to see the different ways you can go with just one piece.
http://www.withtwocats.com/2011/01/brendas-bedroom.html
YoungHouseLove says
Love that board! So much fun.
xo,
s
linda says
i love your curtains!!!! they look awesome and the color of the fabric is perfect!
bhh says
Quick question. Sorry to bother you with details but what is the diameter of your curtain rods? In addition to how high a curtain is hung and how generous is the width of the panels,I think that dimension of the rod itself is important. The scale of your “eye liner” looks perfect in your room, so I’m interested in finding out its diameter. Thanks!
YoungHouseLove says
Hey BHH,
The diameter of the rod is just 1″ (they’re thin, as opposed to the heavier chunky ones that can also be an option) and the curtain panels are 88″ long (now that they’re hemmed, they were 90″ when we cut them) but with the addition of the ring clip and the rod, the rod is hung around 90″ from the ground. The width is 59″ (61″ before hemming) which is just the width of the bolt of fabric. Hope it helps!
xo,
s
bhh says
Thanks! In the midst of busy lives, you are so generous with your reponses.
Elizabeth says
Can I ask what type of fabric that was?
YoungHouseLove says
No idea! It’s heavy and cotton duck-esque. Sort of like the fabric you’d see on a sofa slipcover from Pottery Barn. With a very small ribbing. Wish there was more info, but it’s from Hancock, so maybe they can provide more details?
xo,
s
Elizabeth says
That’s cool…just wondering if it was more cotton-y or silk-y. Thanks!
YoungHouseLove says
Definitely more cotton-y. Not silky at all. Hope it helps!
xo,
s
Virginia says
How domestic!! They look beautiful!!
Hope you’re on gilt group.. they’ve got white porcelain fruit today!! You know, just in case your ceramic animals get hungry :)
karen says
YEAH!! So great! HAHA..love Burger!
LYM says
Wow, I love the use of the heavy duty no sew tape because I do not know how to sew (not very well anyway). I’m actually inspired to tackle this project! We’ve put off the lack of curtains in our family room and bedroom for 15 months now. Its time to venture out this weekend and shop for fabric. What do you suggest in terms of dimensions e.g how many extra inches of fabric should I add to width of the window etc?
YoungHouseLove says
Hey LYM,
We have no idea about “rules” when it comes to that stuff, but for all the windows in our house, and even our sliding doors, we just plan to use the width of the bolt, which almost always can be pulled closed without looking too taut. Hope it helps!
xo,
s
Jen says
FYI, the “rule”, should you choose to follow it, is the total width of all the panels should be about twice the width of your window. All of my 36″ wide windows have one panel on each side and my store-bought panels all range from 40-50″ wide each. Now that I think about it, I guess that is following the “rule.” It matters most on wider windows though – I have a 72″ wide window and an 80″ wide sliding door, and for a year I only had one 40″ panel on each side of the window and door, and that looked too skimpy both open and closed. Now that I finally bought 4 more panels to have 2 on each side, it looks much better but that is a lot of fabric so I’m glad I followed the “high and wide” rule so all that fabric isn’t blocking all the light!
Momlady says
Great look you’ve got coming together there. Please,please post a pic of the new curtains in the closed position.
dana says
Way to go, Sherry! Great choice on the color!
dana says
comments look different. did you change that up?
YoungHouseLove says
Hey Dana,
Yes. We’re excited to finally have threaded comments working on our blog! Now people can hit “reply” under each other’s comments and have a side chat. Plus our answers to comments are automatically placed right below the questions. Hope it helps!
xo,
s
carolinaheartstrings says
Well done. The color is perfect. They hang wonderfully and look very professional…… a new career perhaps. Sherry the curtain maker! PS. Love your hair down.
Candice and Alyssa says
HOLD THE PHONE!!!! SHERRY’S HAIR IS DOWN!!!!!! AHHHHH!!!!!!
Debbie says
I have to say I was kind of iffy on the color of the curtains at first, but now that they are up I LOVE them!
Plus, those ring clips just made my whole life easier since I am going to be making curtains for the house soon. I am horrible at sewing a straight line and now I won’t have to make an uneven loop to slide the curtain rods through!
Whitney @ Becoming says
I’m a HUGE fan of your “high and wide” philosophy! My husband and I are the typical poor newlyweds, so we’re living in a mobile home. We hung our curtains high and wide and it magically opened up our entire living room. Great advice, John and Sherry!
And PS, you guys have to be the cutest couple ever. John, your love for Sherry shines in this article! Your little girl is blessed to have parents that are creating that kind of atmosphere.
Keep being amazing! :)
Courtney says
I am loving the new bedroom! It looks awesome!!
I also had a quick question for you…when we were selling our house we had a home stager come by to give us some tips on staging the house. One of her tips was that when you walk into a room you should never walk into the side of the bed, that when it comes to the bed you should see the foot of the bed first. Have you ever heard this before, and what are your thoughts?
Love, love, love the new house!!
YoungHouseLove says
Rules are meant to be broken! When it comes to this room it was honestly the only place for the bed. We tried it on the other two walls but they both have off-centered windows that made the bed look crazy. And of course then there’s the sink on the other wall, so it looks the most balanced that way. We also like placing long furniture items longways in a room when we can (instead of cutting a long room in half by placing them the other direction). Hope it helps!
xo,
s