Quick note: if you missed the update to last week’s post that went up a few days after it was originally published, you can catch up on that here.
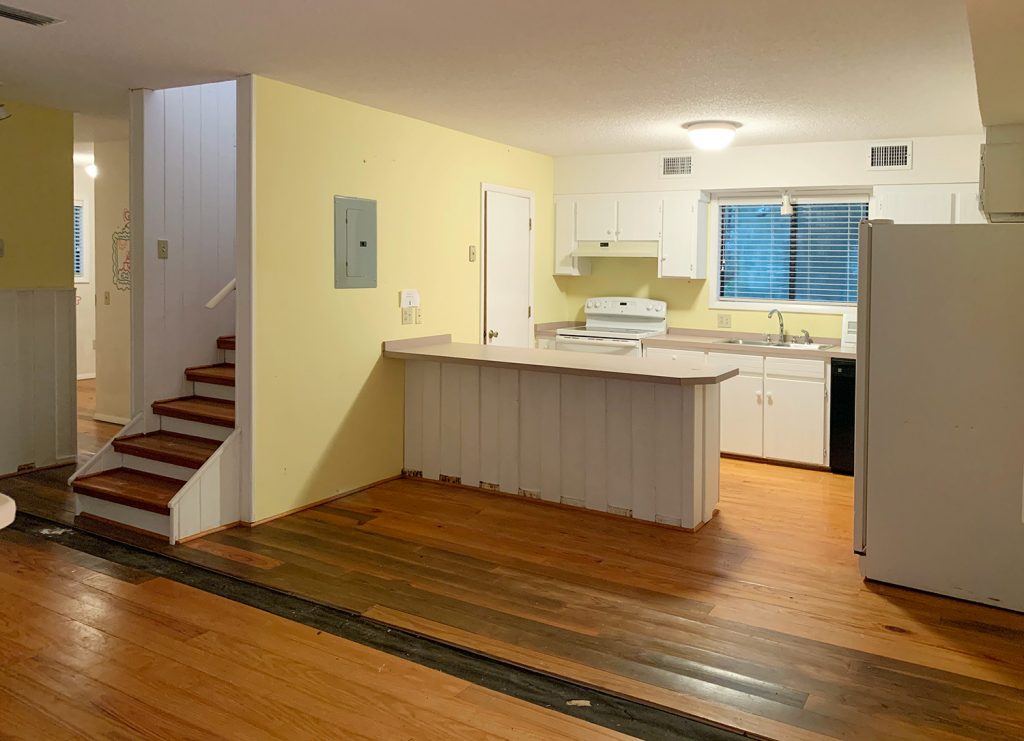
When we moved in one of the subcontractors said they’d been wondering why we didn’t tear out the old cabinets and mismatched appliances and pink laminate counters and redo the kitchen before we moved in. But if you’ve followed us for a while, you know the answer. We like to live with a kitchen for a nice long time before changing the layout or doing any major upgrades like replacing the cabinets or counters (in our last house we waited three years for our big renovation). Actually living somewhere for a while to figure out what we like & find functional/useful versus trying to guess how we *think* we’re going to use a space in the early days of a new home just feels a lot less like a shot in the dark.
The wait is also beneficial because we can save our money for the larger renovation down the line, and implement some quick & affordable updates to tide us over. Not only do these smaller changes make the space work and look better in the meantime, they also let us test-run things that we’re mulling over for our big reno in a nice low pressure way. One simple example is: “will we really like open shelves there? Or would we rather have upper cabinets when we do the full reno down the line? Let’s just hang some shelves for now and live with them and see what we think!”
Another one might be: “does the table feel good in that spot with a pendant hanging over it? Or will we want to move it somewhere else or get a larger table that seats more people down the line? Let’s put the table we have there for now and swag a pendant over it instead of committing to installing an actual fixture box in an exact location until we tackle the big reno.”
It’s like a much-lower-risk trial period to help you work out what you do & don’t want later. Here’s a post with more about why we love Phase 1 changes (and how they can actually save you money – even though it costs money to do them).
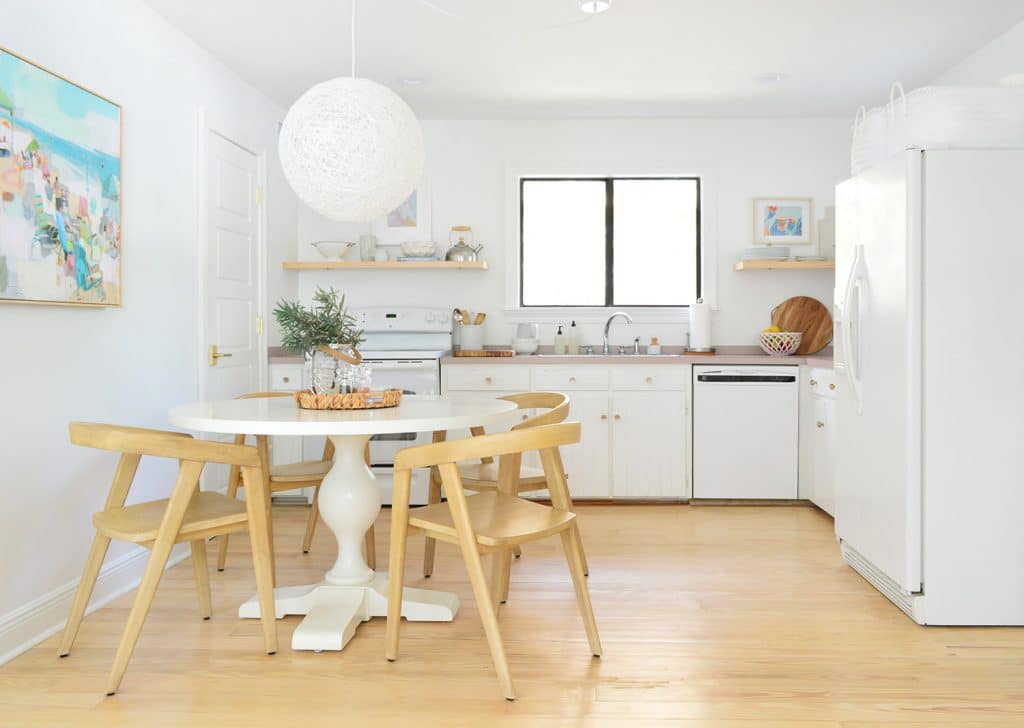
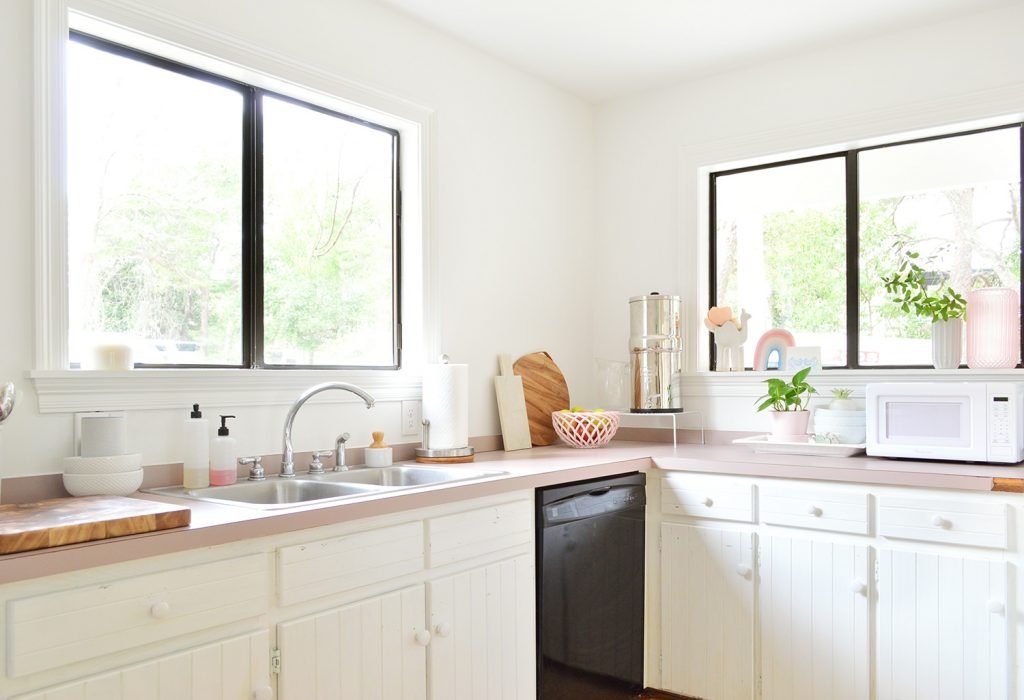
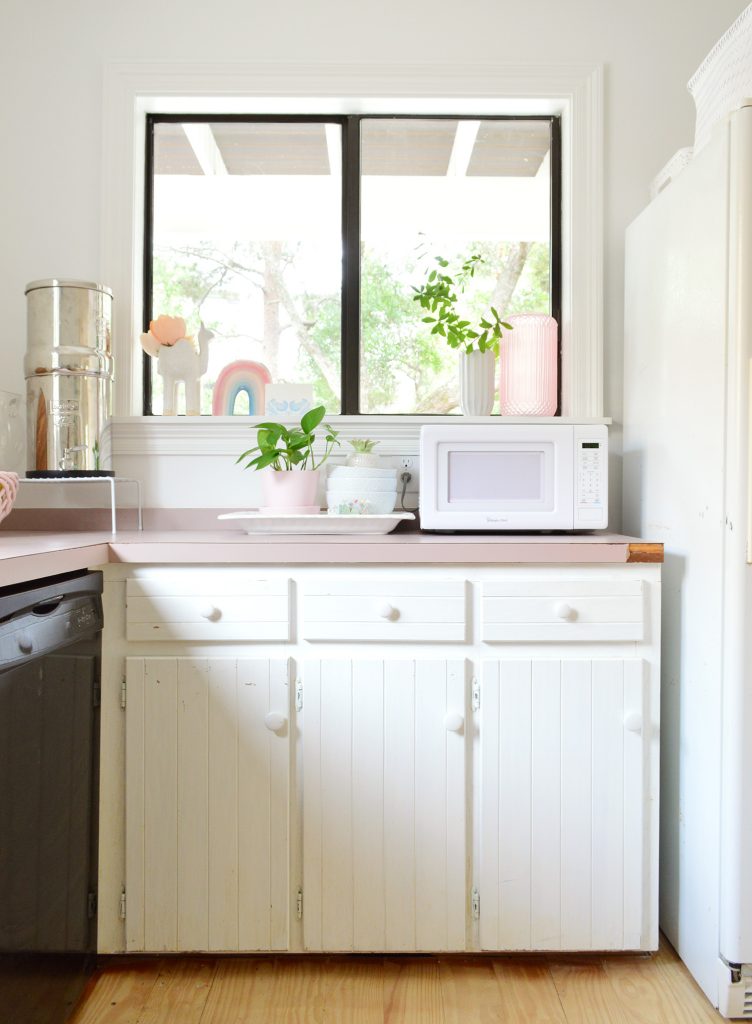
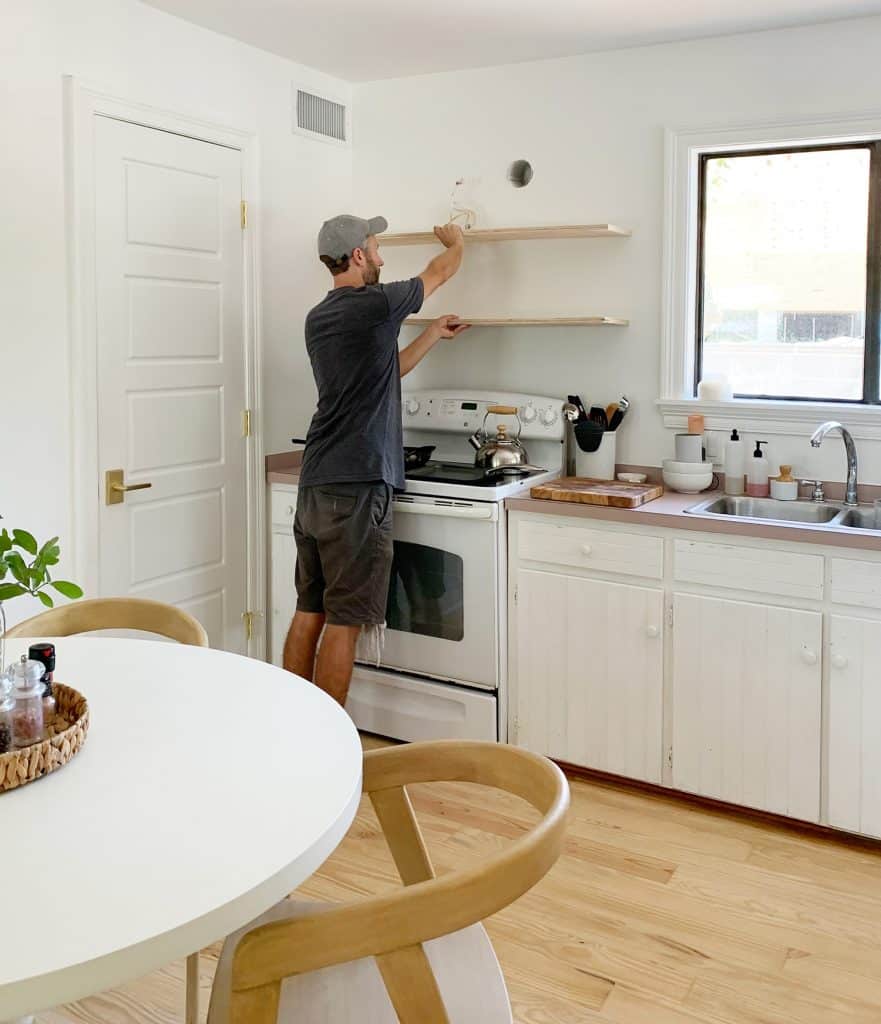
Ok, so back to those five updates. For the “spot the difference” fans out there, let’s zoom out. Here’s a photo we took about a week ago that has all five of them within the image:
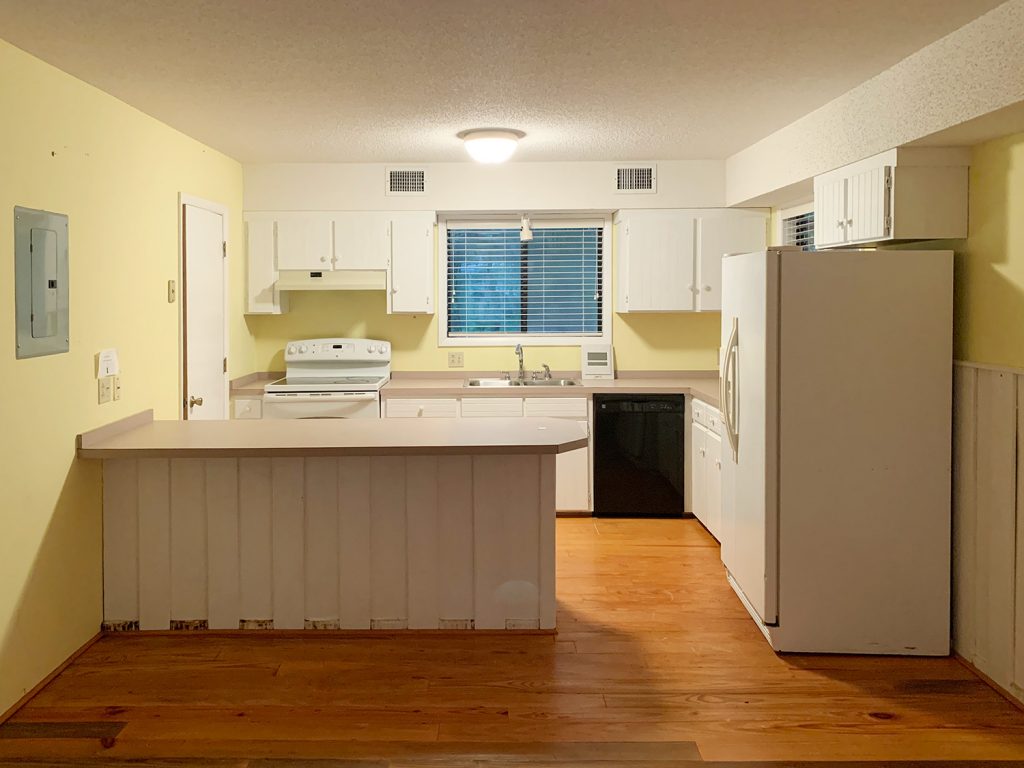
And here’s a picture from two months ago when we showed you how the room was looking after 3 weeks of living here:
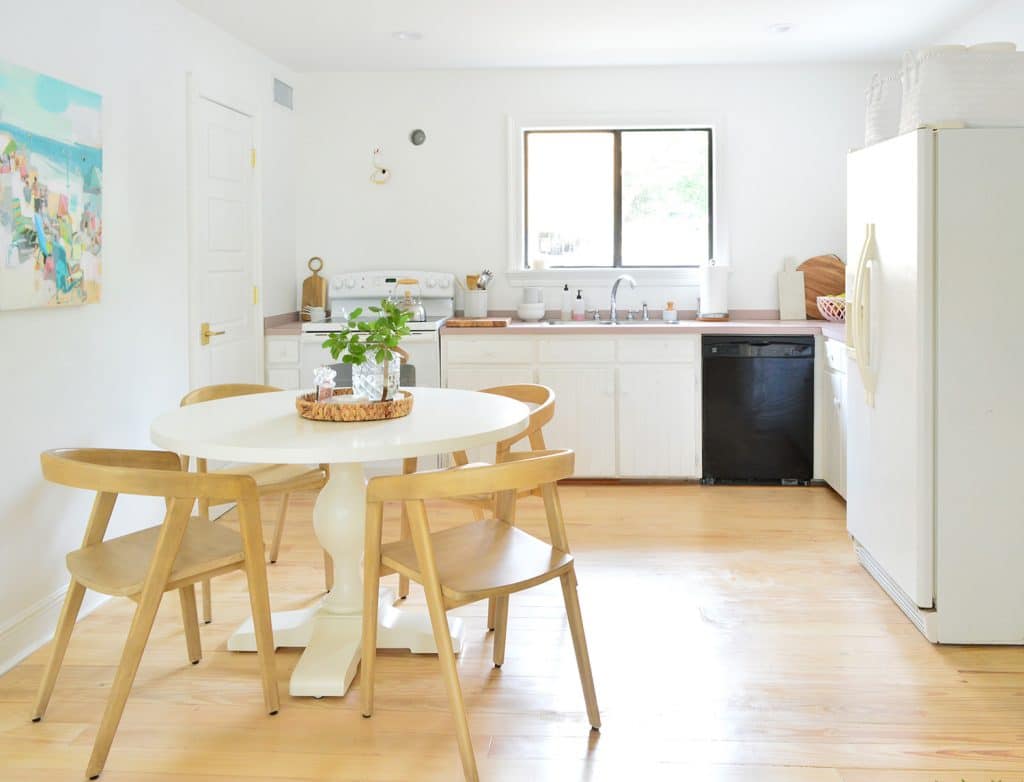
Did you catch all five? Here we go.
1. New Hanging Pendant Light
There used to be a lone off-centered boob light on the kitchen ceiling.
We added a bunch of recessed lights when we learned that all the drywall had to be replaced so the ceilings would be open anyway (more on that here), and decided to have them move that original fixture box to the center of the room instead of terminating it – just because we figured it might be useful for some sort of accent light at some point. If not, we could always pop another can in there and call it a day. The point is that we had a capped fixture box in the center of the room, and a few weeks ago we decided to use it to swag a pendant light over our eat-in table. Hello instant gratification.

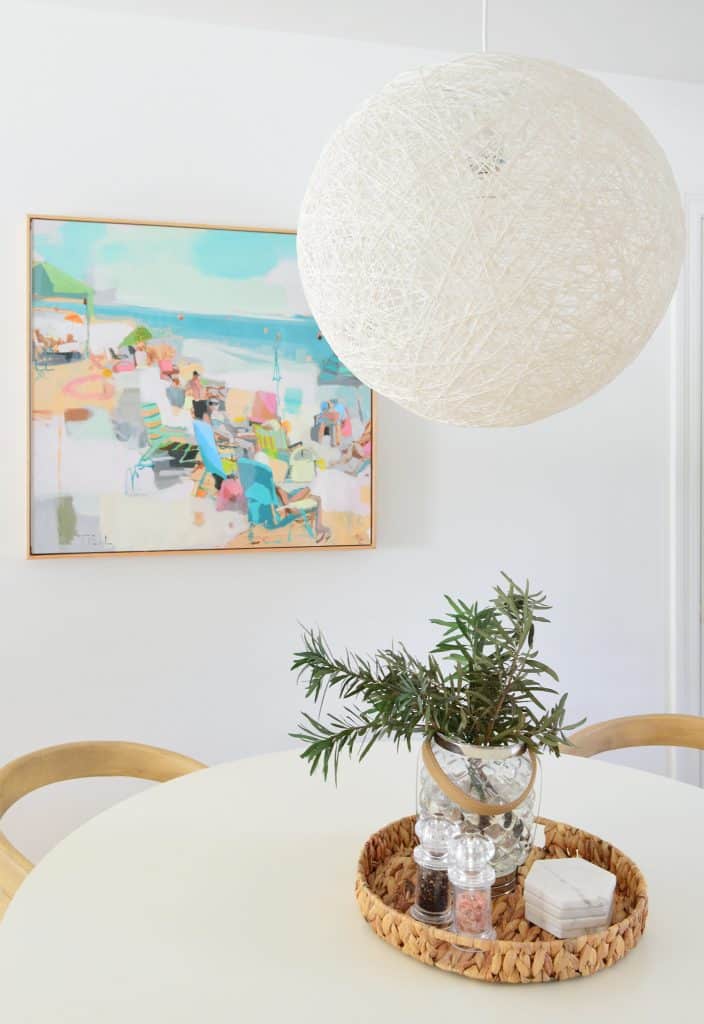
The cord is white nylon so it’s hard to see – but you can make it out in this picture towards the top of the frame (and you can see the white canopy that it comes from at the top edge of the picture).
Since it was going over a table, we knew we could pick a light that hangs lower than a semi-flush or flush mounted option because no one has to walk under it (the kitchen has standard 8′ ceilings). And we were so into this white string globe light in our son’s room that we ordered another one for this spot.
We weren’t 100% sure if we’d like having such a big light in the middle of a small kitchen, but it has been awesome. The size really helps anchor the dining space but the white string construction keeps it from feeling too heavy or visually overpowering. Plus it’s nice to be able to eat under its soft glow instead of putting all the can lights on full blast.
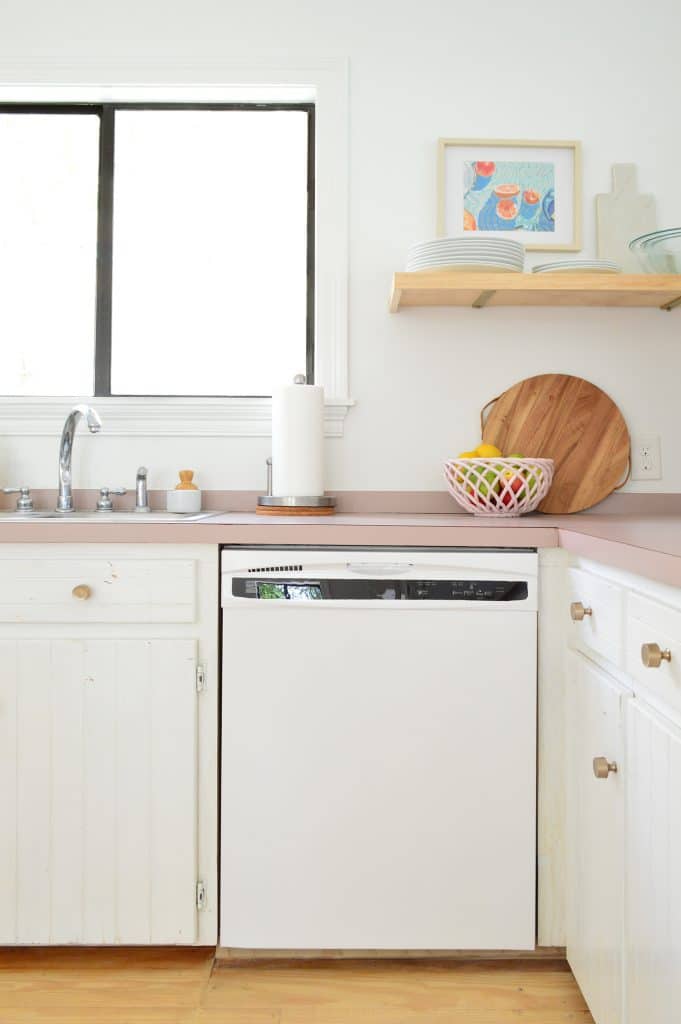
2. Painting The Dishwasher
We didn’t replace any of the kitchen appliances before moving in (we’d rather spend that money when we know exactly what’ll work best in the eventual renovation – what if we got stainless but later wanted white?! Or got a slide in stove but later wanted a wall oven). We’re very thankful that although these appliances are old, they all work just fine and are in decent condition. The black dishwasher was momentarily puzzling, just because the stove & fridge are both white – but it wasn’t anything that we couldn’t change in under an hour.
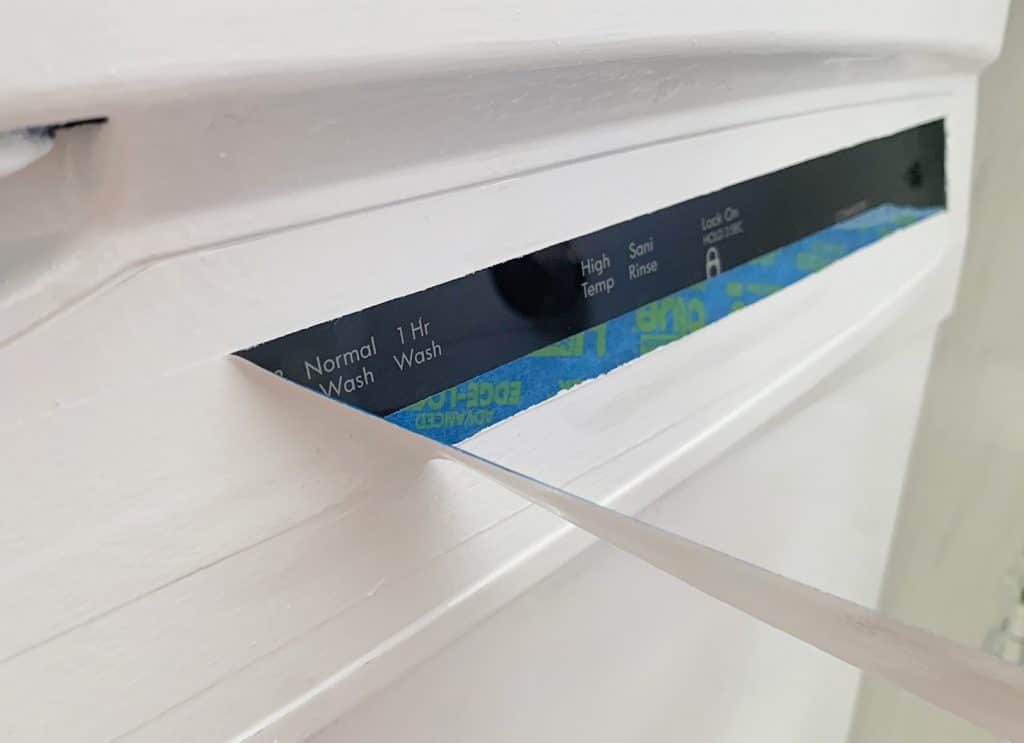
We initially hoped that we could just flip over the dishwasher cover panel like we did in our last kitchen (check your panels guys! It’s such a quick and easy hack!), but no luck. It wasn’t designed the same way, and this cover panel curved around the sides so it wasn’t flippable or interchangeable). So we turned to another Phase 1 kitchen trick that we’ve used before: APPLIANCE PAINT.
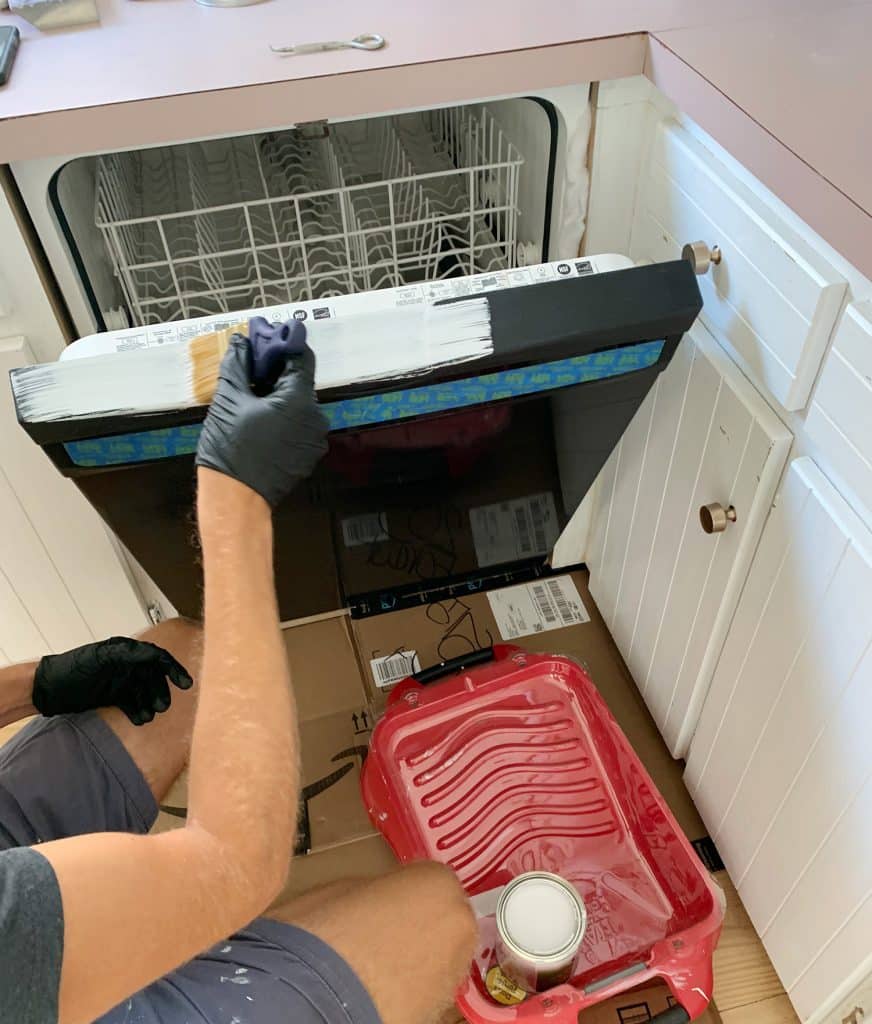
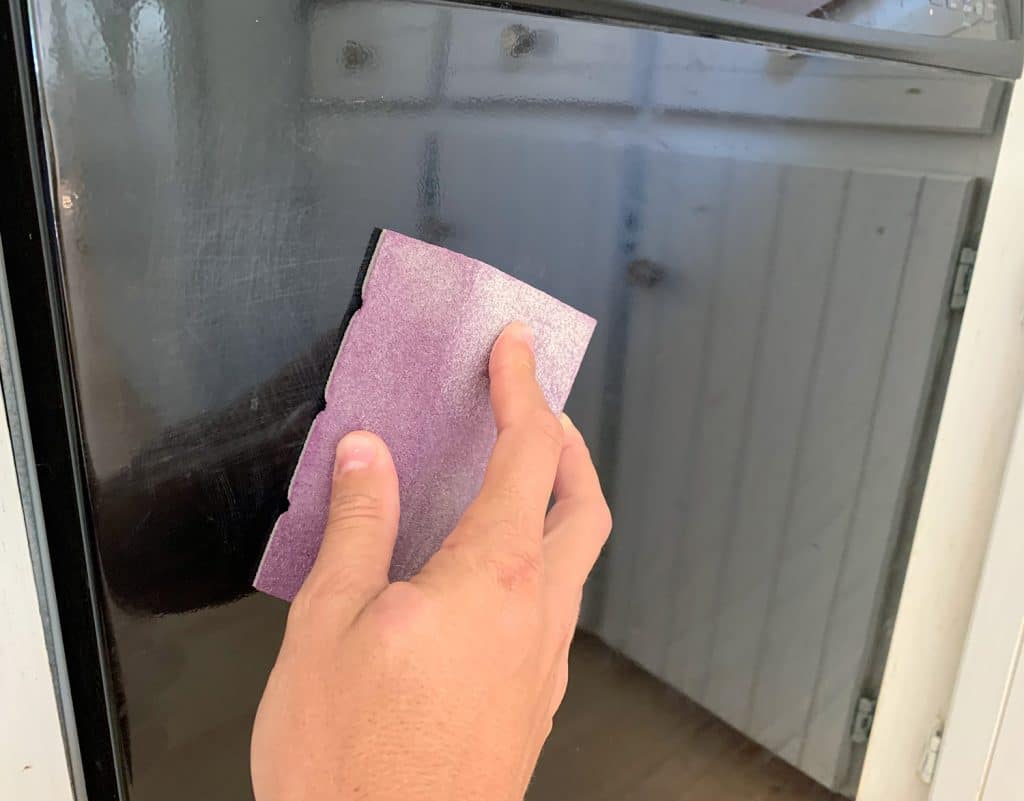
Yes they make specialty enamel appliance paint just for jobs like this. We’ve got more details in our post about painting the almond fridge white in our last kitchen, but it’s super easy. Just be sure to rough up the surface with some sandpaper before you get started and follow the instructions on the can.
We used a combination of a paintbrush (for the hard to reach areas) and a small foam roller (for the large smooth areas) and it took all of 10 minutes to do each coat. Since we were going from black to white it did take about 4 coats to get all areas fully covered, so be patient. We also taped off the controls so we could still read all of the buttons after we were done.
The white is definitely a more cool-toned white color than the cabinets, but it’s WORLDS better than the black hole that used to be on that side of the kitchen. And a quart of appliance paint is only about $15, so it’s a super low-cost improvement. They also sell it in other colors (and in a spray can) if that suits your project better.
We’re actually not going to keep our cabinets white (I know! Shocker!) so we’re debating whether or not to paint the dishwasher again to match the cabinets. According to RustOleum you can sand it and spray any of their enamel spray paints over it, and it has some general language that seems to indicate that you can paint it any color after you have used their appliance paint (I guess it acts like sort of a primer for other paint on top?).
Since our cabinet color is specific enough for us to be sure they don’t sell it in a spray paint – we’re thinking we’ll just try rolling/brushing it on the dishwasher when we paint the cabinets and see how it works out. If it’s a disaster we figure we can add a thin panel to the front of the dishwasher that we can paint to match (maybe with beadboard or luan?). That’s another pro to Phase 1 projects, you can take some risks and experiment a bit because they’re not permanent solutions anyways!).
Oh and while I had the appliance paint out, Sherry painted the handles of the refrigerator a brighter white tone too – so you might have noticed that in the before & after pics as well.
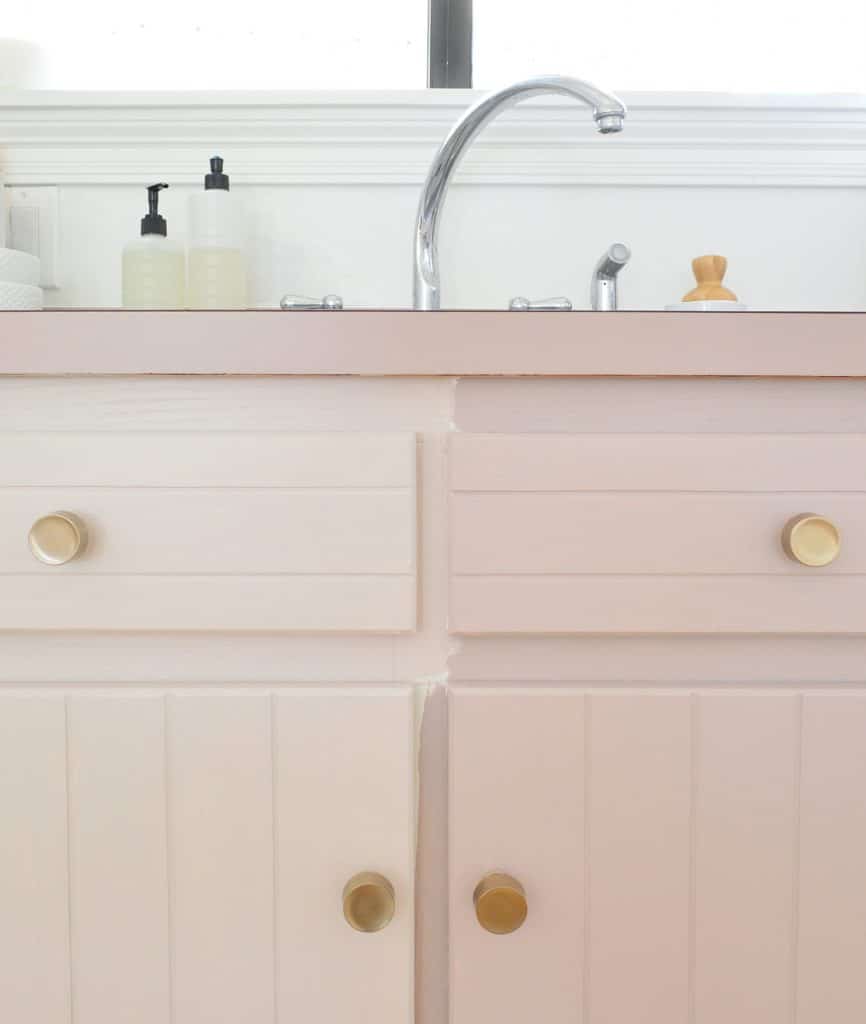
3. Swapping Out The Cabinet Knobs
Our previous knobs were those traditional wood knobs that were painted to match the doors, and they felt sort of big and kind of gave us a “country” vibe.
We had actually purchased some of these brass knobs to update a dresser elsewhere in the house and, before installing them, decided to see what we thought of them on the cabinets. Well, we loved them. So much so that we kept them in the kitchen and ordered others for the dresser. Having these weightier metal knobs in the kitchen immediately felt more updated. Like literally, feeling the shiny new knobs with our fingertips makes it feel like we’re suddenly using a more upgraded kitchen. Cabinet paint dings and all.
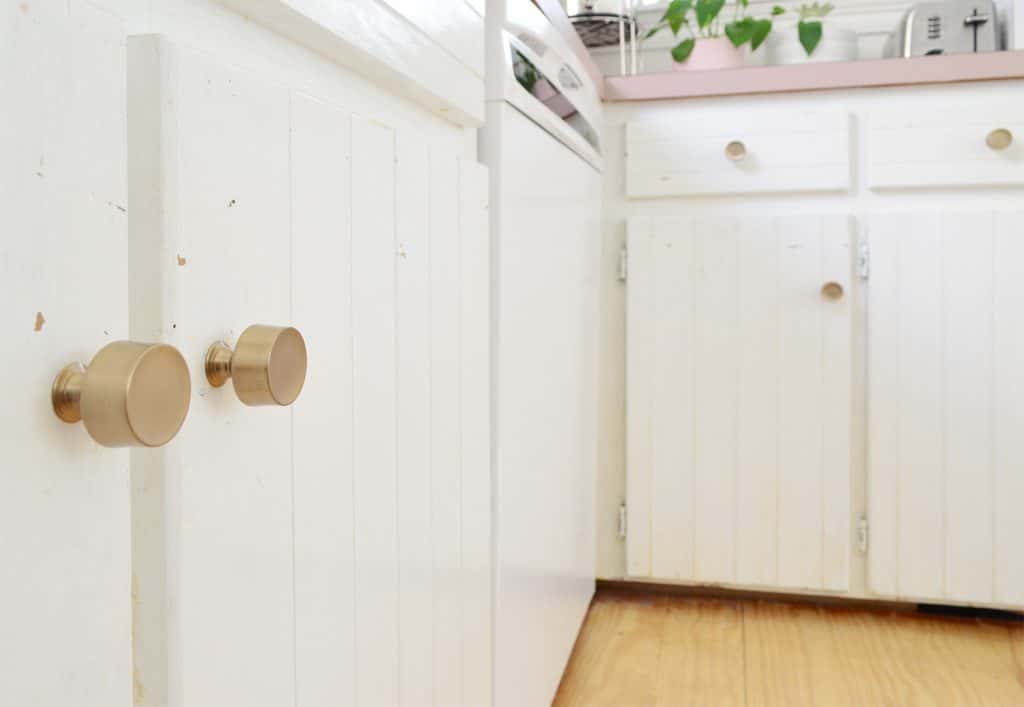
They’re a little higher contrast than the old knobs were, but once we get the new color on all of the cabinet doors we think it will be *chef’s kiss*.
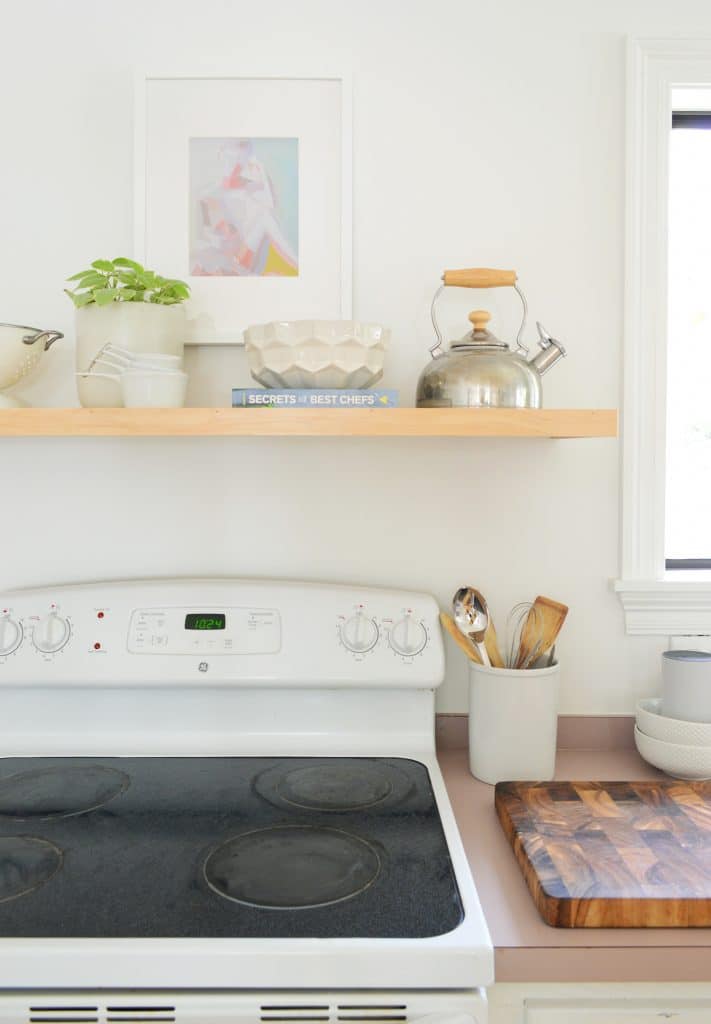
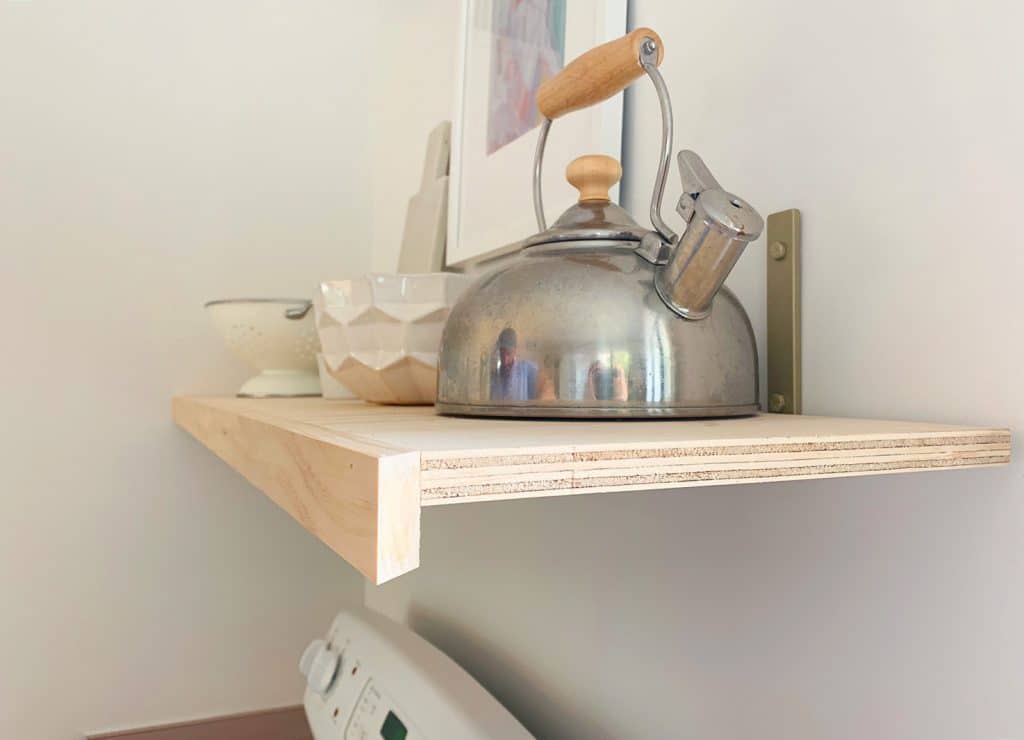
4. Hung Floating Shelves
In order to remove the soffit across the back wall of the original kitchen, we also had to lose the upper cabinets. We knew we’d be losing some helpful storage in the process, but we downsized a ton before moving here and actually have found our seven cabinet kitchen to be even more functional than we hoped (you can see how we’re storing things in this post).
Honestly the most annoying thing about not having the upper cabinets was that it left us with the exposed vent and wires from an old exhaust fan, which was less than attractive to stare at while cooking (don’t worry, the breaker is turned off and a vent hood isn’t required by code here – although we plan to add one back, which is why we aren’t terminating these & patching the drywall).
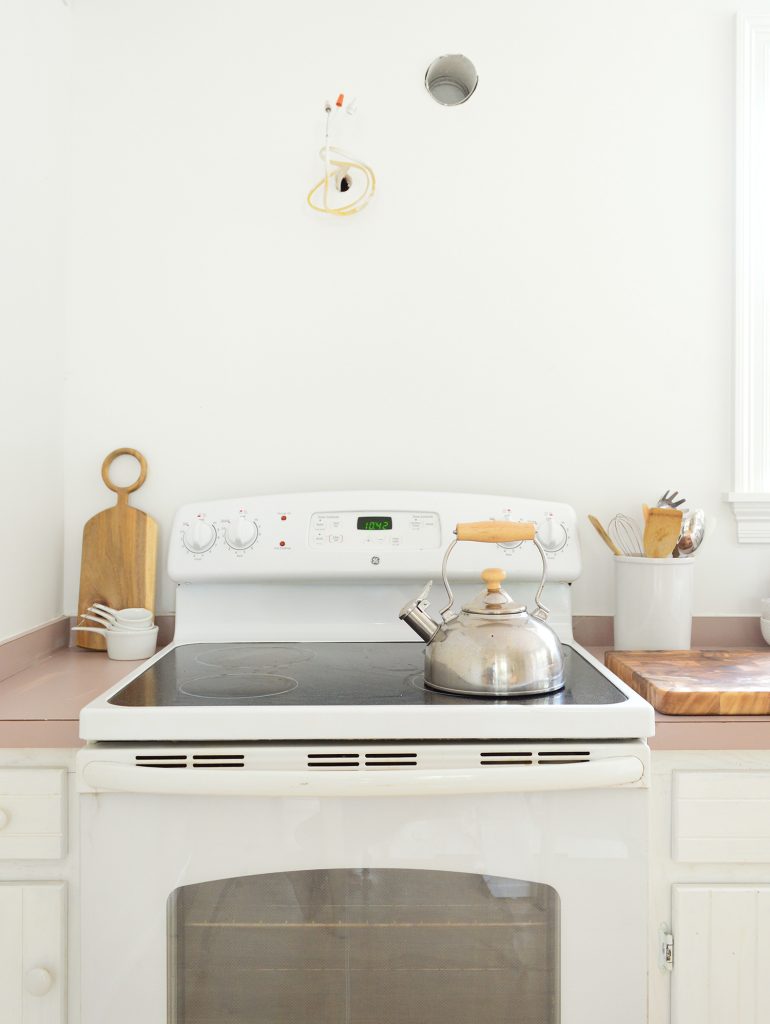
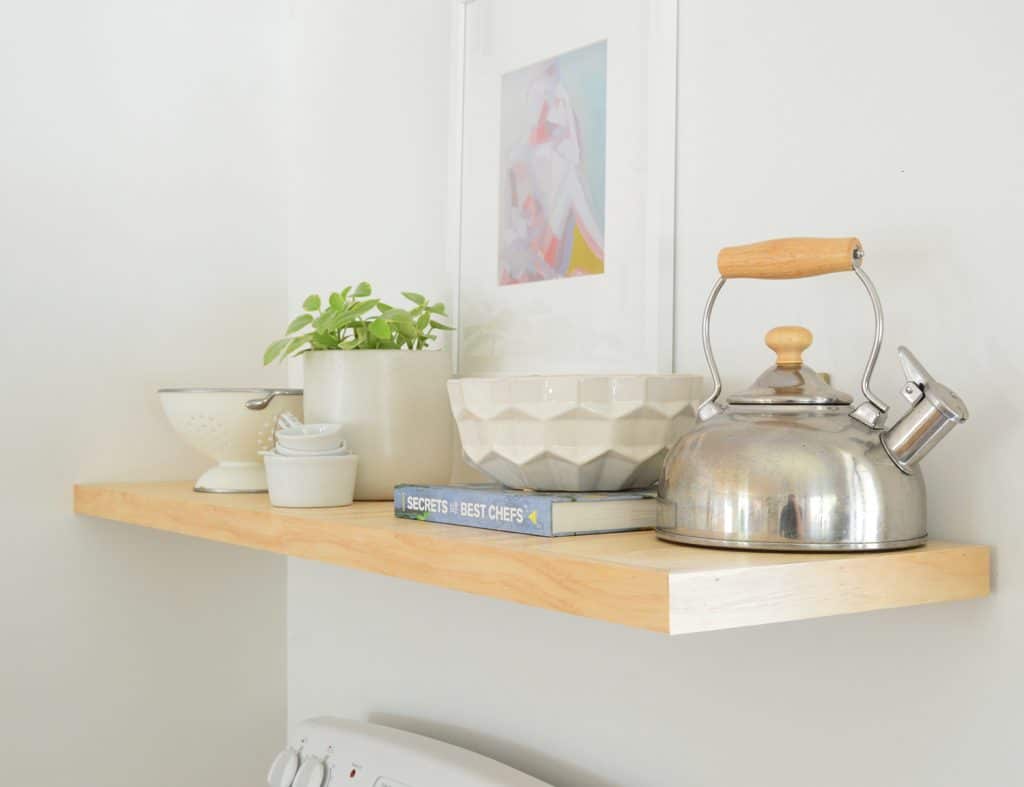
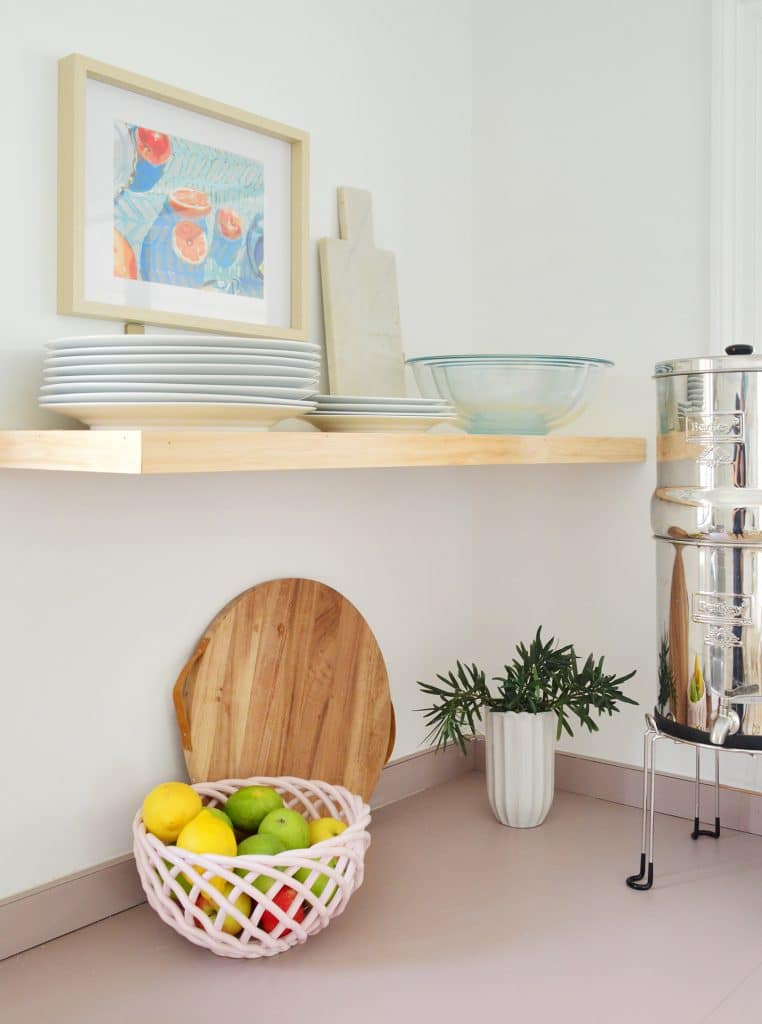
In some ways adding some quick floating shelves was more about disguising that ugly stuff going on in the wall, but the fact that the shelves would also add storage was the icing on the cover-all-the-ugly-things cake. Although I guess it really is the framed art that’s doing most of the work here. The shelf just gives the frame something to relate to so it doesn’t look totally random and float-y.
As for what we put on the shelves, it was purely function-based for the most part with some other things like a plant and a cookbook added after we had all the real items that we wanted to store up there. It’s great to have a spot right by the stove for our tea kettle & strainer – and the shelf on the other side stores some large mixing bowls and dinner plates.
The actual construction of the shelves was a little all over the place, so it’s not really “tutorial worthy” (I’d recommend this technique or this technique instead). We started thinking we might do something similar to the beach house laundry room or office, so we ordered some of the same Etsy brackets as before – this time in brass (Tiffany used them here on her office shelves too).
But while holding things up we realized our original plan wasn’t the best (there’s that lesson again). We could easily see with our eyeballs that two shelves full of stuff on each side would overwhelm that back wall AND since the window wasn’t centered on the wall, there was no easy way to make our brackets look evenly spaced (especially if we wanted to hit at least one stud for maximum strength).
So the strategy became “let’s try to hide the brackets” as much as possible. That meant hanging them where they’d go into a stud and be nice and strong while spacing them so they could be hidden behind objects on the shelf (not on the very end for example), and trimming out the bottom to minimize the view of the support under the shelf. Again, you can get a better sense of what’s going on here if you reference this tutorial.
These project gymnastics are also being compounded by the fact that we’re trying to minimize trips to the hardware store and use as many leftover materials as possible. In fact, the plywood for these shelves was actually just scrap leftover from our laundry shelves!
In the end, the path to get to these shelves was kind of winding, but they do the job really well, and we like how the natural wood tone blends in with the floor and the chairs (Sherry just clear-sealed them using this water based sealer, which we prefer because it doesn’t yellow like oil based poly can).
In the “lessons learned” category, it was good to discover some kinks during this process (like having to adapt to the off-center window) which helps to shift our thought-process as we daydream about our eventual remodel. We’ll probably need to consider some asymmetrical solution that embraces the uncentered window – or some design that cheats things and makes it appear more centered. It’s all TBD and we’re in no particular rush to figure it out, but it’s good to have discovered that quirk so we can think about different solutions for a while.
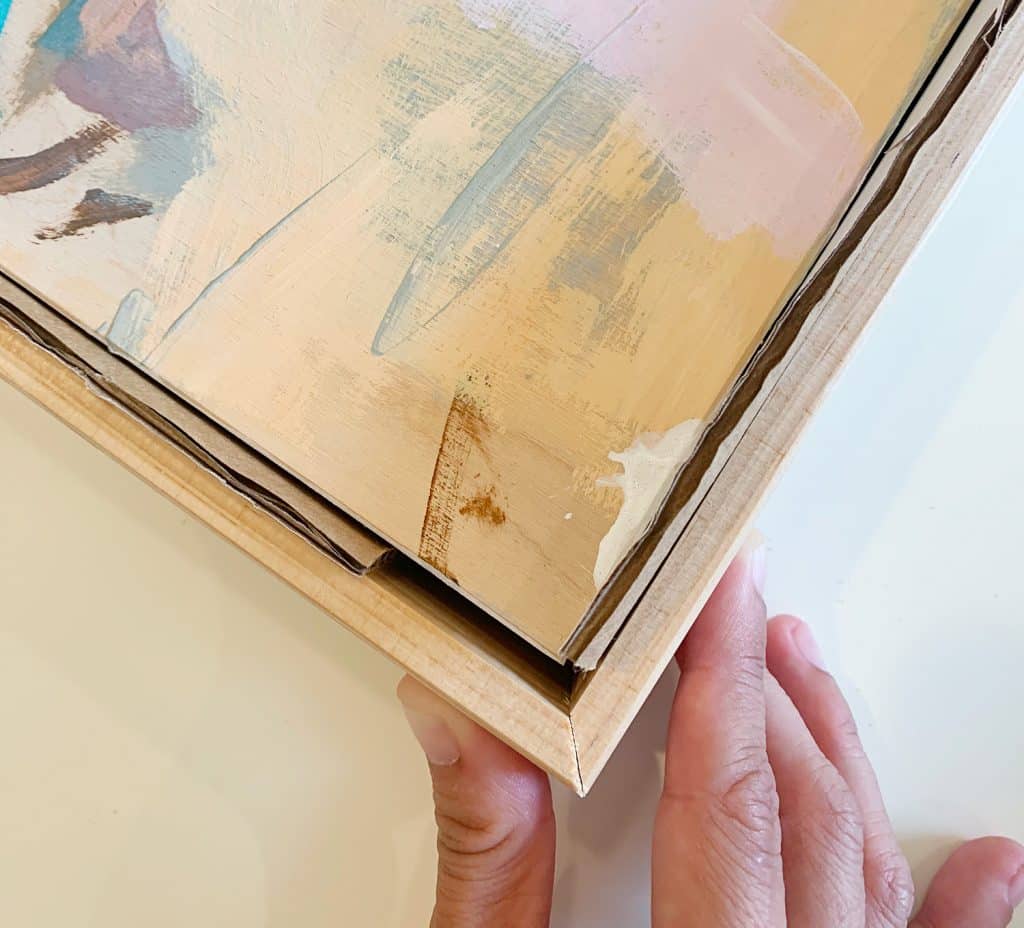
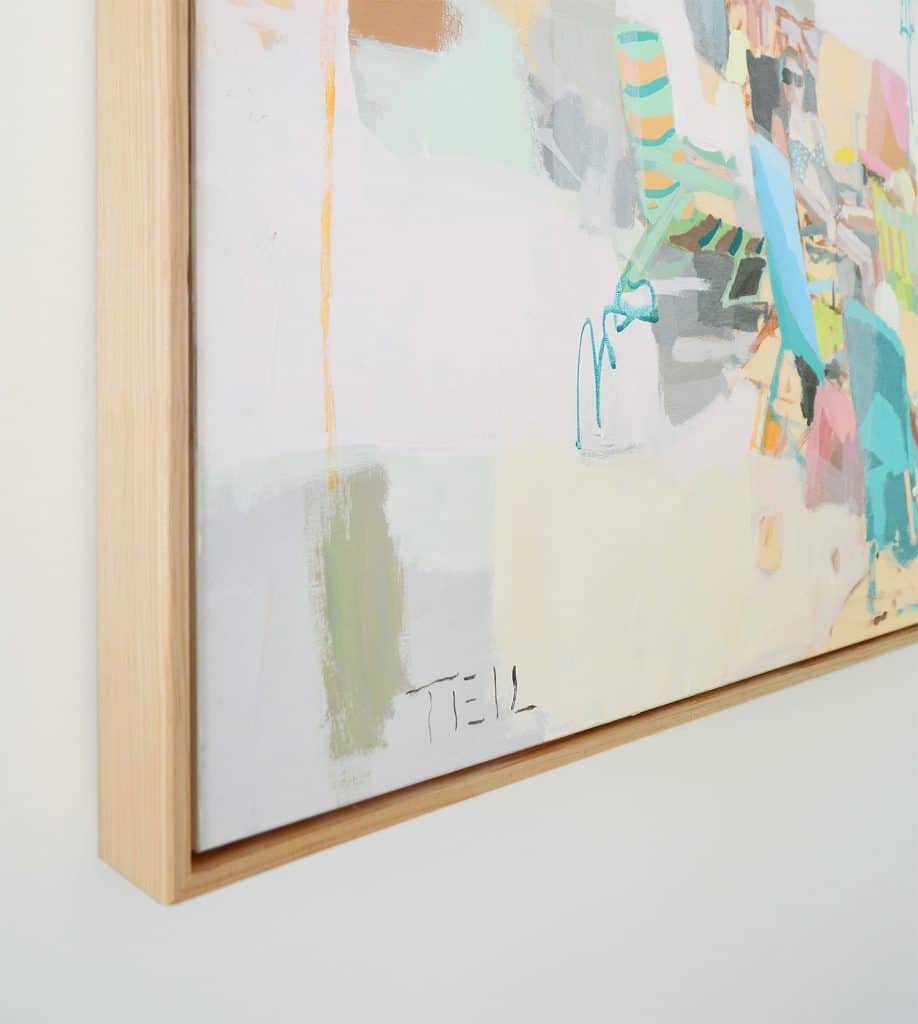
5. Framed Our Teil Duncan Painting
The last thing isn’t really a “kitchen renovation” as much as its just a change in the room that you may have noticed amidst the others when you studied those two “spot the difference” photos. We bought this Teil Duncan painting six years ago as an anniversary gift to ourselves and for most of those six years have intended to frame it or have it framed. And yet… it remained unframed for all that time.
This is another case of wishing I had a better process to show you, but we winged it using some trim pieces available at our neighborhood hardware store and some cardboard as stand-in spacers (that doesn’t stay there – you just use it create a thin but consistent sliver of a gap around the frame so the art appears to float in the middle). The good news is that Jenna Sue has a great tutorial for making a float frame if you’re looking to do this to one of your canvas prints.
We’re kicking ourselves for waiting this long to do it because it really makes the art feel more substantial and finished – plus the blonde wood ties it into the rest of the room. Actually, maybe it’s lucky that we waited this long to do this or we might have chosen a darker wood frame to go with our last house’s mid-toned wood floors. Ok, let’s call this procrastination that just so happened to work out for the best.
Now that you’ve seen all five of the things we changed, I’ll spill the beans that there has been a sixth change that’s not quite done but is already extremely exciting & it changes the whole room in a much more major way than all of these updates.
I mentioned that we planned to paint the cabinets and we decided to embrace the existing counters and go for a tone-on-tone look for Phase One – just because why the heck not?! When else do you get mauve counters to work with?! We tested out two paint colors and immediately liked the deeper one (on the right) that almost exactly matches the counters.
So yes, we’re going full on mauve. There are only seven cabinets, so it’s turning out to be a quick job, and it looks really good already. So we can’t wait to show you more when we’re finished (wish us luck with that dishwasher change!).
P.S. To follow along with our entire reno of this house, you can see every single update we’ve made right here in this FL House archive.
*This post contains affiliate links, so we may earn a small commission when you make a purchase through links on our site at no additional cost to you.
