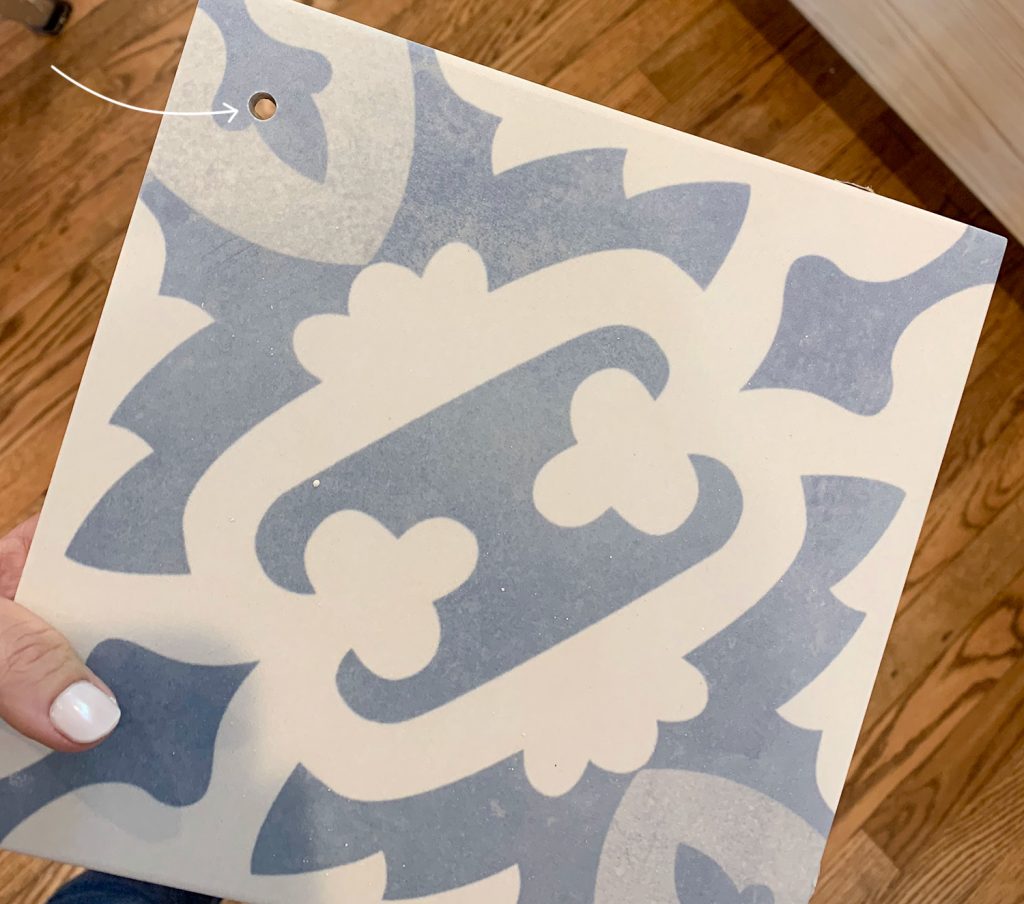
One challenge when building the floating shelves in our duplex kitchens was drilling through the tile backsplash. After all, we had just spent a lot of time and money installing all of this beautiful tile. We didn’t want to mess it up! Was it a little scary? Yes. But is it totally doable? Also yes. Let’s talk about it.
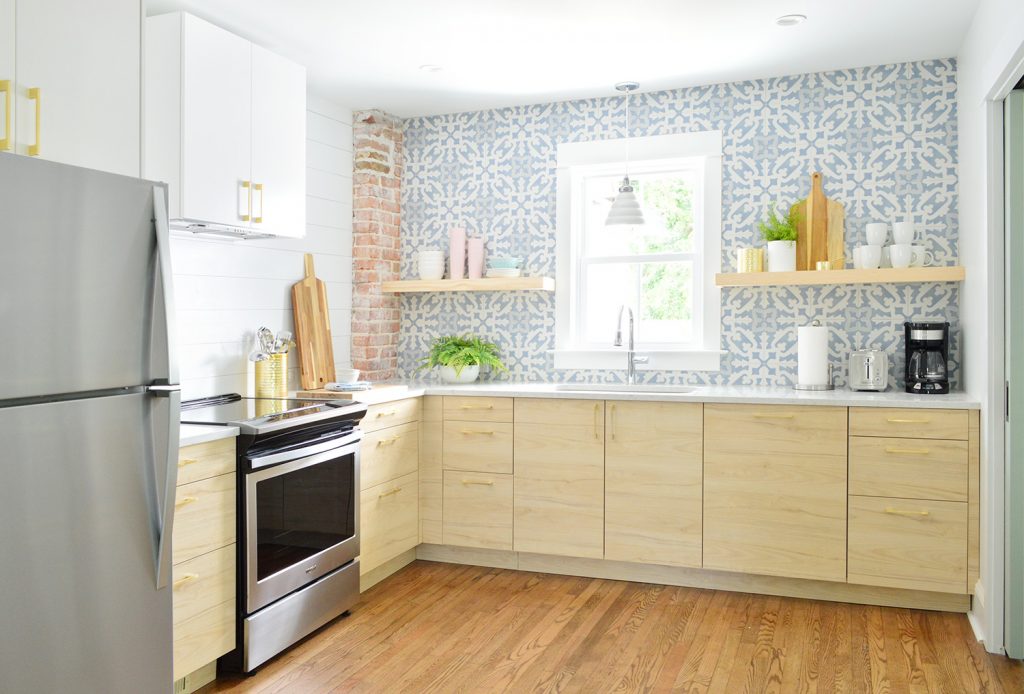
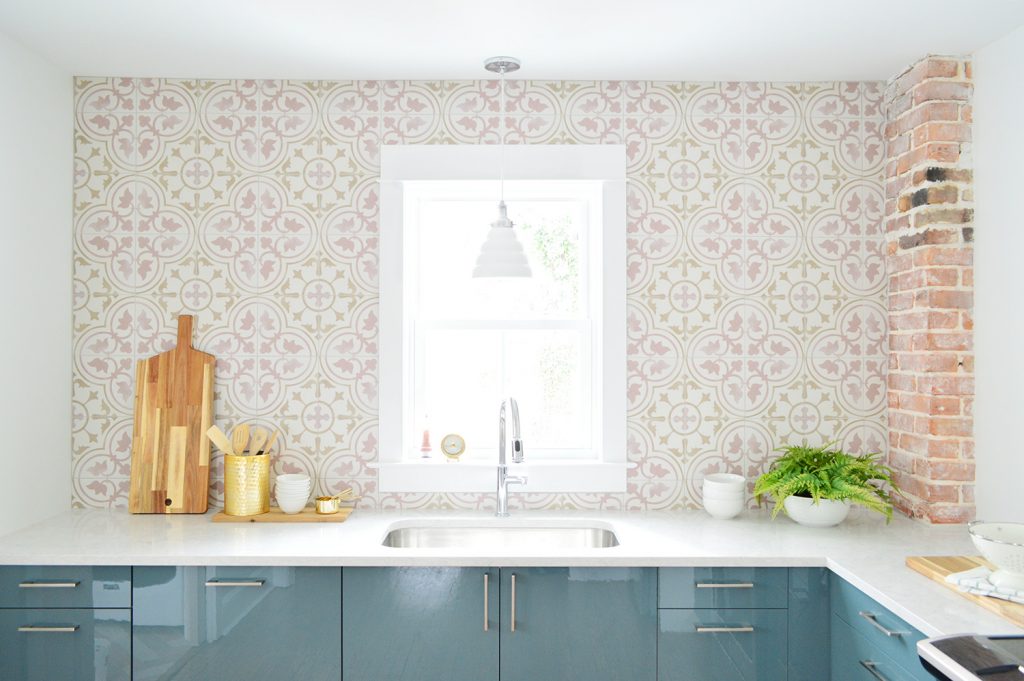
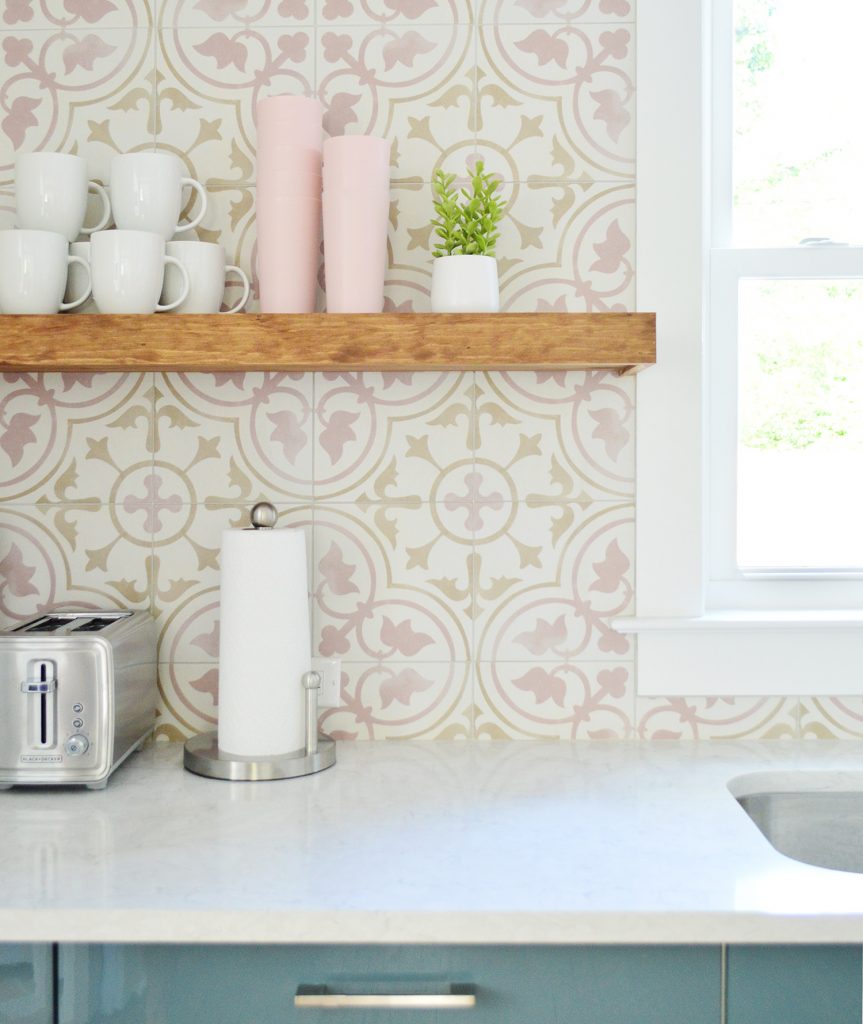
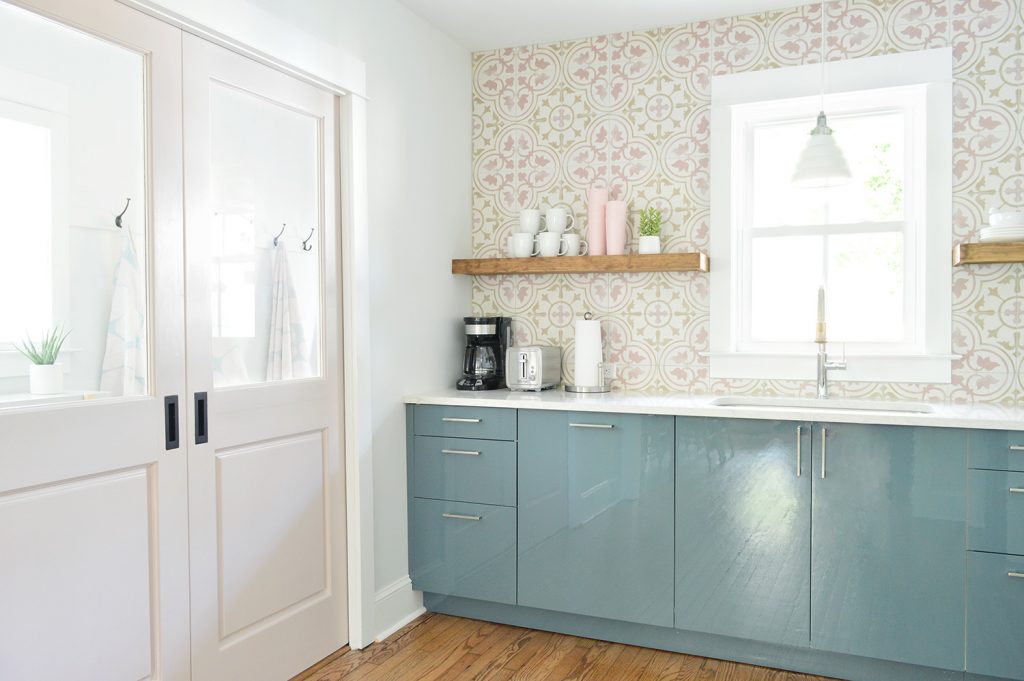
Ideally, we would’ve hung our shelf supports before tiling. Buuuuuut we weren’t seeing eye-to-eye about where to (or even *if* to) hang shelves. Luckily we resolved our stalemate shortly after tiling (I won’t bother you with who was right… but let’s just that person is very handsome and very humble). We decided to install a chunkier version of these DIY floating shelves that we built for our bonus room.
Tools Need To Drill Through Tile
You will need some special equipment to successfully drill through your backsplash without damaging your tile. Here’s what you should have on hand.
- Power drill
- Various sizes of tile drill bits
- Water delivery system guide (optional)
- Water cup
- Painter’s tape
- Paper towels
- Spare tile (optional)
And our #1 tip for this project: take your time! The process is slow and doesn’t reward rushing. So maybe I should add “patience” to that supply list above.
Step 1: Mark Your Drilling Locations
This isn’t technically part of the drilling process, but it’s a vital first step. Drilling a hole in your tile is can be slow going (it took about 5-7 minutes per hole) so do whatever prep necessary to ensure you’re working in the right spot. For us, this first meant finding studs behind our walls since we were hanging floating storage shelves.
This took a bit of detective work on our part because our wall was already tiled and our stud finder didn’t work through the thick porcelain material. We used photos during our renovation and some careful measuring to identify where the studs were. Things like the location of outlets and drywall mud marks were useful clues.
Beyond locating studs, It was also important to pick the right shelf height. We held things up (which involved some flatting squatting) until we liked the look.
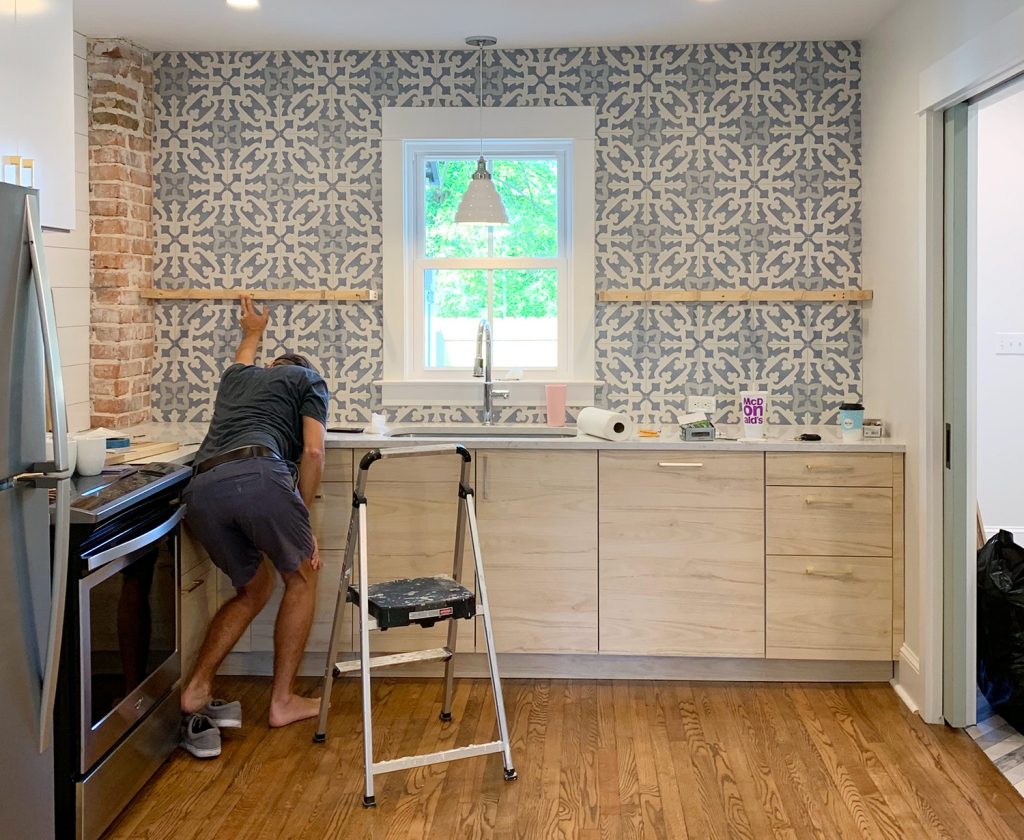
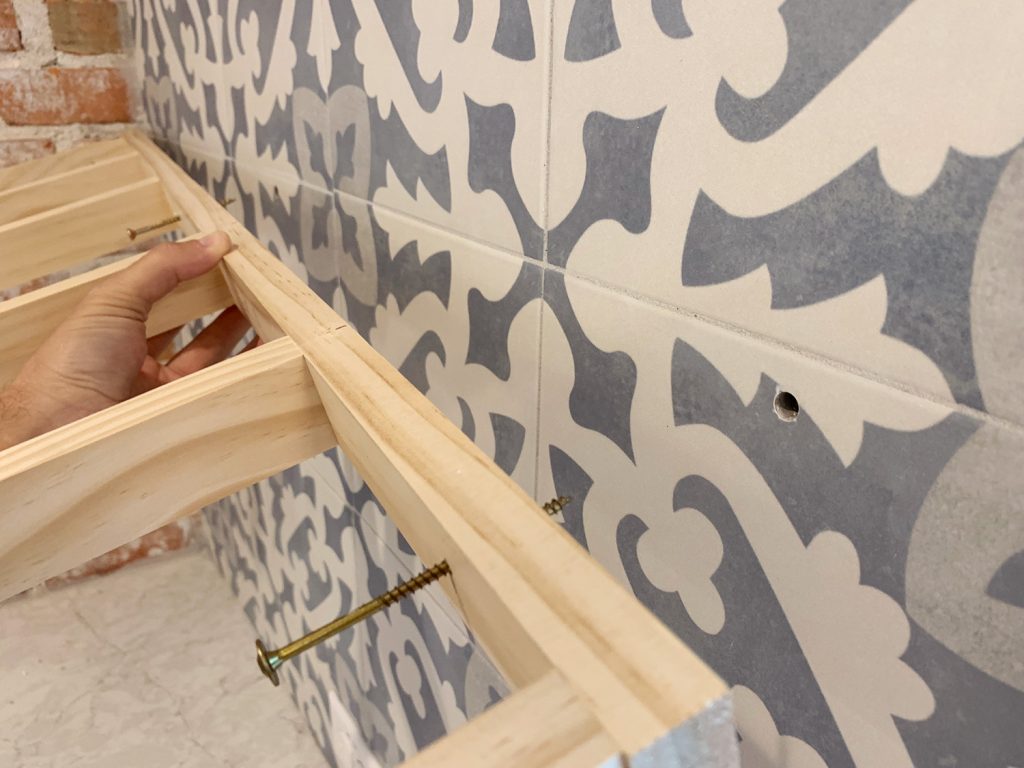
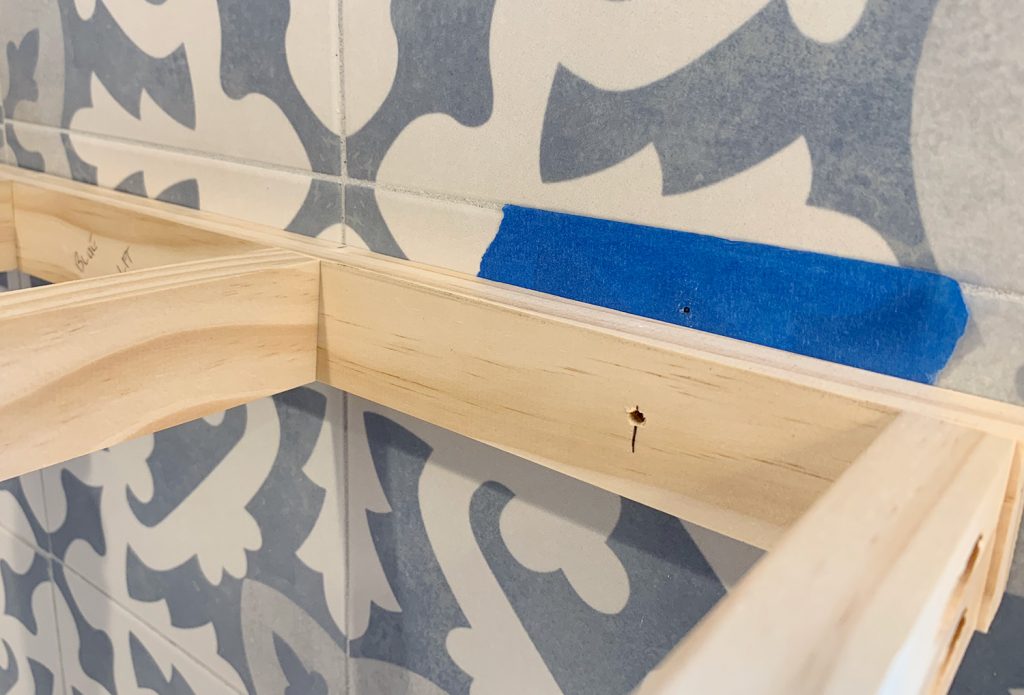
Once we knew the general height (and had check it for level) we marked the precise drilling location by (1) placing blue painter’s tape at each stud and (2) drilling lightly through our shelf bracket with a small, standard drill bit.
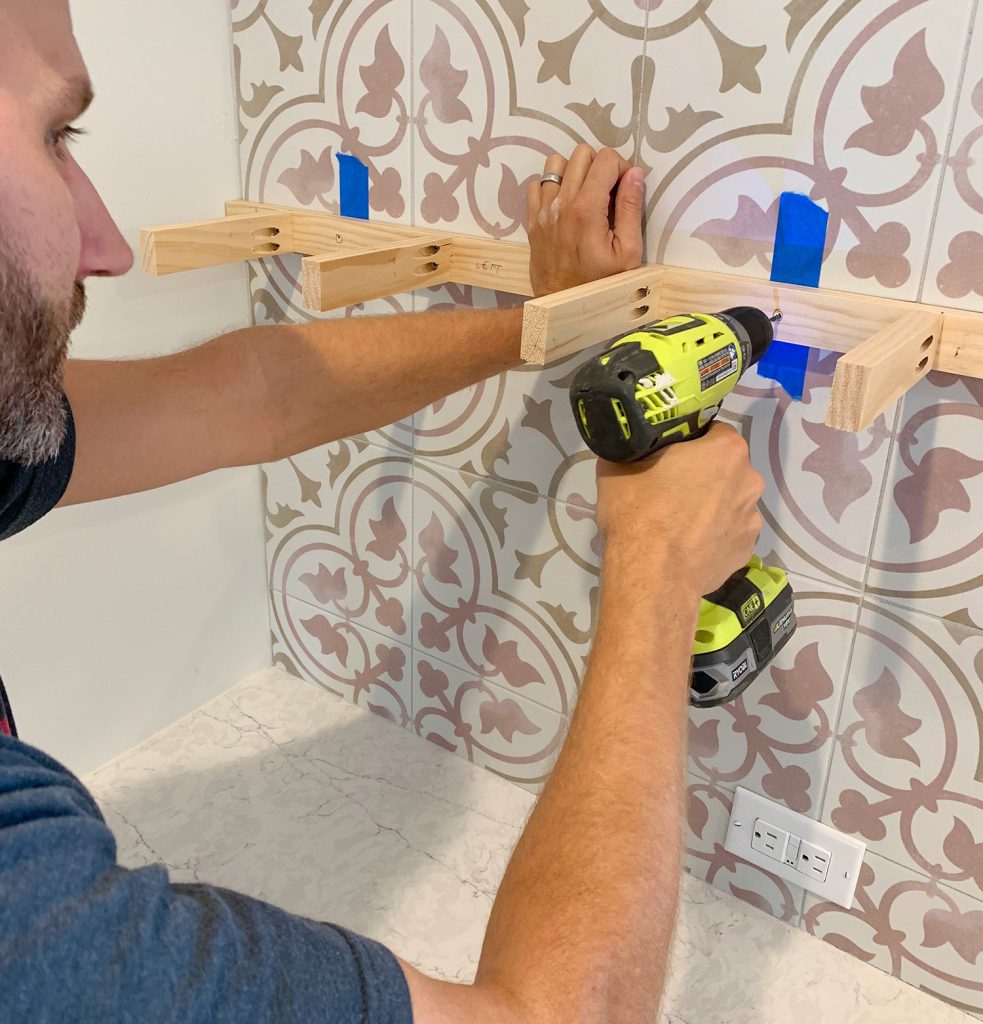
This left a small mark on the tape to indicate where we should drill our pilot hole. And forgive the tile color changing. We performed this process in both sides of our duplex, so photos may jump from one kitchen to another.
With our precise drilling locations marked, we could officially move to the next step.
Step 2: Buy The Right Bit
Drilling through tile requires a drill bit that is specially designed for tile. Unlike traditional drill bits that stab through softer materials like wood, a diamond bit slowly grinds as it spins. Our tiles are porcelain, but these types of bits also work on other tile materials like ceramic, cement, or glass. Just make sure your material is listed on the packaging. We bought this diamond drill bit kit as well as these carbide glass & tile bits too. I ended up using a combination of both so I’m glad I grabbed them all.
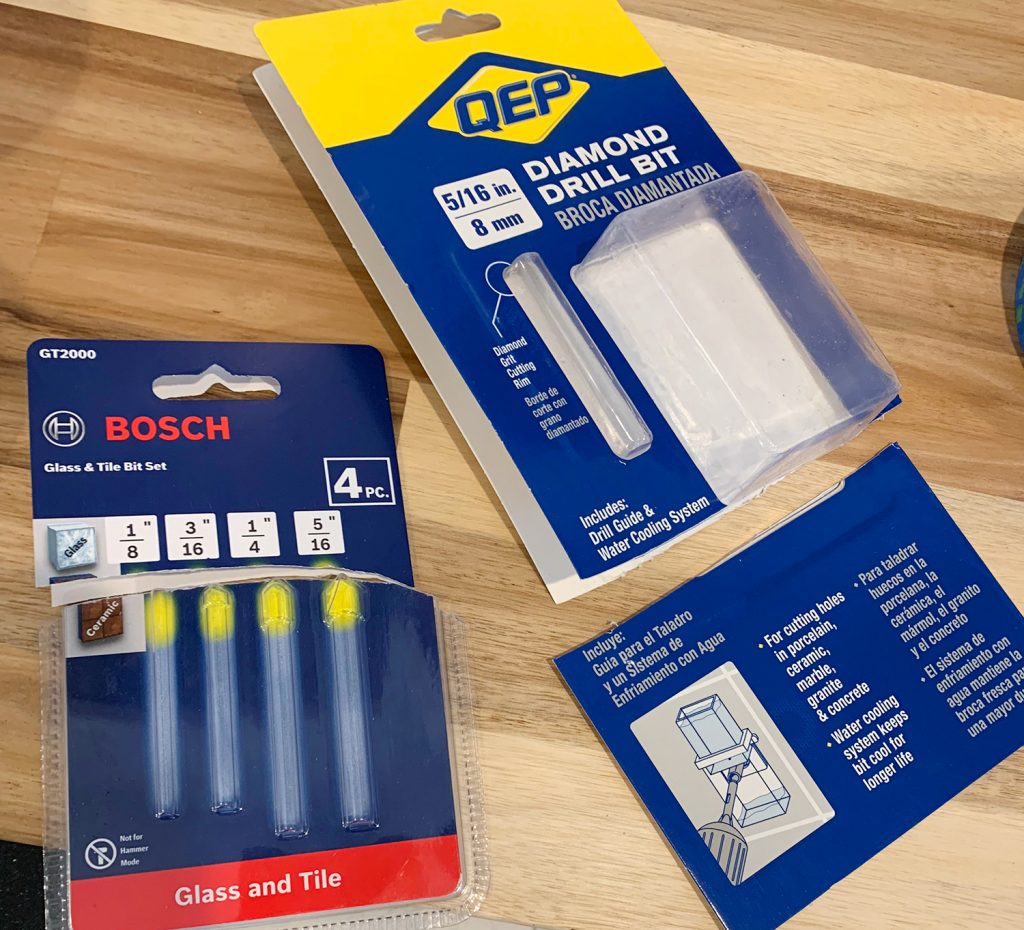
Diamond bits have a tendency to wear down quickly and become less effective over time, so you may want to purchase extras if you plan on drilling lots and lots of holes.
Step 3: Make A Practice Hole (Optional)
Before taking any of them to our pretty tiled wall, we tested them on a spare tile first. They both worked just fine (nothing cracked – woot!) so it was a nice reassurance before continuing. I highly recommend it.
If you don’t have a spare tile handy, you can purchase one (or one made from a similar material) at the home improvement store.
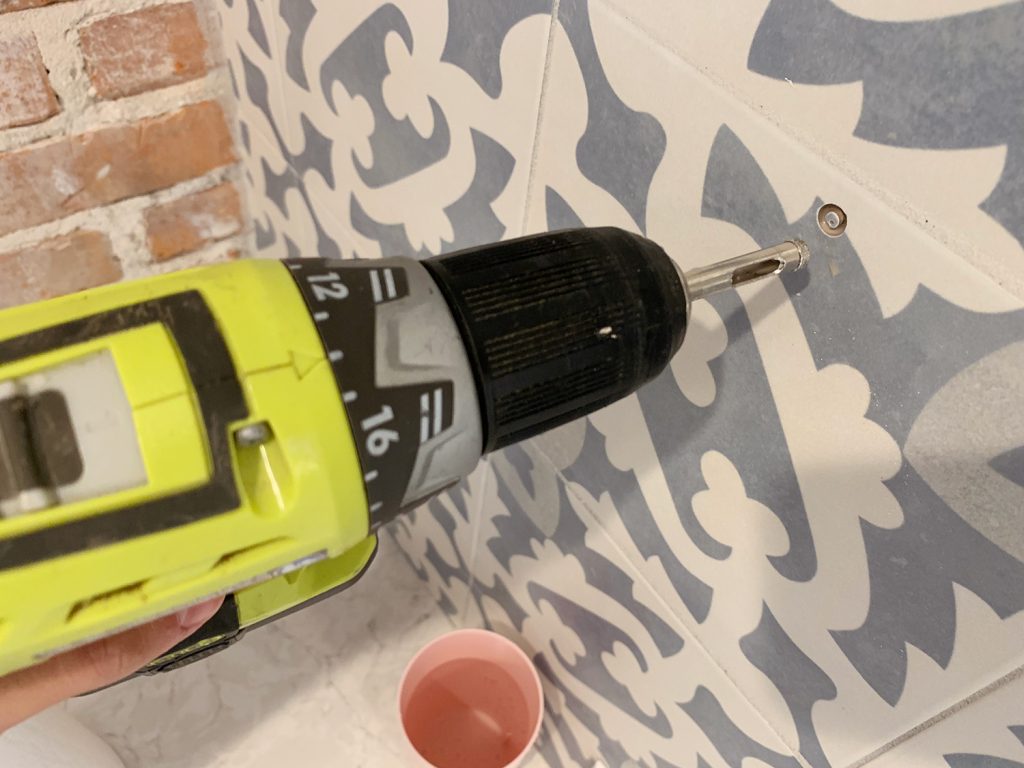
Step 4: Make A Marking Hole
To make sure we didn’t lose track of our marked locations, we first used the small carbide bit to make a small dent through the painters tape. My original mark was very superficial. Slowly and with minimal pressure, I drilled through the tape.
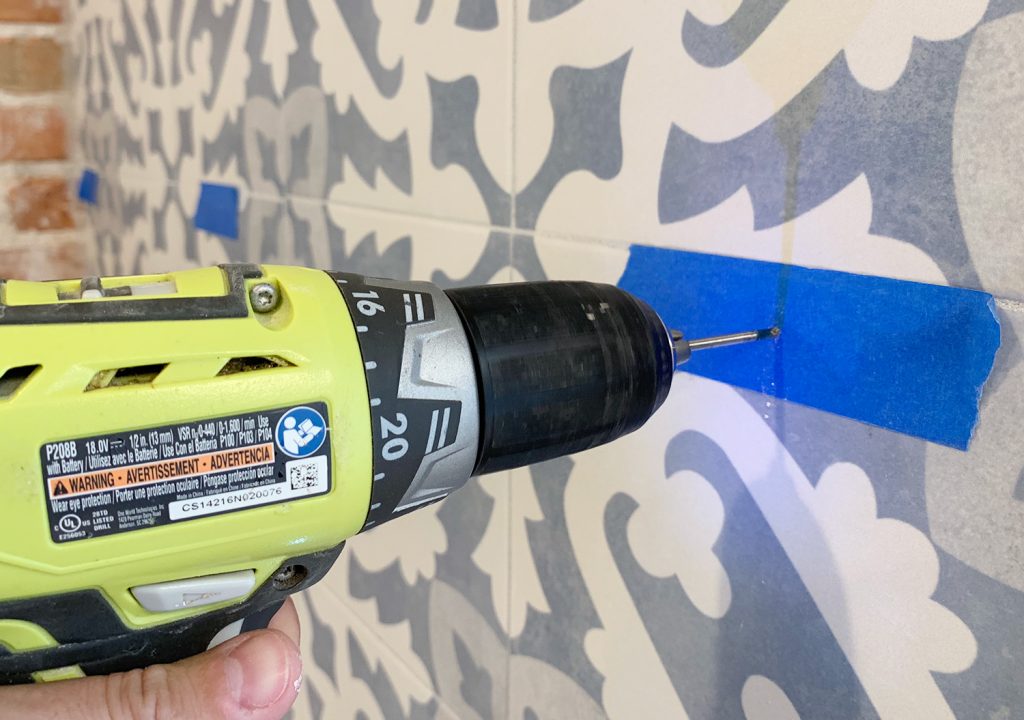
I’m not kidding when I say I was just aiming for a small dent.
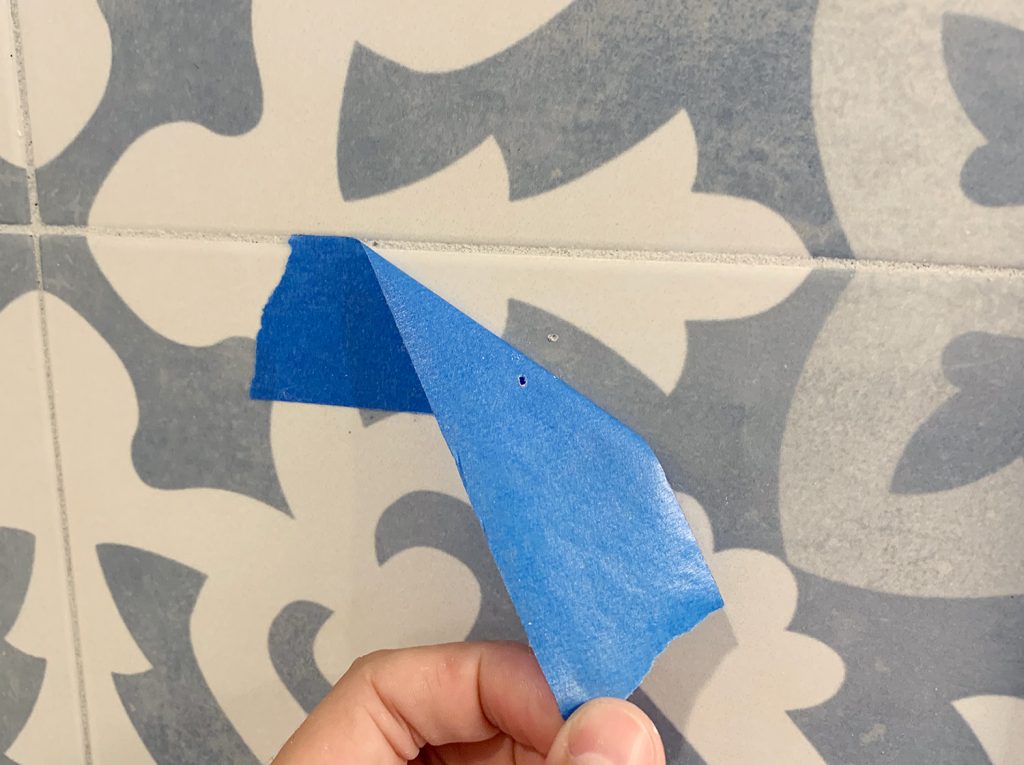
It wasn’t much, but it was enough that I could remove all of my tape and move on to a larger drill bit.
Step 5: Use A Water Delivery System
Water is another key ingredient in this process. The drilling / grinding process creates dust and heat, which can stress both your tile and your drill bit. So water helps control the dust AND cool your drill bit. This helps keep your tile and bit from breaking prematurely.
We had high hopes for this water delivery system contraption we’d bought for this project. You stick these plastic boxes over your tile and drill through them. The water from the clear box on top is supposed to slowly drip through the hole and over the diamond bit as you drill and then collect in the bottom box.
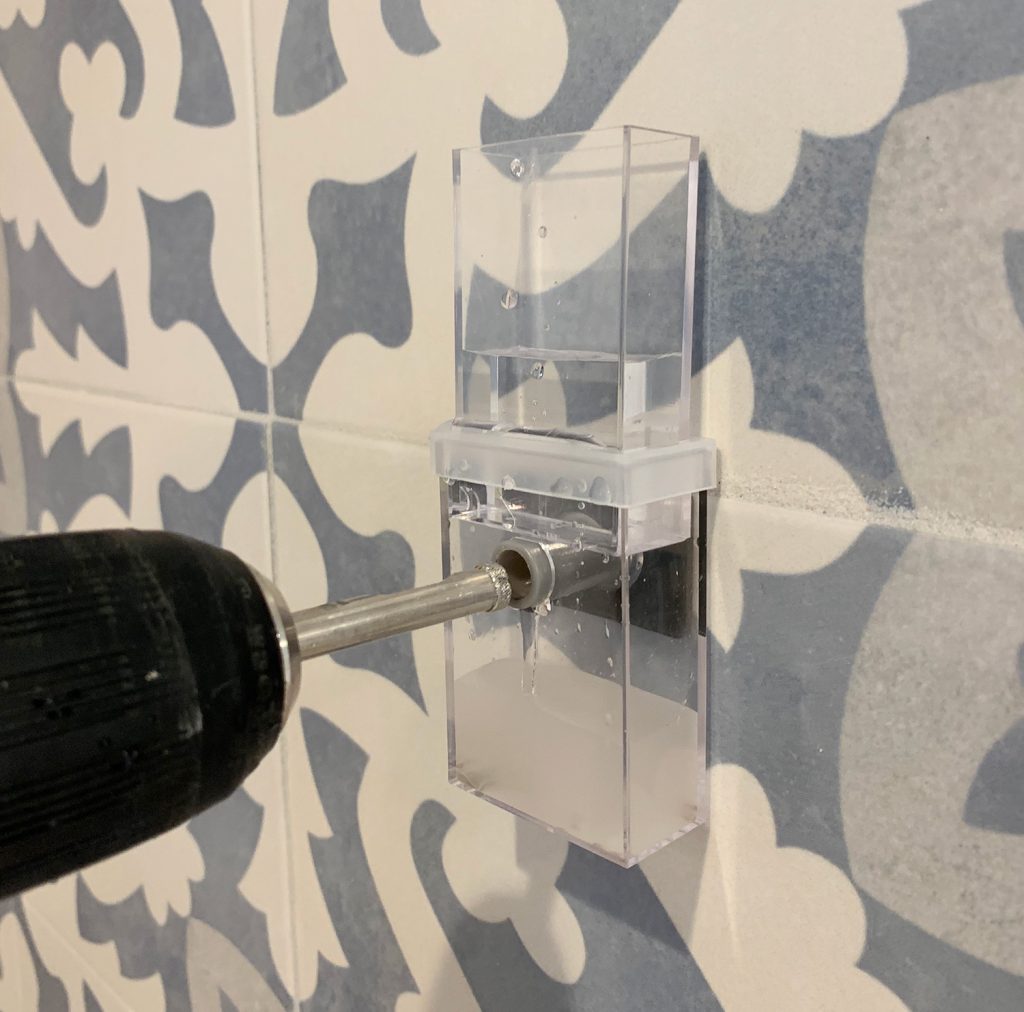
Maybe I did it wrong (although the reviews tell me it’s not an isolated issue) but the water drained almost instantly to the lower box, so the promise of a “slow cooling drip” was a bust.
However, the kit was still helpful because the boxes acted as a steady guide that kept my drill bit in place. So once I’d gotten a good start, I removed the box contraption and continued without it.
Ultimately I relied on my own “water delivery system,” which was just a cup of cool water that I dipped my bit into every 15-20 seconds or so.
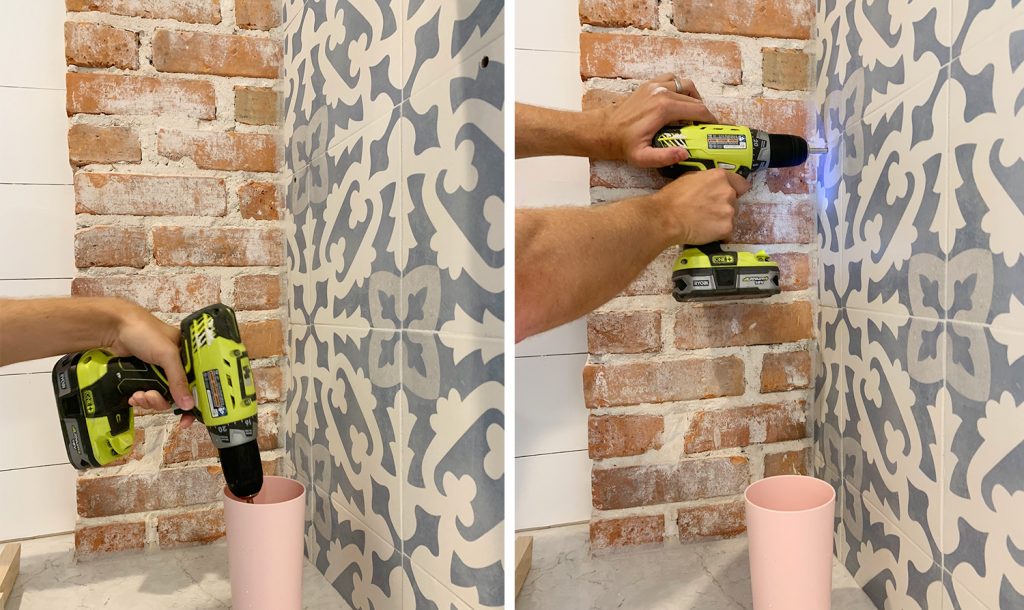
It wasn’t very fancy, but it did the trick!
Step 6: Take Your Time
I know we said it already, but this process is about patience, not pressure. The grinding process is slow, but with minimal force you’ll be able to slowly drill through your tile backsplash. Again, it took us about 5-7 minutes per hole, which meant over an hour of drilling in total. Our attitude was that it was better to use our time being careful drilling than replacing a broken tile.
We were just grateful the process worked as well as it did and we didn’t end up with any cracked or broken tiles. We finished building our floating kitchen shelves and hung them securely to each wall.
And obviously we were just making small 5/16″ size holes to screw through, but a similar process does work for larger holes – like for bathroom plumbing fixtures.
When drilling larger holes, just be sure to purchase the right size tile drill bit for your job. Many even come with water delivery systems too. Just be sure – say it with me! – to take your time. :)
*This post contains affiliate links, so we may earn a small commission when you make a purchase through links on our site at no additional cost to you.
