Well, we’ve almost been in this house for a month. How crazy is that?! We moved on the 14th of last month and this Sunday is the 14th again! The pod is all unpacked and picked up (you can listen in here about what the heck we overpacked & then donated when we got here). It’s so crazy that a single pod of stuff can be too much – but then again, John was a pod-packing champion. Like too good at it. And going from 14 rooms to 6 (and 3150 square feet to 1400) is not a small challenge. I’m not gonna sugarcoat it. This was a multiple month long undertaking. But it was SO WORTH IT.
In a nutshell: we don’t miss anything that we don’t have anymore and we’re feeling so much lighter and loving it. Highly recommend. Ten stars. My biggest advice for anyone else who is majorly downsizing = get rid of even more than you think you need to on the front end, because you never miss it on the back end.
We also talked about the part of moving into a smaller home that we didn’t expect in that podcast episode, so it’ll catch you up a ton about the actual mechanics of the move, how we settled in, what surprised us, etc.
But let’s get into the fun visual stuff: a bunch of photos of our kitchen/dining room/random little seating area as it looks right now. This is one large room that creates a multi-functional common area in the middle of our main floor. This house is basically like a ranch with all the bedrooms and the bathroom on the first floor and a bonus flex space upstairs that we use as a family room/office (sort of like how lots of ranches might have a big flex space in the basement except ours is upstairs instead of downstairs).
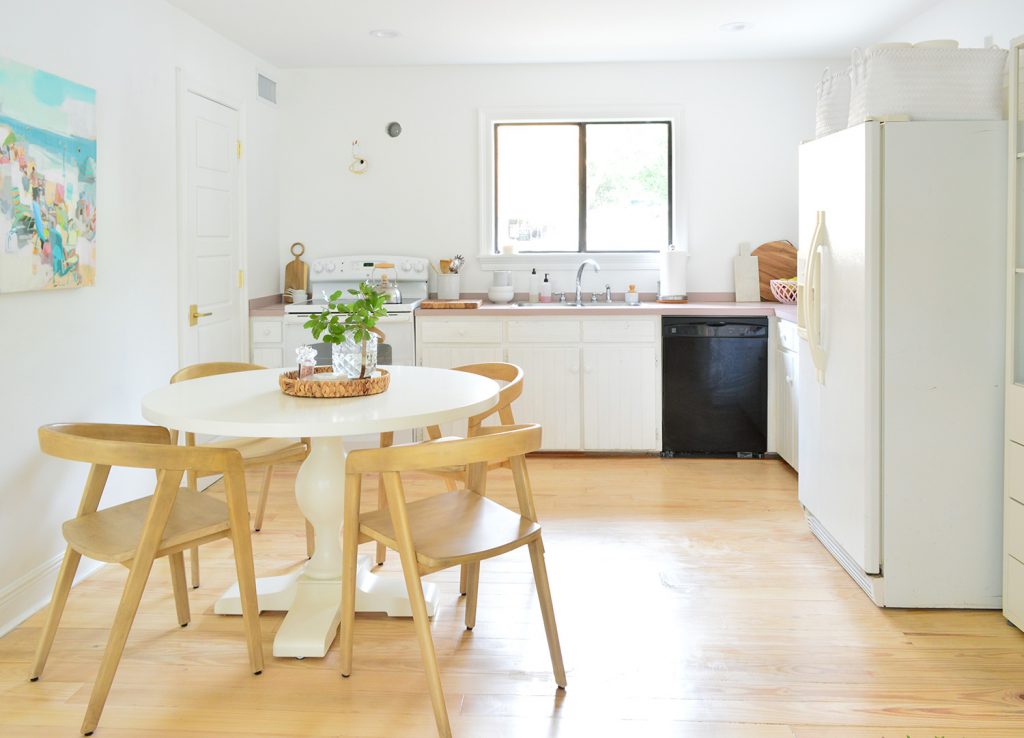
This is just us using stuff that we already own, all of which was in the pod (well, we ordered two more kitchen chairs but that’s it) and showing you how everything landed. We love documenting this because it’s fun to watch how things evolve, and also a pretty interesting study in how some areas of a home seem to take forever to figure out while others settle pretty quickly and work just like that for a very long time.
Just for fun, here’s the kitchen as it looked when we bought the house (you can read more about removing the peninsula & the soffits here & see how we refinished the pine floors to be a lot lighter and less orange here).
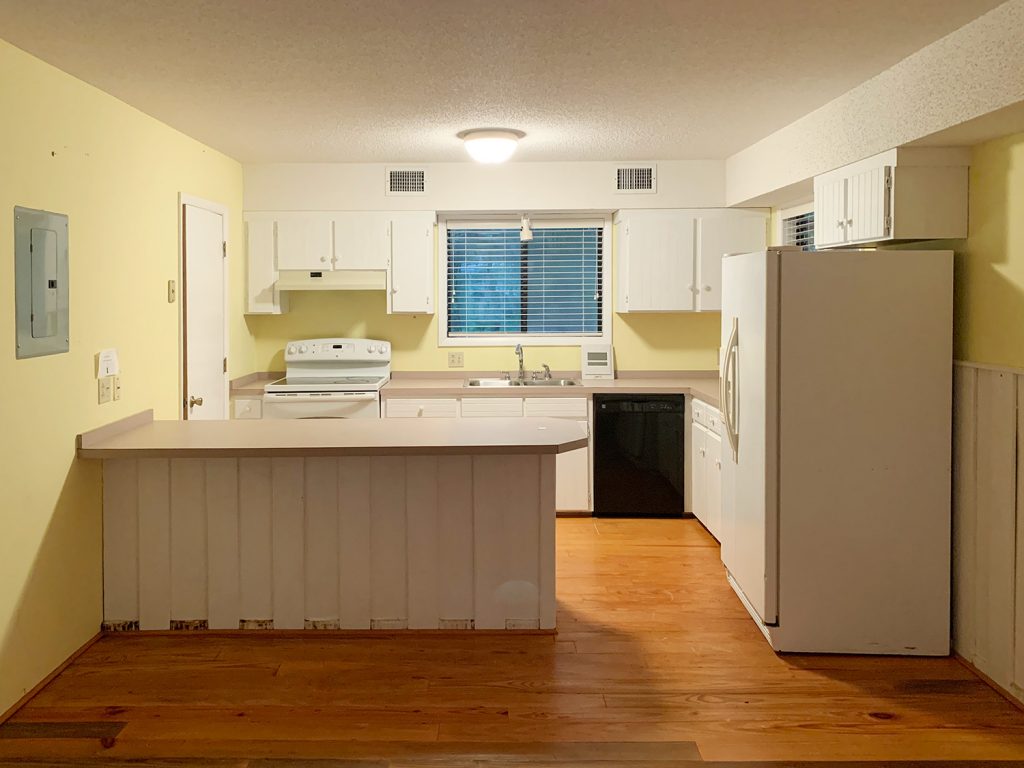
Those changes alone were a huge improvement – along with painting the whole room white for a brighter feeling (the entire house is Pure White by Sherwin Williams – eggshell on the walls, semi gloss on the trim/doors, and flat on the ceiling). It was super dark and rainy when we offered on this house so all of our before pictures are SO BLEAK and we assumed it was just a smaller house that might just need a lot of added lighting because it wasn’t naturally very bright (but that was a price we’d pay to live in such a great walkable neighborhood near the beach)… and then we moved in and were like HOLY CRAP THIS IS THE BRIGHTEST HOUSE WE HAVE EVER OWNED (you can read more about our very strange accidental tradition of buying a house in the rain here).
This video will answer like 10 of your questions, from “what’s behind that door near the stove?” to “wait but will you lose that side kitchen window if you add an en-suite bathroom for your bedroom to that side porch area?” and “how do you like having the downstairs common area between your bedroom and the kids bedrooms?” and “you don’t have a pantry here – where do you store all the food?” It’s all in here for ya, and a lot of that stuff can be seen without needing to have the sound on – just watch me open stuff and look inside ;)
Note: You can also view the video on YouTube (just click the CC button at the bottom to see the auto-generated captions).
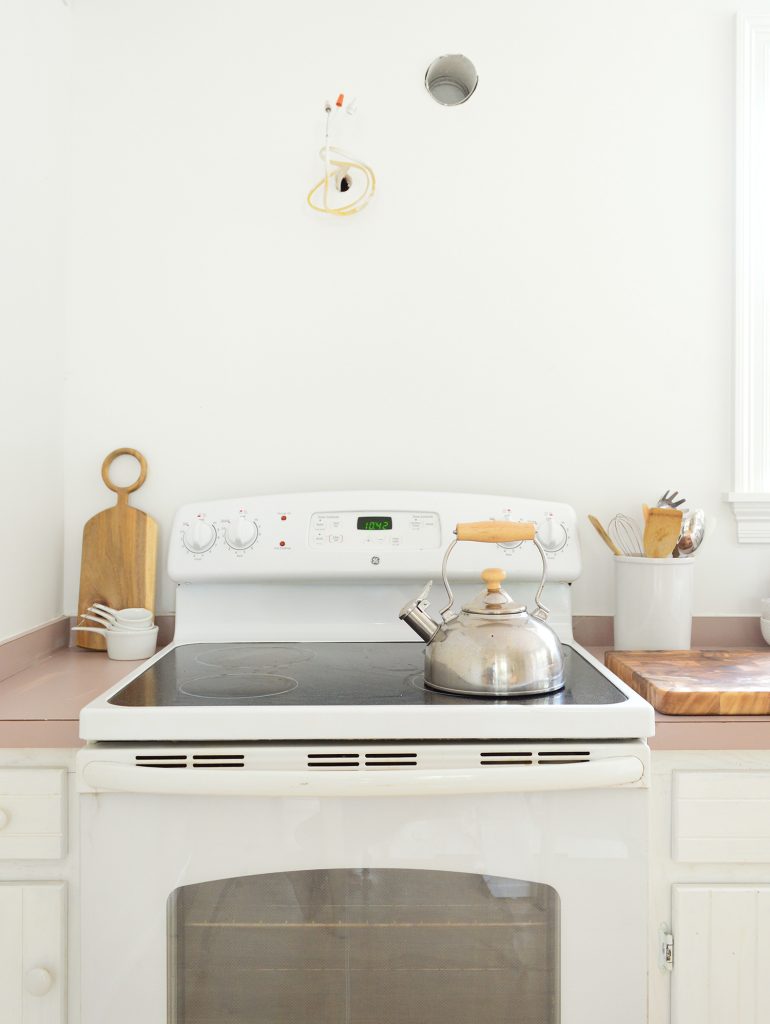
A video is worth 10,000 words so I’m like…. why did we even take these pictures? But they’re fun to look back on as things evolve. Someday we’re going to be like “remember how we lived with a hole in the wall above the stove for a vent hood and after like a week our eyes didn’t even register it anymore?” Truly, I forget about that and the black dishwasher front that sticks out like a sore thumb until I see these photos and I’m like… room for improvement. Anyway here’s John for scale at the table. We’ve LOVED having a casual dining table in here instead of an island.
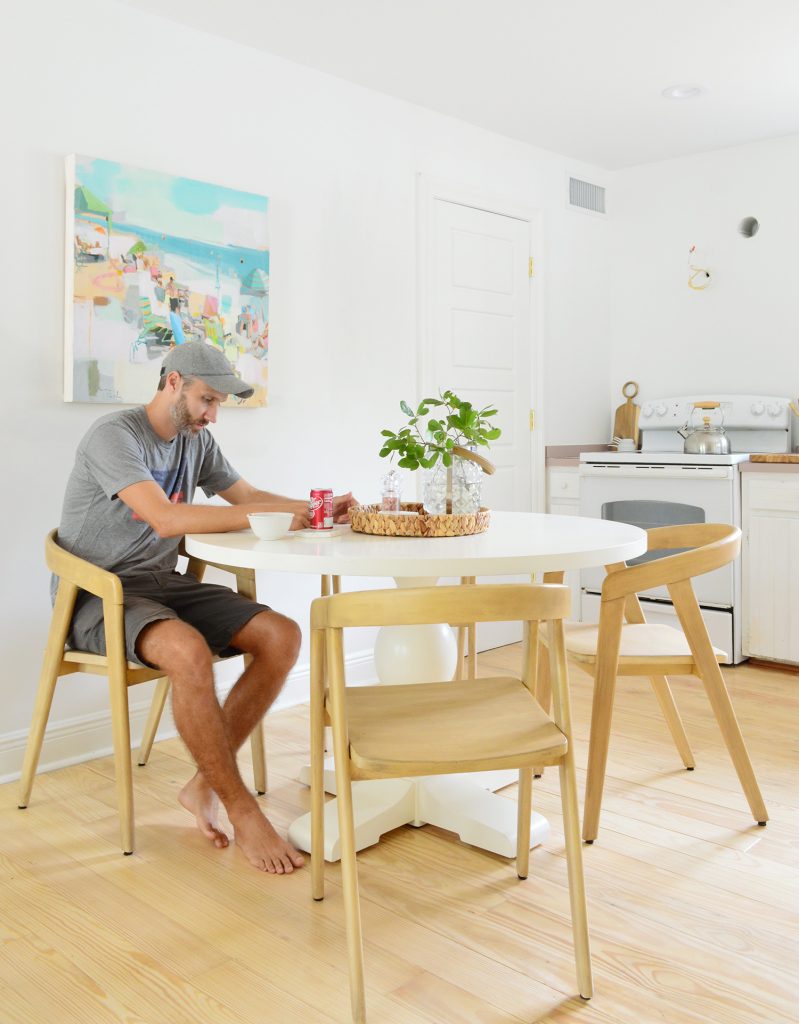
Since the chairs are standard height and not counter height we find ourselves sitting there to do all sorts of things that we didn’t tend to do as much at our last house’s kitchen island (write letters, sort paperwork, type on our laptop, etc). I’m writing this post from that table right now!
One other huge pro to not going with an island is that we all look into each others eyes when we eat! You know, as opposed to all sitting in a line and staring in the same direction instead of at each other. We loved eating at the dining table in the beach house kitchen (and used the island there much less), so that was a good previous experience to base this choice on, and sure enough, we love this setup here.
We debated all sorts of other ideas (adding a peninsula or a small island, building a banquette or adding bench seating along the wall, etc) but so far this is so nice and flexible and casual and easy that it’s definitely our favorite solution for this space for the time being.

Oh and we have two more identical chairs upstairs in the office/art desk area that we can bring down in a pinch to seat six (watch the video for more on how we’d do that). We also have seating for 8 on our upstairs deck and will likely have yet another spot to eat outside on the front side porch which is covered, so entertaining options abound. You know when it’s ok to have a bunch of people over your house again someday…
Behold, a closer shot the stove’s vent hole with these hookup wires hanging out. Memories in the making. The hilarious thing about this stove is that it works perfectly. We expected to have all sorts of weird issues with the old mismatched appliances in here (this house was empty for over four years and had some pretty extensive water damage and no heating/cooling at all in that time) yet all of the appliances are still going strong.
This is essentially the entire counter/cabinet area. A very different story than the kitchen in our last house which had about 739 cabinets (only slightly exaggerating). But guess what? Everything we need fits. Stuff that we don’t doesn’t. Not a bad deal, right? We’re also planning to add some shelves along that back wall with the sink on it, so that’ll free up even more storage space. Soon I hope!
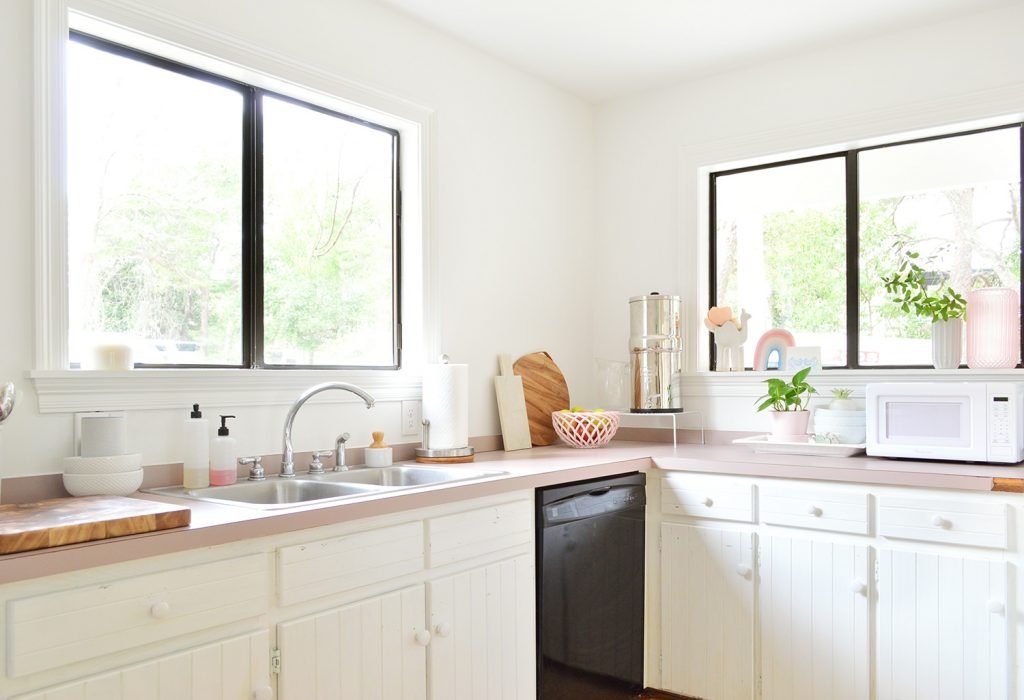
Also, I feel the need to proclaim that I’m actually not hating the pink laminate counter. In fact I’m VERY tempted to make it work for our Phase 1 update (we’re planning to paint the cabinets, get hidden hinges, some new hardware, add those shelves along the back wall, maybe update the front panel of the dishwasher so it’s white like the other appliances, etc).
I do have to figure out how to fix that missing pink corner of the counter, but maybe some wood putty or Bondo that I can paint to match the rest of it will work…
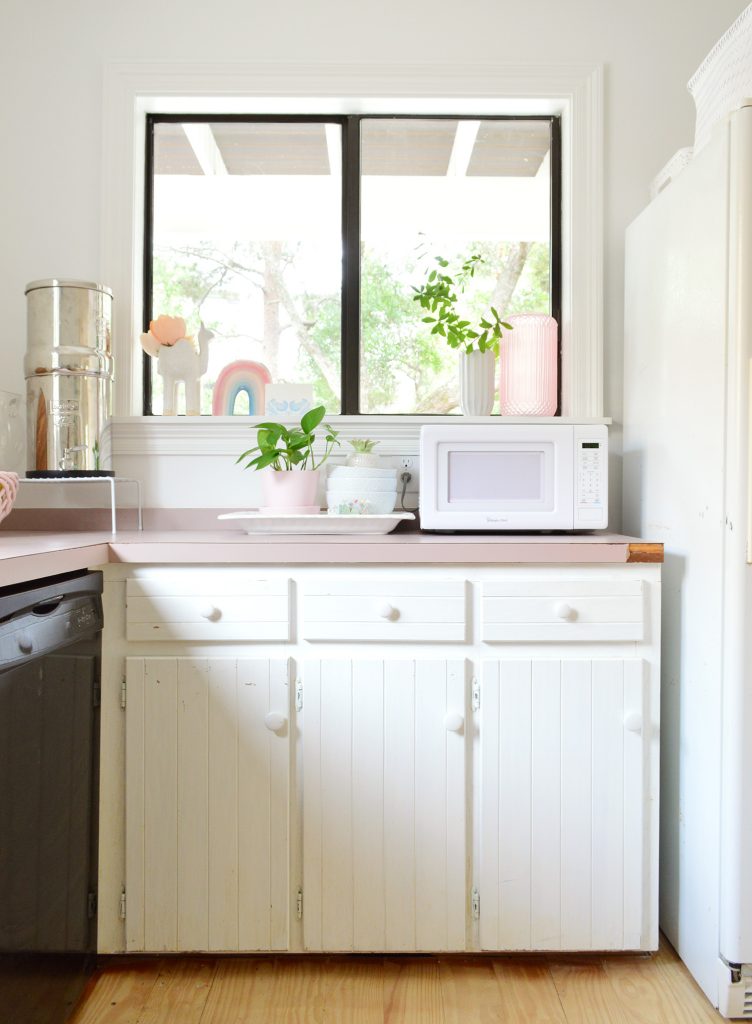
Also if you didn’t watch the video yet, the short answer to the “will you lose the window in the photo above when you add a bathroom to the covered porch out there?” is: although that window isn’t super bright since it’s fully under a covered porch, after living here we love the view, so we’re thinking that we’ll add a smaller bathroom so we can keep half of the window and half of the view. One huge lesson we’ve already learned here is that bigger isn’t better. A smaller bathroom will be just fine. Honestly we’ve all been sharing just one bathroom and it has been totally ok! Way less of an issue or adjustment than we thought! (You can hear more on that here – along with our future bathroom plans).
Oh and welcome to the pantry! That’s right, watch the video to see it in action, because I know your brain is like: those drawers are too shallow to store anything! But we have big bags of chips, cereal, everything in there! It totally works just like the drawers we had in the beach house kitchen. Oh and do you remember where these two big bookshelf cabinet things were in our last house? Everything in our new house = a fun game of what-was-where-in-the-Richmond-house. Here’s a post that shows you the answer if you scroll down and look at the photos. And here’s a post where you can see pretty much everything & where it used to be in our last house.
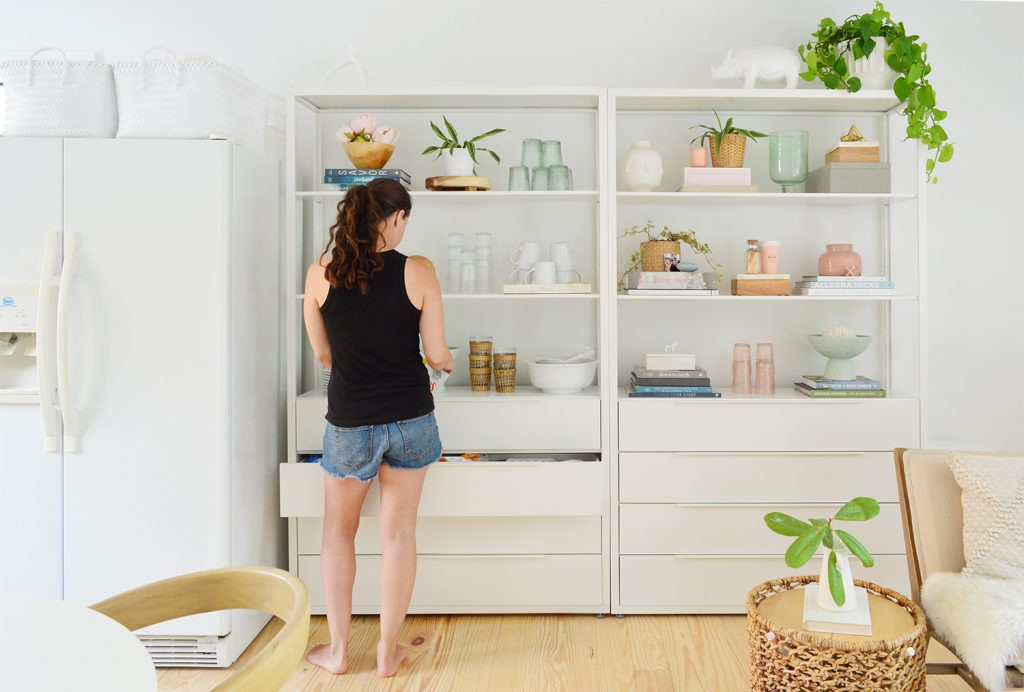
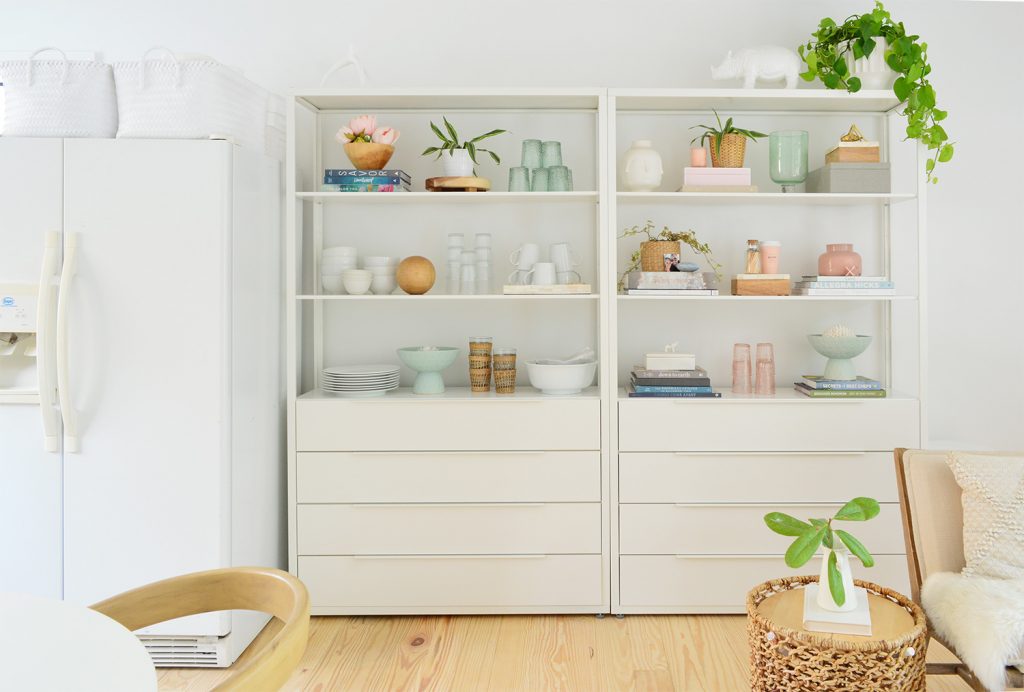
I feel like I keep saying “if you watched the video you saw…” because it truly gives you such a good sense of the space that photos can’t – but this room is so much more spacious than it seems (especially in the before pictures). About one third of the room is cabinets and counters and the fridge and then about two thirds of the space is the dining table, these two large bookcase/storage cabinets, and this little sitting area with a nice landing zone dresser full of storage by the door.
Here’s the before shot from this angle, just for fun.
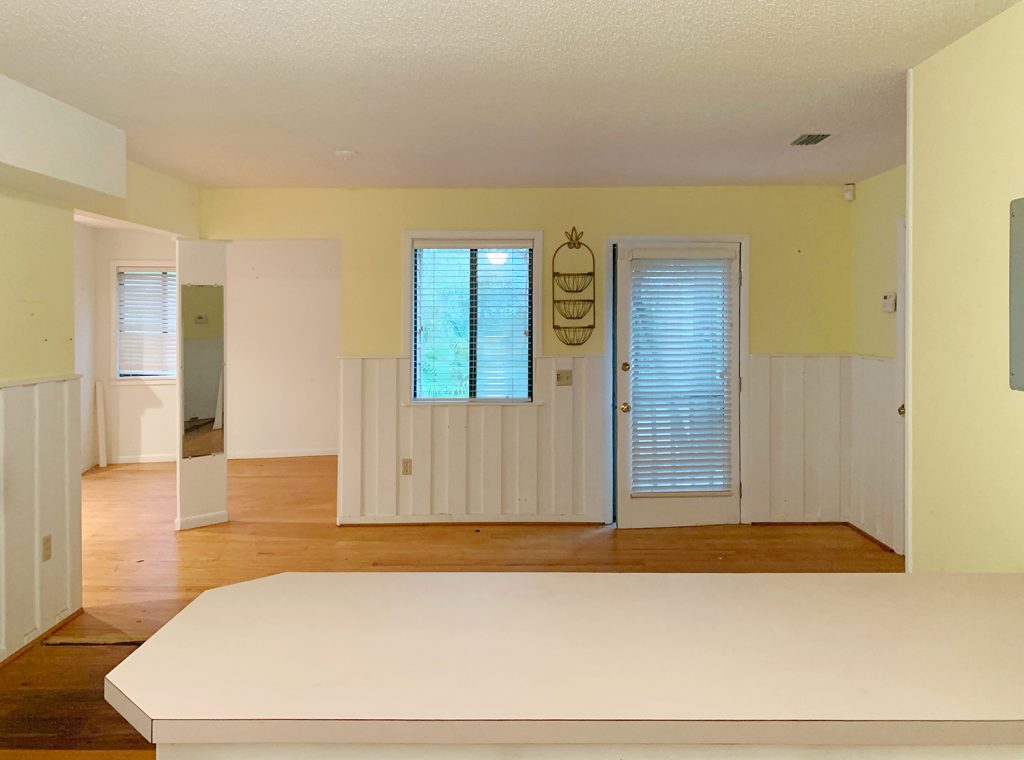
Closing off the larger doorway in the photo below gave us a lot more usable wall space both in the kitchen/dining/sitting room and in our bedroom. That’s the wall that our bed now rests against (you can see our glorious view from bed in this post).
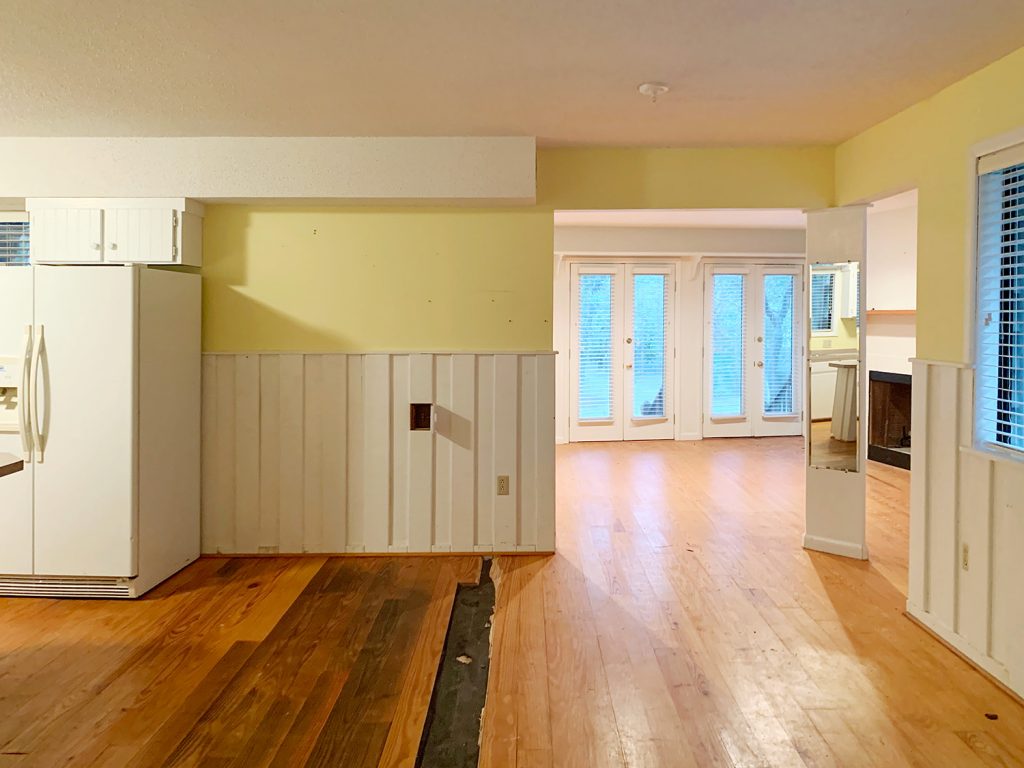
Definitely helps to have that added wall space for a second bookshelf/cabinet thing in here. We also like that we can store dishes and plates and bowls up there. Sidenote: Plants love Florida. Like I’m learning this is a legitimate thing. Burger has never been happier. Also my plants.
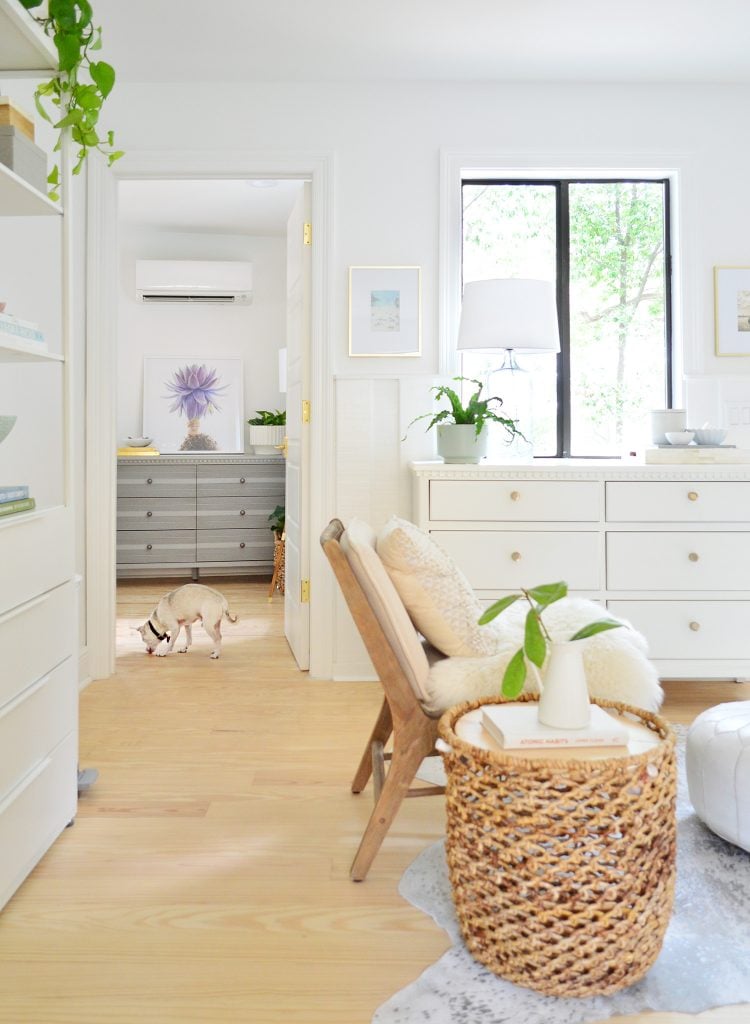
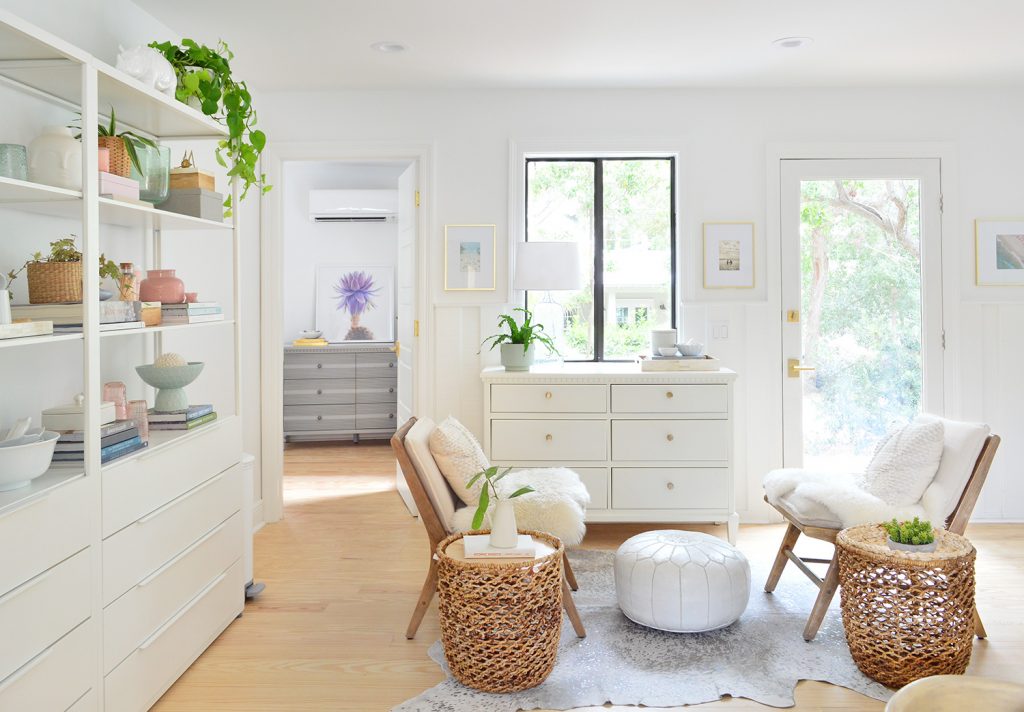
You get a much better sense of this sitting area (say it with me!) IN THE VIDEO, but this is me attempting to show you in a picture which is always trickier. I plopped these chairs down with a little leather pouf between them completely expecting nobody to use them and then my plan was to be like “well the main family room with the big sofa and TV is upstairs so why do I need a second little sitting room down here?!” but EVERYONE USES THIS SPOT.
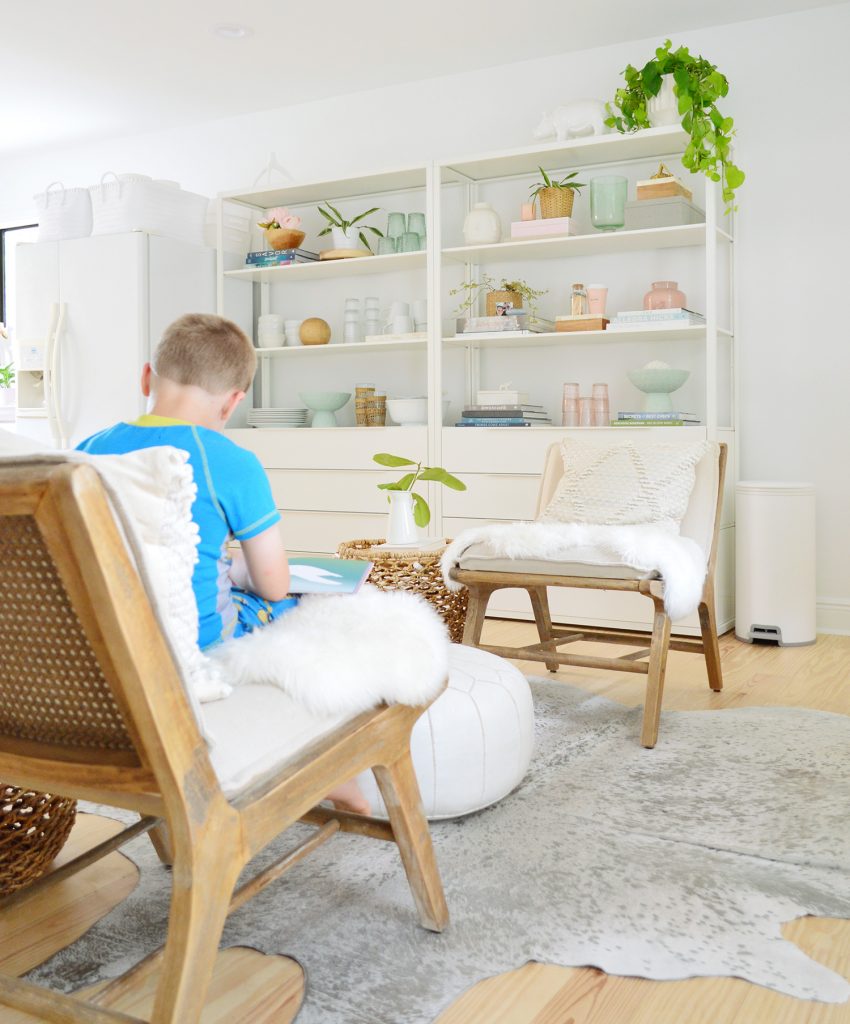
I’m so glad I gave it a shot because it turns out that a little sitting area is so nice for the kids to do sticker books while we cook. Or hang out upside down in these chairs while talking to us or each other (that’s a true phenomenon about these chairs – I’ve heard from other moms who are like “what is it about these that make children want to sit upside down in them?!”). Long story long: this little zone gets tons of use. I’ve actually heard from a few people who have two chairs on one end of the kitchen for sitting and enjoying coffee with a newspaper or casual visits with a friend who might stop by and I gotta say – I can vouch for the concept. It’s really nice.
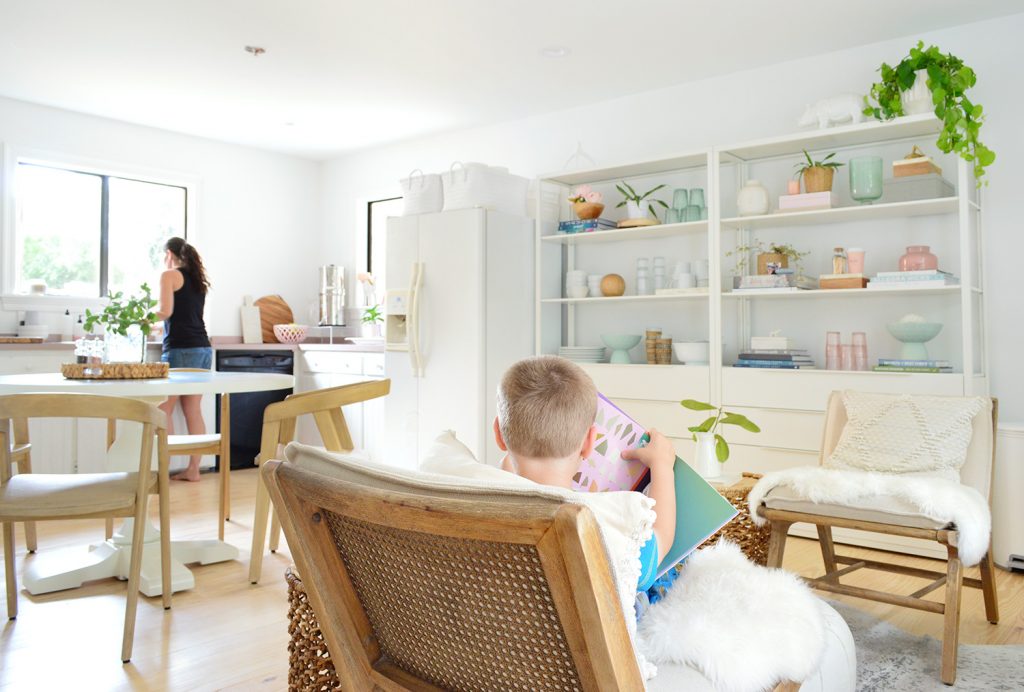
John and I sit in them too if one of us is working in the kitchen just to chat or hang out. Since I’m sure that’s hard to picture, here’s John watching Tiktok so you can see an adult in that area for scale. I believe this video had a cat pretending to be a snake. John is more entertained than he looks…
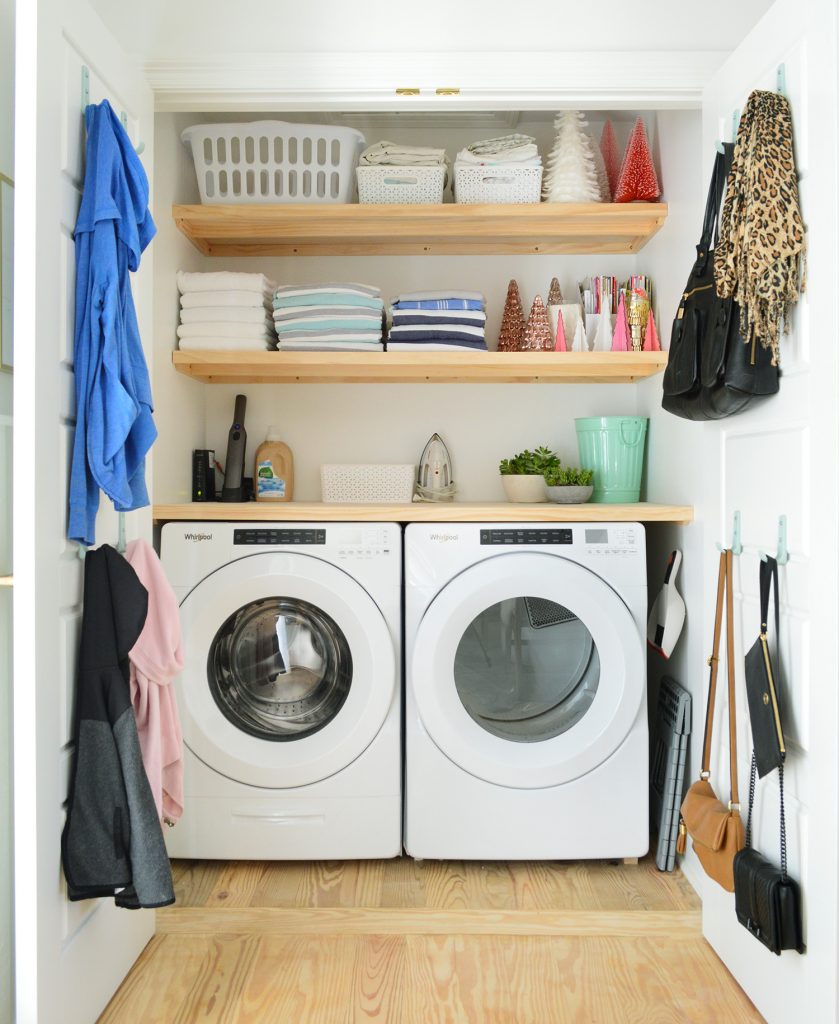
If you walk in our front door (which is seen in the photo above) there’s this huge laundry closet to your left that we added where there once was a very strange smaller double-sided closet that led into our daughter’s room (more on that here).
We added floating shelves in there and a nice big countertop for storage and folding so this closet WORKS SO HARD for us. We’ll have to do a post on how we built them soon because they’re game-changers when it comes to how much we can store in there. There definitely is a lot to tell you in the how-we-contain-all-the-things-in-a-house-with-three-closets vein! We’ll cover it all I promise.
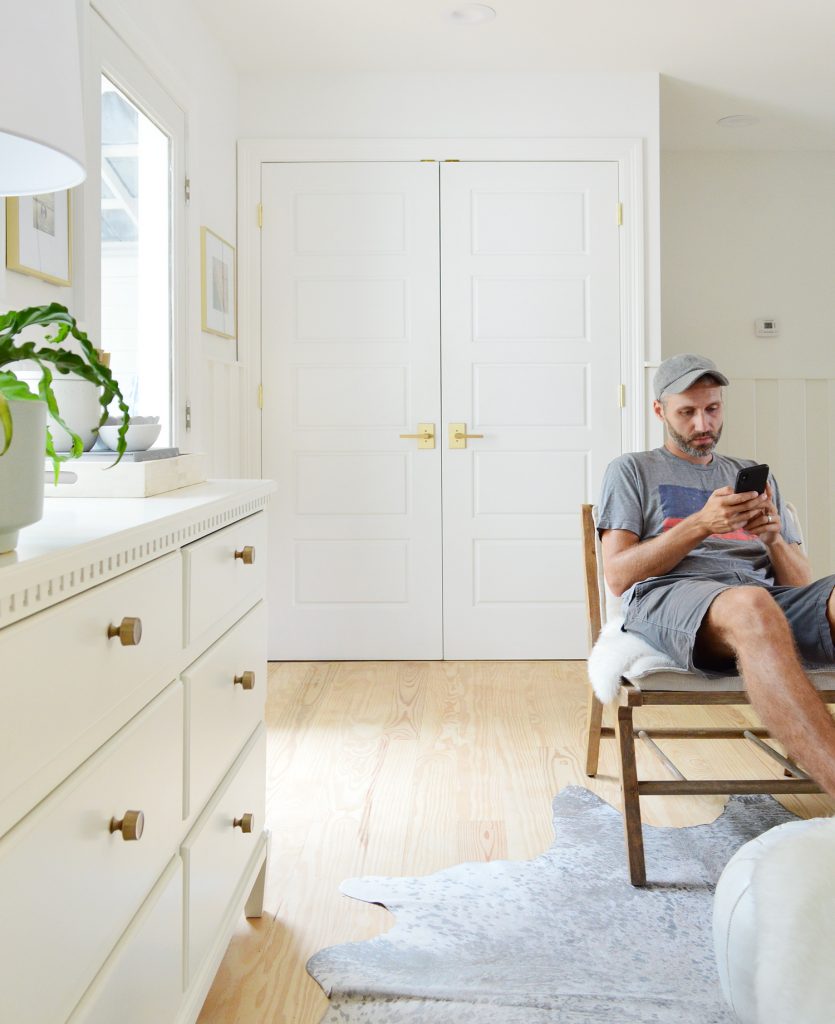
Oh and from this picture of John being a phone model you can also see all the space between our little sitting area and the dresser by the door which is SO SO IMPORTANT in the storage and function game. It’s a main walkway for us and there’s plenty of space to pass through, but also plenty of room to stand in front of the dresser and pull something out, which we find ourselves doing like 32 times a day.

The dresser has everything from sunscreen to Burger’s leash and doggy bags and all the other small items that it’s nice to be able to grab on the way out the door. It’s actually the old dresser from our bedroom but we changed the hardware to these simple pulls. Love all the brass in this house (Exhibit B: my beloved hinges and doorknobs, Exhibit C: my favorite gold frames).

Oh and see that woven “side table” in the photo above? It’s just a basket I had on hand with a lazy susan I also had on hand balanced on top (it’s actually held in place with three bottles of nail polish that I shoved through the basket holes around the top edge to support it). This room is a true testament to working with what you have. The second “side table” on the other side is another basket we already had with a simple Ikea tray resting on top to make a tabletop.

So yeah, this room is nowhere near finished, but things landed and they’re working surprisingly well! And perhaps best of all, our old appliances are also working surprisingly well! No complaints here at all. Although I had two of those Ikea baskets that I could have used as matching basket “tabletops” but I downsized one right before we moved. Ha! So you can file that under the one thing I actually missed after I got rid of it.
P.S. To see the evolution of this house you can click this category for just six posts that cover everything from the before tour and the progress updates to our exterior makeover and more.
*This post contains affiliate links, so we may earn a small commission when you make a purchase through links on our site at no additional cost to you.
