The big, colorful mural we recently painted in our daughter’s room was one of the most fun and impactful painting projects we’ve done in a while. It was a combination of both careful planning and some last-minute improvising that was so easy to do, even the kids broke out some paintbrushes to help. Plus, it extremely was budget-friendly too.
The whole thing was painted by hand, just using regular ol’ paintbrushes and rollers. No fancy paint sprayers. No projector. Not even any painter’s tape! So today we’ll talk you through:
- How to plan your wall mural
- The materials needed to paint the mural
- A step-by-step process for painting
- Why you can’t really screw this up!
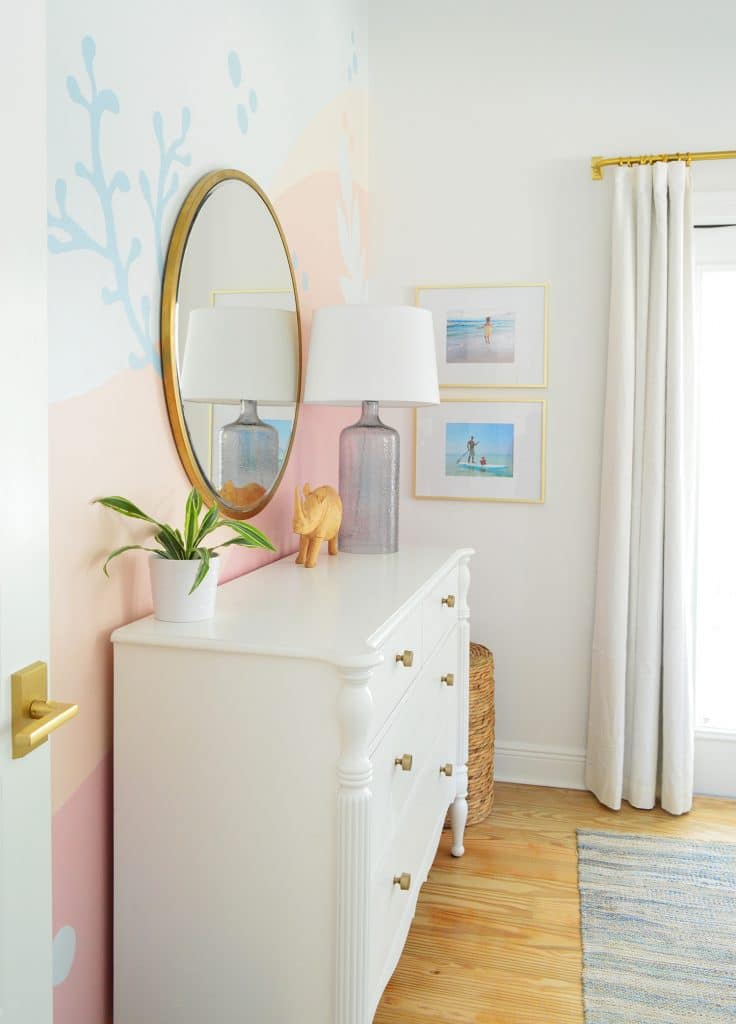
Our painted mural only took us about 5 hours of real working time to complete, but it was spread across 2.5 days since there was a lot of time spent letting parts dry before moving on to the next sections. But it was well worth it because it was exactly what the wall needed and the colors are so cheerful.
Materials & Tools
If you’ve ever painted a room before, then this material list will look quite familiar and – apart from the paint – you probably have most of this on hand:
- Quarts or test pot cans of each paint color
- Short-handled paint brush*
- 4″ or 6″ foam rollers*
- Roller try or roller tray liners*
- Ziploc bags for storing brushes and rollers*
- Drop cloth
- Pencil
- Measuring tape
- Ladder or stepstool
- Ruler (optional)
*Ideally you’ll have one of these items for each color you’re painting, that way you can keep a brush and roller available in each color until the mural is complete.
Step 1: Choose Your Wall
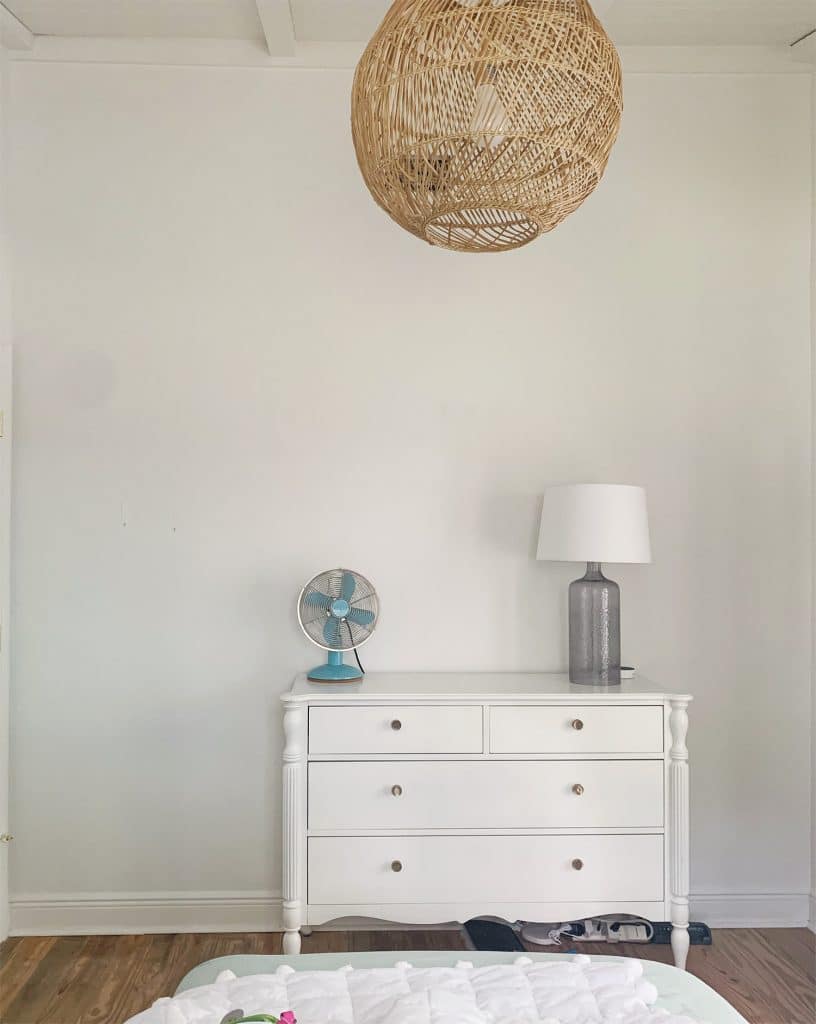
As you saw in last week’s post, we were able to vault the ceilings in this room as part of our renovation. It made her cozy room feel much bigger and brighter, but also gave us a big, blank 10-foot tall wall on the other side of her room.
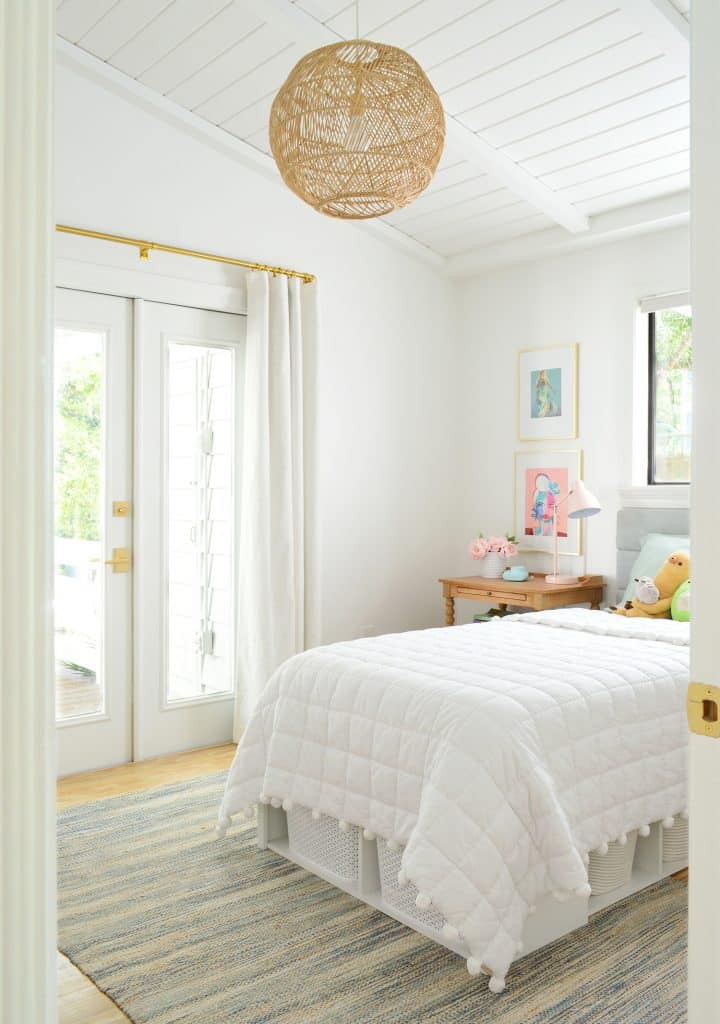
We’ve always had standard 8-foot ceilings, so having such a large wall to decorate was new to us. We’ve done gallery walls and removable wallpaper to add personality to blank walls before, but neither seemed right for such a large area. We haven’t had much practice in making visual sense of such a tall “canvas” – but we were excited to give something colorful a try.
Step 2: Find Your Art or Art Inspiration
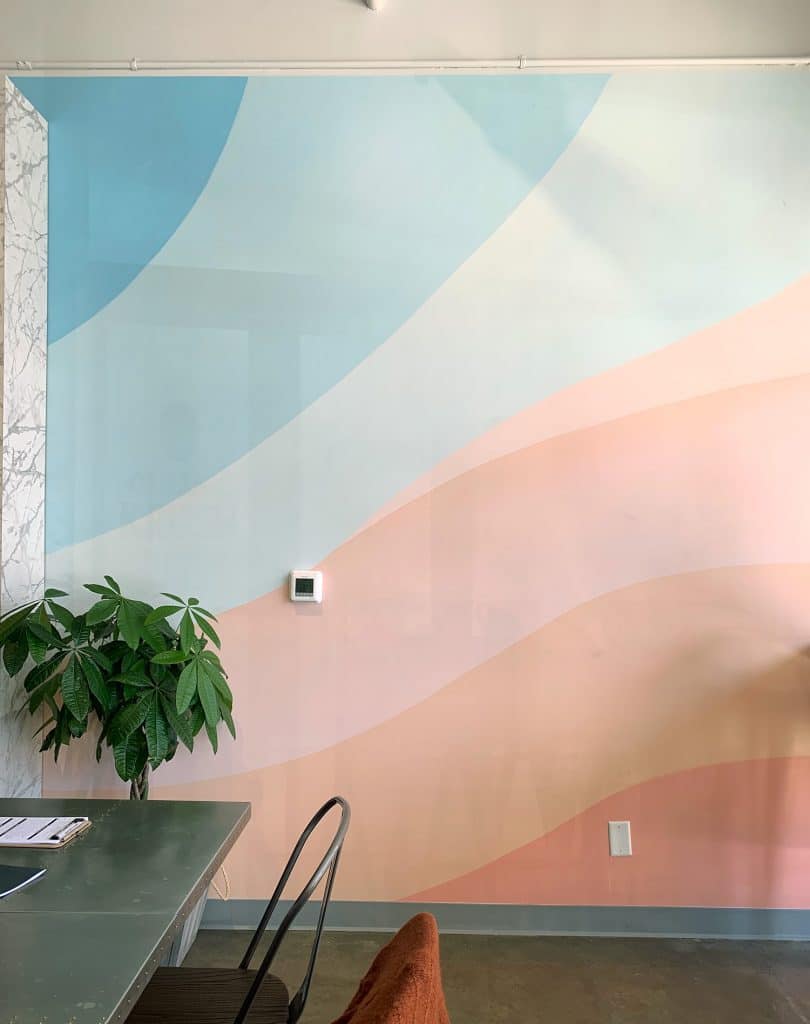
When we started talking about painting a mural on its wall, the photo below was the first thing that came to mind. Long before we had moved (back in 2019) we snapped this shot of an accent wall at a Richmond restaurant called Organic Krush. We learned that the extremely talented Richmond artist who did the mural is Eli McMullen who we then got to connect with & got his blessing to share this project.
We loved the colors. We loved that felt both energetic and relaxed at the same time. We also loved that it would be easy to paint ourselves. Long story short: we all loved it, including our daughter.
But if you don’t have anything in mind, a simple search for “abstract mural” or even “abstract artwork” on Google or Pinterest should help you find some inspiration.
Step 3: Mock Up Your Mural On Paper
The great thing about abstract designs is that they don’t need to be precise and there’s lots of room for error. But with some simple planning, you can make your life easier when it comes time to transfer your design from paper to wall.
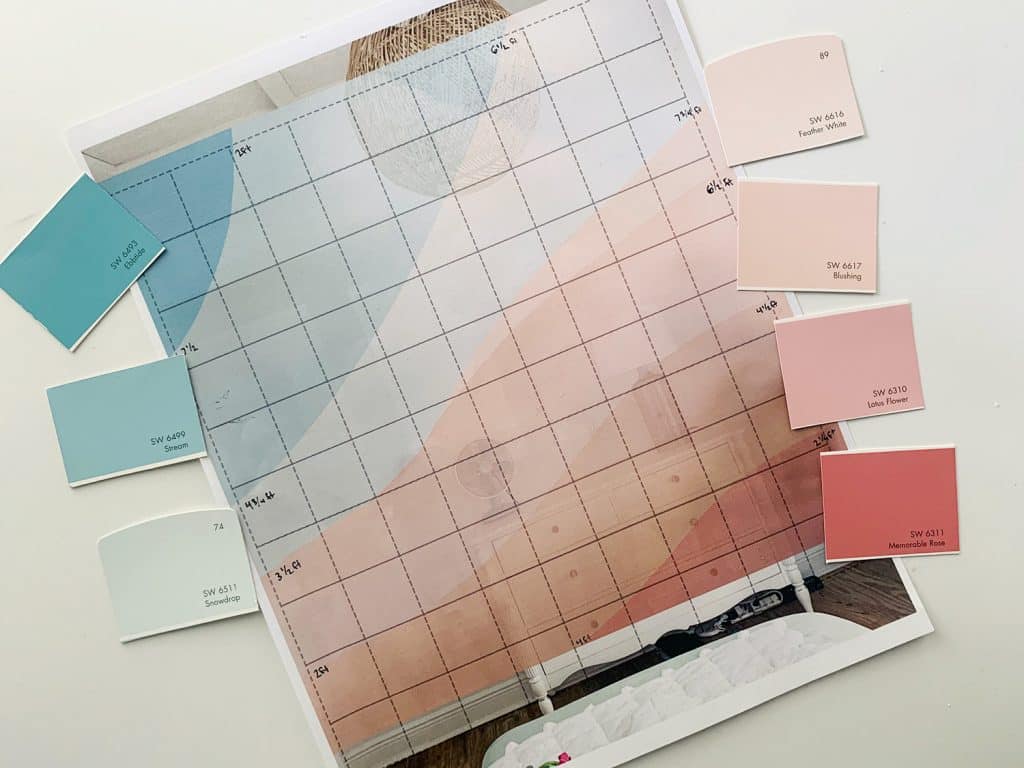
We used Photoshop to digitally overlay our inspiration onto the photo of our daughter’s wall to see how the dimensions match. If you don’t have Photoshop, we share another method later in this post using just your phone. I’ll also talk about the paint color swatches and the grid more in a moment.
This mock-up step is optional – especially depending on how much you’re trying to adhere to your inspiration. We weren’t married to making every curve exactly the same (that’s the beauty of an irregular pattern like this). For us it was just a nice guideline, and it certainly didn’t hurt to have this to map our design onto the wall, which brings us to our next step.
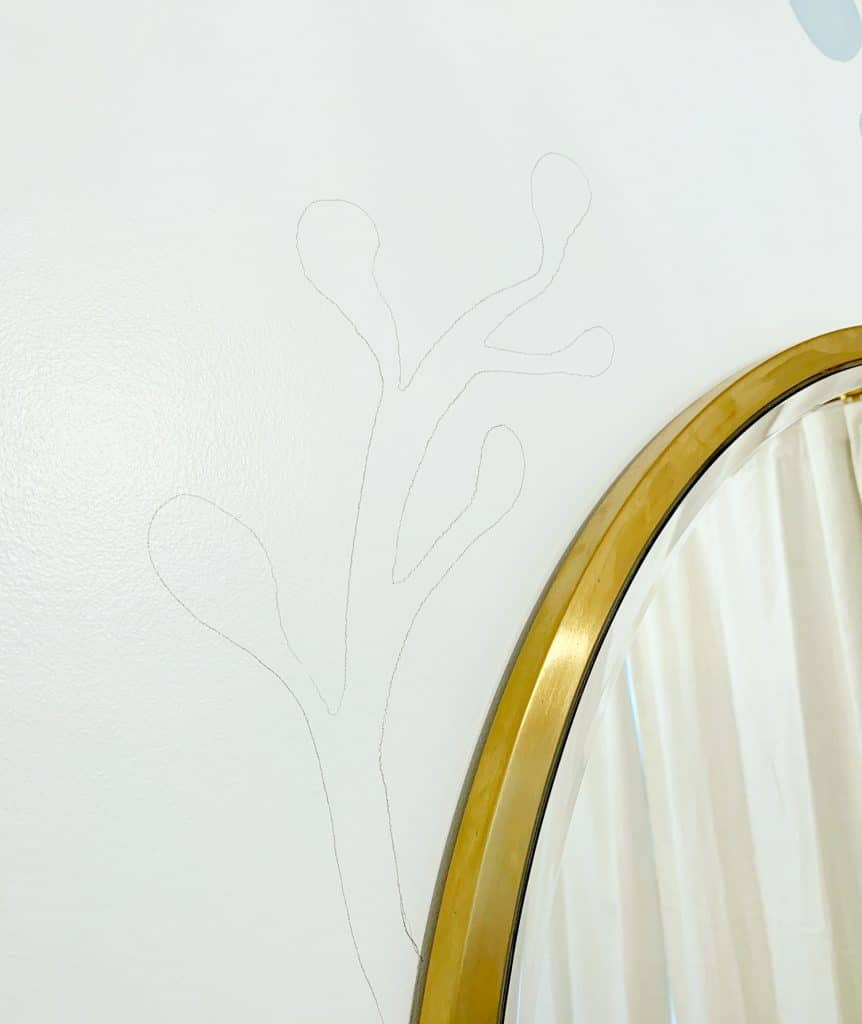
Step 4: Trace Your Design Onto The Wall
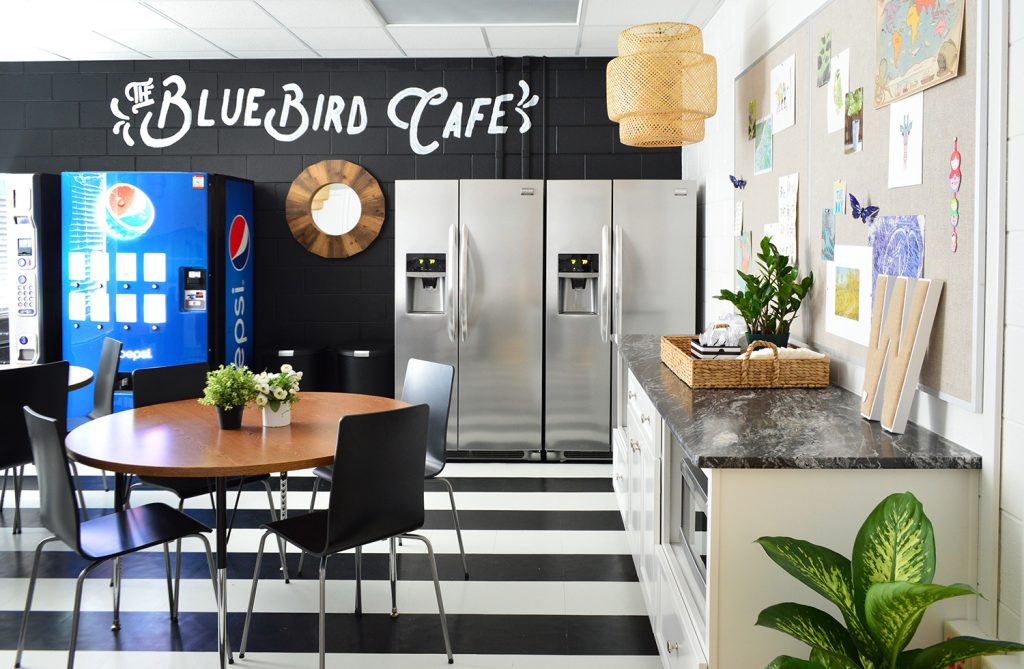
A popular technique for transferring a design like this to your wall is to use a projector – like we did for the lettering on the wall in this teachers’ lounge project shown below.
But this time we didn’t have a projector handy – and again, we were just going for “similar” and not “exactly identical” – so we used the older but still pretty reliable grid method. We overlayed a 1×1 grid onto our mock-up (each square being 1ft) and used that as a guide for roughly where each stripe terminates into the side walls, ceiling, or floor. We did this in Photoshop, but you could add it with a ruler and pencil too.
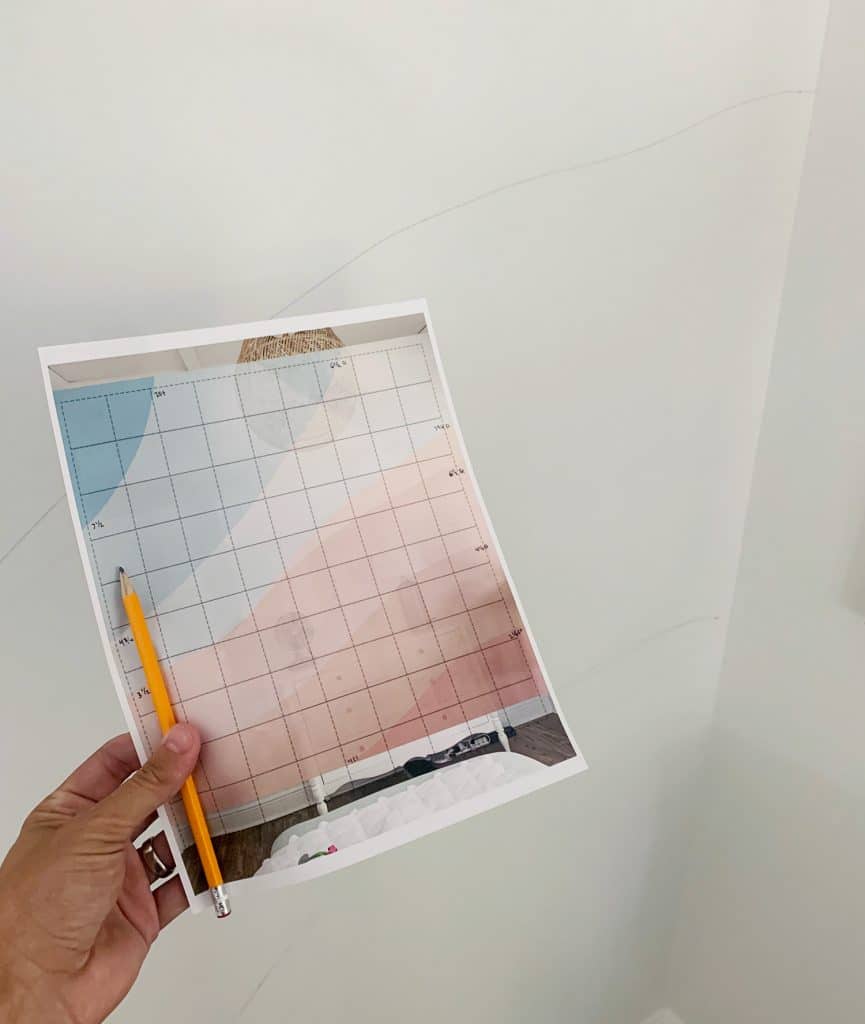
Using a pencil and a tape measure, we marked those “termination points” on her wall and then we connected them by drawing the rough shape of each curve. You can see in the picture above that it’s still pretty imprecise (read: wiggly) at this point, but that’s totally okay. You can can even things out while you paint. Just be sure to step back and check that you like the general spacing/size/shape of each stripe. If you don’t, just erase that line and try again.
Step 5: Choose Your Paint Colors
To pick our paint colors, Sherry broke out a few paint decks and we considered a variety of swatch combinations until we had final approval from our lead designer (aka: our 10-year-old). We ended up choosing lots of colors that were on the same swatch card (just moving up or down to go darker or lighter) which is always a pretty no-brainer way to be sure things will look good together. We stayed close to the original colors, but this design would work with a totally different palette too.
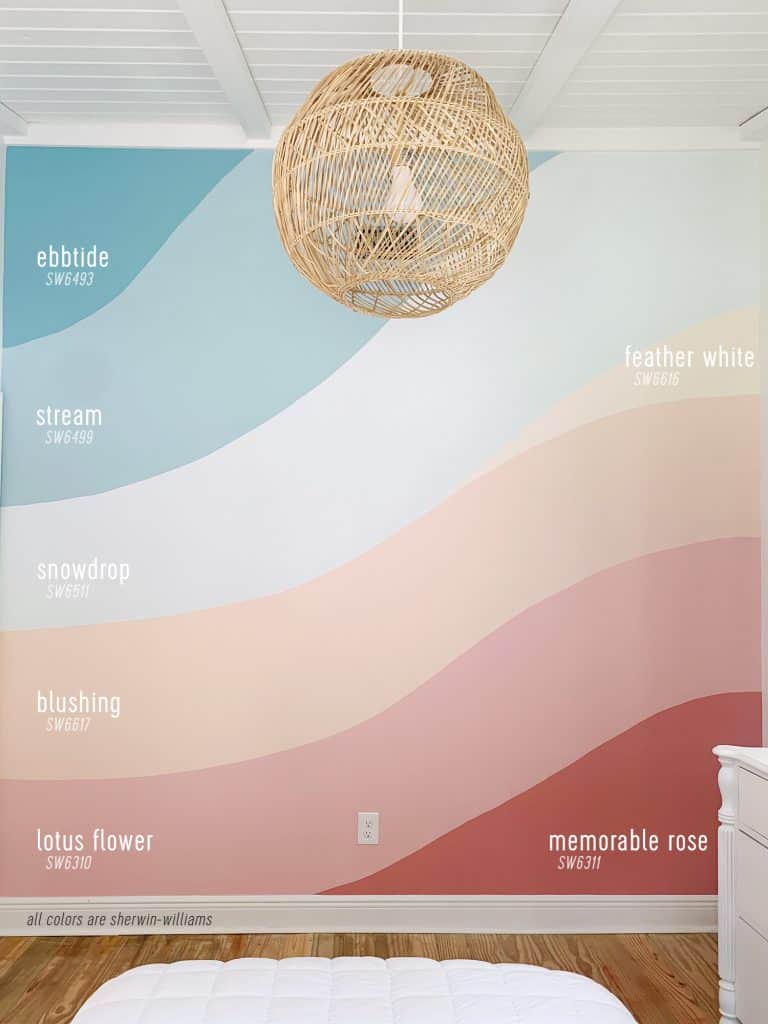
Here’s a list of the colors we landed on, all by Sherwin-Williams:
- Ebbtide (SW6493)
- Stream (SW6499)
- Snowdrop (SW6511)
- Feather White (SW6616)
- Blushing (SW6617)
- Lotus Flower (SW6310)
- Memorable Rose (SW6311)
You can see them all labeled in the graphic below:
Step 6: Purchase Your Paint
We purchased quarts of each paint color in regular latex paint, in an eggshell finish. We could’ve used smaller test pots for some of the smaller stripes, but Sherwin-Williams doesn’t sell anything smaller than a quart (try Lowe’s or Home Depot for those). It cost us about $50 in paint for the 7 quarts, but thanks to Shavonda’s $15 off code at the end of this post we were able to save a little bit more (we were buying some other paint for another project which put us over the $75 spend minimum for the coupon).
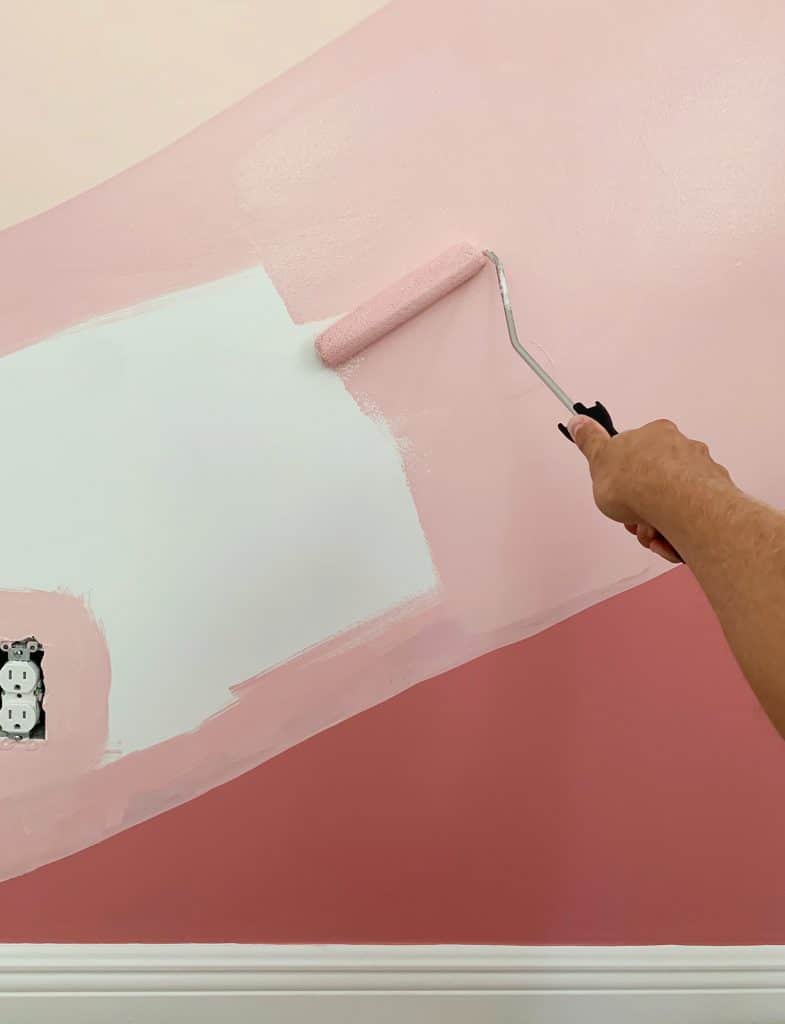
Step 7: Paint Your First Set Of Stripes… Roughly
A mural like this takes some patience because you have to let each color completely dry before painting the one next to it, otherwise you risk bleeding or unwanted mixing of your adjacent colors. So the most efficient way to approach this is to paint alternating stripes. We started by doing these three “base stripes” first using a small foam roller for most of it, and a brush for the edges. We did two coats of paint on each color.
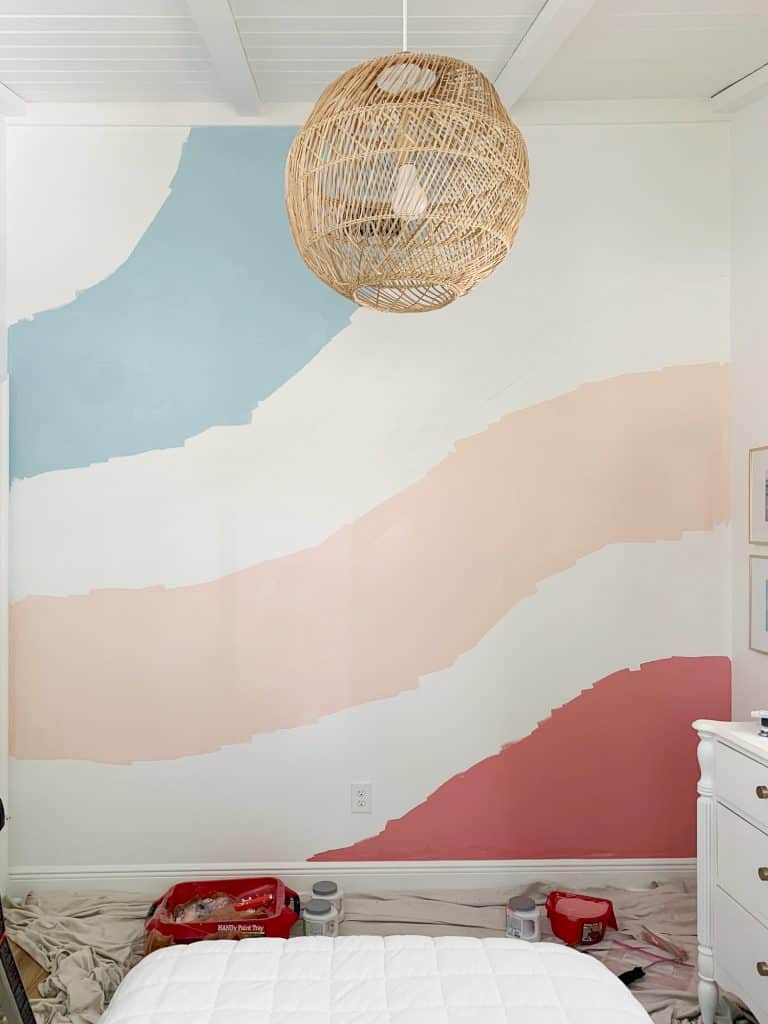
As you can tell, we weren’t worried about getting our edges perfectly crisp at this stage. In fact, we intentionally rolled OVER our pencil lines by a few inches so that we were sure not to end up with any white peeking through the color transitions in the end.
TIP: Store your brushes and rollers in plastic bags until the project is complete, just in case you need to go back and do any touch-ups later.
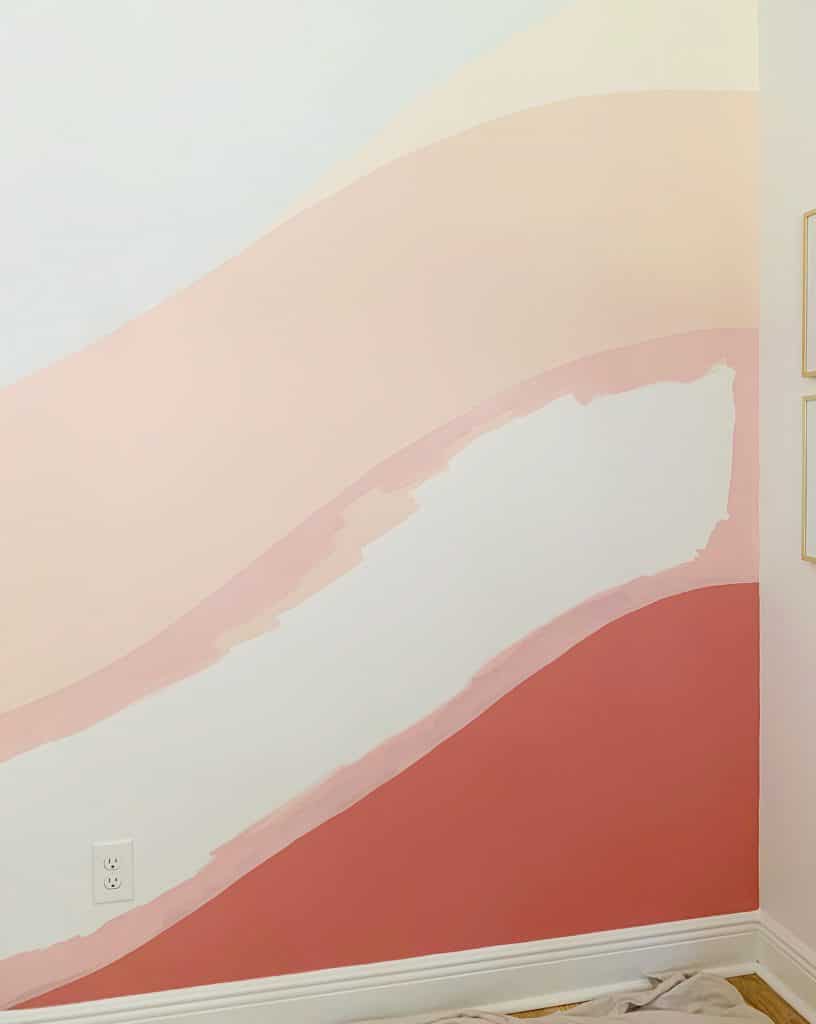
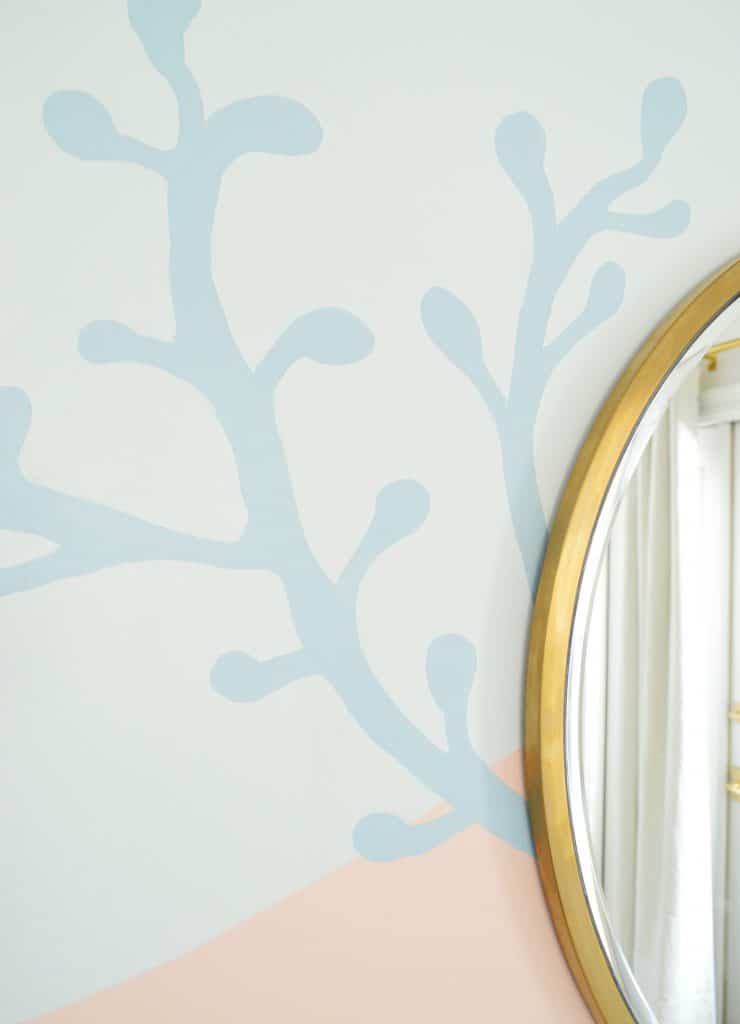
Step 8: Edge Your Next Set Of Stripes… Carefully
Once the second coat of each “base stripe” was FULLY dry, you can start using a steady hand to paint crisp borders between your two colors, which will lead to the clean curves you’re going for. We relied on our favorite short-handled paintbrush (the same one that we always use for cutting in & painting trim) to define the curve between our two colors.
This part is definitely more art than science (especially since we had painted over our pencil lines at this point) but here are a few tips we discovered along the way:
- Aim for long strokes, even if your brush starts to run low on paint. Your curves will be less wiggly than trying to do a bunch of shorter connected dashes. You can always add more paint after you’ve gotten your curve right.
- Don’t use a lot of pressure OR a lot of paint. This can lead to a raised bead or ridge of paint along your edge. If you get one, just carefully feather it out with short vertical strokes (effectively brushing it up or down, away from the edge).
- Go slow, be patient with yourself, and be willing to let your design evolve along the way. We certainly did!
Step 9: Fill In Your Stripes With Paint
Once you’ve got the first coat of your edges done, then you can go back and fill in the rest. We used some small 6″ rollers since we were doing relatively small areas.
Remember that things will probably take two coats – especially the darker colors and where two colors overlap. So be careful follow your own edges on your second pass. But don’t worry, we found that easier because at least you’ve already figured out your curves.
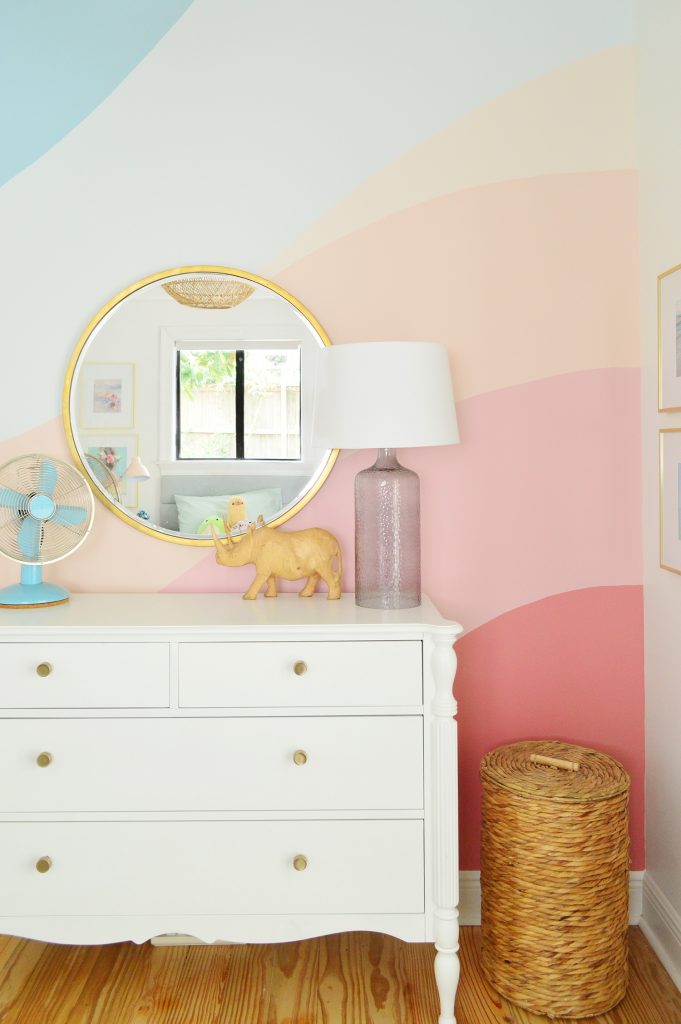
Step 10: Step Back & Adjust As Needed
Once your second coat is done on everything, you MAY be done. But it’s always good to step back and take one last look at everything. Our daughter thought the darkest blue section was looking too much like a big blue sun just barely peeking out in the corner, so we took some artistic license and repainted the top edge so that it curved out and was a lot less ball-like.
Again, you may not need to this, but we were glad we had kept our brushes in ziplock bags throughout this process so it was easy to subtly adjust some of the sections. This is also why it’s good to minimize those “ridges” along the edges, since they might give away places where you originally painted your line but later shifted things a bit.
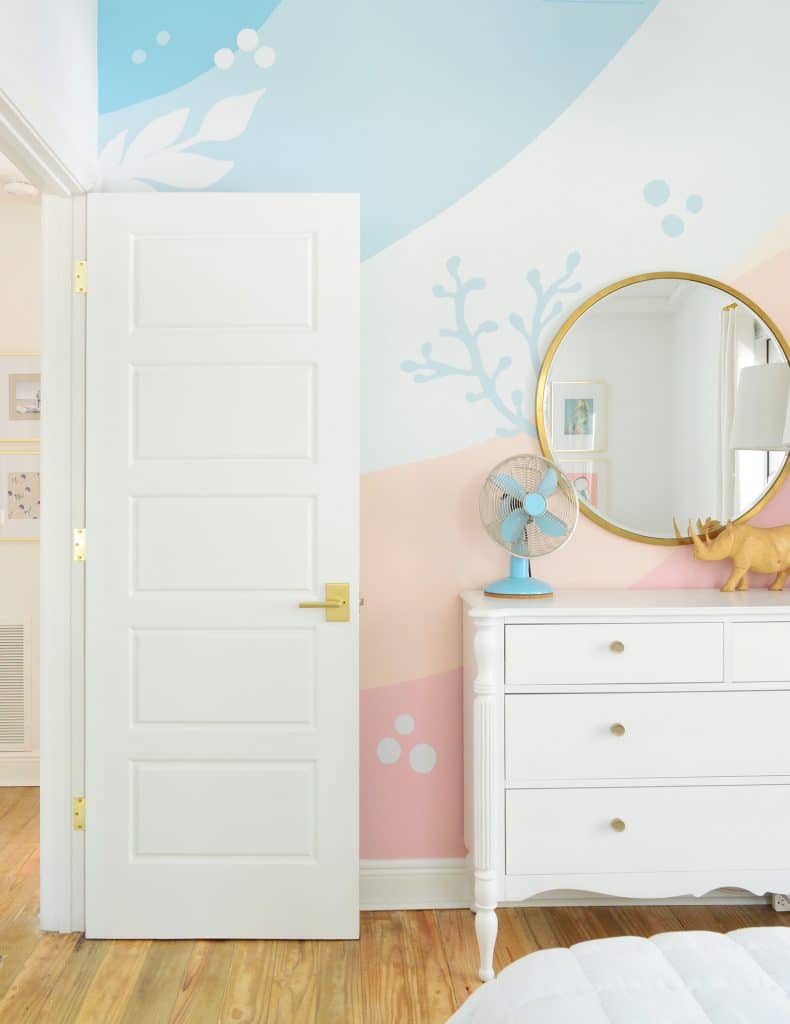
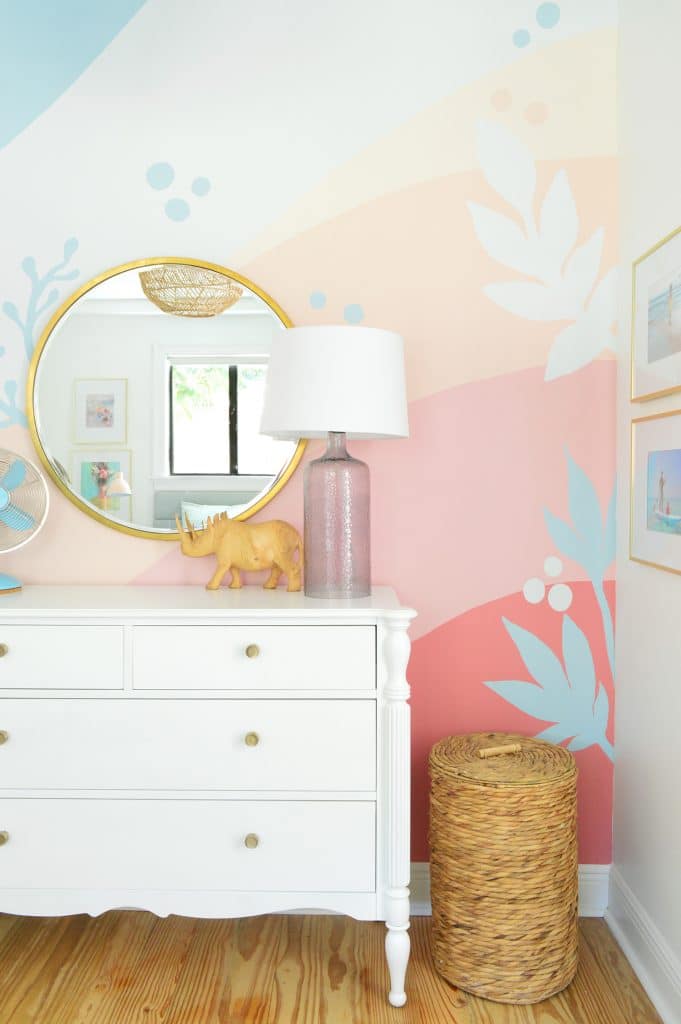
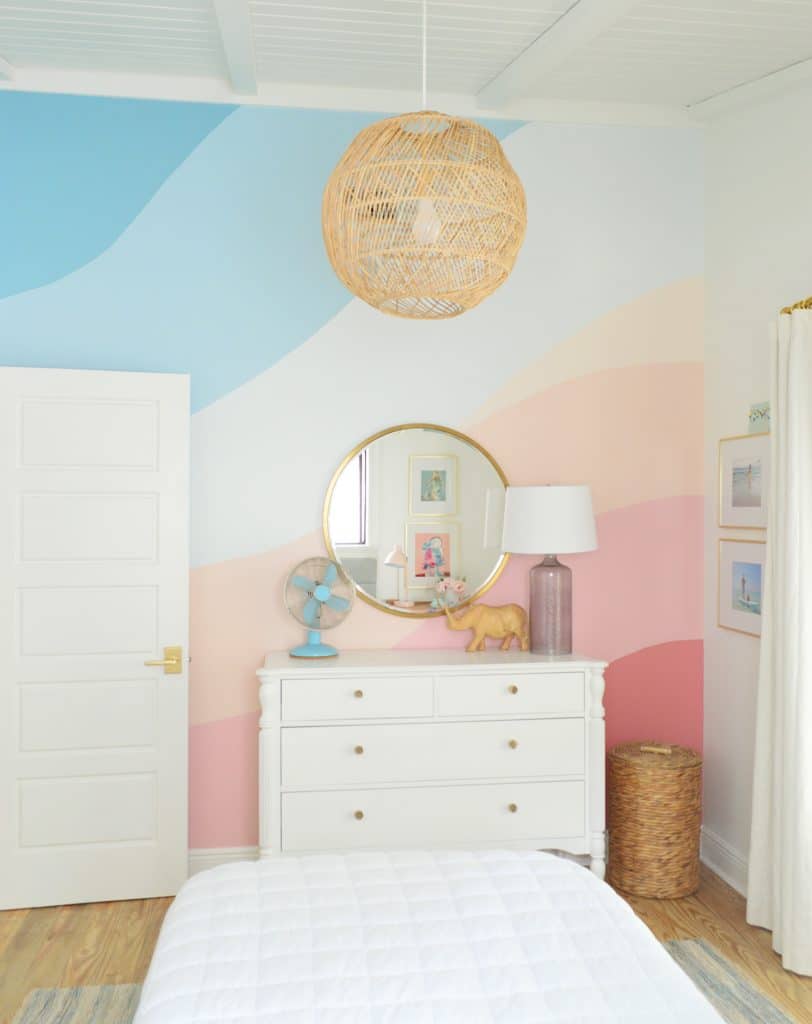
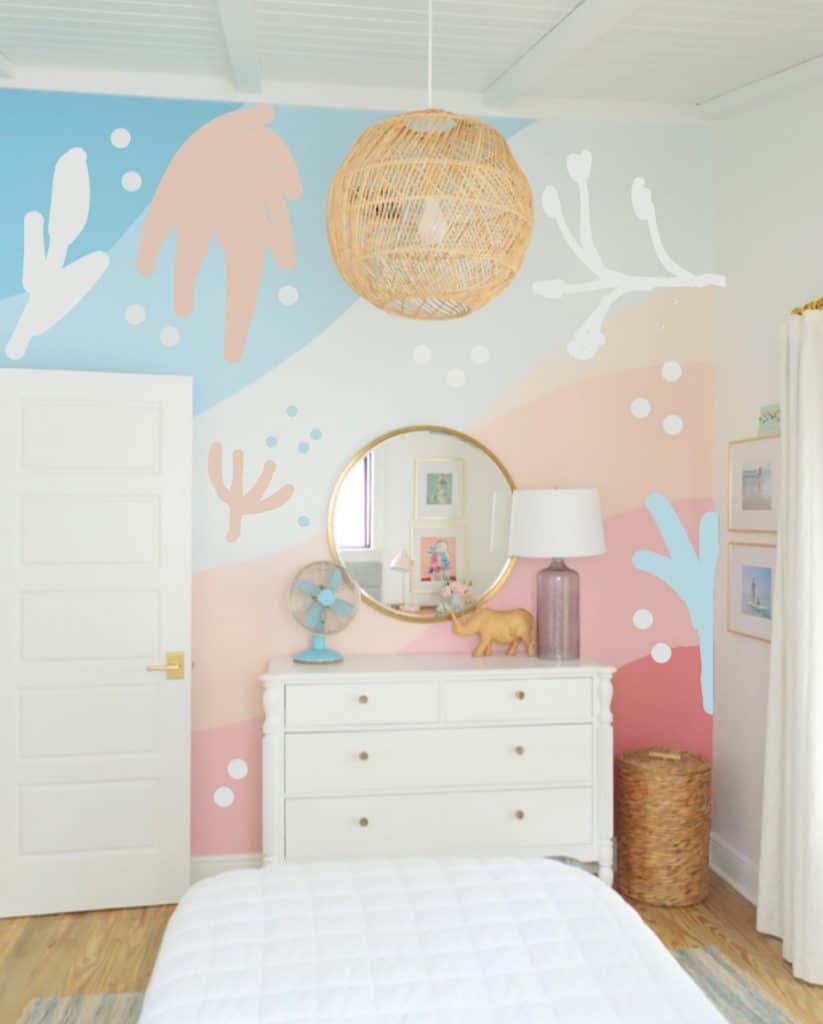
Step 11: Improvise! Have Fun!
Here’s where this project takes a right turn, because a few days after we originally revealed “the finished wall” that you see above, our daughter woke up and was like “I want to paint MORE on the mural!” And well, you’re only ten once, so… WE WENT FOR IT!
This process of adding the beachy elements was not too dissimilar from how we painted the original stripes. This time, instead of planning in Photoshop, Sherry and our daughter used Instagram Stories to very roughly doodle over a photo of the striped mural (just using the paint brush tool). This gave them a rough idea of what types of shapes they might want to add.
Then they just used a pencil and sketched on the wall itself, stepping back to see what they liked – and erasing (either with a pencil eraser or a Magic Eraser) whatever doodle they didn’t love. This is actually pretty hard to mess up because if you don’t like it you can just paint over it and “delete” it.
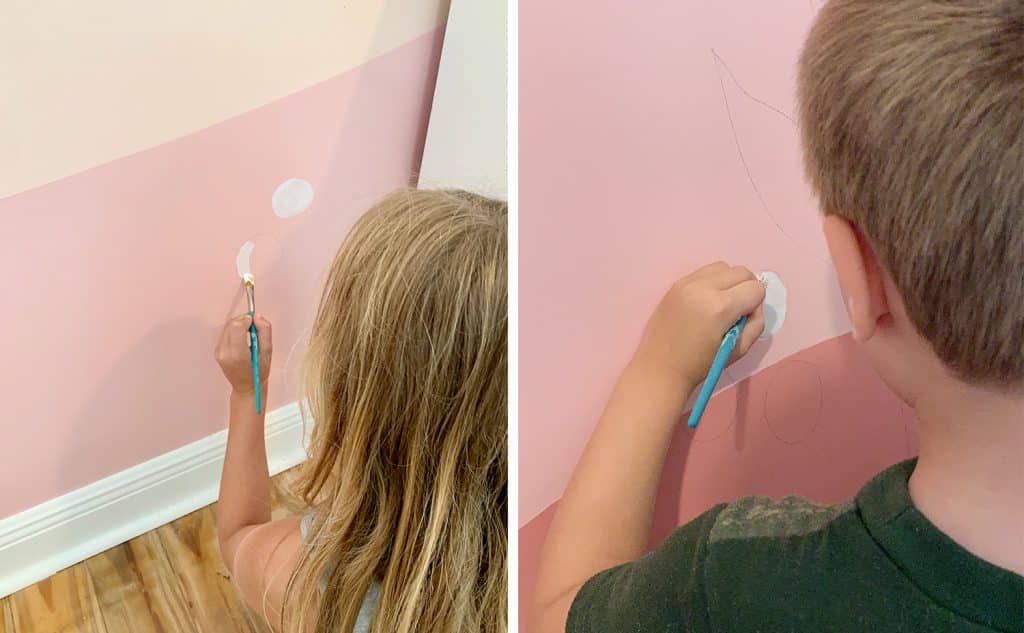
Then we filled in the pencil doodles with the same paint that we had used on the stripes of the mural. It took about 2-3 coats of paint applied with a small paintbrush to get nice crisp coverage, but once it’s all filled in and even, it looks great.
It only took a couple more hours to do and it was great because we could get the kids involved painting some of the lower parts (which gave them a sense of ownership and pride over the project, making them love it even more). Yes, there were some touchups – but it’s great to involve kids in projects like this when you can – especially if it’s for their own spaces.
Note: you can see some quick videos of the kids painting this in the archived circle on our IG profile page (click the circle below our bio that says Murals).
A tip about kids + wall paint (which seems scary, but I’m telling you even our six-year-old did a great job): frequent hand washing is a good idea between kids if they’re taking turns, so that while one has the brush and is working on a certain shape, the other one isn’t accidentally smearing their painted hands on the rug or the bed while they wait for the next turn.
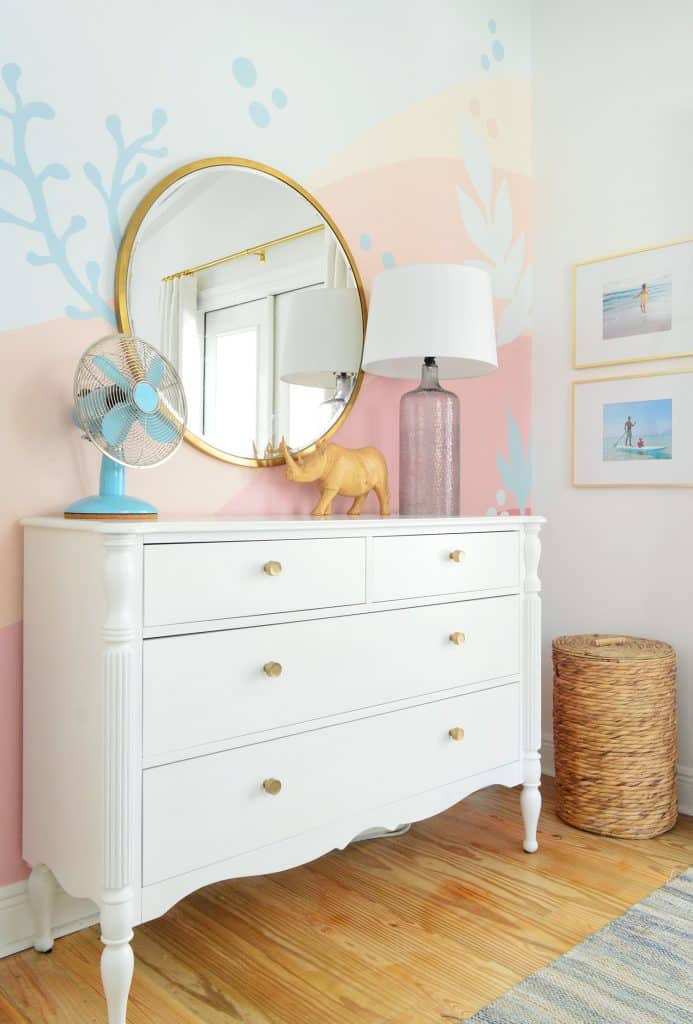
A mural painting project like this makes so much sense of that big wall without us having to rely on a large frame gallery or too-tall inaccessible bookshelf situation to fill it in. Plus, it’s easy enough to change if our daughter ever wants to add more or subtract something down the line (it’s just paint!).
And if painting a mural still seems too scary, check out this colorful planked wall treatment we did in our son’s room that requires no artistic talent whatsoever!
P.S. To follow along with our entire reno of this house, you can see every single update we’ve made right here in this FL House archive.
*This post contains affiliate links, so we may earn a small commission when you make a purchase through links on our site at no additional cost to you.
