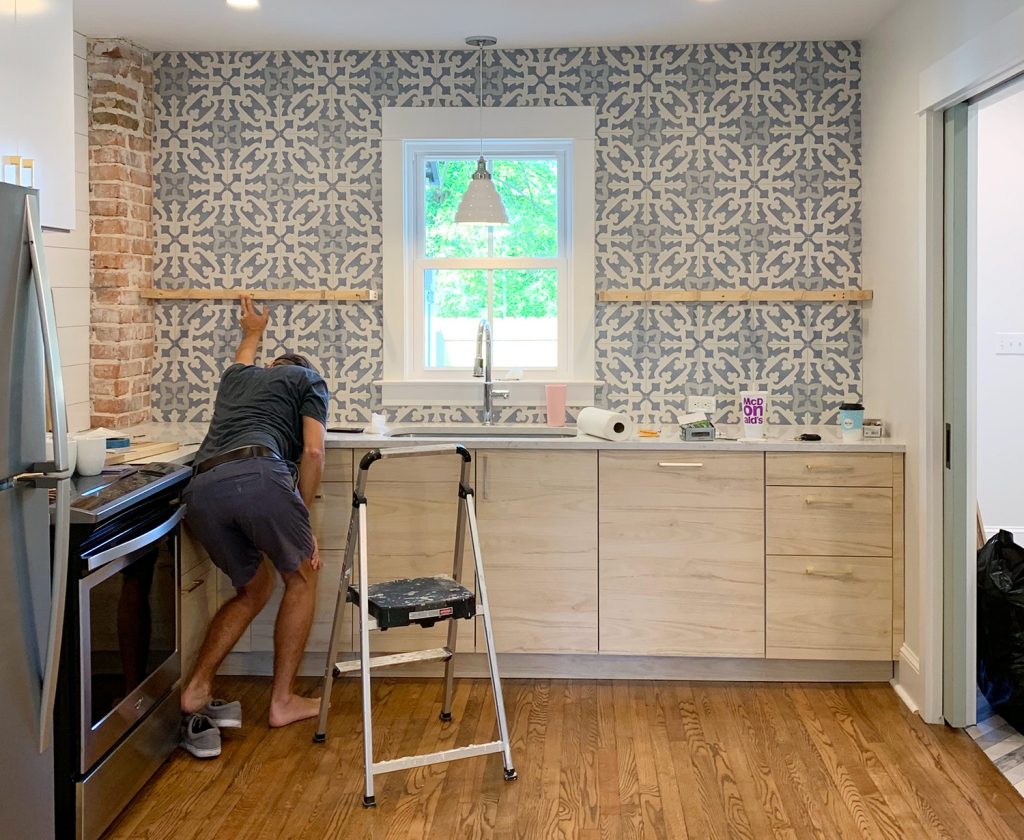
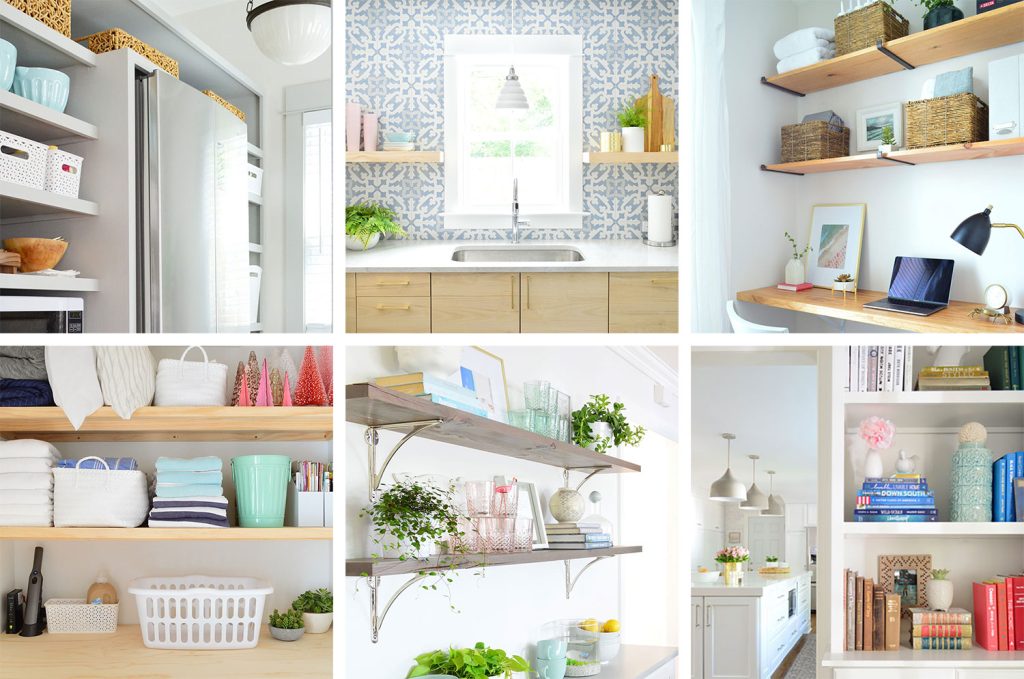
We’re big fans of floating shelves in kitchens. They’re functional, stylish, and create breathing space around all that cabinetry. We’ve had some version of them in nearly every kitchen we’ve remodeled, but our favorites are these DIY floating shelves in the kitchens of our duplex. Today’s tutorial will show you how to build them for your own kitchen.
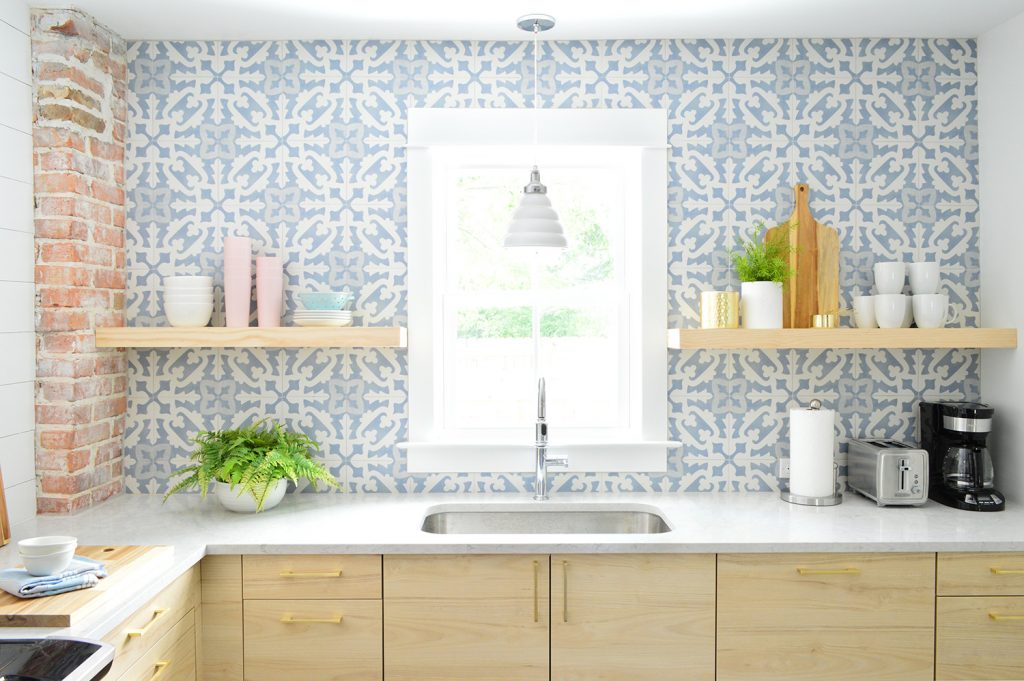
Building your own floating shelves is a great way to fit them precisely to your space AND get the exact finish you want. We’ve used storebought floating shelves in kitchens too – like these chunky Ikea shelves and rustic Pottery Barn shelves – but they’ve never looked quite as custom as our DIY floating shelves.
Tools & Materials for Floating Kitchen Shelves
This project is an adaptation of these white floating shelves we built for our bonus room. These kitchen versions are slightly chunkier and were stained a wood tone, rather than painted. But be sure to reference that tutorial as well for more information. Here’s what you’ll need on hand for this DIY project.
- 1×2″ pine boards (for support bracket)
- 1×3″ pine boards (for facing)
- 1/2″ plywood (for the top of each shelf)
- 1/4″ plywood (for the underside of each shelf)
- Miter saw
- Table saw or circular saw
- Power drill/driver
- Nail gun
- Long level
- Measuring tape
- Stud finder
- Clamps
- 2 1/2″ structural screws
- Wood glue
- Pocket hole jig (optional)
- Tile hole drill bit (for kitchens with backsplashes)
The exact amount of wood will depend on the number and size of shelves you’re installing.
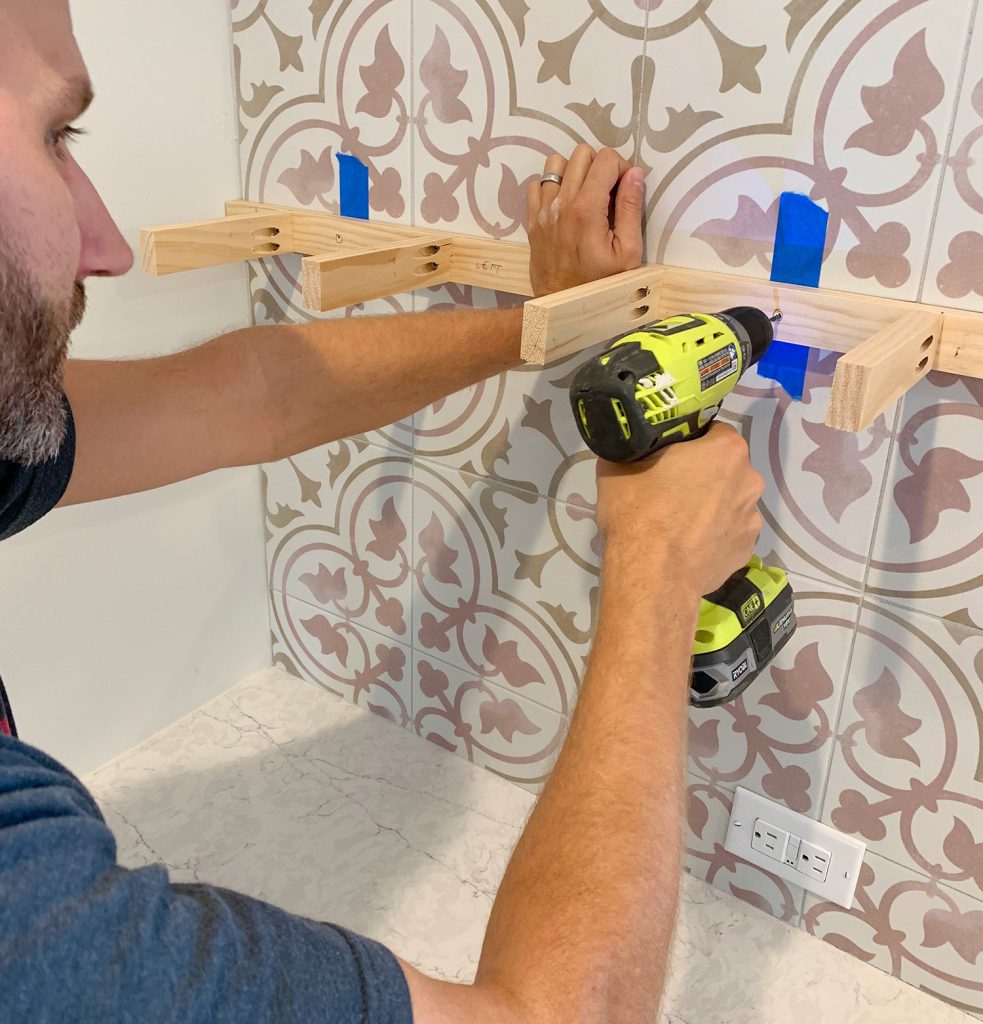
Step 1: Build Your Support Bracket
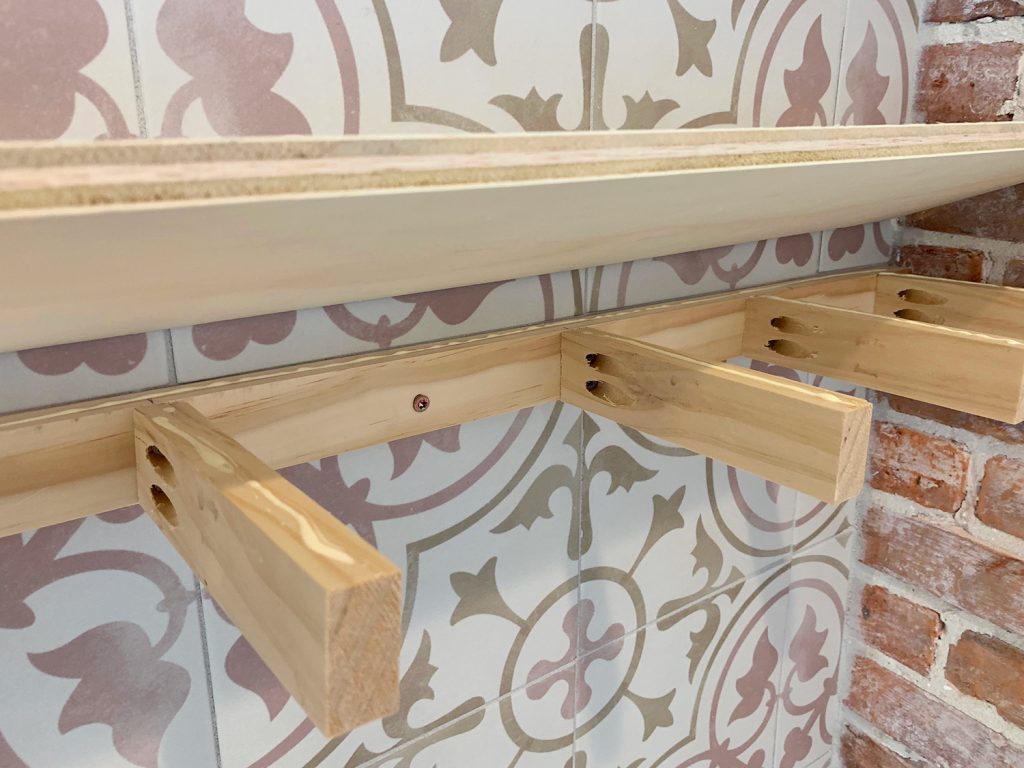
The photo below illustrates the general construction of these floating kitchen shelves. They’re held up by a wooden support bracket that is screwed into wall studs. Then you hide the bracket with plywood on the top & bottom and 1×3″ pine around the edges.
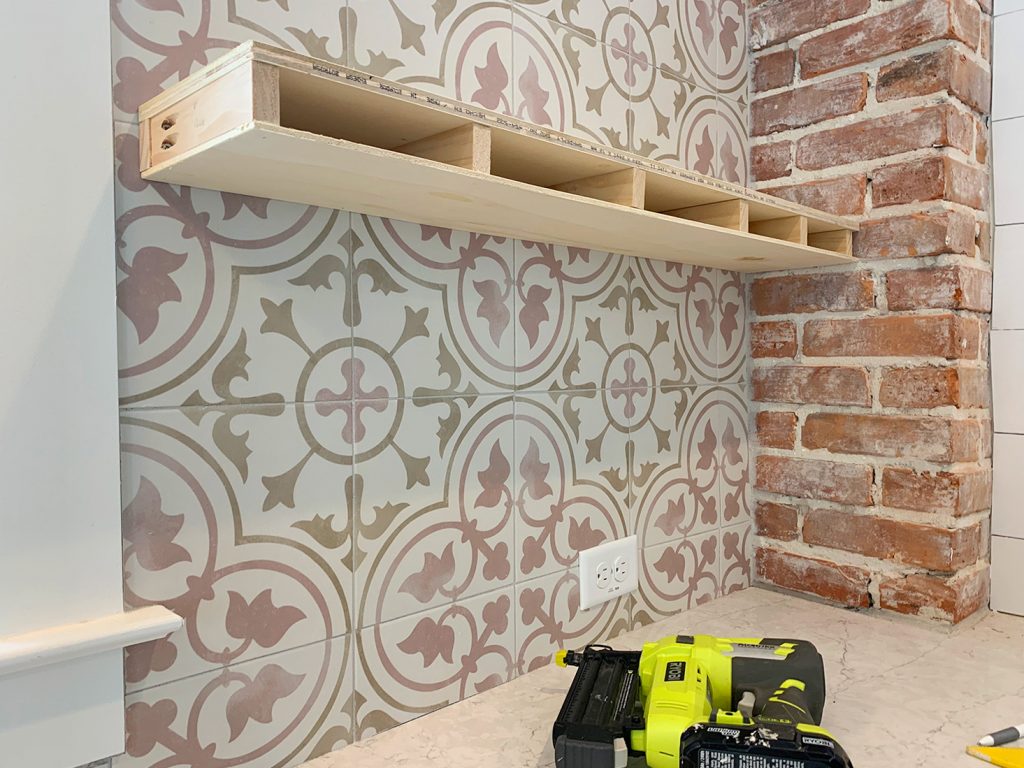
The support bracket is built with 1×2″ pine boards. One long piece goes across the back, and shorter spokes stick straight out to support the shelf. We try to place a spoke at each end and every 8″ or so in between. Just being careful not to add one where you’ll need to screw into your wall stud.

The spokes should be cut to the desired depth of your shelf MINUS 1.5 inches. This accounts for the board along the back of the support AND the one you will add to the front in the end . We attached the spokes using pocket holes made with our Kreg jig. You can also just screw them in from the back. We made all of our cuts and pocket holes at one time for efficiency. The photos below are from our skinny DIY floating shelf project where we installed the spokes flat for lower profile shelves.

You can also use thicker pine boards to make your shelves even chunkier. Our 1×2″ pine support bracket gave us a finished shelf thickness of about 2.75″ (once the plywood was added on top and bottom). But you could use 1×3″ pine instead for a 3.75″ thick shelf.
Step 2: Find Your Studs
Next, you’ll screw your support bracket to the wall. But first, you’ve gotta locate your wall studs. This will make your shelves strongest. You can use certain wall anchors too, but they will limit the amount of weight you can safely put on your shelf. And things like plates and glasses get heavy fast!
This is our favorite stud finder but, unfortunately, it’s less accurate over a tiled backsplash. Luckily, we had found and recorded the locations of our studs before we tiled. If your wall already has tile, you may need to purchase a heavier duty stud finder.
Alternatively, you can use other clues to locate your studs. Look for where outlets are installed, since they are often secured into the side of a wall stud. Check inside your cabinets (especially uppers) to see where they are screwed into the wall, since they were likely attached into studs. We also looked back at mid-renovation photos to see where drywall screws were added.
You also can just drill pilot holes until you hit one. However, this is a more daunting task when drilling through tile. Speaking of which…
Step 3: Mark Your Drilling Locations
Drilling through tile isn’t a fast process, so take your time up front to be confident and accurate with where you need your holes. This means not just your stud locations, but also making sure you’re happy with your shelf height, making sure things are level, etc. We chose a shelf height of 18″ from the counter, which is pretty standard.
Having marked the stud locations with blue painters tape, we held the bracket at the correct height/level and SLOWLY drilled through the wood using a small regular drill bit until I barely touched the tile. This left enough of a mark on the tape that we knew where to make our holes.
Put your support bracket aside for the next step, which you can skip if you don’t have a tile backsplash in your kitchen.
Step 4: Drill Through Your Tile
Drilling through tile is a process that requires patience, so we have a separate tutorial for drilling through a backsplash. It involves some diamond tile drill bits and this water delivery system guide.
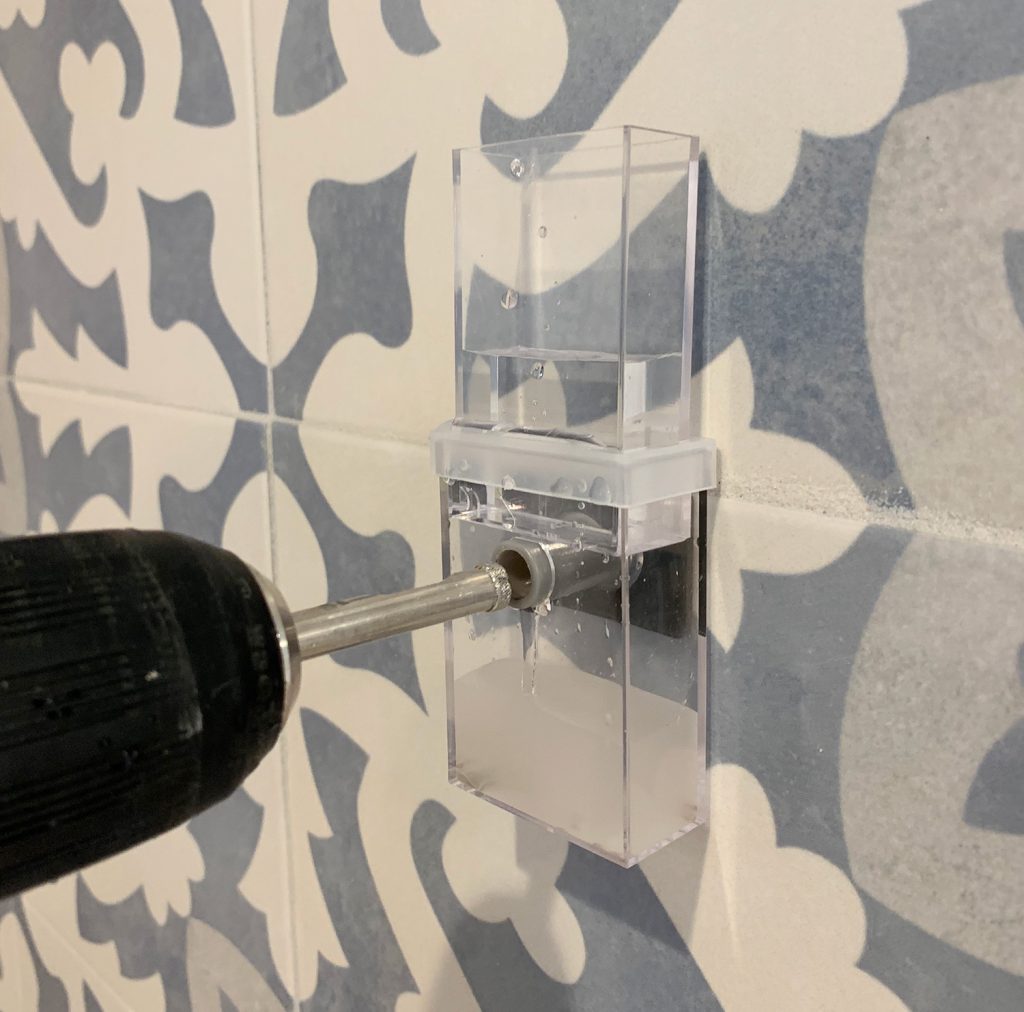
Our main advice is to just take your time and go slow. This is another reason why it’s important to take your time upfront locating studs and marking your drilling locations. You don’t want to make more holes than you have to!
Step 5: Secure Your Support Bracket
With all of your pilot holes drilled in your tile, you can now secure the bracket to the wall. We like to use these heavy-duty structural screws for a tight, strong hold. You can also see that we like to pre-drill the screws partway through the bracket first, which makes it easiest to align them into your pilot holes.
Be sure to use a level during this process to make sure your final shelf placement is level.
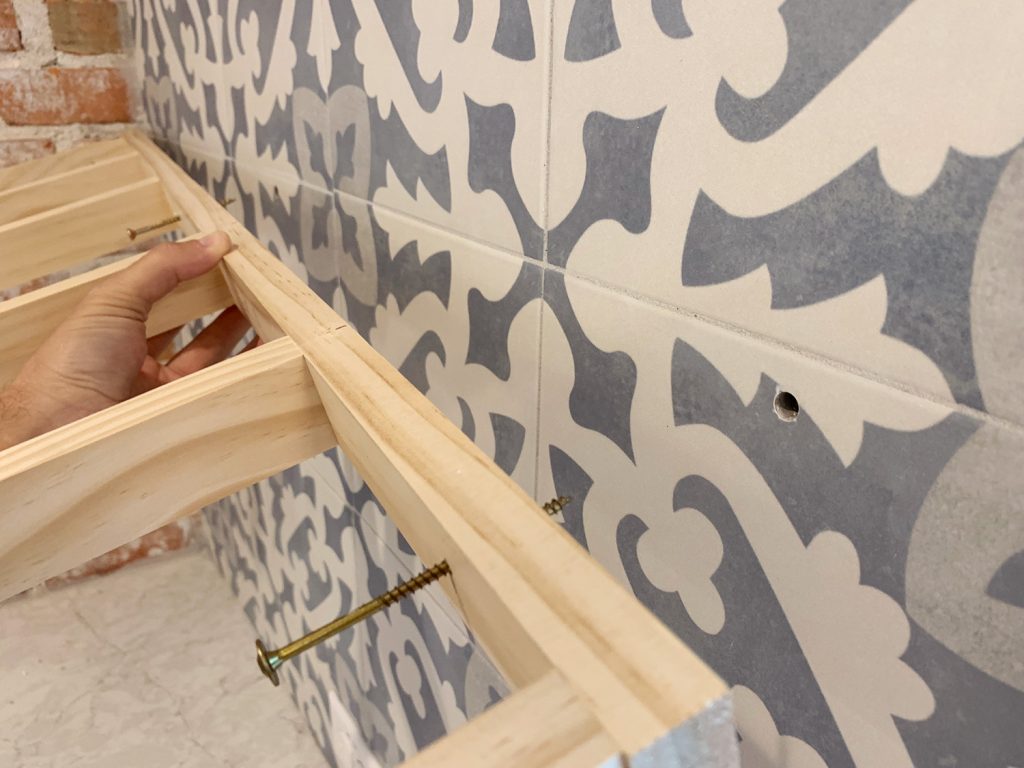
Step 6: Nail In Your Shelf Top & Bottom
With your shelf support bracket secured to the wall, you can now add the finished shelf surfaces. The first is a 1/2″ plywood piece along the top. Use a table saw or circular saw to cut it to size. It should span the full width and depth of your bracket. To secure it, we suggest a generous amount of wood glue plus some finish nails along the top.
Then did the same with a 1/4″ piece of plywood on the bottom. The bottom plywood can be thinner because it won’t have to support any weight. You may want to use clamps to keep the bottom piece in place while you nail it in.

This combination of plywood also helps keep the total thickness of the shelf close to the same size as a 1×3″ board, which you’ll be adding next.
Step 7: Nail On Face Pieces
To finish off the exposed edges of your shelf bracket, you’ll be using 1×3″ pine boards. These too can get nailed & glued along all of the unfinished surfaces. You can see we also chose to miter cut the corners where the front and side pieces meet.
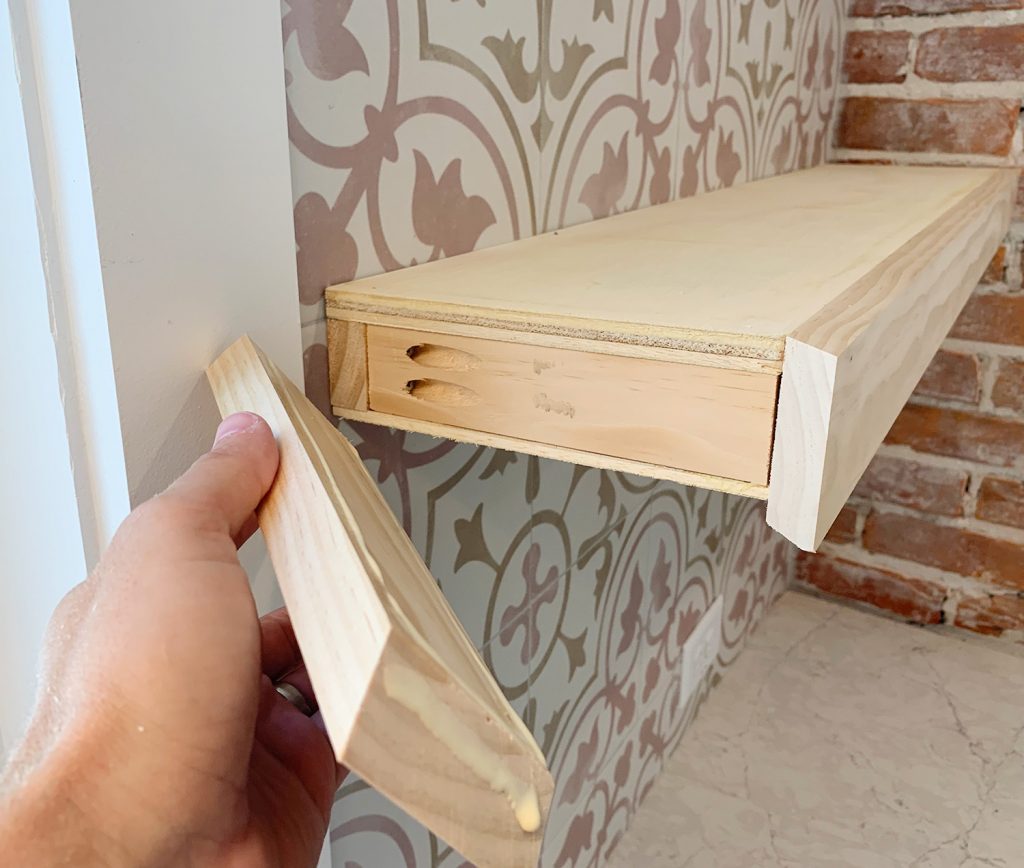
If you have access to a table saw, you can also rip these 1×3″ pieces slightly shorter to be the exact depth of your shelf. If not, there will be a tiny lip on the bottom side of your shelf (or the top side, if you prefer). This didn’t bother us, so we didn’t bother to break out our table saw.
Step 8: Add Paint, Stain, or Sealer
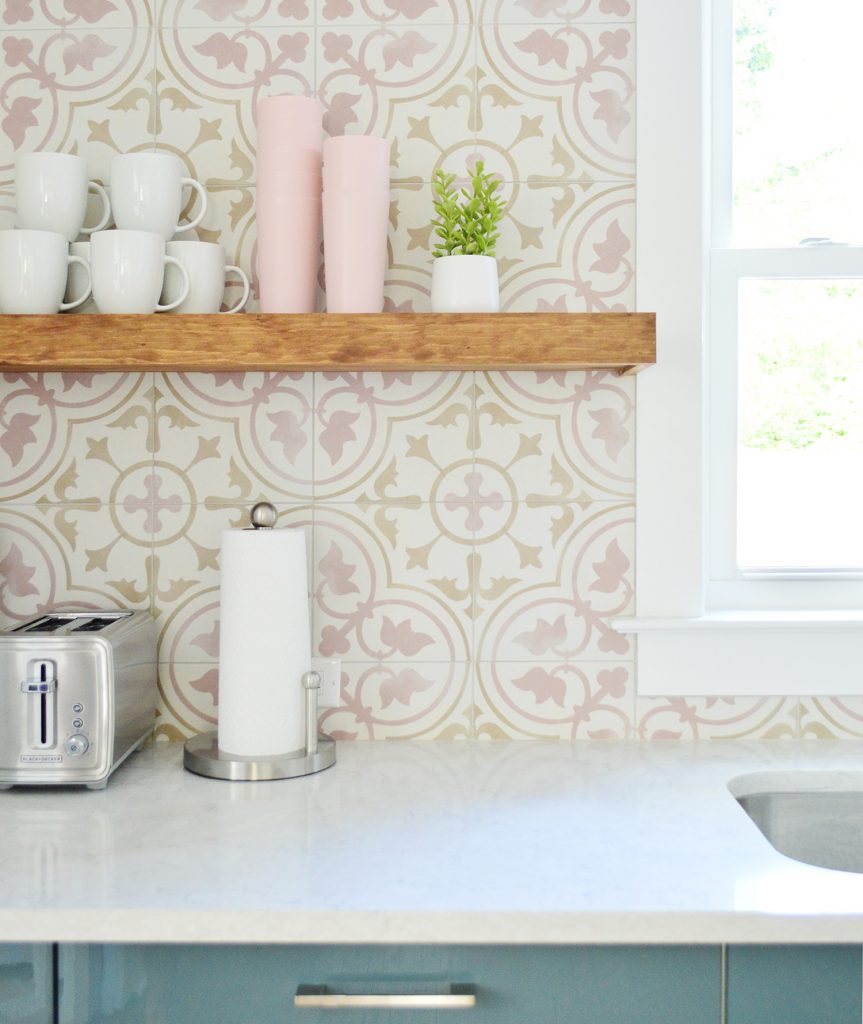
With your floating shelf construction complete, the last part is to finish the wood surface however you’d like. We chose to stain the shelves in one kitchen using a medium oak stain, as you can see below. We chose something that matched the floors on this side of our duplex.
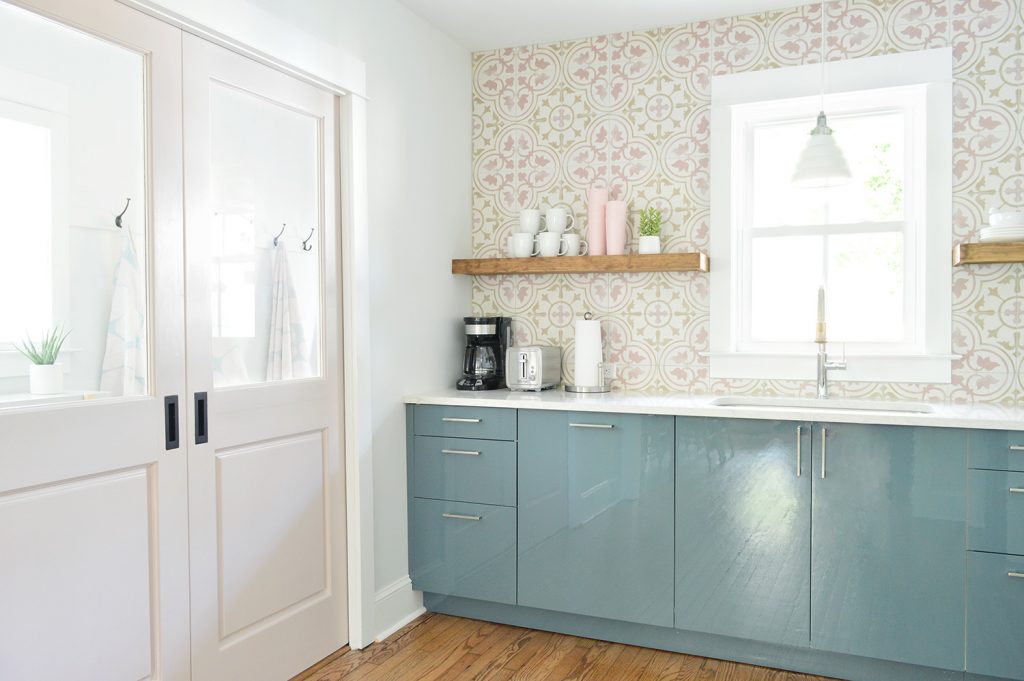
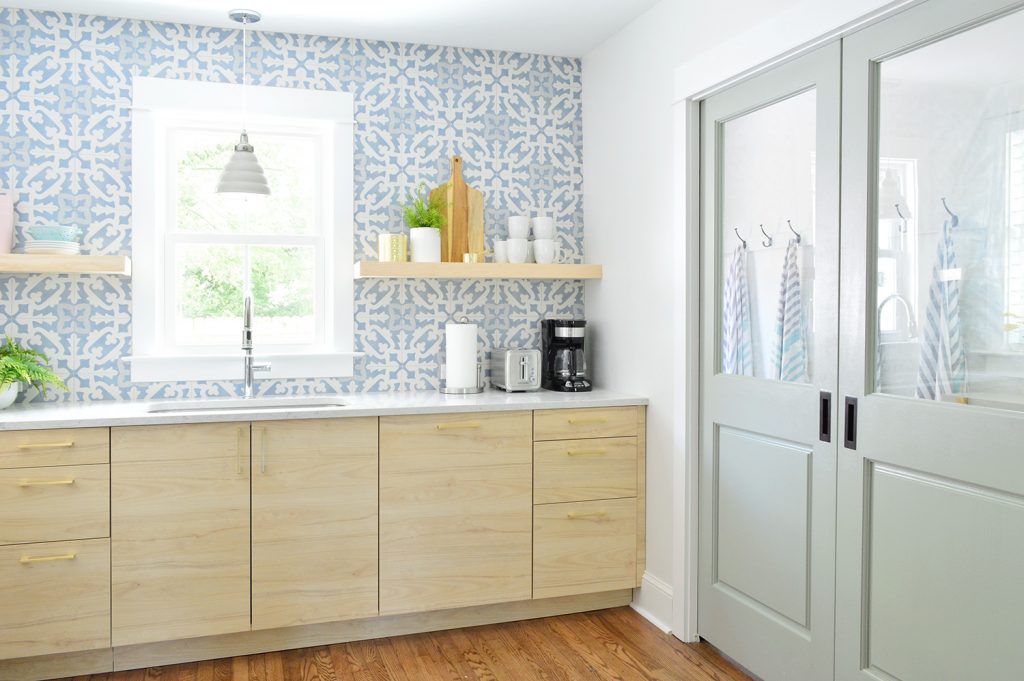
On the other side, we simply sealed the shelves with a clear, water-based sealer to help protect it from stains and moisture. We thought the natural wood tone worked well with the wood cabinets.
You can also prime and paint your floating kitchen shelves too. However if you’re going that route, we’d suggest substituting the 1×3″ pine boards with pre-primed versions. And you might want to use MDF instead of plywood for the shelf surfaces, since it can give you a smoother finish.
More DIY Shelf Ideas
If you’re interested in more shelving ideas & projects, this post has 16 DIY shelving ideas for you.
P.S. To read how we pulled these kitchens together, here’s a post with a full reveal, and here’s one about adding the horizontal planking on the stove wall (it was a great $31 upgrade). There’s also a full budget breakdown for these two kitchens – and if you haven’t heard our big duplex news you can listen to it here or read it here.
*This post contains affiliate links, so we may earn a small commission when you make a purchase through links on our site at no additional cost to you.
