Our kids are very much into the traditional Jack-O-Lantern-style pumpkin carving, often trying to make a scarier, grosser, or goofier face than last Halloween. But we still remember a time when toddler-friendly (even baby-friendly!) pumpkin “carving” was the name of the game over here. So we wanted to highlight six simple, fun, but unconventional pumpkin decorating ideas for kids that we’ve used in the past. Including a “romantic” one we made pre-kids (yes, I’ll pause while you ponder what exactly can be romantic about a pumpkin…).
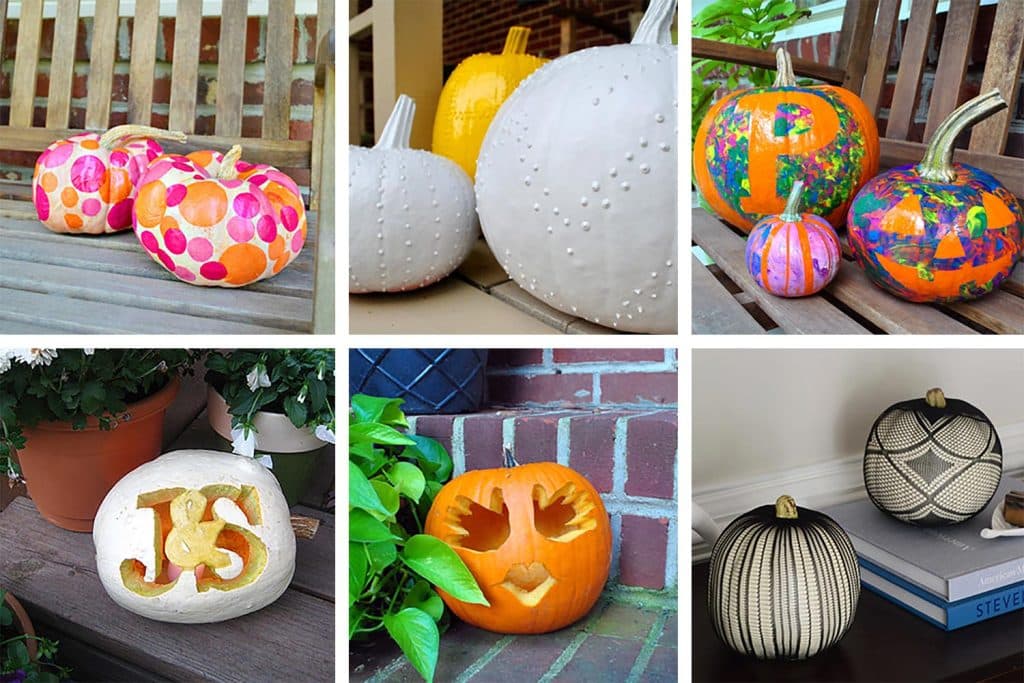
We’ve included a brief description of each below, but you can also follow the link to the original posts for more photos and details about each pumpkin-carving project.
“Baby’s First” Handprint Pumpkin
Materials Needed:
- Paper or cardstock
- Pencil or pen (for tracing on hand)
- Sharpie or marker (for tracing onto pumpkin)
- Scissors
- Pumpkin carving tools
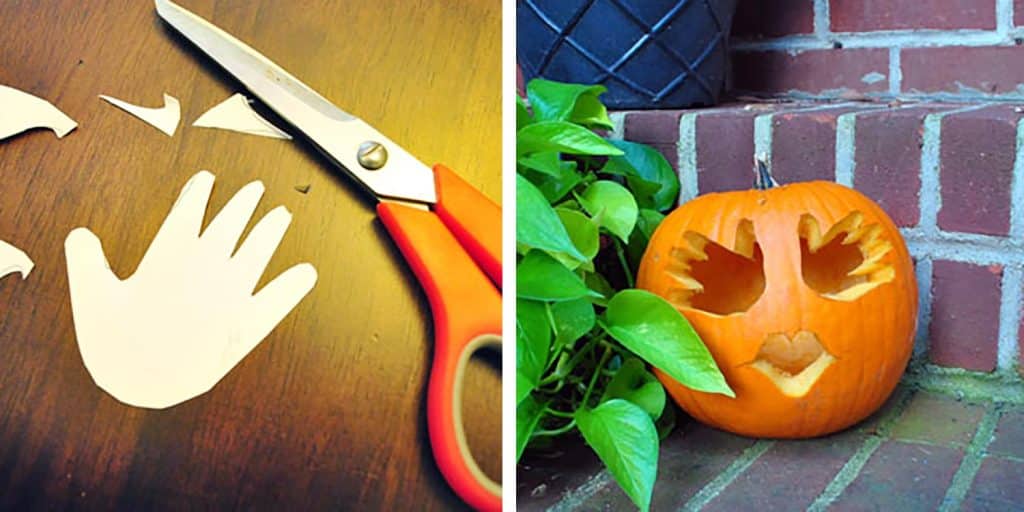
Our daughter was only 5 months old by the time her first Halloween rolled around, meaning there wasn’t much she could do to lend a hand in the pumpkin decorating process. But she still participated in that year’s carving by doing literally just that: lending a hand. We traced both of her little hands and used them as homemade stencils on our pumpkin. In our project, they became the eyes of our Jane-O-Lantern (Jacqueline-O-Lantern?) but that part is up to you. They could be butterfly wings, funny ears, or even just hands! Check out the full handprint pumpkin tutorial here.
Finger Painted Stencil Pumpkins
Materials Needed:
- Painters tape
- Sharpie or marker
- Craft knife
- Finger paints
The following year, we used a slightly more hands-on approach to involve our daughter in the pumpkin decorating process. She was already into finger-painting on paper, so we just adapted the activity to a new surface. Before unleashing the paint, however, we used painter’s tape, a marker, and a small craft knife to apply some designs to each pumpkin so that once the paint had dried, we could reveal some distinct designs or patterns on each pumpkin. And in retrospect, had we used faux pumpkins we could’ve kept these to break out again the following year. See the full finger-painted pumpkin project here.
Puffy Painted “Studded” Pumpkins
Materials Needed:
- Puffy paint
- Craft or latex paint (even leftover house paint works)
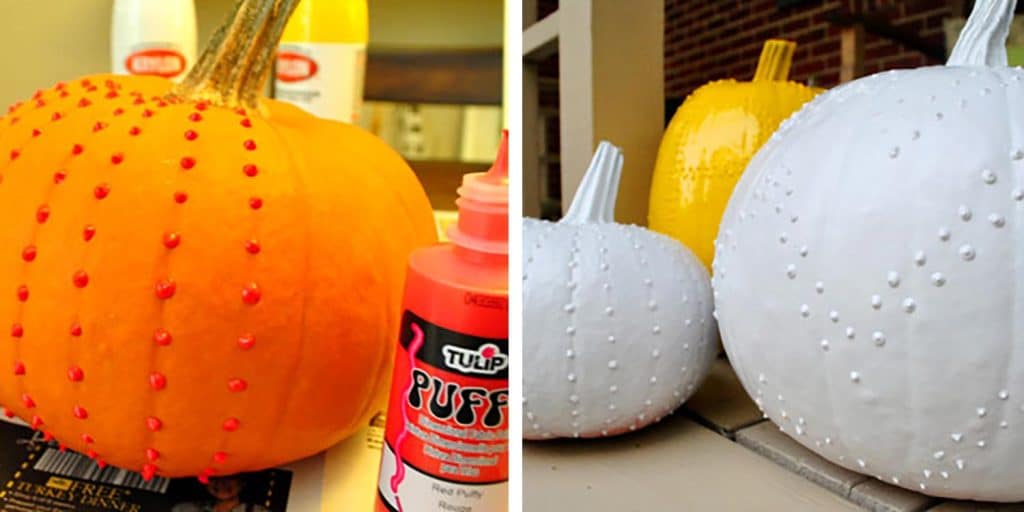
This is a craft we completed pre-children, but it would still be a great one to get young kids involved in. Simply use puffy paint to add a design, texture, or pattern to the outside of your pumpkin. We chose to do rows of dots on ours – making stripes, chevrons, and a monogram (we were very into monogrammed pumpkins at the time, apparently) – but you could do the same with solid lines of puffy paint. Once it has dried, paint the entire pumpkin with a solid color to create a sophisticated, textured look. See the full puffy painted pumpkin step-by-step here.
Tissue Paper Mod Podge Pumpkins
Materials Needed:
- Colorful tissue paper
- Mod podge
- Scissors
- Paint brushes
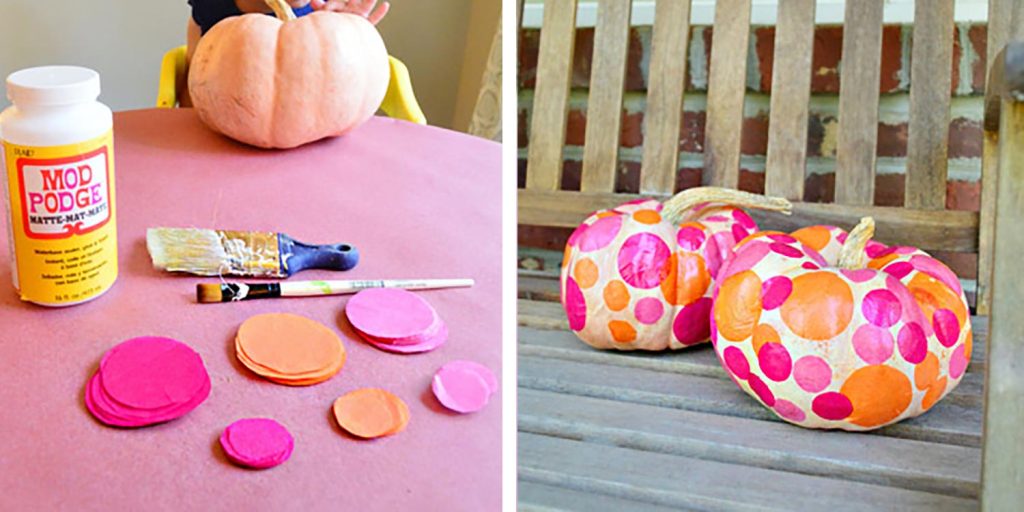
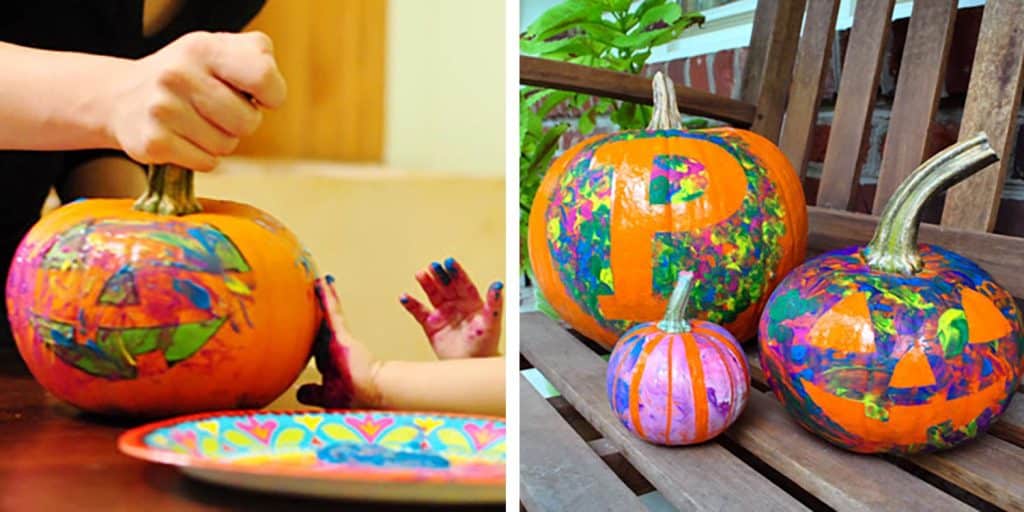
We decided to repurpose some leftover tissue paper for this project. We cut three colors of tissue paper into circles, some big and some small. Then we (the adults) coated the pumpkin in a thin layer of Mod Podge to make it sticky enough that our daughter (who was 2 at the time) could place the tissue paper dots wherever she liked. Once she was done, we coated the whole thing again to “seal” the paper to the pumpkin. This project has so many possibilities – colors, shapes, patterns, etc – and if your child is old enough, they can partake in the cutting of the tissue paper! See the full tissue paper pumpkin tutorial here.
Gothic Panty Hose Pumpkins
Materials:
- Black fishnet panty hose
- Scissors

This is a weird one, but it stick with me. It’s also ridiculously fast! We stumbled upon some black fishnet pantyhose on clearance at the store, and thought it would be fun to try for a Halloween craft – especially since lace-looking pumpkins were all the rage that year. All we did was shove the pumpkin in one leg, stretching the design over the surface and revealing the pattern. Then we cut off the excess and they naturally shrunk tightly around the top and bottom of the pumpkin. Obviously, these are best to dislpay indoors – and we think they look especially great on white pumpkins. See the complete pantyhose pumpkin project here.
Homemade Stencil Monogram Pumpkin
Materials Needed:
- Computer
- Printer
- Paper
- Pencil
- Marker
- Pumpkin carving tools
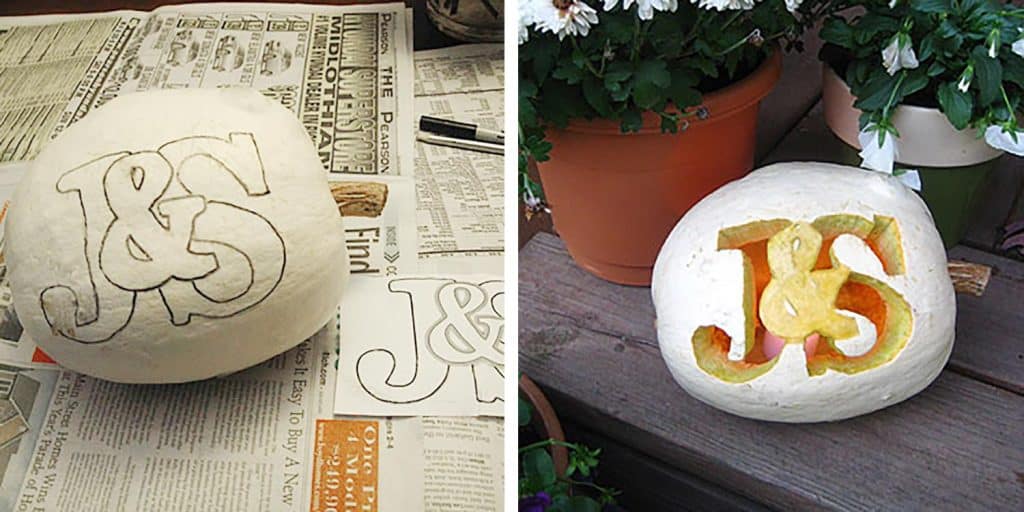
Like I said, we apparently were very into monograms back in the day? But this particular project shows how you can easily make your own homemade stencil. We just printed out a design, covered the backside of the paper in pencil, pressed it against our pumpkin, and traced over our design with pressure. This transferred the design lightly onto the pumpkin’s surface, which we then carved as usual. This technique can be used with any homemade or DIY pattern – we even used it for a more intricate design in the post! Click here for the full monogram pumpkin stencil tutorial.
So there you have it! Maybe I’ll share these with our (now much older) kids this year to see if they spark any new pumpkin decorating ideas of their own. Either way, I’m sure we also have some zany hand-carved Jack-O-Lanterns in our future again!
