Many moons ago we promised to share the DIY play-by-play for this shiplap-esque, paneled wall treatment because it’s ridiculously easy and GLORIOUSLY BUDGET CONSCIOUS. As in, it cost less than two boxes of my favorite light bulbs. Or dinner at Chipotle. Yes, those are my units of measure. But the point is: it was only $31!
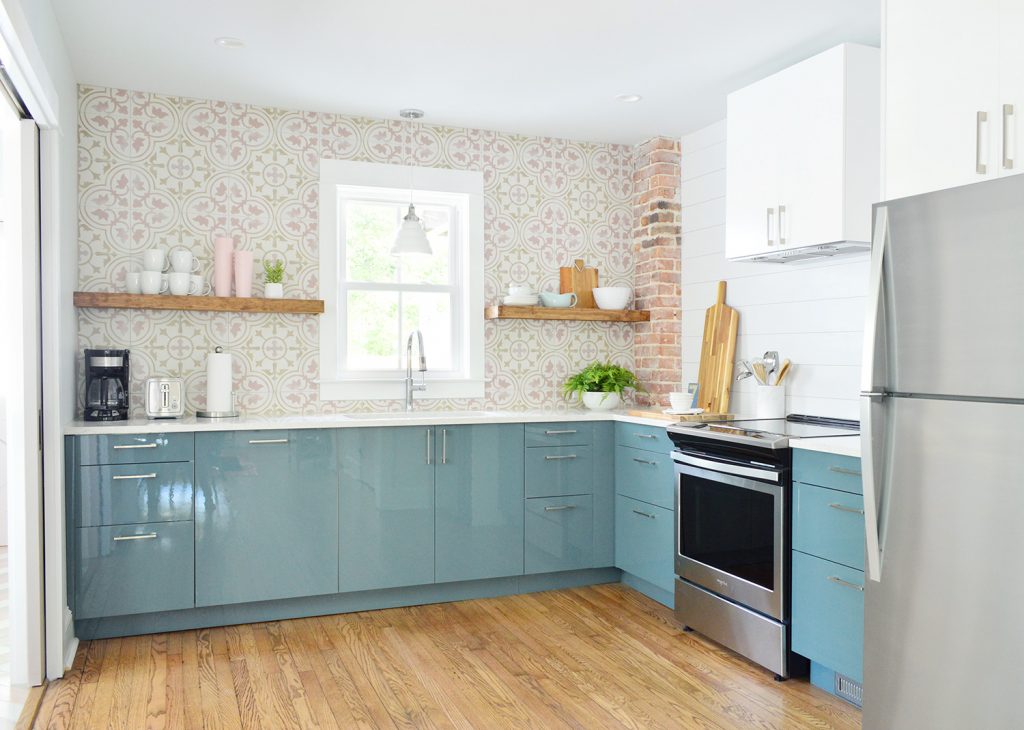
I mentioned in our backsplash post a while back that we opted for a different treatment on the stove wall in each of the duplex kitchens because it felt too chaotic to continue our patterned tile on two walls, so we chose something subtle yet wipeable AND easy to maintain (you can see the both duplex kitchen reveals here). Also cheap & easy to do. Because at this point in the duplex reno we were TIRED (did I mention we had tiled 8 rooms at that point along with installing 2 Ikea kitchens and hanging 2 wall murals? I did? Many times? Clearly I’m still not over it).

Some call it planking, some call it horizontal paneling, and some call it faux shiplap (real shiplap interlocks), but whatever you want to call it, we were excited to jump on the bandwagon after years of really liking how Shea McGee uses it in her beachy/modern designs, as well as how Chris & Julia’s TV wall in their old family room turned out. Our overwhelming verdict: what the heck took us so long?! (Also, I still haven’t received my Fixer Upper merit badge. I’m expecting a lapel pin with Chip’s face on it to just show up in the mail…)
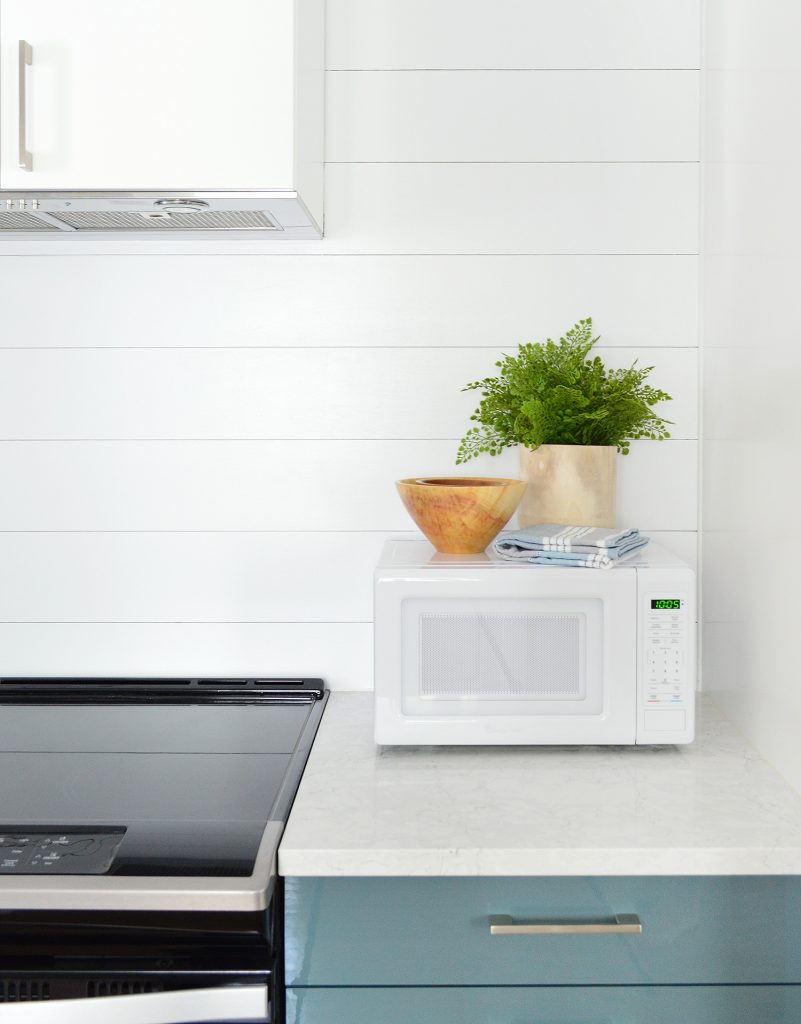
This wall treatment is basically just thin pieces of plywood that we cut down to planks, nailed to the wall with small spacers, and painted with durable and easy-to-wipe semi-gloss paint (we color-matched it to the the cabinets so everything blends). Both sides of the duplex were rented all summer long (22 renters took these kitchens for a spin over the last three months!) and it has turned out to be a great durable and stain-proof surface (akin to how people add beadboard backsplashes). Happy to report it still looks like new.
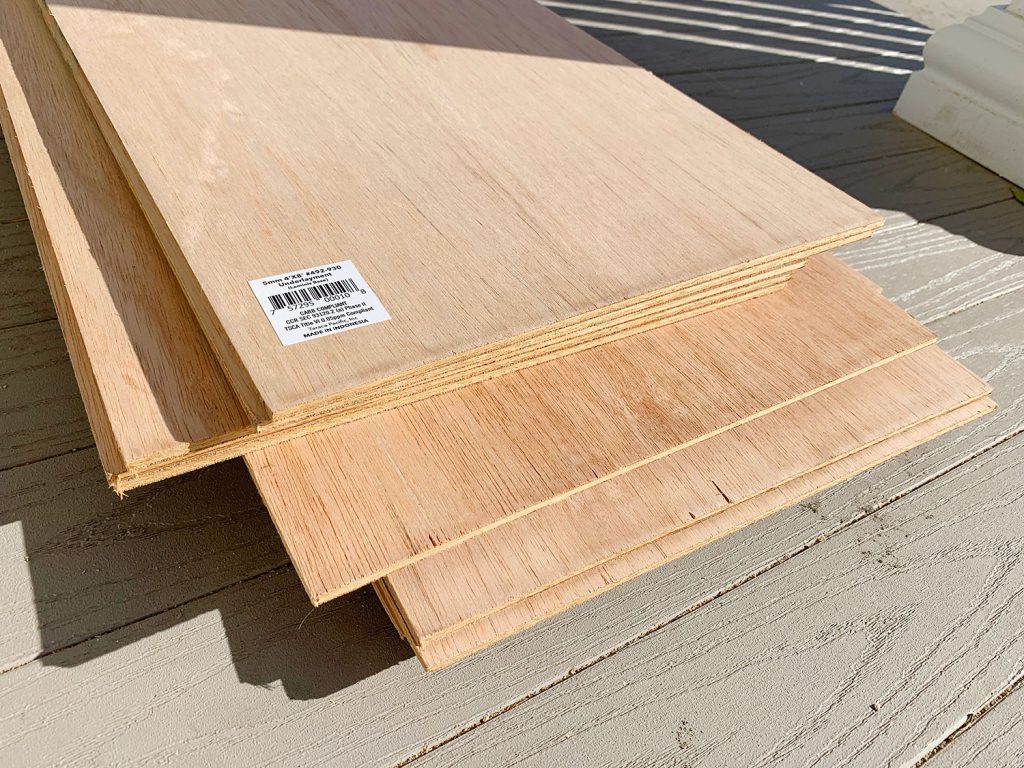
The secret to pinching pennies on this project is to NOT use the pre-made shiplap panels stores are now selling (yes, home improvement stores are on the bandwagon too). This one from Lowe’s is $6 per 8 foot board and this one from Home Depot is $5, but by cutting your own out of this 5mm underlayment like we did, you can get the price down to LESS THAN $2 per 8 foot board! And depending on the size of your project, that savings could really add up. It made the wood for each of our two kitchen backsplashes total $22.50 instead of $60 – $75. Across two kitchens that saved us around $100 in lumber.
Like many DIY projects, cutting costs does mean you have to put in a bit more work. So if you’re looking to knock out the project quickly and you can swing the pricier pre-made stuff, go for it (it’s usually pre-primed and self-spacing). But ever since reading Jenny Komenda’s budget bathroom shiplap project we’ve been itching to try an approach like hers. They’ve discontinued the type of MDF she used for the project, which is how we ended up with the 5mm underlayment. Our certainly has a bit more of a woodgrain pattern than MDF would, but we actually kinda like that extra texture. It came out really well and has proven to be extremely durable. So let’s dive into the tutorial.
Materials
We had pretty much everything on hand except for the wood ($45) and paint ($17) so we got TWO kitchens done for $62. You might need to grab a few more tools or supplies if you don’t already have them, but they’re things that we use for lots of house projects so they’re pretty great “house investments” if you plan to DIY other stuff over time.
Oh and it bears noting that if you have a gas stove you’ll want to check if this is to code (some areas don’t allow a wood or beadboard backsplash unless you add a little metal strip over the stove like Chris & Julia added here. We have electric stoves at the duplex though (fun fact: there’s no natural gas in Cape Charles – no one ever ran it that far off the mainland).
Here’s what we used:
- 4 x 8′ panels of 5mm underlayment ($15/panel) – we needed 3 panels for both kitchens & got eight 8′ strips out of each panel
- Primer (you probably just need a quart)
- Semi-gloss paint
- Wood Filler
- Caulk
- Paint brush & small foam rollers
- Small spackle knife
- Nail gun (this is ours)
- Table saw (only if you don’t get the strips cut in store – this is ours)
- Miter saw (this is ours) – a hand saw works too, just a bit more slowly
- Jig saw (to cut outlet and switch holes – this is ours)
- Drill/drive (this is ours) and 1/2″ drill bit (like this)
- Sanding block
- Studfinder (here’s our favorite one)
- Level and pencil
Cut Your Boards To Size
The underlayment comes in 4 x 8′ panels but we had it cut down in the store for easier transport. Now, guys. I have to detour for a moment to say I’ve never gotten a BIGGER EYE ROLL than the one I got from the lumber section employee when I asked him to cut these strips for our shiplap project. I was half mortified and half cracking up inside that even the Home Depot employees are tiring of the shiplap trend. I’ve never gotten pushback before, but this guy COULD. NOT. EVEN. with my request.
He eventually agreed to cut my 3 panels into fourths (aka 12″ strips – shown above) so I could fit then in my car. That meant I later had to cut them in half again at home on my table saw. But I just set my guide and ripped them all in no time. Having said that, this guy is literally the only person who has ever given us any sort of resistance, and I think if it had been a different day and a different employee it would have been no big deal to get strips cut.
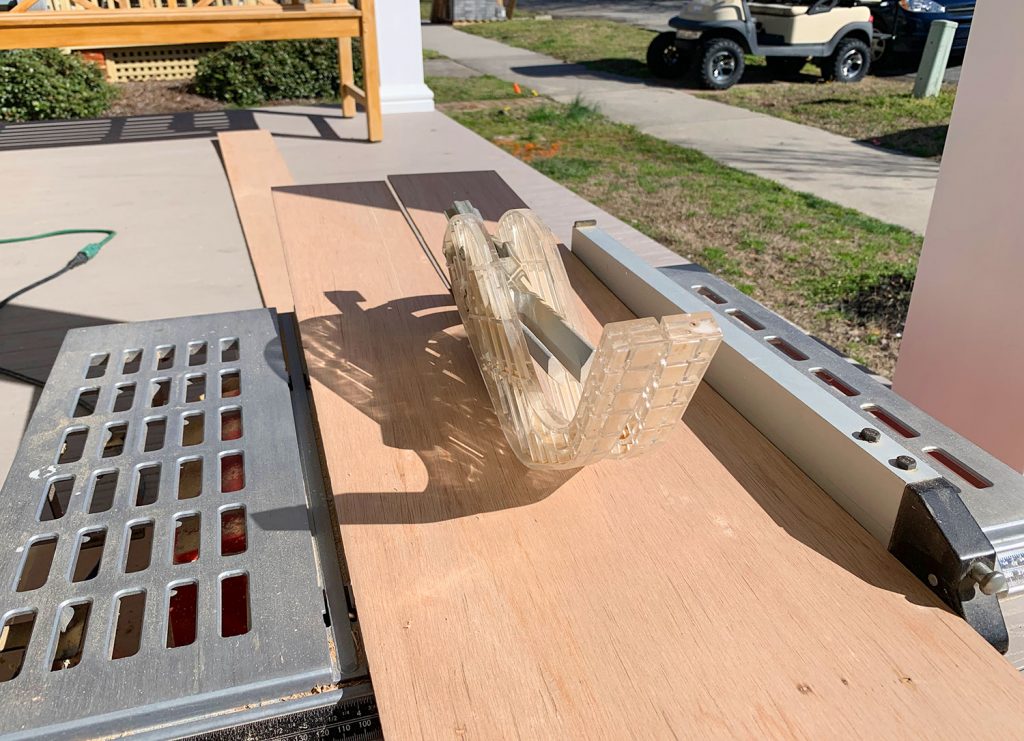
NOTE: Be sure to cut them to slightly less than 6″ wide (ours are 5 7/8″). You lose about 1/8″ of material from the saw blade itself, so trying to get a full 6″ strip will cause your last piece to be almost a full inch shorter than the others.
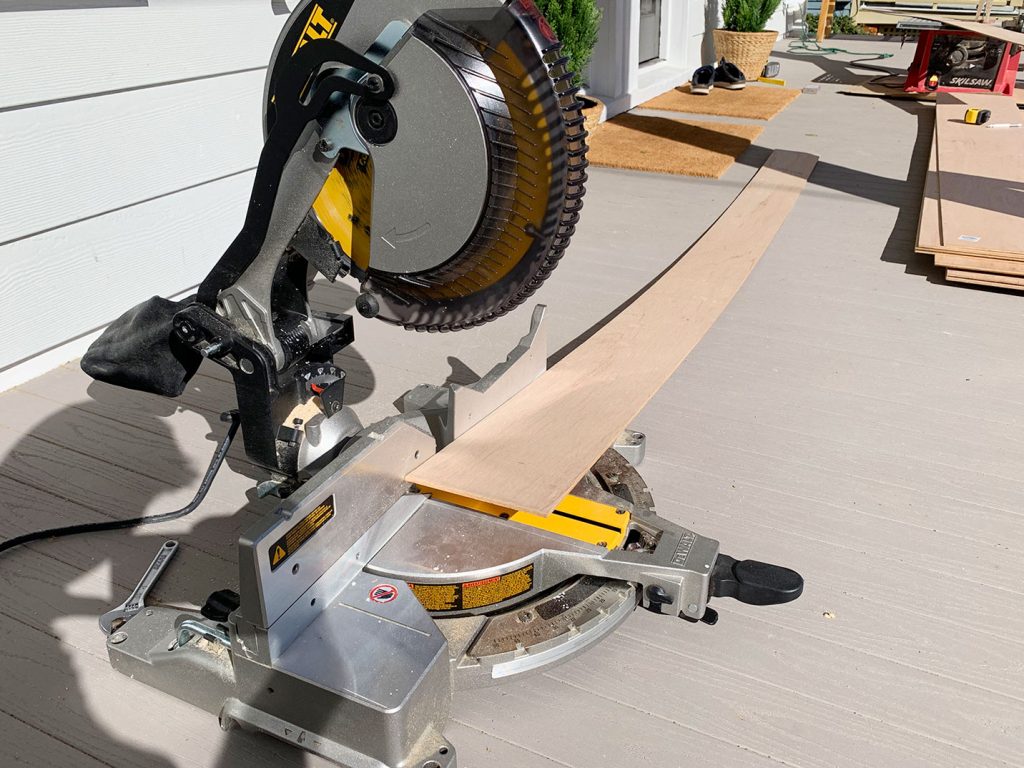
If you can convince your store to cut your strips to their final size you won’t need the table saw, but you’ll still need either a miter saw or hand saw to cut each strip to the length you need. Our wall was just shy of 8 feet so we just had to trim a little bit off of each strip.
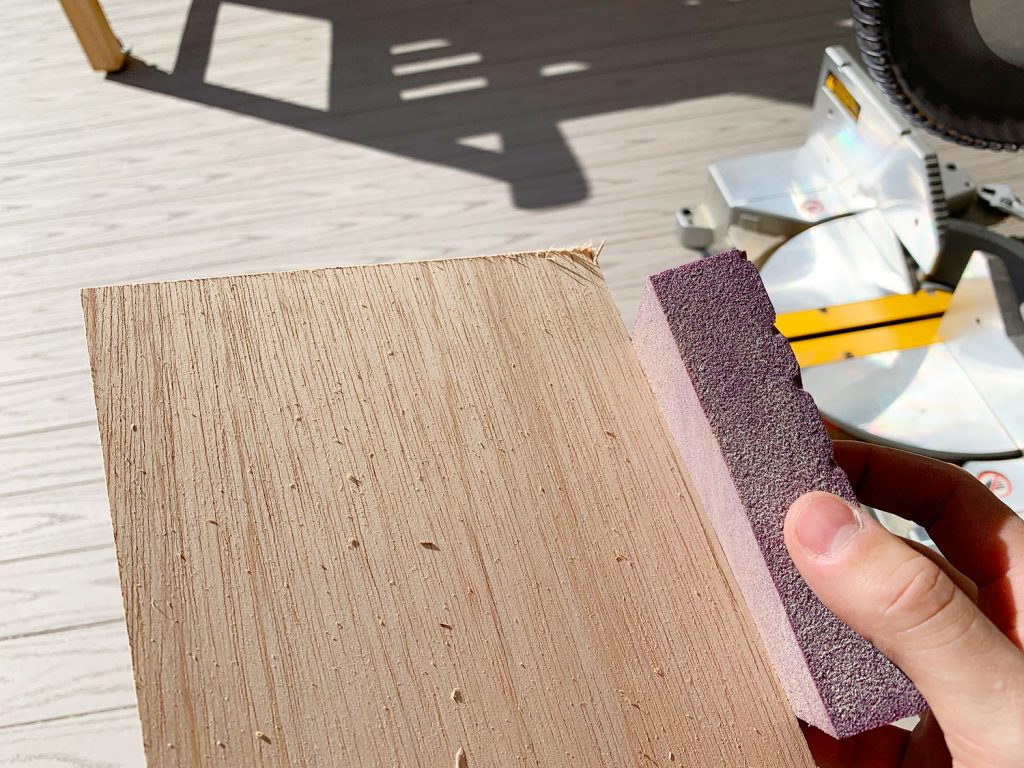
Once you have each piece cut you’ll want to give the cut edges a quick once-over with a sanding block to remove any splinters.
Prep Your Wall
Before you hang anything you also need to prep your wall a bit. First remove any obstacles like outlet covers or switch plates. I’ll show you in a moment how I make my cuts around these puppies.
You’ll also want to find your studs so you can be sure you’re securely fastening your boards to the wall. By now you probably know that we’ve been relying on this low-tech magnetic StudBuddy (our favorite stud finder to date).
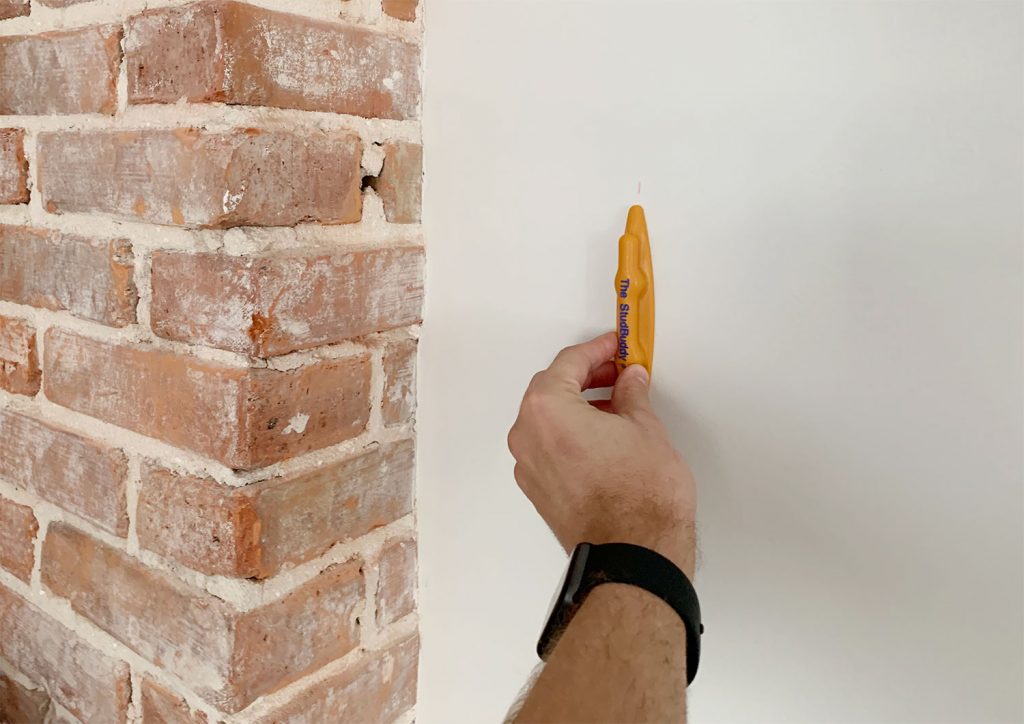
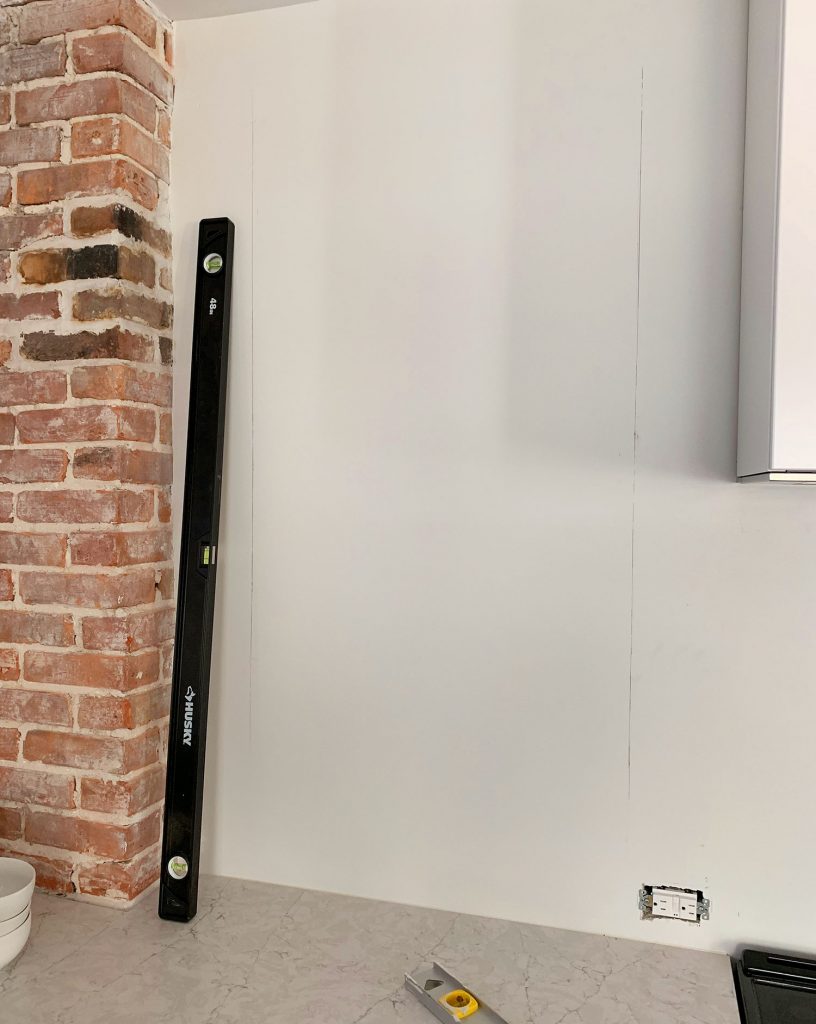
Once I marked the locations of my studs, I drew a tall vertical line at each spot using a long level. This creates a visual reference for each stud that I could reference as I worked my way up the wall. Don’t worry if your mark doesn’t go all the way up. Eventually you’ll just be able to see your nail marks and follow those.
Cut Holes For Outlets & Switches
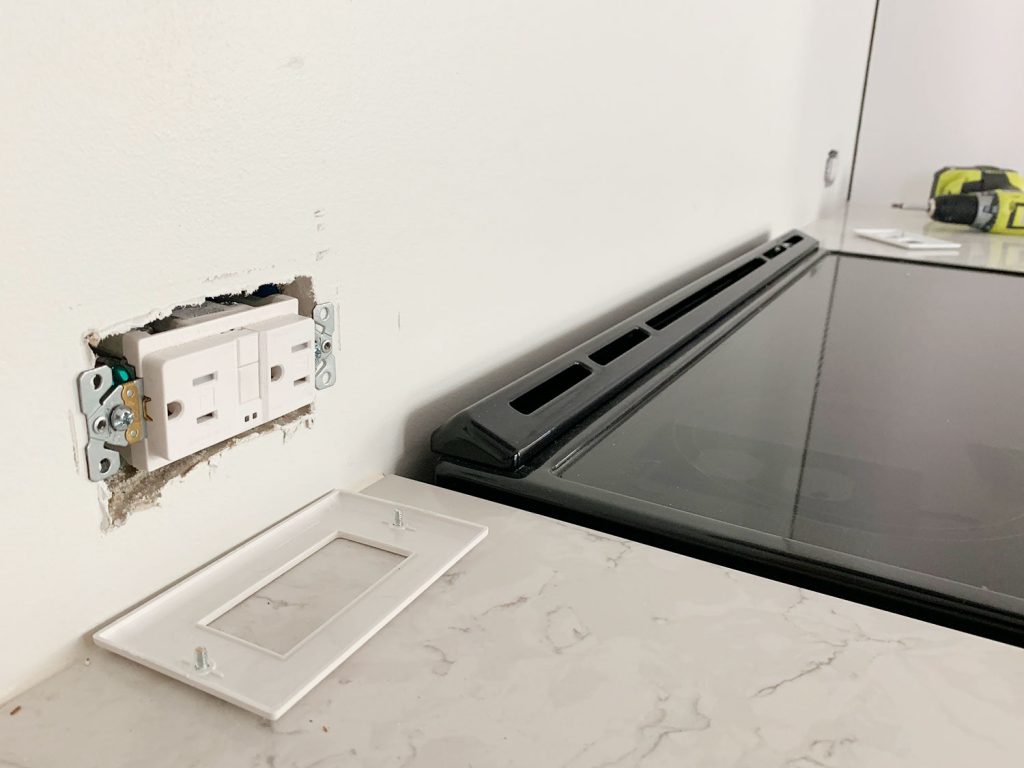
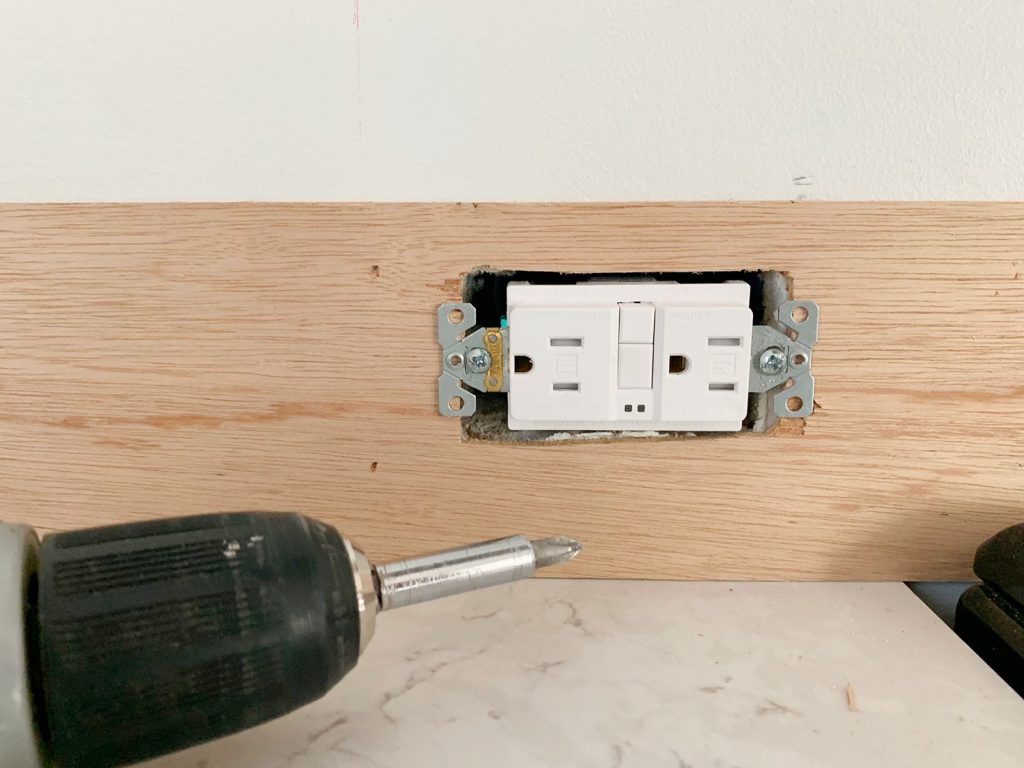
My first board had two outlets that I had to cut around and, as a reminder, this is how you’ll want them to look in the end. Just like when you’re doing a tile backsplash, you’ll have to loosen the screws so the outlet can be installed to rest on top of the edge of the board (or tile). If you cut your hole too big and the outlet sits against the drywall, your cover plate won’t be flush with the plugs when you got to reinstall it.
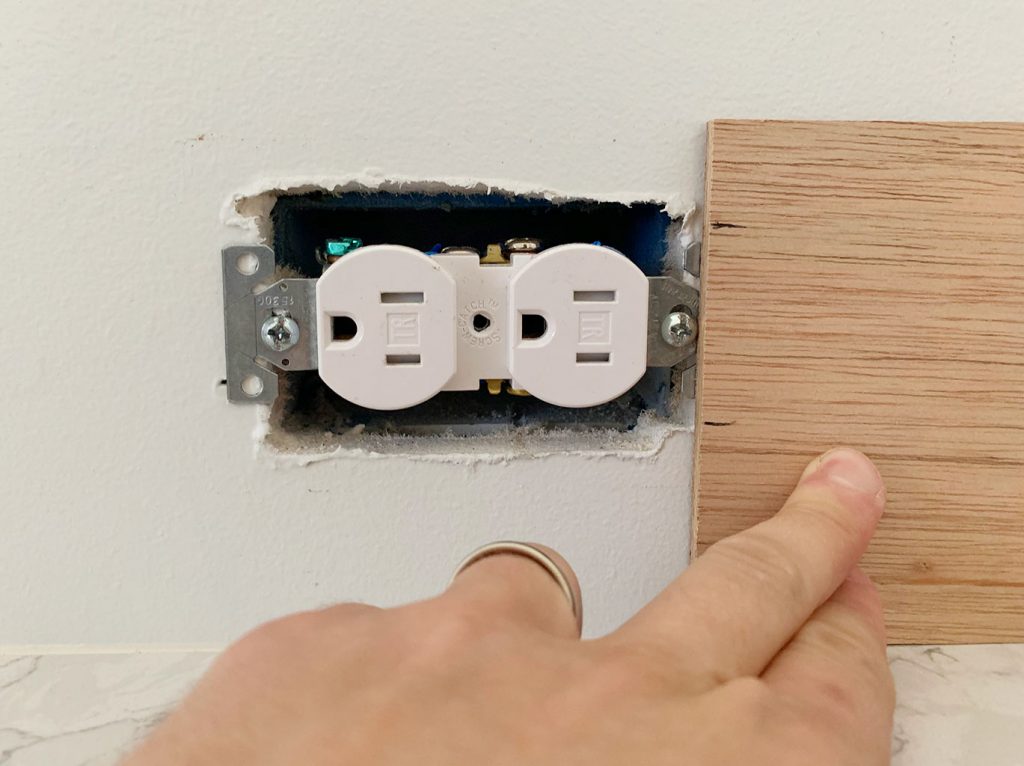
To make my holes I held up my board in front of the outlet and marked my hole left-to-right. I know the marks look way too wide in the photo below, but trust me that it’s just a perspective trick.

Then to mark the hole top-to-bottom, I used a scrap piece to figure out the height.
Then I used the two sets of marks to draw a guide on the back of my board, giving me the exact area I needed to cut out for the outlet.

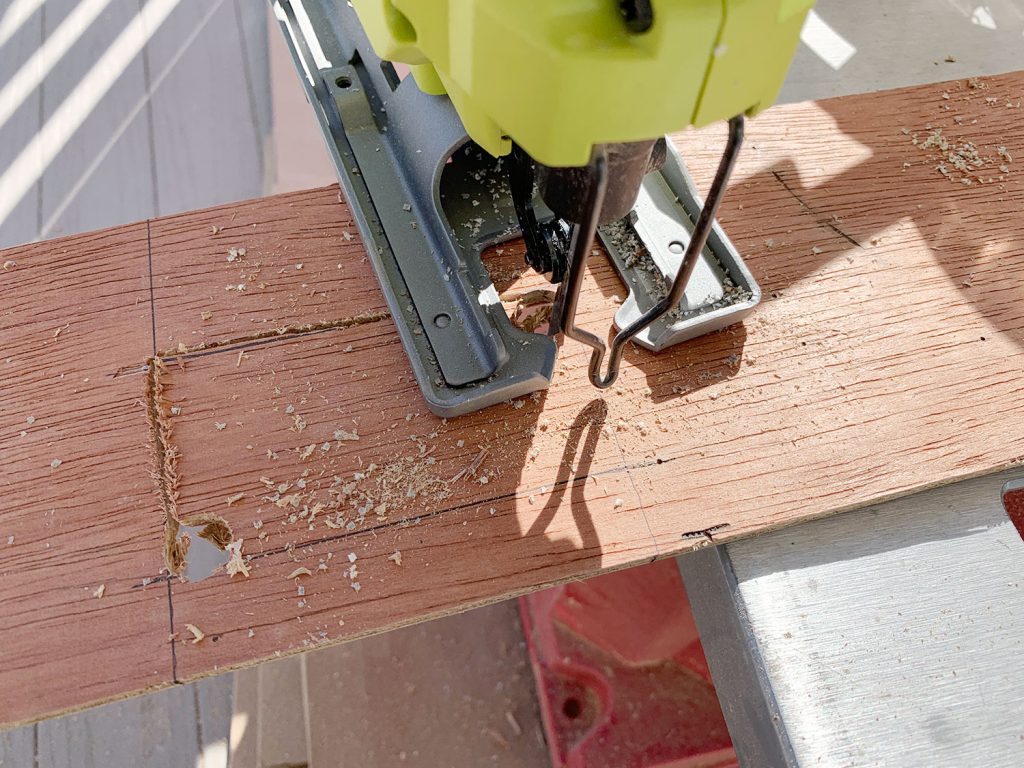
To do the cutting, I used my jig saw. For cuts like this where I can’t start my blade at and edge I like to use a 1/2″ drill bit to create two starting points in the corners of the area to be cut. This gives me a place to slip my jig saw blade in and easily cut along my lines.
Nail Your Boards To The Wall
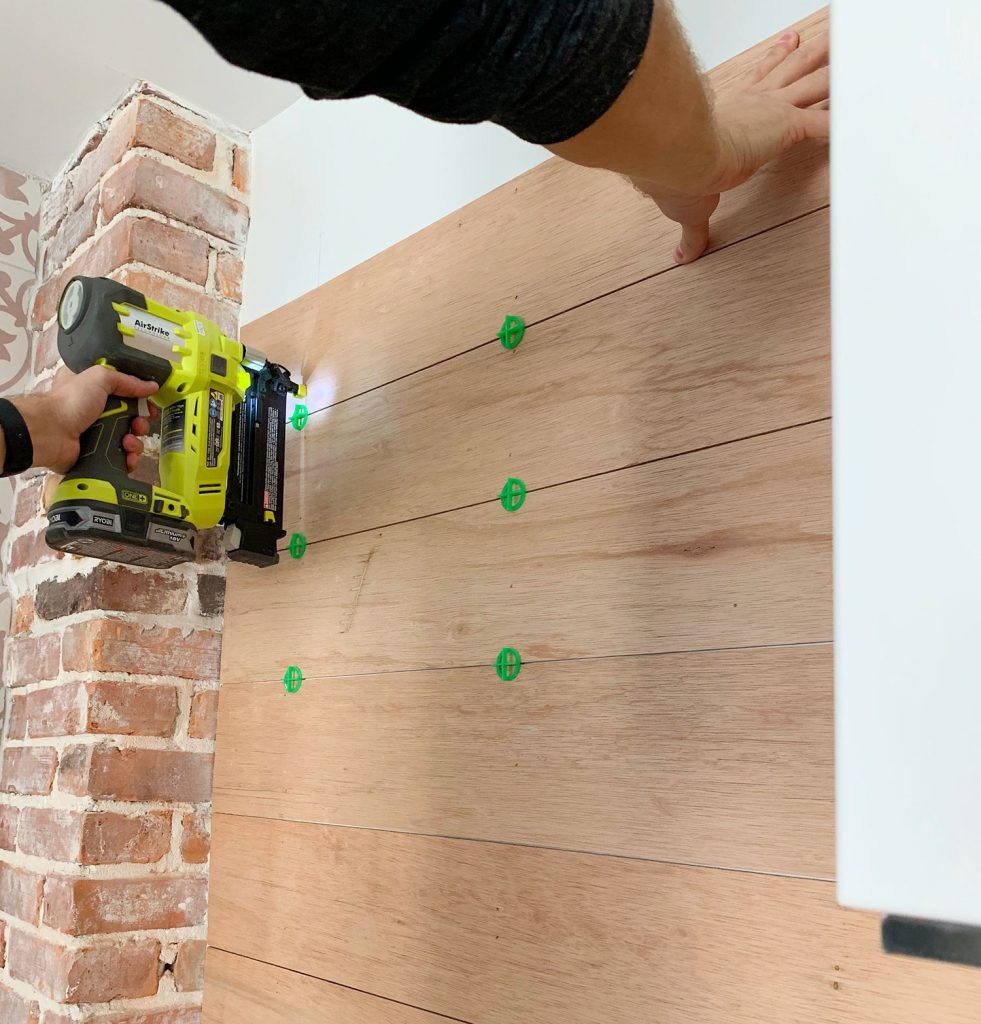
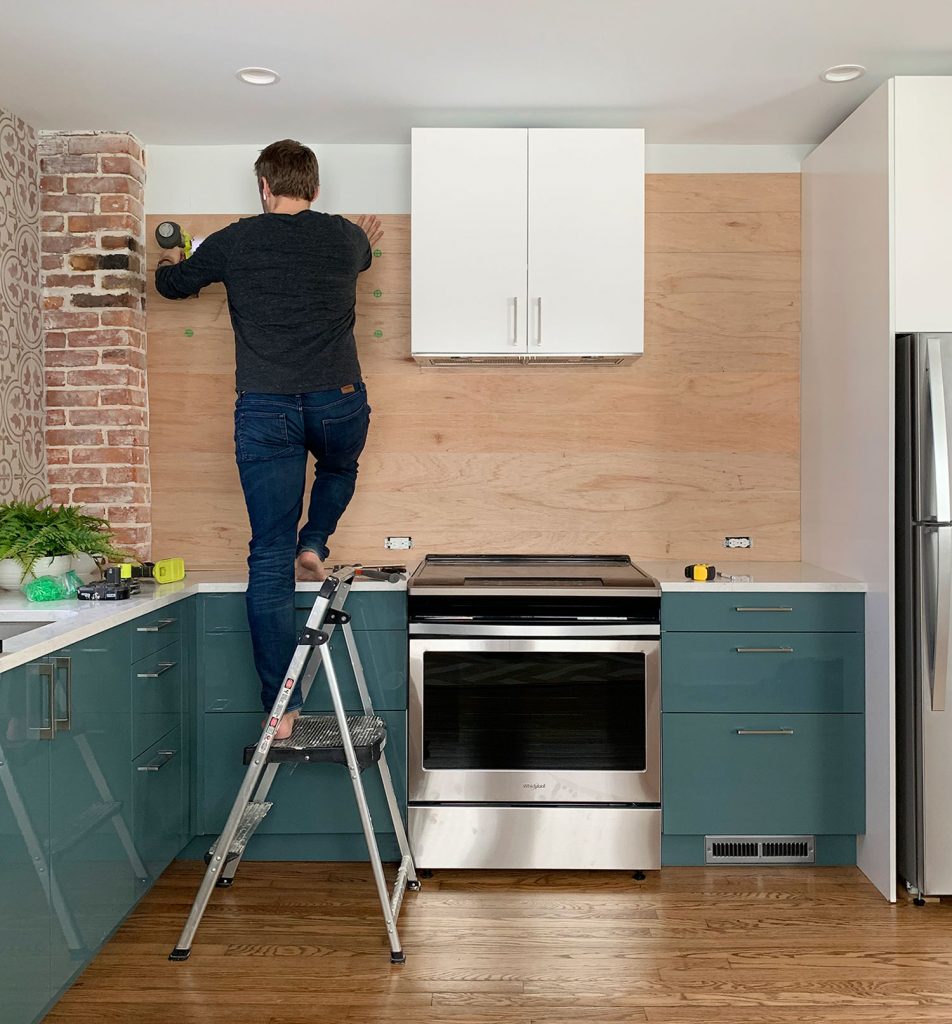
With my holes cut and my outlets reinstalled, I could begin installing the boards and working my way up the wall. As you can see, we used some leftover tile spacers to create the gaps between each board. But you can pretty much use any small object you have on hand. Jenny Komenda used pennies!

Some people use an adhesive like LiquidNails behind each board, but we just secured ours with 1.75″ brad nails into the studs using our cordless nail gun. In a steamy environment like a bathroom the adhesive is probably a good idea to prevent against warping, and it wouldn’t have hurt to use it in here, but we decided to skip it because we didn’t want to ruin all the drywall behind each plank if we changed our minds about the shiplap. Thankfully it has held up perfectly, so our plan is to keep it for the long haul.
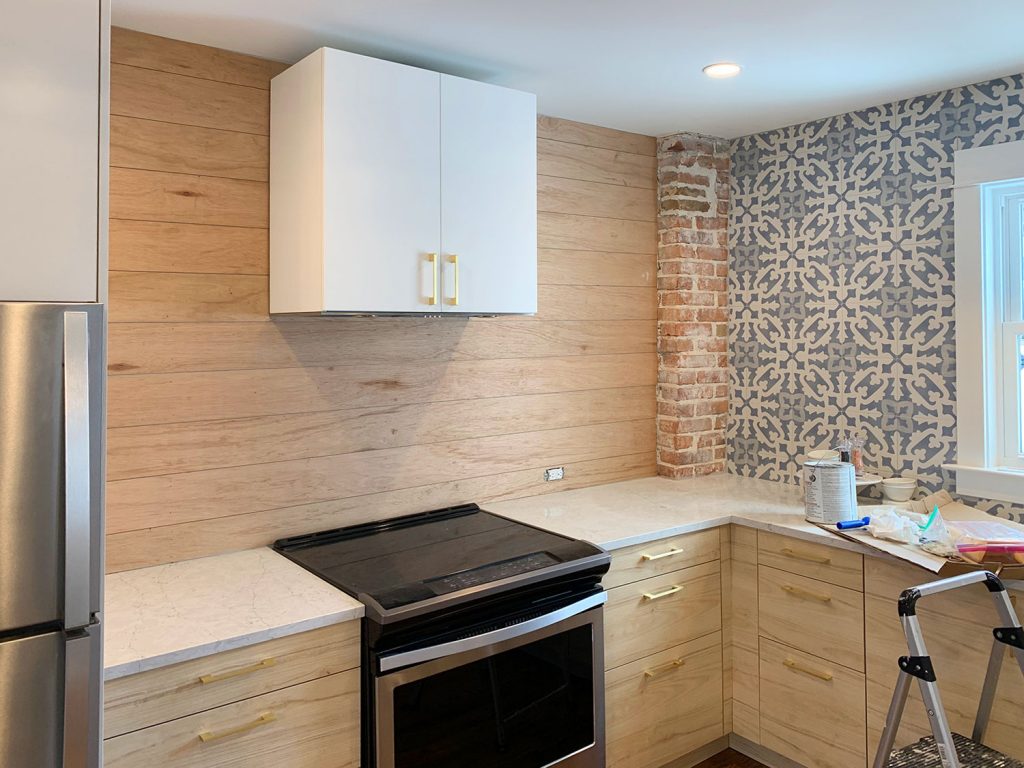
Had we decided on this look earlier in our process, I probably would’ve installed it BEFORE we hung the hood cabinet – mainly because it would’ve made it faster than cutting boards around it, but it wasn’t too bad to just trim those boards.
Prime, Patch, And Paint
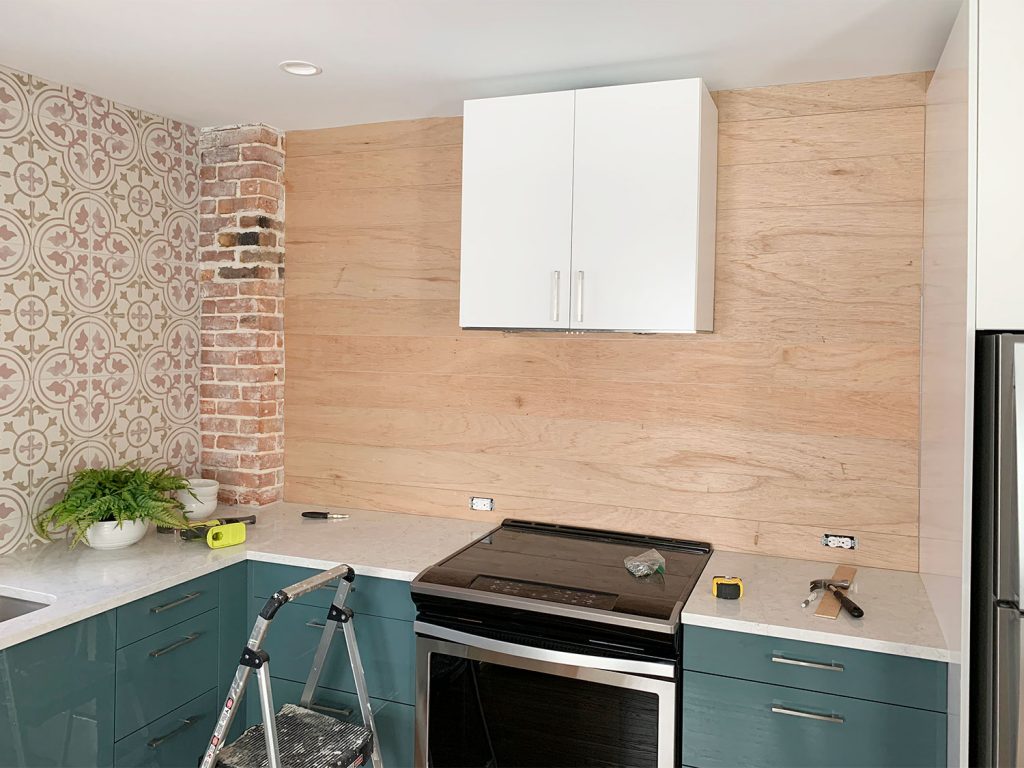
Here’s the wall after it was just completed and, I’m not gonna lie, I kinda liked the raw wood look. It wasn’t right for this space or application, but it looked better than I thought! So if you’re looking for an interesting ceiling or wall treatment that’s unpainted, this was pretty nice looking.
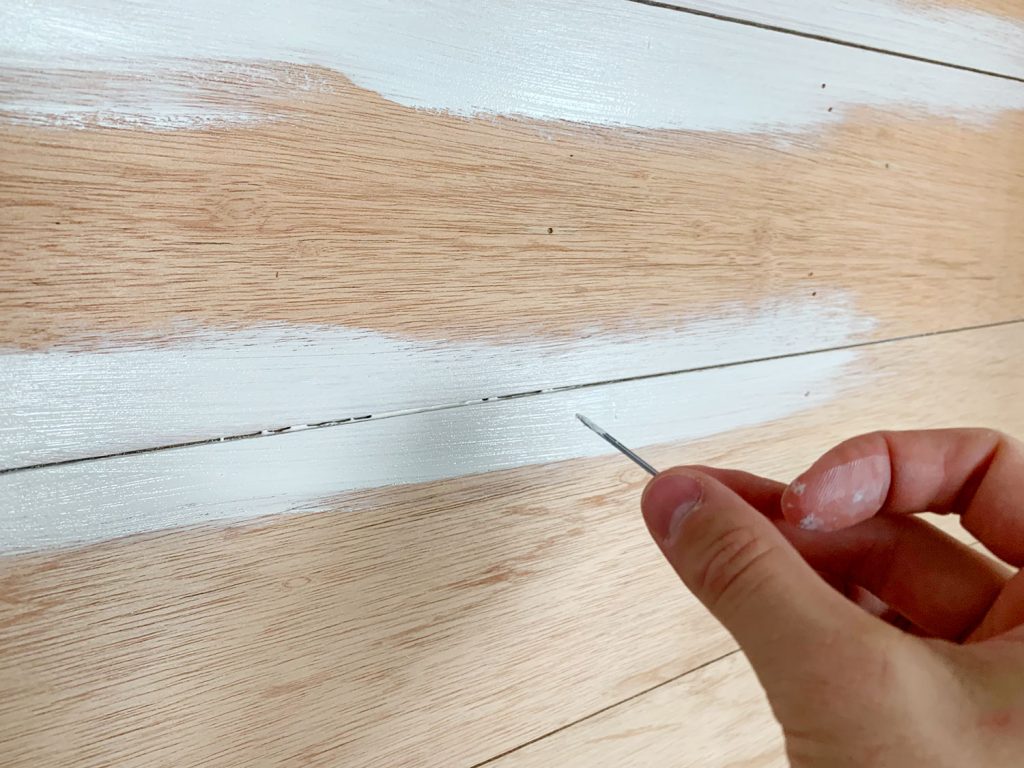
Since our goal was to cover it with wipeable semi-gloss paint and make it blend into our cabinets for a more backseat role in the kitchen (our tile and brick chimneys are the stars in there), the next step was priming. Technically you could go to nail hole filling next, but I personally find it easier to spot all of my nail holes after wood is primed. We had a mostly full gallon of our favorite primer on hand, but a project this size probably only needs a quart if you have to pick some up. We started off by going over all of the cracks with a brush.
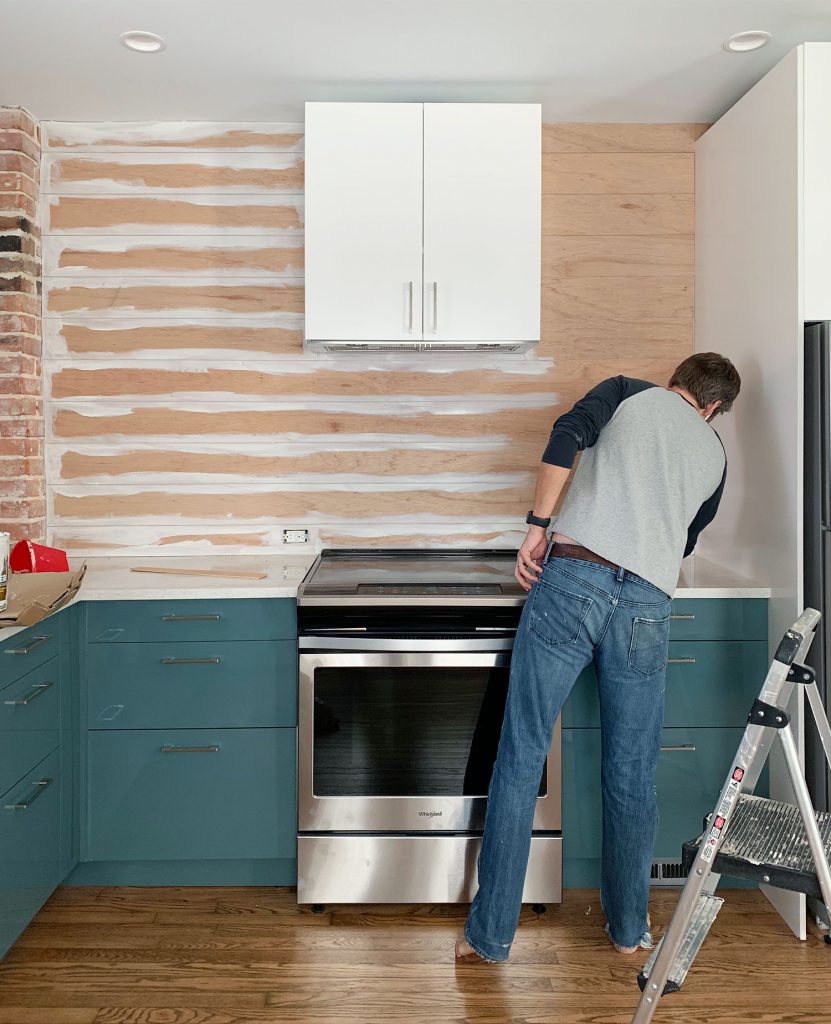
I did find that I sometimes got globs of primer collecting in the cracks, so it was helpful to have a small nail nearby to scrape them clear. Maybe this is an argument for slightly larger gaps? I dunno, but it was’t a big deal in the long run and we love the finished look.
After priming with the brush, we rolled the whole wall with a small foam roller. After that dried – and we could clearly see all of our nail holes (along with some wood knots that we wanted to tone down) we filled them using that pink wood filler that turns white once it’s dry and ready to be sanded.
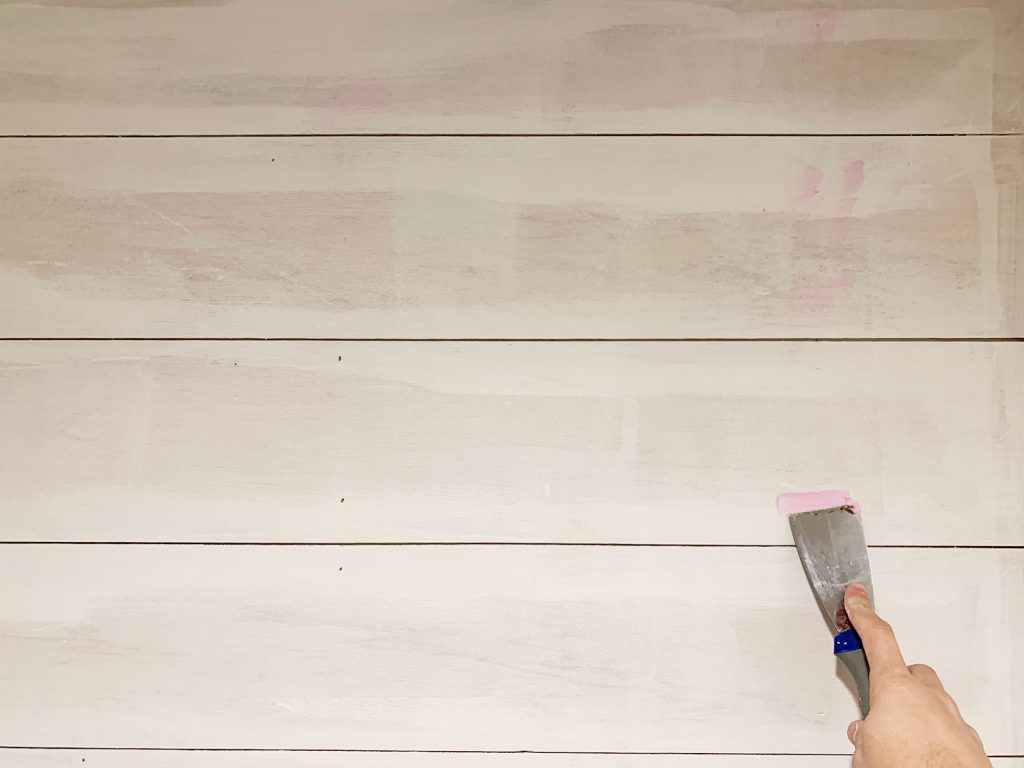
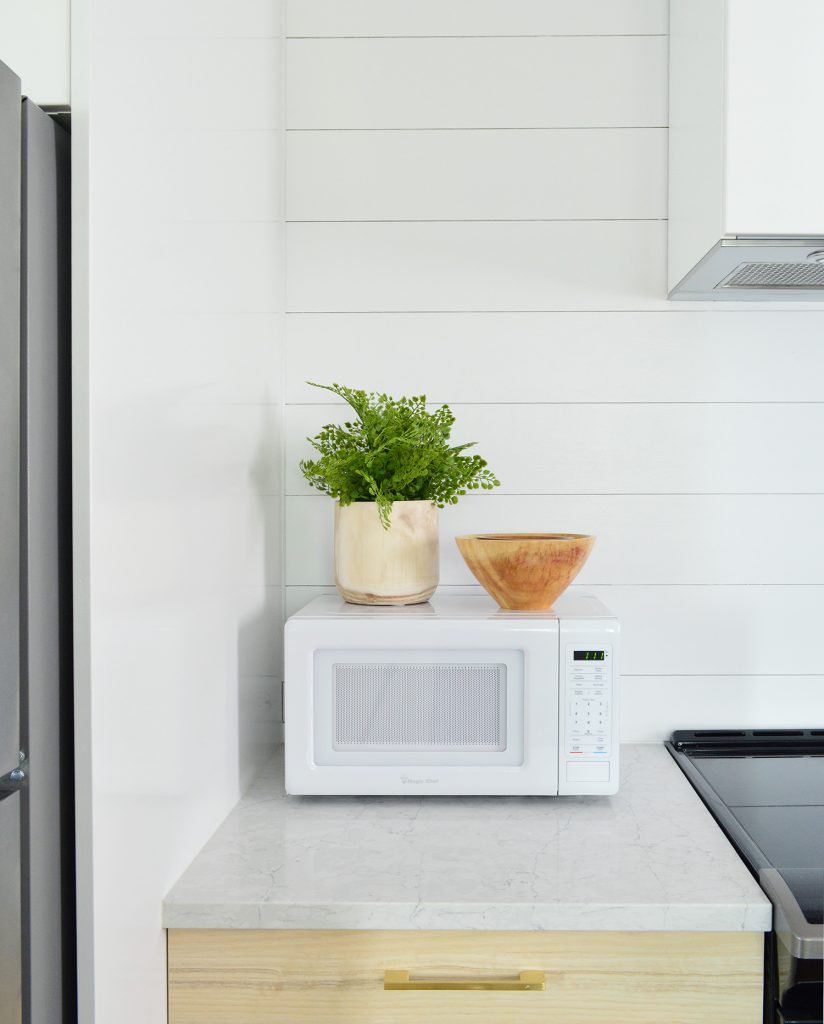
We rolled on a quick second coat of primer once all of our nail holes were sanded smoothed, and then painted the whole thing using a semi-gloss white paint that we had color-matched to the cabinets (we brought in a scrap piece of a filler panel so they could scan it at the paint desk and whip up a close match). Thanks to priming first, we got away with just one coat of paint, and once it was dry we caulked the edges with our go-to kitchen caulk and called it a day!
I should point out that we had to repeat this whole process on the other side too. So it wasn’t quite as speedy as it would be if you were only doing ONE kitchen, but we completed both of them in a weekend.
It was just the thing that side of the kitchen needed, so I’m really glad we gave this a try. Gotta love when projects are straightforward, affordable, and hold up well (cause we all know that doesn’t always happen).
And if you’d like to read about other affordable DIY projects, here are a few reader favorites from our archives:
- Our $57 board & batten (it’s also surprisingly simple!)
- How we added easy & affordable landscape lighting
- Adding crown molding to the top of your cabinets
- Or adding crown molding around your room
- How to install a kitchen backsplash for $200
- How 13 sheets of tile majorly upgraded our laundry room
- Sanding & refinishing a dining table
- A quick way to hang curtain rods
- How to install your own under cabinet lighting
P.S. You can see lots of other projects & updates here in our Home Improvement category.
*This post contains affiliate links*
