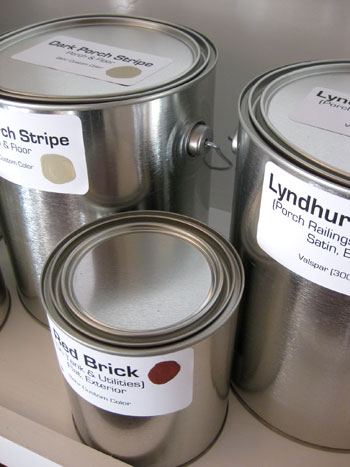
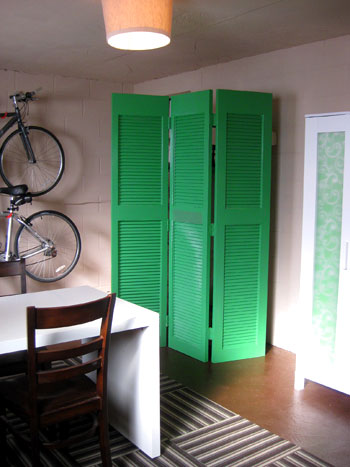
First of all, thanks so much to everyone for sharing in our baby-bomb excitement and wishing us well on our little “project.” You guys are the best! This new-ish development (actually it began in August, which feels like eons ago) certainly means that we’ll be working away harder than ever on our house and we promise to share every dirty home improvement detail with you. And speaking of details, we’re interrupting our regularly scheduled programming to field a bunch of the questions you guys asked on Wednesday in this as-promised Petersik Baby Q&A. Q: How far along are you? When are you due? Baby Petersik (or “the bean” as he or she is affectionately known
Thanksgiving Place Setting Ideas
Last year Thanksgiving flew by so fast that we barely got to acknowledge any fun fall decorating (except for this post with some seasonal inspiration that we were loving). So this year we were determined to do a little Thanksgiving sprucing of our own and we finally got around to it yesterday. First we transformed our formerly spooky Halloween console in the living room (more details about that here)… … into a less sinister, more fall-friendly Thanksgiving setup complete with white pumpkins, glittering votives, a stack of cream and brown books, and an abundance of corks atop a borrowed kitchen cake stand. You’ll notice that we kept the same textured piece of burlap as a
A DIY Buffet Makeover
When Lindsay sent us the before photos of a cabinet that she completely transformed we could never have predicted just how different the end result would be. It looks like a whole new piece! Here’s her letter: Well, I know you guys love a good before and after so I wanted to share an “extreme makeover” we performed on a large hutch a few weekends ago. For us, it was all about working with what we had, livening up the piece and taking cues from places like Pottery Barn and Ballard Designs (too much $$, but really cute things!). The hutch is a truly dramatic transformation (see more info here on my blog about the
A Beautiful Kitchen Nook Makeover With A Capiz Chandelier
When Ania sent us her delicious after photos (thanks to this mood board that we whipped up for her last month) we couldn’t wait to share the eye candy! We know you guys love a good before and after, and Ania did a faaaabulous job! Here’s her letter: Here are a few after pictures that I took for you! Needless to say, we LOVE our new living and dining room area. I can’t believe I ever had doubts about the bentwood chairs or the media stand. They are honestly my favorite items that we purchased. We L-O-V-E everything. From the frame collage to the chandelier to the sofa table… everything! Thank you soooooo much for
How To Hang Our Bikes On The Wall Of Our Basement
We’re back with our weekly basement update (here’s where we left off) and this time we conquered the bare-bulb ceiling fixture (by dressing it up with a polished linen shade). We also snagged a vertical balancing bike rack (on sale!) since our cinder block walls make hanging weight-baring hooks and stands close to impossible) and got the ultimate surprise from Flor in the form of an awesome 5 x 8 rug thanks to their amazing carpet squares. Sure we still have to add privacy to the windows, paint the built-in cabinet near the bikes, build a screen to hide our eyesore of a water heater, and more… but here’s what the room looks like these days with the
How To Paint & Reupholster A Wood Chair
When Angie sent over her simple and inspiring chair makeover we loved the outcome so much we had to share it. Here’s her letter: I love your style and your blog. I just got into blogs a few months ago and yours is a must read every day! I’m so excited to share my before and after chair makeover. I purchased it at the Ann Arbor ReUse Center for $5.00. After I removed the seat cushion and a ridiculous number of staples, I patched, sanded and primed the chair. I bought some new foam for the seat on sale at Joann’s and painted the chair with some white trim paint I had on hand from other paint jobs in our house. To cover
How To Add Basement Storage
Well, thanks to the generous and wonderful folks at True Value, we now have a totally dry and completely functional basement to use for storage galore (read about how we prepped and waterproofed the former bug graveyard here and here). And thanks to a little road trip to Ikea this weekend, we came home armed with pretty much every item that we planned to snag in this basic mood board of sorts that we shared last week: Expedit shelf (included in the total Expedit Workstation) -$120 Torsby table (already owned, so it’s free!) A woven basket or two – $17 each Two Aneboda wardrobes – $100 a pop A few white storage boxes – $12
Natural Pest Remedies & Getting Rid Of Roaches
When Rebekah emailed us with a doozie of a question we were pretty much left scratching our heads. Here’s it is: Q: I’ve become an addict of your blog – just ask my husband! I can’t help but check it multiple times a day. Your posts are always so informative and they keep me motivated to keep working on our 1960’s home. Anyway, my husband and I purchased the brick ranch with a lovely yard about four months ago. My only problem is that we’re starting to see more pests (i.e. roaches… ewww!) due to the weather getting colder here in Georgia. I can’t live in a house and accept that the pests will always be there. We woke up at 4am
Beautiful Bathroom Reno With Vessel Sinks
When Totty sent us photos of her almost unbelievable bathroom makeover we just had to share the big transformation. Here’s her letter: My husband and I are fellow Richmonders and have been following your blog for quite a while. I wanted to share some pics from our newly renovated bathroom. This poor room has had 2 makeovers in 4 years. It hadn’t been updated since the 60’s so it was in dire need of one and we unfortunately chose a bad tile guy who did a HORRIBLE job, hence the 2nd makeover this summer (I posted the full story on my blog). We were definitely budget conscious when planning this redo, but knew that re-tiling
How To Make A Floor Plan With Graph Paper
Here’s an easy way to create a workable floor plan and decide exactly which pieces will work in any room. Just draw a to-scale sketch of the space with graph paper and have fun moving things around ’til you love what you see.
Painting An Old Wood Dresser Bright Green
When Monica sent her amazing dresser makeover our way we couldn’t wait to share the goods. Here’s her letter: I just recently found your blog and let me tell you, like everyone else around here, I’m totally in LOVE with everything you guys do, plus your How To tips are super! My boyfriend and I just moved to a new home (rental) and like anything that is not yours, we’re tying to put our stamp on it. I inherited my boyfriends dresser and I wanted to incorporate it into my kitchen nook, thus a PROJECT was born. While I love wood and before I paint anything I really think about it, I knew that the
Fun Friday Departure: Costume Chitchat
With Halloween finally upon us we’re wondering if you guys plan to host parties, attend them, attend them in costume or just answer the door and shove fistfulls of Butterfingers at the three-foot-tall ghosts and goblins ringing your bell. Something about Halloween is especially intriguing to us this year. Maybe because it’s sort of a before and after fest when it comes to your house (our porch and our living room had a little spooky makeover) and even when it comes to yourself (if you’re dressing up there’s a definite transformation that takes place). So tell us all about who or what you’ll be for the night (any Jon & Kate Plus 8s? Or how
- « Previous Page
- 1
- …
- 88
- 89
- 90
- 91
- 92
- …
- 123
- Next Page »