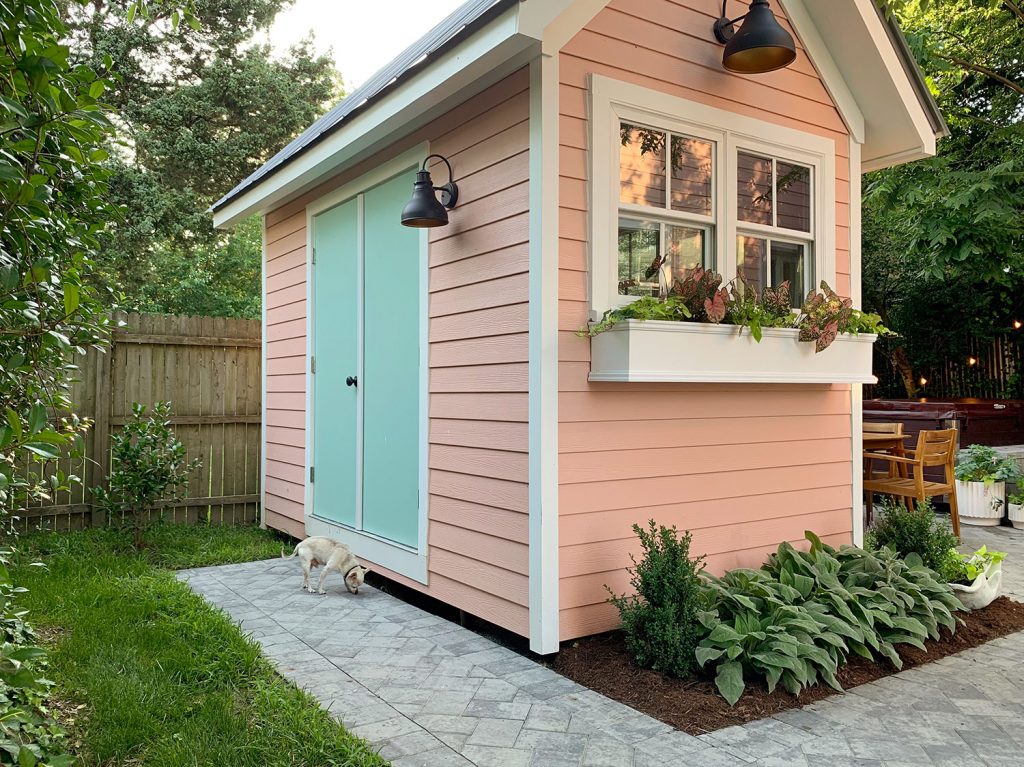
Earlier this summer we shared how we made over our beach house backyard in one giant post that covered the entire year-long process of taking it from a gnarly jungle to compact-yet-relaxing little oasis. It’s a very small space, so we worked really hard to squeeze lots of function out of it – more on that here – and back when we shared that post, many of you asked for photos of the inside of our pink shed along with details about what we store there. So today all of your shed-poking-around dreams are about to come true.
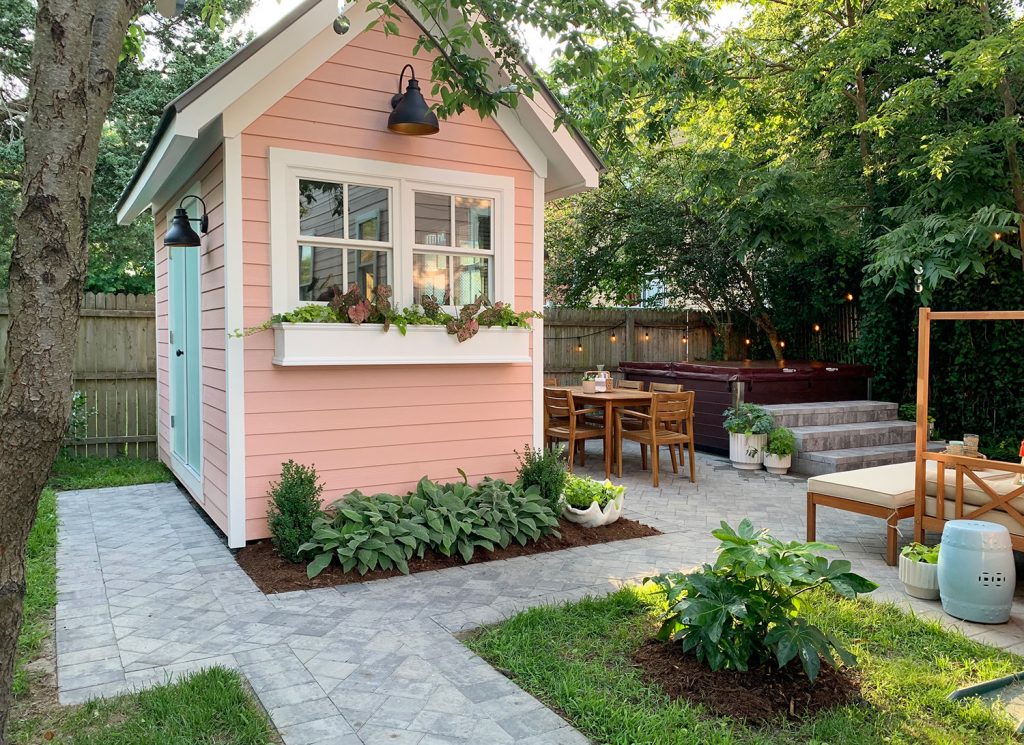
When we shared that backyard before & after fest, I confessed that the inside of the shed was a “disaster pile” – but we were able to turn that around about a week later in under 5 hours, without purchasing anything beyond some basic lumber and a few hooks. I’m not gonna pretend it’s the most perfect shed that ever shed-ed, but I did do two things that made all the difference in how much we can store (and easily access) if I do say so myself. Overall this project was a good reminder to us that good organization doesn’t have to be overwrought or expensive to be functional.
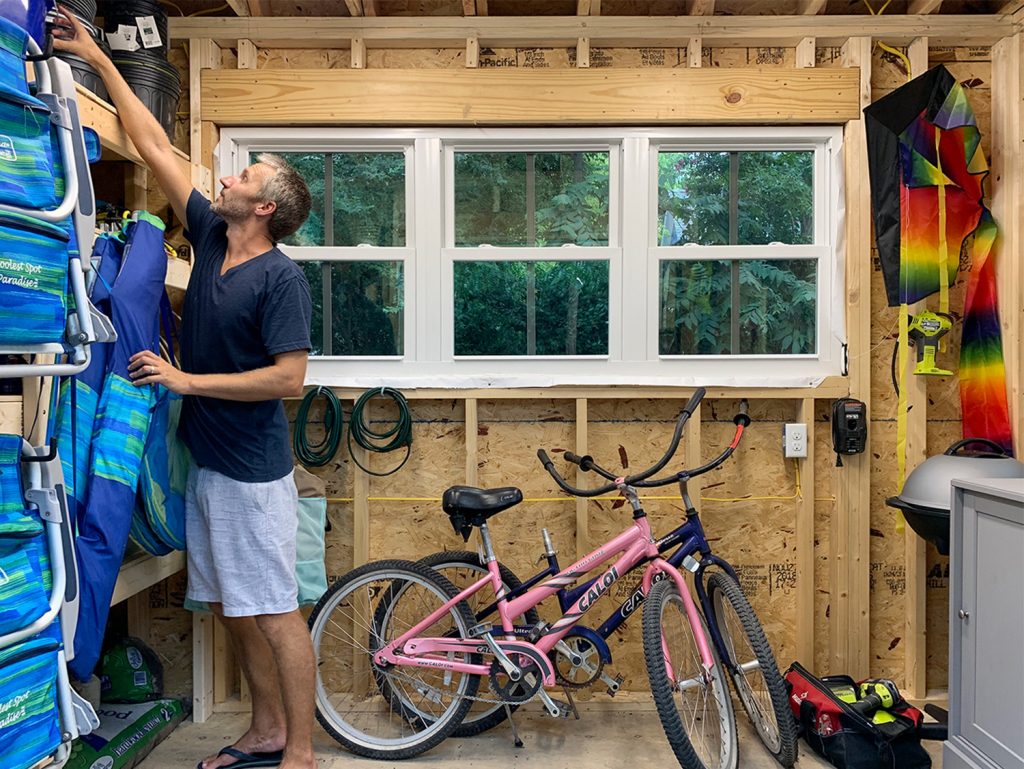
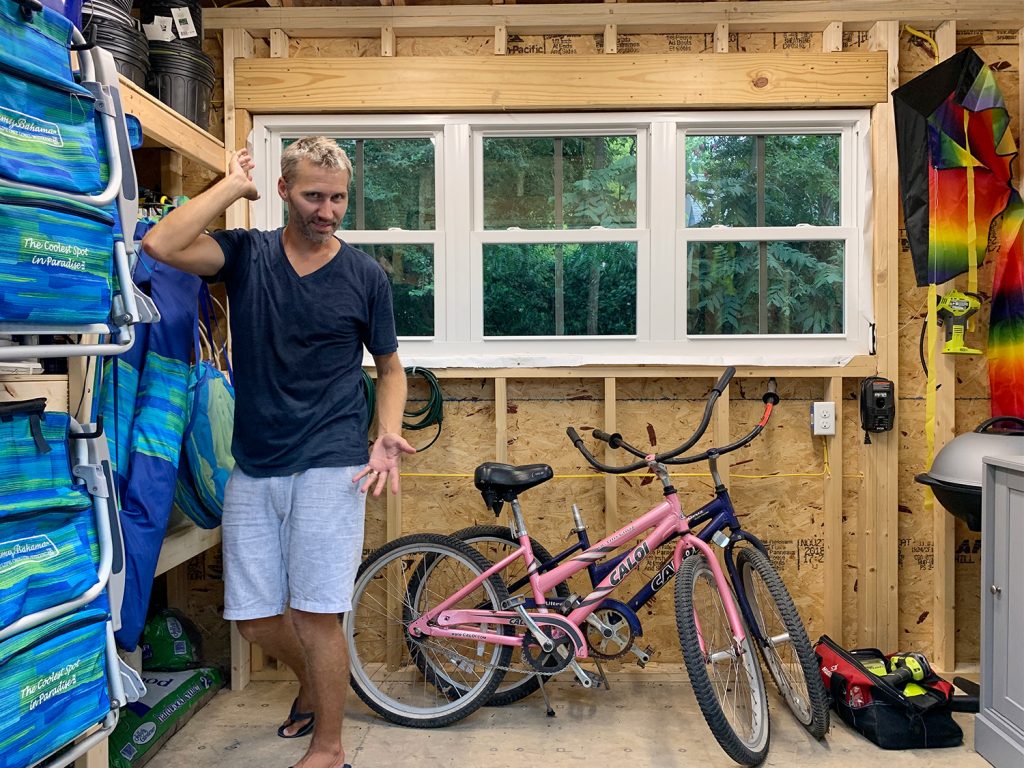
It also taught me that I’m stunning and versatile model. Is that a smize I detect? #WatchOutChad
While the outside of the shed is an important visual anchor point in the backyard (not to mention a really great privacy provider that helped establish that nestled & cozy feeling), the inside was meant to solve our no-garage, no-basement, no-other-outdoor-storage issue. For more than a year we had been piling lawn equipment, beach gear, tools, and lots of renovation leftovers into the beach house foyer and mudroom. Which as you can imagine was not ideal (hello sand and grass clippings, welcome to our home). So as soon as the shed was complete, we eagerly transferred everything that should live in the shed into the shed. It was a big day for me. And that’s how our disaster pile was born.
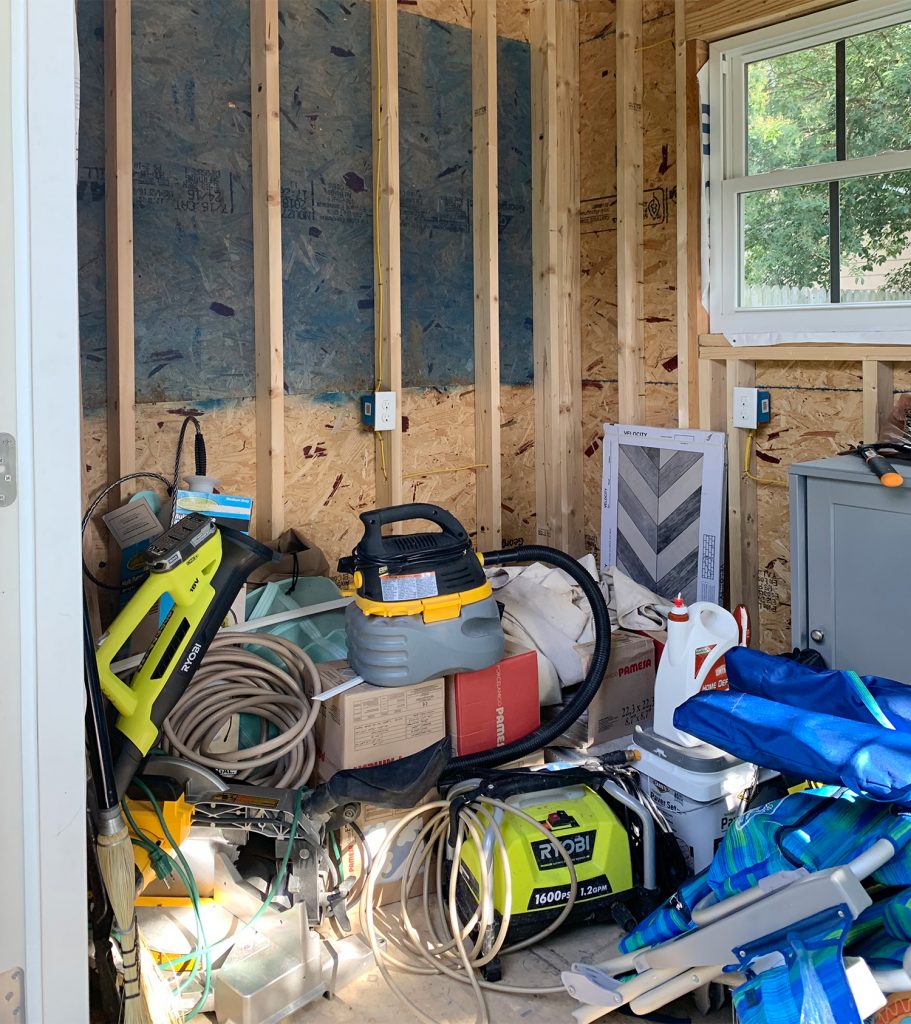
It sat that way for a while, just festering – as piles of disaster tend to do – and then we finally had a weekend to whip this shed into shape. The name of the game in here was basically just to utilize the wall space so we could clear the floor space.
The challenge is that we didn’t have a lot of wall space to work with, since the wall shown above is the only wall without doors or windows on it (the other three walls have either three windows, two windows, or two doors that take up most of those walls). Which meant it was the obvious spot to build some heavy duty shelves:
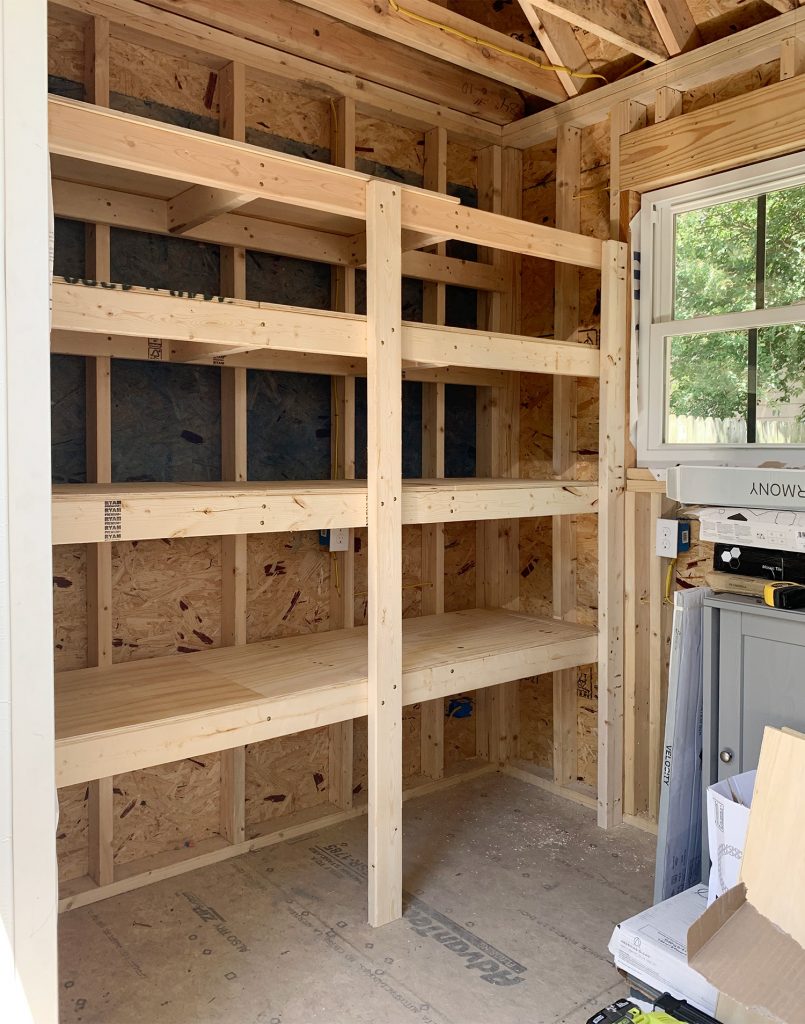
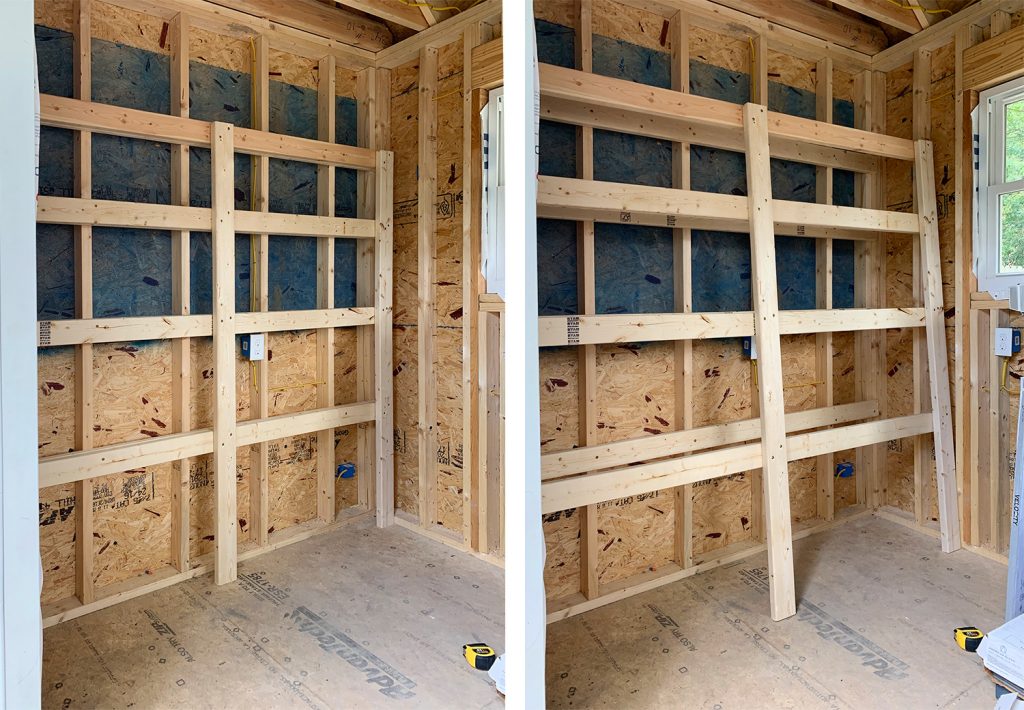
I built these shelves in just a few hours using the same technique I used in our Richmond shed, which was based on this Ana White tutorial. It just uses 2 x 4s and plywood, and involves a super simple trick that saves you lots of measuring and leveling. You can see more of the step-by-step details in this post but the gist is that you build your outer shelf supports right against the wall, literally screwing them (temporarily) into the inner shelf supports. That way when you separate them you’re confident that the front and back of your shelves will line up perfectly. Because you literally build them on top of one another. It makes it really fast too!
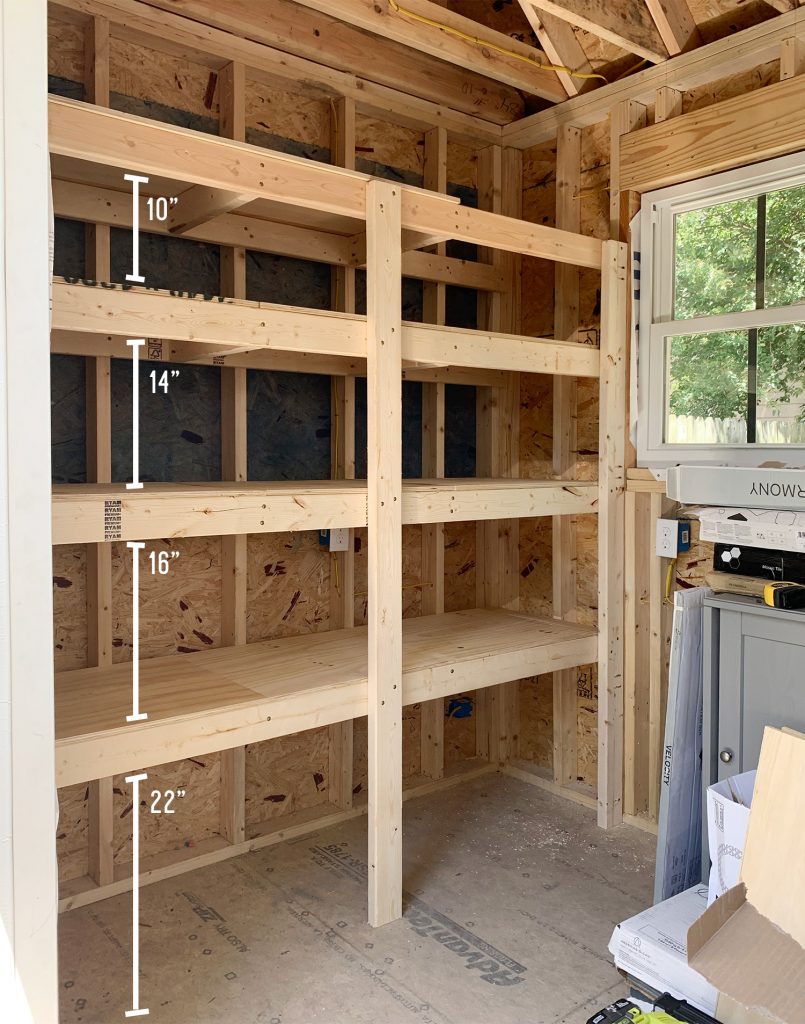
You can space the shelves however you’d like (to customize it for the items you’re storing), but I’ve included our measurements below for reference. You can see that we like some big shelves on the bottom for bulky items and tools – and then some smaller ones up top. This gives us a ton of flexibility, which is great – especially when you’re not 100% sure what’s going to go on each of the shelves (the stuff you store in a shed also seems to evolve over time – so versatility is key).
The one thing we were certain was going on those freshly built shelves was all of the spare tile from both the beach house and duplex renovations. We like to keep at least one box of extra tile on hand for every project (just in case something cracks or a plumbing issue pops up and we need to replace some tiles down the line) and the tile from 3 kitchens and 7 bathrooms and 3 mudrooms really adds up (YES, WE TILED THIRTEEN SPACES IN TWO YEARS BETWEEN THE BEACH HOUSE & THE DUPLEX! You can see the results here & here).
Fortunately that all fit easily on just one and a half shelves, so I had lots of room for about 70% of what was originally in our disaster pile – including things like our pressure washer, our inflatable paddle board, the kids’ boogie boards tha, some potting soil/mulch, our miter saw, and our shop vac. I’ll show you where the other 30% of the disaster pile ended up in a second.
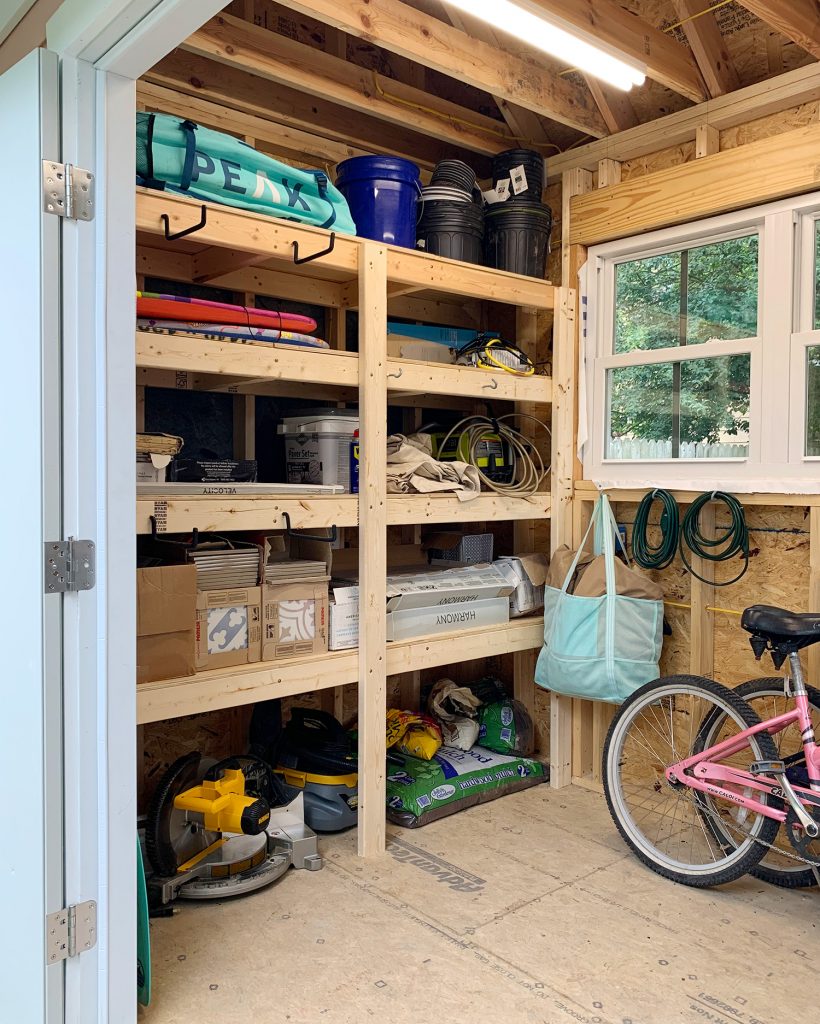
Here comes my favorite part of this particular shed project. I kinda hated that I had used up our only full wall to store things we’ll need very infrequently (or maybe never in the case of the extra tile). So I decided to treat the front of the shelves like a wall of their own by adding another layer of organization on top! Kind of like when people hang a picture frame on the face of a bookcase. But more sheddy.
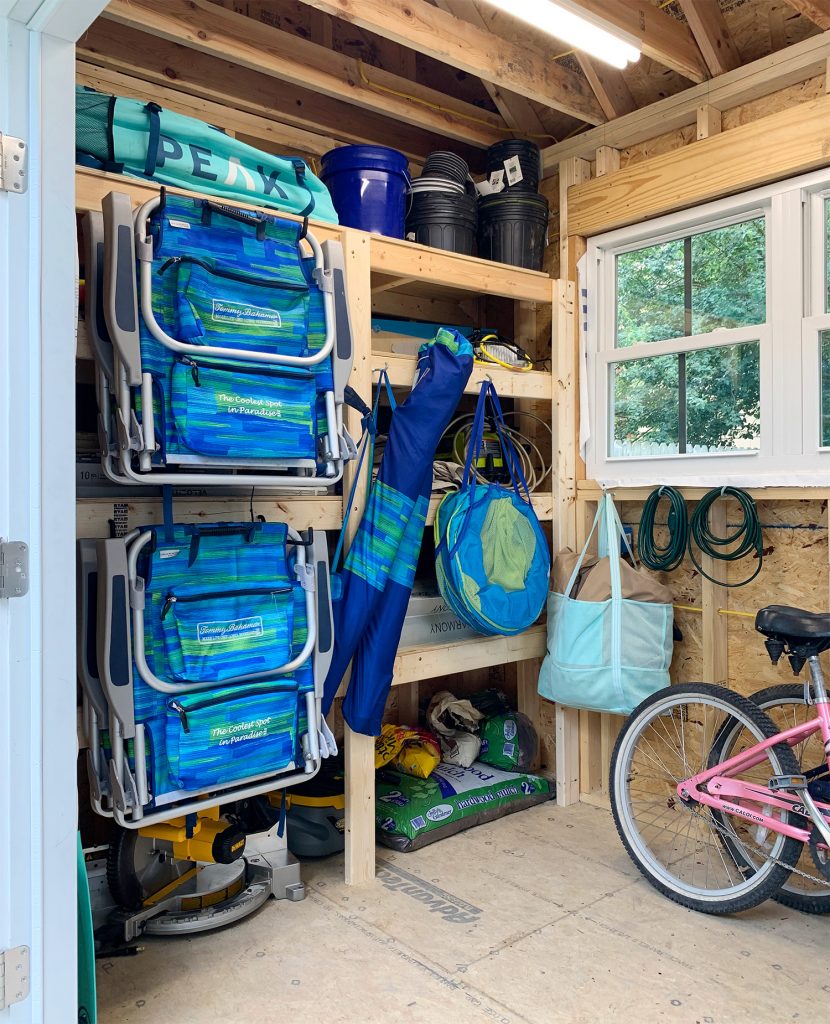
All it took were some strategically placed hooks (like these ladder-hooks-turned-beach-chair-hooks) and now we can hang our more frequently accessed items (aka beach gear) in a suuuuuuuper convenient spot right next to the shed door. I can’t begin to tell you how useful this system has been over the last couple of months. And it’s not like we wish we could see those random looking tile boxes, so hooray for some strategic shed layering.
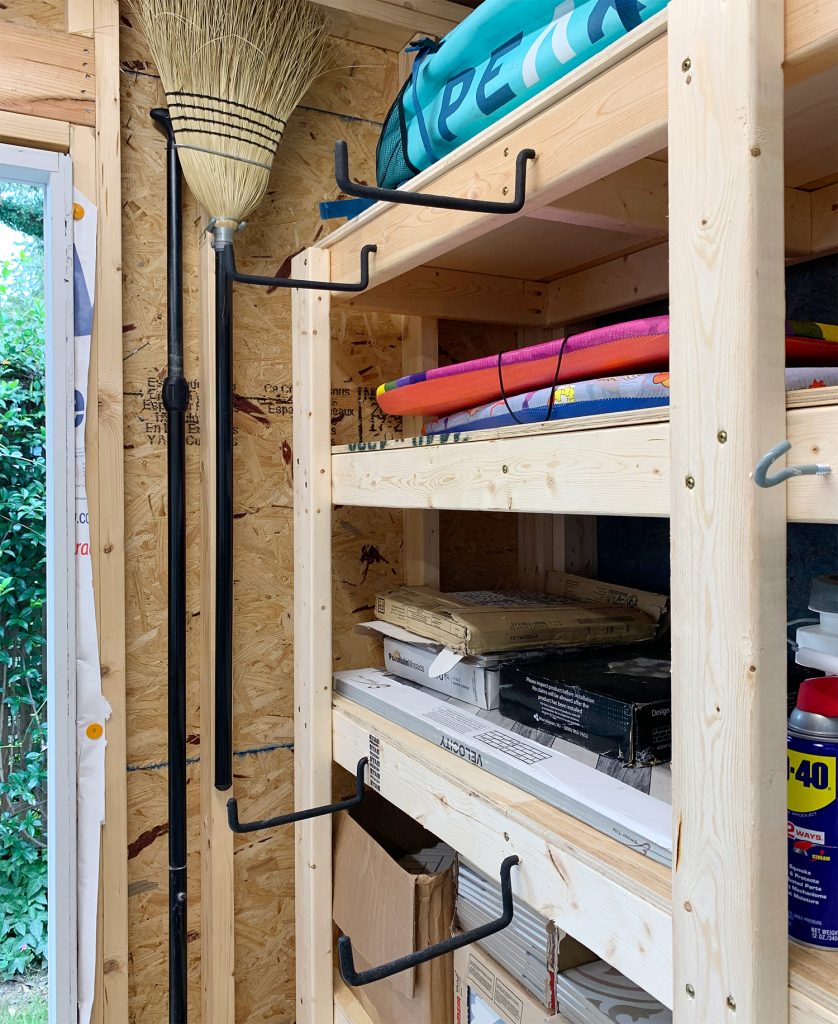
Note: if you’d like more projects that have to do with adding shelving, this post has sixteen easy shelving ideas for you.
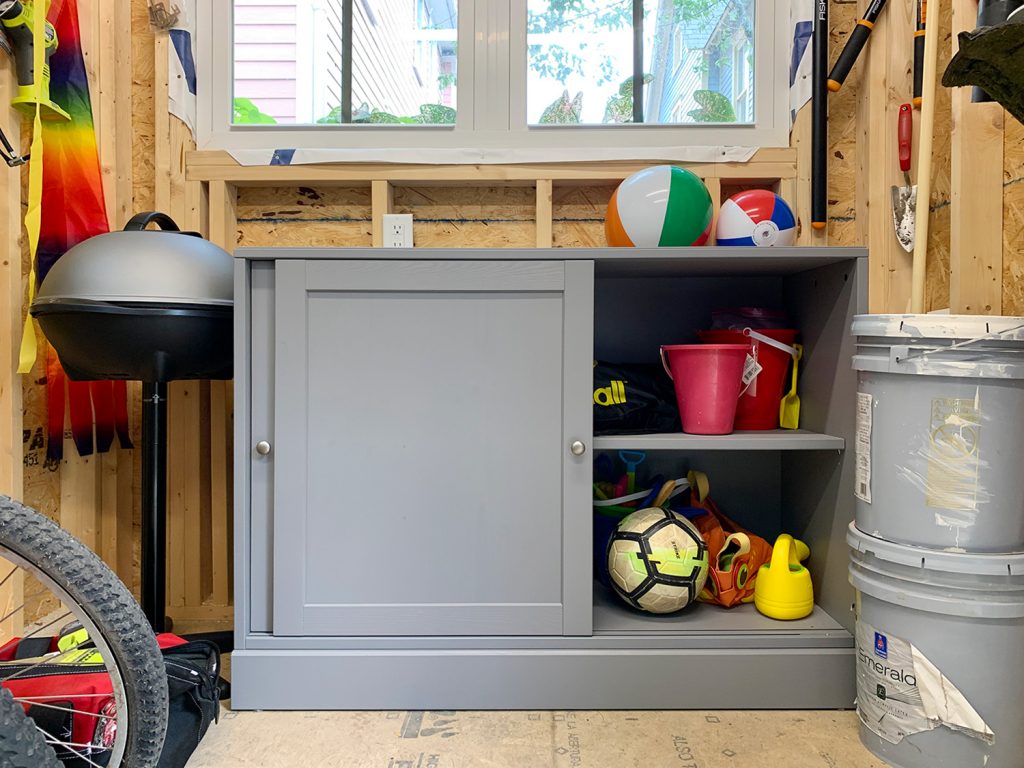
Now let’s spin around and take a look at the other side of the shed – which is mostly windows. Again, the windows are what help the shed look so good from the outside but they limit our options in here. I managed to make use of some of the narrow wall space and corners for things like our beach kite and our little electric grill, but the area under the big window is mostly consumed by a couple of leaning bikes. They’re hand-me-downs from a neighbor (which is why one is missing a seat) that we’re hanging on to for when our kids are a little bigger – so it’s really nice to have room for them.
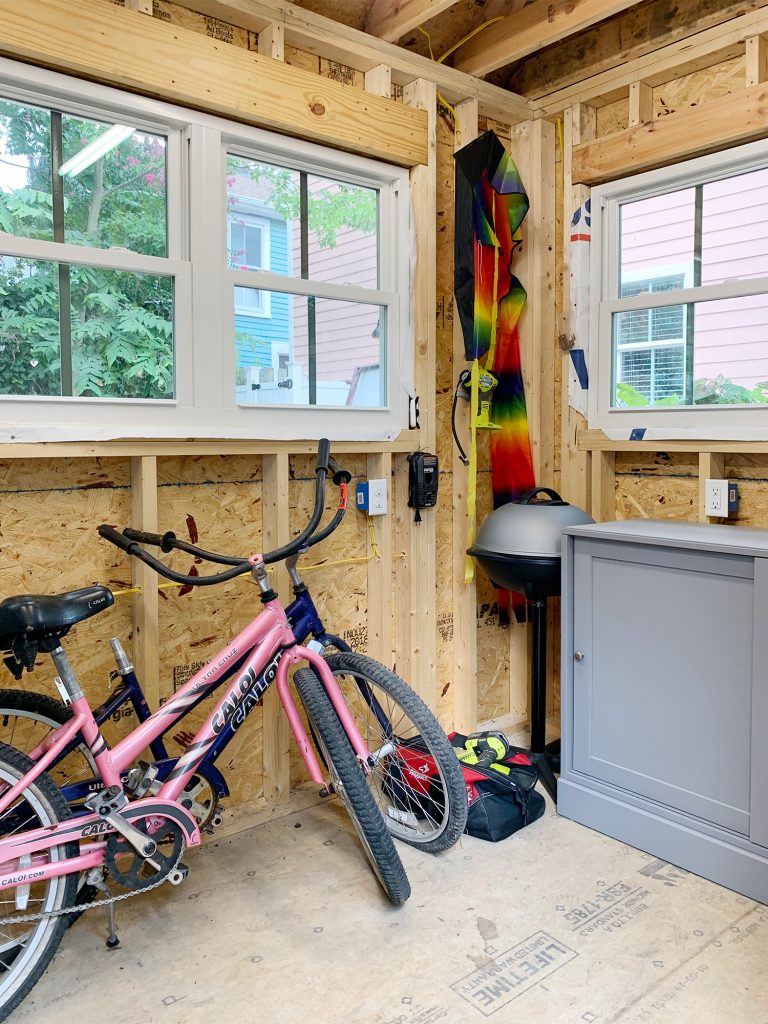
The gray storage piece under the other window is actually an Ikea item that we originally bought as a duplex media cabinet. But after assembling it we realized it was waaaaay too hulking for that use (we ended up using these instead) and we sent this to the shed to use for storage instead.
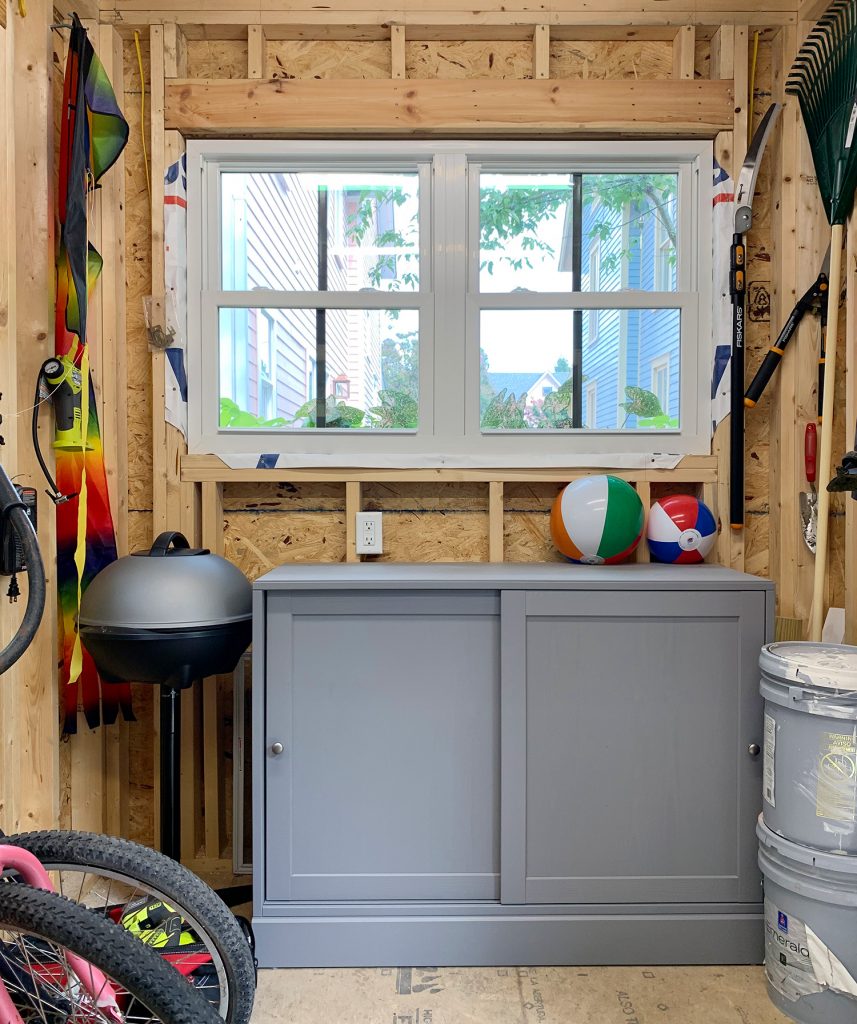
It’s probably not the piece I would have chosen for this use if I hadn’t already had it on hand, but it has turned out to be a decent way to corral smaller items like toys & buckets along with some random garden gear like hoses and gloves (which are stored behind the closed door). Actually having doors that slide instead of swinging out is nice because the area in front of this cabinet doesn’t always have to be completely clear to open the door, which is handy.
The wall to the immediate right of this cabinet has a smorgasbord of random screws, nails, and hooks that we attached to wrangle our various outdoor tools: clippers, a rake, some shovels, etc. I’ve bought some of those “fancy” outdoor took racks in the past, but I can’t say I’ve really loved any of them more than an easy system like this. Just make sure when you’re buying outdoor tools that there’s a way to hang them (most should come with a hole or loop somewhere for this purpose).
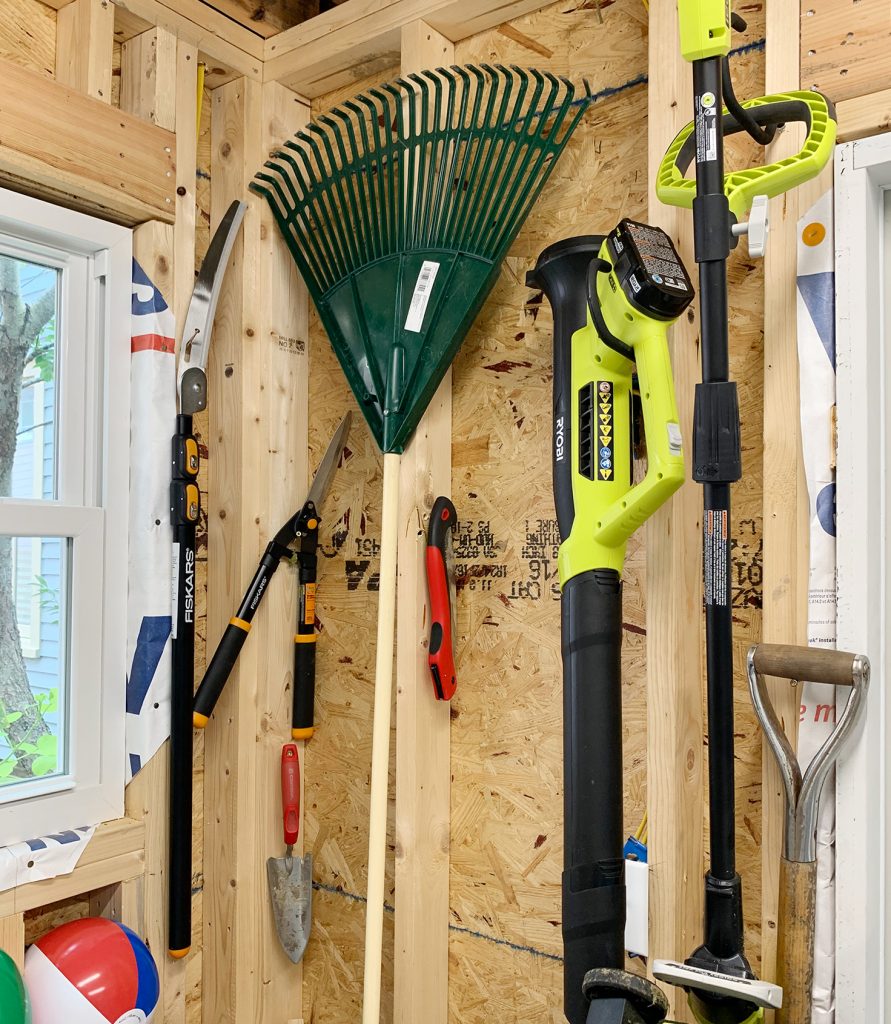
For things that didn’t already have a ready-made loop, I used some heavier duty bike hooks to hang items like our blower, weed trimmer, and ladder. And speaking of the ladder…
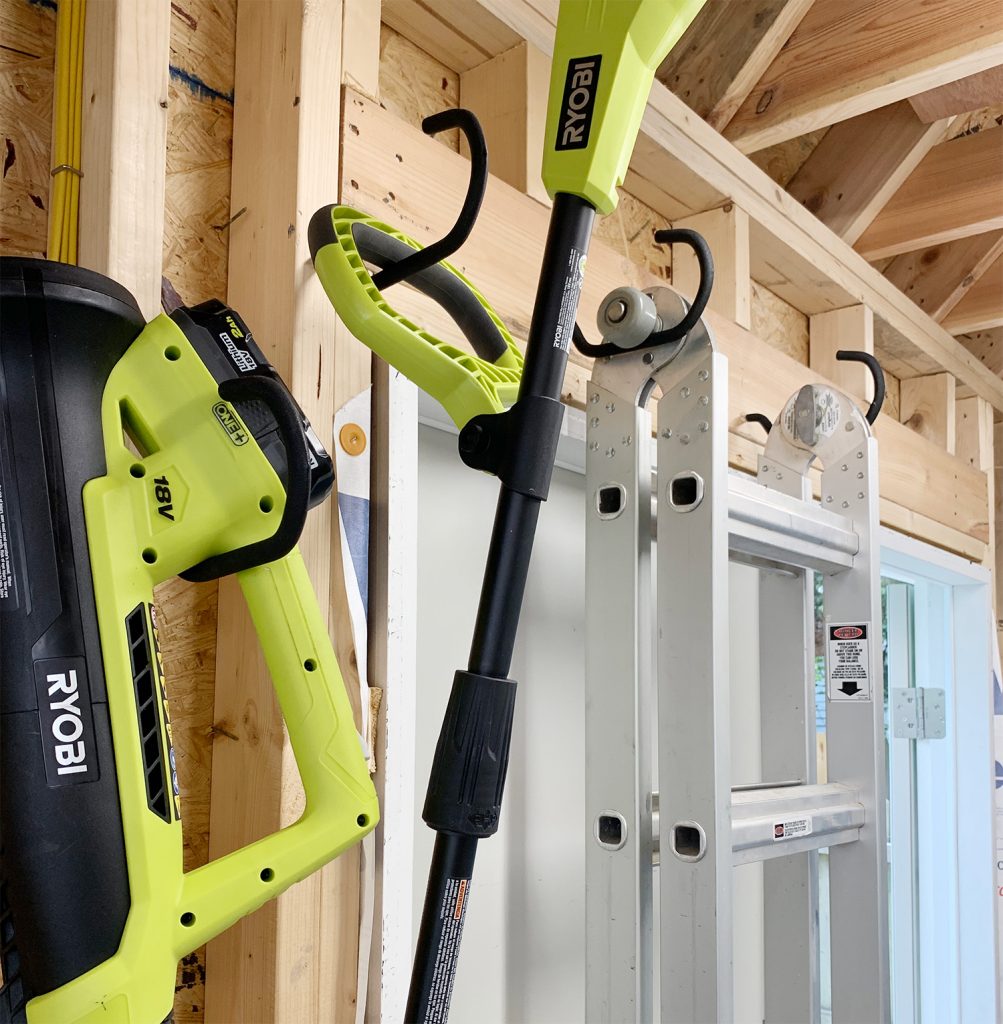
…this is the second instance were I sort of “created my own wall space.” How? Well I hung it right in front of one of the doors. We put double doors on the shed to make it easier to load in larger or longer items like our outdoor furniture on occasion – but so far we’ve rarely opened both of them. And since that door with the ladder in front of it stays fixed in place unless unlatched at the top & bottom, I figured why not make use of that most-of-the-time “wall” space? I can easily take the ladder down if we ever need wider access, but 99% of the time it’s more useful this way and I love that it’s securely hung and out of the way.
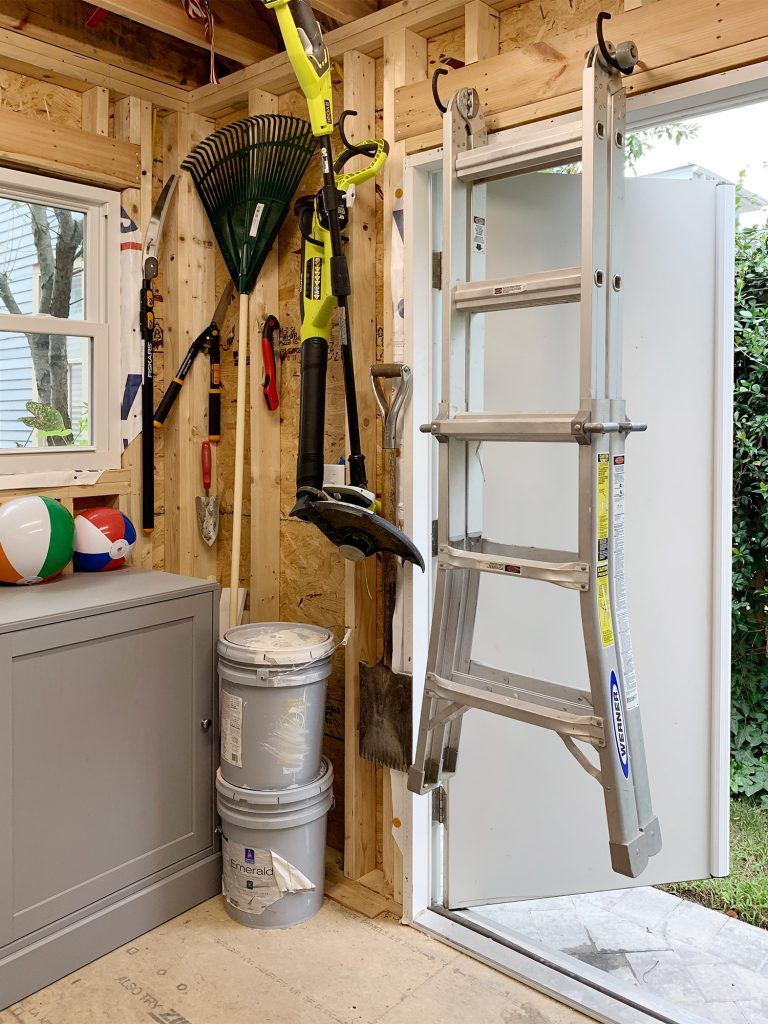
That concludes my guided tour of the beach house shed. Hopefully it has satisfied your curiosity about what lurks behind those blue-green doors.
And if you like organization posts (or SHEDS!) as much as I do, check out:
- Four Ways We Organized Our Richmond Shed
- Maximizing Our Mini-Mudroom
- How We Organized Our Kitchen Cabinets (full video tour!)
- Turning A Coat Closet Into Extra Toy Storage
*This post contains affiliate links*
