Who wants to refinish a table? You? Good – because we’ve actually refinished TWO dining tables using a little elbow grease, ZERO chemical strippers, and, well, a lot of sanding. It’s a testament to how easy it can be to breathe new life into an old piece of thrift store furniture.
Why Refinish A Table?
We needed not one, but two dining tables for our duplex rental because each side has its own dining space. For one side we planned to use our old dining table, which was a hand-me-down Crate & Barrel table we got from a friend.
She had warned us that the cherry finish was pretty scratched up and needed some refinishing at the time, but we just never got around to doing it.

The second table was my sister’s old farmhouse dining table. We jumped at the chance to buy it before she listed it on Facebook Marketplace. It was also pretty worn from years of use, but the size was perfect and we loved how solid and casual it was.

These dining tables were great candidates for refinishing because they were both made from solid wood. If either had a laminate or wood veneer top to them, it would’ve required a different approach. And since both tables were already pretty beat up, we weren’t nervous about taking a sander to them!
Tools to Refinish a Table
We love to avoid using any harsh chemicals when we can, so here’s what you’ll need to refinish a table using this method:
- Electric sander, like this corded random orbital sander or a battery-operated palm sander
- Coarse (80-grit) and medium or fine (120-grit) sandpaper for your sander
- Paper towels or tack cloth (optional)
- Shop vacuum (optional)
- Stain-grade paintbrushes
- Rags
- Wood stain in colors of your choosing (we did Minwax Special Walnut and Minwax Classic Gray)
- Water-based polyurethane (we used this “Triple Thick” version)
- Mask
- Nirile gloves
Those last two are just to keep you a little safer and cleaner while you’re working.
Step 1: Sand A Test Spot
We were a little anxious about taking a sander to a Crate & Barrel table, so we dipped our toes in slowly by first removing and sanding the top of one of the legs. We weren’t sure how deep the stain went and what type of wood waited for us underneath. Plus, if we didn’t like what we found, no one would ever see the failed attempt.
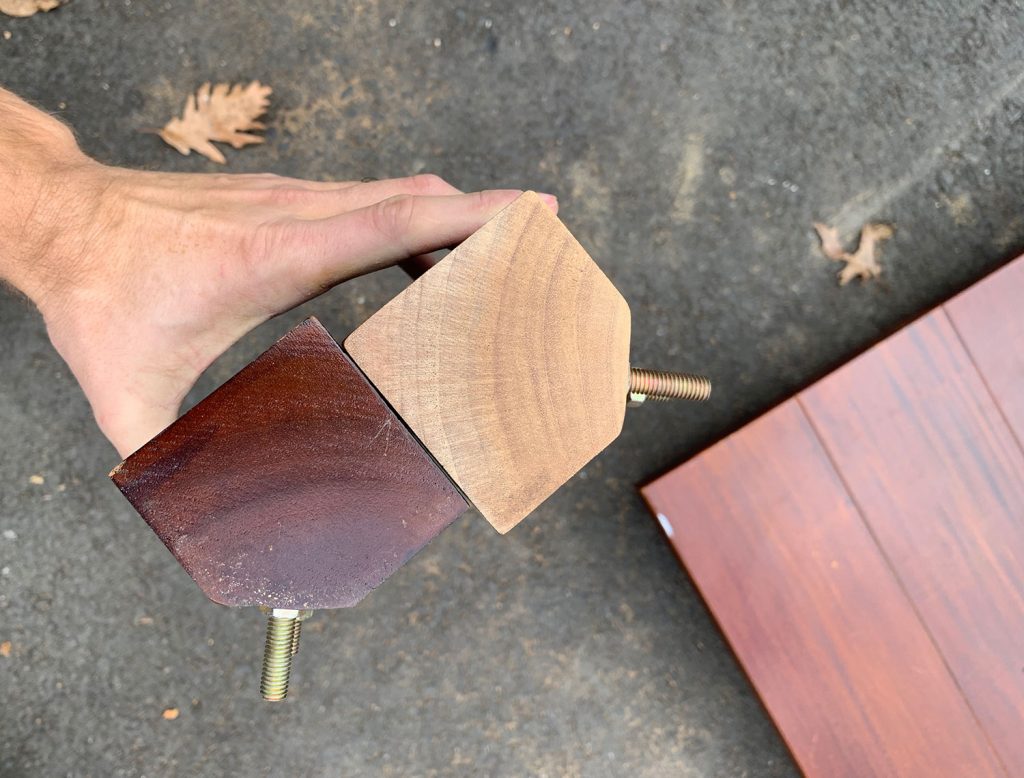
But fortunately, it worked. BEAUTIFULLY. This was our cue to proceed.
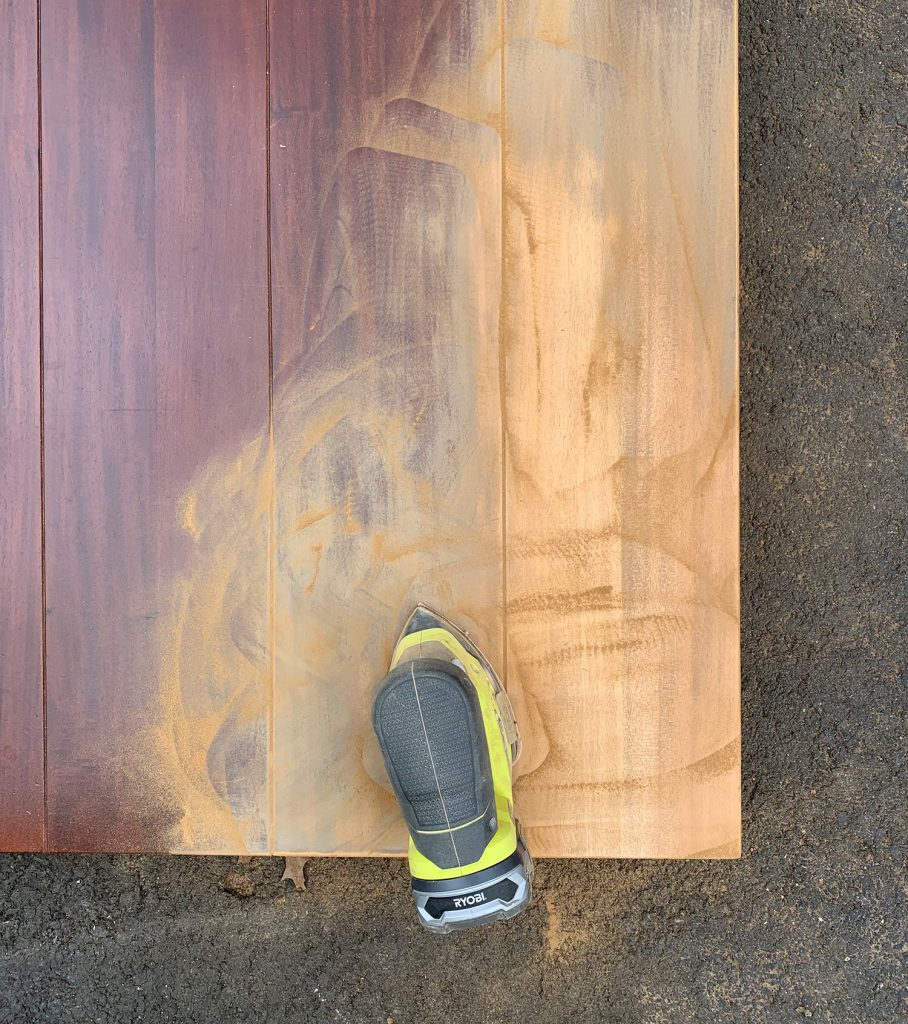
Step 2: Sand Off The Old Finish
Once we had the green light to proceed, we started sanding all surfaces using coarse 80-grit sandpaper on the battery-operated corner cat sander I already owned. Working in small sections at a time and moving with the grain of the wood, we could slowly see the old stain come off and reveal the lighter wood underneath each table.

The battery-operated sander did a fine job, but it was slow going. After an hour or so of work, I went and bought this $79 corded random orbital sander to see if a little bit more power (cue the Tim Taylor jokes) could get me a cleaner and faster result.
It. Was. So. Worth. It.
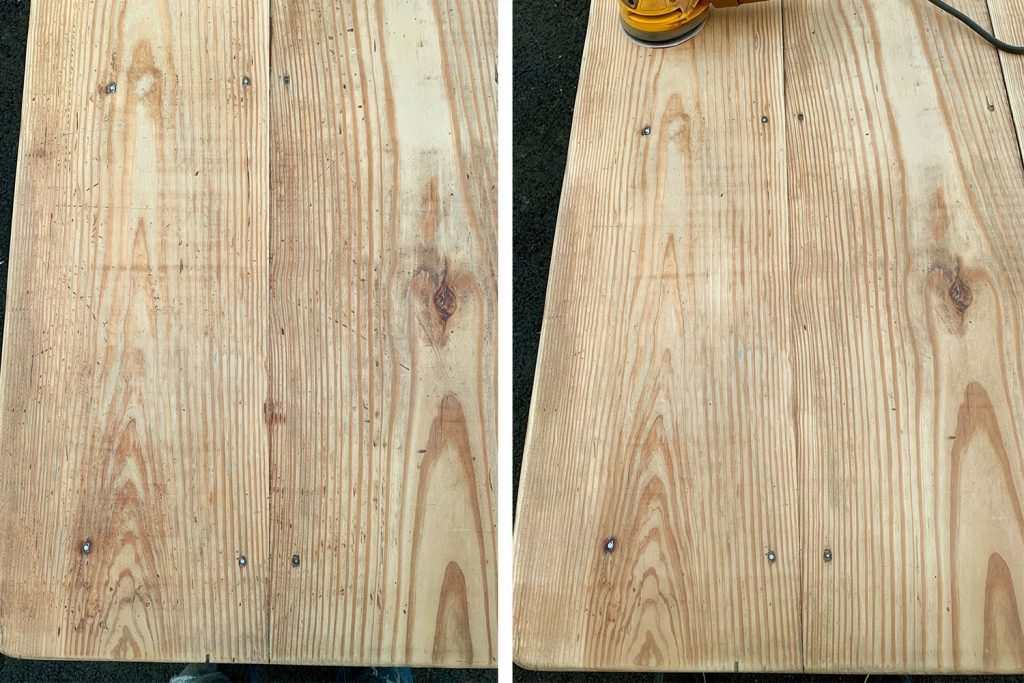
Step 3: Smooth Out Scratches & Dents
My new corded sander showed its worth especially when it came to removing some of the stubborn scratches and marks on the farmhouse table. See the left photo below, which was taken before I used it, and the much cleaner and more stripped shot on the right, which was taken as I was going over it with the orbital sander. This old farmhouse table had some pretty gnarly gouges and this helped me smooth them out.
It was also a lot faster, which helped immensely when it came to sanding off the thick factory finish on the Crate & Barrel table. I couldn’t believe how much wood grain was hiding under that dark red stain!
Step 4: Finish Sanding With Fine Grit Paper
Once all of the finish is removed from the entire table (the top, legs, skirt, etc) it’s usually a good idea to give your table a once-over with a finer grit sandpaper (like 120-grit) to smooth out the finish. This might be especially helpful on the table top surface itself.
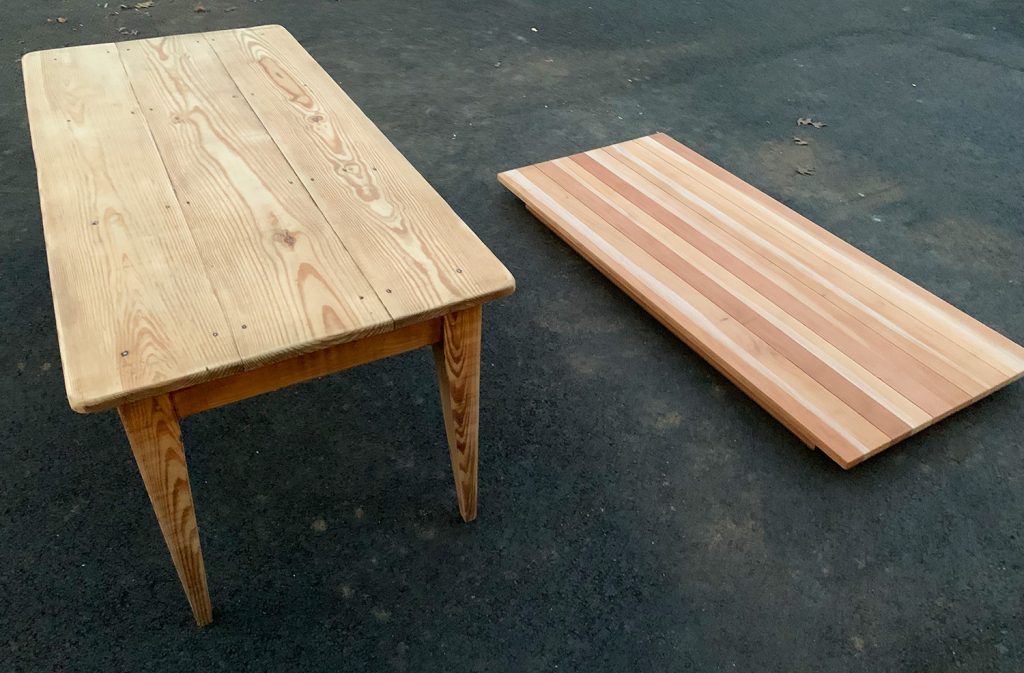
All in all it probably took us 2 to 3 hours to sand both tables, especially because of all of the legs and aprons we had to get too. But I was happy to have discovered the new heavier-duty sander and even MORE happy about the results.
Step 5: Clean Off Your Sanding Dust
With the hardest part behind you, make sure you take a moment to remove all of your sanding dust and debris because you’ll want a totally clean surface before you start applying any new stain or sealers. Since we were outside, we used our leaf-blower to get most of the dust away, but a shop vacuum would also do the trick. You can also go over the surface with a damp paper towel or tack cloth afterwards to remove any lingering sawdust.
Step 6: Apply Your Stain And/Or Sealer
We decided to transport our tables to the duplex like this and then stain and seal them in place, that way we could be sure we liked how the stain colors were looking in the space (and adjust them if they looked weird in the rooms).
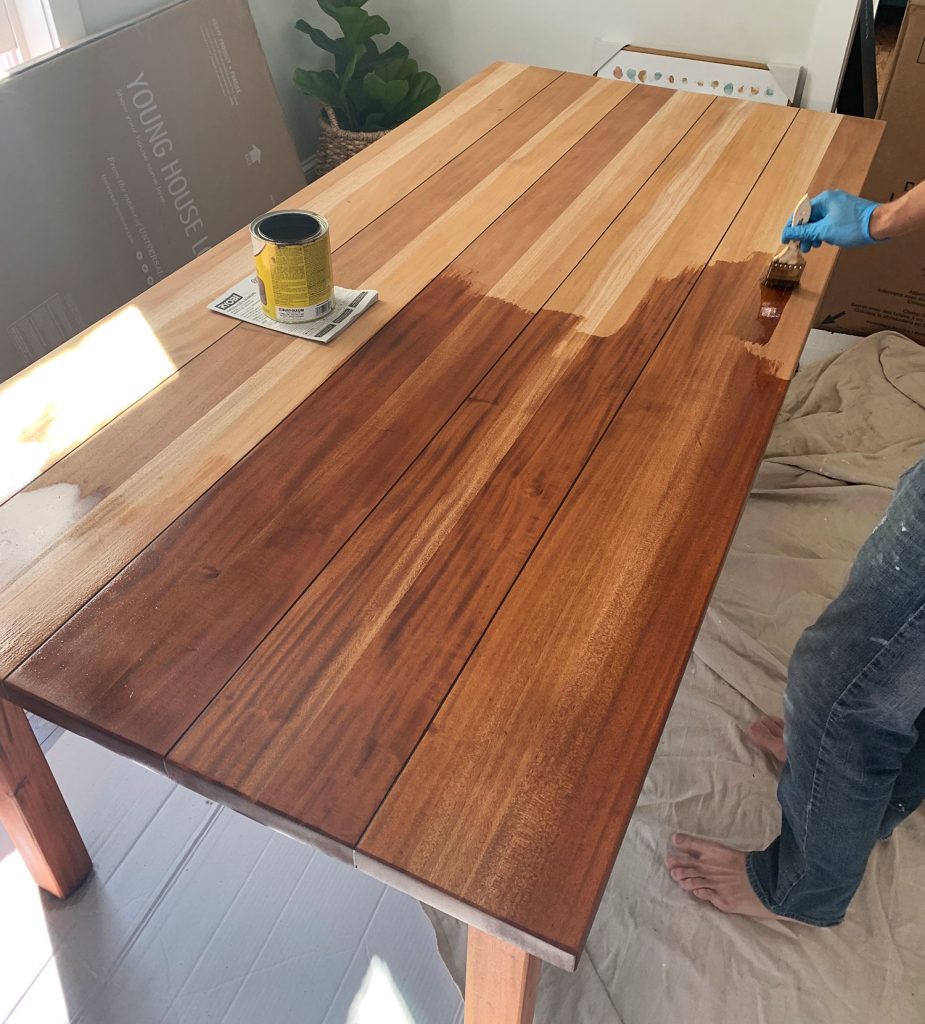
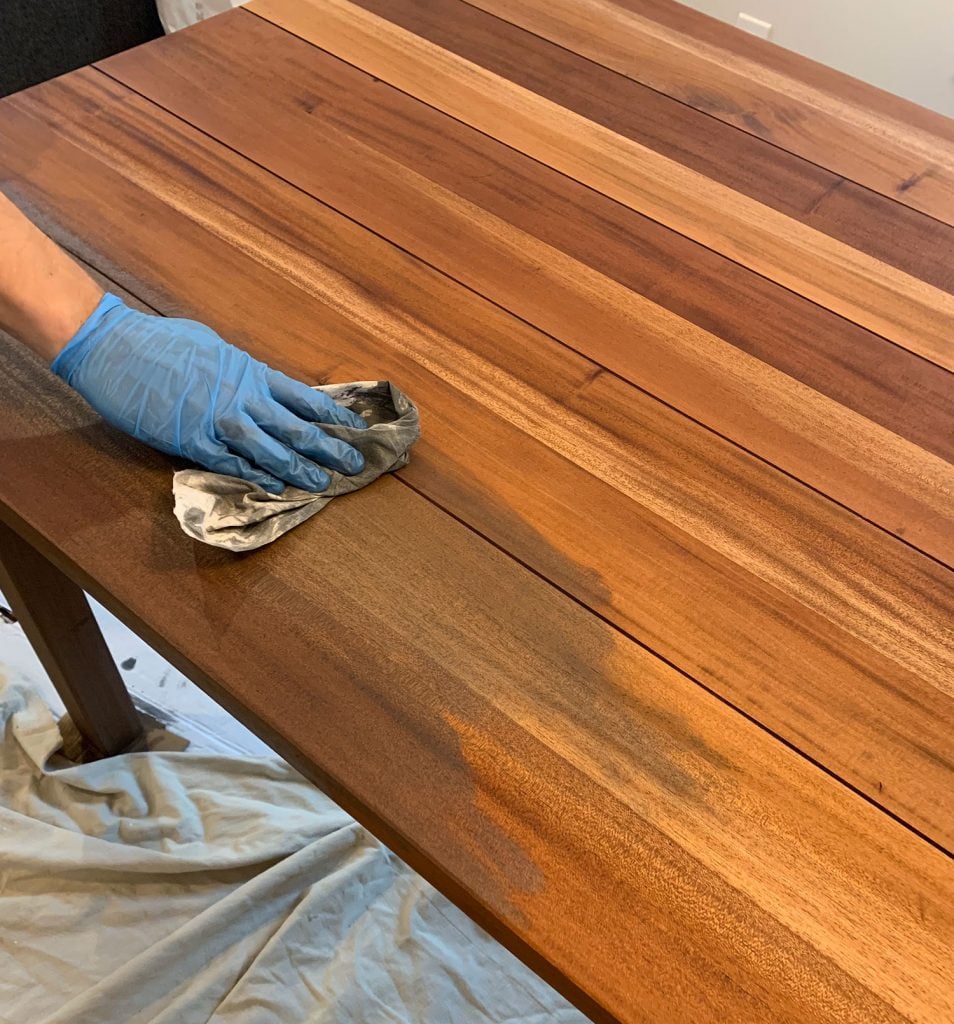
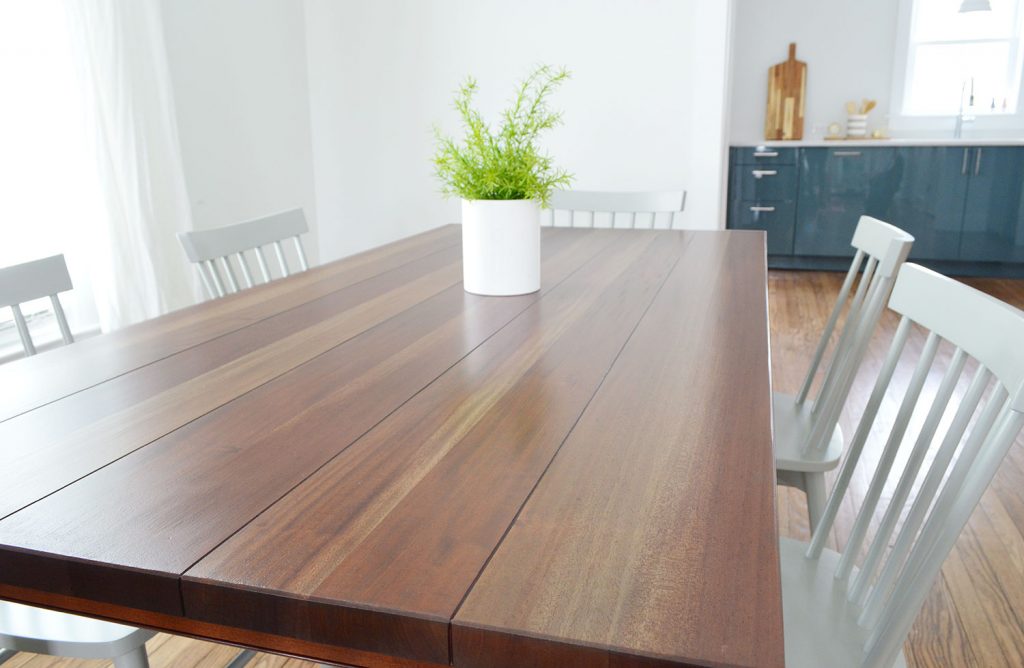
First, since we liked the raw look of both tables, we tested what it would look like if we just clear-sealed both tables. Here it is going on the farmhouse table from my sister.
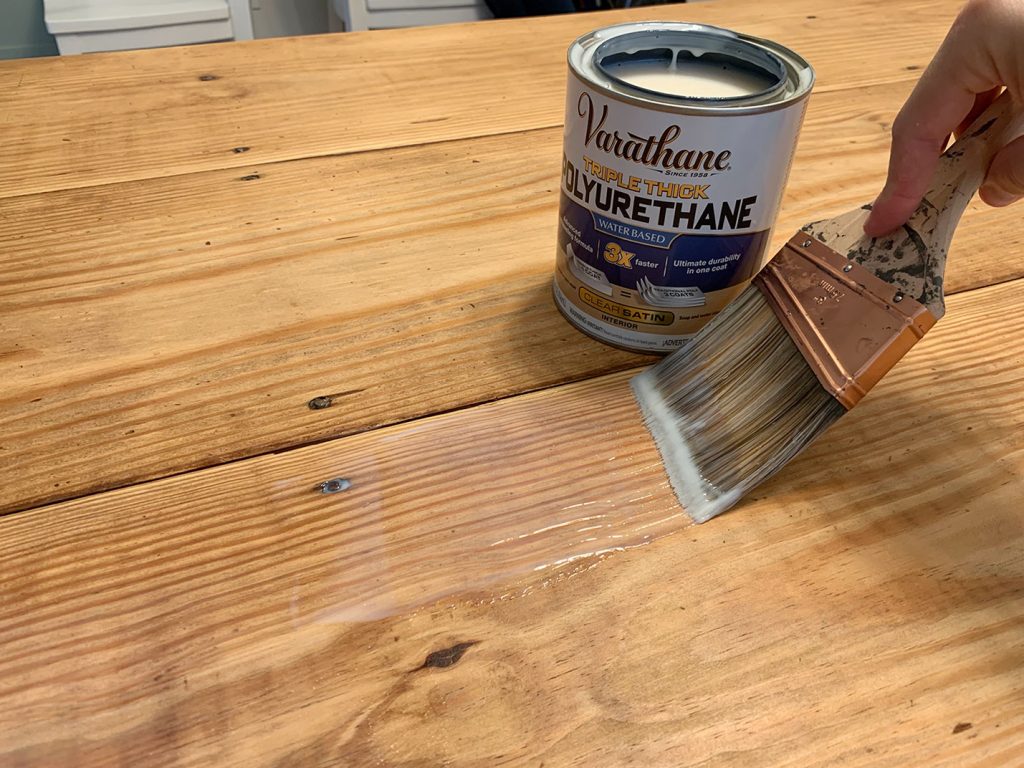
We loved the result on this dining table since it deepened the color only slightly and didn’t disguise any of the wood grain. Sherry applied one coat of basic water-based sealer, and then for our second coat we tried this “Triple Thick” version to add extra protection and durability. It went on just as easily and we love the satin finish. Highly recommend it.
Here’s a reminder of what the top of this table looked like before:
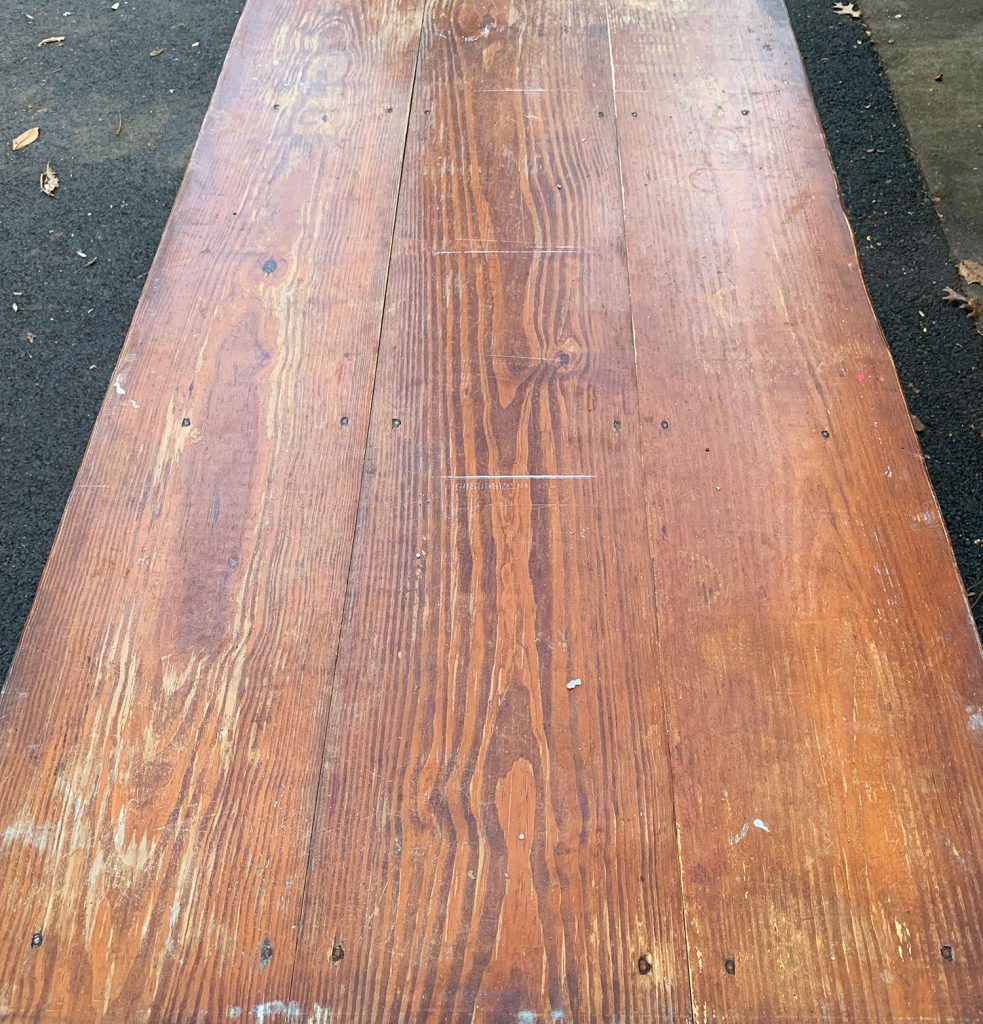
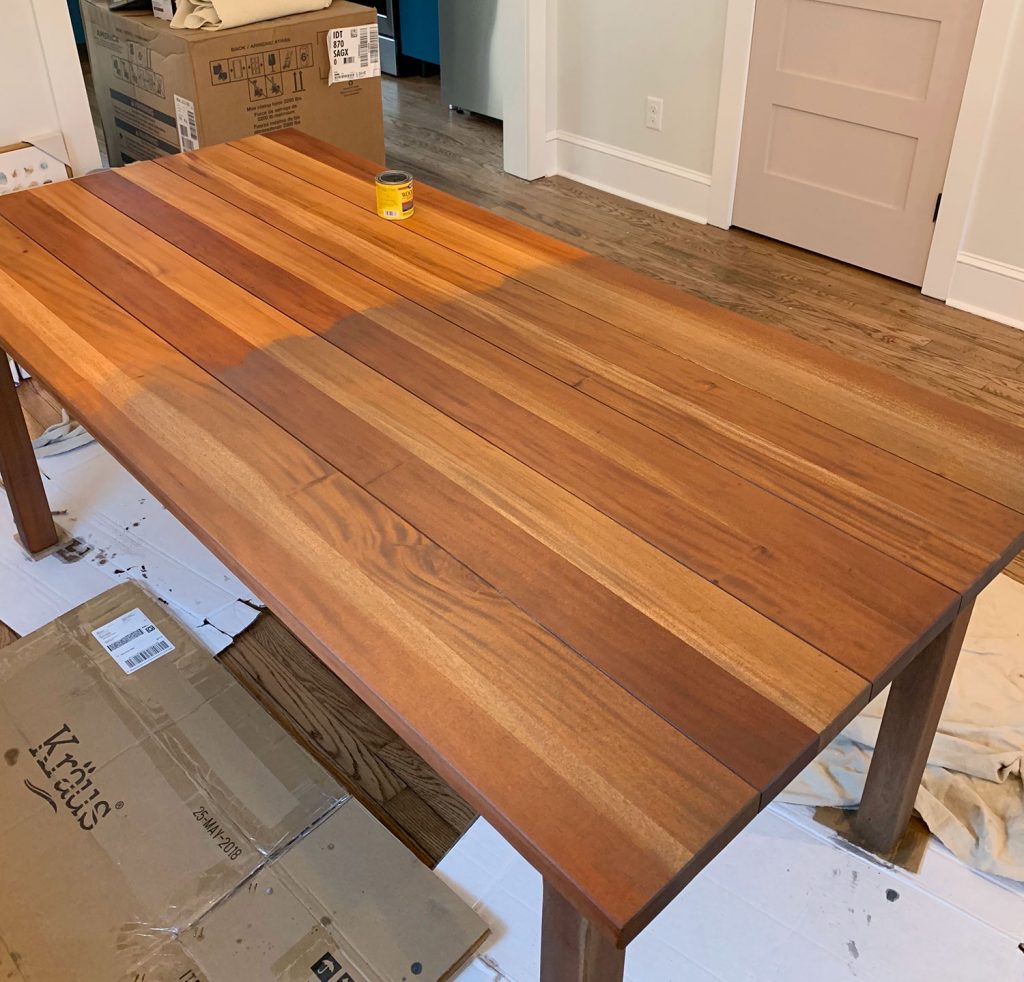
And once we finished clear-sealing it, the lop looked like this:
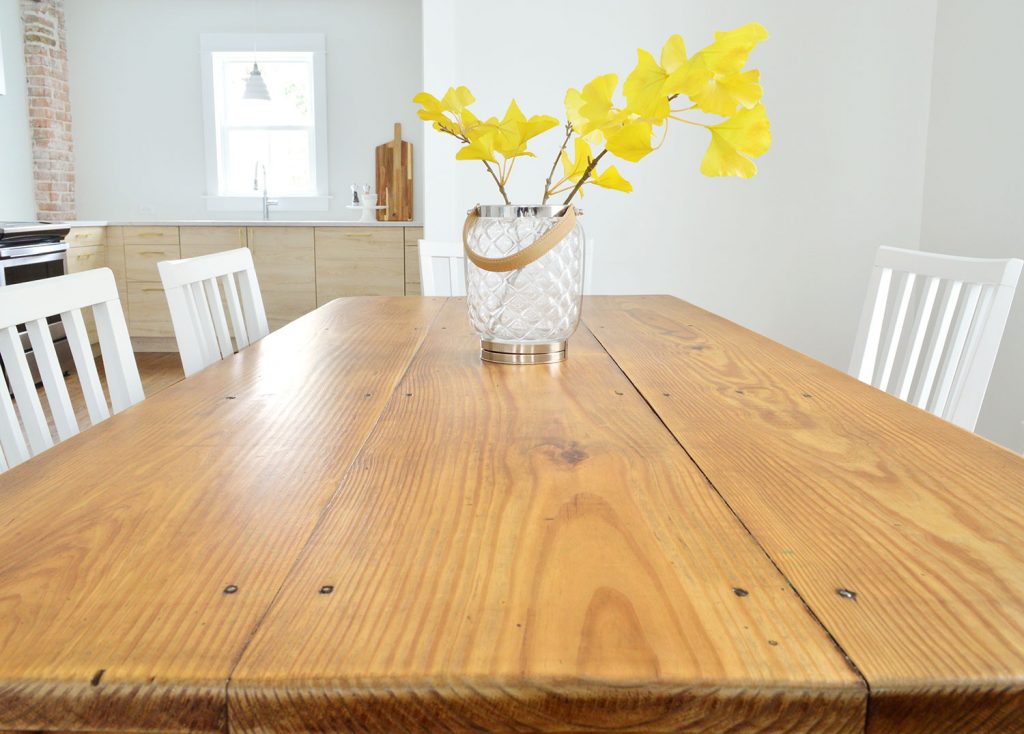
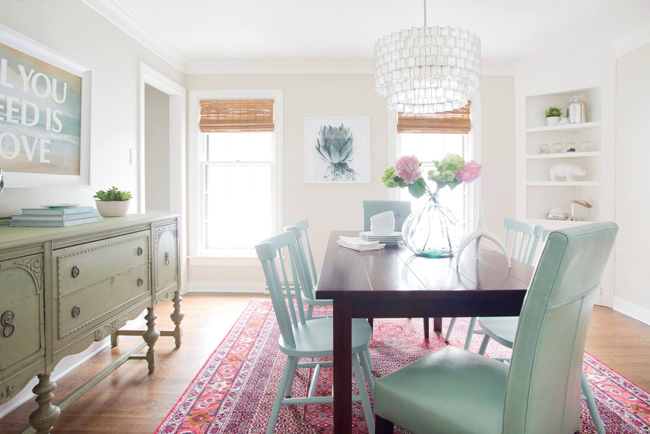
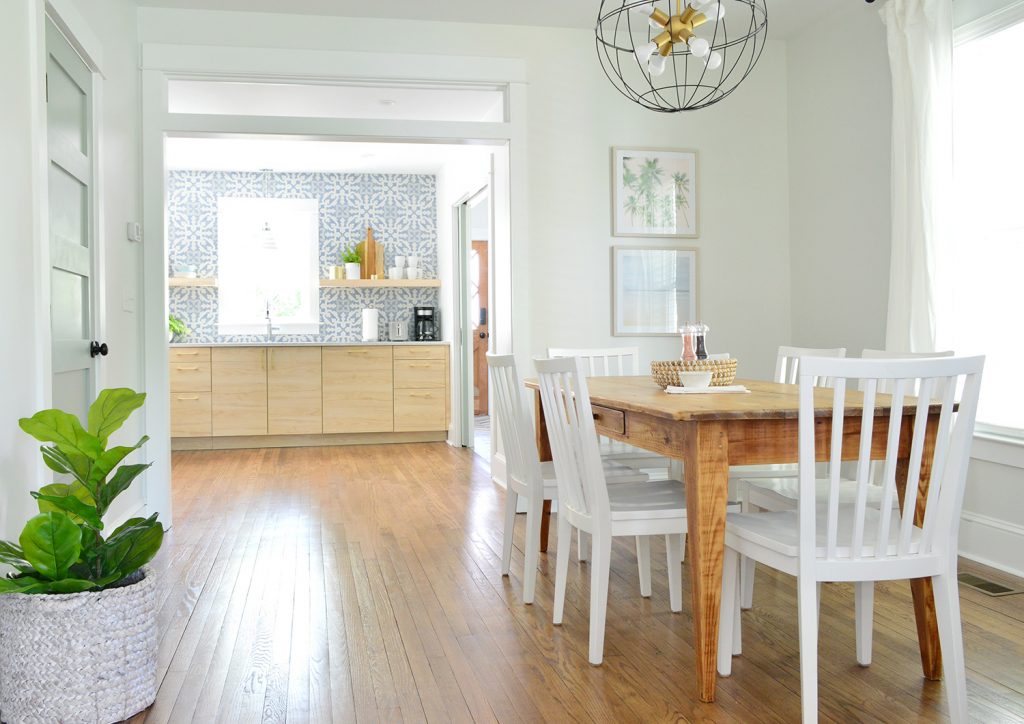
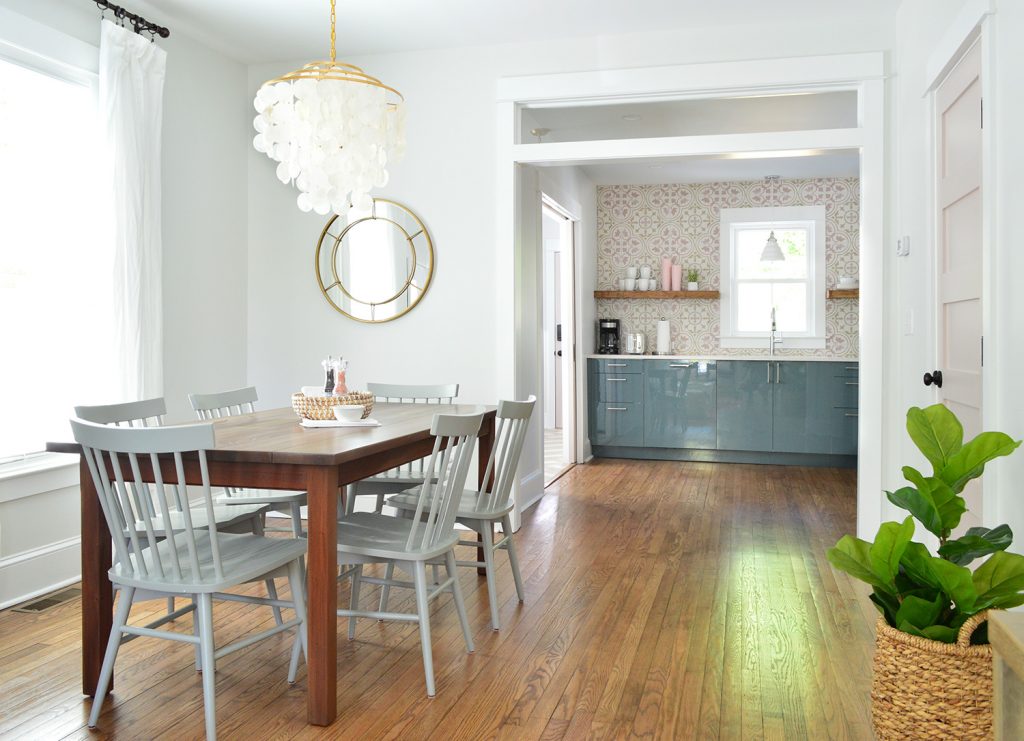
Now the room has come a lot further (as well as that kitchen behind it), so this is the final result. We love how it ties into the wood door that you see peeking out of the mudroom next to the kitchen.
Step 7: Don’t Be Afraid To Layer Stains
When it came to the Crate & Barrel table, our little test spot of the clear sealer just brought out the red undertones of the wood when it dried, which is NOT what we wanted. So we decided to stain it with a cooler brown color to downplay the red. Our first instinct was to use Special Walnut by Minwax, since that’s what we used on the duplex floors (you can see the before & afters of those here).
It was looking good as it was going on, but once it dried it looked redder than we wanted (almost like it was slowly creeping back to original red color that we painstakingly sanded off). So we darted out to the hardware store and bought a gray stain instead (called Classic Gray) and wiped on a very light coat to see if it would cool off the red undertones.
It did just the thing we were looking for, so it was full steam ahead on this combination of stains. So we wiped on a really light coat of the Classic Gray over the Special Walnut coat and then immediately wiped it off (the can usually tells you to wait, but not letting it soak in kept the color from getting too gray).
In the end, we’re so glad that you can still see the variation in the wood tones through those two-layered stains, and after that quick Classic Gray coat dried, we did two coats of that same “Triple Thick” sealer we used on the other table and BINGO BANGO, both tables were done.
As a reminder, this is how the red Crate & Barrel table started.
And here we are now, complete with our tiered capiz chandelier (in the gold finish) above that table.
On the other side we used our mixed-finish wire globe light (which also comes in white + brass, or all bronze) and added the white dining chairs from our furniture line. Sherry laughed about the fact that between the table, the chairs, and the backsplash in here, we’re repping something old, something new, and something blue. Maybe the duplex guests can count as “something borrowed” since they aren’t permanent? Might be a stretch.
In the end, neither of us really knew what to expect as the outcome of these refinishing escapades, but we’re extremely relieved that they worked out so well. And apart from the new sander, some sealer & stain, and the cheap family rate my sister gave us on her table (ha!) we didn’t have to spend anywhere close to the cost of two brand new tables!
Alternate: How To Paint Furniture
Now, if your attempts to refinish a table didn’t go as planned or you decided it’s not the look you wanted, we also have a tutorial for how to paint furniture that works great on wood furniture. If your table isn’t fully wood, we’ve also got tips for painting laminate or veneer too!
P.S. For lots of other furniture makeovers & DIY projects, check out our Furniture Upgrades category.
*This post contains affiliate links*
