Ok, so we completed the door-painting process a few days ago (picture us doing the droopiest super-tired happy dance that you’ve ever seen) and we’re now into the “waiting game” portion of the cabinet painting process. But we couldn’t wait to share all the photos of everything both during the painting-process and now that they’re all glossy and finished, so here ya go:
We used Benjamin Moore’s Advance paint in Cloud Cover in a satin finish (it’s a soft tonal taupey-gray color, so it’s not quite as bright as our glacier white counters for a subtle layered look). Benjamin Moore Advance paint (in the satin finish) actually came recommended by a few pro cabinet painters that we know. We used it on our office cabinets a few months back (which still look mint after Clara has beat on them relentlessly with wooden toys) so it’s safe to say that we’ve been extremely happy with it. The fact that it’s low-VOC, self-leveling, and amazingly durable is pretty much the cabinet paint trifecta.
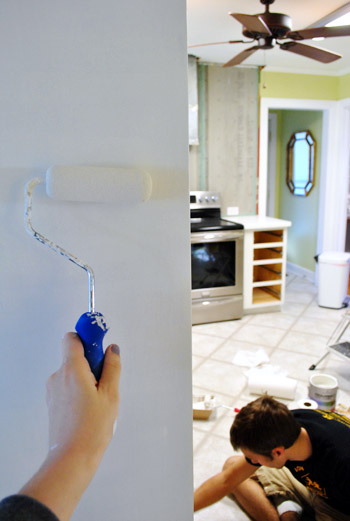
Just like we did for the office cabinets, we applied it with a high quality 2″ angled brush to get into all the cracks and a small foam roller to smooth everything out and ensure that we were applying super thin and even coats. As for applying any sealer or topcoat, the general pro recommendation for cabinet painting is to use high quality stain blocking primer and 2-3 thin and even coats of super high quality paint with ample drying time between coats (Benjamin Moore’s Advance paint is meant for cabinets without any top coat, since sealers can drip, yellow, and even cause things to stick/crack since they thicken the application). We’ll be back with a video on Wednesday to share more actual application details/tips along with the big full monty reveal (we thought it would be helpful to share one exhaustive how-to-paint-cabinets-post with a detailed tutorial, application video, and the after pics all in one spot).
Using high quality primer and good self-leveling paint helps hide a lot although it doesn’t guarantee 100% invisible grain (we don’t see any evidence of grain on the oak cabinets in the office but do see a hint of it on the kitchen cabinets, so it probably just depends how much grain your cabinets have to begin with). We don’t mind painted wood that looks like painted wood though, so a little grain is ok with us, as long as the paint is nice and even and glossy.

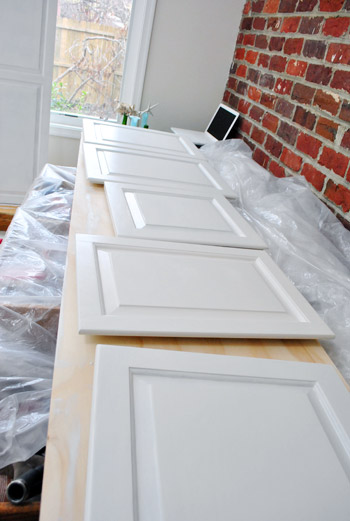
For those wondering how those few retrofitted doors that we whipped up are doing with primer and paint (more on that process here), some of them are completely seamless (the two corner cabinet doors might even stump a detective) while a few others are a tad less than perfect. By this I mean if you look at them from an inch away for five minutes (bobbing your head back and forth to catch the light bouncing off of them) two out of ten people might notice a tiny seam. See the über light horizontal seam on the door with the arrow in this pic below?
![]()
Yeah, me either. Haha. It’s nearly invisible and impossible to photograph. But once we hang them all we’ll take some close up pics for ya. Even in person it’s so subtle that we can’t decide if it’s worth doing anything about (thankfully at least two of the five doors are seamless, so we’re leaving those for sure). We’ll keep you posted if we decide to sand the other three one more time and use some sort of buildable primer and a few more coats of paint to hopefully make them as perfect as the two corner cabinet ones).
We’re psyched to have two perfect ones among the group because it gives us faith that if we want to be super type-A about things, we can probably get all of them to look that good with a little more work (if none of them worked out we’d bag it and go with Plan B). All in all I’d say we’re really happy about being able to work with our existing cabinets to save some major loot (thereby making other upgrades like new appliances, cork floors, new counters, new backsplash tile, and a big opening into the dining room possible).
So for $40 in paint (ya know we used a $10 off coupon, haha) and $22 in primer, we’re beyond overjoyed at the new layout and the lighter look! Painting cabinets is right up there with painting wood paneling or dark brick – we think it’s one of the biggest bangs for your buck. It’s amazing what 60 bucks can get ya. Well, 60 bucks and a week of puttying, sanding, deglossing, priming, painting, and waiting not-so-patiently to put everything back together.
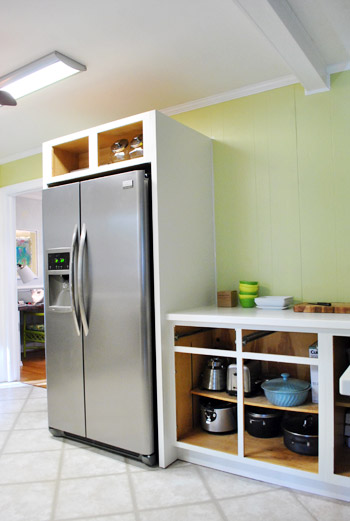
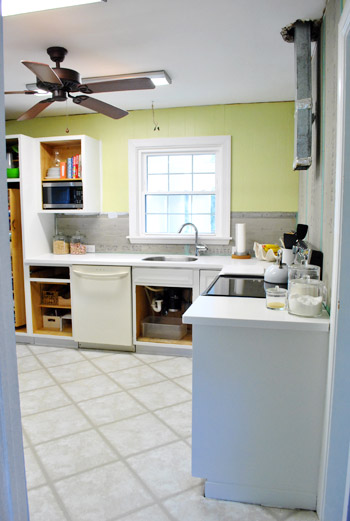
Oh and we primed and painted the outside of the frames and the front and back of the doors while leaving the inside of the cabinets oak. This way we can toss things in there and pull them out without worrying about scratching or peeling paint. We also like the two-toned effect of clean paint with wood interiors (we did that in our old kitchen and in our office built-in cabinets and really love the surprise of natural wood when you open the door).
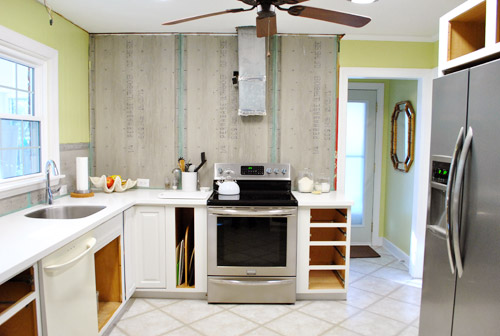
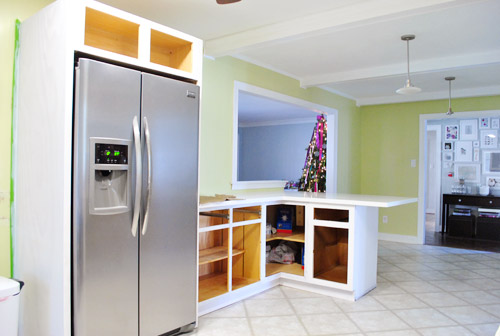
Of course the room’s still pretty white-washed since the rich cork floors aren’t in yet, but we’ll get there eventually. And now for a bunch more random doorless pics. This is fun because you can spy on all of our kitchen items like my pretty blue cassarole dish:
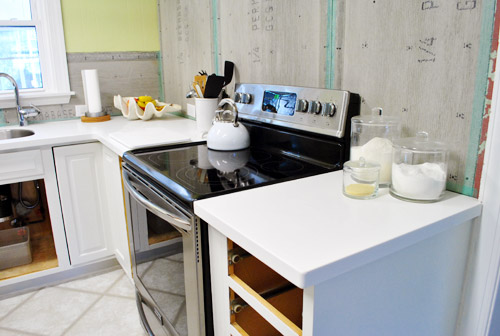
This shot makes me long for our backsplash tile to go up (after we hang our cabinet doors and add hardware it’s next on the agenda!).
Yes, our tree is still up. I always hate taking down my glowy happy friend.
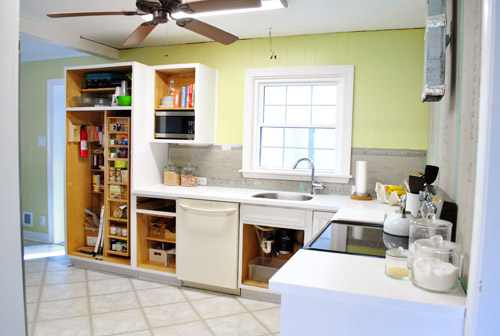
It’s so light and airy in here now… except for that terrible bisque dishwasher. Egads. Can’t wait to install the new one (after we lay the new flooring so it can run under it).
These two views (the one above and below) are a lesser seen angle (taken from the office doorway). I still do that “ahh!” thing when I walk in that way because I keep picturing the dark old kitchen that used to be there.
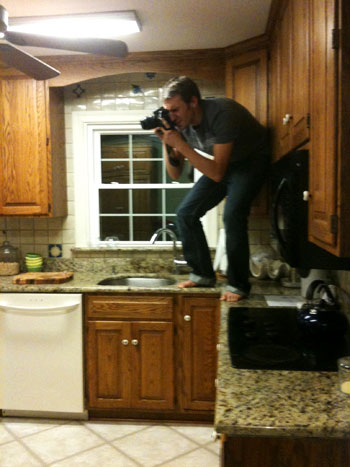
You know, the one that looked like this (although John didn’t always stand on the counter like that).
I like it a lot better now.
And once we add the 12″ deep floating shelves and a range hood over the stove, things like the sink window will look a lot more balanced (there will be 14″ of space on either side of it):
We’ll be back with an entire cabinet-painting tutorial complete with a detailed video and lots after photos on Wednesday when things are finally cured enough to hang the doors and add hardware. Ahhhhhhhhhhhhh, even typing that is more thrilling than I should admit. I’m off to watch paint dry. Literally. Ok, and write more book stuff. There’s nothing like an entire-manuscript deadline of the 4th to get the year off to a ca-razy start! But just like fiiiinally finishing our painted cabinets, handing in our huge 260+ page beast of a book should feel pretty darn good! Then we just have to shoot 100 secret photos/projects in our house over the next two months. Ah chaos, come on in and get comfortable. I hope you don’t mind an in-progress kitchen…
Psst- In case you were off caroling and cavorting, here’s a roundup of all the posts that you may have missed over the “holiday break”:
- Our ribbon-rific holiday card (here)
- A whole lotta cabinet puttying and sanding (here)
- Making some 2012 resolutions (here)
- Priming our pants off (here)
- A superlative-riddled December recap (here)
Glad to have ya back!

Leave a Reply