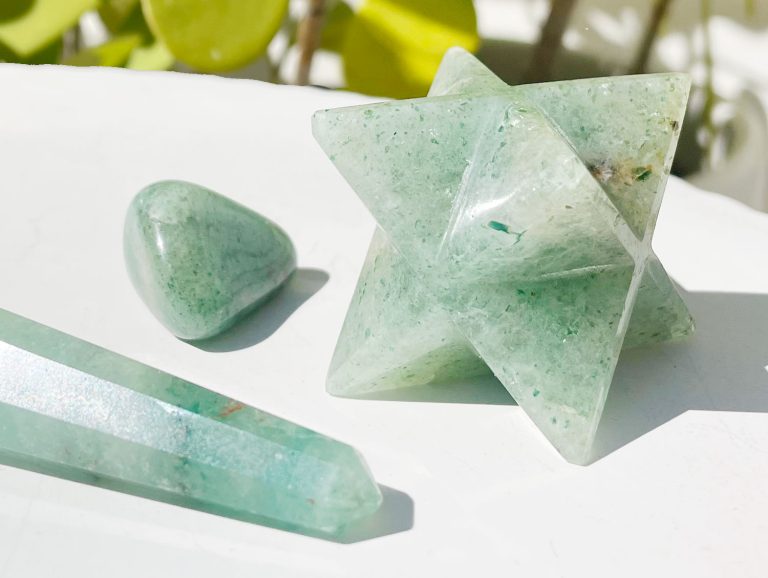
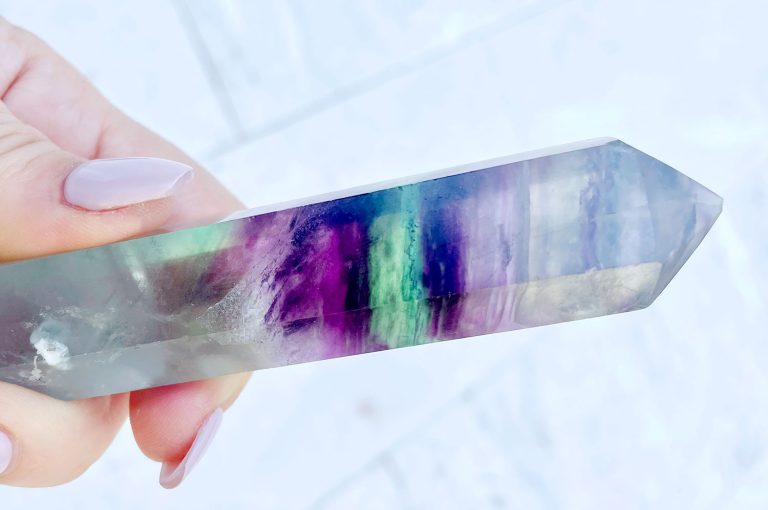
Author Archive
The Spread & The Splurge
Psst- We switched up our Forum layout for you guys after getting your feedback last week. Hope you like it!
Happy Friday y’all! We have some interesting house guests today (we’ll instagram/Facebook a sneak peek as soon as we get the ok) so we thought we’d have some Friday fun over here. We used to make at least one mood board each week and we’d get your thoughts every Friday with Burning Questions (little home-related “would you rather…” polls) but somehow over the years our smorgasbord approach narrowed and before we knew it things were feeling pretty our-house focused. Which is why one of our blogiversary goals was to get back to the variety that we used to have so much fun with (goal #2) and to include “more of you” (goal #4). So we thought this feature would be a fun way to highlight some cool mood-board-worthy stuff while getting your take.
So here’s the big question: if someone slapped $460 into your hand, would you go for this big statement making armchair or this collection of lower priced items and accessories?

The splurge source: This armchair.
The spread sources: This bedding, this pineapple vase, this candle, this mirror, this bath mat, this accent chair, these hanging glass terrariums, and these artichoke printed napkins.
I can totally see arguments for each side, so I can’t wait to see which way you guys go! And feel free to elaborate in the comments.
Our Last Minute Siding Sprint
So sorry this is late guys! Internet problemz.
Remember back when we debated painting the siding on the front porch way back here in fall 2011? Hence the creepy Halloween wreath on the door.

We had picked a color and everything (Flagstone by Martha Stewart – the one on the right in the photo above) but before we got around to doing it, the temperatures dropped too much to paint. Then the test swatches – which lived on our porch for several months (sorry neighbors) got painted over when it was time to shoot book photos out there. The project literally became out of sight, and out of mind.

Then we redid the columns. And when we did a few of you guys were all “wait, weren’t you going to paint the siding out there? what happened?” and we were all “oops, yeah, that never happened.” And then we added the pergola and a few window boxes and our paint-that-siding hankering returned. Initially we worried that painting just the porch siding would be weird without doing all the other siding on the side/back, but after rethinking it we decided it would be fine since the cream color of the other siding is still in the porch trim, so it all ties in.
So although you could literally describe us as being on the fence about this project since 2011, in the end we just didn’t want to leave without going for it. Especially because we thought the trim, columns, and that happy yellow door would pop a lot more from the street. And let’s face it, we’re going to be doing a lot of drive bys just to wave at her once she’s not ours anymore. #totallynormal

So out came the paintbrush and roller. We had already bought the paint way back when we settled on the color in 2011 (Flagstone by Martha Stewart) so we didn’t need to spend any more loot to make this happen. Update: this is hardboard siding, which is like a wood composite material, so this method might not work on aluminum or vinyl siding.

And believe it or not, we whipped out the entire job (two coats!) during a Clara nap on the same day that we hung the window boxes (we were like little front yard tornadoes running around).

And since the color ties in so well with the mortar in the brick (it’s nearly the same color up close) it’s a nice seamless addition. It helps the door and the trim and the columns feel a bit less flat from the curb, yet it doesn’t make the other cream siding stand out like a sore thumb since that relates to the rest of the trim.
The biggest difference that we notice in person is that the house feels less choppy since that big cream rectangle was a lot more broken up looking than the not-as-light new color. See how the before picture below looks like a house made of a brick box next to a white box next to another brick box and the after picture looks a lot more like one facade instead of three blocks sitting next to each other?

Best of all the yellow door is one heckova happy guy now that he’s next to a slightly deeper tone than that former sea of cream.

Almost makes us forget that the house looked like this during our first walk through back in 2010…

Anyone else painting siding? How did you tackle it? We just used a small foam roller and a brush (John used the roller to get along each length of siding and I used the brush to get into the groves and cut in around the edges). We were both shocked how quickly we got those two coats knocked out.
Spring Pinterest Challenge: Boxed Up
Word up my fellow Pinterest playas. Hope you got down with some baking, crafting, painting, organizing, sewing, building, or knitting fun because it’s time to share this season’s (completely unofficial) Pinterest Challenge (not sponsored by Pinterest or anyone else, just dreamed up by Katie to make us stop pinning and start doing). The only rule is to pin something you’ve wanted to get done (big or small) and do it. You know, instead of sitting on your duff pinning other things… which I’ll admit happens a whole lot in my world.

Our mission this season? Window boxes! I actually pinned two window-box related pics, this picture just for the eye candy of it (at $90+ bucks per box they’re purely for inspiration) and this tutorial for making them (which we planned to do if we couldn’t find ready-made ones in our price range). We thought they’d add some nice dimension and soft greenery to our long boxy ranch, and they’d been on our list for a while. They’re definitely not necessary for resale or anything, but we just couldn’t part with this house without seeing how cute they’d look. How’s that for being a weirdo? Anyway, here are the three windows that we thought could use some quaint greenery…

And here are the materials (the window boxes, liners and brackets) that we grabbed last week at Home Depot (we priced out building vs. buying and realized it was pretty close).

We loved that the planters were clean-lined and mid-century-ish (it was like they were made for a ranch). As for how to hang them, here’s what worked for our brick facade:
Step Numero Uno: Use a hammer drill to drill pilot holes for the screws for each bracket (after carefully marking where you want them to go by holding up the window box to make sure it’s centered).

Step Dos: Hang the brackets according to the package instructions (you’re essentially just drilling them into the pilot holes you make while adding that weird little metal thing up top (we’ll get into what that’s used for in a second). Oh but we made two mistakes for you, so now that we know what not to do, we wanted to spread the word:
- Don’t use the cheap/short/non-masonry screws that come with the kit! We had 2″ masonry tapcon screws that we had leftover from our fireplace project that worked really well.
- Don’t use a regular drill to get the screws in, be sure to use a hammer drill! It really got them in tighter and the ones we screwed with the regular drill were lose and needed to be redone.

Step Tres: Once we got our method down, it was easy to get them in nice and tightly. And then the weird metal thing on the top of the bracket could be bent over the window box once it was placed onto the bracket, thereby locking it into place. The metal thing was so soft you could just bend it with your hand. Although I should have told you guys that it was crazy hard and the only reason I could do it with my bare hand is because The Hulk is my second cousin.

Step Four: Drop the plastic liner into the planter box while making a weird face (check). Oh and be sure to pop out the two drainage holes in the plastic liner beforehand (I used a house key to smash them out since they were slightly perforated but I couldn’t get them with my finger). The cool thing about the drainage holes in the plastic liner is that they line up with the pre-drilled drainage holes in the planter box, so that was nice planning on Home Depot’s part.

You might wonder what John and Clara were doing while I was on window box duty…

Yup, they were spreading mulch. And it was adorable. And we all had about 100 inch worms on us by the time we were done outside.

But back to the window boxes. I used an old “cheaper and already grown in” trick, which is to buy two hanging baskets from a local nursery (Great Big Greenhouse, here in Richmond, where I actually had a store credit so they didn’t cost me anything). The reason hanging baskets are so smart for window boxes is because they already spill down and appear to “drip” instead of the typical pots and flats that they sell for gardening. Hello, instant gratification!

I just dumped them out and very very carefully divided them as gently as I could…

… and bam: I had a few spilling-over flowers for each window box, without having to play the waiting game while they grew over the edge.

Aren’t they cute? I have no idea what kind of flowers these are. I think the white and pink ones are petunias though. Maybe these purple guys are some other blend of mini ones?

I think the window boxes are sweet little additions. Not giant and commanding, just casual and simple. I actually love that they’re the color of the brick so the flowers are the star and they don’t look too busy. And as they continue to fill in and spill out more I think they’ll look even better.

So there you go, three window boxes, some tips for what not to do while hanging them, and one way to find already-droopy flowers to fill them.

And just look at that fresh come-hither mulch. Me-ow.
Don’t forget to check in on Katie, Emily, and Renee to see what awesome projects they’ve whipped up (they’ll all be sharing theirs sometime today as well)!

And we’d love to hear what you guys did for this season’s challenge. If you’ve already blogged about it, just:
- click on the blue “Add Your Link” button with the odd cartoon head at the bottom of this post (you might have to do some scrolling, depending how many projects are added)
- add a link to your specific blog post about your project in the url field (not your home page)
- where it says “name” write a descriptive name for your project (ex: “Homemade Leaf Wreath”) as opposed to your actual name
- we’d also love if you could quickly link back over to our project posts within your own (here’s Katie’s, Emily’s and Renee’s) – it’s also nice to link to your inspiration project on Pinterest as well as to directly link to the original project/site, just so they get some love too.
And if you’d rather just link over to your project in the comment section, feel free to do that – or even add a link to a free photo sharing site like Flickr with your pics if you don’t have a blog (remember to set the gallery to public so we can all see it). I’m borderline too excited to see what you guys have been up to…


