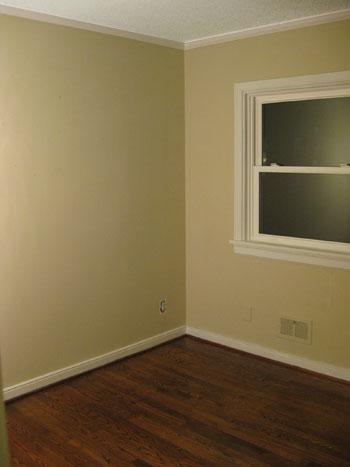
Woo to the hoo. We finally finished the nursery! And at just four weeks before the beanette’s estimated arrival (although we’re sure she’s gonna be late) we’re beyond excited to have a cheerful and functional room waiting for her. It definitely has come a long way from the blank canvas that we started with:
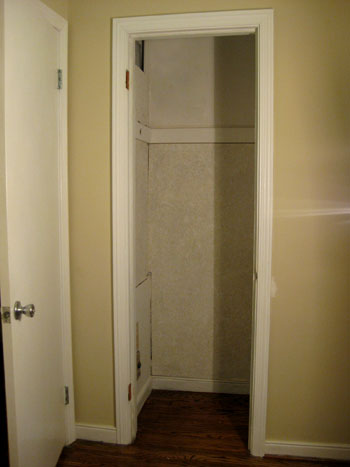
And that closet. Let’s just say it was one of our major challenges when it came to storage space, function, organization and all that good stuff:
Luckily we were able to introduce a ton of stash space thanks to a crib with a large built-in drawer, a generously sized double dresser (snagged on Craigslist for just $20), an already owned storage ottoman, and a side table with retrofitted basket “drawers.” Plus adding a padded bench with a large toy bin slipped under it (two more things we already had on hand) gave us even more spots to tuck toys, clothes, books, and everything else that comes with having a wee one. Oh and did we mention that the room is only 8′ x 10.5′? Yup, it’s the smallest room in the house (except for the bathrooms). But without further ado, the big baby-tastic after pics:
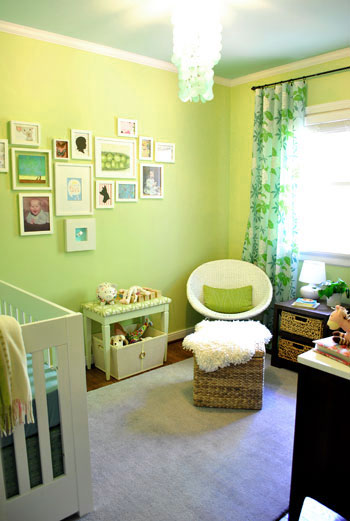
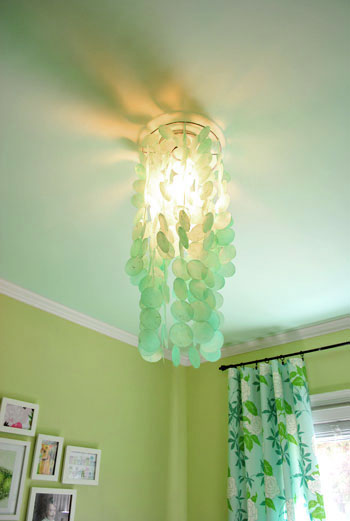
We had so much fun hunting down deals like this playful $50 aqua capiz chandelier from a local lighting outlet (which casts so many fun shadows on the ceiling for Baby P to enjoy).
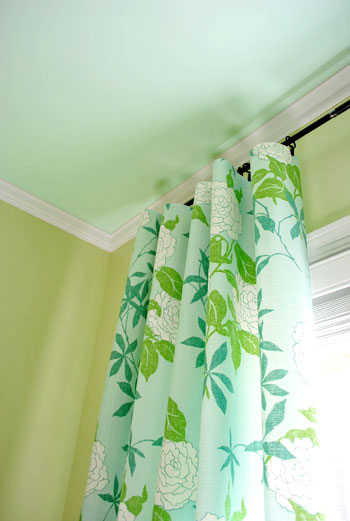
And DIYing our own no-sew curtains with some cheerful printed fabric allowed us to create a much more balanced and grand look on a wall that formerly boasted a small-ish window that was off to the side (we’re all about cheating windows with curtains so they look centered). Is there nothing that a set of high and wide fabric panels can’t solve?
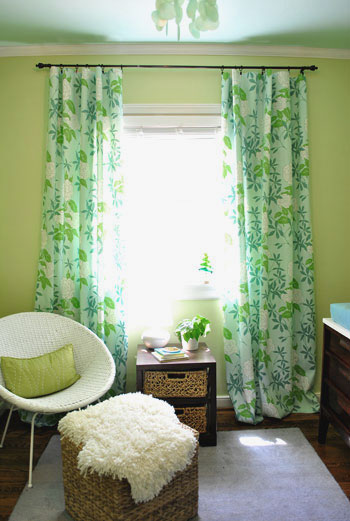
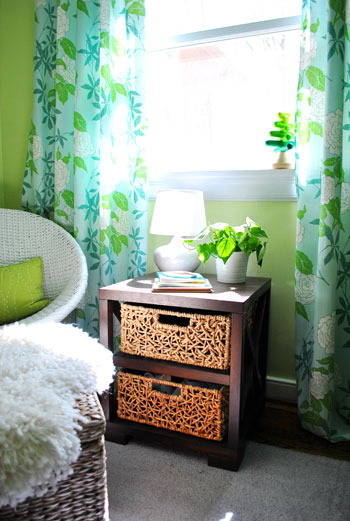
Bringing in the former side table from our guest bedroom (originally from Target) creates a nice spot for a glass of water, a reading lamp and some books. And the super insane coincidence was realizing that some woven baskets that we already owned slipped perfectly into the side table’s open shelves to create two basket “drawers” (which offer up even more room to house books and toys out of view- anything to keep the clutter factor to a minimum!). And because the baskets are woven and don’t have any harsh pointy corners, we even think Baby P will be able to easily use them to put away her own toys when she gets older and a bit more mobile (which of course will be our cue to switch out the real plant on the table for something less dirt-riddled).
And we can’t forget about the super cozy sink-in-able bucket chair that we snatched up for just $20 at a thrift store. Paired with an already owned ottoman (topped with a homemade faux sheepskin rug) it creates a nice little feeding and reading corner that even Burger thinks is the bee’s knees.
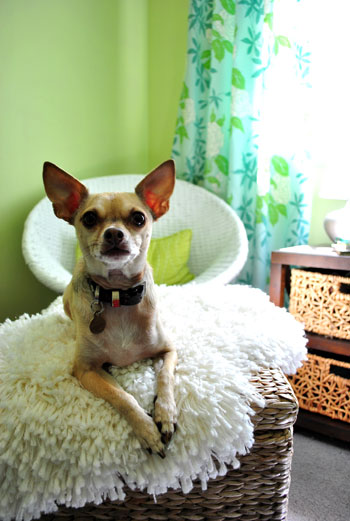
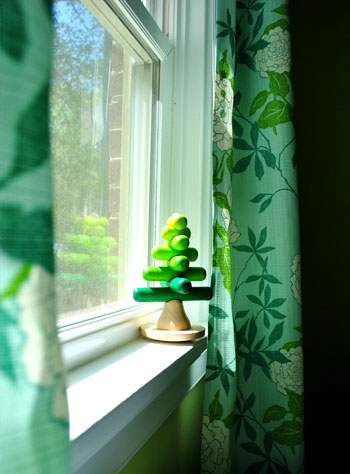
We also love that we were able to place the chair next to the window so we can appreciate the natural light streaming in during the day, along with the view of our big green backyard (which is sometimes accentuated by a playful chihuahua on an intense bug hunting expedition). And isn’t that little wooden tree in the windowsill adorable? We got so many great baby gifts from friends and family, and the makers of this one (Plan Toys) are extremely eco conscious and use only the greenest materials and non-toxic dyes and glues.
Oh and we can’t forget how much the soft aqua ceilings (Mythic’s Adanna Aire in a flat finish) next to the crisp white molding and the pear green walls (Mythic’s Autumn Bloom in eggshell) transformed this formerly tan-walled guest room into a dreamier place for our little girl (read all about the painting process right here). Plus we figure she’ll constantly be gazing up at the ceiling when she’s in her crib, so it’s nice to know it’s sort of sky-reminiscent as opposed to plain old white.
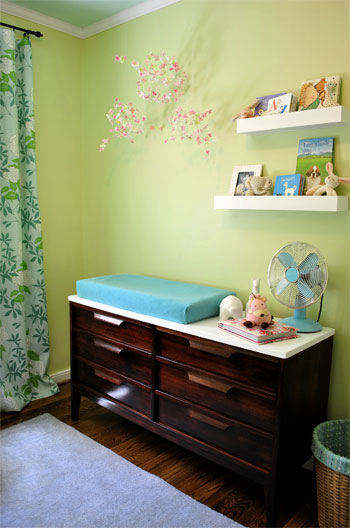
Here’s a shot of the $20 Craigslist double dresser that we totally refinished (earning ourselves six generously sized drawers for storing everything from diapering supplies to clothes and even tiny socks, bibs, and other pint-sized accessories). And the wire and faux flower mobiles that we made to hang over the changing pad along with the DIY shelves built by my handy hubby really add kid-friendly function and form to the entire wall.
You might notice that small basket to the right of the dresser in the photo above. Well let’s zoom in, shall we?
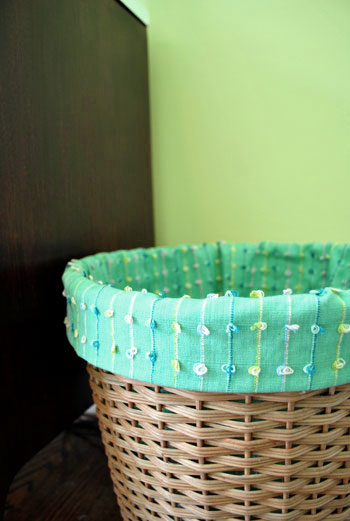
It’s actually a cheap-o Ikea basket which we then lined with extra crib skirt fabric that we already had on hand. Bam- instant hamper for under $5. And we like how the lighter woven texture ties into the basket “drawers” in our makeshift side table under the window- and even the textured ottoman that we paired with our thrift store chair.
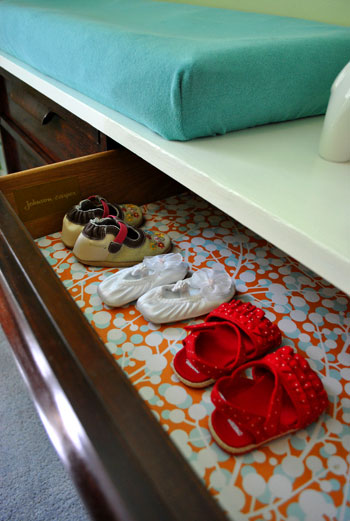
But back to the dresser for a minute. Remember when we lined the drawers? They definitely add a splash of happy to the space every time we slide them open to gaze at all the tiny outfits and accessories awaiting Baby P. Is there anything cuter than baby shoes?
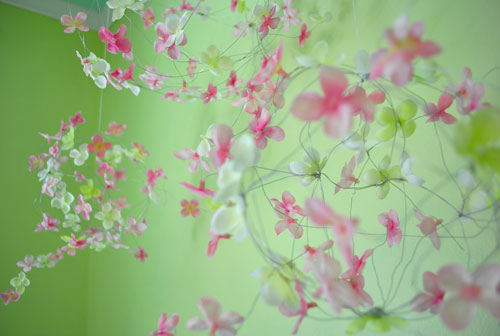
Here’s a closer shot of the three-orb mobile that we crafted while parked in front of the TV one night for less than $12. We love how it gently sways above the changing pad and we have our fingers crossed that it’ll really come in handy once the beanette gets more wiggly and we have to keep her distracted while we hurriedly change her.
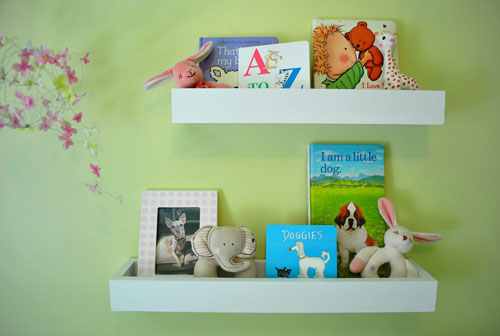
And here’s a detail shot of those lovely shelves that my manly man built with his own two hands (ok, and some power tools). We love that they’re constructed like long skinny wall mounted boxes to keep books from toppling down as they might on an open shelf. And we can easily switch out those books, frames, and toys to keep reinventing that wall as our baby girl grows.
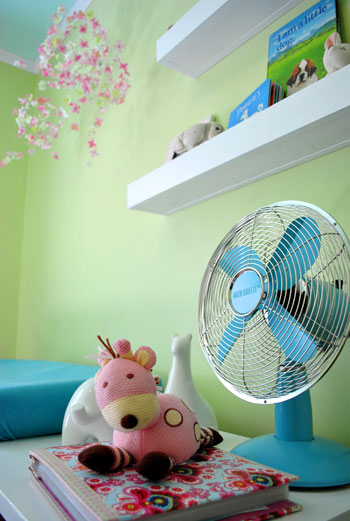
And because we’ve heard that well ventilated rooms with fans can help when it comes to scary things like SIDS, we sprung for this vintage-looking turquoise charmer (by Deco Breeze in “sky”) which is just as easy on the eyes as it is functional. Plus we love the fact that small fingertips can’t fit past that protective wire cage.
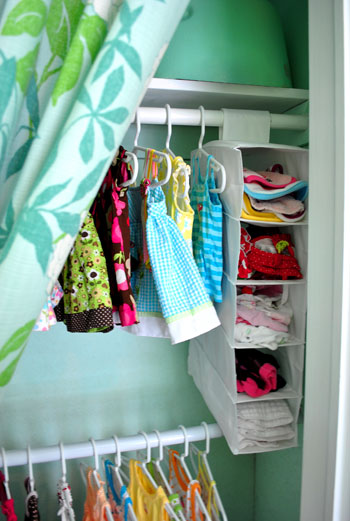
But let’s swing over to that formerly sad little closet. We livened things up by painting the inside of it the same soft aqua color as the ceiling, hung a fabric curtain for some pattern and interest, and added a second hanging bar along with baskets, shelves, and boxes to store a lot more than we thought we ever could in that tiny enclave. Check out the whole closet transformation here.
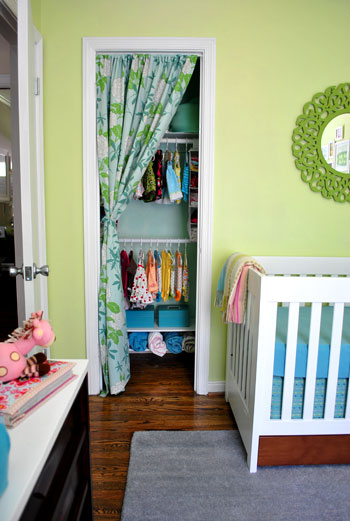
And maybe I have to revise my “is there anything cuter than tiny baby shoes?”question. Because the answer might be “baby clothes.” Oh and we love that we were able to repurpose a hanging shoe organizer from Ikea as a caddy for everything from bibs to burp cloths and even tiny leggings.
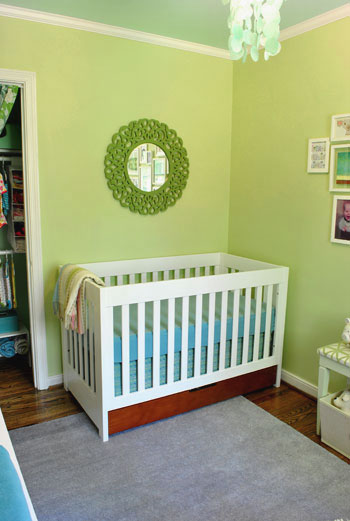
Here’s a shot of our crib tucked into the corner to keep as much open rug space available for playtime as Baby P grows. We love that the crib we chose has that drawer built right in for even more storage space (it’s actually empty right now, along with the storage ottoman- which we think is a good sign since we’re sure to accumulate more stuff as we go). And we even got to whip up a no-sew crib skirt to the tune of just $14 to add texture and hide the formerly open space between the bottom of the mattress and the top of the drawer.
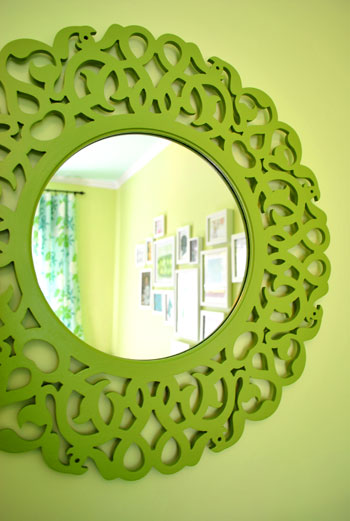
Here’s a close up of a super affordable Marshall’s mirror that we grabbed back when it was black. Reinventing it with some cheerful green paint and hanging it (extremely securely) across from the window allows it to bounce some nice light around the small room. And we figure between staring up at the blue ceiling, the aqua chandelier and this whimsical mirror while she’s in her crib, the beanette will have no shortage of places to peer while she dozes off.
And here’s our art wall which we recently refreshed with some under-one-dollar decorative craft paper, a few photos and prints that we already had, and two new pieces from Etsy and Wall Blank. We especially love the mixed and matched feeling of playfulness that it adds to the room (and the fact that we can switch things out whenever the urge strikes). Plus the asymmetrical arrangement makes it feel more fun and less formal, which seems fitting for Baby P’s cheerful pear and aqua nursery.
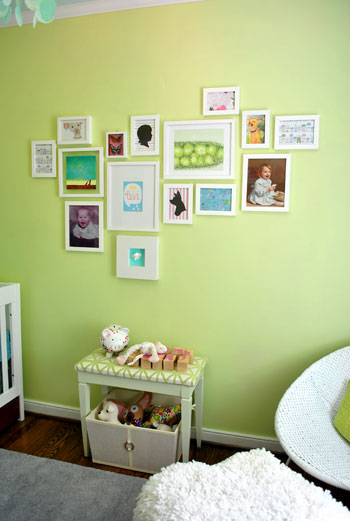
We already mentioned the old thrift store bench that we brought in with a bin of toys under it for more display and organization space in our modestly sized room. We really love how the soft celery color and the patterned upholstery fit right into the room without competing too much with the curtains. Talk about a happy accident since we redid that $7 bench over a year ago without ever knowing that it would someday be worked into our future nursery.
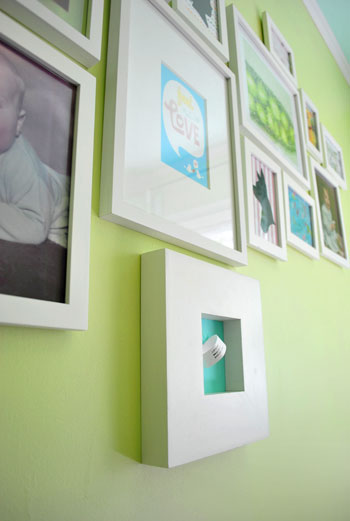
But back to our art wall for a moment. Here’s a closer shot of one of our favorite sentimental ideas. We’ll be placing the beanette’s hospital wristband in that chunky frame on the bottom (and until then we made our own little placeholder version). We also plan to create a paper silhouette of her sweet profile once she’s here (to match the one that we already have of her four-legged brother Burger). Gotta love some fun and easy personalization- especially when it’s free.
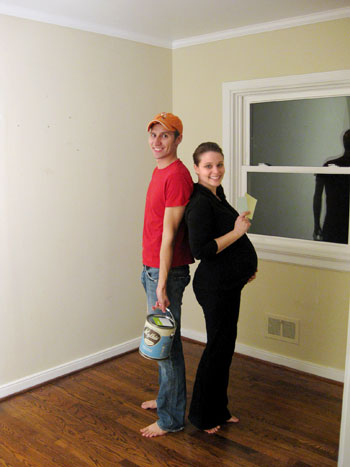
So that sums up our recent guest-bedroom-to-nursery makeover. And because we’re suckers for photo documentation, we glanced at this picture from the beginning of the project…
… and just knew that we had to replicate it a few months later now that the room is done:
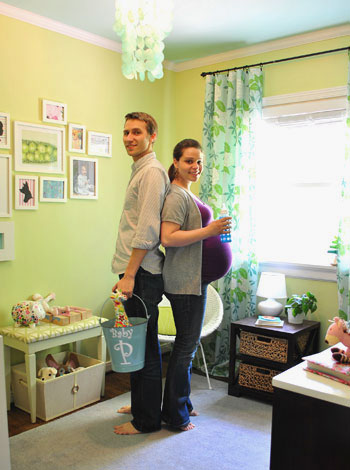
There’s that belly shot so many of you have been requesting. The funny thing is that while I’m definitely bigger in the after shot than I was back in January when the first back-to-back picture was taken, it’s crazy to think that in it’s been three months since that photo and I haven’t grown all that much. I guess it’s safe to say that I popped early.
But enough bump chatter, let’s talk budget. We headed into the nursery makeover assuming we’d spend around $1500 (since we had absolutely nothing and needed lighting, paint, a chair, a dresser, a changing area, a crib, a rug, storage solutions, a closet makeover, a mirror, art, curtains, shelving, a mobile, and more). We arrived at that estimation since some simple online shopping revealed that even affordable places like Target charge around 1K for a crib, a dresser and a changing table (which doesn’t include other major items like a chair, a rug, lighting, art, shelves, etc). Of course we hoped to whip things together for less, but we always like to be realistic instead of overly optimistic when it comes to budgeting (since it feels a lot more triumphant to come in under budget when you take the time to land on a feasible estimate- as opposed to completely blowing a budget that was way too low to start with).
Here’s the full budget breakdown:
- No-VOC wall, ceiling and closet paint: $80 (Mythic paint was a much-loved splurge)
- 100% wool 5 x 8 rug from a local outlet: $99
- Aqua capiz chandelier also from a local outlet: $50
- DIY window & closet curtain fabric: $105 (another splurge, but they make the room)
- Curtain rods and ring clips on clearance from Target: $10
- White faux wood blinds from Home Depot to block all light: $37
- Modern crib with built in storage drawer: a gift from my sweet mom
- Organic crib mattress: generously provided by Savvy Rest
- Thrift store chair: $20
- Chair pillow from TJ Maxx: $6.99
- Ottoman, bench, side table and baskets: already owned
- Faux sheepskin rug on ottoman: $19
- Marshall’s mirror & paint to transform it: $50
- Craigslist dresser & refinishing supplies: $31.51 ($20 dresser, $11.51 supplies)
- Drawer lining project: $1.30
- Closet makeover: $18.36 (hanging bar, storage systems, etc)
- No-sew crib skirt: $14
- DIY mobile: $12
- Organic crib sheet and changing pad cover: $29 with coupon
- Blue fan from Target: $55
- Homemade wall shelves for books and toys: $14
- Ikea lamp on side table: $19
- Ikea basket for hamper: $4 (along with already owned leftover crib skirt fabric)
- Art: $42 ($25 Wall Blank print + $12 Etsy print + $5 worth of craft paper)
- TOTAL: $717.16
Not too bad, right? Especially when you think about shows like Trading Spaces having 1K to transform a space. And the fact that we were able to pick up two major pieces (the chair and the dresser) for just $20 a pop definitely allowed us to take on a ton of smaller projects that might not have originally worked within our budget. Now granted the gifted crib and mattress definitely helped when it came to staying under a thousand dollars (and coming in at less than half of our original $1500 budget) but we’re thrilled that we were able to whip up so many under $20 projects with that freed up moolah (from our mobile making and shelf building adventures to our drawer lining project, no-sew crib skirt and even our big closet makeover).
So what do you think? Are we ready for a baby or what? And what really is cuter… baby shoes or baby clothes? We’re so excited to finally share our big nursery reveal with you guys and we’d love to know if any of you are making over a nursery in your home- or sprucing up a kids room for your own growing bambinos. Heck, even if you’re kid-free, are you planning to take on any of the projects that we tackled for this space like ceiling painting, curtain making, dresser refinishing, closet organizing or shelf building? Do tell.
Psst- Wanna see our nursery progress from the very beginning? Here’s our painting post, our big shopping spree, our crib hunting rundown, our curtain-making tutorial, our fun little chair search, our mirror-painting extravaganza, our DIY faux sheepskin project, our big dresser makeover (and subsequent drawer lining project), our closet makeover, our homemade crib skirt undertaking, our DIY mobile, our shelf-building adventure and our art wall makeover. Oh the memories…

Melly says
I just want to say thank you for taking us all through this lovely nursery makeover with you. The beanette with be a very lucky little girl.
Sarah says
Love the room! It’s so much fun, and not too over the top babyish. I too am working on a nursery. I’ve taken a lot of inspiration from you. I will send before and after pics when it is complete. Thankfully our little Monkey is due about a month after the Beanette, so we have a little more time to get our project complete. Way to go!
Heather@VintageSoulsPhotography says
This is the cutest nursery I have ever seen! EVER! I love it soooo much! When we get ready to have a little bean or beanette of our own I can only hope to have a room as adorable and functional as this one! Two thumbs WAY up!
Laura says
Your nursery is beautiful! I love it. Very cool and unique take on a girl’s nursery and I love the color scheme. Sherry, you are glowing! Can’t wait to see pics of Baby P enjoying her awesome room. So excited for you. As a previous poster said, you are the world’s cutest couple!
Rebecca says
I think that is the cutest nursery I have ever seen! I love the colors.
I’m a mom of 4 and one tip I have is I get those clear plastic shoe boxes (like $1 at target) and put them in my baby’s dresser. I can usually fit 3-4 in a drawer. I use them to separate different clothes. Their clothes are so little that it is easy for them to get all mixed together. You have probably already thought of something like that since you are so organized.
YoungHouseLove says
Hey Rebecca,
What a great tip! Thanks so much for the idea!
xo,
s
Amie says
Oh my this looks wonderful! What a great job, and congrats on keeping the budget so low – it looks like a million bucks!
Michelle says
Amazing Job! I’m absolutely envious of your amazing update on the dresser. I am totally inspired!
Stephanie says
So cute!! We are readying a nursery ourselves for our adoption of a new baby girl who is due June 30th. We are using an lt aqua/teal color on the walls and using Pottery Barn Coco Dot bedding with a white crib. I’m painting my old dresser and matching mirror white along with a wooden rocking chair I got a few years ago at a second hand furniture store. I’m also stealing your idea of white pic frames with scrapbook paper backgrounds for pics of us, the dogs and her cousin along with a few other whimsical touches.
Kristin says
Hi,
absolutely adorable! What a great nursery.
You look great on the “belly shot”, I always imagine how I will lok when I’m pregnant as I am exactly as tall as Sherry :)
Tracy says
The two of you as well as Baby P’s room oozes cuteness!!!!!
Looks amazing and on a spectacular budget too! ABSOLUTELY AMAZING!
Angela Alwine says
It’s absolutely beautiful! Definitely got some bang for your buck on that room.
Sarah says
Look at those teeny tiny shoes! This nursery looks perfect for your little bean, you both did an amazing job!
Your site has become “the site” that I turn to for anything home-decorating.. I was looking for some inspiration for a tv stand, and I found it in your nursery dresser overhaul. I was looking for some ideas for serving trays, and I immediately remembered your Christmas moo-card tray. Thanks for sharing all of your knowledge!!!
Annalea says
Wow. What a wonderful transformation! As someone who has always wanted to feather her nest, but hasn’t ever been able to own a home long enough to do so (we’ve built one & sold it, bought one and sold it, and rented seven others in ten years!), this looks like a dream come true. You guys have thought of nearly everything, and I know that Baby P and both of you are going to love using the space.
Enjoy your little girl!
Jenn says
Your nursery looks amazing! Congrats on getting it all done! You look great too!
Sarahgirl says
Amazing! When you first started the project, I was a little weary of the green-blue combo for a girl, but everything comes together beautifully now! Since blue and green are my two fav colors, I am inspired to use them whenever my hubby and I take the parenting plunge. Good job youngsters!
Jennifer says
WOW! I have been following the transformation of the nursery since the beginning and I just have to say you guys did a fabulous job! I love every detail of this room. Props to the both of you.
Sherry- you look great! Can’t wait for pictures of the beanette!
Sara says
Looks great! Even though I’m not any where close to thinking of having a baby (I’m 26), I still loved following this project! I will have to go back to this in 10 years when I’m ready to have a baby. haha :)
Amy says
Lovely room; great job, you two! You’re so talented, and I’m so thankful to have you as a DIY resource!
May your little one bring you great joy in the months and years to come.
Nicole says
Just recently started reading your blog somehow via Ohdeedoh – love it. Love the room – looks great! We are currently expecting #3 and are redoing both of the kids’ rooms at the same time (one for the boys, one for baby girl!) – thanks for some great inspiration – I’m definitely going to give the crib skirt a shot!!
Sherry says
Wow! Looks great! I love it! Now the question is “what are you going to name her?” or did you already tell everyone that?
YoungHouseLove says
Hey Sherry,
Baby P (aka: the beanette) actually doesn’t have a name yet. Of course we have a few favorite contenders but we want to meet her to see which one “fits” her best. It’s really fun to have a big surprise waiting for us at the end. Who will we be taking home? And will we still end up calling her the beanette regardless of the name we choose? Only time will tell!
xo,
s
Rachel says
Beautiful room! Your little baby girl will love this room and will know that her Mommy and Daddy put so much love into every detail of it. Great job and best of luck and happiness with the new baby!
Leah says
Sherry – I love how you are standing on your tiptoes in both pictures :)
Elisa says
I had to comment AGAIN and say how happy this room makes me. I’ve been dying to paint something in Celery Sticks ever since you introduced that color a while back. Now seeing it painted in the nursey makes me want it even more…
Sara says
I absolutely LOVE the mobile and would like to do something similar in our nursery, but we won’t know the gender until the baby is born. Any ideas for a more gender neutral mobile? Our walls are a pale green/blue with dark hardwood furniture.
YoungHouseLove says
What about dragonflies? You could find them (or some other gender-neutral object like birds or bumble bees) at a craft store and create wire orbs to glue them around just like we did with the flowers. Hope it helps!
xo,
s
Jess Hilliker says
GREAT JOB, you two! What a tremendous project filled with so much anticipation….the bump is just beautiful (you are huge! in a good way!) and I simply can’t wait for the “final” reveal, little Baby P!
Erica says
The nursery looks great! I am also expecting a little girl, but she won’t be here till late July. I’ve used your room as a sort of inspiration (i’d love for you to look at the pics on my blog!) and love how the room is turning out! Congrats on finishing and I can’t wait to see Baby P!!
Lisa says
The nursery transformation is stunning! I am 12 weeks pregnant and just forwarded this post to my husband so we can start choosing which ideas of yours to steal! Gorgeous color choices, excellent bargain-hunting tips and great ideas(the fan, the chandelier, the mobile above the changing table)! It’s a bit early for us to start renovating, but we have a small office that needs MAJOR work before it can be turned into a nursery. It’s served as a storage area for my husband’s film equipment and every other thing that we don’t have room for in our apartment for the last several years.
Congrats on completing it! And good luck with the last few weeks of pregnancy!
Rachel P. says
I’ve loved seeing the nursery for your little one come together. I know you probably haven’t got yourselves sorted out yet when it comes to organizing all the stuff that comes with baby such as diapers, wipes, burp cloths and so on. Those kinds of things never find their permanent home until the baby actually arrives and you realize it’s really important to keep a receiving blanket in that certain spot within arm’s reach, but I would love to see it when you do. The systems parents come up with in order to survive an ordinary day is always interesting to me.
Melanie says
here’s the comment box ! :)
thanks for sharing this great make-over and thanks for replying so fast !
Best
Melanie
Briel K. says
Beutiful job guys! It all turned out so great and everything fits well together. Love it. :)
What made you decide to go with cloth diapers?
YoungHouseLove says
Hey Briel,
We talked to friends and family members who had decided to take the cloth plunge and then we looked at how much money we could save (hint: not hundreds, thousands). In the end we decided that it definitely made sense to give it our best shot. We ordered some of the most idiot proof cloth dipes on the market (Bum Genius One-Size-Fits-All All In Ones without inserts) so we’re confident that we can hack it! Especially since we’ve heard you do laundry all the time with a newborn anyway.
xo,
s
Katelyn Likes This says
WOW, that room looks just fantastic! And yeah, you really popped early! That’s good though, at least it was obvious that you were pregnant and people didn’t think you had just gained weight!
Cecelia says
There’s such a zen quality to the room!
Beautiful!
Sarah K. says
WOW- the nursery looks beautiful, as do you, Sherry! Little Baby P is one lucky little gal to have such loving & inventive parents! All the best to the three of you!
Jen Z. says
OMG the room is awesome! Just gorgeous! What little girl would not like this room. Congrats for a great room makeover too. And you look great Sherry. Love the bump.
MandyP says
Might I suggest a book for your collection…”Let Me Hold You Longer” by Karen Kingsbury. BEAUTIFUL book!!!! =) (Have a kleenex handy!)
~MandyP
YoungHouseLove says
Hey Mandy,
Thanks for the suggestion! We’ll have to hunt it down.
xo,
s
Barb says
The room looks super cute and I love how affordable it was!
Question… was the closet wallpapered previously or is that just strange lighting? Either way it looks great now and really functional!
YoungHouseLove says
The closet was just that gross unfinished fiberboard wood so it had a woodchip-like texture that was kind of crazy. Nothing a few coats of paint couldn’t solve though!
xo,
s
Amy says
I love this room! What a beautiful and unique room for a baby girl! I love that you did so many conventional pieces in an unconventional way.
Katie says
The nursery looks amazing! I have fallen in love with the color combination you chose, although I was a bit worried at first being a girly pink lover ;-) Thanks for sharing and providing some inspiration!
katherine says
I’ve been waiting for this post and it didn’t disappoint. Love it! Congrats again on your baby girl.
Rachel says
It looks amazing! And I have to say that as much as I love shoes, baby clothes are adorable. I’ll be shopping at Target or someplace, pass by the baby clothes, and get so jealous because I wish they made them in my size!
Lauren @ chezerbey says
Super cute!
Kim at Yellow Brick Home says
This room is so fun and playful – and I especially that almost everything has your own personal stamp all over it! Add that to the fact that you’ve chosen anything but pink for a little lady’s room, and you’ve really come out on top!
Nice work, way to go, etc, etc… :)
Kate says
Hi John & Sherry! You’re nursery is ADORABLE! I am sure that Baby P will feel all the love you poured into it.
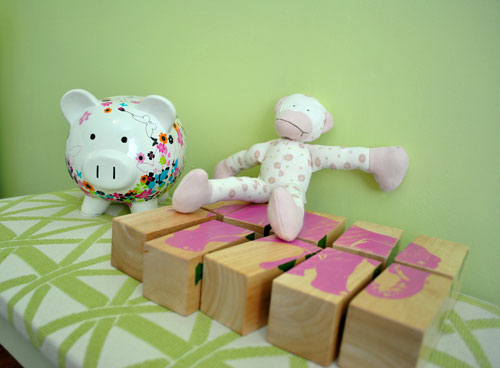
I’m wondering where you got the pink elephant blocks that are pictured on the small bench?
I’m a new mom myself (Baby Grace is almost 6 months old!) and I LOVE cloth diapers, so way to go! You won’t regret it. And you probably have a gazillion blogs you love to read, but here’s one I enjoy and have found super helpful on all kinds of topics http://simplemom.net/
Great job you two! I always love reading your blog.
YoungHouseLove says
Hey Kate,
We love that blog! Thanks for sending us the link to be sure that we’re in the know. And as for the blocks, they’re actually a gift from Pottery Barn Kids (possibly the Pottery Barn Kids outlet actually). Hope it helps! And thanks for the cloth diaper encouragement. We can’t wait to see how it goes!
xo,
s
Katy says
oh, it’s so pretty and cheery. I love it!!
Question: I want to use your idea on hanging panels high and wide over the windows in my toddler’s room, however, they have plantation shutters in the window. So, can I do curtains or is that a no-no with shutters?
thanks : )
Alicia Damron says
You guys did an awesome job on this room. I love the fact that you were able to fit so much into a small room without looking too cluttered. Great job, everything flows without matching too much, you’re very talented. And I love the before and after shots of you two. Your bean will love those when she grows up!
Jamie says
Incredible!! You guys are such an inspiration to making a house a home. I can only hope that when I close on my first home next month I can do the same. Congrats on the little one!
jja says
Amazing work. What a happy baby this will be!
Begoña says
lovely, lovely,lovely!!!!
Kathy says
Beautiful! I’ve loved seeing your nursery come together. The beanette is one lucky girl. I’m looking forward to working on our nursery (I’m 13 weeks), but we’re moving when I’m 7 months along, and my husband is starting a new job. So I’m hoping some strategic planning now and nesting instincts will make it not too-too crazy.
Melanie Beth says
I absolutely love what you did with this nursery! I especially love that you chose something other than the standard girl colors. Where does your inspiration come from?