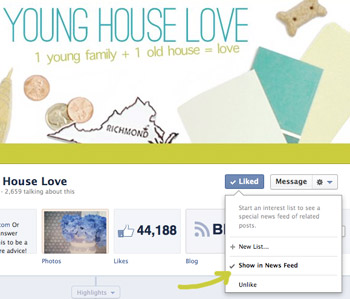
First a little Facebook diatribe: we’ve been hearing from folks who no longer see our posts or Instagram pics hitting their Facebook feed and have learned that FB made a few changes, so if you’d still like to see our posts in your feed again, just take a second to do this:
- Click over to our Facebook page
- Hover over the button that says “Liked”
- Make sure the box next to “show in news feed” is checked. If it isn’t, just check it. Then everything should permanently show up in your feed again. Sorry for the trouble!
And now back to our regularly scheduled blogging…
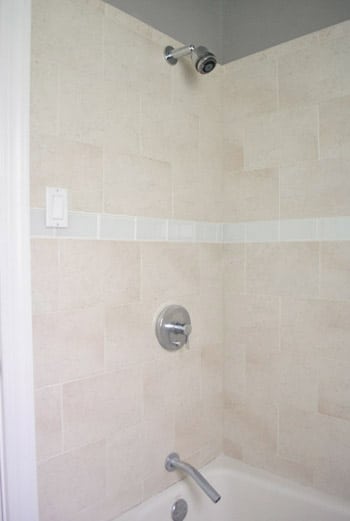
In case you missed the post where the tale of “removing the dated tree border that makes us sing that song from The Lion King in our bathroom” began (more on that here), we thought we’d share a few refresher pics. Exhibit A: the aforementioned tree-tile border that encircles the entire room, on all four walls – over and over again.
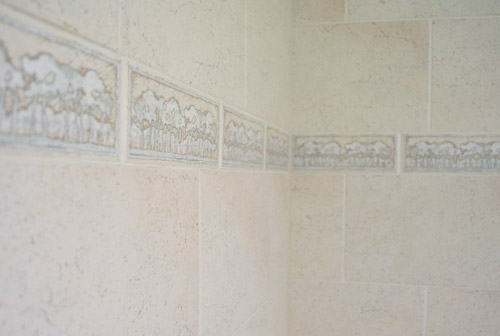
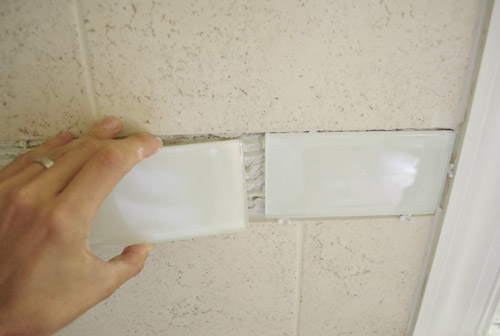
Exhibit B: The scene after a bit of Dremel-ing and prying with a screwdriver.
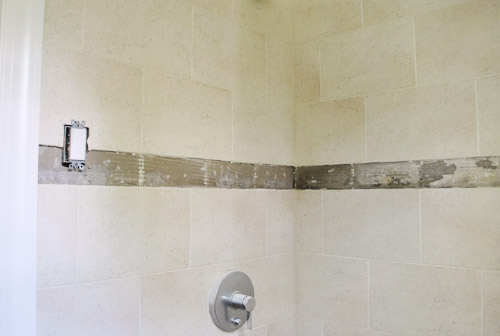
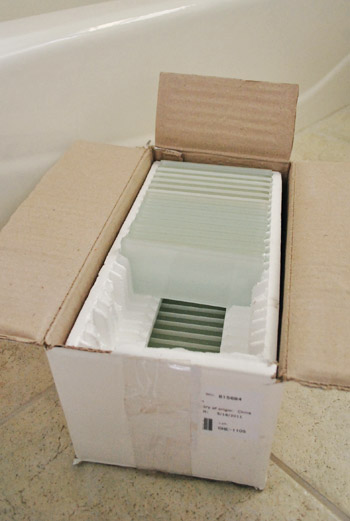
Exhibit C: The $50-ish box of clear glass subway tiles (called “Glass Snow” from The Tile Shop) that we’ll be installing in its place. You can read more about the tile we chose, and how Clara enjoyed lying on the floor of the store here.
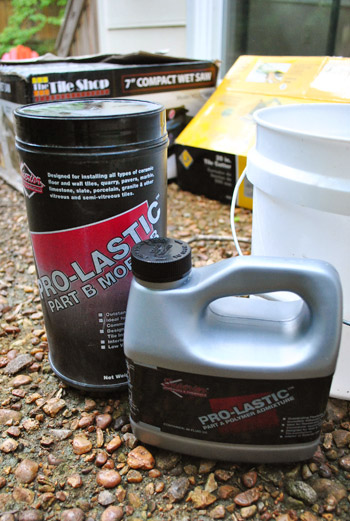
This isn’t our first trip to the tile rodeo, so this task promised to be pretty straightforward. Plus, by now we’ve accrued a pretty complete collection of tiling accessories, so one of our only purchases for this task was a new container of thinset mortar (the adhesive that keeps tiles stuck to the wall) and thinset admixture (the liquid that turns the thinset powder into its final cake-batter-y form). We got both of these at The Tile Shop for about $28 along with our tile.
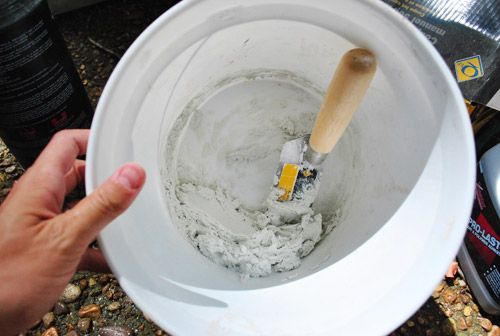
We mixed a small amount of mortar and admixture in a bucket using a trowel until we got it to the right consistency. Looking back at this photo, it appears a bit thicker than we usually like it (we snapped the photo prematurely, but kept mixing things to get it to the right consistency). In the end we like it to be spackle-like – like thick pancake batter.
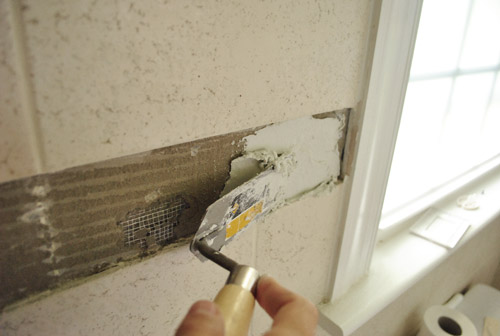
Since our to-be-tiled area was so narrow, we actually used the same trowel that we used to mix it all to spread the thinset on the wall.
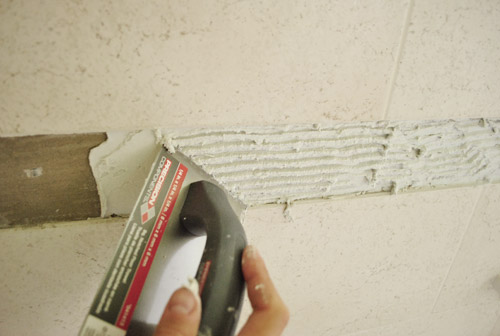
Then we went back over it with the grooved end of a small notched trowel that we picked up (the smallest one that Home Depot sold, for about $3) so we got that ridged surface that’s ideal for sticking tiles to the wall.
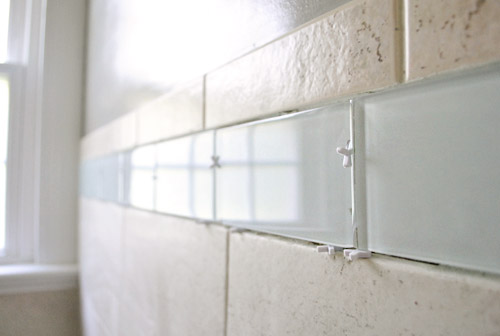
Actually placing the tiles was a cinch, since there was no leveling or anything needed. We just sort of plopped them in place (using some 1/8″ rubber spacers to maintain a gap for the grout). Some glass tile is completely translucent, so you have to be careful because your thinset lines can show right through it. Thankfully our glass tile is actually backed with an opaque film so you don’t see the thinset through it but it still looks completely glassy and clear (not frosted or anything).
We just repeated that process around all four walls, mixing up more thinset as needed.
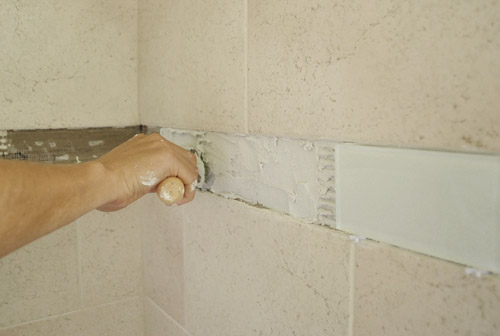
Here you can see the first section tiled (on the wall to the right) and the next side all thinsetted and ready for tiling.

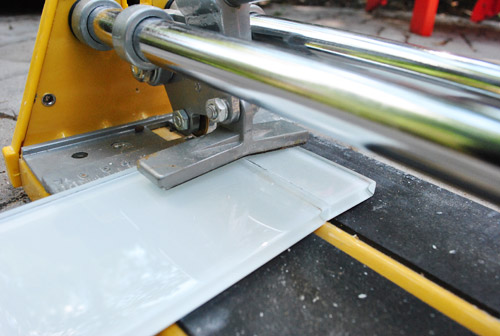
We did run into a few spots that required cutting (in a couple of the corners) so for that we broke out this tile cutter that we used back when we did the subway tile in our last bathroom. It’s a pretty cool tool (which sadly didn’t work when cutting our penny tile backsplash). You place your tile with your cut line aligned with the small raised ridge on its platform (the yellow stripe between the black rubber). Then with light pressure, you score your line by rolling the blade back and forth a few times. You can actually see my score line in the glass below.

Once scored, you move the angled metal pad atop the tile and press down until it snaps right along your score line (if all goes well). For us it’s the fastest, cleanest, and easiest way to get a straight cut on tiles like these.
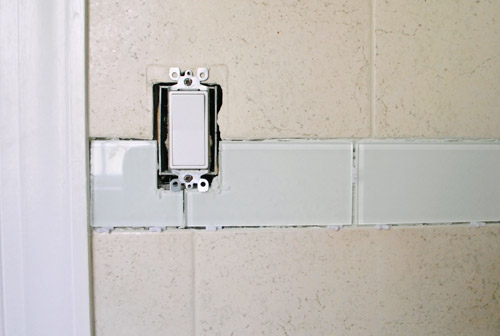
Unfortunately we did have one spot where we needed to notch out just the corner of a tile (around the light switch) which meant we had to use a wet saw. It stunk that we had to set up the saw for such small cuts, but it just had to be done.
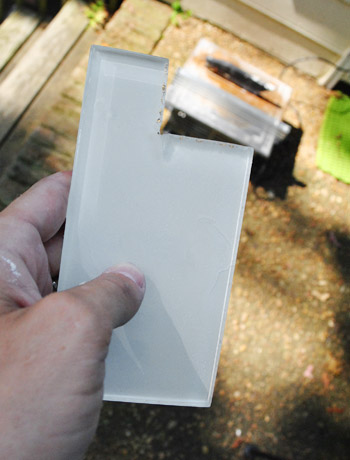
Here you can see the two tiles that got the wet saw treatment. The cuts aren’t 100% perfect, but the light switch cover will hide the imperfections at the corners.
All in all the whole process – from getting all of our supplies out to tiling and finally cleaning everything up again – took us all of Clara’s two hour nap. Not bad at all. One nap for demo. And another for re-tiling. This is our kind of project.
Of course, we weren’t completely done yet. Our new tiles still needed to be grouted and sealed, but all of that would have to wait for another day since we needed the thinset to cure completely.
But the next day came before we knew what hit us, and it was time to grout. At first we debated what color grout to do in order to try to get the best match to what we already had in there, but then we discovered that the previous owners had left us some of the grout they had used in the basement. It’s “Antique White” colored, which wouldn’t be our first choice against sleek glass tiles (we’d probably go with pure white or soft gray), but in this instance it was more important to match the grout in the rest of the room, so we sucked it up and proceeded.
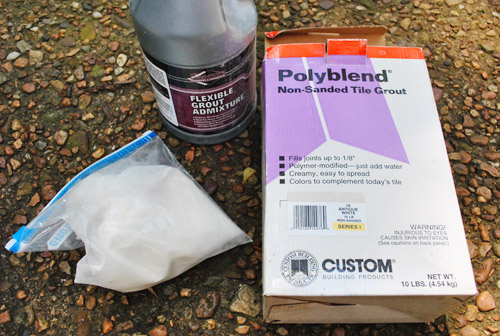
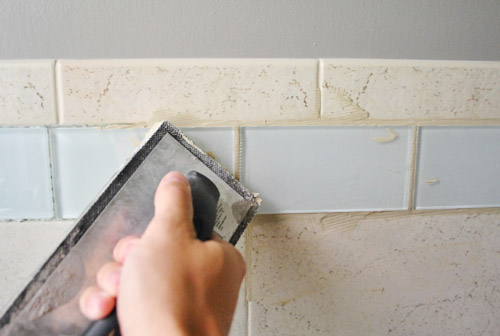
Having mixed up our free leftover grout with some free leftover grout admixture (a bottle we didn’t quite use up during our kitchen project), we went to town spreading the toothpaste-y stuff onto the tile surface using a grout float.
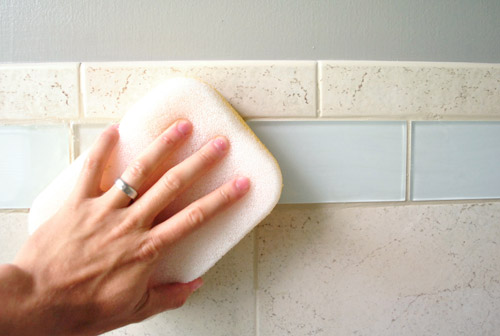
Once we had worked the grout into all of the grooves, we gave it a couple of minutes to set and then used a damp sponge to wipe away all of the excess from the surface of the tiles. The whole grouting process took just about 45 minutes. We’ll call that 1/3rd of a Clara nap.
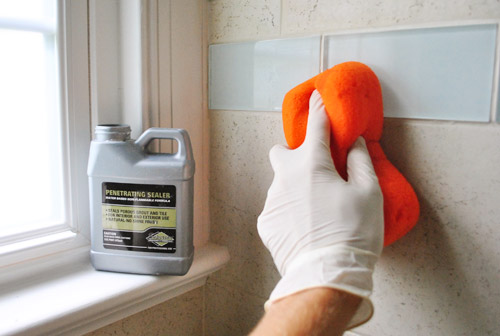
The last step – which we did the day after grouting so it all had time to dry – was sealing the grout lines so that they’ll stand up better to moisture and stain less easily. We had some sealer leftover from the kitchen, so we followed the instructions on the back and applied it generously with a sponge – then wiped off any excess a few moments later. This step took so little time that I did it while Clara was awake and playing in the other room. I know, I truly live life on the edge.
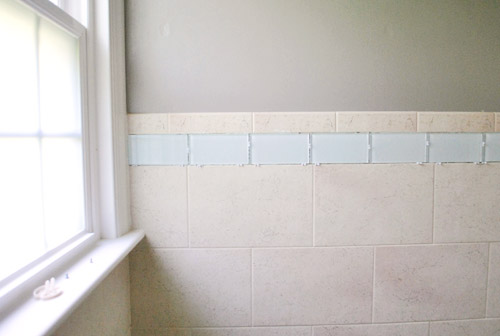
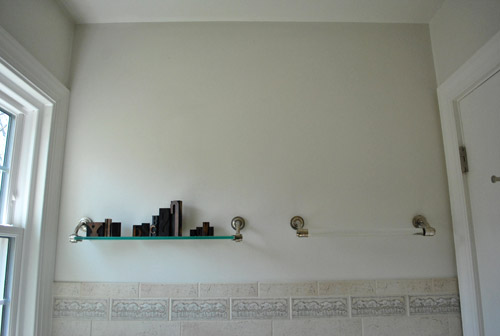
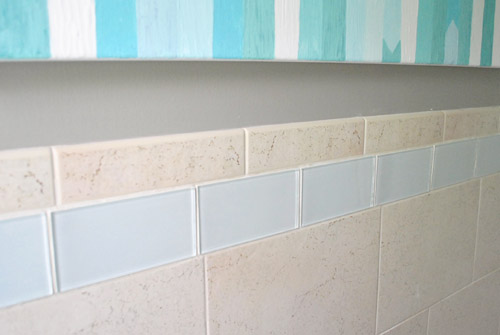
Sealing (plus putting a bit of caulk in the corners of the shower) was our last step to this whole project, meaning it took us just about 2.5 Clara naps (aka 6 hours-ish) to demo, tile, grout, and seal it. Not too bad at all. You can see in this picture below (on the left of the border) how the glass tile gleams as it reflects light around the room. It really makes the room feel fresher and more updated.
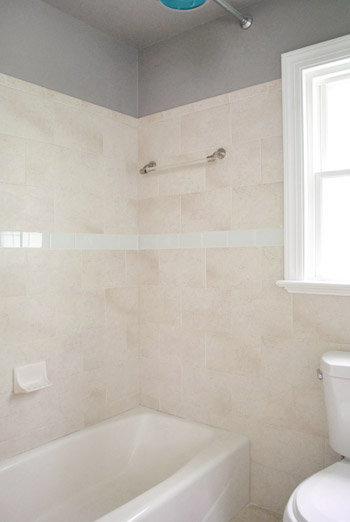
Admittedly we’re not always border-tile people, but the modern glass tile is a definite improvement from the trees, and for $50 in tile, it was an update worth making (we’ll get to the full budget breakdown in a minute). Reminder: that light switch isn’t really in our shower, this is just a really weird angle without the shower curtain in place – but it’s actually located outside of the shower curtain (so it doesn’t get wet).
It’s definitely one of those annoying these-photos-don’t-do-it-justice projects, so feel free to come over and use our bathroom to really see these guys in all of their glory.
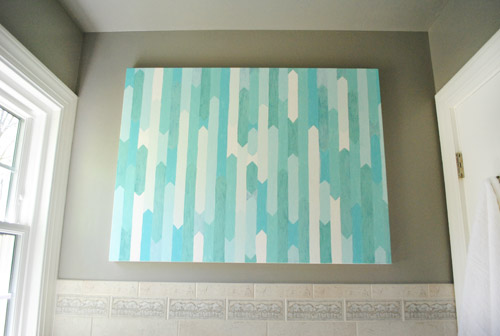
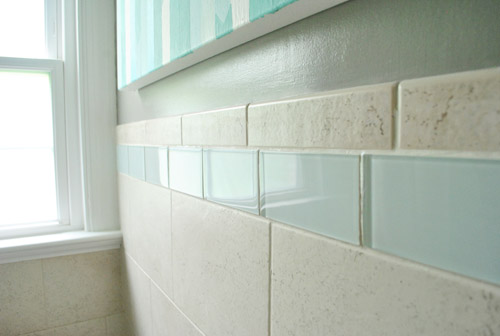
It just feels simpler and less busy than the tree-drawings that used to encircle the room:
It definitely has come a long way from this shot that we took of the room before we started any updates (you can see links to all of our bathroom updates in order at the bottom of this post):
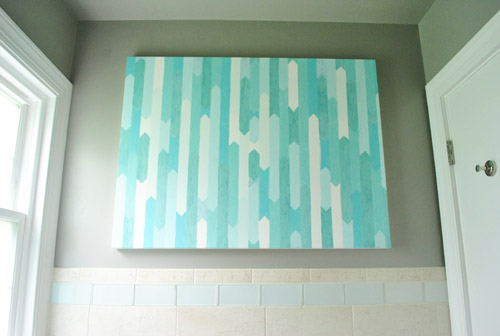
And although the tile is completely clear and shiny, it picks up the subtle tones in the art and the blue glass pendant light, so it brings sort of a cool tone to a previously very warm and beigey room. So even though those beige tiles certainly wouldn’t have been our first pick, they feel kind of balanced out by the new border tile.
We’re so glad we were able to use the same grout that the previous owners used to install everything originally – it really looks like this border has always been here, which is a lot better of an outcome than a new-border-installed-with-old-tiles look. Whew.
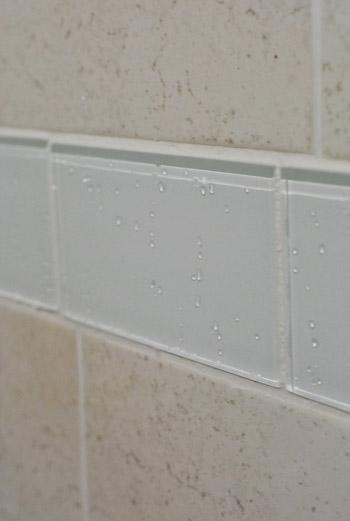
It looks especially glassy and sleek when it’s wet. We love how little drops of water collect on the glass surface and sort of reflect through the tile since it’s clear.
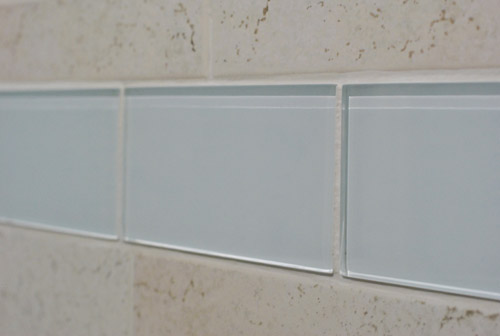
Here’s a shot that shows how it picks up some of the tones in the room even though it’s a clear glass tile – see how in this shot they look a little blue-green just because they’re picking up the art above them?
As for a budget breakdown, here we go:
- Clear glass subway tile (called Glass Snow) from The Tile Shop: $50
- Thinset mortar and Thinset Admixture from The Tile Shop: $28
- Small trowel and tile spacers from Home Depot: $6
- TOTAL COST: $84
Well, technically we also bought a Dremel Multimax (more on that here) which was $130 with the special grout head that we used, so the real total for this project is $214 if you count that, but our new Dremel has already come in handy for a bunch of other projects (we’ve used it on the deck and plan to use it on another project in the bedroom) so it’s definitely handy to have in our tool arsenal.
Oh and some folks seemed surprised that we were taking on another semi-big project like this along with our slow-going deck, but because we can only work on the deck one or two days a week (and it really demands full days of time, or at least chunks of 4+ hours) it could literally be a month or two until it’s completed. And this project was something we could tackle during Clara-naps, so we were excited to get ‘er done. So that’s what we’ve been up to in the bathroom. Wait, that sounded weird. Any bathroom projects going on at your house? Or are some tiling endeavors going on in another room, like the kitchen?
Psst- To follow this bathroom sprucing project from the start, check out this planning post, this painting post, this light-swapping post, this art and trim-painting post, this toilet-updating post, this window frosting and shampoo wrangling post, this toilet selling/buying and door-cutting-down post, and this pre-tiling post.

Rebecca @This Nest is Best says
Just wanted to make sure you guys know that the FB changes are a bit more complicated that just checking “show in newsfeed” – even if people do that, not all of your posts will actually show up in their newsfeed. This article explains the changes really well…
http://www.momcomm.com/2012/06/facts-about-facebook-promoted-posts/
YoungHouseLove says
So interesting! Thanks!
xo,
s
Pamela @ Pink Hammers & Sippy Cups says
Wow that is an amazing make over! It never would have occurred to me to simply replace the tree line, great job!
Karen A. says
I’m dying to know what you’re gonna do when your child(ren)is too old for naps! :-)
YoungHouseLove says
We might never get anything done again! Haha. Except she’ll be in preschool so that will buy us some time!
xo,
s
Carol N. says
Hey guys, I was just on Amazon looking up something for my cousin’s kid and saw that your book has a cover on it now! And I can pre-order which is wonderful!!! I’m actually pre-ordering and having my mom give it to me for my birthday which is about a week after it comes out. So she doesn’t have to come up with a gift idea this year; your book is it! Great cover by the way.
YoungHouseLove says
Aw thanks so much Carol! We’re still refining the cover, but it’s so exciting to see that first draft up there!
xo,
s
Lynn @ SafeBeauty says
That turned out sooo nice. And not bad for only 6 hours worth of work. It gives me hope because we love our bathroom tile other than the blue flowery insert tiles that line the shower stall. Who knew that we wouldn’t have to tear the whole thing down and start from scratch? Thanks for saving me money in the near future.
My best, Lynn
YoungHouseLove says
So glad Lynn! Good luck!
xo,
s
Kahley @ Ambiance says
Love:)
Toby says
Definitely an improvement but to make it truly YHL worthy, I think eventually you’d have to do away with the beige tile altogether. What do you think?
YoungHouseLove says
Oh yes, this is just a quick change to work with what we have, but someday down the line we wouldn’t mind reglazing them to be white and retiling the floor for a totally fresh look. Just not looking to gut it since it’s not in bad shape!
xo,
s
Crystal @ 29 Rue House says
I have never thought of changing the tile color with reglazing. How would you go about that? You’re making me rethink our tile and if it is something that can last longer or if it needs to get demo’d. Maybe we should have someone/expert come take a look and tell us if it’s worth saving (I assume grout also has to be in good/clean shape)??? What do you think Sherry/John?
YoungHouseLove says
We had it done in our first house’s tub, it’s basically hiring a professional to do it for a few hundred dollars but their method is so much better than a DIY job and it can last for decades! I think if the tile and grout is in good shape and just isn’t the color you’d like, it’s a great solution!
xo,
s
Kate says
This is totally dorky, but I’m so excited I just found you on yahoo! http://shine.yahoo.com/at-home/hall-fame-8-stylish-hallway-decorating-ideas-204100613.html
I saw your hall and was thinking, oh that’s my friends John and Sherry’s hall. How fun – you’re famous! Even though you kind of already are cause of this blog and you don’t know me, but I feel like we’d be friends.
Hi my name’s Kate – and we’re the same age and I have a young kiddo too, and I have a house (although not nearly as stylish…) and two dogs. You’re welcome to visit anytime you want, since now I’ve introduced myself and maybe we can be friends. Oh and don’t feel like you need to show this comment cause I just wanted you to know you’re famouser.
YoungHouseLove says
Aw thanks Kate! You’re so sweet.
xo,
s
Karina says
I do not comment much to be honest – but I feel the same about the whole friend thing. I watched Clara grow up, watched you beautify your first and second home (stalker!!)… so I often find myself talking about you and your blog to my fiance like I totally know you. For example “Clara totally did the cutest thing ever yesterday… ” (yes, he knows all of your names too now!! Yes, I talk about your blog a lot. Yes, you totally influenced and changed my German design taste buds. Yes, I am a copycat). Very creepy :), sorry!
YoungHouseLove says
Aw, you’re so sweet Karina! Thanks!
xo,
s
kasandra says
Hi! Love the glass tile! Question: Can you see the mortar through the glass tile? I’ve been thinking about doing that in my kitchen, but I watched one of Jeff Lewis’ decorating shows on Bravo and he said the mortar and imperfections showed through the glass. This was making me reconsider, but it doesn’t look like yours does.
Thanks!
YoungHouseLove says
Thankfully our tile came with an opaque film on the back so you don’t have to worry about the mortar showing through!
xo,
s
Scotty P says
Im a daily reader of your blog and I enjoy all the great home improvement ideas keep them coming
Scotty P
YoungHouseLove says
Thanks Scotty!
xo,
s
Linda says
Looks just great! Now, is it totally evil of me to wish you had to remove wallpaper from a bathroom? For some odd reason, my prior owner wallpapered the master bath. Good news – that paper is still in good shape after 8 years – not a wrinkle or peeling anywhere. Bad news is I’m terrified to even start trying to remove it – I’m so afraid it wasn’t installed properly and that I’ll damage the walls in the removal. I would feel so much better if YHL had tackled this issue – but I think you’ve at least been saved that challenge.
YoungHouseLove says
Oh man, we tackled wallpaper removal in our first house’s dining room and it stunk! We scored it with a wallpaper tool and then sprayed it down with hot water and most of it peeled off. A steamer makes it go really fast though!
xo,
s
Debbie says
Do you guys have plans to completely redo this bathroom eventually?
YoungHouseLove says
Perhaps down the line we’ll redo the floor and might even reglaze the beige tiles to be white – but for now we love this little update so much there’s definitely not a rush!
xo,
s
Julia says
I love this! What a simple change and such a dramatic (and hugely improved) difference!
re: the multimax – would you mind elaborating on just how “labor intensive” it was to drill out the grout? I have big dreams of replacing the (disgusting brown) grout in my bathrooms and kitchen, but I have about 300 square feet worth of grout to contend with.
YoungHouseLove says
It took a while but wasn’t really labor intensive. Picture holding a spinning toothbrush and slowly dragging it around each tile over all the grout lines. Definitely took a few hours (with chiseling things out afterwards) but we didn’t go to sleep with sore arms or anything.
xo,
s
Alena says
Wowee! Drastic difference!
kim says
Not feeling it….maybe if you had gone a darker grey!
YoungHouseLove says
It’s definitely a different strokes for different folks thing. In person we love it, but we’re certain 100 people would have chosen 100 different tile options!
xo,
s
GreenInOC says
The most recent post about the deck and the two about this project gave me agita just reading about them, that’s how inept I am an serious DIY projects!
I thought that it wouldn’t be too hard to scrape out some of the grout in my kitchen tile so that I could re-grout it to “refresh” and clean it up. Bought all the supplies (including 2 grout saws), got everything ready (including my hair!), and set to work.
10 minutes later and about 14 tiles ruined from the grout saw I threw in the towel!! I called and had the grout cleaned instead and fortunately most of the scratched tile isn’t noticeable unless you are right up on it.
Also, interesting (to me at least)… I first read this post on my iPhone and I was not a fan of the tile. Of course, I would not have shared that but the blue/green color didn’t look right to me (personally, I couldn’t figure out the references to “clear”).
Later on my laptop, when I visited to see if there was a new post, I saw that the tile looked TOTALLY different! In fact, you now have my “no value at all” approval!! Just thought it was an interesting difference based on how it was viewed.
I’m sure you’ll sleep better tonight knowing I am happy about your bathroom tile!!
YoungHouseLove says
Haha, that’s so funny! We have definitely heard that things look different on all monitors! And especially in person, we usually think things look much better than pics- which is kind of annoying but kind of fun since we get to enjoy something that looks nicer when you’re really there- haha.
xo,
s
Ikl says
Get rid of that awful, cheap homemade art. Just frame a large black and white photo of clara and burger or you guys as a couple, will classy up the bathroom. Cant stand that canvas in there, it just doesnt fit…sorry
YoungHouseLove says
Art is definitely a subjective thing! We love it but it’s not going to be everyone’s cup of tea! This is a tiny room that’s hard to capture on film, so in person it looks much nicer to us, but maybe even in person it wouldn’t be your thing! Just gotta do you in your own home, ya know?
xo,
s
GreenInOC says
Art IS totally subjective.
I have this piece up in my bathroom for no other reason than it makes ME smile:
http://www.blogcdn.com/www.spinner.com/media/2007/07/rat-pack-credit-preston-400.jpg
Some people come out of my bathroom asking why it’s there (clearly not fans) and other people who clearly enjoyed it as much as I do every day.
After years of worrying about art being “right”, I realized that art was only right if the people living with it loved it.
Emma says
I think that your comment was very rude. This is their home. And they have opened up to you and welcomed you into their world. I doubt you would like someone saying such critical things about your personal decorative style. I also doubt you would say this in person. If you have nothing nice or constructive to say please do not say anything at all.
Karina says
Actually, I love the artwork so much, I used it as an inspiration for my own flat (thanks Sherry)! I painted two cork pink boards in a similar style for the office, it looks awesome!
YoungHouseLove says
Aw thanks Karina!
xo,
s
Heather F says
I sense a Christmas gift idea for youuuuu!!!! :)
Audrey says
This might sound bad, but I thought yesterday when you shared the replacement tile that it might not be that great with the rest of the tile. I’d never share that (who am I to judge what someone else likes?) – except that I was DEAD WRONG. It looks AMAZING – like you installed all of the tile and meant it from the beginning. I wish I had that eye for possibilities like you do. Great job!
YoungHouseLove says
Aw thanks!
xo,
s
bfish says
It looks 1000X better with the new tile, and installation is beautiful. The old border was really bad and dated!
YoungHouseLove says
Thanks Bfish!
xo,
s
Dani says
What exactly is the admixture? We just did our entire shower with glass tile, and we never used admixture, nor was is suggested. We mixed our thin set with water.
YoungHouseLove says
We have heard it can enhance the flexibility of the mortar, so it grabs and holds for the long haul (with less of a chance of cracking)- The Tile Shop people love recommending it and we have used it a few times and really liked the result, but I’m sure folks go without it all the time with great results, so maybe it’s an extra credit type thing.
xo,
s
Tracy K says
Yes, as a matter of fact, I just finished up a budget friendly bathroom update.
http://dollarsandsensedecor.com/2012/05/im-baaaack/
YoungHouseLove says
Wahoo!
xo
s
Lindsay says
Um, yep. As usual, you guys blow me away!
YoungHouseLove says
Aw thanks Linsday!
xo,
s
Sarah says
That looks great! I love how you are not afraid to do the hard work of digging out the old tiles. Your kitchen penny tile inspired me to redo our tub surround which used to be made of pink plastic tile. I went with white subway, dark grout. The tub still remains pink…but we plan to have it refinished in white!
http://mouseandhinge.blogspot.com/2012/03/white-subway-tub-surround-complete.html
YoungHouseLove says
So pretty! I love it!
xo,
s
Megan says
Always enjoy looking at your projects…both the process and the finished product. I got to thinking, do your projects ever require 2 or 3 trips to Lowe’s or Home Depot like every DIY project does for me?!?!?!
YoungHouseLove says
Haha, yes! All the time! Sometimes we get away with just one trip and sometimes it feels like five!
xo,
s
John@RemodelingBIBLE says
It looks like a whole new room. Great job! The abstract painting adds a more modern touch, too.
YoungHouseLove says
Thanks John!
xo,
s
Karina says
I love it! Have you considered removing the shower curtains for glass??
YoungHouseLove says
That would be awesome for down the line (it’s a pretty pricey update so for now our soft white curtain still feels nice and easy.
xo,
s
Hilary says
Nice one! this boarder looks great i didn’t think you could remove indvidual tiles like that but of course you guys are always breaking new ground!!! keep up the good work i love this blog!
YoungHouseLove says
Thanks Hilary!
xo,
s
Ruth says
Very detailed instructions on how you improved your bathroom. This is definitely going to be a reference for when I tackle mine!
shauna says
Hi guys! You have mentioned in the past that you were planning to switch out the accent tile in your bathroom and your timing could not be more perfect!! We are planning to do the same in our guest bath…..only we are hiring it out because we don’t have the time/patience/skil to DIY. HOWEVER you have me rethinking our plan. My questions for you are……what was your backup plan it you had been unable to get the tile off, ended up putting a hole in the drywall or damaging the other tiles??????? Those three little ‘what-ifs’ are what keep me from attemptimg this project on our own. I would hate to have to rip out the whole bathtub surround because I punctured the wall in an attempt to switch out the accent tile!
You guys are such an inspiration!!!!
YoungHouseLove says
I think we generally go into all of our projects fearing that it might not be as straightforward as we initially thought, but we try to have confidence that in the end we usually figure things out, either thanks to google, reformulating our plan, or even calling in an expert when we need to! Hope it helps!
xo,
s
Kelsey says
At first I didn’t think the trees were so bad, but after seeing this upgrade, I changed my mind. Love it!
YoungHouseLove says
Thanks Kelsey!
xo,
s
Kirstin @ The Olive Seed says
Hey YHLers — this post couldn’t have come at a better time! We need to remove a couple rows of tiny (1×2.5″) subway tile in our kitchen backsplash, then re-tile it higher because we’re replacing our OTR microwave/hoodfan combo. I had never thought of using the Dremel tool — we will have to give that a try.
I was hoping you would end up having to match grout colours. I could really use some advice on that. What do you do if you can’t find the exact brand and colour of grout?
Thanks! Will let you know how our kitchen backsplash remove/replace works!
YoungHouseLove says
We were just going to take an educated guess. The Tile Shop has a display so you can see all the grout colors and compare them and just bring a photo and hold it up to see what you think matches. Hope it helps!
xo,
s
Colleen P. says
It looks lovely and crisp and cool and welcoming-GREAT choices!
DeeJay Conley says
You guys are seriously fabulous. Your parents must be so proud.
YoungHouseLove says
Aw, thanks! That’s so sweet of you to say!
xo,
s
gemma@thesweetestdigs says
Love how this turned out!! So much better than the trees. Nice work :)
We also did an aqua glass tile border on our recent bathroom renovation: http://thesweetestdigs.com/2012/05/01/project-bathroom-the-reveal/
YoungHouseLove says
Gorgeous!
xo,
s
Simone says
Your bathroom looks great! We have a similar border in our master bath, except instead of trees it looks like some 90s style tribalish pattern. Everytime I see it I wonder whether there’s some way to replace it…now I know! Thanks!!
Maureen says
Oh was this post dangerous (for my husband’s sake) for me to see… trouble, trouble.
Not sure if we have the time/money to re-do our bathroom. I realized what I hate most about our bath is the random accent tile and the thin trim that runs around the room (similar to yours). Told the hubby that i was curious if we could just chip that tile out and replace it. Guess we have our answer :)
Although our border tile is thinner than yours, still worth looking into.
thanks!!
Katie says
Did you think about painting the tile? I know that’s tough in bathrooms. but curious if you’ve considered/encountered permaglaze to do it instead of paint. Really want to try it ourselves!
YoungHouseLove says
Oh yes, it’s called professional reglazing around here! We mentioned it in our post yesterday if that helps (we had it done to our first house’s tub and really loved the result).
xo,
s
Elizabeth says
looks fantastic! well done :)
so glad i found this page, i have white tiles in my bathroom, they look really clean and modern but there’s a border of (wait for it…) PINK TEAPOTS!!! in my BATHROOM!!!
when i first moved in i put tile stickers over them. it works i guess, but i know the truth!
so the next time the other half goes away for a few days im going to crack on with replacing them! cant wait.
oooh tile shopping, woohoo!
thanks :) xx