I know, I know. The idea of puffy paint in most craft projects makes you skeptical. Me too. But a few weeks ago John and I were brainstorming about what we should do to our pumpkins this year, after painting them last year:
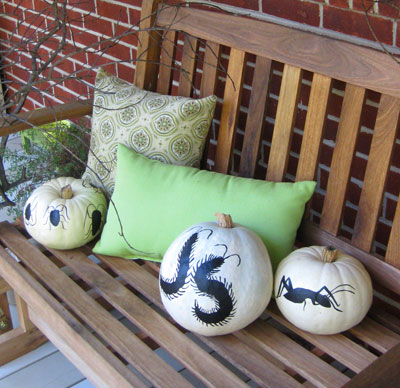
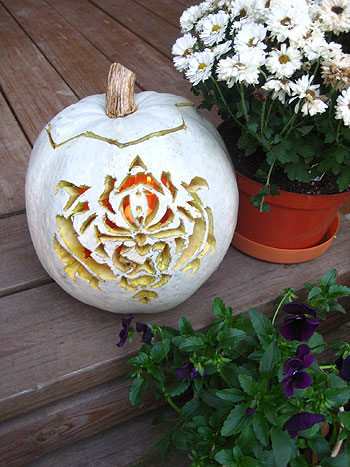
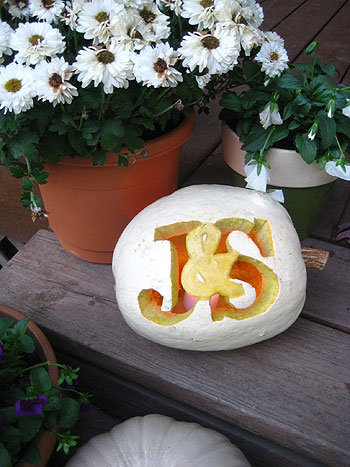
… and carving intricate designs into them the year before:
Anyway, so somewhere along the line John said “too bad we can’t use nail polish or something to build up shapes on the pumpkins.” I sort of looked at him sideways at the nail polish suggestion, but I liked the idea of somehow creating raised designs on them… and so the idea of puffy paint was born. We figured it was made for puffing (aka, building things up) and it’s super cheap so why the heck not. We even hoped that if we spray painted them after puffing them they might look sleek as opposed to cringeworthy and bad crafty. You know how there’s good crafty and bad crafty? We wanted to stay on the good crafty side of things.
In full disclosure, this was one of those projects where we had full expectations of failure. We could just picture the puffy paint sliding right off the pumpkins and creating a drippy mess (since pumpkins don’t exactly lay flat like paper or fabric). But we figured it was worth a try- and lo and behold it actually worked! Oh happy day.
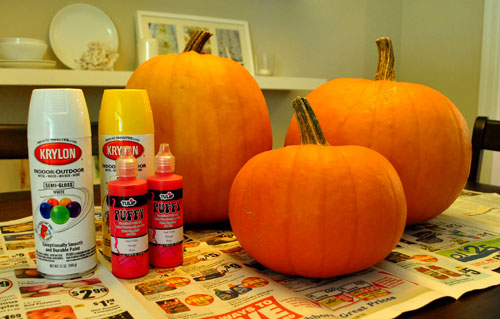
Here’s how it all went down. First we started with three pumpkins along with some puffy paint and some spray paint from Michael’s:
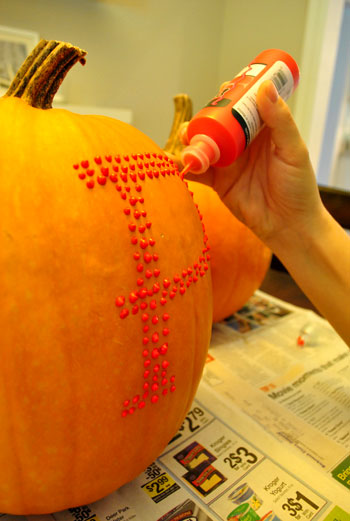
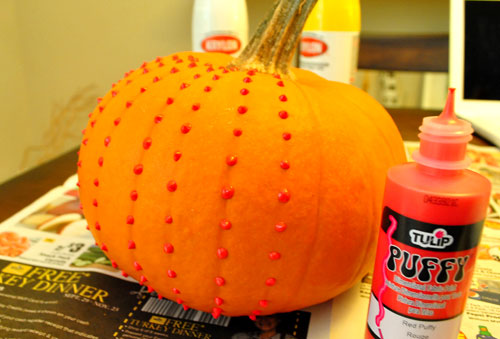
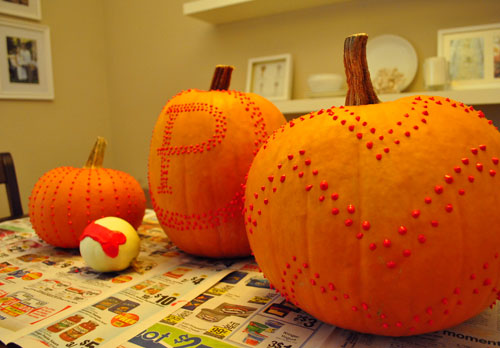
Then we just went to town on them with puffy paint. Here’s what things looked like in progress:
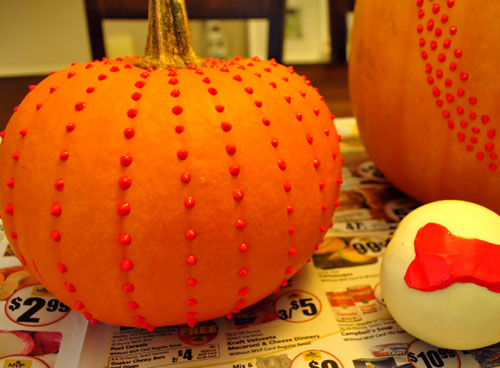
When we finally proclaimed them done (after about twenty minutes or so) here’s what we ended up with:
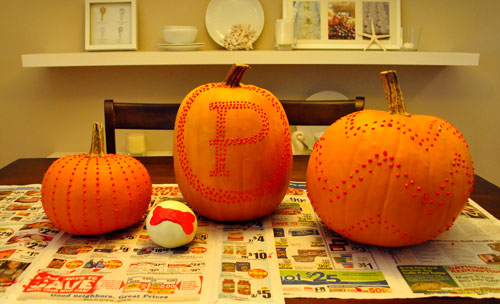
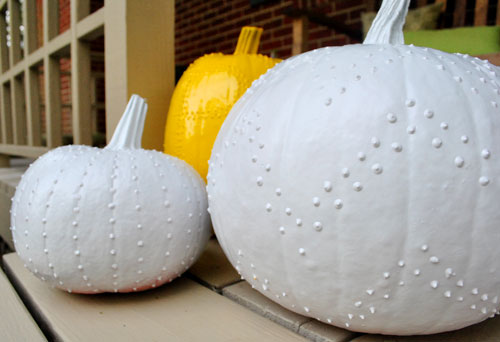
We decided to do a fun studded vertical stripe effect on one of them, a P monogram on the big tall guy, a chevron-inspired zig-zag pattern on the fat one, and a small bone on the tiny backyard pumpkin that we accidentally grew (you know, in Burger’s honor). We liked how everyone in our family of four was semi-represented thanks to ending up with four pumpkins- although I’ll be mad if you assume I’m the round one (even though John’s obviously the tall one).
Oh and I chose that reddish-orange puffy paint color because I thought it would most closely resemble the color of the pumpkins, so when we sprayed them they would hopefully end up with even coverage and a uniform look (which did seem to work for us). Here they are with a few thin and even coats of marigoldy-yellow and pure-white spray paint:
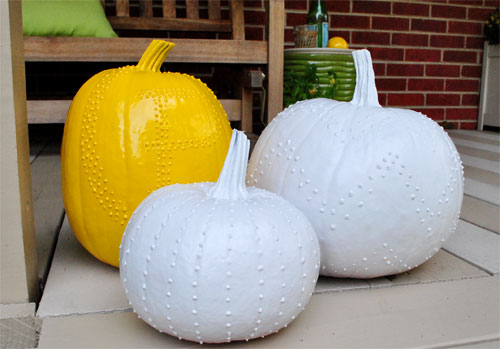
We went with those spray paint colors since we thought they’d work with the yellow mums and the light cream accents on our front porch.
Thankfully they fit right in.
Burger’s wee pumpkin is back behind them on the planter side table that we made a while back. I can’t believe John “farmed” that. It’s so round and perfect that it looks more like a superball than a pumpkin.
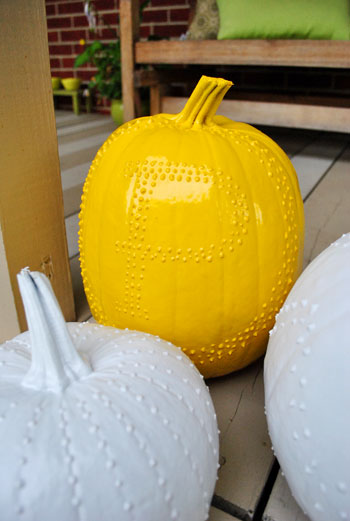
Oh and here’s a spray painting tip for ya: we balanced each pumpkin on an old quart-sized paint can before spraying them so we could get all angles of ’em except for the unseen bottom portion without having to touch them and ruin the finish. We used white semi-gloss and marigold yellow high gloss paint and we actually preferred how the semi-gloss looked a bit more. The more matte texture made the studs look cool – like hammered metal – as opposed to the slicker and harder to see high gloss monogrammed P. In fact if we were to do it all over again we’d suggest using semi-gloss or even satin paint for all of them instead of dealing with the super shiny stuff. Surprising, because going into it we thought high gloss would look better. Live puffy paint and learn I guess.
But we’re happy with how they came out for sure. And it was a really easy and fun project. Although we must admit that we’re craving pumpkin seeds so much that we might grab one more small pumpkin and get all traditional on it- you know, so we can scoop out the goop and enjoy the seeds for Clara’s first Halloween. What about you guys? Do you have any pumpkin carving or Halloween decorating plans? Were you totally cringing when we said we used puffy paint on our pumpkins? Admit it, you were.

Krystal says
LOVE IT! So unique and chic!
Jamie M M says
You’re right, i did cringe at the puff paint idea (it brings up memories of some pretty bad crafts from when i was a kid) But I love what you did with it!! And I must say that all your spray painting ideas have me itching to spray paint something! I just can’t decide on a color or what to paint! lol.
And I’m dying to get into a pumpkin and bake the seeds! That’s one of my favorite snacks this time of year but I don’t have a pumpkin to gut!
Steph @ Birdhouse Family says
These look really cute – I might just have to make some! They remind me of those textured white Ikea vases that everyone seems to have (including me).
Jenn from Much to My Delight says
That is the best idea ever! Not only is it not cheesy (not even close, please!) they look completely chic and don’t require mad carving skills (which I severely lack). You guys are so creative!
Rebecca @ the lil house that could says
I will be painting our 4 currently naked pumpkins with my 2 month old niece in a few weeks. I’m not sure she can handle the puffy paint yet, but it’s a great idea! I was going to go with some simple polka dot/stripey/and other graphic patterns to compliment our other porch stuff.
But then again, I doubt the niece will be helping much with that either! She’ll just look cute for the pictures with her first pumpkins, as I’m sure Clara did also :)
Kellan says
What a creative and fun idea! I think Ill try this. Always impressed by your creativty. Thanks for sharing!
Stephanie says
You guys are so creative! Cool idea.
Caroline @ The Feminist Housewife says
I’m not going to lie, I was a little skeptical when I read puffy paint. But I should have known better..you guys always have such fun ideas! ; )
Jenn C. says
I’m curious to see if they’ll stay pretty like that later on. Then you could just reuse them. :-)
Taylor says
I think your next website venture should be Spray Paint Love :)
tricia says
Love love love the “P” pumpkin! You guys are so creative:)
Heather says
I love them all! Especially Burger’s little pumpkin. Very cute!
Ami @ beyondpeasandcarrots says
very cool and creative! There has been quite a few yellow accessories making there way into your home lately! New favorite color??
YoungHouseLove says
Hey Ami,
It’s definitely up there with our favorite colors for sure! We’ve slowly been falling in love with it since getting our yellow living room rug about a year ago.
xo,
s
Kelli @ Lovely Little Ruffles says
Your pumpkins look amazing! Thanks for sharing your great ideas! :)
Amy C. says
I love this idea! Can you guys do a Spray painting for Dummies post? Every time I attempt to spray paint, it turns into a mess.
YoungHouseLove says
Hey Amy C,
Here you go:
1. Never get closer than 8-10″ from the item you’re spraying with your nozzle (getting too close makes for drips)
2. Always keep the can and your hand moving while you’re spraying (you want to “mist” your item, not spray it with a ton of paint)
3. Three thin and even coats (with drying time between them) is so much better than one drippy heavy coat.
4. Use high quality spray paint (the $2-4 stuff isn’t nearly as good as the $6-7 Rustoleum stuff)
5. Always always always spray in a well ventilated area and wear a mask if you have one around (we always do!)
xo,
s
Christine says
Wow! These turned out amazing! I must admit, I first had flashbacks to the days of painting puffy paint on christmas sweaters and the like back in the day – but I’m impressed. I love the texture on these!
p.s. How much fun is puffy paint? I’m sure you guys felt like you were back in elementary school!!
liz says
Those are beautiful! I saw on TV how you can scrape pumpkins while they’re still on the vine & they scar up kinda like your puff paint.
Brian says
I’d love to hear a follow up to this to know if painting with high/semi gloss makes the pumpkins last longer and not rot as soon… also, as a fellow young house lover who recently was able to sell our little home and move up into something more spacious as you did, I can’t tell you what a difference all your little projects and design touches will make – if I may be so bold as to make a comparision between what we did to our home and yours; we were flattered when a potential buyer agreed to our asking price. But only with the caveat that our thrown together/carefully staged dining/kitchen area using ikea and thrift finds as well as DIY inspired hacks was to be included with the sale. We said “see ya, you can have our $100 worth of crafts and we moved on to bigger and better”
Good Luck!
Brian
Leanne says
Those are so cute! Puff paint? What a great idea. You two always rock the unique ideas.
Elizabeth says
Am I the only one who immediately thought “Charlie Brown” when looking at the zig-zag pumpkin?
And ahhhh…puffy paint…many a sorority item in the 1980s fell victim to the puffy paint.
Lydia says
WOW! You take pumpkin decorating to a whole new level!
LauraC says
LOL: “although I’ll be mad if you assume I’m the round one (although John’s obviously the tall one)” I’m LOVING the spontaneous posts, and although your writing has always been a cut above, it seems that it’s even better now. You’re having fun! Love the puffy painted pumpkins, though I still like the super-shiny yellow gloss one the best. Love the “P” monogram! Oh, and I bet you also went with the yellow color b/c that’s what you had (from the candlesticks)! Am I right?! ;-)
YoungHouseLove says
Hey LauraC,
Yes! We still had some yellow spray paint from our candlestick & our cups project- but we ended up getting a fresh can of marigold yellow because the small amount that we had left wasn’t enough to cover the two pumpkins that we wanted to spray.
xo,
s
Jessica @ How Sweet says
Oooh they look awesome! I did some glittery pumpkins last week but it was too much for me. I didn’t have the patience. This I think I can do!
Megan Elizabeth says
Love it! I plan carving out some pumpkins too. I really want some yummy seeds :)
Heidi says
Hi! I love your blog and I just love this simple pumpkin idea. This is great for a couple on a budget (planning a wedding costs a lot of money..go figure)that still wants to get into the holiday spirit.
P.S. Soon you’ll have to change your header to two young people, an adorable baby, and their lovable dog, falling in love with their second house! :)
Nicole says
The mere mention of puffy paint took me right back to my “t-shirt decorating” themed 8th birthday party. I must admit that the paint looks better on the pumpkins than it did on those t-shirts!
Mrs. Money says
Wow, those ARE super cute!
GRACE HAPPENS says
hi sherry and john! this is hands down the most creative fall project i’ve seen in blogland. so simple and beautiful! hope you are enjoying the gorgeous fall weather RVA brings every year. i miss my hometown!
Amy goodhouse says
Great idea! I’m wondering if the spray paint also prevents squirrels and other critters from chomping away at the pumpkin. Cause I just came home to a half-eaten pumpkin tonight! (or if you have any other remedies to prevent such a travesty from happening?)
YoungHouseLove says
It probably can’t hurt! So far no squirrel attacks… although they might be busy collecting the million acorns littering our driveway…
xo,
s
Andrea says
These look great! It’s exactly what Erica on psimadethis.com did with vases last fall. So smart to transfer it to pumpkins!
http://psimadethis.com/post/213803164/im-seeing-spots-the-good-kind-beaded-details
YoungHouseLove says
Holy cow! Everyone follow that link! Totally fantastic amazing. Thanks for sharing Andrea!
xo,
s
Destiny says
Clever doesn’t even begin to cover it! You guys are TOO MUCH! I love this idea — so far from the traditional carved pumpkin (that I’m so over) and yet it is so incredibly traditional … and beautiful!
Catherine says
You never fail to inspire! These are so simple a chic; I love them! And I love the link from Andrea too. I totally want to copy both projects.
Stell says
Maybe this means I’m “bad crafty,” but I really like the look of the pumpkins before they were spray painted. What a fun idea!
YoungHouseLove says
We actually did too! We almost wished we used black puffy paint and white pumpkins. That would look pretty amazing without any spray paint at all!
xo,
s
NK says
Such a creative idea. They are quite eye catching.
Crissy says
Krylon should totally be one of your sponsors.
Amanda says
These look so cool. They almost don’t even look like real pumpkins! They look like a fake pumpkin made like that! Which is too cool … but you don’t have to store them all year round. ;)
Tressa Duerr says
Love this project! Last year I added a color wash of copper craft paint to our pumpkins and the critters left them alone. If you want to harvest your seeds early you could always cut out the bottom instead of the top. I find it easier to light a candle and then sit the pumpkin over the cut out base. I have read you can apply vaseline to the cuts to seal the wound and slow the decay. But anytime you cut the pumpkin it will begin to decay, so don’t do it too early. Those gorgeous pumpkins must make it to beggar’s night!!!!!
ginger says
“I’ll be mad if you assume I’m the round one” BAHAHAHAHAHA
No way you are “round” Sherry. You look great.
And I agree… why aren’t there any spray paint sponsers?? They don’t know how many cans of spray paint you guys have “sold” single handedly.
Momnivores Dilemma says
I’m totally RUNNING to Michael for some puffy paint STAT. I think I will gobble up some of those craft pumpkins instead of using the real thing. That way I can enjoy them year after year.
I did the same thing with stick-on gemstones…
but funny…I just wrote a halloween post of my own with some great Halloween ideas, more in line for those who have lil ones slightly older than Clara…
http://momnivoresdilemma.blogspot.com/2010/10/twas-night-before-preschool-halloween.html
Carey says
LOVE it! Great job! So artsy and full of personality! OK, what song is that on the video? Love it, too. :) Thanks for the great ideas! (Can’t wait to see you on the Nate show, btw. I’m kinda stoked!)
YoungHouseLove says
Check out the link at the end of the video for that info. Hope it helps!
xo,
s
Ashley says
This is simply the coolest idea ever! We definitely want to give this a try next year (when we aren’t knee-deep in renovations and don’t have saw dust, tools and paint everywhere we turn!). Great job!
Meredith says
I’m glad this project turned out better for you than my disco pumpkin did for me! ;)
Danielle Potter says
I LOVE this idea!! I have a question; I have been searching high & low for the perfect marigold spray paint color but have not had any luck. Would you mind telling me what spray paint brand & color you used? Thank you so much & love these great ideas!!
YoungHouseLove says
Hey Danielle,
We believe the name of the paint was Krylon’s “Sun Yellow” (which looked more lemon-yellow on the cap but was definitely marigold on the pumpkins- perhaps because it took on some of the orange from the pumpkin). Hope it helps!
xo,
s
Allison says
first time on your blog and you’re so creative! love this!
Kathyk says
I was actually just thinking about doing this myself when I saw how amazing it looked for this little girl’s first birthday decorations. So cute!!!
http://aestheticoutburst.blogspot.com/2010/10/first-birthday.html
YoungHouseLove says
Aw that cross stitch is really cute! Love the colors and the subtlety! Thanks for sharing the link!
xo,
s
Alyssa says
These look great!
I carved my first pumpkin this year with my roomates. I decided to carve our house number into the pumpkin and for my first go, and the fact that we have a 3 which is curvy, it looks pretty fantastic!
Amber Rules says
We don’t really get into the pumpkin carving in Australia, but they are awesome whether it’s Halloween or not! Just a little word of advice (which I’m sure you’ve already thought of, but just in case)…don’t put those painted pumpkins in your compost if the compost then goes onto your vegie/herb patch. You’ll end up with spray paint in your beautiful, homegrown food chain. Urgh.
YoungHouseLove says
Great tip Amber! We actually learned another reason not to compost our pumpkins even without any spray paint on them (since we like to use our compost to garden)!
xo,
s
Timothy says
These designs are seriously awesome!!! Definitely inspiring.
Ashley M. [at] (never home)maker says
I think your pumpkins are GORGEOUS. Seriously . . . beautiful! But I sort of cringe at the idea of spray-painting something organic. We always let our pumpkins decompose in our compost after we’re done with ’em). I could see using this tip on a fake pumpkin, though.
YoungHouseLove says
Hey Ashley,
Well, something crazy happened the last time we let our pumpkins decompose in our compost (check that out here) so this year we know better than to toss them in our compost pile (since we like to use our compost for gardening)!
xo,
s
jillian m. {coffee, light and sweet} says
what a unique idea for pumpkins! you guys are super creative when it comes to this kind of stuff. i’m excited to see what you’ll come up with next…
:)