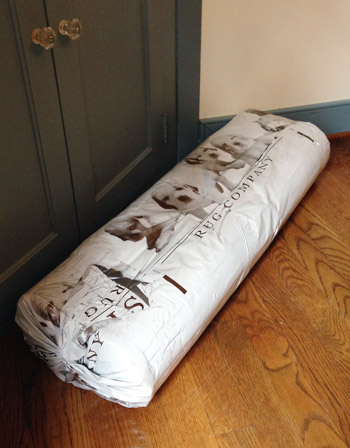
We’ve never been more all over the place than we have been lately (Clara’s room, the master bath, the kitchen, the sunroom veranda) and we can’t believe it has been around a month and a half since we last mentioned our staircase. Several of you have been eager to hear about the new runner that we ordered, and we’ve been eager to tell you all about it (it was back-ordered and arrived a little behind schedule, but it’s finally here). But the last vestiges of the old carpet in this house were standing in our new runner’s way…
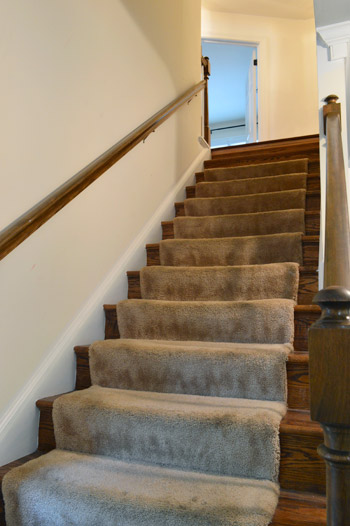
When we finally removed the carpet from our master bath, the stairs became the sole remaining carpet location – even though we had ripped it off the top step in order to install the hardwoods back in May. But between avoiding the tedium of the task and worrying about a small dog and a small human navigating those slick uncarpeted steps, we’ve just been living with this lovely situation for the last five months.

But with our new runner just glaring at us from within its packaging for the last several weeks, we decided to start chipping away at the eyesore once again. You know, for the sake of the puppies.
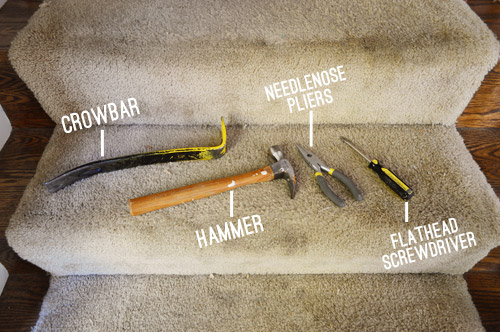
The task really wasn’t that hard. It was just boring and meticulous. Here were our weapons of choice, basically all serving the purpose of prying things up (carpet, tack strips, staples) at varying levels of detail and care (crowbar for yanking up carpet, pliers for delicately twisting stuck staples out).
Once the crowbar helped me loosen a corner or two of the carpet, it was fairly easy to just yank it up by hand. Well, by gloved hand since the carpet was rife with staples and other sharp objects determined to pincushion me to death.

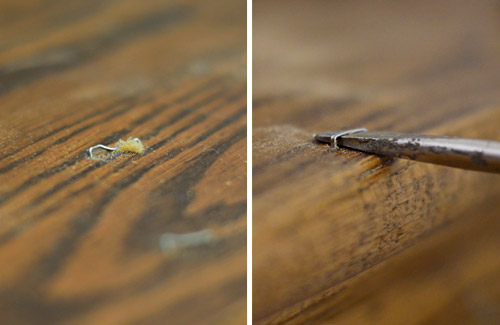
It’s what lurked beneath the carpet that was the true joy (italics = heavy sarcasm) of this project. Sure, the blue foam padding was quick to tear up… but the staples. OH THE STAPLES.

You can’t even really tell in these pictures just how many staples there were. So I decided to mark them (along with the nails holding down the tack strip) with yellow dots. I’ll save you from counting. There are 49. Multiply that by 12 steps and it’s nearly 600 things that Sherry and I had the pleasure of prying up.
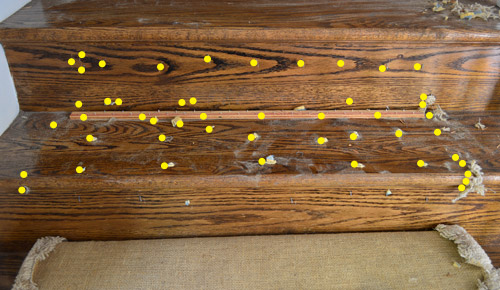
Most of them weren’t that hard. We could just stick a flathead screwdriver under and pop them up. Usually only one side came lose from the wood, so we’d have to go back and pluck it out completely with the pliers. But some got stuck. Some broke. And at least one or two made us mutter some not-Clara-approved words under our breath as we went.
Slowly and steadily, we stripped each step clean of its metal and moved on to the next one.
We worked on it over the course of three days on and off, so Sherry would steal a few hours here and there and then tag team me and I’d go back in. All told it was probably around seven hours in total. And if we were to play you a montage of the process, it would basically just be a bunch of Burger cameos. I’m not sure if working on the stairs just made us notice all the times he goes and up down on a normal day, or if he increased his usual number of trips just to satisfy his curiosity about what the heck we were doing. Yes, that’s him doing some stretching in the middle of the staircase.
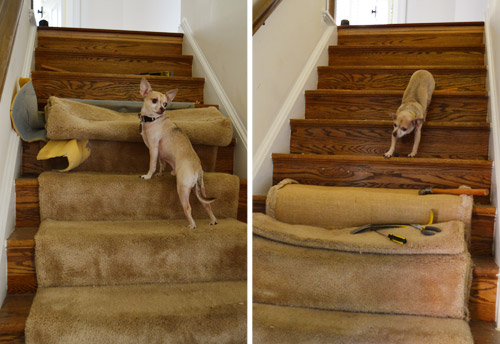
I’m mostly convinced he just wanted to be near us (there was one point where Sherry was leaning forward, full of concentration, and got some Burger tongue to the nose). I also had a particularly hilarious run-in with him when he was sitting on the carpet that I was about to rip up.
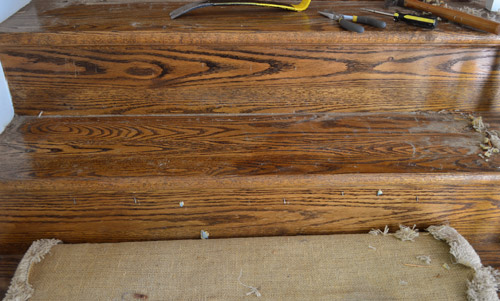
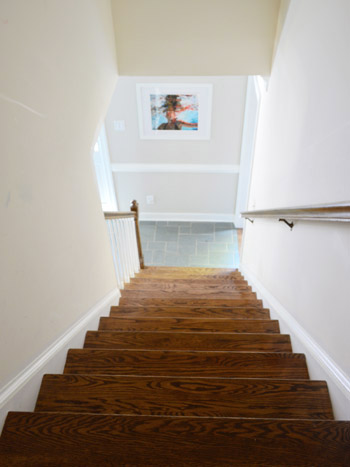
Here we are, at the end of our montage, with a completely carpet-less staircase and (more importantly) and completely carpet-less house. So one of Sherry’s before-I-have-this-baby goals has officially been met. And she’s pretty jazzed about it. Just don’t mention staple removal to her. There will be grumbling.
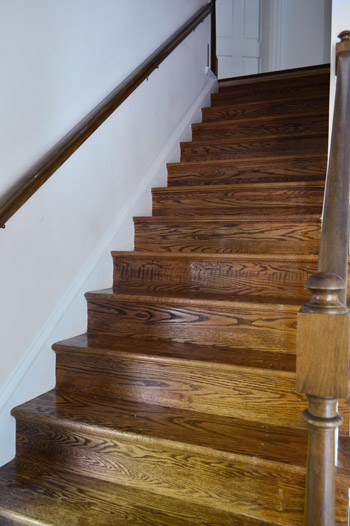
The wood left behind is in good, but not flawless condition. It’s not very scratched up, which is a relief considering all of the pointy tools we had near it, but there are some little more-noticeable staple holes in a few spots (these two steps on the bottom of the photo above are the worst, so we wonder if they used a different tool or re-stapled them here for some reason).
We still plan to paint the stair risers white – but not the treads (like this) – so that should help to hide most of the tiny holes (we can putty them before we paint). For the tread holes, the new runner should cover most of them and we’re hoping to do the same thing we did to fix up our downstairs floors before installing the runner, which should fill/hide some other slight imperfections. Note: we’re not planning to change the color of the stair treads since they flow into the upstairs flooring, which we chose to be a very close match.
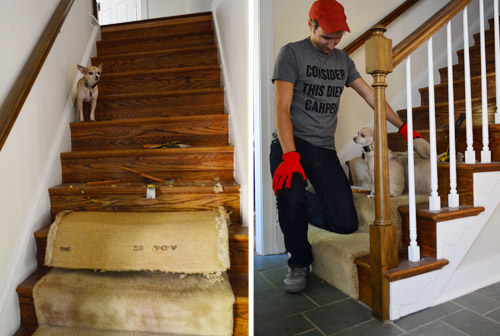
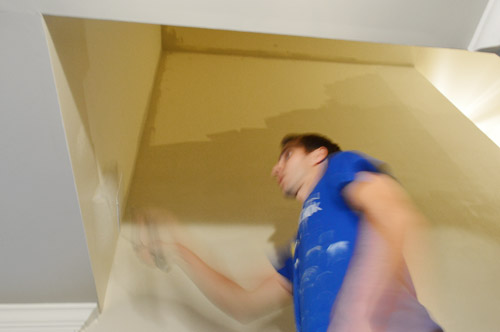
One other step that we had to tackle before runner-time was painting the walls and the ceiling leading up the stairs, since we didn’t want to do that after installing the runner and risk dripping paint on it. But we’re glad to report that we knocked that out too! We thought it would be fast and easy (it’s not too much actual ground to cover) but the fact that it involved balancing on a ladder with a giant roller pole did add a few levels of difficulty (it was about 16 feet high in some points) – which is why this terrible picture is the only one we managed to capture of the process.
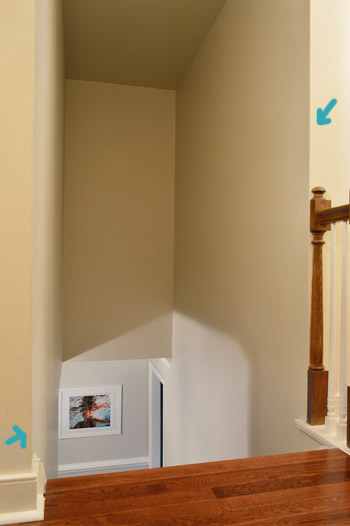
I also used our tape-the-paint-brush-to-the-pole method (detailed here) to get into those upper corners. All told, that was about another 3 hours of work, but it’s really nice to have it done. As planned, we used the same Edgecomb Gray color that we used in our foyer (we chose that knowing we’d use it up the stairs and in the upstairs hallway too). You can see where we stopped painting by the arrows along those two edges. We just wanted to do enough so we wouldn’t worry about dripping on the new stair runner, but tackling the entire hall means buying another gallon.
Hopefully early week will be the full runner reveal, assuming we can get those risers painted and dry in time! But the good news is that in the meantime both Clara and Burger have had no trouble on the carpet-less stairs. They’re not really slick at all (maybe from years of being lightly worn under a carpet?) so we’ve mostly put that worry to bed. But we’re still excited to add the new runner, just to be safe and to soften the blow if ever do lose our footing.
Is anyone else removing old carpeting and plucking every last staple out by hand? Does it make you rue the day that staples were invented? Yeah, me too.

Ashley says
The previous home owners removed the carpet on our back stairs and painted a cream runner down the middle and then distressed it so there are specks of black. With burgundy on either side, they scream “80s!” in a really negative way. Unfortunately, they painted right over the staples and nails so I am in the process of digging them out before repainting. I’d say 600 is probably a good estimate for us, too, so I feel your pain!
YoungHouseLove says
Sending you lots of good nail-digging-out vibes! Godspeed Ashley!
xo
s
Nina says
Do you have any plans for the walls above the staircase/stairwell? The paint makes a huge difference but it might be a cool place to do something visually interesting that you could see as you walked down the stairs.
YoungHouseLove says
I think art would be nice up there… and someday a big chandelier or pendant in that alcove above the steps would be awesome.
xo
s
Tamara says
I’ve been slowing removing the carpet throughout my home for the past 2 years or so. The stairs will be next. And last, hurray! But what’s up with “tackless” carpet strips?? False advertising if ever I did see! Glad to see the last of your carpet is out pre-baby and also glad to know I’m not the only one to use the tape-the-paintbrush-to-the-pole method!
YoungHouseLove says
Haha!
xo
s
Amanda says
I *hate* carpet staples. We swapped out the pee-stained carpet in our house before we moved in 6 years ago. I was 9 months preggars with Number 2 and my DH pulled up 1000 sqft of carpet and a set of stairs and removed all the staples so we could replace it before the furniture arrived. I was painting baseboards and heard him mutter words I didn’t know he knew. The new carpet was laid 4 days before baby arrived. But we will never do that again!
Sighly says
I did this exact same thing this past summer at my mom’s 1950’s cape in CT. Not sure why they felt they needed THAT many staples! But, at least it kept the wood underneath new for us! My stairs have carpet over finished wood as well, but it leads to a loft for my ten year old son, I think I will leave it on there for a little while longer.
Angela-Rose says
Attempt #2 to comment & hopefully on the correct post this time!
You guys are following in my footsteps lately…first painting windows and now ripping up old stair carpet. We went one step further (after the fun of tearing up the dusty carpet and padding, prying up the tack strip & painstakingly removing all bazillion staples w/my amazing 14 yr old daughter’s help!) and tore out the whole staircase (two actually as we did the basement staircase also!)…and then awesome husband got to build two new wonderfully straight (as opposed to awkward & turned) staircases. Summer of ’13 was a wild ride around here! ????
YoungHouseLove says
So funny!
xo
s
LJ says
I’m so excited to see what you do with this stairway area (if anything). It looks just like mine! I’ve only ever seen ideas for stairwells with a half wall or banister on one side. Good luck!
Julie says
I feel your carpet-removing pain! When we moved into our “new”/old house, the first thing I did was take up the 25+ year-old carpet from the stairs and hallway. The padding underneath was almost dust and I think I breathed in the previous owners. We’re now soul mates, I’m sure. Yuck.
Do you think a runner will be a PITA to vacuum and keep from getting hairballs collected on it? I’m totally about to copy you guys, but I haaate all of the hairballs that collect on our wooden stairs and am trying to picture what it would be like with carpet, so that’s my hesitation.
YoungHouseLove says
We’ll tell you how it goes! I imagine we’ll have to vacuum it but we have a bunch of cotton flatweave area rugs in other places so I hope it’s not too bad.
xo
s
Julie says
Oh, and by hairballs, I mean dust bunnies as well. I realize that not all pets shed as much as our cat does.
Julianne says
Looks soooo much better without the old carpet! Congrats on ridding the house of the old. Can’t wait to see the finished staircase. Sounds like it’ll be lvely. :0)
pretty is our playground says
When I did this, my tool list included some wine. The job got filed somewhere between removing floor tiles and emptying the litter box:)
YoungHouseLove says
Haha!
xo
s
Taylor says
I LOVE how Burger is in the middle of this project. BUAHAHA, my cat Zeus does the same thing. Nothing can be touched around the apartment without his approval(a.k.a. sniff)
P.S. I’m obsessed with your blog and just haven’t gotten a chance to write! I found your blog about a month ago and LITERALLY started from page one and went post by post in order because I didn’t want to miss any project or milestone (something that is a little stalker-ish, but I mean as a compliment LOL.
Can’t wait to read more!
YoungHouseLove says
Aw thanks Taylor!
xo
s
Michelle @ A Healthy Mrs says
I ripped the carpet off of two sets of stairs this summer, so I feel your pain! Prying all of those little bits up — thinking about it still makes me shudder! :)
JG says
For your next stapler/nail pulling event, there is an awesome hand tool called “Carpenters Pincers”. They look kind of like long-handled dull tile nippers, and they are *great* for pulling nails and staples! A highly recommended addition to the toolbox!
Jordan says
Oooh yes, we ripped out the runner on our stairs within a month of moving in. I, too, could only get a few stairs done before taking a break or trying to pawn it off on someone else– “hey mom, thanks for coming by to visit–want to take out some aggression on the carpet runner??” ;). The staples, ooooh, the staples.
Unfortunately our stairs were a bit too scratched up so we need to refinish them, which has been on the to-do list for 3 or 4 months now. And we’re having a debate about painting the risers. One good thing about leaving the stairs in this limbo state is that we’ve figured out we don’t need a runner!
YoungHouseLove says
That’s awesome Jordan!
xo
s
Shelley says
So funny I just painted my stairway Edgecomb gray this weekend. I rigged up a long pole to do as high as I could but couldn’t get to the edging. What kind of ladder did you use? I also took down the popcorn ceiling and can’t reach that to make it look halfway decent. Didn’t plan ahead obviously.
YoungHouseLove says
We used one of those awesome telescoping ones from Home Depot (got it a few years back). It allows us to make one side shorter than the other so it can securely sit on stairs.
xo
s
Diana says
I’m looking forward to seeing what you do, art wise, on the stair walls. I feel like a lot of things are just cheesy, seems to be a tough place to get right!
Brandi from Bloomington says
I am completely envious of your Samantha French print. Ugh. Consider me green.
YoungHouseLove says
Aw thanks Brandi! I was such a fan for so long and it was a little scary to bite the bullet and order it, but it’s one of my favorite things! I think it was the first piece of art that we hung up at the new house!
xo
s
Erica says
Oh goodness, STAPLES. When we ripped up the carpet and padding in my house, we had to pull out the staples on the floor. In one room, I swear, there were staples every half an inch. It took my mother and I an entire day to get them out. That staple picture gave me nightmares! It’s just so good to know it’s worth it in the end! I can’t wait to see your new runner!
Tania says
Love the shirt, the day definitely was carped!! You guys are so amazing, love your stuff:) I spent a few days pulling staples from a floor too once after pulling up carpet throughout a whole house, it is painful.
Chelley / AisForAdelaide says
Those stairs are beautiful!!! It was a lot of work, but so worth it for that outcome! Nicely done!
pendy says
We’ve had uncarpeted stairs (with white risers) for decades and I love them. So easy to keep clean and they were never a problem for the kids (just loud when they were teenagers!).
Minna says
Last time I pulled up carpet tacks was in a basement, and it pulled up some of the cement floor. That experience has scared me from trying to pull up the (horrific) carpet and laminate on the steps. Yes, you read that correctly. Laminate in the middle with carpeting on the sides. (There are things all over my new house that make me wonder what, in heavens name, the previous owners were thinking.) Was I doing something wrong? Or is that something that happens with cement, but not wood?
YoungHouseLove says
Oh no! I don’t think you did anything wrong, concrete is just crumbly and comes apart like that sometimes. I hope your stairs are easier to deal with! Just go slow and steady and try not to gauge :)
xo
s
Katy says
We are preparing to do the same thing! How did you keep from getting carpal tunnel? I am anticipating sore hands from staple wrangling.
YoungHouseLove says
I would just recommend working a few hours at a time if you’re feeling the burn. Breaking things up across multiple days can save your wrist and your sanity!
xo
s
Emily @ Life on Food says
We just removed carpet on the stairs, upstairs hallway and three bedrooms. The stairs and the hallway were the worst. pretty sure when it was install someone was staple happy. Our backs were not happy when all was said and done but the hard wood underneath was so worth it.
Teresa W. says
I really do wonder why carpet staples break easier than any other kind! I am sure there is a logical reason, but I think those who remove and install carpet for a living want us to know they are worth every penny they charge.
I had to laugh when I saw Burger helping you. I was staining our new porch last weekend (and using your post from last August to do so) and my dachshund Schatzi, would get as close to me as she could without getting paint on her. She always has to supervise!
YoungHouseLove says
That’s so cute! And you’re right about the breakage! Each time I was like “maybe this one will be different… crack!” – haha!
xo
s
ellie says
Just a bit of advice – I get so many good ideas from you guys! We did the risers on all of our steps -at home and at our beach house in Bethany Beach – where I note you guys sometimes vacation!…….with sheet Formica…….Makes cleaning them a breeze. Also – I would be concerned that regardless of the number of base coats you do the oak risers in…….they will eventually yellow…….
YoungHouseLove says
Thanks for the tip Ellie! We’ve already started painting so we’ll have to see how they hold up!
xo
s
Angela says
That looks so awesome!
We started ripping 42 year old RED carpet off our curved entry stair-case and feel your staple pain. I only did 2 stairs before realizing the stair treads aren’t stained all the way across (only the edges that showed.) Grrrr. Turned into a bigger project than I’d hoped.
YoungHouseLove says
Oh no, good luck Angela!
xo
s
Jessica Nielsen says
Our last house was a Craftsman, built in 1897. We ripped up the stair runner (which actually turned out to be three fringed hall runner rugs with the fringes tucked and tacked down at each end). But seriously… those babies were tacked down like a wind monsoon was coming! Here’s a photo – http://nielsenhomestead.com/2013/02/06/157/
On the plus side, we found the original rug tags and realized they were Karastan rugs and were worth some big bucks. They were beautiful but definitely not our style, so we sold them on ebay for $1500! Score! We liked the rug-less stairs, and the reward for our staple/tack-pickin!
YoungHouseLove says
That’s amazing! I love stories like that!
xo
s
megan says
It seems that you guys usually use and recommend Benjamin Moore paints, however, occasionally I see Sherwin-Williams pop up. My husband and I JUST closed on our first home and have our first baby due on Thanksgiving day. We are in a mad rush to get some trim and walls painted, but unfortunately don’t have the time to test different paints out. Why would you choose one brand over the other, or do you have a straight up recommendation regarding your paint brand choice?
Thanks!
YoungHouseLove says
We’ve actually never tried Sherwin Williams ourselves (the pros who painted the outside of our house used it and we loved the result though). When we do design dilemmas for our readers we like to mix up the paint brands (so one week it might be SW, the week before that it might be Behr). I think everyone has different favorites, but after trying a bunch of them (Olympic, Behr, Glidden, Benjamin Moore, Valspar) over the last seven years, we tend to prefer Benjamin Moore if we’re doing a more permanent/major project (ex: painting cabinets, painting walls). We might be biased because we create a color collection with them each January, but we’ve used their paint since well before that partnership, and we always pay for our own paint, so we truly do like it best. If we’re doing a small crafty thing (like painting a plant pot) we might use a tester of Behr though, and we recently used Olympic on the stenciled floors in the bathroom (since we’ll be removing the subfloor to tile that space down the line when we do a full reno). Hope it helps!
xo
s
Colette says
Oh, I remember doing this to our house and totally empathize with removing all of those dreaded staples!! What grossed me out the most though, was what was hiding UNDER the carpet and underlay – lots of sand, dirt and just general grossness (I think there may even have been some tiny spiderwebs). We painted the risers white as well, but haven’t installed a runner (yet). Now every time I go up that staircase, I can’t help but smile because not only do I LOVE how it looks, I know that it is CLEAN. Hah! :)
YoungHouseLove says
Haha it’s true! Sure is nice to see the steps and know nothing’s lurking…
xo
s
Andrea says
I am in awe over a carpetless house! We did the bottom floor a couple of years ago and I am itching to do the rest. The stairs look great, by the way.
You’re right. Pulling up staples is a fool’s task. Last time we did it, we employed our two children. It was character-building chore.
YoungHouseLove says
Hahaha! Oh man, I remember the character building tasks my mom put me through. Those were the days…
xo
s
Frob says
I’d love to rip the carpet off my stairs, but there is no lovely hardwood underneath! Same goes for the faded pink carpet that is all over the upstairs including in the dining room. I already know I’ll be in staple pulling hell in a few months.
YoungHouseLove says
Good luck Frob!
xo
s
Leah says
We just bought a house less than a month ago and the first thing I had to do is get rid of the mauve/salmon colored carpet in the bedroom. They stapled that pad down like nobody’s business. I learned why you should wear gloves when pulling staples and ripping up tack strip. My hands are torn up from all the little pokes from tack strips and staples.
Kelli Fox says
oh yes, we just removed the carpeting on our stairs.. we didn’t have pretty oak all the way underneath so we plan on painting the tread black, the riser white, then at some point installing a runner… right now they are primed white – even that is better than the carpeting! Can’t wait to see which runner you chose.
Carly says
This makes me want to look under our stairs to see if there is wood. We have 2 sets of stairs and the carpet is old. Needs to be replaced or something. I’l love adding a pretty runner. Maybe I can investigate without ripping up too much.
Katie says
What is your plan for the railing? Are you still going dark? if so – when/how will you do it? What are your thoughts on stain vs paint? I plan to also paint my balusters white with a darker railing – but am torn with how to approach it. Do I stain the railing, then paint the balusters? or do I paint both? help!!!! LOL
YoungHouseLove says
We have heard a bunch of folks weigh in after having done any combination of things (stained just the top rail, painted the balusters and the rail, etc) so I think any of those options can look awesome. I think we’re leaning towards stain and painting the vertical parts white so the rail is just a dark stripe (which will mimic the stripes in the runner) but we’re not 100% sure yet. We plan to do that after we roll out the runner and look at it but before installing it.
xo
s
Cybele says
Someone may have already said this, but please please please google “cats paw staple remover” and look for the ones with a screwdriver handle. Best $5 you will spend this week. Promise.
YoungHouseLove says
Thanks Cybele!
xo
s
Syl says
Ok, I’ll admit, I’m late to this post so the idea of reading all the comments is overwhelming.
I’ll add my 2euro cents though… The wood on the stairs looks great. And if you’re going to go the runner way I really, really, really, really, really, really,really, really, wouldn’t paint the risers.
Put down a carpet runner, or paint the risers. Don’t do both. It’ll be far too busy in that visually contrived space.
Just my two Euro’s worth right? Celebrate the wood with a runner, or tone it down with a paint job on the risers. Not both. Pick your poison.
YoungHouseLove says
Thanks Syl! We have been trolling the web for photos (it’s so hard to picture it all in our heads) but all of our favorites have a runner and painted runners (like the one we linked to in this post) so that’s what we’re aiming for I think! Here’s hoping it works out…
xo
s
Brittany says
I feel your pain! Ripping up carpet = no fun. I, in all of my wisdom, decided to tackle tearing out the carpet in the living room/hallway. Alone. While my husband was out of town on a work trip… Did I mention how smart I am? ;) I actually wrote a “girl power” post about it: http://underthegingkotree.blogspot.com/2013/07/getting-down-and-dirty.html
along with a time-lapse video of me pulling up tack strips like a boss.
Can’t wait to see how your stairs turn out! In the meantime, just imagine me– in my carpetless/still-living-on-the-cement-slab state, but still happy that my carpet is outta here! And, from what it sounds like, you guys are pretty happy to be done with it, too! Best of luck!
Cheers,
Britt
YoungHouseLove says
Haha, I love it! Girl power + time lapse = high fives.
xo
s
Nevin says
I can’t wait to hear and see your new stairs. We too have a dog and our carpet is a off white Berber. Need I say more? I have often times thought about removing the carpet, just been too scared to do it. We can’t afford to replace the hallway carpet upstairs,but I am okay with that. Our stairs meet hardwood at the bottom. Once I see yours, my opinion may change! That’s for the inspiration, and courage.
Kayla says
We have that exact same black and white striped runner on our stairs and we LOVE it. Hope you enjoy yours just as much as we do ours.
YoungHouseLove says
Yay! SO GLAD TO HEAR THAT! I’ve been worried about how it would wear (or if it would be high maintenance) so that’s music to my ears.
xo
s
Kelli says
So, when you guys revealed to us that you had bought this house, I told my husband, “The Petersiks have gone cray cray and have so much to do in this house!” (not that I ever doubted your abilities)! Fast forward to next Friday, when we close on your house’s twinsie–think less blue trim and more wallpaper–like a 3100 sgft house of nothing. but. wallpaper. Moral of my comment: Thank you for giving me the confidence and plenty of posts to tackle this house and make it our dream. You guys are the bestest.
YoungHouseLove says
Haha, I love that Kelli! I keep telling myself that someday the blue trim and wallpaper will be nothing but a memory – and the worse the before is, the better the after! Haha! It makes me smile a little while I peel wallpaper. All the best with everything!
xo
s
Audra says
Hey guys!! Love the blog. We are in the process of selling our starter home and are contingent on another house…reading your blog gets me all the more antsy to get in our next home. This post reminded me of a post I did not too long ago that I thought you’d enjoy!! http://keepinupwiththejahns.blogspot.com/2013/09/carpet-crush.html
Take care! Audra @ keepinupwiththejahns.blogspot.com
YoungHouseLove says
Love it! So much inspiration!
xo
s
Kayla says
Burger stretches while going down the stairs too. Must be a chihuahua thing, my chihuahua Lily does that as well!
Gaidig says
We pulled up our carpet this weekend to reveal the hardwood underneath, and we found that the absolute best tool for pulling up carpet staples is a really cheap pair of flush-cutters. The particular ones we have are made in China, and although I have successfully cut soft metals like like craft wire with them, they are made of metal that is too soft to cut through nails or the staples. You can actually see the dents in the blades! This means that the cutting blade can slide under the stable, flush with the floor, and you won’t accidentally cut off the sides of the staple. It was actually faster and easier than using a staple puller on paper. Good thing, too, since there were hundreds of staples to pull.
YoungHouseLove says
Great tip! Thanks so much for sharing!
xo
s