As much as we love having our new built-in shelves in the laundry room, they did kinda get in the way of our oh-so-fancy ironing board storage system. You know, the one that made a clanging noise whenever the spin cycle kicked on?
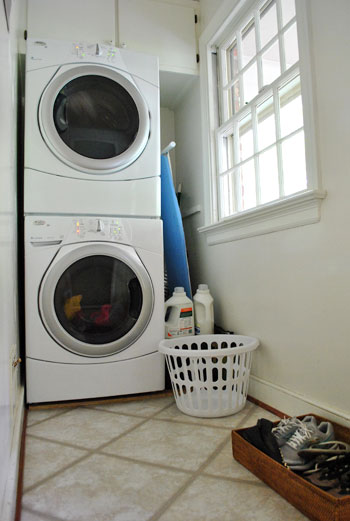
So clearly the ironing board had to find a new home. Earlier on we thought about making a little cubby so the ironing board could slip into our built-ins, but we wanted maximum space for baskets and bins and bowls (instead of breaking things up and making it narrower). We contemplated just shoving him (her?) in a closet somewhere else in the house, but somehow it felt like he she it belonged in the laundry room… just not looking all busted and ugly.
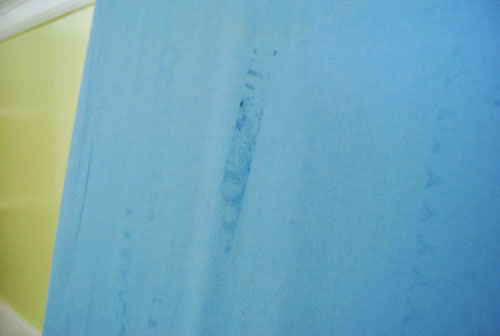
Those nice little dark streaks? Would you be surprised if I told you they were residue from Sherry’s oft-used no-sew hem tape? Picture the wife hanging her head in shame. And an old more-fun cover that we had was also ruined in a similar manner (ripped – oops). Maybe Casa Petersik is where ironing board covers go to die?
Sherry contemplated sewing a new cover herself (possibly out of ironing-board-disfiguration guilt), but after popping over to Etsy (specifically, here) for some inspiration, she instead found herself inspired to buy a charming little handmade-by-someone-else cover (long story short: she was enamored with the fabric and unable to find it herself at a few local stores that she hit up). So 24 bucks later we had a much more presentable looking ironing board that Sherry is excited to display 24/7 (and has vowed not to maim). She’s more into that ironing board cover than a person should be.
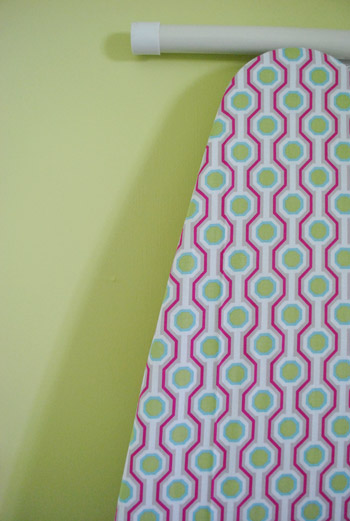
Do I get any husband points for letting her go the pink route? Even I’m man enough to admit that it looks pretty awesome with the grellow walls.
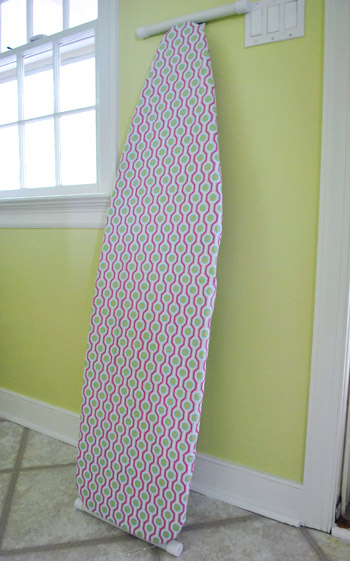
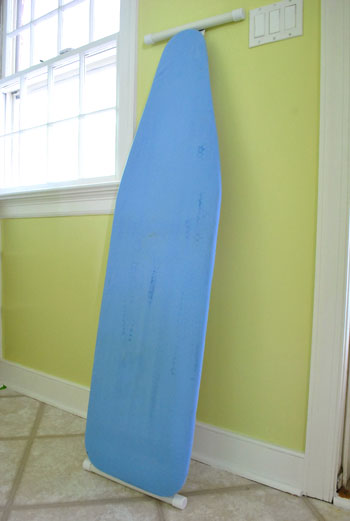
Obviously leaning on the wall wasn’t our storage solution. Nope, we wanted to hang this lady (now that it’s pink, I’ve decided it’s a girl) on the wall. We briefly considered some sort of pulley system from the wall or ceiling that would allow it to fold out for in-room ironing, but thanks to the space being about as narrow as a bathroom stall, we decided we’d much rather hang it somewhere to store it, but keep it removable to accommodate ironing in a more spacious room (Sherry’s partial to the living room, I like the bedroom). The perfect wall for the job was this one (opposite the door) since it had some eyesores of its own to be covered – er, accessorized?
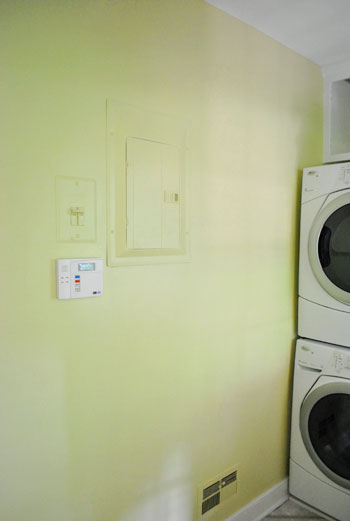
Yup, remember those two painted-over fuseboxes? We figured hanging our chipper little ironing board there was a multi-tasking solution. This way we can easily access the fuse box by simply removing the iron (just like a framed photo or bulletin board, which some other folks opt to hang there instead).
Since all of the ironing board hook / caddy things we found at the store also had a spot for an iron (and our iron ain’t pretty enough to showcase, plus we worried about slamming into it since the room is so narrow) we decided to “make” our own by repurposing two jumbo sized coat hooks from Lowe’s (about $6 each). To hang them, we used long strong wood screws and intentionally drilled into studs (so we didn’t risk hitting any wiring that runs to the fuse box and got a nice secure hold).
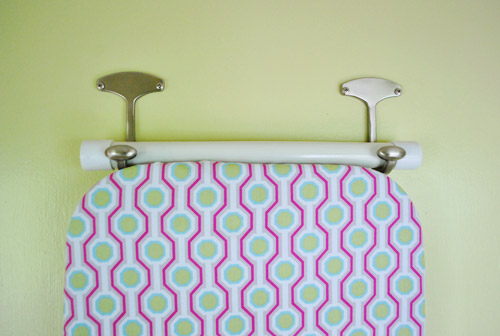
The hooks worked perfectly – which was quite a relief since they were the only ones I could find that I hoped were big enough to accommodate the wide ironing board bar and attractive enough to pass TWT (The Wife Test). The only thing we were somewhat undecided about was which direction to hang the ironing board. Sherry preferred the look on the left (pointing up), and I liked the version on the right (which Sherry thinks is “upside down and weird”). Feel free to rock the vote and weigh in on your favorite ironing board direction. Can you handle the excitement? Oh the things we debate around here.
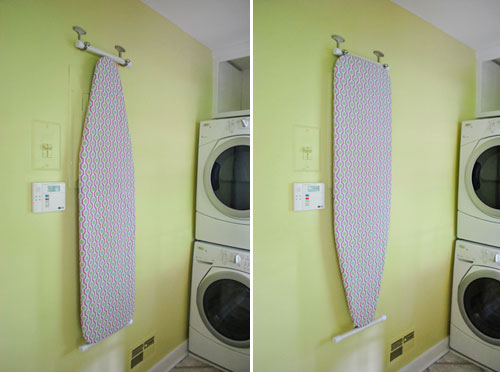
But this is my post, so the rest of the pics will have it hanging my way. Sorry lady-wife. By the way, we realize the ironing board looks a bit far from the appliances (especially from this angle) but that’s intentional because:
- we wanted to position it over the fuse box
- we didn’t want to be banging into the ironing board every time we opened the washer door, so it’s happily out of the bang zone. And if we ever get around to switching the way the dryer door opens that one won’t bang either (right now it swings the other way).

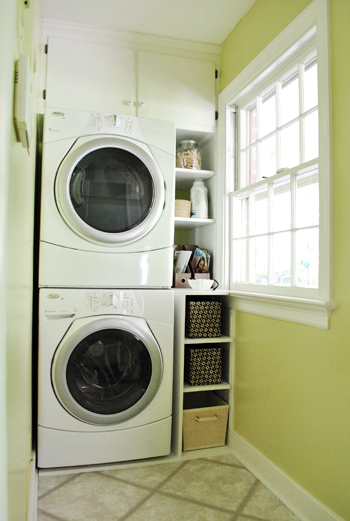
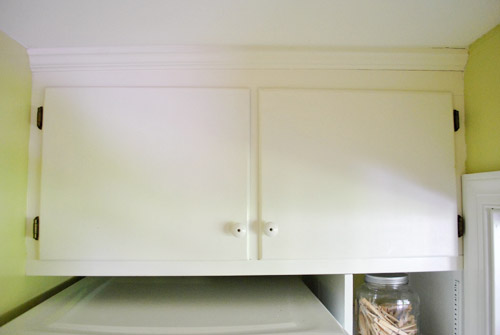
Oh, and notice the missing cabinet doors two pics up? That’s because we had another little project going on at the same time. Those built-in cabinets that we inherited are great for concealed storage (aka, the place where ugly stuff goes to be ugly) – but they were sort of an off-white color that clashed with the freshly painted white trim, and the hardware was kinda blah.
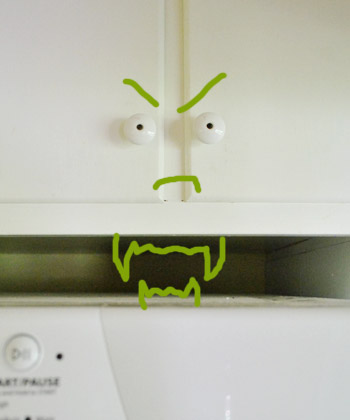
In fact, we had another jeepers-creeper-where’d-you-get-those-peepers-knobs situation going on like this oldie but a goodie. Except this cabinet monster is a vampire since we’re in the midst of watching True Blood Season 3 on DVD (no spoilers – we’re only halfway through). Just picture it saying “Sook-eh, that was not my intention” in a weird Southern accent a la Bill Compton.
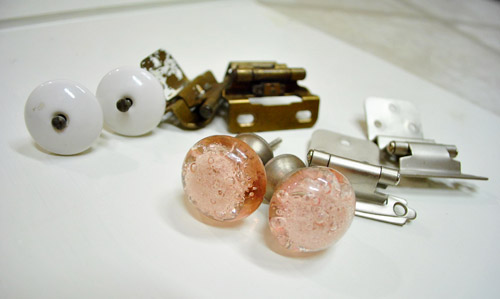
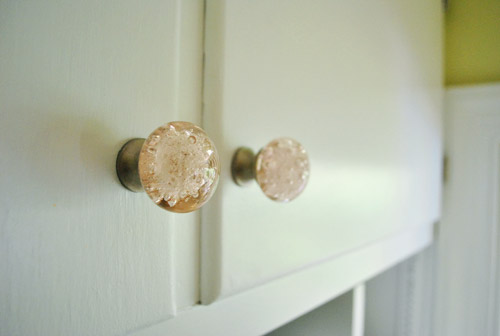
So off came the doors, knobs, and hinges. Here’s the old hardware (white eyeball knobs & brass hinges) next to the shiny new replacements. The pink glass knobs (yes, there’s me permitting pink again) were around $4.00 from Hobby Lobby after a 50% off sale (is it me, or are they constantly having 50% off sales there?). The brushed nickel hinges were $3 a set from Home Depot. Together they make for a much more updated (and fun) finish on those cabinets.
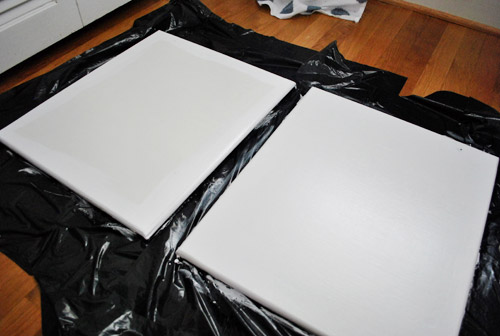
But first the cabinet doors and frame needed a coat of Kilz no-VOC primer and two thin coats of white semi-gloss paint (Olympic Premium No-VOC Base 2), which you can barely detect making a difference in these photos. You can kinda see how the door on the left has been framed with fresh paint around the edge. Maybe. If you happen to have binoculars or a magnifying glass next to your computer.
With primer and paint dry and the new hardware screwed in, things were back in working order within about a day or two (although we kept the doors cracked for another 24 hours, just to combat any stick-age).
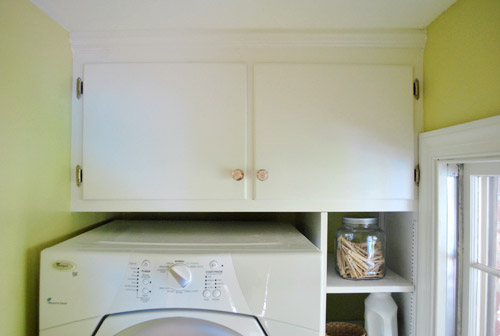
Not the most dramatic makeover you’ve ever seen, but hey – sometimes it’s the little tweaks that make us the happiest. Sherry says those pulls remind her of pink champagne. Not that she’s ever had any, but she thinks it sounds fancy. Then she said something about pink diamonds but I tuned her out.
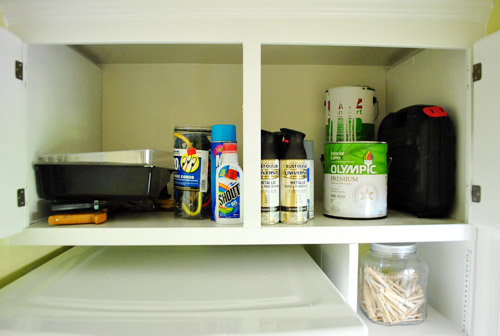
Oh and if you’re curious as to what’s actually in that cabinet… in a word: junk. In a few more words: a drill, paint and supplies, seldom used laundry items, bungee cords, and some saws. You know, the usual. If you’re Dexter or something (saws, drills, and bungee cords? yikes).
Oh but before I go, here’s our updated laundry room to do list.
Paint the odd brown quarter round near the baseboards glossy white
Redo all the dinged up trim (also in semi-gloss white)Paint the wallsReplace our dryer hose with a safer all-metal oneAdd adjustable built-in shelving in that nook next to the stacked washer & dryerPrime & paint the upper cabinetryReplace the hinges and knobs on those upper cabinetsHang the ironing board to obscure the giant metal fuse box- Get a new light fixture <- DIY something? maybe a small chandelier?
- Add a window treatment (maybe a homemade one?) <— ?
- Add other functional storage near the door for shoes, Burger’s leash, etc
- Hang some art to keep it cheerful
We’re still debating the whole window treatment part, hence the question mark. That window isn’t a privacy issue (you just see the top of the built-ins and the ceiling from outside) and we wonder if even a simple roman shade would just crowd things since the window practically grazes the built-ins and the white trim and mullions are nice and clean on their own. So we’re planning to figure out the light fixture and then make the call.
Anyway, what’s up with you guys? Anyone have an ironing board cover that they’re loving a little too much? Do you have some small projects like new hardware & hinges or a coat of primer & paint that you plan to cross off your to-do list by the end of the weekend? Anyone want to come over and do some laundry with us? Seeing how many people we can pack into our tiny 3.5′ wide space could be a good time. Or a science experiment (my guess is 32 & Sherry’s pushing the envelope with 43).
Psst- We announced this week’s giveaway winner. Click here to see if it’s you.
Psssst- To jog your laundry room memory, so far we’ve replaced the washer/dryer, taken down window shutters & cluttered shelves along with frosting the door (all here), filled some ceiling cracks, painted the room, and added some built-ins.

Katie K says
I like John’s way because it covers the entire fuse box. It looks a little bit too chaotic not all covered up. I love the fabric!
tracy a says
just saw this ironing board in a decor magazine and thought of you. not sure it is your style, but it would have definitely solved your problem…
http://www.unicahome.com/p2279/magis/amleto-ironing-board-by-magis.html
YoungHouseLove says
Very cute.
xo,
s
Tara says
Too bad you didn’t insert a poll after this post. It would be interesting to see who’s in front–Team Sherry or Team John. LOL!
Personally, I’m torn! At home I hang my ironing board like Sherry (and always have) because it just seems like the “right” way, kwim? However, in this case I’d be tempted to make a case for John’s way since the whole reason for putting the board there was to cover the fuse box and hanging it like that does so more effectively.
So, to quote (or misquote) John–how’s it hanging now? Okay, that’s totally lame, but it makes me laugh this early in the morning and not much will do that pre-coffee, lol!
YoungHouseLove says
I know right? It seems like it’s nearly a tie! So funny.
xo,
s
Sarah says
definitely the one on the left, pointing up
Debby says
I’m not a fan of window treatments when you have such great trim on your windows, but with that said, I think a Roman shade, very similar to the blue and white shade shown in the first play room picture Sherry has on the Yard Sale Score posting would be awe-some (read in a sing songy voice). A bold graphic like that will mimic the ironing board cover, but on a larger scale, and if you chose a color from the ironing board cover it would look SWEEEET! Robert Allen fabrics Dwell Studio line has some nice ones, and so does Waverly. Just a thought.
Debby
Kimbercrafts says
I sure do have a hinge project! I am in the process of repainting our kitchen cabinets. The hinges are impossible to remove, since they have so many coats of paint on them from previous owners. When my husband tried to remove one, it actually split the wood! So…the old hinges have to stay.
Would you happen to have any suggestions for how to “update” ugly hinges without removing them? Would using carefully applied spray paint work?
YoungHouseLove says
Hmm, I would try to use a chemical stripper on them and even try sanding them to get as much excess paint off as you can- that way when you spray paint them (or very thinly paint them with spray paint that you’ve sprayed into the lid of the spray paint can applied with a small brush) they’ll open and close smoothly instead of getting jammed and gunked up. Hope it helps!
xo,
s
Michelle says
just curious as to where your washer spins out to? I have always had a laundry sink in my laundry- which is great for soaking and washing the dog etc – have you ever had one, and do you miss it? we are in the process of redesigning our laundry/bathroom and were thinking of installing an european laundry instead, but will not have alot of space to pull it off in.
Cheers to all of your fantastic ideas!!
YoungHouseLove says
We’ve actually never had a laundry sink so we probably don’t know what we’re missing! Haha. So sorry we can’t be of more help!
xo,
s
Kathryn says
Point up!
Carlyn says
Dear John and Sherry,
I never do this, I am a very shy person. I was looking for ideas on what color to paint my house, and I ended up on a sight that had a little icon for yours. “Iron-y” caught my eye, anyway, it was absolutely adorable. Thanks a lot, you made my day. Good luck to you. I, on the other hand, still have to find a color to paint the house, one my husband won’t say is too dull, or too girly, or too bright, or too light,,,,well, you get the picture.
YoungHouseLove says
Aw thanks Carlyn! You’re so sweet. Glad you found our blog – and good luck finding that perfect color!
xo
s
Evelina says
I fully took out a ruler and measured 3.5 feet. WOW! You guys are amazing for what you did with that space. This post is older so I’m sure you’ve settled on the ironing board’s direction by now, but I prefer up. Team S! I lovelovelove the pink champagne — Diamond! — knobs. Is there a post that covers what you keep on the builtin shelving beside the washer/dryer? Hmm.. I shall go search your archives now!
Quick side question — where do you fold all your freshly-laundered clothes? Or do you have a spot for a laundry basket?
YoungHouseLove says
We have a laundry basket so we usually fold it on the bed or the sofa.
xo,
s
Cri says
Great solution! I love your laundry room and the colours you used for the wall!!