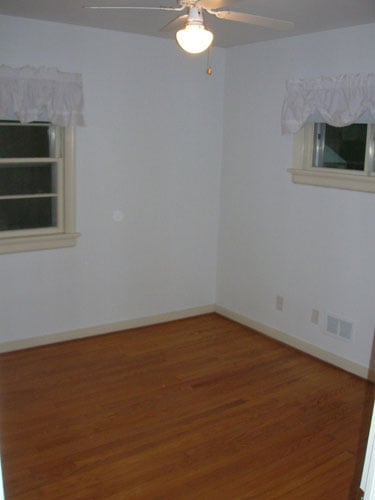
Do you hear that high pitched scream? It’s me, all the way in Richmond, shouting at the top of my lungs that the office/guest room/playroom makeover is finished. Woot! Come on in and take a look around. But wait, for old time’s sake, let’s check out the room as it looked when we moved in:
And here it is now, all office/guest room/playroomed out:
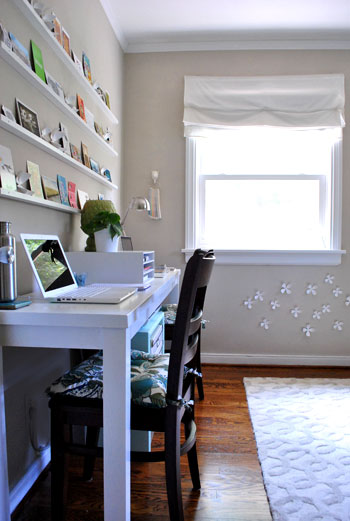
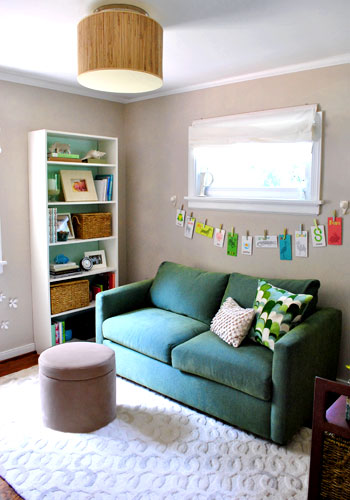
We love this room because although it’s only a 10 x 10.5′ box, it easily gets the best light in the house. So it’s not a bad spot to spend 80+ hours a week logging blog time, playtime, and accommodating the occasional guest or two. It was totally worth all the projects that we took on to get it to where it is today- in fact it was a darn good time.
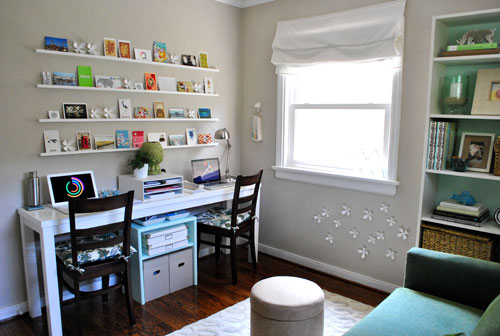
We did our best to squeeze in as much function as we could, from the shallow DIY desk and the magnetic wallflowers under the window to a ton of shelves and bookcases and a storage ottoman that’s filled with Clara paraphernalia (aka: Claraphernalia). And we can’t forget the fact that our budget friendly sleeper sofa (with a comfy full sized mattress tucked inside) really freed up some serious floor space.
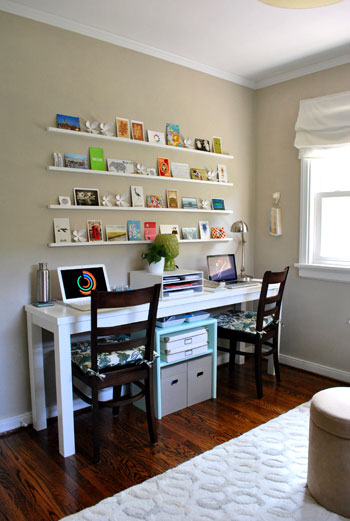
The desk that John built with our old bathroom door really saved us money and space (since it’s not too deep to keep the sofa bed from easily folding out when guests arrive- stay tuned for photos of the bed folded out in this afternoon’s post). We also found a lot of room for files and paperwork thanks to some woven baskets on the tall bookcase by the window and the small blue filing cabinet under the desk, which John also built.
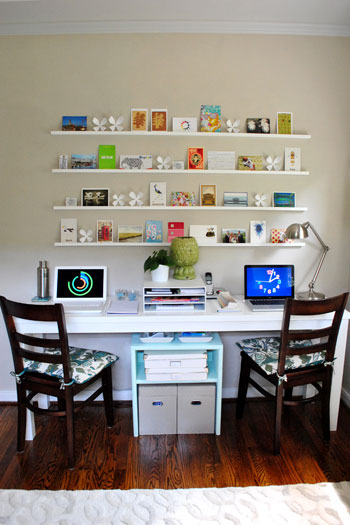
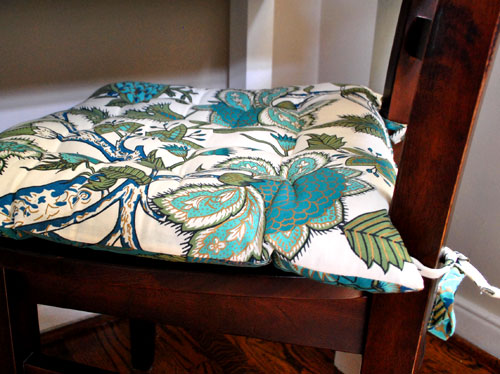
You’ll also notice that we picked up some fun patterned seat cushions that work really nicely with the sofa and the rest of the colors in the room. We already had these chairs at our disposal since we switched them out for a padded bench in our dining area a while back. And happily the cushions were just $12.50 a pop at World Market, and they definitely make our already-comfy dining chairs even easier on the ol’ backside (we’ve put in some super long days on them and can’t complain a bit).
And we can’t forget how we wrangled all of our wires to keep things looking streamlined. The whole office side of the room really works perfectly for us- and there’s enough room on the rug behind us for all sorts of playtime with Baby P (since one of us is usually on Clara duty while the other blogs away at the desk).
John also got to flex his problem solving muscles. A few days ago I was telling him how I wished there was a way to keep paint decks from taking over my side of the desk, and he smartly suggested that we hang a $5 ceramic pig hook (from Mongrel here in Richmond) at arm’s reach. It totally does the trick- and actually looks like art. Especially because we used two other pig hooks across the room to hold up our flash card clothesline and a fourth one in the closet to hang Clara’s growth chart. And you know I love a good ceramic animal (or four) to swank up a room.
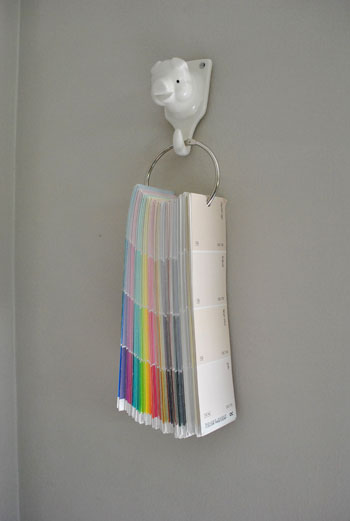
Oh and that’s actually a DIY paint deck that I made by grabbing a slew of my favorite swatches, hole pinching them all in the same spot, and sliding them onto a 3″ binder ring (snagged at Office Max on the cheap).
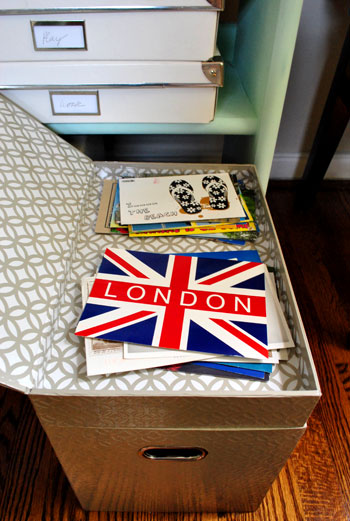
We’re also really enjoying our never-boring homemade postcard shelves since we can easily rotate things in and out whenever the mood strikes. In fact we’ve already switched out a ton of postcards and other small objects that make us smile. It’s addicting. Thanks again to everyone who generously sent postcards and other notes for the art wall our way!
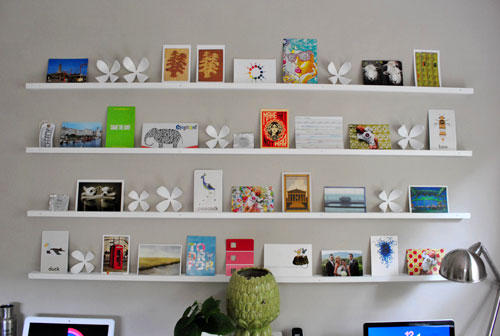
We’ve received them from England, Holland, Switzerland, Afghanistan, Greece, Spain, Austria, Italy, India, Africa, Australia, Canada, and a ton of interesting domestic locations as well. We keep all of the ones that aren’t currently on display in the handy top compartment of one of our filing boxes so we can change things up in a snap. So if you don’t see your card it doesn’t mean it won’t be up on the wall soon!
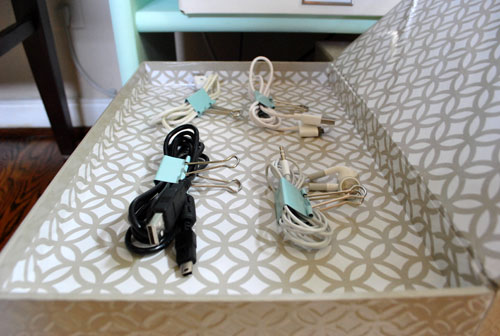
We use the other small compartment in the top of our second filing box to house all of our cords and wires in neat little bundles, thanks to some little blue binder clips from Office Max (which keep them from turning into a huge knotted mess).
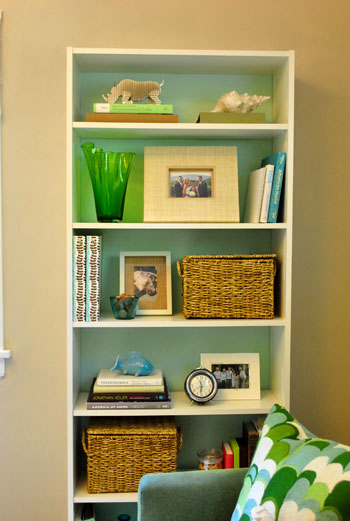
Then we have the Ikea bookcase that we tweaked with a soft blue background and some sawing at the molding to ensure that it would sit flush against the wall. It’s another really important storage piece in the room (those baskets from Michael’s are filled with paperwork and office accessories that we like to have on hand- plus it houses our printer). But we did our best to add some eye-pleasing accessories to keep it from feeling too work-heavy when guests come to stay.
We even have a quick shelf switcheroo that we pull when friends and family members arrive (stay tuned for that info in this afternoon’s post).
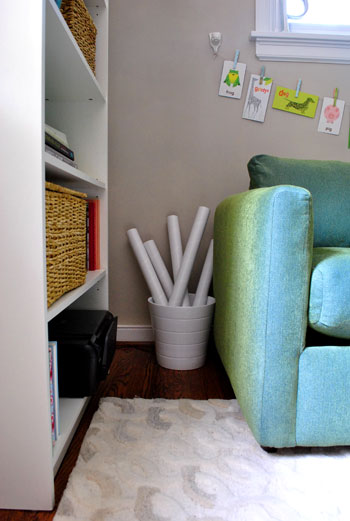
We also used an already-owned white Ikea planter to corral mailing tubes for shop orders that we like to have nearby (they used to be stored in a cabinet in the kitchen, which made for a lot of trudging back and forth).
And of course we have the DIY flash card clothesline that we whipped up. Safety note: twine, wire, or ribbon can be strangulation hazards. Hanging things out of reach and keeping an eye on children who may get hurt is always advised!
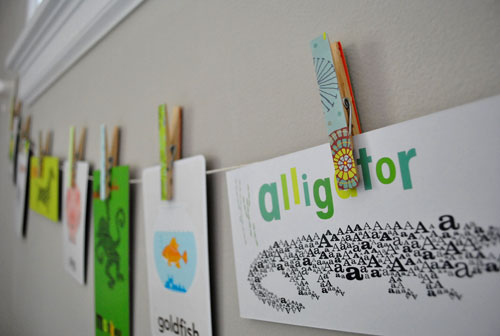
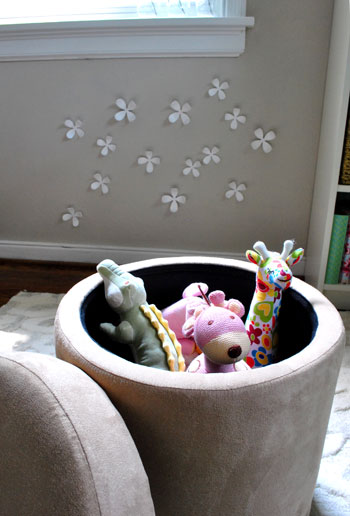
We love that it can also be used to display art that Clara makes as she gets older- or even a strand of colorful paper flags (check out those pictures here). Plus this morning we explained how we made those patterned clothespins over on Babycenter, so be sure to drop in on that post too (just click here)! We really didn’t want to- er, half butt- the playroom aspect of the space by tossing a few toys on the floor and calling it a day. So adding things like the flash card clothesline and the magnetic wall (for Clara to interact with thanks to our already owned magnetic wallflowers) really introduced that authentic playroom feeling. Not to mention that we have tons of spots to stash her books, toys, blankets, and blocks. Like this $27 storage ottoman from Target…
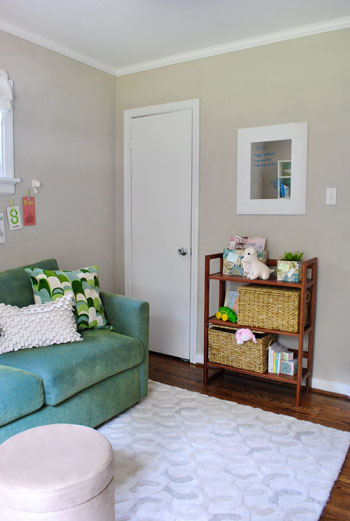
…and the woven baskets on the bookcase by the closet…
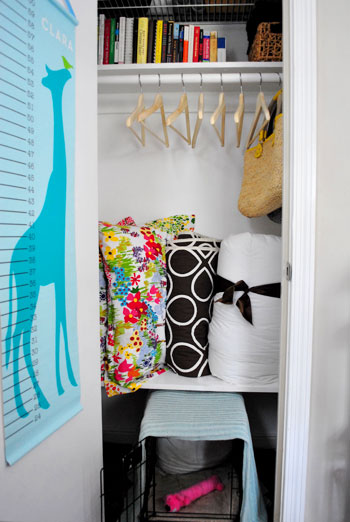
And speaking of the closet, our little makeover last week really transformed it from a dark and gloomy mess to a totally functional place to store linens when the guest bed isn’t in use (and clothing and luggage for our friends and family when it is). Remember, stay tuned for photos of the bed all folded out and ready for company in this afternoon’s post.
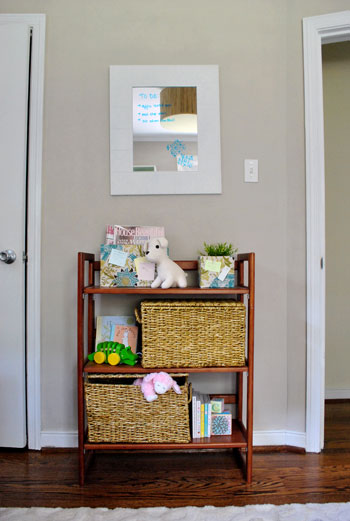
Who knew we’d end up with two bookcases in one tiny room? But they really do the trick. This one is perfect for all of Clara’s books, stuffed animals, block sets, and other “playroom” stuff that we stash in those generously sized baskets (from Michael’s) when things aren’t in use. And do you see those two patterned boxes on the top shelf? Stay tuned for a quick tutorial on that fun little project coming soon.
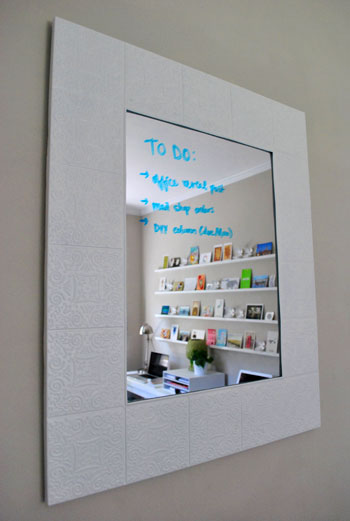
We can’t forget about our mirror/to-do list. A mirror is always nice to have around for guests to check their hair before emerging. And we gave it some office function by using a dry erase marker to write down whatever we need to accomplish and crossing things off as we go. But when guests come to town we erase all of our scribbles and write them a sweet little welcome note instead.
So that’s the big office reveal. But how much did it set us back? Here’s the budget breakdown:
- DIY pendant light: $32
- Homemade desk: $70
- File cabinet: $20
- File boxes & desktop cubby: $42 (from Target)
- Chairs: already owned
- Chair pads: $12.50 a pop (from World Market)
- Post card shelves: $23
- Post cards: free (thanks to you wonderful people!)
- Small bookcase: already owned
- Large bookcase: $69 (from Ikea)
- Baskets: $40 (from Michael’s)
- Mirror: already owned
- Storage ottoman: $27 (from Target)
- Full sized sofa bed: $699
- Pillows: already owned (from West Elm and Crate & Barrel)
- Rug: already owned (from Pottery Barn Outlet for $129)
- Wallflowers: already owned
- Magnetic primer for wallflowers: $21 (from Home Depot)
- Clothesline: $20 (for decorative paper, ribbon, and flash cards)
- Pig hooks: $5 a pop
- Closet shelf: $12
- Eco power strip for cord wrangling: $39
- Wireless printer: $79
- Mailing tube caddy: already owned (a repurposed planter from Ikea)
- Total: $1,238 ($539 without the sleeper sofa)
We’re pretty excited that the entire room makeover came in at a little over a thousand dollars and we were able to add: a two person desk, a bookcase, a sleeper sofa, an ottoman, a wall of built in shelving, a pendant light, a file cabinet, a wireless printer, and tons of storage solutions. We figured that much new furniture would bring the budget to more like 2-3K going in. Especially because many of the sleeper sofas that we researched cost over $1200 alone. And the idea that we only spent $539 after the cost of the sofa has us pretty proud (since someone could easily spend that amount on a two person desk or just an ottoman and a bookcase – and we were able to stretch that amount to include a slew of other furnishings, accessories, and electronics). Now we have a multifunctional space where we spend tons of time each day, and it also works to host our friends and family whenever they swing by.
Oh and we’re thrilled that we were able to take on 90% of the transformation after Clara came into the picture. Hooray for naptime projects and taking turns with the beanette while the other parent applies magnetic paint, builds a file cabinet, or whips up a flash card clothesline. And we’re even more excited to tackle our next mini makeover (did somebody say sunroom?). Stay tuned!
Update: You can check out what this room looks like when it’s all set up for guests or being used as a playroom right here!
Psst- Looking for more info on any of the projects or items that you see above? Click here for the intro post, here to read about the big sleeper sofa hunt, here for the DIY desk play-by-play, here for the homemade light fixture project, here for our hacked Ikea bookcase, here for the file storage we built, here for how we squeezed in some toy storage, here for how we picked out some DIY art that we could agree on, here for how we wrangled our wires, here for the play-by-play of creating our postcard art wall, here for our magnetic wallflower paint project, and here for our closet overhaul.

Katie says
The room looks lovely – well done. I am especially impressed on how you keep the bookcases from being too crowded. It is something I have not been able to manage. I really like the rhincerous on the top shelf of the bookcase – it reminds me of dinosaur kits we use to have as kids. Where is it from?
YoungHouseLove says
Hey Katie,
It’s from cardboardsafari.com. Hope it helps!
xo,
s
Rebecca says
You make me want to go home and finally finish my office… This is amazing… I, too, want a shallow desk and a sleeper chair or sofa in the room thats about the same size as yours… Hope you don’t mind if I totally steal some fabulous ideas!! Thanks!
Rachael says
Please share your paint color with us!!!! I love it. It’s crisp but not cold!!!
YoungHouseLove says
Hey Rachael,
It’s Glidden’s Sand White (they discontinued it but can look up the formula at the paint desk). Hope it helps!
xo,
s
Lauren E. says
Great makeover as usual! What has become of the office nook in the den? Gift wrapping station?
YoungHouseLove says
Stay tuned for a post with some photos of the desk as it is today within the next few weeks. We decided to keep it as a desk for letter writing, web surfing on our laptops during the weekends (when we don’t want to be holed up in the office) and eventually we think it’ll become a place for Clara to draw and do homework while we cook/hang out nearby. Should be fun!
xo,
s
Stacey says
Hey guys – the room looks great! Where is your mirror from? I’m looking for a similar style for my bedroom.
YoungHouseLove says
It’s actually from Target (picked up a few years back). Hope it helps!
xo,
s
Amanda says
Wow, you guys! I’ve been watching and been continually impressed- but of course I just loooooooove a big final reveal like this. I am so impressed at how you managed to fit that much function into this space. Truly a testament that we don’t all need mega-houses! Fabulous job!
Camilla {Hygge Nook} says
Oh, I sent the London postcard. Glad you got it!
erica says
hi! i noticed in your earlier post on this space, there were loose/untamed wires under the desk, but now they’re gone. i was just wondering how you control cords and wires…do you tack them down? i’m trying to dog-proof my home office area that has so many wires..cable wires, electrical wires for cable box, modem, etc…
YoungHouseLove says
Hey Erica,
Just follow the link at the very bottom of this post that says “how we wrangled our wires” for that info! Hope it helps!
xo,
s
erica says
omg! i didn’t even see that! sorry! that’s what happens when i try to do stealth blog reading at work!
YoungHouseLove says
No worries at all! We know we packed a lot of info and links into that post!
xo,
s
Carmen says
Hi, any ideas/ suggestions on what else you could use instead of the dremel? or a circular saw?
YoungHouseLove says
Hi Carmen,
If you want to carve a notch into the wood you’ll need a saw of some kind. A jigsaw might also do the trick but it could be a bit challenging to keep it from going all the way through the wood. Otherwise you might want to look into attaching a lip on top of the shelf’s edge. Try gluing or nailing a smaller piece of wood or trim on the edge, or you might even find that a thick gauge wire works as well. Good luck!
-John
jc says
is there a how to on the diy desk?? I LOVE IT AND NEED IT IN MY LIFE NOW!!!!!!
YoungHouseLove says
Just follow the link at the very bottom of this post that says DIY desk. Good luck!
xo,
s
Chetana says
Love the use of small space. Where did you get the sleeper sofa from? I am trying to find a resonably priced sofa that isnt too big for our bursery/guest bedroom.
Thanks,
C
YoungHouseLove says
We got it from a local sofa dealer here in Richmond called Sofa Designs, but it’s a Rowe sofa so any local dealer in your area should carry Rowe pieces as well. Ours was a floor model which is why we got it for such a steal. Hope it helps!
xo,
s
Kim says
Love the room, can you tell me where I can find a list of all the paint colors that you use in your home?
YoungHouseLove says
Hey Kim,
If you look next to our picture on our sidebar you’ll see a tab called “Shortcuts.” Click that and the second link down will take you to a breakdown of our house’s paint palette.
-John
melarse says
I got my pig hooks today – they are even cuter in person! Thanks for another great idea!!
YoungHouseLove says
So glad you love them as much as we do!
xo,
s
Juanita says
Your blog is truly an inspiration. I’ve been trying to figure out how I should decorate my guest/office/play room and now I have inspiration!!!! You’ve given me great ideas on how to work with such a small space!
Joanna says
Love your guest room/office redo. What color paint did you use on the walls? From the pictures it looks like a light tan or is it like a navajo white? Thanks! YOU ROCK!
YoungHouseLove says
It’s a soft tan with some gray in it (love it so much we used it in the living room too). It’s called Sand White by Glidden. Hope it helps!
xo,
s
samantha says
i LOVE your rug. is it all white? how does it hold up? is it always getting dirty? I’ve been looking for something similar for my living room but I am so nervous about the light color!
YoungHouseLove says
It’s holding up really well so far! It’s gray and cream and white but it doesn’t seem to show a lot of dirt (even with a baby and a dog). Maybe thanks to the texture/shapes in it and the gray undertones? Hope it helps!
xo,
s
samantha says
let me know if you ever want to sell it, haha :)
YoungHouseLove says
Will do! Haha.
xo,
s
Chrissy says
Where did you get the screen savers? They’re so cool!
YoungHouseLove says
Hey Chrissy,
One is from realsimple.com and one is called the “polar clock” which you can google to find. Hope it helps!
xo,
s
Sara says
I have an office being built as we speak… a brand new shop with my 15×25 office in it.
I’m wondering what you think of black trim? I really want to do it but am nervous it will look bad.
YoungHouseLove says
Oooh it sounds lovely and fun! We say go for it. It’s only paint- you can always undo it. But 9 times out of 10, we love when we take a risk. And it usually pays off!
xo,
s
Haley says
Hello! I am curious about the cute ceramic animal wall hooks that you used for the flash card clothes line. I want to put up a clothes line for my son’s art and cannot find any cute animal wall hooks! Honestly, the world of wall hooks for kid’s room can get pretty cheesy! Thanks!
YoungHouseLove says
We got those from a local store here in Richmond called Mongrel (but perhaps you can call them to see who makes them or if they ship?). Good luck!
xo,
s
dana says
Hello…
Where did you get the lighting fixture? I tried to find it in your post but I can’t seem to locate a link or any details about it. I’m dying to know where I can buy it, ha.
Thanks!
Dana
YoungHouseLove says
We actually DIYed it! Here’s that link for ya: https://www.younghouselove.com/2010/06/office-progress-let-there-be-light/
xo,
s
Beth says
hey!! i love your house, design, style… everything! getting lots of good ideas from you guys for organizing but still keeping the style AND having toddlers. :) twin 16 month olds to be exact. whew! anyway, i was just wondering what color you guys painted this room? i’m sure its on here somewhere but i can’t find it. also, where did you find that cute growth chart? oh.. sorry for all the questions, but one more. do you have any good ideas where to get picture frames. have a set of number flash cards i want to frame, but need cheep. :)
YoungHouseLove says
The walls are Sand White by Glidden (they might have to look up the formula on the computer since it’s been discontinued) and the growth chart is from nameyourdesign.com. As for frames, the cheapest ones are at thrift stores and garage sales (under a buck each) and you can spray paint them to match. Or you can go to Ikea or Target and looks for sales or cheap ones that’ll work. Good luck!
xo,
s
Dana says
I love this room. I have found it as an inspiration for my office redo.
Olivia says
I stumbled across your blog looking for bathroom ideas for a super tiny bathroom. I just bought an adorable 1960’s cottage that needs a good heaping dose of TLC. Well one thread on here lead to another and another. I’m now full of inspiration, thank you so very much! Your office is just about identical to my little box so I’m sure I’ll be using some ideas. Question: I noticed you use the window covering style quite a bit. What is it called and did you make them or purchase? I love the idea of it functioning like blinds and a curtain. How are they hung on the wall? My windows are finished horribly so hanging them slightly outside such as yours would help hide some eye sores too.
YoungHouseLove says
Those are called roman shades, and lots of places sell them but these are from Ikea a while back. They hang on two little i-hooks at the top that go into the wall. Hope it helps!
xo,
s
Breia says
Where did you get your sofabed? I want one that size but cant find one in a good budget!
YoungHouseLove says
It was from a local sofa retailer (Sofa Designs here in Richmond, VA) but it’s made by Rowe, so find a local Rowe retailer and try to buy a floor model on sale (that’s what ours was!).
xo,
s
Vancouver2010 says
Hi great job renovating and reinventing on a tight budget. I love how you reuse a lot of pieces from what you already have not just for budget but cuts down on wastes too.
I love the ceiling pendent light. Where did you get it from? I noticed in some of the other rooms the ceiling fixtures looks like a lamp shade
Thanks for sharing!
YoungHouseLove says
Thanks so much! We actually reused the original chandelier, we just painted it navy and added a large shade that we got from an outlet. Here’s that post for you: https://www.younghouselove.com/2011/09/the-updated-light-fixture-blues/
xo
s
almie cooper says
what are the dimensions of the desk? Can you explain a little more of how it was built?