Do you hear that high pitched scream? It’s me, all the way in Richmond, shouting at the top of my lungs that the office/guest room/playroom makeover is finished. Woot! Come on in and take a look around. But wait, for old time’s sake, let’s check out the room as it looked when we moved in:

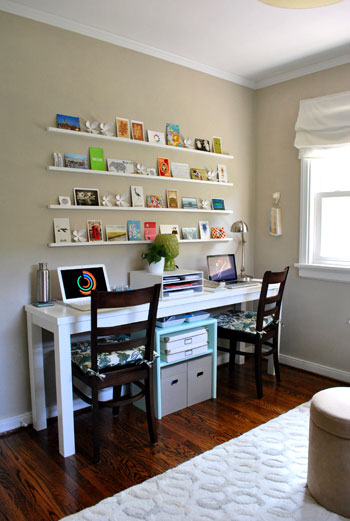
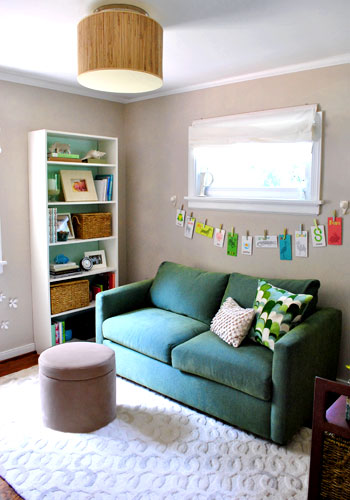
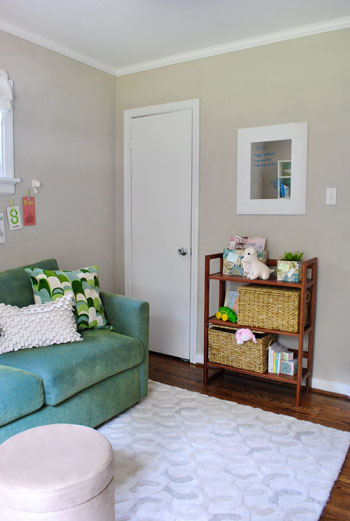
And here it is now, all office/guest room/playroomed out:
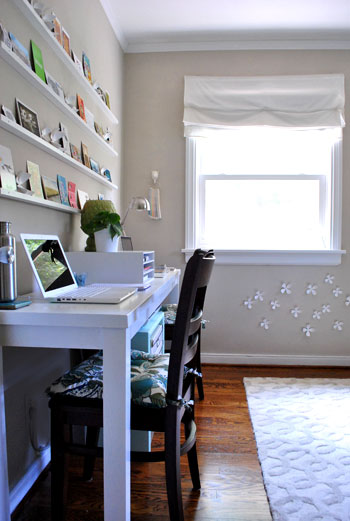
We love this room because although it’s only a 10 x 10.5′ box, it easily gets the best light in the house. So it’s not a bad spot to spend 80+ hours a week logging blog time, playtime, and accommodating the occasional guest or two. It was totally worth all the projects that we took on to get it to where it is today- in fact it was a darn good time.
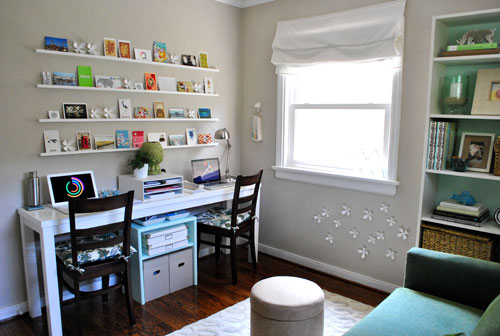
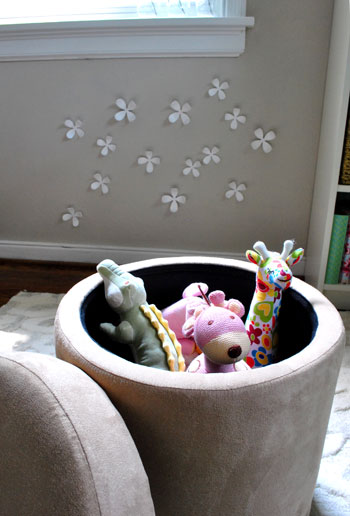
We did our best to squeeze in as much function as we could, from the shallow DIY desk and the magnetic wallflowers under the window to a ton of shelves and bookcases and a storage ottoman that’s filled with Clara paraphernalia (aka: Claraphernalia). And we can’t forget the fact that our budget friendly sleeper sofa (with a comfy full sized mattress tucked inside) really freed up some serious floor space.
The desk that John built with our old bathroom door really saved us money and space (since it’s not too deep to keep the sofa bed from easily folding out when guests arrive- stay tuned for photos of the bed folded out in this afternoon’s post). We also found a lot of room for files and paperwork thanks to some woven baskets on the tall bookcase by the window and the small blue filing cabinet under the desk, which John also built.
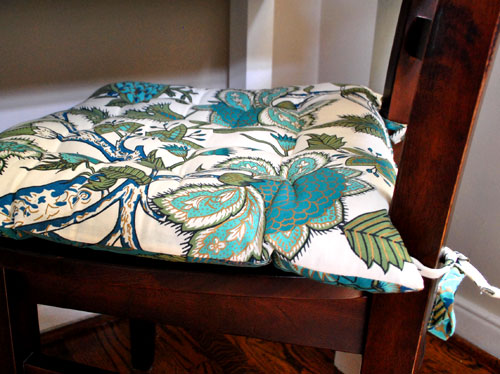
You’ll also notice that we picked up some fun patterned seat cushions that work really nicely with the sofa and the rest of the colors in the room. We already had these chairs at our disposal since we switched them out for a padded bench in our dining area a while back. And happily the cushions were just $12.50 a pop at World Market, and they definitely make our already-comfy dining chairs even easier on the ol’ backside (we’ve put in some super long days on them and can’t complain a bit).
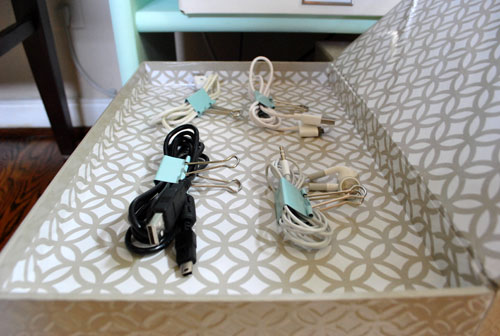
And we can’t forget how we wrangled all of our wires to keep things looking streamlined. The whole office side of the room really works perfectly for us- and there’s enough room on the rug behind us for all sorts of playtime with Baby P (since one of us is usually on Clara duty while the other blogs away at the desk).
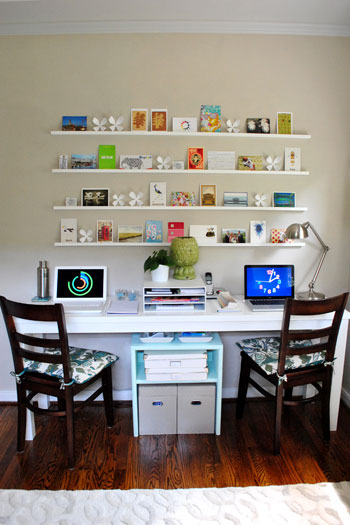
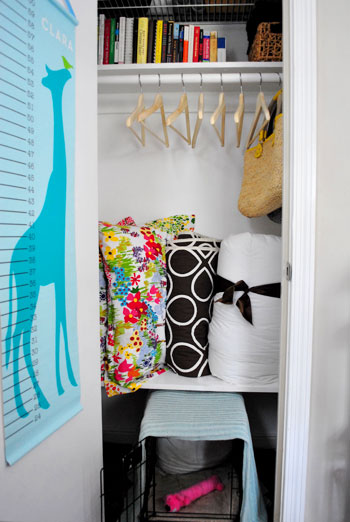
John also got to flex his problem solving muscles. A few days ago I was telling him how I wished there was a way to keep paint decks from taking over my side of the desk, and he smartly suggested that we hang a $5 ceramic pig hook (from Mongrel here in Richmond) at arm’s reach. It totally does the trick- and actually looks like art. Especially because we used two other pig hooks across the room to hold up our flash card clothesline and a fourth one in the closet to hang Clara’s growth chart. And you know I love a good ceramic animal (or four) to swank up a room.
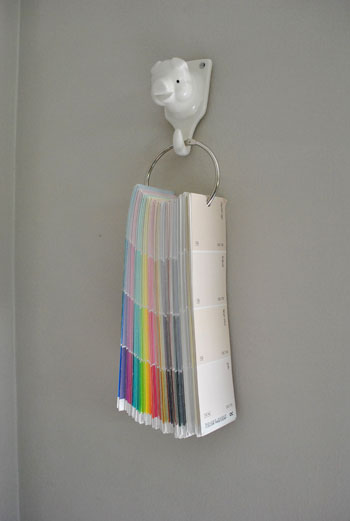
Oh and that’s actually a DIY paint deck that I made by grabbing a slew of my favorite swatches, hole pinching them all in the same spot, and sliding them onto a 3″ binder ring (snagged at Office Max on the cheap).
We’re also really enjoying our never-boring homemade postcard shelves since we can easily rotate things in and out whenever the mood strikes. In fact we’ve already switched out a ton of postcards and other small objects that make us smile. It’s addicting. Thanks again to everyone who generously sent postcards and other notes for the art wall our way!
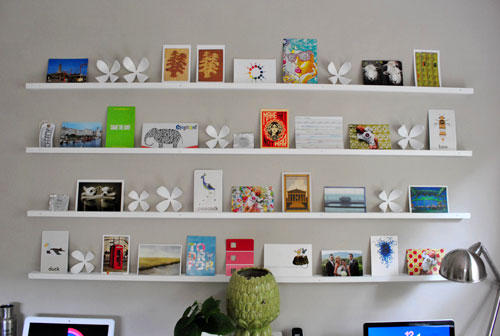
We’ve received them from England, Holland, Switzerland, Afghanistan, Greece, Spain, Austria, Italy, India, Africa, Australia, Canada, and a ton of interesting domestic locations as well. We keep all of the ones that aren’t currently on display in the handy top compartment of one of our filing boxes so we can change things up in a snap. So if you don’t see your card it doesn’t mean it won’t be up on the wall soon!
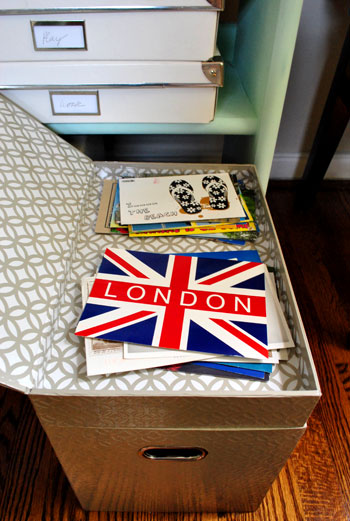
We use the other small compartment in the top of our second filing box to house all of our cords and wires in neat little bundles, thanks to some little blue binder clips from Office Max (which keep them from turning into a huge knotted mess).
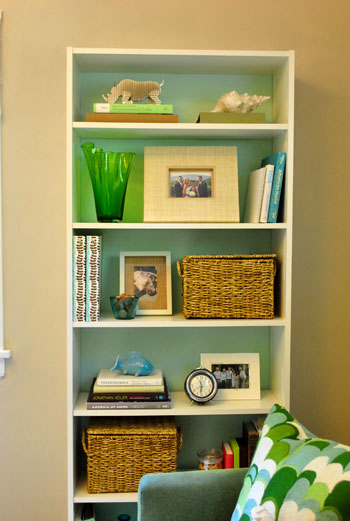
Then we have the Ikea bookcase that we tweaked with a soft blue background and some sawing at the molding to ensure that it would sit flush against the wall. It’s another really important storage piece in the room (those baskets from Michael’s are filled with paperwork and office accessories that we like to have on hand- plus it houses our printer). But we did our best to add some eye-pleasing accessories to keep it from feeling too work-heavy when guests come to stay.
We even have a quick shelf switcheroo that we pull when friends and family members arrive (stay tuned for that info in this afternoon’s post).
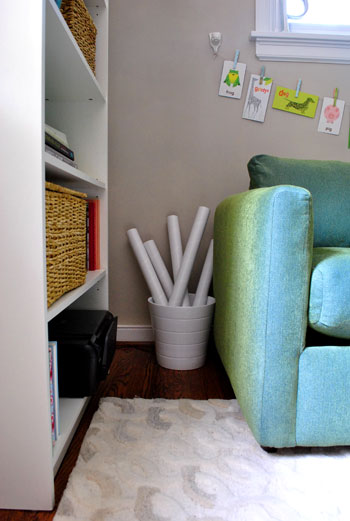
We also used an already-owned white Ikea planter to corral mailing tubes for shop orders that we like to have nearby (they used to be stored in a cabinet in the kitchen, which made for a lot of trudging back and forth).
And of course we have the DIY flash card clothesline that we whipped up. Safety note: twine, wire, or ribbon can be strangulation hazards. Hanging things out of reach and keeping an eye on children who may get hurt is always advised!

We love that it can also be used to display art that Clara makes as she gets older- or even a strand of colorful paper flags (check out those pictures here). Plus this morning we explained how we made those patterned clothespins over on Babycenter, so be sure to drop in on that post too (just click here)! We really didn’t want to- er, half butt- the playroom aspect of the space by tossing a few toys on the floor and calling it a day. So adding things like the flash card clothesline and the magnetic wall (for Clara to interact with thanks to our already owned magnetic wallflowers) really introduced that authentic playroom feeling. Not to mention that we have tons of spots to stash her books, toys, blankets, and blocks. Like this $27 storage ottoman from Target…
…and the woven baskets on the bookcase by the closet…
And speaking of the closet, our little makeover last week really transformed it from a dark and gloomy mess to a totally functional place to store linens when the guest bed isn’t in use (and clothing and luggage for our friends and family when it is). Remember, stay tuned for photos of the bed all folded out and ready for company in this afternoon’s post.
Who knew we’d end up with two bookcases in one tiny room? But they really do the trick. This one is perfect for all of Clara’s books, stuffed animals, block sets, and other “playroom” stuff that we stash in those generously sized baskets (from Michael’s) when things aren’t in use. And do you see those two patterned boxes on the top shelf? Stay tuned for a quick tutorial on that fun little project coming soon.
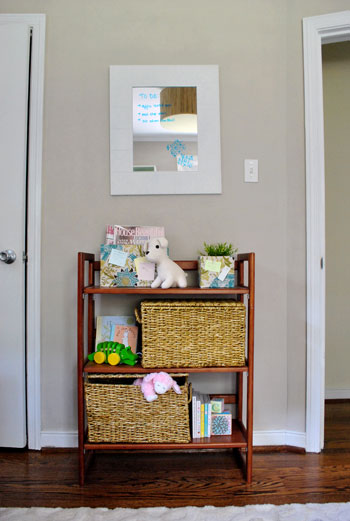
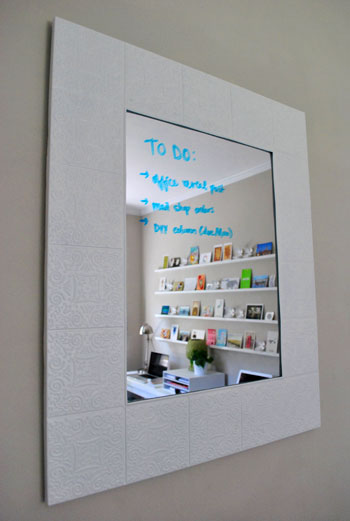
We can’t forget about our mirror/to-do list. A mirror is always nice to have around for guests to check their hair before emerging. And we gave it some office function by using a dry erase marker to write down whatever we need to accomplish and crossing things off as we go. But when guests come to town we erase all of our scribbles and write them a sweet little welcome note instead.
So that’s the big office reveal. But how much did it set us back? Here’s the budget breakdown:
- DIY pendant light: $32
- Homemade desk: $70
- File cabinet: $20
- File boxes & desktop cubby: $42 (from Target)
- Chairs: already owned
- Chair pads: $12.50 a pop (from World Market)
- Post card shelves: $23
- Post cards: free (thanks to you wonderful people!)
- Small bookcase: already owned
- Large bookcase: $69 (from Ikea)
- Baskets: $40 (from Michael’s)
- Mirror: already owned
- Storage ottoman: $27 (from Target)
- Full sized sofa bed: $699
- Pillows: already owned (from West Elm and Crate & Barrel)
- Rug: already owned (from Pottery Barn Outlet for $129)
- Wallflowers: already owned
- Magnetic primer for wallflowers: $21 (from Home Depot)
- Clothesline: $20 (for decorative paper, ribbon, and flash cards)
- Pig hooks: $5 a pop
- Closet shelf: $12
- Eco power strip for cord wrangling: $39
- Wireless printer: $79
- Mailing tube caddy: already owned (a repurposed planter from Ikea)
- Total: $1,238 ($539 without the sleeper sofa)
We’re pretty excited that the entire room makeover came in at a little over a thousand dollars and we were able to add: a two person desk, a bookcase, a sleeper sofa, an ottoman, a wall of built in shelving, a pendant light, a file cabinet, a wireless printer, and tons of storage solutions. We figured that much new furniture would bring the budget to more like 2-3K going in. Especially because many of the sleeper sofas that we researched cost over $1200 alone. And the idea that we only spent $539 after the cost of the sofa has us pretty proud (since someone could easily spend that amount on a two person desk or just an ottoman and a bookcase – and we were able to stretch that amount to include a slew of other furnishings, accessories, and electronics). Now we have a multifunctional space where we spend tons of time each day, and it also works to host our friends and family whenever they swing by.
Oh and we’re thrilled that we were able to take on 90% of the transformation after Clara came into the picture. Hooray for naptime projects and taking turns with the beanette while the other parent applies magnetic paint, builds a file cabinet, or whips up a flash card clothesline. And we’re even more excited to tackle our next mini makeover (did somebody say sunroom?). Stay tuned!
Update: You can check out what this room looks like when it’s all set up for guests or being used as a playroom right here!
Psst- Looking for more info on any of the projects or items that you see above? Click here for the intro post, here to read about the big sleeper sofa hunt, here for the DIY desk play-by-play, here for the homemade light fixture project, here for our hacked Ikea bookcase, here for the file storage we built, here for how we squeezed in some toy storage, here for how we picked out some DIY art that we could agree on, here for how we wrangled our wires, here for the play-by-play of creating our postcard art wall, here for our magnetic wallflower paint project, and here for our closet overhaul.

Jyl says
Looks great! I love all the thoughtful touches that went into it- how lucky are your guests?
Where did that awesome patterned Giraffe come from!?!
Will you post a Flickr gallery of all your postcards? We’re nosy.
YoungHouseLove says
Hey Jyl,
That giraffe was a gift that hails from Target (online only I think). Love it! As for the postcards, we wish we had time to scan and post them all but there just aren’t enough hours in the day! But keep an eye out for future post card wall photos where new ones will be in rotation!
xo,
s
Sophie says
Oh my gosh! There’s my postcard!
My little red phone box, second from the left on the bottom shelf. Aww, you guys, thanks for putting it up there!
The office/guest room/playroom looks amazing! You did such an awesome job!
Harinee says
Looks amazing! You’re artists!
Christine says
It looks amazing, so many perfect little touches! You guys never miss a detail!
Lin says
I’m sure you know this, but I would make sure those magnets are put away until Clara is several years of age once she starts getting mobile. Nothing worse for a baby to swallow than magnets! I know everyone probably knows this, but for some reason I cringe when I see magnets eye-height of a crawling baby. It’s beautiful for now, though :)
YoungHouseLove says
Hey Lin,
Not to worry! The magnetic wallflowers are too big for Clara to swallow as a whole, and the actual magnet part is enclosed in plastic so it can’t possibly be popped out. Safety first!
xo,
s
Emily @ The Happy Home says
absolutely gorgeous! i’m amazed at how much space you managed to eek out of that room. everything is so simple but perfectly detailed.
Shannon says
SO fantastic. There are so many things in here that I am crazy about (and more than few ideas I have to steal!). I never thought to write on a mirror with dry erase markers – and that’s after five years of teaching and using them daily!
Jenna says
I write on mirrors with dry erase marker too. In fact, I have a marker in each room (that has a mirror) because I’ll think of something and need to write it down fast. If I don’t, I forget, and I’ll never get anything accomplished!
Linda says
Fabulous, just fabulous!
Jaime @ Mamarazzi says
Well… You did it!
I am not sure how you managed to squeeze everything in (spaces and zones and stuff) and make it look so good – but you got it right!
Very nice job!
Christin says
Once again, fabulous job. The room looks so fantastic. :)
OwningSingle says
I think that you did a great job fitting all of your functions in! As far as major makeovers, I’m embarking on a kitchen redo and my home office is almost done and I’ll be sharing soon.
Sing says
The room looks great. I have the same wallflowers in black.
http://singaturestyle.blogspot.com/
Joanne says
I read that you got the filing boxes at Target but I can’t find them online. Do you know if they still have them?
YoungHouseLove says
Hey Joanne,
Last time we were there (about three days ago) we saw them so they might just be in-store only (not available online). Hope it helps!
xo,
s
Jocelyn Stott says
Looks great!!!
Cait @ Hernando House says
Looks great you guys!
Our house is big enough that we don’t have any multitasking rooms (yet) unless you count the fact that the art room has a desk my husband uses for school.
Meredith says
I love that patterned giraffe as well.
Overall, it looks like you guys created a really functional room that flows wonderfully with the rest of your house on the cheap! Great work!
Jennifer says
Great job, guys! It looks wonderful.
Just wondering if you have a plan for all of the bigger toys which will undoubtedly come your way – mini kitchen, train table, dress up trunk, dollhouse, etc. Would love to hear your ideas for these items, as I am looking at some of them right now! Would love suggestions for those of us that do not basement playrooms.
YoungHouseLove says
Hey Jennifer,
We plan to just keep evolving and changing our house to meet our needs as the Claraphernalia gets bigger as she grows. Stay tuned for those details as we go!
xo,
s
Katrina says
Your office/guest room/playroom looks FAB – I love all the details they look amazing!
Yuliya says
Fantastic job, but really it’s what I’ve come to expect from you two.
I think what’s really amazing is how your sense of style comes through in everything you do, from overall color scheme of the house to patterned clothespins (too cute!)
I wonder if in the future you guys would consider doing mini design dilemmas, when someone (me!) has a space that is nearly finished but needs help putting the final touches to bring it all together.
Also, what do you think about a layer of magnetic paint and then a layer of chalkboard paint so Clara can express herself in chalk!
YoungHouseLove says
Hey Yuliya,
We’ve definitely considered offering that service! We don’t even have a moment of time to take on Design Dilemmas these days (we’re kind of on a maternity leave of sorts) so hopefully when we get caught up and have a spare moment we can think more about helping people who don’t need full room overhauls!
As for adding chalkboard paint someday (so Clara can have fun doodling on the wall somewhere) we definitely think it’s a fun idea. We can’t wait to see how our house evolves as she grows!
xo,
s
Lindsay@Tell'er all About It says
Looks great, guys!!! Keep up the great work!! :-)
Kristen says
Lovely! I love all of your projects! After perusing your blog I cannot seem to find a tip on how to paint wood that has that smook finish. I have not mastered all the teminology but if I can describe it correctly, it is the wood that is smooth to touch…almost like ALL of the IKEA furniture products…Can you help me?! Thank you!
YoungHouseLove says
Hey Kristen,
That material is called laminate furniture and it can be pretty tough to refinish in a way that works for the long haul without peeling or bubbling. Your best bet would probably be to follow the directions on our furniture painting tutorial here, but it probably won’t be as durable and long-lasting as solid wood furniture is. Hope it helps!
xo,
s
Josh says
Great job!! Both functional and fun! With a new one on the way (we just found out and are super stoked!!), we are going to have to dual purpose our home office soon. Some great ideas in your post that we will likely incorporate! Thanks for sharing!
Holly says
Looks great! I love the postcard wall- what a fun idea!
Laura Durrer says
Do you guys really fold up your cords with clips every time or sometimes are they in there on their own? This room looks fantastic. (totally envious of your showcase room).
LOVE IT!
YoungHouseLove says
Hey Laura,
So far we’ve actually been keeping things clipped. It saves us time since we don’t have to spend 20 minutes untangling everything!
xo,
s
Anna Seek says
Oh My Gosh! I adore this room! Come to my house, I have a room you can tackle! I love, love, love the wall color!
Ben says
Dude and Dudette, this is really a great idea for anyone who has a dorm room, studio or lives in a refrigerator box (which in California is more common than you think). It looks like you were able to pack a lot into one room.
I will need to send you guys a postcard from Santa Cruz. I got to January 2008 in reading your posts haha, I am such a nerd. Been telling everyone with new houses to come to your site so they can get in on the revolution.
You guys rock!
macy dawn says
I can’t wait to see how the room transforms for guests!
Danielle@NewlywedsParadise says
The sleeper sofa is so cute in the space! You would never know how small the room is by these pictures! We have that same storage ottoman and love it!
Erika says
I’M A STAR!
My imaginary dream would be to become an accomplished artist.
Erika says
Oops – wrong post!
;o)
Love the finished space!
Robyn in Chicago says
BeaUtiful! I love.
Just have to say – wowee, people really are checking that budget list of yours verrry carefully. ;)
And finally a question. Did you ever think about painting the bookshelf by the closet a nice crisp white? Just curious since I know you guys love your white and I’m sure you at least considered doing it…would just love to hear why or why not. Is it that the white would be too matchy matchy with the rest of the white in the room? Or maybe you just like the added dimension of another brown besides the chairs, baskets, and drum shade?
YoungHouseLove says
Hey Robyn,
We did consider that but we thought since the chairs and the baskets and the light are more of a brown tone (as you mention) that it wouldn’t really look out of place if we left it unpainted. And that way we figured it was more durable and kid friendly (since it wouldn’t chip or dent due to heavy use and lots of basket sliding and block banging). Hope it helps!
xo,
s
Erin says
LOVE the finished product! I am a huge fan of the postcard shelves. I have two similar shelves in my house – one in the living room and one in the bedroom – where we put larger framed art. I love the freedom they offer.
Keep up the great work and thanks for the inspiration!
Kelly says
I love your office/guest room/ playroom it looks great. I just love your style. I was wondering where did you get the box that you store your post cards in? That is a cool box with 2 layers.
YoungHouseLove says
Hey Kelly,
It’s from Target in the office aisle (we can’t find it online so it’s probably an in-store only item).
xo,
s
Leslie says
This turned out beautiful. I love how practical everything is. My hubby and i just did a kitchen makeover
and I wish we had kept track of our spending like you did. I think it’s neat to have an exact number so people can know home makeovers don’t have to be super expensive.
Audrey says
We just bought our first house. I’ve been doing reveals as we finish out each room.
Here’s our kitchen: http://house-of-boys.livejournal.com/104153.html
Who doesn’t love chalkboard walls, custom painted stools for their boys, and a made over CraigsList table?!
YoungHouseLove says
Love it Audrey! Such a difference!
xo,
s
Natasha Kay says
Glad you got my postcard from Switzerland! The room looks fabulous!
Alison says
Binder clips….genius!!!
Vonda says
Love. It. You have really inspired me to clean up that mess of a room we use as guest/office/catch all.
And thanks for the hanging advice on the white flowers. I may even get up the nerve tonight to try to hang ’em!
Shunta says
As soon as I saw the cushions I said to myself–WORLD MARKET!! I have that same patter for a table runner from WM! And thought about getting the seat cushion for the chair in my sewing room! Seeing it in your room…maybe I will go on and get it! I have a coupon from them anyway! :-)
Liz says
Hey! Love the office! My favourite part are the shelves that hold all the pictures above the desk!
Just a tip for the readers, at Home Outfitters (in Canada), they sell the wall flowers! I just saw them the other day. Just incase people didn’t want to buy them online! They also had them in different shapes too.
Jen says
This looks awesome!
I’m trying to tackle the same room at the moment, but life is proving to be a big time robber. I love how the narrow desk, so the sofa bed could still be pulled out. Do you like working at the desk? Is it big enough to do much besides work at your computer? I love SPACE to spread stuff out. Although, I guess that just means more space for junk to build up, but I’m curious nonetheless.
YoungHouseLove says
Hey Jen,
Desk depth and size is really a personal preference thing. We are glued to our computers 99% of the time (being bloggers and all, haha) so our desk situation works perfectly for us. All we need is room for a notebook and we’re good. Hope it helps!
xo,
s
Jess says
Looks fantastic! I’m so impressed by how much function you packed into a small space.
I spotted my Boston postcard on one of your shelves! How fun! Glad you got it :)
jo says
This is really awesome, you guys! I love your room reveals! This one is so packed with playful, thoughtful details, and, as always, I love your color scheme and the overall crispness of your design. I don’t know whether this room or the nursery is my favorite so far. Your nursery wall color really inspired me in picking paint for mine (she’s due in December, so I’m excited to follow you on Babycenter, too), but this one really makes me want to spend a lot of time in it – just what it was designed for, right? That’s what I call a successfully done room.
Kati says
I think your idea for the DIY paint swatch book is genius. Sort of a “why didn’t I think of that” idea, which is the best kind. I’m going to corral all my swatches and steal (borrow?) your idea! Thanks!
bindc says
Super great reveal!! Thanks!
Irene says
Love it! The result is awesome. And I see my postcard arrived OK.
Irene
Matt Color Wheel says
I love the DIY color swatch. We just did a similar thing but with far less paint swatches. We got the idea from the new Behr display that offers pre-punched swatches and small o-rings to create your own swatch. We will have to work even harder to catch up to your awesome stack.
Love the finished room as well. Your house is a great inspiration.
Rachel W says
love it!!!
where on earth are those pillow cases from for the sleeper? i know i’ve seen em before, but drawing a blank?
will look perfect on my bed!!!
YoungHouseLove says
They’re from Pottery Barn (the organic woodland series I think). Hope it helps!
xo,
s
jen m says
the finished office looks great, but where did the window treatments come from? i’d love to buy some like those for my office – please share the deets!
YoungHouseLove says
They’re from Ikea about four years ago. They were super cheap so we hope they still have them!
xo,
s