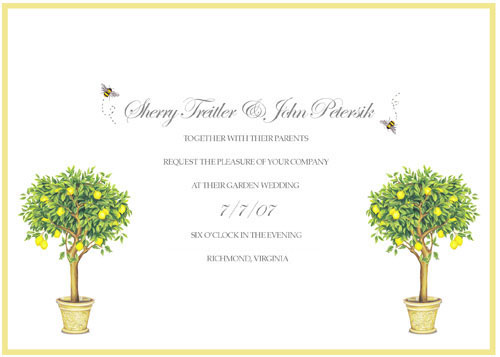
Remember how we mentioned in our Charlotte window shopping post that we found inspiration for our nursery mobile at a charming little shop called Lucy & Co? Well, after talking to the incredibly inspiring designer of the yellow butterfly mobiles we learned that all it took to whip them up was some floral wire, some yellow fabric butterflies, and some glue. Sounds doable, right? But instead of butterflies we decided to brainstorm a few other “things” that could appear to be swarming around in a ball above our baby girl’s head. John kept harping on bees because they were on our homemade wedding invitations…
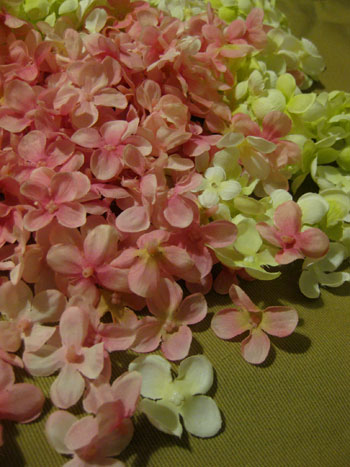
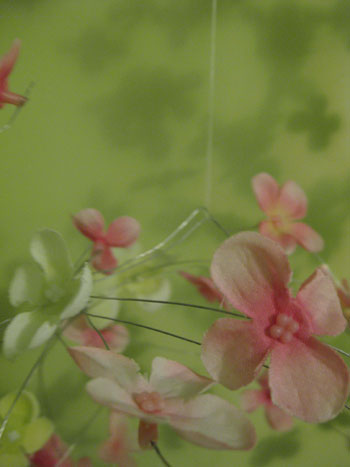
… but I thought that might be a bit terrifying. Bees in the nursery? Yikes. We finally settled on small yellow and pink blooms after we slipped through Micheal’s to check out what they had on hand. We were crazy about the small feathery little florets that we could pop right off of the stems and we loved the idea of adding some yellow and pink to our soft green and aqua palette. Plus they were buy one get one free, so for $8 we picked up two giant bunches of faux hydrangea blooms (one bunch in yellow and one bunch in pink).

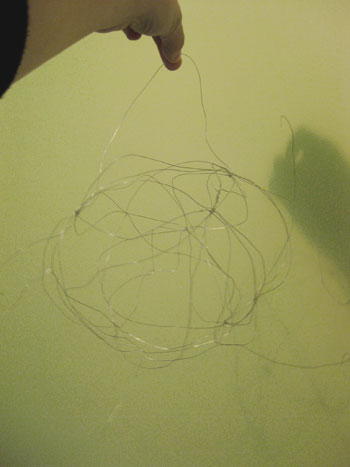
We also picked up some silver floral wire to the tune of a few bucks. Then we parked our butts on the couch in front of the TV and watched The Celebrity Apprentice while we messed around with the floral wire and tried to create three orbs that we could cover with a swarm of hydrangea blossoms. This step of the process was sheer trial and error. We started by making a few loops of wire to establish the size of the sphere and then gradually took it from a 2-D circle into a 3-D ball-shaped mass of wire while Burger watched with suspicious half-closed eyes (see his legs below).

In the end our little orbs turned out feathery and haphazard and semi-ethereal. We could definitely work with them and we were sure to make one big beach-ball sized one along with one that was about the size of a cantaloupe and one that was somewhere in between. And as you can see from the image below, we left a few wires feathering out from the sphere for a light and airy look (once we glued the flowers on). Note: we later removed the little wire handle that we created on the top of the orb (stay tuned for more hanging details).
After we made all three wire spheres we got to work popping off the blooms from each individual stem on our faux hydrangea bouquet (by this time we were watching The Amazing Race- this is one of those takes-a-while-but-you-can-do-it-kind-of-on-auto-pilot projects).
Each individual flower came off with a bit of a hollow nub in the back, which used to slide over the stem to keep it in place.
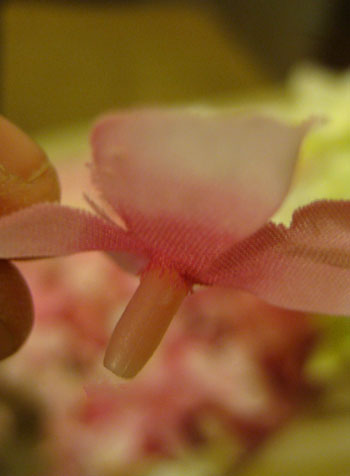
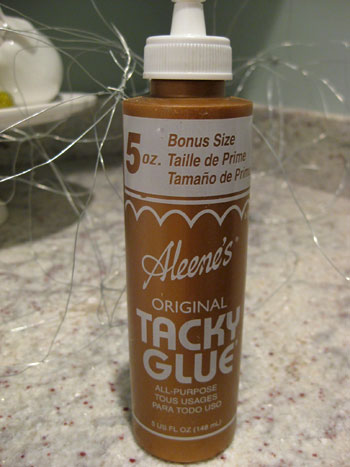
So in order to attach our flowers to the wire, John geniusly suggested that we use an Exacto knife to cut each of the nubs vertically up the center about a centimeter, which created a forked pincher that we could dab with some glue and slip over the wire to adhere them to our spheres. And it worked! The pincher held it in place long enough for the glue to dry and really secure it for the long haul. So the forked flower nub + a dab of glue was all it took to secure each of our blossoms, which we clustered around each sphere randomly for a charming unplanned and not too overly balanced look. Oh and we used Aleene’s Original Tacky Glue (which we already had laying around) as our glue of choice since it’s non-toxic and water-based (both good selling points for anything that will live in a nursery).
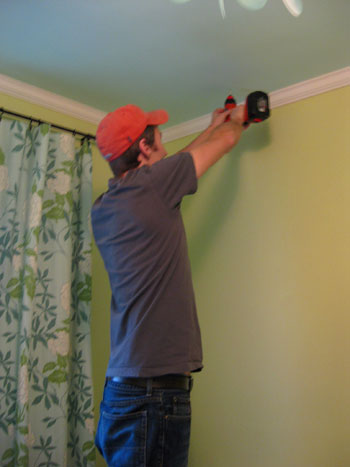
Then we dug three small white ceiling hooks out of our screws/nails/etc drawer (they can be found at any hardware store or even at Target if you don’t have them on hand) and John drilled three tiny pilot holes into the ceiling. It was helpful to whip out the drill just to get things started since it’s hard to have great leverage when you’re trying to screw something into the ceiling. Oh and as for placement we just suspended each orb with regular old white sewing thread and John moved them around until we decided on the best three spots for our hooks. Again, we went the trial and error route.
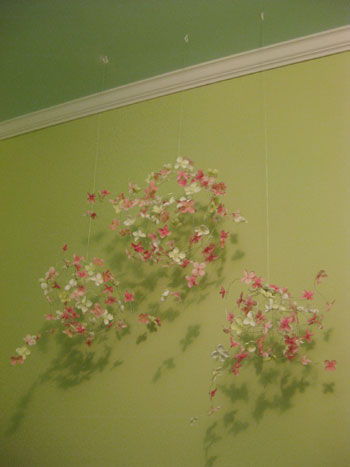
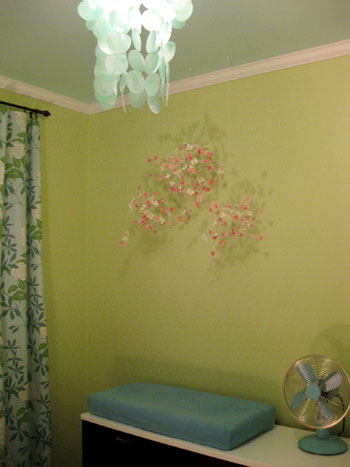
And here they are all hung up on those white hooks with nothing more than white thread keeping them suspended. We love that the thread is so hard to see that they almost appear to float in the room. We definitely wanted them to look light and airy (and we love that we had the thread on hand so it was f-r-e-e). As for how we staggered them, again we just experimented with different lengths of string and kept stepping back to see what looked best. In the end we loved that none of our orbs were exactly the same size and that they were all hung at slightly different heights- just to keep things interesting.
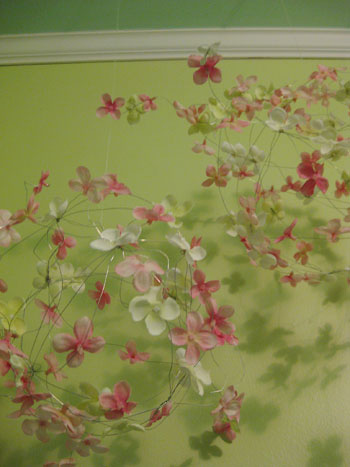
Here’s more of a detail shot for you. See how invisible the string is? And how those little offshoots of wire ended up looking really whimsical and sweet once we added some blooms? Plus we love the fun shadows that they cast on the wall. Who knows, maybe the beanette will stare at those more than the actual mobiles.
And we mentioned that we removed those large wire “handles” that we initially made in favor of just pinching the wire in a spot on the orb (just a bit) to create a much smaller and less obvious place to loop the white thread around. Thankfully, it worked like a charm.
And although you’re probably assuming that we hung them over the crib, we actually opted to place them over the changing pad above our newly refinished dresser since that wall was looking a little bare (and we already had a great mirror on the wall above the crib to bounce around a lot of light from the window across the room and serve as a fun and colorful shape for Baby P to gaze at). Of course our new trio of homemade mobiles might look a bit high and a smidge off-center but we have other plans for that wall as a whole so you’ll have to stay tuned for those details…
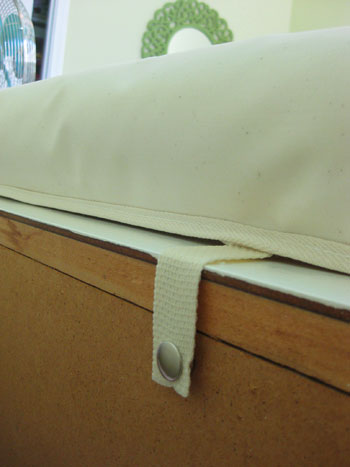
And speaking of our changing table pad, we wanted to share how easily we secured it to the dresser using the screw & snap system that came with it. See the screw that I’m holding in the photo below? It has a large and super firm snap on the back of it, so you just have to secure it to the back of the dresser in line with wherever you want your pad to be placed…
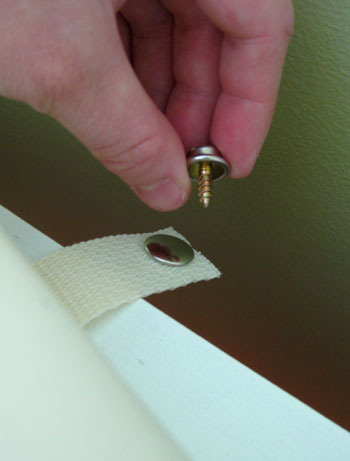
… and screw it firmly into place…
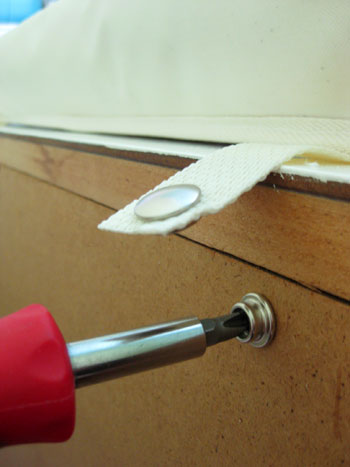
And then you can snap your changing pad so that it’s fixed for the long haul (there was one snap-screw that we attached for each end of the pad so it’s wiggle proof and extra secure).
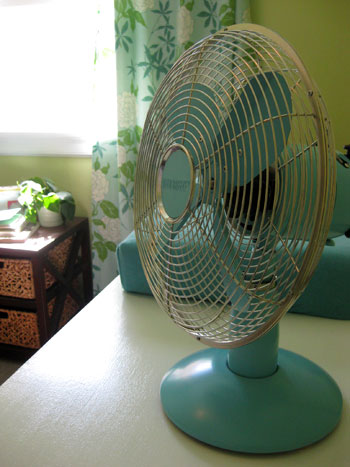
And you may have noticed our little blue fan. We have heard time and time again that good air circulation (ie: a fan in the nursery) can cut down on SIDS and make for a comfortable and happy baby- so we invested in a cute (and finger-tip-safe) Deco Breeze fan for the other side of the dresser that we can easily aim right at the nearby crib to cool down the beanette. We love how it looks with everything from the aqua ceiling and chandelier to our printed curtains (and you get a little sneak peek of another nursery furnishing that we’ll elaborate more on later in the background below).
So that’s how we made a fun little three-sphered mobile to hang above the changing table pad that we secured with some simple hardware. Oh and if you’re wondering where we got the changing pad cover, it’s actually from the same place where we got our organic aqua crib sheets (the changing pad cover is also organic, and we thought the price was pretty darn good). What about you guys? Have you ever made a mobile? Any tips or project ideas to share with the group? Any other changing-table-safety methods that you’ve implemented? Do tell.
Psst- Wanna see our nursery progress from the very beginning? Here’s our painting post, our big shopping spree, our crib hunting rundown, our curtain-making tutorial, our fun little chair search, our mirror-painting extravaganza, our DIY faux sheepskin project, our big dresser makeover (and subsequent drawer lining project), our closet makeover, and our homemade crib skirt undertaking. Good times.

Diapers & Divas says
This is a great project and it turned out so incredibly perfect! Great contrast to the room but still “goes” with the look. I love more personal mobiles for nurseries. I’ll have to figure out something to maybe do with leaves to blend with out monkey theme… hmmm…
Melissa says
Love your site and have been following along for a while now – especially excited to watch the nursery progress, as we are expecting #2 right around the same time.
And for another easy way to keep changing pads in place on dressers or any other surface: just cut a piece of non-slip rug grip to go underneath the pad. No screws required, and easily transferable if you ever move the changing pad.
G&D says
This is beautiful! You guys did such a wonderful job. The nursery is coming along so nicely–I just love what you’ve done!
YoungHouseLove says
Aw thanks D. Good job making such a cute baby girl! We love checking out her pics and wondering what our beanette will look like…
xo,
s
Tracy @ Cotton Pickin Cute says
Those mobiles look amazing. I just love the creativity of them. They’re so gorgeous and soft and sweet looking and I love the way they cast shadows on the wall.
Great job. Wonderful blog. Happy Easter. Hugs…Tracy :)
Stephanie says
Oh gosh! This has got to be one of my fav DIY projects you have featured so far. Thanks for sharing!
Stephanie
Becky says
I cannot believe how completely awesome this is and how well it turned out! I do every craft I can get my claws on and this one is on “the list” now…..Wow! Thank you!
Chlor says
Love these mobiles! I actually saw the exact same concept — floral wire and everything — at Ginter Gardens this weekend. Only they wanted $80-$100 a pop!!
Crystal G. says
If someone wanted a more perfectly round, symmetrical shape for the orbs, do you think using balloons inflated to different sizes (which you could wrap the wire around and then pop/removed the balloon) would work?
YoungHouseLove says
Possibly, as long as you’re careful not to pop the balloon with the wire as you go. And you’d need to get round balloons and not oval shaped ones. We’ve seen people use inflatable beach balls for projects like these (which can also be popped or deflated to remove them) so that might be another approach. Hope it helps!
xo,
s
Sarah says
I love the pattern and colors of the window curtains. Where did you buy them?
YoungHouseLove says
Just click the curtain making tutorial link at the bottom of this post for all that info! Hope it helps.
xo,
s
Becky J says
I loved this idea so much that I made it my project last weekend! I LOVE how it turned out, and I LOVE the fact that my total out of pocket cost was just $5 for the flowers I got on sale at Michaels, since I actually already had the wire and glue! I can’t wait to hang them in my baby girl’s room to give it a girly touch, since we’re not repainting the light blue top half of the walls (the bottom half is a milk chocolate color). Thanks so much for the inspiration, I’m using your ideas right and left (I’m on the hunt for your Marshall’s mirror, and I’m going to DIY my crib skirt using your tutorial) :)
Rachel says
That turned out SO pretty. It also looks like it would be really fun to make. I love it! Thanks so much for sharing this, I’ll be linking.
JessieBelle says
Hey guys new to your site…and love it! I just have to ask, why did you choose a changing pad with out any belts or buckles to strap The Bean in while you change her? She could roll off very easily. Not trying to dog you guys or your parenting skills or anything, just curious on your decision.
You may of already answered this in an earlier post/comment. Not sure.
YoungHouseLove says
Our changing pad does have a waist buckle to strap in the bean, we just tucked it under the pad for the pics so you can’t see it! We definitely plan to supervise our baby girl 100% of the time while she’s on the pad (we’d rather hold her with two hands than rely on a strap) but it’s definitely there if we need backup. Hope it helps!
xo,
s
JessieBelle says
Awesome! Mystery solved.
thanks :-)
Misty says
Maybe this has been said already, but did you know there is a lamp from PB that looks alot like this mobile???? Amazng!
http://www.pbteen.com/products/de-lite-lamp-base-and-butterfly-shade/?pkey=cside-table-bedroom-lamps
YoungHouseLove says
That’s so cute! We hadn’t seen it yet but we’re so glad you shared the link. It’s definitely another DIY spin on our mobile project that someone could tackle themselves to save some serious cash!
xo,
s
Katie Cereceres says
You both are so inventive and are such an inspiration. I am moving in a couple of weeks and will be implementing many of your tips and ideas. Keep up the good work!!
Ashley says
Hi!! This is my first time to your blog but I’m already a fan :) Mostly I’m super impressed because you’re in DIY magazine…my FAVORITE! Anyway, I am a very very new blogger but I’m excited about it and plan to focus on “green” crafts/home projects and recipes. Check it out if you have a second I would love feedback :)
<3 Ashley http://gogreeno.blogspot.com
Molly says
Hi Sherry and John!
I’m looking for a metal table top fan like the one you have in your nursery and bedroom – can you give any suggestions of where to find one like that for a good deal? I would appreciate it! Thanks!
Molly
YoungHouseLove says
We got ours from target.com but we don’t think they have the same one anymore (it’s called a Deco Breeze fan) so we’d try amazon.com or ebay.com. Hope it helps!
xo,
s
dasi says
hi there–
a latecomer to the site, but i love this mobile. can you tell me what gauge the wire is? there are so many gauges of thickness out there and i want to make sure i get something that will be bendable yet sturdy.
thanks!
dasi
YoungHouseLove says
We used 26 guage wire but something thicker probably would have been easier to work with (we just couldn’t find it). Hope it helps!
xo,
s
susan says
sooooo happy to find your site – I’ve been wondering(ok, obsessing) about the details of the lovely floral mobile since I, too, saw it at lucy & co here in charlotte!!! MIraculously, while perusing my new DIY magazine I came upon your article, and tracked you down – thank you so much for sharing!! I’m going to talk my college daughter into making some for her apartment bedroom – I think they’d be great. I’ll be spending the rest of the week examining your entire site…love, love your wedding. many blessings to you –
PS do you know about Metrolina here? Come in October-one of the BIG shows.
YoungHouseLove says
So glad you found our blog Susan! And good luck with your mobile! Oh and thanks for the Metrolina tip!
xo,
s
susan says
thanks- Metrolina Expo is Sleepy Poet on extreme steroids….chippy, schticky, all prices and styles, plus junk food…..we found chippy old shutters and iron gate pieces to use for a headboard, needlepoint pieces, hip clothing from our friends at Cool Mom Boutique, loose-weave burlap, all great deals…. Allow a full day. Also now that you have MIss Clara, you need to know that Bella Tunno is based here. Does Burger wear bibs?! Thanks again for great instructions and inspiration-
JoDe says
Any ideas for one for a boy??? I love the flowers but idk if that would work for a boy. LOL
YoungHouseLove says
Everything from matchbox cars or acorns to twigs with bluebirds or even helicopters or lightning bolts could look cute. Just hit the craft store to see what you can find! Good luck!
xo,
s
Sara says
Where did you find the screws with the snaps on them to secure the changing pad? Thanks!
YoungHouseLove says
Hey Sara,
They came with our changing pad (in a little package with the pad). Hope it helps!
xo,
s
Alena says
I love this idea!! :) Going to make a set for my neice <3 Question: where did you find that awesome fan??? I want one!!
YoungHouseLove says
That was from amazon.com for a pretty good deal (it’s called the Deco Breeze fan, but we found it on sale for around 45-ish dollars I think… sometimes they’re upwards of $90). Hope it helps!
xo,
s
megan says
We needed to girl up our gender neutral (light green and aqua) nursery after having a girl in January and these were perfect. Thanks for the great tutorial and ideas!!
AlisaMarie says
I absolutely loved this idea but the pink flowers were just not going to cut it for my almost 2 year old son SO I made a few changes and I thought you might like to see another take that is more gender neutral :)
http://crunchymacaroni.blogspot.com/2011/02/diy-earthy-whimsical-mobile.html
Thanks for the inspiration! I love your guys’ ideas!
YoungHouseLove says
Love them! So fun!
xo,
s
Shelley says
I LOVE the mobiles! I’m starting to dream up what our “nursery” will be like for our little boy on the way. Any idea for what you could use instead of flowers? I’m stumped.
YoungHouseLove says
What about little paper airplanes? Or little blue birds? Or tiny matchbox cars? Or planets or starts or something space-themed? You could even go nautical and use rope or something? I’d just walk around Michael’s or JoAnn and see what they have! Good luck!
xo,
s
kerri says
I was just curious how many flowers you used to make these? Also, do you think it is necessary to have the “plug” part of the flower? or would the petals be just fine on their own?
YoungHouseLove says
I think I used about three or four faux hydrangeas for the whole thing (and used the plug part to glue them in place, so it might help you as well). Just see what works. Good luck!
xo,
s
kerri says
Hi, me again. Do you know what gauge wire you used? I’m trying to do this project and the “haphazard” is an understatement of what my circles are turning out to look like. Maybe my wire isn’t thick enough? (it couldn’t possibly be my crafting skillys :P) I’m using 26ga.
kerri says
Ok, Ignore the last question. I just found that you already answered with 26gauge. Any tips for making it stay together? The second a let mine go the wires go into a limp jumble rather than retaining their shape…
Thanks in advance.
YoungHouseLove says
Every rotation I made a little knot with the wire around the circle so it was sort of knotted in a bunch of places around each rotation to hold its shape. Hope it helps!
xo,
s
Tara says
You called the mobile wire forms “orbs”…kinda foreshadowing to your love for ORB spray paint =) Thought that was a funny little happening
YoungHouseLove says
Haha – that’s hilarious!
xo,
s
CDobson says
I know I’m super late at getting around to post, but what changing pad do you guys have? I haven’t been able to find one with the snap/screw solution (which is genius and so much better than sticking something to my antiques), but maybe I just haven’t been looking in the right places?
Thanks!
YoungHouseLove says
We registered for an organic one from Buy Buy Baby and got it as a gift (don’t remember the name but I think it was the only organic one they sold). Hope it helps!
xo,
s
Alicia D. says
Hi! We are using many of the same colors in our nursery. I was wondering where you got the fan?
YoungHouseLove says
That’s from target.com a while back but I don’t know if they sell it anymore. But I’ve seen it on amazon.com (called the “deco breeze” in “sky”).
xo,
s
kandra says
love the mobile. my flowers are ready to go however i cant get the wire globes to look right, any suggestions? and what gauge wire did you use? THANKS
kandra says
oops just found my answer =)
Cara says
I should have known to look here. I was doing a search for how to make a butterfly orb. Thanks so much!
Ashley says
I’m so glad I found this post! I was about to order a butterfly orb mobile from etsy to the tune of $60 from here…http://www.etsy.com/listing/76692899/mobile-for-nursery-in-hot-pink-pink-and and wasn’t completely in love with it being butterflies…would’ve preferred flowers! Now, I’m going to get my craft on! Thanks Sherry!
YoungHouseLove says
Aw, so glad!
xo,
s
Lindsey says
I thought you guys might like to see the “butterfly globes” I made inspired by your baby mobile!! Thanks for the great idea!
Lindsey says
Oops…here’s the link: http://mommasewcrafty.blogspot.com/2012/02/kitchen-shower-crafts.html
YoungHouseLove says
They look lovely!!!
xo,
s
Emily says
Thanks for the inspiration and instructions on the mobile! Check out my nursery post to see how I made the mobile my own! http://thedomesticchemist.weebly.com/1/post/2014/02/the-nursery.html
YoungHouseLove says
Really cute!
xo
s