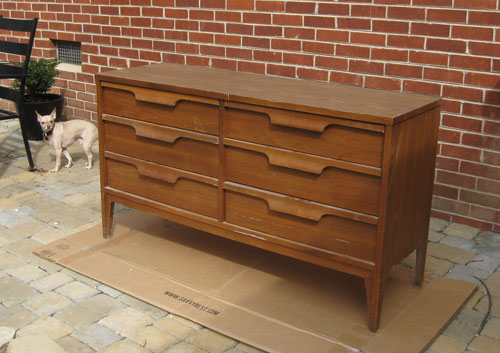
On Tuesday we shared how we refinished a Craigslist dresser for the nursery, taking it from this…
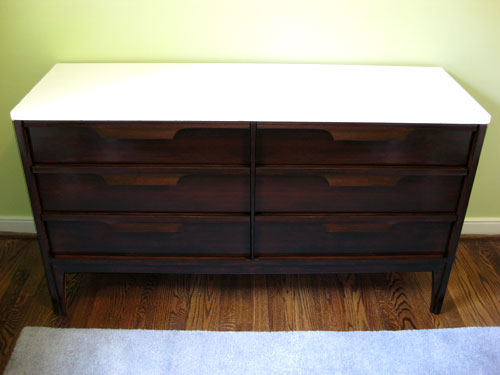
… to this:
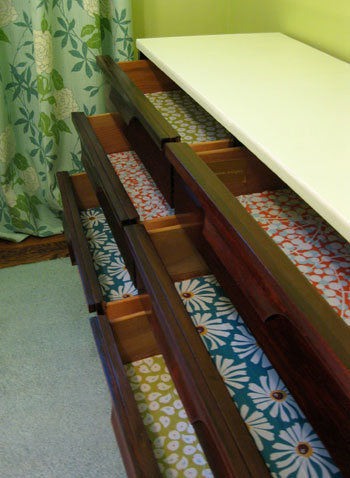
So now we’re back with all the dirty drawer lining details as promised. This project actually only set us back around $1.30 because we already had everything on hand that we needed except for two foam craft brushes which we picked up at Michael’s for around sixty-five cents a pop. Our other already-owned project materials were Mod Podge and six sheets of wrapping paper (given to us by friends who founded this awesome local paper shop called Ink + Paper). And just for fun we selected three different patterns to use inside of our six 50+ year old drawers to give them a totally fresh look and a nice clean texture (as opposed to the raw wood that they came with).
We were lucky that the drawers were pretty clean (nothing a wipe down with a moist rag couldn’t remedy) and there wasn’t any musty smell or sticky stain to be found. But if you’re dealing with a slightly grosser old drawer scenario (like mustiness and odor that slaps you in the face every time you open a drawer) we’ve heard that wiping them down with mineral spirits and letting them sit out in the sun or air out in the garage for a bit might do the trick. Murphy’s Oil Soap is also said to be one of the best ways to thoroughly clean wood drawers that are past their prime to rid them of any stains or smells. And as extra credit you can place bowl of fresh ground coffee inside of each drawer to absorb any lingering odor afterwards (we’ve also heard that bowls of untreated charcoal briquettes work the same way). Gotta love a cheap and natural solution like that.
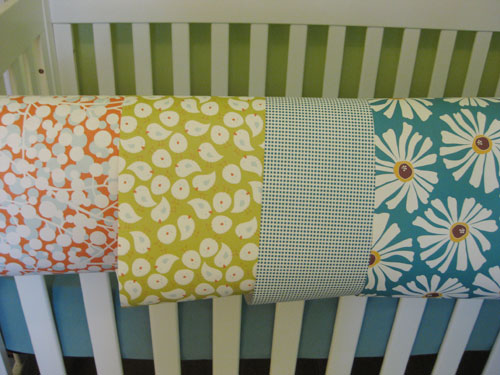
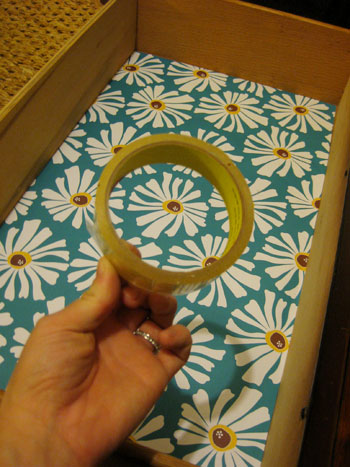
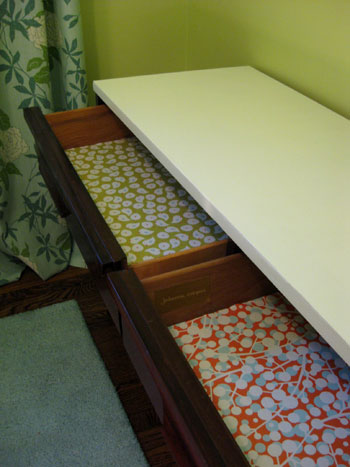
Anyway, here are four of our potential patterns that we laid out over the lip of our crib to evaluate as a group. We actually opted to use the three boldest ones twice (since we had six drawers to line) so each drawer would have a punchy little surprise inside. This meant that we had to eliminate one pattern so after a bit of deliberation we settled on two drawers with the orange bubble pattern, two with the green birdie design and two with the bright blue flowered paper. We figure that they’ll never all be open at the same time so it’ll hardly be overwhelming and we liked the idea of Baby P pulling open each drawer when she’s older to see something fun and graphic while she’s grabbing a pair of socks or putting away her crayons.
So after selecting our six sheets of wrapping paper (in three different patterns) it was time to cut each of our six sheets down to the size of the drawers (luckily they were all the same size so we cut one out and just used it as a template to quickly snip out the other five. Then we just had to decide how to adhere our “drawer liners.” Initially we debated using some simple double stick tape to hold the paper down around the edges, which probably would have worked just fine. But after a bit of thought we realized that we wanted something a little more heavy duty (that could take a bit of a beating for the next 15+ years and still look pretty good).
So that’s when we settled on Mod Podge. We recently used it to create “vintage” sign art for our bathroom, so we know how well it holds up to moisture and general wear & tear (thanks to the protective coating that you can apply right on top of any sort of paper to make it a lot more durable than it was before). The first step was not to Mod Podge over the paper though, it was to apply a thin and even coat of the stuff to the bottom of the drawer so that our pre-sized pieces of gift wrap could be securely adhered.
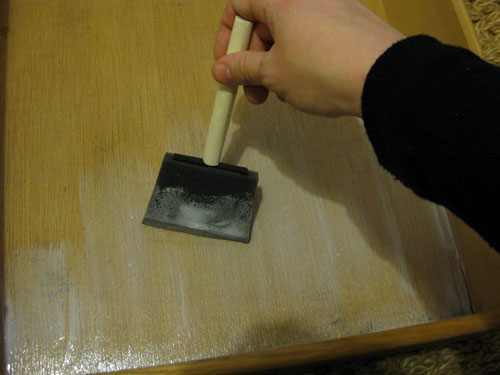
We always go for the “matte” kind of Mod Podge because we’ve found that it cures up more solidly and never feels tacky or sticky after it fully dries (usually within a few hours) so that should help keep the drawers from feeling grippy and tacky even in the warmer months. So after we slicked that onto the bottom of the dresser it was as easy as sticking down our already-cut-to-size gift wrap rectangle and pressing it along the center and out towards all of the corners to eliminate any bubbles or wrinkling. Note: we did not apply Mod Podge to the back of the paper, only to the bottom of the drawer.
I then worked my way around each of the other drawers, applying the Mod Podge to the base of the drawer and sticking down each pre-cut rectangle of gift wrap. Oh and the reason I didn’t go right to applying a layer of Mod Podge over the first wrapping paper swatch after it was stuck down was because I wanted to give it ample drying time before moistening the front of the paper and possibly causing bubbles or wrinkles. In fact, I gave all of the drawers about four hours to fully dry before applying that top coat of Mod Podge over the paper for added protection.
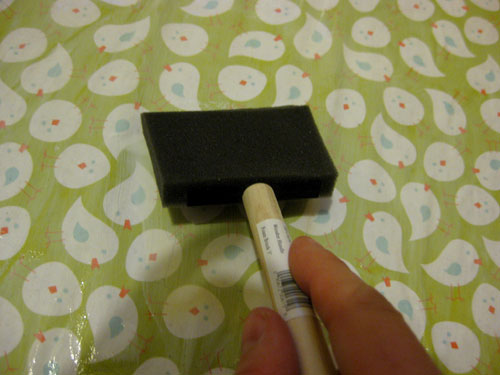
I was sure to apply the top coat evenly and thinly (not too gloppily so as to avoid wrinkles and bubbles). And after letting them dry overnight, we were left with durable and cheerful lined drawers that should last for the long haul (while providing a little dose of happy every time they’re opened). Oh and we love that Mod Podge is 100% water based and non-toxic so it’s not going to stink up our baby clothes or pollute the nursery like some other more chemical-ish sealers might. Good times.
So there you have our under-two-dollar drawer lining adventure. We’d definitely suggest looking around your house for anything from decorative scrapbooking paper and gift wrap (even tissue paper) to swatches of wallpaper or even flash cards or playing cards to create your very own custom drawer liners on the cheap. Mod Podge + pretty much anything that’s flat = interesting drawers that make you smile every time you slip them open. And you could even line drawers with old swatches of fabric, we would just use dots of fabric glue or even glue gun dabs on the back of each piece to hold them down as opposed to Mod Podge.
What about you guys? Have you lined any drawers with something that you already had around the house? Or even hit up Target or the dollar store for festive paper with just that purpose in mind? We’d love to know if you’ve added some unexpected personality to the inside of a dresser or cabinet so spill the drawer lining beans.
PS: Wanna see another cool way to spice up a thrift store find? Check out this cool paint pattern we applied to a secondhand desk.
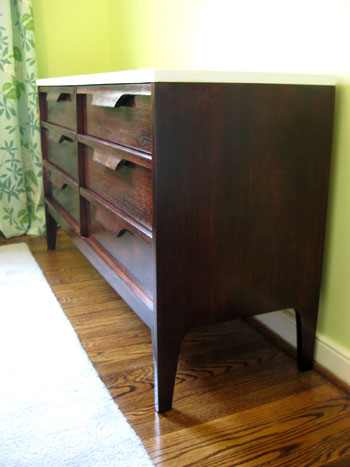
Psst- Wanna see our nursery progress from the very beginning? Here’s our painting post, our big shopping spree, our crib hunting rundown, our curtain-making tutorial, our fun little chair search, our mirror-painting extravaganza, this DIY faux sheepskin project, and our big dresser makeover. Fun, fun, fun.

Amanda H says
GREAT IDEA! I just finished painting our baby’s dresser for the nursery and i’ve been trying to figure out what to line the drawers with! Definitely using wrapping paper! Thanks for the tip/tutorial!
Kim Spurlock says
This is a great idea!!! I’m actually trying this for my daughter’s dresser. I’m using decorative scrap booking paper. I’m going to have to trim to cover the entire drawer. What are some suggestions on trimming to get a perfect fit?
YoungHouseLove says
I would make templates with cheap printer paper first and then just use them to trace that shape onto the decorative paper to get it right.
xo,
s
Kate says
We’re about to do this to the dresser my dad first painted when my mom was pregnant with my oldest brother… 39 years ago! I probably won’t go the mod podge route, only because I’m hesitant to make any seemingly permanent changes to the dresser, but I love the thought of getting a fun surprise every time a drawer is opened! I picked up 4 different wrapping paper sheets from Paper Source (can I say that??)… they’re a touch on the girly side, too, so in case baby #2 is a boy and comes around before any of my brothers wants the dresser, they should be easily swapped out :)
Jenny says
I seriously love this! I always had papered drawers as a kid but I love the permanence and durability of using Mod Podge in our own kids’ rooms. Genius! xox
Kate says
I’m still barely pregnant (only 15 weeks), but my parents are bringing out some of my old furniture for the nursery this weekend and one of the things I plan to do it to line the drawers like you did! The dresser and nightstand are both pieces my grandpa bought unfinished and painted for my mom when she was a really little kid, then I had them in my room my entire childhood, and how my little one will have them. They definitely need some new paint (the current white paint on the frame of the dresser is 28 years old!), maybe some new fun knobs, and a fun drawer lining!
One question I was trying to answer but couldn’t quite find from looking at your nursery posts – how early did you start working on nursery projects? I feel like it’s wierd to start too early, but I’d also like to paint and such while the weather is still warm to get good ventilation (up here in the north our falls can get very cool very fast!).
YoungHouseLove says
I think I was about halfway when we started? Maybe 18-20 weeks?
xo,
s
Kate says
Thanks, that makes me feel less crazy for wanting to start clearing out the future nursery in the next couple weeks!
Mandy says
Just FYI for anyone reading this and thinking of ordering the cute paper from the Ink + Paper website http://www.inkandpaper.com that is talked about here, I ordered paper from their website and never received my order, never received any response to any of multiple e-mails I sent, no phone number to reach anyone to find out what happened to my order. Basically I couldn’t get my order after I had already paid for it, so PayPal finally refunded my money. I recommend getting your paper somewhere else to do this project.
YoungHouseLove says
Oh man that stinks Mandy! Sorry for the trouble!
xo,
s
Kelli from LittleCottageOfMine says
Sherry this dresser is so adorable! You guys are always on trend before the trend! Guess that makes you trendsetters…:)
Two years later I’m finally discovering two toned midcentury love and scored a great Basset dresser at a garage sale for $20. I’m painting the whole thing white and stripped and stained only the drawers.
I’m going to post the reveal in a day or two if you wanna see it YHL inspiration in action :) omg if you start following my blog I would just die of giddiness!
But anyway, my question is about the paper/modpodge. How’s it holding up? Would you do it again? Love the look and wanna know if I should do it the same way or give something else a try.
Thanks sooo much,
Kelli
YoungHouseLove says
Aw you’re so sweet! It’s definitely still holding up well and we love it! Would definitely recommend it! And we’d love to see your reveal!
xo
s
Kelli @ LittleCottageofMIne says
Hi Sherry, just wanted to share :) Thanks for the inspiration! (and for lookin :)
http://littlecottageofmine.com/2012/09/24/mid-century-dresser/
YoungHouseLove says
OH MY GOSH!!! It could not be more gorgeous. I’m in love. Your site is really pretty too!
xo
s
Mandy says
I love your dresser refinish!
Erin says
Hi, love your site and we just bought a fixer upper house but….. I am not at all crafty. I really liked this idea and thought I would try it as it didn’t seem too complicated. I used a really pretty gift bag cut into the shape of the drawer bottom but when I put the mod podge (first time I ever heard of this) and then the paper, the edges curled up. I don’t know what to do now as it’s kind of a mess. Any idea what I did wrong?
YoungHouseLove says
Hmm, I would use double stick tape on the four corners and the center and then press that down and then Mod Podge the top after it’s stuck so it can’t curl. Hope it helps!
xo
s
Cathy C says
Really late to this party :) My mom used the wrapping paper from my baby showers to line the drawers of my bedroom set. 30 years later, and that paper is still in the drawers, and that bedroom set is in my guest bedroom, and I love the fact it wasn’t just random paper, but the paper that people gave me as a baby.
YoungHouseLove says
SO sweet!
xo
s
Dana says
Hi! I love the dresser you refinished, we are going to do something similar for our nursery- I am wondering about making the top of the dresser into a changing table… did you do that to yours? If so what did you need to purchase/build?
Thanks!
YoungHouseLove says
Oh yes we did that. Just painted it and sealed it and plopped a changing table on top of it (which we secured with snaps). We did a post about it (I think it’s on our Projects page in the kids section).
xo
s
ashlea says
So what about removing it? Pretty much a mess if you try to? Suggested only for pretty permanent liner?
YoungHouseLove says
If you want to remove it I’d just lay it in there or use double stick tape. We can mod podge a new pattern over ours but probably wouldn’t have much luck trying to peel it out :)
xo
s
ashlea says
thanks! i used some of the sticky puddy stuff.
YoungHouseLove says
So glad!
xo
s
Sue Taylor says
Love this! Where did you find such cute wrapping paper? Sue
YoungHouseLove says
There’s a link to it in this post (it’s called Ink & Paper). Hope it helps!
xo
s
Kathlyn Alex says
I really enjoy your blog! I actually found you online was searching for a better cheaper way to line my daughters antique dresser drawers other than using expensive wallpaper. Your blog was exactly what I needed and worked perrrfectly! I will be returing here for help on ideas in the future!
Rani says
Looks great!I have some leftover Liquitex Gloss Gel Medium, can I use that instead of Mod Podge?
YoungHouseLove says
Hmm, I’m not sure. I would maybe test it out on a small area?
xo
s
Jessica C says
Hey! Googled this old post specifically to see your method. Just wondered if you could give me an update as to how it has held up. I am currently refinishing the antigue dresser I used as a kid for my daughter and have the cutest wrapping paper I want to use as a liner. Wondering if mod pod he is the way to go and if it goes the distance in preserving the paper.
YoungHouseLove says
Still going strong and Clara is 4 now!! The paper looks great and hasn’t moved/peeled/pulled up at all!
xo
s
kay says
I’m working on one of my first projects. Last night I lined one of the drawers using modge podge wrapping paper and a sponge the very same you used. I was getting off to a good start,,I thought,,there were wtinkles and the paper began to tear in certain parts. I mostly used light pressure with my fingers,I have a brayer on order,its late I’d saw people using credit cards I think this is when it went wrong. The paper couldn’t take the pressure and began to tear. Itwas ssuggested to me to dilute the glue! Do you have any helpful tips for a smooth finish….Please?!!