Alternate title: putting the floor in Florida. I’ll pause while you slap your knee. I’m telling you, I’ve got mom jokes for days. And speaking of days, I googled this topic for days on end. And let me tell you, finding someone who shared actual photos and an exact rundown of what floor products they used on pine floors to get the result we were aiming for was BLEAK.
We were looking for a soft and light end result (not darker or more amber-toned/yellowed, which seems to be what pine likes to do, especially if it’s sealed with regular old oil based sealer – even just the clear stuff yellows it significantly). Oak floor refinishing info is endlessly available by the way. But straight pine pics & details about achieving a softer & lighter just-sanded look… not so much. In fact our contractor said most people rip out their old pine floors and replace them with white oak to get that lighter and not amber look and I was like AHHH MY EARS ARE BLEEDING WHO RIPS OUT GORGEOUS ORIGINAL HARDWOOD FLOORS?!
Especially because dude, look how good they can look:
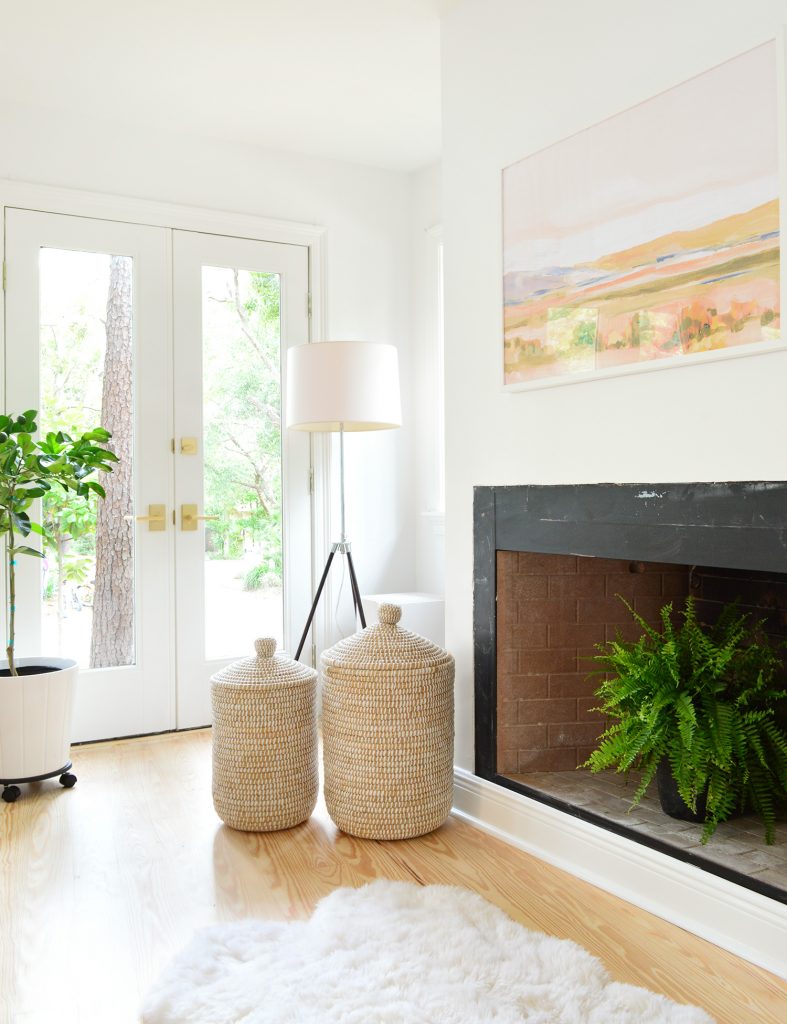
Long story short, we’re thrilled to be able to save these original beauties and they came out even better than we hoped – as in, I actually teared up when I laid eyes on them for the first time because no phone pics from the contractor could do them justice.
So consider this my contribution to the internet in the hopes that the next person who is desperately googling for photos of refinished pine flooring (not hickory! not heart pine! just regular old pine) that isn’t darkened and yellowed actually sees this post and has the heart to save them. It can be done! And it’s freaking beautiful! Save all the old pine floors guys!
In person they’re even better than any of these pics (remember how the contractor couldn’t capture them and I cried when I laid eyes on them? It’s a real thing). They just reflect so much light and feel so beachy and welcoming in person.
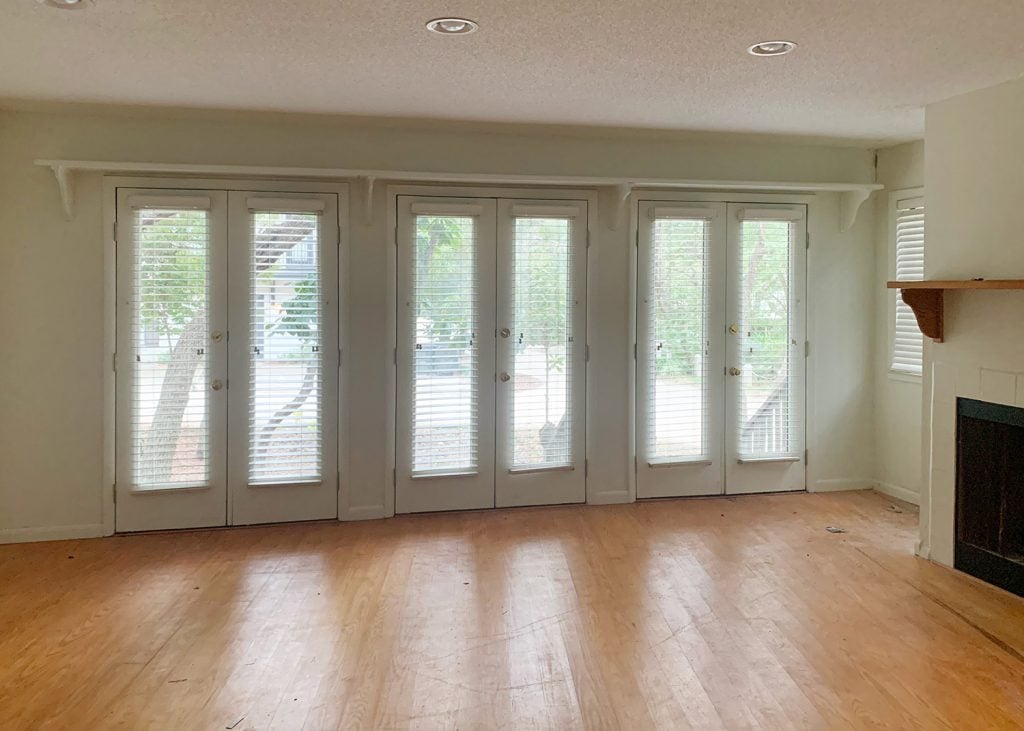
This is a before shot of what we started with. It’s what most people have when you see pine floors. They’ve been sealed with regular old oil-based sealer and they’re darker and yellower. I still think they look nice, but we wanted more of a just sanded “au naturale” look.

There were also issues with the actual condition of them, so we knew no matter what, they needed to be refinished. This is another before shot with the lights off where you can see the wear and scratches a bit better (remember this flooring ran through the kitchen and the hallway to the kids rooms and had actual holes and missing portions in those areas, so we knew the floors were a line item on our to-do list when we bought this house).
Obviously without the lights on it looks slightly less yellowed in that shot above, but you can tell they’re still significantly darker and more amber colored than the results that we got when we refinished them (all of our after photos are taken in natural light).
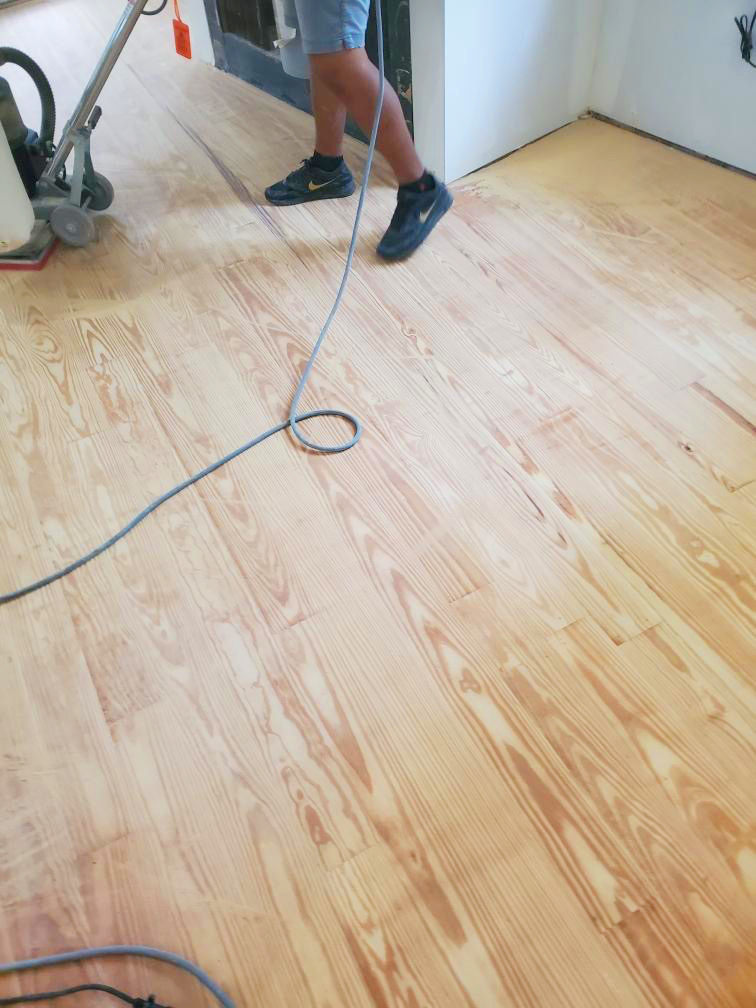
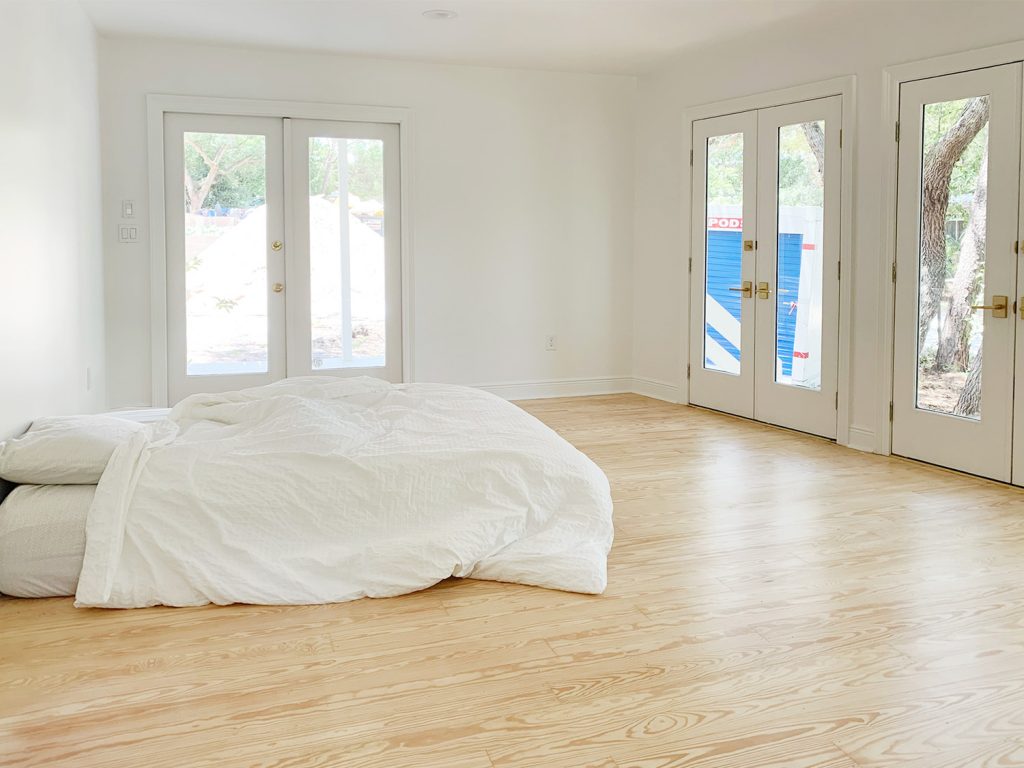
By comparison, this is what they look like when they’re sanded down. I mean, night and day right?! So I was on the hunt for something that could keep them light and soft like this, but obviously that could also provide protection and seal them and offer wipeability and all that practical stuff.
And friends, here is our after (why yes we are still sleeping on a mattress on the floor, thanks for asking). Other than not looking as dusty and matte as the floors above, we definitely maintained that au naturale look. And we are THRILLED. We picked a satin finish, and the shine really bounces light around. Highly recommend (I also read that matte topcoats can end up cloudy, and that scared me – so we really like this satin result!).
Ok, so now that I’ve lamented the very real struggle of finding pine flooring info and pics, here is our solution, right down to the specific products we used. First of all, you generally want to apply a stain or a sealer after a floor has been sanded down, and then you add 3-4 layers of a topcoat to give it that durability and wipeability. And we knew with pine that we didn’t want stain (pine generally doesn’t take stain very well and can bleed and look sort of blurry – meanwhile oak takes stain really well by comparison).
Since we weren’t trying to add a deeper tone anyway, we knew we just wanted some sort of sealer (not a stain). And after literally weeks of debate we decided to just go for it and try one coat of Bona NaturalSeal with Bona Traffic HD Commercial Satin for the topcoats (four coats were applied). The NaturalSeal is designed to keep more of that just-sanded look instead of deepening and yellowing hardwood floors. If you picture a very very light whitewash (you know, a very soft tint of white but mostly clear sealer) that’s what it does to counteract darkening and keep things looking more freshly sanded. And it did the trick! We couldn’t be happier!
Meanwhile the Traffic HD Commercial Satin topcoat is known to be very durable – it has a hardener that’s added to the mix and so far we have loved it (we went with the satin finish, and 4 coats were applied). *None of this is sponsored or was gifted to us by the way, we just researched it and bought it ourselves off Amazon
So that’s our holy grail formula. I hope it helps anyone else with pine floors (honestly I think this formula would be nice for oak and other hardwoods too – anyone who is looking for that “freshly sanded” and not too yellowed or darkened look).
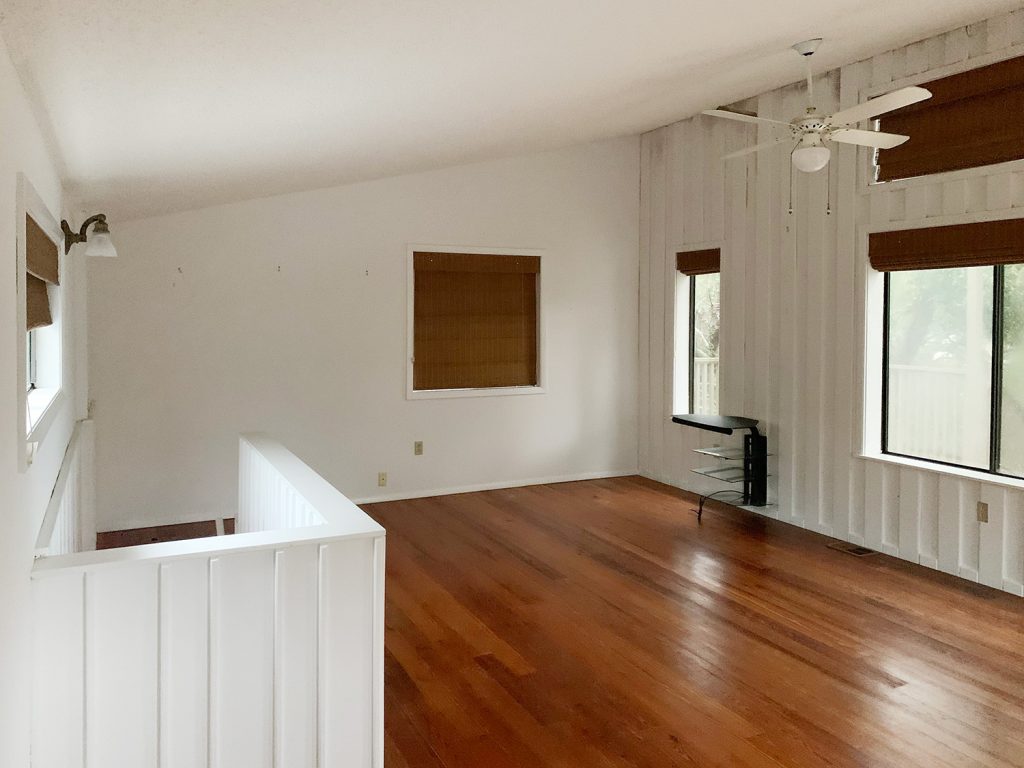
Oh, but we don’t just have pine floors. That would be too easy! Ha! Upstairs is all heart pine, which has darker and redder undertones. This is the before:
We used the exact same formula up there (the Bona NatrualSeal followed by the Bona Traffic HD Commercial Satin topcoat) and it definitely helped us tone down the darkness and the redness significantly. Here’s an after shot for ya:
I will say that some areas of this floor upstairs look a little less consistent (see the almost dusty looking horizontal lines that go across multiple boards?). We were told by our floor refinisher that these upstairs floors had been previously redone, so this was their second sanding and sometimes those can dredge up old marks and stuff (like if someone in the past had sanded unevenly, this new sanding might reveal that stuff). So that’s his best bet for why this isn’t as smooth and consistent as the results that we got downstairs on our pine floors.
Honestly I think we might clear out this entire upstairs room (everything onto the deck!) and do this trick that I used in our last house – I think a fresh coat of shine could make them look more consistent. And I gotta say, even if they stick to looking like this, we still like the result a lot more than the darker and redder before that we started with.
In summary: let’s embrace old floors – and maybe throw the idea of completely flawless results out the window. That sure beats throwing the actual wood into a dumpster and starting over. Let’s call it character.
P.S. Wanna see more of our Florida house? There’s this post about our style inspiration, this one full of before shots & an actual video tour, this one about the progress we’ve already made on the house, and this one about the exterior updates that we did (MY FAVORITE SO FAR!). We’ve also shared lots of moving details on Instagram Stories, as well as a bunch of sneak peeks of us settling into our new home.
More Hardwood Floor Refinishing Projects
If you would like to read more about our specific hardwood floor refinishing projects, please see the posts below. They range from matching original hardwoods to new prefinished flooring to restoring 100-year-old pine floors!
- Refinishing Mid-Century Oak Floors in Our First House
- Matching New & Old Hardwood Floors In Our Third House
- Refinishing Historic Heart Pine Floors in Our Beach House
- Repairing Historic Oak & Pine Floors In Our Duplex
*This post contains affiliate links, so we may earn a small commission when you make a purchase through links on our site at no additional cost to you.
