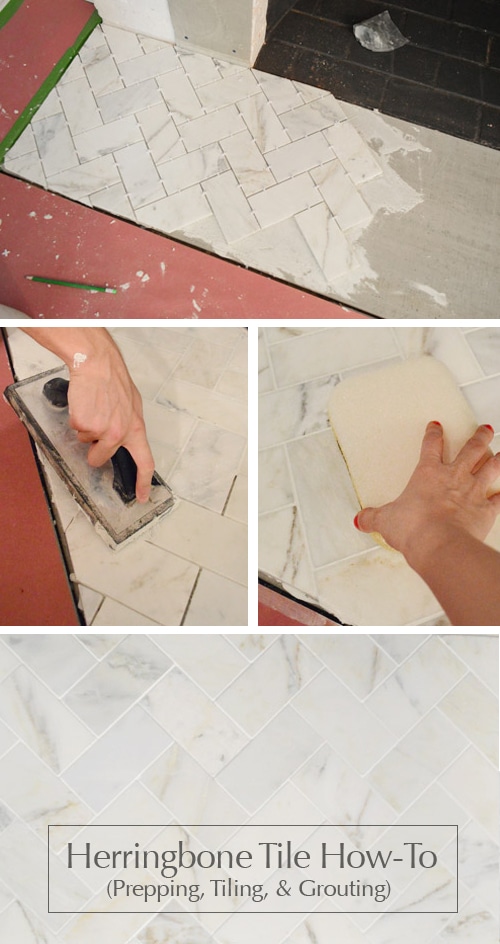
With our fireplace refacing plan all worked out, and our supplies waiting at the ready, it was time to dive into step 1: TILE! So we’re here with every last detail, from prepping and tiling to grouting.
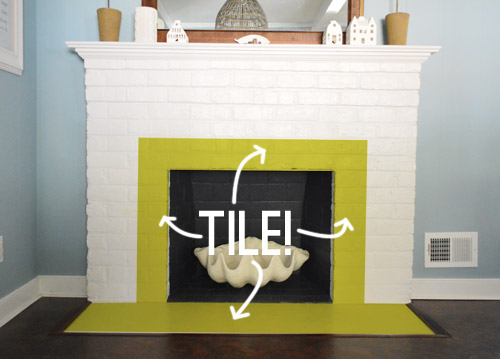
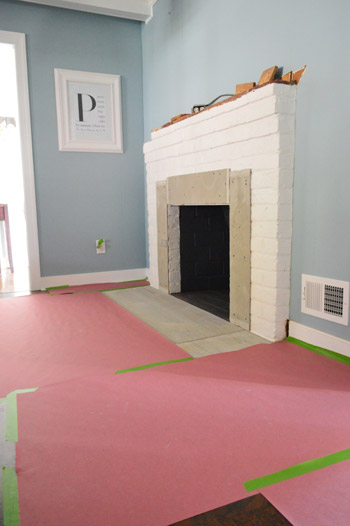
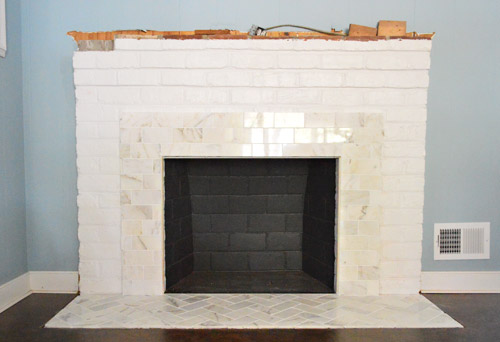
In case my sketch below is still indecipherable to everyone but me, I highlighted the areas of the photo below that are going to get the tile treatment. The tile border is only about 7 inches wide because the rest of the brick is going to get framed out with wood and MDF (which will layer on top of the tile, hence doing tile first).
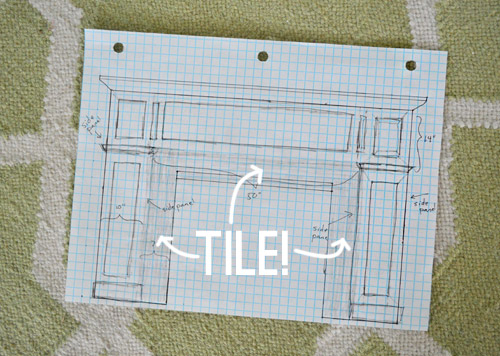
Oh but it’s smart to check the code in your area to make sure your wood surround isn’t too close to your firebox (ours calls for at least 6″ of tile and then the wood surround can start). And no, the tile is not going to be grellow. Ha!
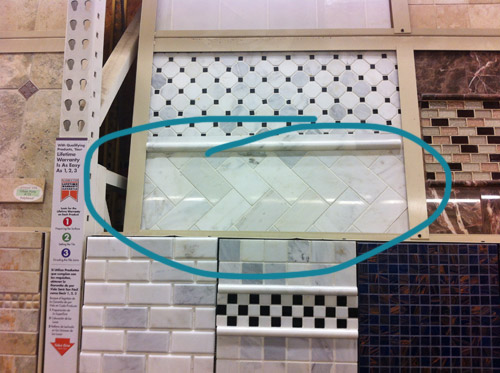
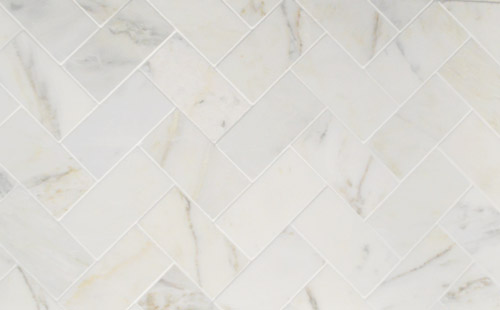
If you recall, the tile we picked out was this marble subway found at Home Depot for a little over $5 per square foot.
But before we could start slapping tile everywhere (that’s a technical description, btw) we had to create a smooth surface on which to attach them. So we bought some 1/4″ cement board and we used the old bend score and snap method to cut it into strips. Then, thanks to some heavy duty masonry screws and a cheap masonry bit for our drill, we attached them to the fireplace. It was quite a dusty process, and it helped to have four hands around for it (Sherry would hold while I drilled and vice versa).
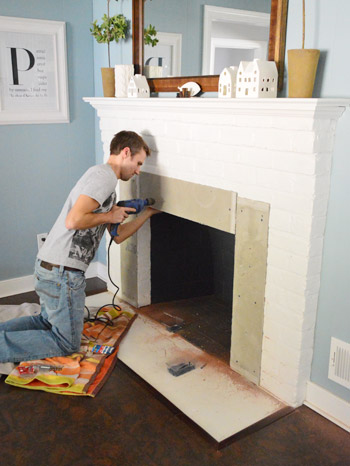
Oh yeah, and it was around this point that we realized we probably should clear off everything sitting on the fireplace mantel so that all of our drilling didn’t send anything down on our heads. Plus I’m not going to lie, if I directly (or even indirectly) sent one of those ceramic houses on the mantel crashing to the floor, the lady wife would not be pleased (I have sort of a bad track record when it comes to things like that).
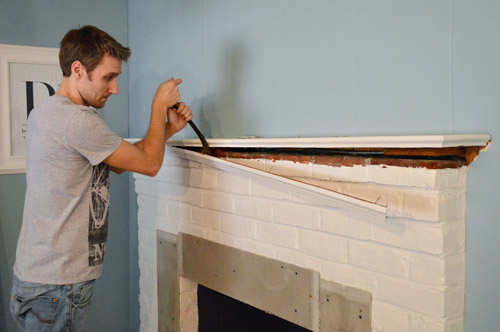
So after we cleared things off the mantel and ripped off the old wood top while we were at it (demo-ing things fully before tiling is always smart) it was back to tile prep. For the bottom hearth portion, I actually just squeezed out a whole bunch of heavy duty construction adhesive, laid down my pieces of cement board and then stacked some heavy storage ottomans (of which we have plenty around here) to hold them securely in place overnight (I later added a few screws at the corners just to reinforce them).
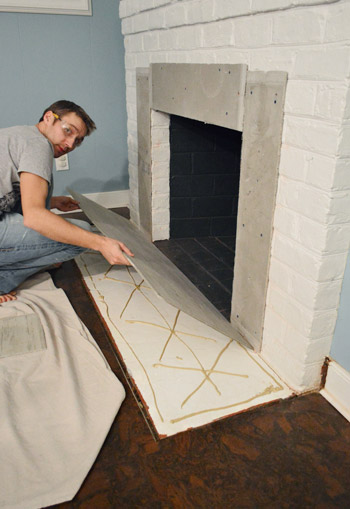
The nice thing about adhering the cement board right over the old hearth instead of demoing it out first was that because we added the cork floor right over our previous linoleum one (due to not wanting to disturb an asbestos liner underneath) we still had room to add cement board and tile without it bumping up and being oddly raised (in fact it brought it back to being aligned).
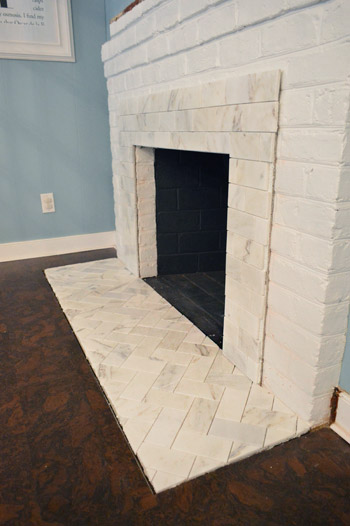
So here’s the fireplace all set and ready for actual tile.
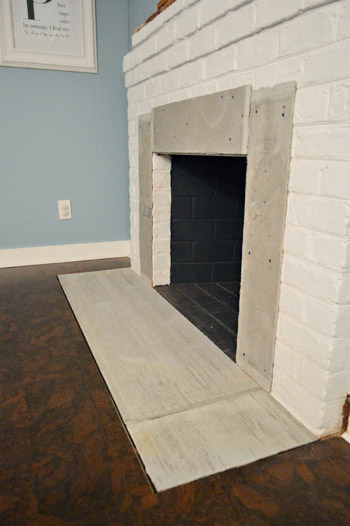
Well, not totally all set and ready. We wanted to protect our cork floors before getting into the thinset-and-grout-y mess of a tiling project, so we quickly taped down some protective rosin paper leftover from our last kitchen tile project.
We also took the time to lay out our tile beforehand. At Bryn’s suggestion, we bought a few extra boxes than we needed, just to account for overage and so we could pick out any weirdly chipped or discolored ones. Thankfully there weren’t many broken or otherwise wonky tiles, so I’d say that we used 90% of the tile we bought, and only returned 10% as overage tile (which is a pretty normal percentage – and Home Depot is happy to take it back).
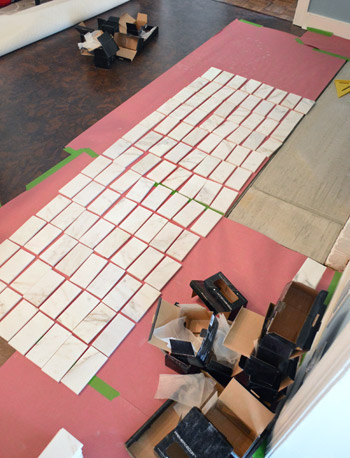
It was a smidge tedious to lay it all out, but it was great because we could begin to see how they’d come together and even do things like space out the veining (so there was a nice mix of both instead of all of the dark veining ending up on one side of the hearth and all the lighter tiles on the other side). And in the interest of using as many tiles as we could without being super picky, we also made a pile of “why-is-this-one-weird-or-chipped-on-one-side?” tiles to use for the smaller cut pieces that we’d need (we could slice off the weird/bad parts for many of the edge tiles anyway).
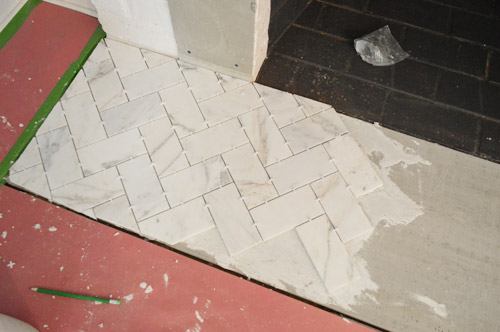
And as you can see from the angled cut that I’m marking below – we decided to go for a herringbone pattern on the hearth mixed with a traditional brick-layers pattern on the fireplace surround (we held them up a few ways and liked that configuration best). Update: we’re getting requests for more info on why we chose that combo, so here ya go… with so little surface area (just 7″ showing around the firebox) it wouldn’t really establish the pattern enough (we thought it would look like random and busy half-zigs and half-zags without enough of the tile showing to look like chevron). So we held it up both ways and liked the simpler pattern for the smaller area, just because we didn’t think it would look as chaotic.
And thank goodness we own this triangle square…
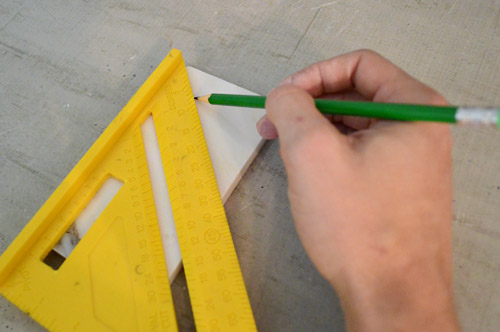
It was a lifesaver since basically every single cut for the hearth was on a 45-degree angle. And after cutting tons of crown molding on all sorts of angles, I gotta say that this was much simpler. Anyone can do this. Yes, even you scared-of-tiling folks out there. It’s really not that bad. I promise.
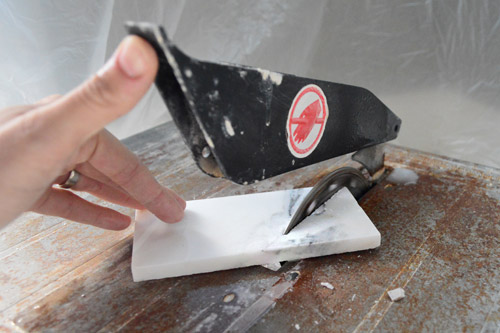
We made all of our cuts with our wet saw (one of my favorite tools) and it was fairly easy. The only challenge was that the marble was a bit brittle so sometimes the corners broke off as I got to the end of a cut. But I didn’t lose too many tiles in the process, so it was actually a lot easier to work with than penny tile (we had a much higher learning curve when it came to cutting that).
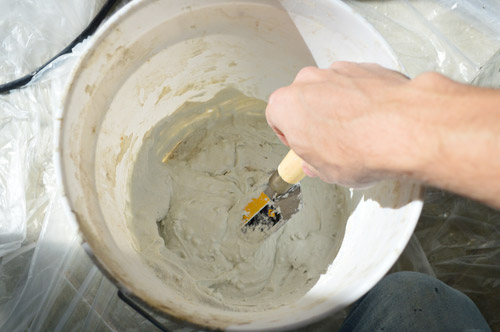
Once we had a few of our initial pieces cut, we mixed up some thinset (still leftover from penny tiling – woot!) and started slapping down some tile. Again, that’s a technical term.
I realize I’m glossing over some of the details of the actual tiling process. But we’ve covered it so extensively in the posts below (including video) that I thought sharing those links made the most sense. So for this project just trust us that it went along pretty much the same way unless otherwise noted in this post.
- Here’s how to hang cement board
- Here’s how to install penny tile (including video)
- Here’s how to grout penny tile (including video)
- Here’s how to de-haze & sealing tile
- Here’s how to install a subway tile shower & marble floor (including an extremely detailed supply list)
Once we had the pattern started it was a pretty mindless process, it just took a long time because there were so many cuts involved in such a small space. But it was pretty straightforward (it was one of those just-keep-going tasks that didn’t involve much problem solving once we got the hang of it). I’d guess that it took us a good four hours to get the bottom portion done (although it was broken up by lunch plans with an old coworker, so it still ate up a good portion of day 1).
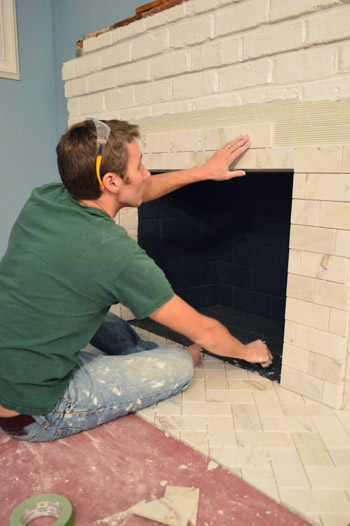
The next day during Clara’s nap we attacked the top portion, which went significantly faster because the straight cuts were easier to do.
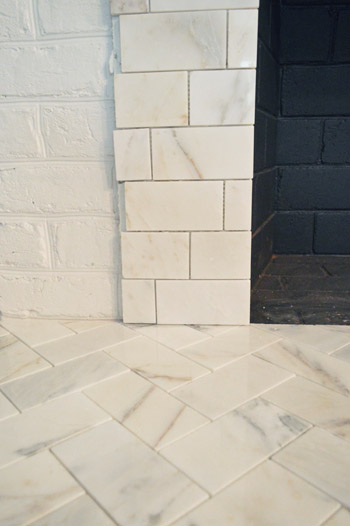
And since the outer edge was going to get covered by the MDF frame of our wood surround eventually, we didn’t have to be sticklers for a clean edge. In fact, Sherry and I figured out a way to stagger the tiles so that we were able to reuse both sides of a cut, which made life much easier. See how the bottom row has a cut tile on the left? The other half of that tile is in the row above it (on the right). So they sort of staggered themselves up the wall, and we weren’t creating tons of tile fragments that we couldn’t use.
So by the end of day 2, we had all of our tile done. Yeehaw. (Oh, and that white strip of brick inside the fireplace is eventually going to get painted the same dark charcoal color as the rest of the firebox, so just ignore it for now – and of course we have trim pieces for the floor around the hearth so it’ll be seamless and smooth in the end).
The next evening we got our grout on using some non-sanded grout from Home Depot in their Snow White color (it’s not super white, sort of a very soft gray).
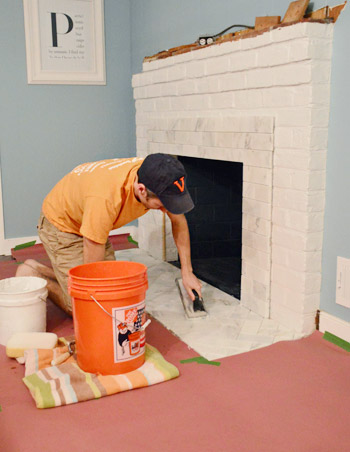
I don’t know about you guys, but for some reason the transformation from un-grouted tile to grouted tile is super satisfying to me. Seriously. I could grout all day… well, if I had a bionic wrist.
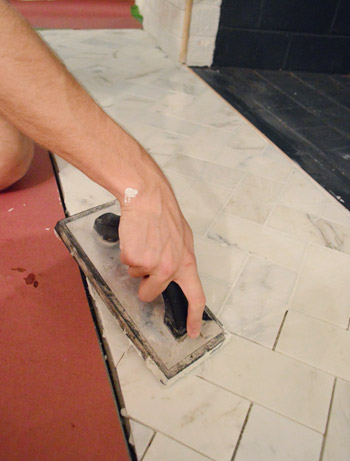
As I shoved grout into joints, Sherry stepped in periodically with a slightly damp sponge to smooth everything and wipe off the excess. I’m still jealous of how clean she stayed.
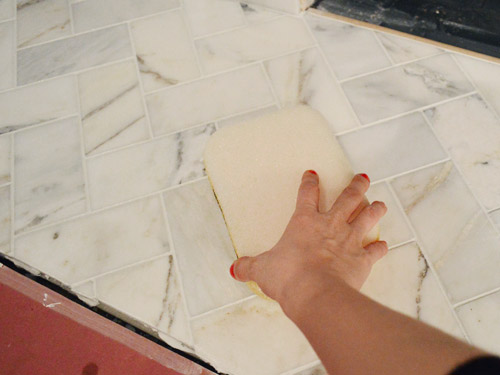
Grouting took all of 45 minutes, maybe. And it left us with this beaut. Admittedly it still looks crazy without a built out mantel around it, but that’s next on the agenda.
So we’re excited to start building the surround, reconstructing the mantle, adding trim and molding, priming and painting, and eating a celebratory cookie (or twenty) when we’re finally done.
Oh and we sealed all of the tile/grout after the grout-drying waiting period on the bottle (we had some leftover from the backsplash). Took ten minutes tops. Ending up with a completely re-tiled hearth and fireplace surround (in white marble, no less) feels like such an upgrade for only around seven hours of work (total), and the budget wasn’t nearly as scary as “marble tile” sounds. Ha!
- Cement board (2 sheets): $16
- Masonry screws: already owned
- Liquid Nails Heavy Duty: $2
- Subway tile: $5.50/sq ft, totaling $70
- Thinset: Already owned
- Tiling tools (saw, trowel, float, etc): already owned
- Grout: $11
- Tile sealer: already owned
- TOTAL: $99 (*thanks to some holiday gift cards from the family, we actually only spent $49 – but without gift cards or already owned supplies this might be an $150 upgrade)
I think we’re riding a herringbone high right now. Seriously. I’m so glad we decided to do that pattern. For some reason it makes me feel super fancy. Maybe we need to rename our house Downton Ranchy.
And maybe we should record a sequel to this SNL skit called “Marble Subway Tile.”
Does anyone else have some good experiences with subway tile, a herringbone pattern, or tiling a fireplace in general to share? Have you purchased a marble column recently? Are you like “What is this, The White House??”
*This post contains affiliate links

Leave a Reply