The ceiling hole is patched (see more on how I get that done here, complete with a ridiculous video of the process) – although admittedly the paint is probably still drying. But we’re ready to call this turkey done. For now.
This is one of those makeovers that wasn’t a total gut job, but was a series of smaller tweaks that added up to something pretty darn noticeable. In fact going into this we thought this just might be a “for now” fix that we’ll eventually redo completely (all that beige tile was hard to get behind) but now that we’ve made these upgrades we’re surprised how much we like the room – especially since we plan to redo the floor someday down the line with some hex tile, as seen in this mood board (more on that here).

So other than a flooring update down the line, we might just leave the beige wall tile as-is (or eventually have it professionally reglazed to be white for a few hundred bucks, like we did to the tub in our first house). Which definitely wasn’t something we thought might be our solution going into things (we really thought we would have to demo out all of the tile in this bathroom to really make it feel fresh and updated). So that’s a nice surprise, even to people like us who have been DIYing for a long time – you never know when something “for now” will charm you into sticking with it for a while longer! And as much as we love a sledgehammer, you know we also love using what we have…
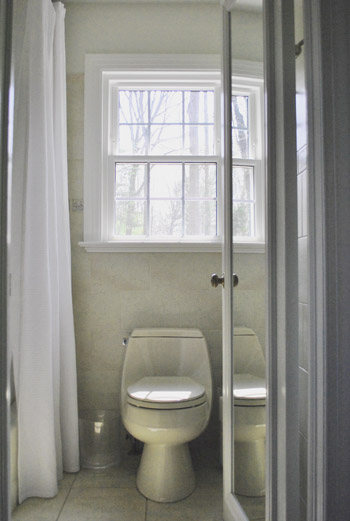
But enough chitchat. Let’s get to the before and after pics and the big ol’ budget breakdown. First the pics. Here’s the room before we did anything other than hang an extra long shower curtain at ceiling height (that’s one of our favorite small-bathroom tips – if you can’t trick the eye into making the room feel wider, you can at least make it feel taller and loftier by raising the curtain).
And here’s the room now, after some planning, some painting, some light-swapping, some art hanging, some trim-painting, a toilet-update, some window frosting, some shampoo wrangling, some door trimming, some border tile demo, some border retiling, and some light-moving.
Here’s another before pic from another angle.
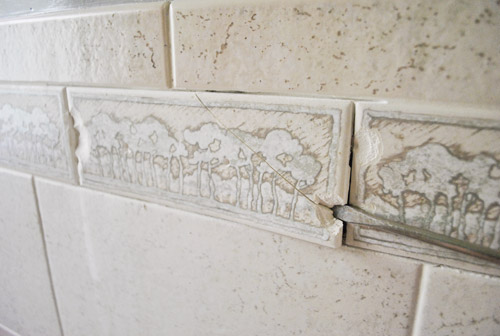
And the updated after pic from that same angle. See how painting the walls darker, painting the trim bright white, swapping the repetitive tree border tiles with clear glass ones, and switching out the old squat almond toilet for a tall white one made it feel a lot less like a beige box?
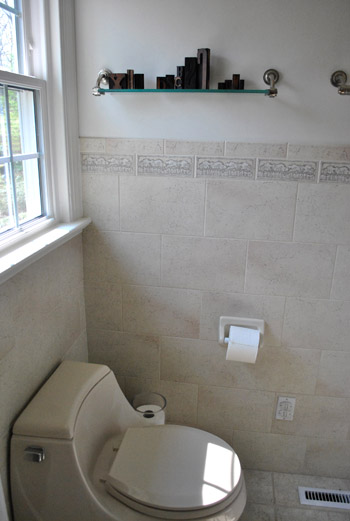
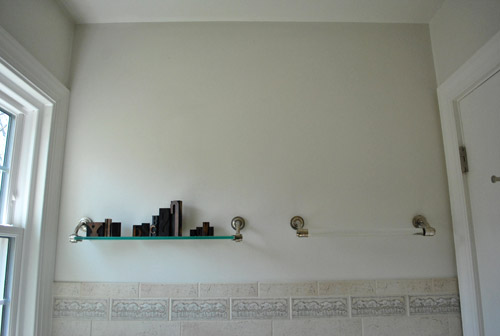
Here’s another before pic of the shelf and towel bar that we inherited (you almost felt like you might scrape your body on them whenever you walked in since it was such a tight space):
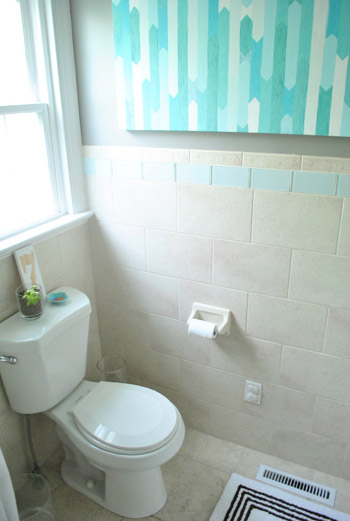
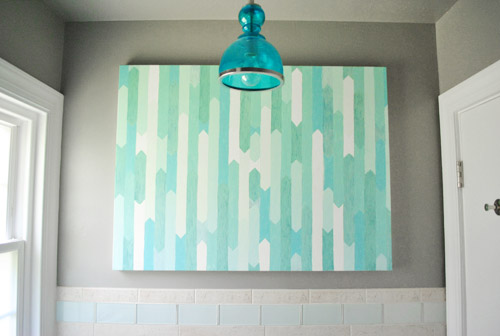
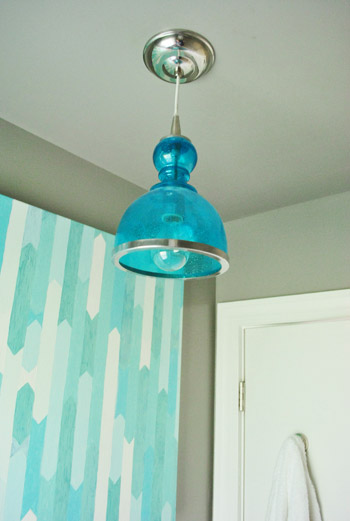
And here’s that wall now that we hung some DIY artwork I already had around and added a pretty blue pendant that we recently centered on the window and door:
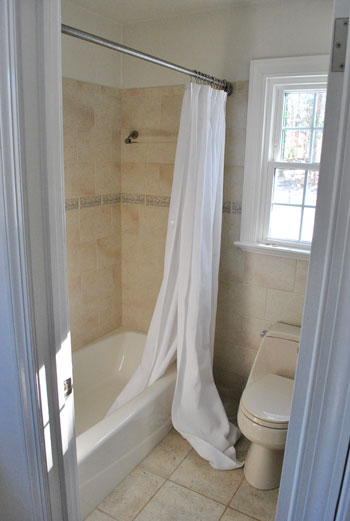
Here’s an old pic of the room from the hall before we even raised the shower curtain (it was taken on move in day)!
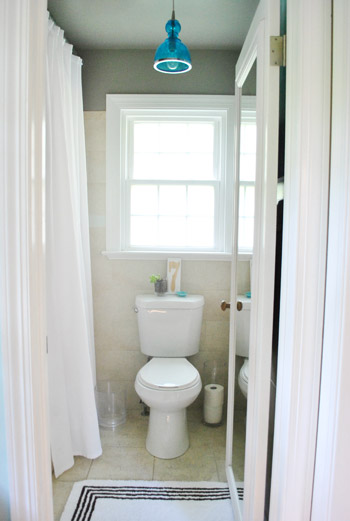
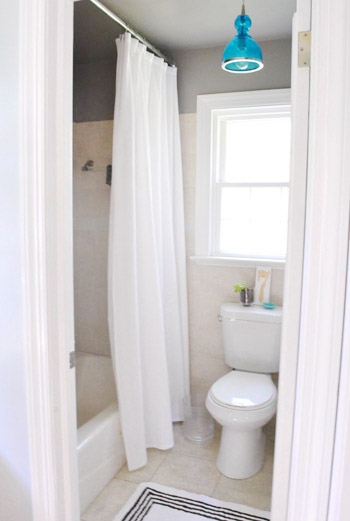
And here’s a shot from that angle now. It’s definitely not an entirely new room, but a few small upgrades added up to a nice little facelift that makes it feel a lot fresher, cleaner, newer, and less beige-on-beige. See how breaking things up with more white and dark gray paint along with some pops of cool blue make the tile feel a lot less pinky-beige than it did before we added those cool-toned accents and pops of white to temper things?
And since I can’t stop at just a few before and after pics, here are two more fun little detail shots. You know, for posterity.

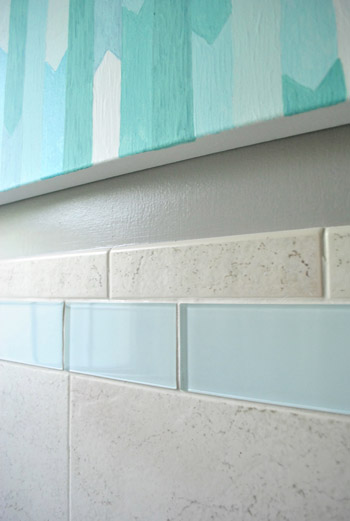
I think our favorite upgrade in here is the hardest to catch on film (in person it’s definitely what “shifted” this room from feeling old to feeling crisp and new), which is the little border tile switch-out.
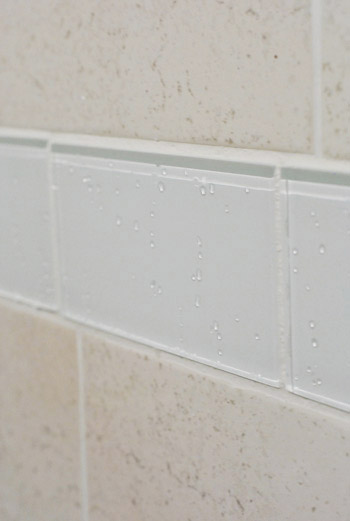
The new “snow white” clear glass tiles make such a difference (they’re not blue at all, they just reflect the accent color in these pics for some reason, so they look blue-green here).
My favorite thing about them is how they make little droplets of water that fall on them in the shower glitter like tiny glass beads.
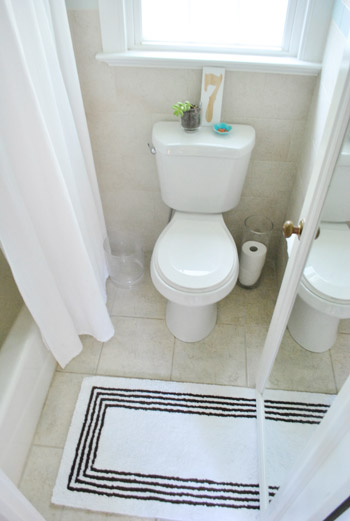
Here’s a shot that shows how tiny the room really is. Somehow shooting the floor seems to capture it best as the tiny space that it is. Yup, it’s literally four tiles deep and around three and a half tiles wide. Teensy. But cute.
So now our bathroom to-do list looks like this:
paint the walls so they have some contrastreplace the boob lightpaint the cream trim whitehang some bathroom-friendly artcraigslist the toilet and replace it with a classic white onedo something to add privacy to the windownix the ugly and cluttered showerhead caddyremove the door so we can shave the bottom to allow for a rug/bathmat (and add a door stopper so it doesn’t squash the art)replace the border tile around the roommove the blue pendant light to hang centered in front of the window- finally get a bath mat <– since this one is borrowed from the guest bath, we still have to get on that
- replace the floor tile & possibly reglaze the wall tile, just to completely freshen this old beige box (phase 2)
And our budget breakdown looks like this:
- painting the walls a moody gray color (Benjamin Moore’s Rockport Gray in Natura, we only needed a quart): $16
- upgrading an old boob light for a blue glass pendant from a local outlet (for around $100 less than one by Ballard): $80
- hanging a painting I made about a year ago and painting the trim white (with trim paint we already had): $0
- selling our old beige Kohler toilet on craigslist (for $60) and buying a taller white Glacier Bay one for $88: $28
- frosting the window for privacy (without blocking too much light): $0 (we had frosting film leftover from another project, but it’s usually around $20 for a giant tube of it at Home Depot)
- adding shower caddies for shampoo/soap/conditioner storage: $22
- trimming down the door so we could actually use a bath mat (the door was so tight to the floor it didn’t open all the way since it got caught on an air vent in the floor): $0
- redoing the new border tile (more on that here and here): $84
- moving the light so it’s centered on the window and door instead of oddly close to the shower curtain: $0
- TOTAL SPENT: $230
You can spend $230 on a toilet or a bathroom light alone, so that total makes us pretty darn happy. Even though it’s tiny, we crammed in lots of updates and it was nice to take things one week at a time and just do as much as we could handle as we inched along. I’m telling you, the “no rush” approach really does cut down on the stress-factor of a bathroom redo (especially when you’re not demo-ing your only full bathroom down to the studs so you don’t have anywhere to shower like we did at our first house). What about you guys? Have you bought any new toilets? Updated any border tile? Painted the walls? Hosted any bath mat fashion shows? I can’t wait to get my bath mat fashion show on when it comes to finally picking one for this room (so I can finally return the one above to the guest bathroom where it rightfully belongs).
Psst- To follow this bathroom sprucing project from the start, check out this planning post, this painting post, this light-swapping post, this art and trim-painting post, this toilet-updating post, this window frosting and shampoo wrangling post, this door trimming post, this border tile demo post, this border retiling post, and this post about moving the light.

Leave a Reply