The toilet in our hall bathroom has rocked a little bit from the day we moved in (the inspector even noted it on our little home inspection form). Some people can fix this with plastic shims or tightening bolts, but we quickly diagnosed the issue as a rusted bolt under the toilet flange. That’s a fix that requires removing the entire toilet and replacing the bolt, so it took us a while to get to this to-do task. But here’s how I finally decided to seize the day toilet and show this rocking throne who was boss!
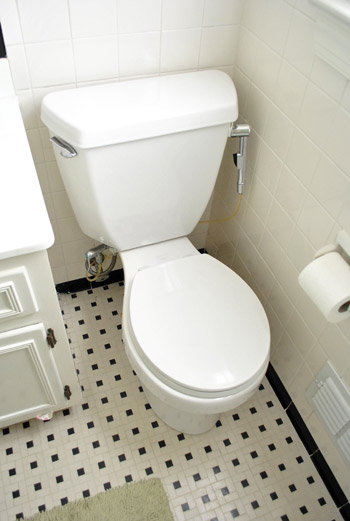
The process is similar to our toilet installation tutorial, but that project didn’t involve removing an old toilet first. So today you’ll get to see the fun part of removing an old, somewhat grody wax ring (along with some uncomfortable close-ups of the Petersiks’ potty). Sounds like fun, right? Don’t say I didn’t warn you. Let’s start with turning off the water.
Materials For Fixing A Rocking Toilet
Removing and reinstalling a toilet involves pretty basic hand tools (no power tools!) that most homeowners will already have around their house. The only thing you’ll probably need to buy at the store is a new wax ring kit, which is
- Flathead screwdriver
- Wrench
- Hacksaw
- Small putty knife
- Bowl, sponge, and/or paper towels
- New wax ring kit*
- White silicone caulk
*We always recommend buying 2 just in case… and make sure it’s the KIT that comes with bolts!
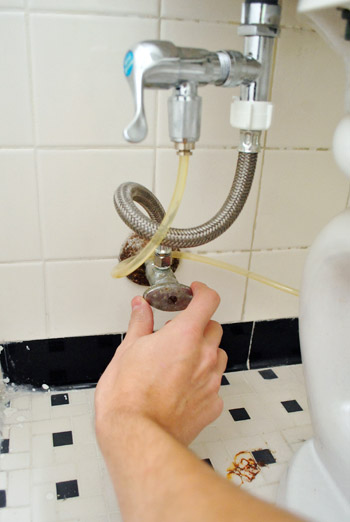
Step 1: Turn Off Water & Drain The Tank
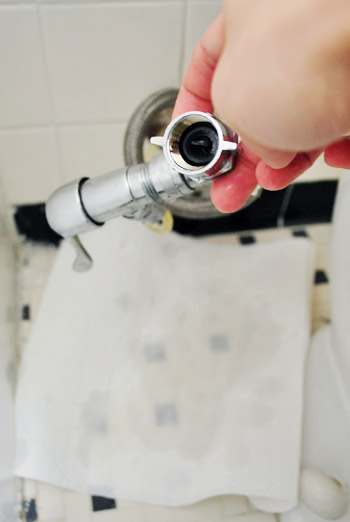
Start by turning your water supply line valve clockwise to turn off the water. Try to do this by hand to avoid breaking the valve. If it’s stuck, try spraying WD-40 or even olive oil to lube the connection (don’t remove the screw!)
With the water off, flush the toilet to get as much water out of the tank and bowl as possible. Then use towels or a sponge to sop up the extra water by hand. And no, I won’t show you a picture of my hand in the toilet bowl.
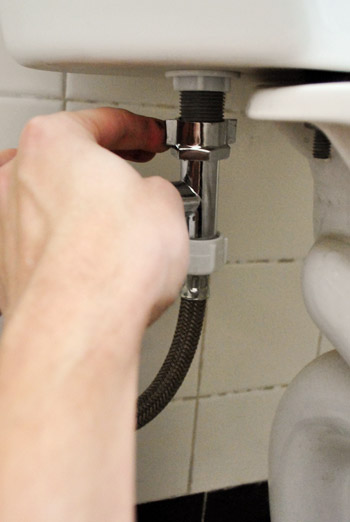
Step 2: Detach The Supply Line
Once things were pretty dry, I unscrewed the supply line from the bottom of the toilet tank. We’ve got a diaper sprayer attached so ours looks a bit crazier than your average toilet, but the idea is basically the same.
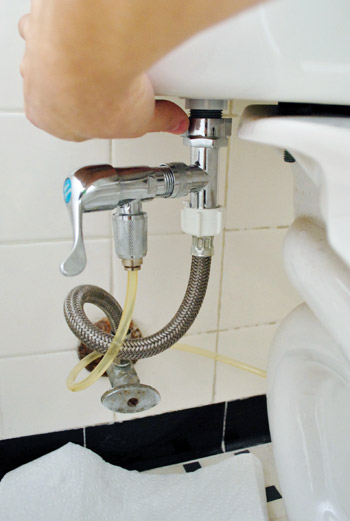
There was a bit of water leftover in the supply line, so I had some paper towels on hand to soak it up.
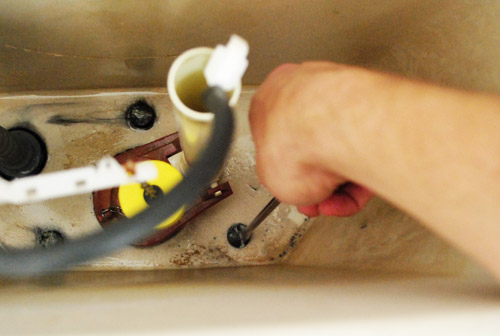
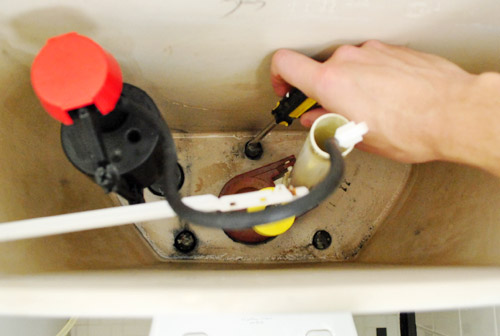
Step 3: Unscrew & Remove The Toilet Tank
Next up was removing the tank, which is bolted to the bowl in three spots. I was pretty much able to do it with a screwdriver all from the top, but I did have to unscrew the nut from the bottom side at one point.
Once it was unscrewed, I lifted it up carefully and set it down somewhere soft and out of the way. In this instance, that meant an old towel in the bathtub. Oh yeah – we’re a classy operation ’round here.
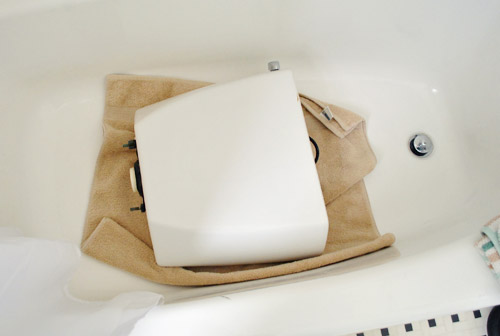
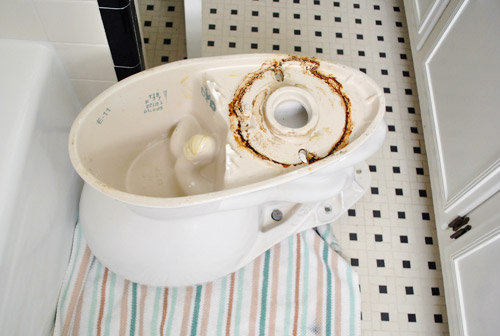
Speaking of classy: here’s our topless toilet.
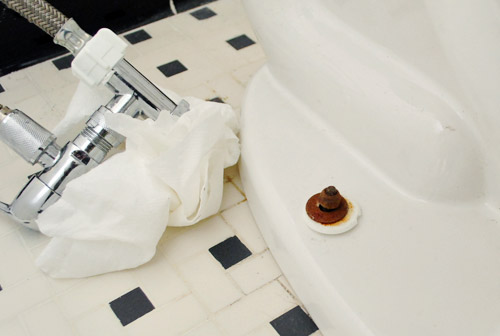
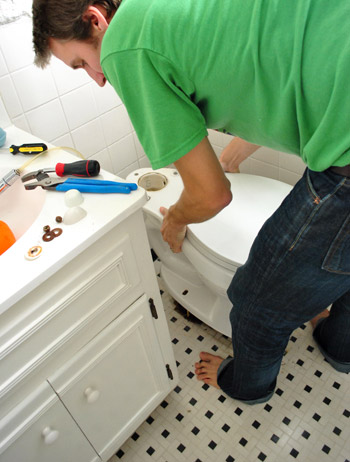
Step 4: Remove The Toilet Bowl
To remove the bowl, I used my wrench to unscrew the bolts on either side – this particular guy was the culprit for the rocking situation that got us into this whole mess:
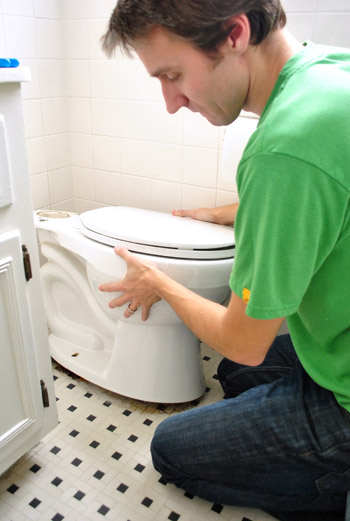
With both bolts unscrewed, I used a gentle rocking motion to detach the toilet from the floor. It’s stuck to the floor in place by a wax ring (just wait for that beautiful picture – it’s coming up!). But once you’ve got it unstuck, the bowl comes up pretty easily.
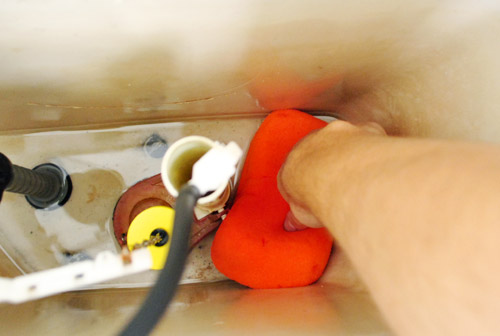
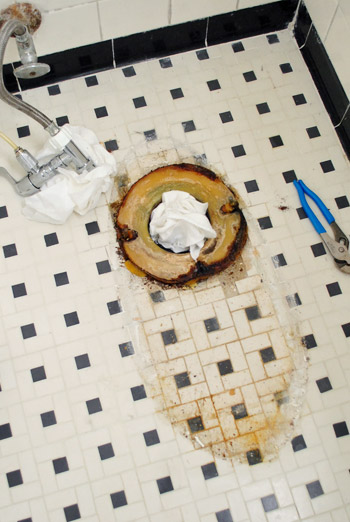
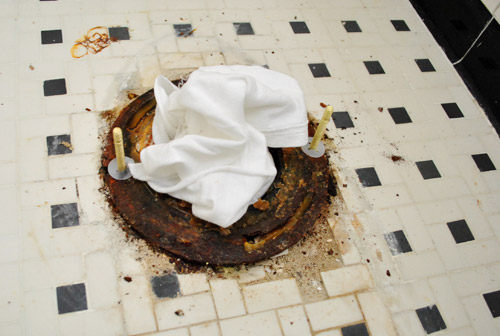
Step 5: Plug The Sewage Hole
And here’s that beautiful picture I teased. If you’re eating breakfast, you might want to stop scrolling. You can see I plugged the hole with an old rag to minimize the odors creeping back up and assaulting my nostrils. You just have to be careful not to put it in so deep that it gets lost into the sewer system. You might anger the Ninja Turtles living down there.
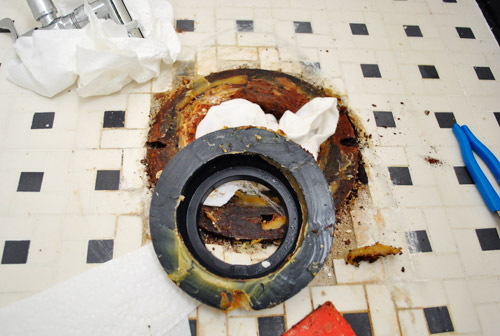
Step 6: Scrape Away The Old Wax Ring
Since the old wax ring had to come up to make room for the new one, I got to scraping it with a plastic putty knife. This is probably the grossest picture of the post, so please accept my apologies. But rest assured that it’s just wax and rust – nothing more.

Oh, and I made sure to remove the old rubber reinforcement ring too. This comes in some wax rings, so it shouldn’t be left in place (our new wax ring had one in it).
I also had to clean a little bit of the wax off of the base of the bowl too so it was all pretty looking. Well, pretty is probably a stretch.
Step 7: Put The New Bolts & Wax Ring In Place
Here’s the new wax ring kit. It came with new bolts and everything for a whopping $7 at Home Depot.
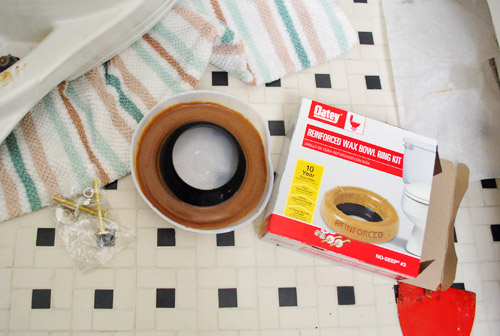
The new ring gets stuck to the bowl, not the floor. I just pushed it slightly down over the opening at the bottom of the bowl. Be sure to have an inquisitive chihuahua double-check your work.
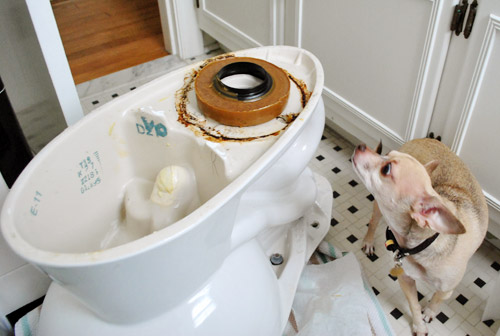
Oh, and of course the new bolts had to go into place around the flange (that’s the steel piece attached to the floor – ours is very rusty). And remember to pull up the rag right before you put your toilet back into place (so as not to meet the wrath of Ninja Turtles living in our sewers).
Step 8: Set The Toilet Bowl Back In Place
Then came the tricky part – which I’ve been known to mess up in the past – putting the toilet bowl back into place. It’s tough only because:
- They’re a bit heavy and
- You have to line it up perfectly over the bolts
But if worse comes to worst, you just pull it back up and try again (though if you’ve squished your wax ring too much you may need to put a new one on). That’s why I always buy two wax rings just in case. Better to spend an extra $6 to save a trip to the store (or risk a leaky toilet). Plus you can always return it the next time you’re at the store if you don’t end up needing it. Oh and this step can be helpful with two people (Sherry did once she was done taking this picture!)
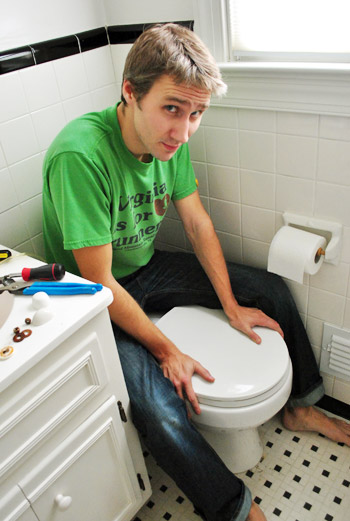
Once we had the toilet placed and straight, well, I sat on it. This little bit of pressure squishes the wax ring into place to ensure that we were getting a good seal. I wish I could say this is the first post that featured a picture of me on the john, but alas…
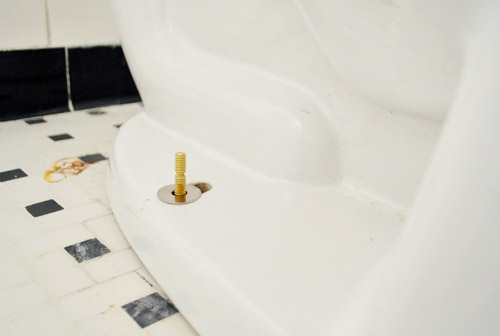
Step 9: Tighten The Bolts
Once it felt pretty set, I went to work bolting it into place. You can see how the new bolts stick up nicely through the holes in the bottom of the toilet bowl. Note: that is not a hairball on the floor, it’s a weird rust stain that has been there since we moved in. So we plead the fifth.
I hand-tightened the nuts most of the way, but used a wrench to finish things off. The thing about a toilet is you don’t want to over-tighten because it can easily crack the ceramic. So just be sure to do this slowly and go back and forth tightening each side a few spins for an even installation. You can also break out a level if you really want to make sure.
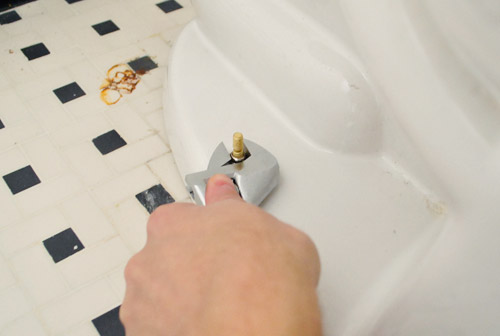
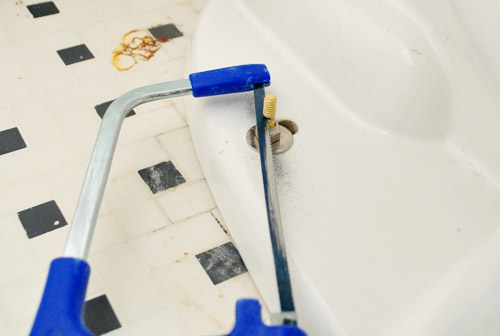
Step 10: Cut Off Excess Bolt Length
Your bolt will likely be a bit too long for those little plastic covers to fit over them, so use a hacksaw to saw off any extra length.
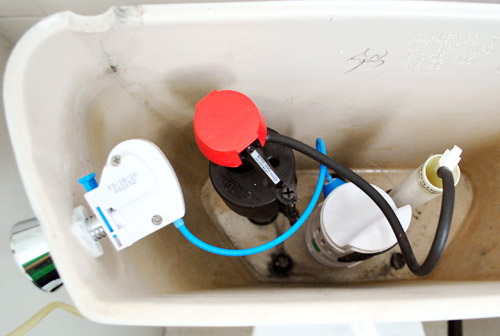
Step 11: Reattach Your Toilet Tank
Bowl securely in place? Check. Not rocking anymore? Check. Now it was time for some tank action. I put the tank back into place on top of the toilet and screwed it in. Again, not too tightly because I didn’t want it cracking. But enough so that it felt secure and I didn’t think it would leak.
Step 12: Reconnect Your Water Line & Check For Leaks
And last but not least, I reconnected the water supply line so we could refill the tank and bowl. Be sure to check for leaks around the base of the bowl, the bottom of the tank, and where the water line is connected.
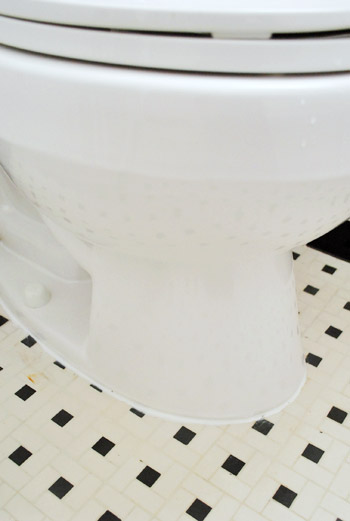
Step 13: Caulk Around the Base Of the Bowl
All of that checked out okay, so I ran a line of caulk around the base of the toilet. I only did it around the front 75% of the bowl so that if a leak were to happen in the future, it could escape out the back and alert us to the issue (that’s a little plumber’s trick we learned a few years back for ya).
BONUS: Add A Dual-Flush Converter Kit
This is usually where a toilet replacement adventure would come to an exciting conclusion, but we used this as an opportunity to install a dual-flush converter kit to this toilet.
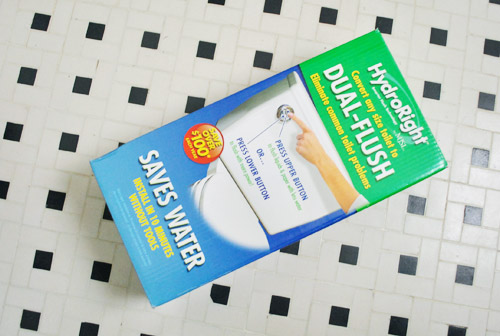
We did this in our last house so you can read our more in-depth dual flush toilet conversion tutorial. But basically, this $25 converter kit lets you take a normal toilet and give it two flushing options: a lighter flush for, um, lighter “activities” and a fuller one for the, you know, other stuff. Hooray for saving water (and money) and pretending your toilet is from the future.
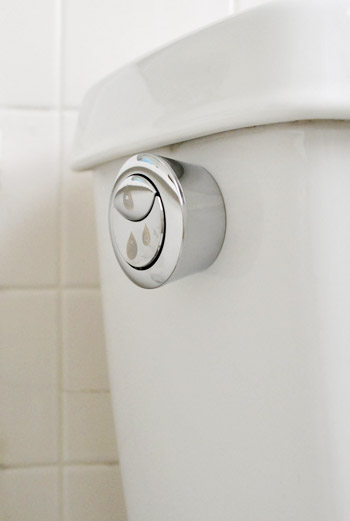
The installation was a cinch compared to the whole wax ring replacement stuff. Here’s a shot of the finished product.
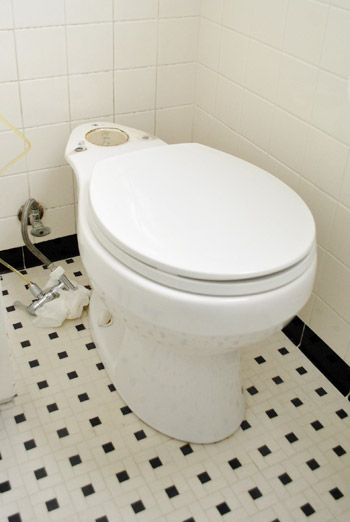
And for the grand finale – and “after” shot of our now fixed, now dual-flushing toilet. Sure, it looks pretty much the same. But just try sitting on it. It’s soooooo much better. No more seasick-esque motion. No more shouting a warning to guests who head down the hall to use the facilities.
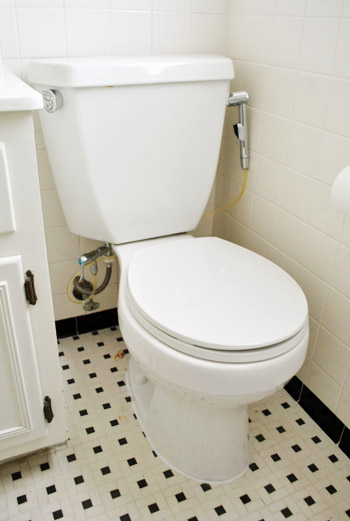
And admit it, that diaper sprayer on the right is hardcore. Like our toilet is wearing a little holster or something…
Psst- Now that I’ve assaulted your eyes with toilet pictures, check this out (it’s much cleaner and sweeter).

Jennifer says
How hard is it to push the buttons on your dual-flush toilet? We want to try converting ours, but have read some reviews that kids have a hard time pushing the buttons. We have a 4-year-old, a 2-year-old, and one on the way, so this is obviously a concern. I know Clara’s not at that point yet, but any thoughts/advice on the issue?
YoungHouseLove says
Hmm, Clara probably couldn’t push them but we have nieces and nephews who are around 6 can do it. Not sure about a 2-4 year old though. They’re a bit firmer than a handle but not strenuous for an adult. Anyone have any kids who can weigh in?
xo,
s
Jules says
We have dual flush toilets that have a regular handle. Push towards the wall or pull towards you depending on the amount of water you want. I don’t know if you can get converter kits with this type of handle. The toilet itself is builder grade and not an expensive one, Vortens brand. Where I live the city will give you a $50 rebate check for upgrading to a low flow toilet, which helps cover the costs of a new one.
YoungHouseLove says
Such a great tip!
xo,
s
tracy a says
my 3 year old can do it!
Krystle @ Color Transformed Family says
I have been meaning to ask you a question about your diaper sprayer and cloth diapers. We just recently switched to cloth diapers and are loving it! I am wondering what you do with the diaper after you spray it thoguh. I have just been keeping plastic bags in the bathroom but would like a permanent solution. Do you use the pails so that you can bring it into the bathroom when you need to spray a diaper?
YoungHouseLove says
We have a wet bag (they’re made by Planet Wise from amazon.com) that we keep in the cabinet under the sink for the wet diapers that get sprayed.
xo,
s
Larissa says
I’ve been wondering about this too. I started out strong with the cloth diapers, but when we introduced solid food I just couldn’t take it and switched to disposables. How often do you wash the diapers and how horrific does the diaper bag smell when you open it to do laundry? I was using latex gloves every time I washed the diapers and that was just on breastmilk. Am I just being a weenie?
YoungHouseLove says
Oh man, really? I’m sure it differs for every kiddo (some poop is scarier than other, haha) but we just spray them down, toss them into the wetbag (which completely seals the smell) and then we wash the whole shebang every day and a half or two days (BumGenius recommends washing them that frequently and not letting them sit too long, so we follow that and they’re holding up well!). There’s not too much smell because you spray them down.
xo,
s
jenn says
great job! And for the rust stain try making a paste of cream of tartar and vinegar. Works like bleach, but totally green! :)
YoungHouseLove says
Thanks for all the tips everyone!
xo,
s
Andrea says
I don’t know if somebody already mentioned Bar keepers friend it’s hard to find in some areas they make a powder and cleanser form think Soft scrub if you well. That will show that rust stain who’s boss and if you have stainless pots or pans use it on them and they look new again. Good luck
Katie says
Hi friends, thanks for keeping it real as always, and for the informative tutorial. We have had great success removing rust stains by making a thick paste with baking soda and water, letting it sit overnight, then rubbing it off with a green dish scrubbie. The rust seems to lift right off with the flakes of dried baking soda.
Also, I was so excited to see your dual flush converter! I didn’t know you could buy those without buying a whole different kind of toilet. Now I want to install one on ours! Thanks for the great tip!
YoungHouseLove says
Thanks for the tip Katie! You guys are all so sweet to share all these rust-cleaning secrets with us!
xo,
s
Andrea says
I forgot to ask where did you get the diaper sprayer? My sister is about to have a baby any day now and she is going to use cloth might be something she needs!
YoungHouseLove says
It’s by Bum Genius and we got it on amazon.com!
xo,
s
Stephanie says
Totes jelly of the older model Bum Genius diaper sprayer. We have the newer one and instead of the clear line that attaches to the spray nozzle, it now has a metal one. Still LOVE and ADORE the contraption, just wish it was less noticeable and busy on the toilet…
YoungHouseLove says
That’s so funny! Someone else commented the new ones had chrome lines and I was jelly of that!
xo,
s
Erika says
Thank you for this post! I am going to show it to my husband… When we moved into our house 18 months ago the SOLE toilet rocks a little. We’ve tightened the bolts, but I didn’t realize you had to disassemble the whole toilet. I know what someone is doing this long week-end…!
YoungHouseLove says
Aw, you’re welcome! Good luck Erika!
xo,
s
Kelsey says
Have you tried Bar Keeper’s Friend on the rust? I use it on everything in my house… it works miracles!
Lindsey @ arkadian belle woods says
HAHAH! I know this post was information and don’t get me wrong you did a top notch job as usual but so many hilarious things were running through my head when I was reading this like ‘John on the John’ hahah or the fact that John takes some photogenic pix perched on his throne! I could give you a laundry list of others but since this is a post about bathrooms hahah!
YoungHouseLove says
Haha, that’s my favorite thing to serenade him with while I take pics.
xo,
s
Amy says
You know how most public bathrooms these days have the automatic flush sensor so you don’t have to touch anything? Well, not too long ago I was in a public bathroom that had something kind of amazing — AUTO dual flush. How was this accomplished, you ask? Well, a little sign behind the toilet tells me that it senses HOW LONG YOU TOOK, and flushes accordingly. Creepy, right? But also kind of awesome.
YoungHouseLove says
Oh my gosh- that’s hilarious and scary and amazing all at the same time!
xo,
s
Stephanie says
P.S. John & Sherry – this is unrelated but there is a bicycle print on Zulily today that made me think of John. http://www.zulily.com/p/bicycle-print–11843-1116259.html?pos=3&
YoungHouseLove says
Love it!!
xo,
s
Crystal @ 29 Rue House says
1. Ewww…did you really have to put your hand in the toilet to soak up the water?? I think I would have had to wait weeks after company left to feel like the toilet had been rid of all those extra germs!
2. I like the push button thing. I think it would make it a lot easier for our two year old to flush the toilet herself. Thanks for letting me know that is out there!
YoungHouseLove says
Yep! Really did. Call me gutsy like that. :)
-John
Alisa says
Who would have thought I’d learn so much from a post about toilets?? I actually have to remove some paneling from behind a toilet in our master bathroom but I didn’t know how to get it out without removing the toilet so it’s just sat there, partially painted, for over a year. Now I guess I have no excuse to not finish the project.. Oh, and we got that toilet sprayer (after seeing it here) and LOVE it. It’s made the whole cloth diapering thing a whole lot less scary. Now I want to convince the hubs to put the duel flushing thing on the toilet so we’re not using a ton of water after rinsing off a diaper..
Diana says
Our plumber recommended we use a stack of two “plain” wax rings instead of one with a plastic flange. He claimed the flange tended to catch paper and clog the toilet. I’m not sure this has really made a difference, but it was slightly cheaper and works just fine. We will have more wax to remove if we need to re-seat the toilet again.
blair says
love the t-shirt john! i got the same one when i ran the virginia breach half marathon last year. i love wearing it down here in north carolina!
also, i work with new home construction in the charlotte, nc area. i’d suggest using a product called ‘bar keepers friend’ on the rust. it comes in a shaker can and you can pretty much buy it anywhere (grocery stores, target, etc.) dampen the area and sprinkle on ‘bar keepers friend’ to form a paste. leave it on for a few minutes and then scrub away (scotch brite should do the trick.) good luck!
YoungHouseLove says
Great tip Blair! Thanks!
-John
John says
A tip if you’re putting the toilet on the bolts yourself. While you’re getting the wax ring and stuff, stop at a fast food joint and pick up a handful of straws, you only need two, but get a few in case you mess up. Then before you’re placing the toilet on the flange/bolts, put the straws on the bolts to extend them. then it’s a bit easier to align the toilet with the bolts since the straws guide you down correctly. then once it’s on over the flange and bolts, pull the straws off. Easier to align while it’s a few inches above the floor instead of 1 inch above the floor while the wax ring is hitting and stuff.
John says
Oh, and it sometimes helps to cut one straw down a few inches so you can align the straws one at a time.
YoungHouseLove says
Such a great tip! Thanks John.
-John
Shauna says
Thank you so much for posting this! We’re about to start our DIY bathroom renovation but we don’t really know what we’re doing, haha. This could not have come at a more perfect time! And I never knew those dual flush converters existed…awesome! We’ll have to grab one of those too. Thanks again for the helpful tips!
Katie Rose says
Last year I helped my dad fix one of our toilets. Getting the toilet back on the screws was the hardest part, especially since our toilet is older and the water tank wasn’t detachable. Let’s just say his arms were pretty sore the next day from all the lifting and hovering! You made it look easy :)
tracy says
Shoeless Johnny strikes again! I’m not sure I’ve ever seen a DIY post from him wearing shoes. Or even socks for that matter. :)
Devon @ Green House, Good Life says
I’ve been amazed at what some dry baking soda rubbed vigorously into a stain with your finger can accomplish.
Robyn says
I had a little drip that turned into a bigger dribble in the bathtub faucet. I’m not shy about doing home improvements and repairs myself, but I’ve never really had to deal with plumbing before. A few weeks ago, with lots of online research and video watching, I took a chance to try to fixed it myself. I figured if I couldn’t do it, then I would call a plumber. I knew the hot water was the culprit, but I went ahead and changed both of the “guts” behind the hot and cold water handles. The project actually ended up taking a whole weekend. The cold water plumbing came out and was replaced just fine. The hot water was stuck like chuck, and I tried every tool I could think of to get it off. I went to Home Depot 4 times in 3 hours buying tools and returning them when they didn’t work. (Luckily I live less than a mile from a HD and a Lowes!) After getting some Liquid Wrench penetrating oil and letting it sit over night, the hot water plumbing final loosened! I got everything changed out on the hot water, and the drip is gone.
YoungHouseLove says
Oh man, sorry to hear it was such an adventure (misadventure?) but glad it all worked out in the end. Your story sounds all too familiar…
-John
Katy @ The Non-Consumer Advocate says
I installed that same dual-flush converter kit, and have been really happy with it. However, I heard from one of my readers that she was really unhappy with her. Her complaint? That the buttons were too hard for her to push, and that her long nails made it difficult to push the buttons down.
But we’re six months in and couldn’t be happier.
Katy
YoungHouseLove says
That’s so interesting! We’re a short finger-nailed family so we have no issues! Haha.
xo,
s
Lori says
I love how you turned a toilet adjusting tutorial into a post that made me laugh out loud! :-)
Ashley says
We started our complete gut job of a bathroom reno yesterday! New joists, new subfloor, new walls, new everything! We have a whole whack of plumbing in our future. It’s definitely going to take awhile, since we’re doing the majority of it ourselves. Yikes!
YoungHouseLove says
So exciting! Good luck!
xo,
s
Jimmy says
Looks good. And nice run down on the how-to part. I’m not sure about you, but whenever I have to deal with taking apart a toilet I spend a lot of time yelling “who does number two work for?!” a-la Austin Powers.
I just finished the recap of our top-to-bottom bathroom renovation here: http://www.thebookofjimmy.com/?p=455
You’ll notice I cheated on the tiling and instead of lifting the toilet first I just tiled up to it and grouted around it. I know, I know – renovation shame on me. What can I say? I guess I just really did not want to see what was going on under our 30-year-old commode.
YoungHouseLove says
Haha, I love a good Austin Powers reference.
xo,
s
Eric says
This may be a silly question, but what is the reason you didn’t just tighten down the existing bolts rather than going to the trouble of replacing them?
Thanks,
-Eric
YoungHouseLove says
They were actually broken (one side was, so it rocked). I think they must have rusted through over time!
xo,
s
Rebecca M says
Great job! If no one else has mentioned Bar Keepers Friend, I just got a rusty stain out of my bathtub with it(it’s sold next to powdered Comet Cleanser and Ajax). It works well on a lot of other surfaces, too, so it’s worth a try even if it doesn’t get the stain out.
Kelly says
This is not toilet-related, but I just had to say that I’m guessing Pacers loves it when John wears his “Virginia is for Runners t-shirt!” Love that shirt!
Dean says
Some questions about the install:
1. Why did you take the top off? Why not just move it while it was still fully attached?
2. Why did you put the ring onto the toilet and not the flange? I’ve always seen plumbers put it into the flange and lay the toilet on top, then tighten down.
Is there some secret to plumbing that I am missing?!!? Let the secret out!!! Plllllleeeeease
Thanks!!!!
YoungHouseLove says
Haha, I think we’ve just done a bunch of toilets following online tutorials that we dig up and this is the method so we follow it to the letter! Five toilets later we have our groove! haha. But it’s probably one of those there-are-a-few-roads-you-could-take-that-all-lead-to-Rome. Haha.
xo,
s
Carla Runs The World says
No way you just missed an opportunity to say “a picture of John on the john”! A picture of “me” on the john just doesn’t have the same ring to it…
YoungHouseLove says
Haha, I think we already made that joke here: https://www.younghouselove.com/2011/01/im-running-out-of-mirror-puns/ Haha.
xo,
s
Nikki says
Thanks for the post, John! We may doing this sort of thing on the weekend :-) About the rust … two things come to mind … A paste made with hydrogen peroxide and baking soda or Shaklee’s Scour Off. Put a little on the rust and scrub away with your fingertip. Hope this helps.
YoungHouseLove says
Great tips everyone! Thanks for sharing!
xo,
s
Wendy says
You got lots of great suggestions for the rust spot, we have a product here called Iron Out that works great. It comes in a spray and a powder.
Megan says
We are in the midst of our master bathroom remodel right now! The set up is a lot like yours, but our shower area is a lot smaller. Our fixtures are arriving today and the electrican and plumber are coming on Monday! Our big ‘debbie downer’ is that our shower drain has to be moved and a whole new sloped pan and curb has to be put in. The drain is off center by a good 5 inches and the water never drained to it so we had a constant puddle of water next to the drain. Fun times. We’re super stoked to finally get this project rolling after a year from when we demoed it!
YoungHouseLove says
Aw man, good luck with everything!
xo,
s
Teresa @ wherelovemeetslife says
You know, I had no idea that working with a toilet was that easy. At least you make it look easy. And I also had no idea they even sold those kind of dual flush kits… great idea!
Evan says
I recently read an article somewhere (of course can’t find it now) about the impact of dual flush and other low-flow toilet systems on city sewers. Basically, without a certain volume of water being pushed into the system by each and every flush, sewers stagnate, build up odors (requiring cities to add extra chemicals in the water treatment process), and eventually become clogged.
Does anyone have any more information about this or live in a part of a country where this is a problem?
YoungHouseLove says
Weird! I have never heard anything about that! In fact our city encourages the installation of these in newsletters and there’s even talk of implementing rebates and stuff! In over a few years of using them in our first house we never had any odor or back-up issues!
xo,
s
Brenda says
I’m working my way through the archives, and I just (as in minutes before reading this post) read the post about installing the diaper rinser and dual flush in your previous house. It has a nice symmetry when you read it like that.
YoungHouseLove says
Haha- so funny!
xo,
s
Michelle M. says
So the dual flush is easy to install? Can the old handle be re-installed easily? I’m in an apartment and when I move I’d like to take the dual flusher along with me.
YoungHouseLove says
Oh yes, I think you should be able to reinstall the old one and bring the dual flush thing with you when you move – just keep the old parts you take off on hand to put back together!
xo,
s
Audrey says
I am going to be looking into getting the flush converter thingy. and replacing the wax ring…..
and i really love you guys!! i have never bought any sort of DIY book, but i am purchasing yours just so i can support y’all, and i’ll get a great book to boot!!!
YoungHouseLove says
Aw thanks Audrey! You’re sweet.
xo,
s
Amy says
Hey there! I know this may not be your first choice due to the fumes and chemicals but CLR might be your best choice to get your white tile, nice and pearly again. Good Luck!!
Kate says
completely unrelated – but the elephants i mentioned a few weeks ago are back on OKL! https://www.onekingslane.com/sales/13231
YoungHouseLove says
Thanks for the tip Kate!
xo,
s
Alisa says
I rent a house but would love to install dual flush on my toilet! If I keep the old parts could I return it to the original condition when I move? I don’t think my landlord would like the switch…he’s pretty old fashion and would think it is odd. Thanks!
YoungHouseLove says
Oh yes, I believe you could totally restore it and take it with you!
xo,
s
lesley says
THANKS for this post. I feel I can do this myself now. One question… when we moved into our house the toilet in the upper bathroom looked newish. It flushes great and we love it. The only thing is that it gets this NASTY film in it. I feel like I am cleaning the toilet every second day to avoid having to look at this film. Do we need to replace the toilet or is there something I can do prevent his film from forming? Sorry for the gross nature of this post.
YoungHouseLove says
Hmm, anyone have any tips for Lesley? We’ve never come across this but I’m sure someone out there might have an idea for ya!
xo,
s
Timmi says
John if it makes you feel any better, (probably not) but at my wedding I had to go to straddle the toilet facing the tank because of my train, well my sister thought it was so funny and got the photographer to take a picture of it, I won’t post it, but yea I have a professionally taken picture of me on the toilet, family is so nice sometimes
YoungHouseLove says
Haha- nice!
-John
Val says
I seem to remember another bathroom remodeling post featuring John barefoot…lol. :)
We have a hellaciously annoying rocking toilet that needs this treatment. We’ve just been putting it off because it’s in the world’s tiniest bathroom and trying to do much of anything in there sucks.
Maria says
I read this post while trying to eat lunch. Mistake.
YoungHouseLove says
So sorry Maria! I told John to toss some warnings in there for people! Haha.
xo,
s
Paige says
I don’t know if it’s just my computer, but while I love the new background, the color and pattern combined with the black type make it really hard to read. Just wanted yall to know.
YoungHouseLove says
You’re probably viewing on a smart phone! We haven’t changed the background but sometimes on smart phones you just have to clear your cookies/cache/data and it’s all better! Wish it was something we could fix on our end!
xo,
s
MrsB says
Try a little Naval Jelly – get at your fav hardware store – let it sit – might take a couple of tries. ALWAYS works for me.
YoungHouseLove says
Thanks for all the tips everyone! So helpful!
xo,
s
Krystal says
Here is the miracle to all your stain and dirty grout needs: Stain Solver (http://www.stainsolver.com/)
Let it soak for a few minutes, wipe it up, and behold: Grout that is cleaner than the day you installed it. I didn’t believe it when people told me, but my kitchen floors don’t lie (and the grout was black due to four dogs and clay mud backyard).
YoungHouseLove says
Thanks for the tip!
-John
Giulia says
Yup on the bathroom adventures. Leaky toilet isn’t’ always an easy wax ring replacement as we learned earlier this year. Argghhhh ;)
http://www.fishlynews.com/2012/01/of-copper-and-plumbing-and-unplanned.html
We still have one old toilet, so I like the dual flush conversion kit – I think I’ll be getting that.
YoungHouseLove says
Urgh, how frustrating!
-John