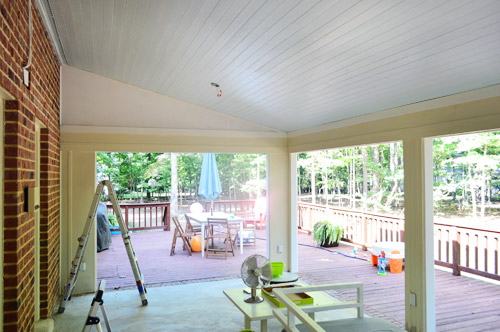
First of all, thanks so much for the unbelievable outpouring of well-wishes for our announcement yesterday. It was great to share our news with you guys. While madly trying to keep up with the 3,000+ (!!) comments, our afternoon post sort of fell by the wayside, so we figured we’ll share an afternoon one today with you instead. In the meantime, Sherry is cutting and pasting a ton of questions from yesterday’s comments and working on Friday’s Q&A post for you, and I’m here to shake my tail feathers about managing to cross a few more things off our sunroom to-do list in this week (yes, feel free to picture that).
So let’s talk about three steps that have taken our sunroom from half-baked to feeling a lot more finished: adding trim, caulking, and painting. They’re not always glamorous project steps (especially installing trim and caulking) but details like those tend to make all the difference (wonky trim and messy caulk can add up to a shoddy looking finished product, even if a room is furnished really nicely). I originally planned to gloss over the trim-hanging part and dive more deeply into caulking and painting, but then I messed something up and, voila, it felt like info that might be helpful to share. Nothing like celebrating your screw ups, right?
Ok, so we had to add trim to polish off our recently tongue-and-groove planked ceiliing. Originally I was just going to toss out a quick mention like: “We installed trim to bridge the gaps around the ceiling and the new triangle panels we added. To match the other simple lattice-like trim around the rest of the room, we opted not to use typical crown molding. Plus, it spared us from having to calculate how to cut all of tricky crown angles against an angled ceiling.”
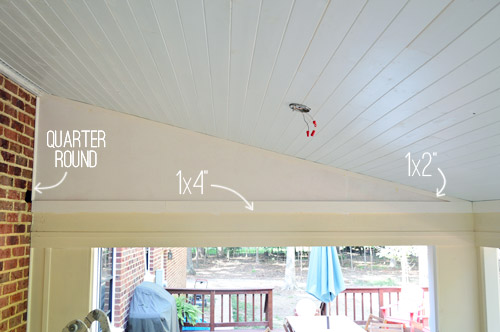
But after the trim was installed, we both stepped back and decided it didn’t look good. Not because it wasn’t crown, but because the 1 x 2″ against the ceiling and the quarter-round against the brick were too puny compared to the heft of the nice chunky 1 x 4″ trim piece along the bottom of the triangle.
I had chosen the 1 x 2″ trim piece to run along the freshly lofted ceiling because it most closely resembled the lattice in the rest of the room. The bigger 1 x 4″ trim piece was only there to cover some leftover rough patches from where the previous trim was removed (so something thicker was necessary). But we decided the 1 x 4″ board looked much better than any of the skimpier stuff, so suddenly Sherry and I found ourselves removing trim again… just 24 hours after putting it up.

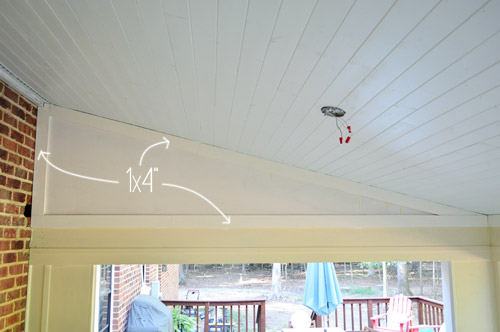
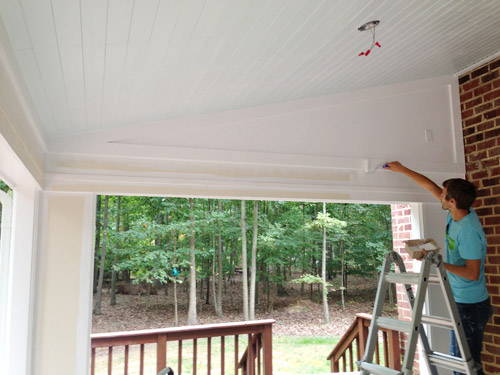
We each pried off a side and decided to install 1 x 4″ all around each triangle, so the trim near the ceiling carried all same visual weight – rather than the trim closest to the top looking chintzy. It’s hard to judge from this picture below (especially since it’s not caulked or painted) but trust me, it looks waaaay better. As for how we hung it, it’s mostly a two person job when you’re working with such long pieces up on a ladder, so one of us held it in place and the other worked the nail gun (I slipped some wood glue behind each piece for extra hold too).
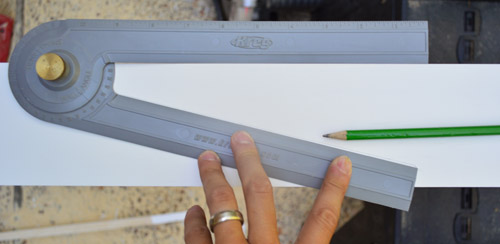
And while we’re on the topic of the trim, it was a bit more challenging than a usual trim project – just because we were dealing with some angles. Fortunately we had the angle finder handy from the Kreg Crown Pro that we bought to do crown molding in our last house (though I’m sure any angle-finding tool would work). So we just set it in the nook of the triangle to find our angle.
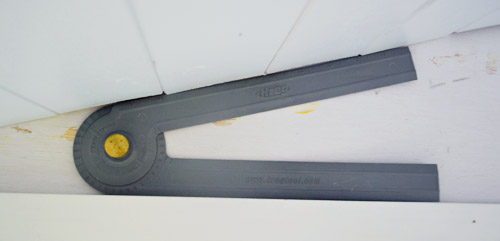
Then I marked that same angle on our board.
And then I used a circular saw to cut along the line.
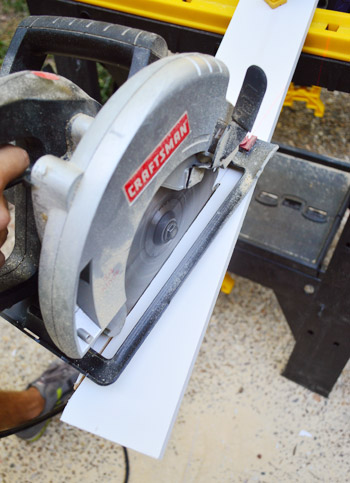
Most of the cuts weren’t 100% perfect, but it wasn’t anything that caulk wouldn’t fix. So as trim jobs went, it was a relatively speedy one – even if we did have to do those two triangle sections of it twice.
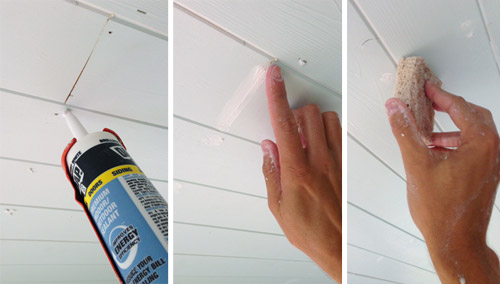
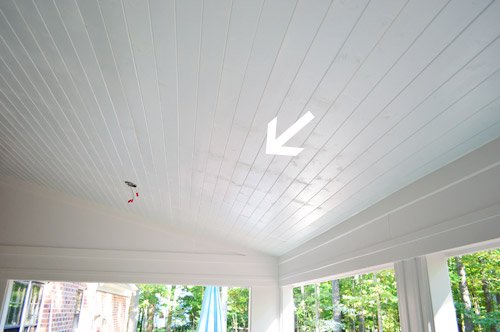
With trim up, it was time for caulking. Sherry and I usually tag-team steps like this, but outdoor caulk is too VOC-filled to inhale while carrying my baby, so I gladly flew solo. In addition to caulking all of the seams around the trim, there were also a bunch of touch-ups that I wanted to do on the ceiling itself. Call me crazy for taking the time to caulk all of our nail holes in each ceiling plank, but it was totally worth the couple of hours it took for the peace of mind that everything was sealed in and nothing would warp/rot due to the elements or the changing temps outside. Eventually I came up with quite the efficiently system: squirt a dot of caulk in each spot, smoosh in with a finger (dipped in water to help keep caulk from building up on my skin) and then smooth that over with a damp sponge. The sponge step was the key to a nice finish, and it made it go faster too.
None of our before-and-after shots of the caulked holes really demonstrated the difference (it’s one of those things you have to see in person, I guess) but having all of the little distractions taken care of was actually a big move forward in this ceiling feeling finished.
Then there was painting to deal with. Not that the cream + white + blue + primer + brick combo isn’t totally the rage these days.
In our heads painting this room wasn’t a big deal. There’s like 0.003 square feet of walls, after all (I may have rounded down a smidge). But then we remembered the 15-paned door and the three giant 15-paned windows. URGH. That’s a whole lotta mullions.
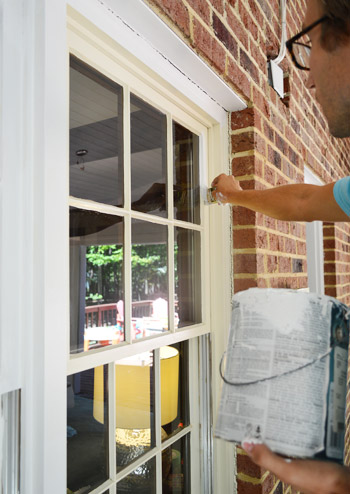
Okay, I’m being dramatic. It wasn’t that bad. It took me about four hours total to apply two coats for full coverage – but I wouldn’t call it an exciting job. Oddly enough Sherry loves to be the cutter-inner, so she was sad that exterior paint is on the no-no-pregnancy list. Did I hit the jackpot with my trim-painting wife or what? Oh and as for the color, we used Snowbound by Sherwin Williams, since the rest of our white exterior trim is painted that color.
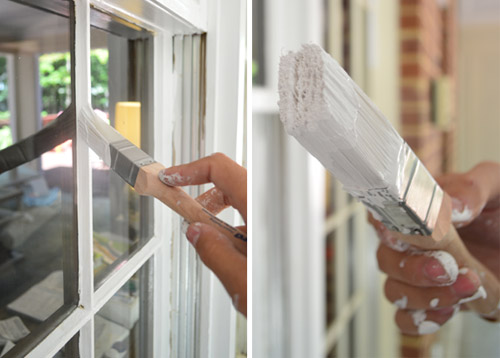
I did my best not to get too much paint on the windows just to save ourselves time on the back-end from having to scrape all 60 of those window panes with a razor to remove the paint (we learned on the windows upstairs that scraping was a pain whenever primer was involved, so we figured exterior paint would be just as difficult since it’s a more intense formula with a built-in primer). I also tried out a new brush that’s specifically meant for this type of job – just in the name of seeing if it made things easier. In the end after both of us tried it (Sherry for just a second with a gas mask on because the girl couldn’t resist) we actually found it harder to use than our usual short-handled brush, but we’re glad that we gave it a shot, just to be sure there’s not some magic bullet out there.
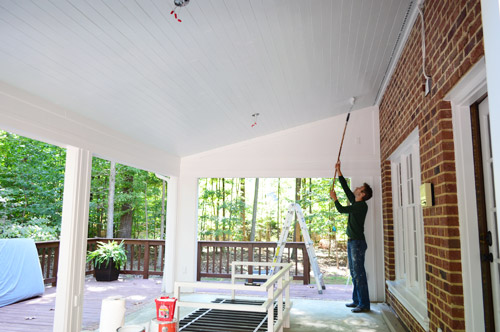
With the windows and the door done, it seemed like a cinch to finally get to painting the walls, which I did with a small foam roller for the most part (I did use an angled brush to get into some of the cracks and tight spots but it was mostly a roller job).
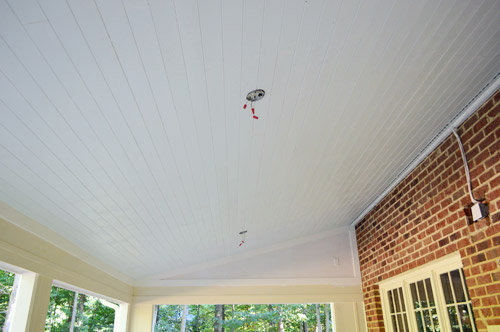
With that done, I still had one last paint job to complete: a final coat of blue on the ceiling to hide all of the caulking I’d done. Even though the white caulk blended pretty nicely with the light blue ceiling, it was still noticeable. Unpainted caulk tends to “flash” so that it’s visible at certain angles, like the row of caulked nail holes you can see below looking sort of dusty.
Painting a ceiling is one of our least favorite tasks, but since I didn’t have to edge this one (and it only needed one coat) it was actually pretty fast. I knocked it out in a hour while Clara was at preschool.
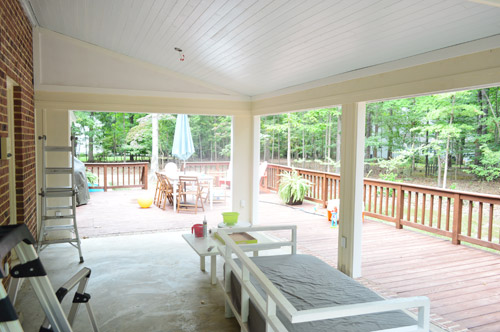
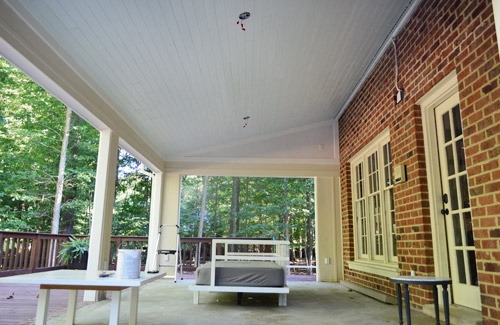
So yeah, not the most exciting updates in the world – but these little fixes really helped take our “completed” ceiling to being an actual completed ceiling. Oh except for maybe the missing fans part. Ignore that for now, and let’s just appreciate the difference between how it looked before trim/caulk/paint…
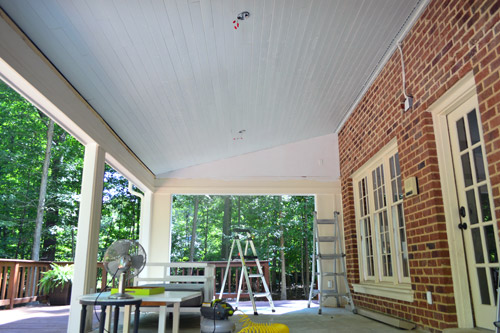
…and after.
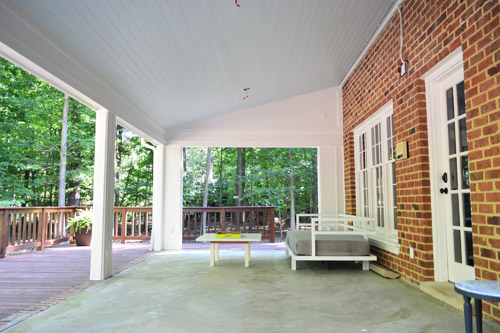
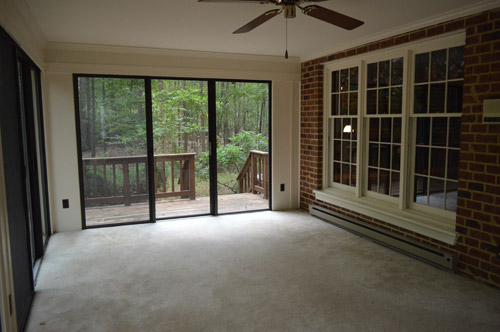
And of course I’d be remiss to leave without a before picture of the room when we started.
So we got to cross two more lines off of our to-do list, which puts us that much closer to the part that we’re looking forward to the most: the tile floor! Hopefully that’s on the docket to get done (er, well, started) this week so that we can have a update for you next week.
Rip up the old carpeting(more on that here)
Remove the sliding doors and tracks to open things up(more on that here)
Convert outlets to outdoor-safe rain-proof ones with covers(more on that here)Add fresh casing to the openings and caulk like crazy to waterproof everything(more on that here)
Demo the old ceiling in hopes of possibly lofting it (get a pro in here for advice)(more on that here)
Remove old beams, reinforce ceiling stability, and re-route electrical for two fans instead of one(more on that here)Prime, paint, and install our beadboard ceiling(more on that here)
Add trim around the ceiling and caulk/paint thatRepaint the columns & interior of the sunroom with white exterior paint (it’s currently cream)- Hang two ceiling fans
- Tile the floors (we bought something that’s outdoor safe and less slick than the glue-stained concrete here)
- Get a rug, furniture, and maybe even add some outdoor curtains and lanterns/sconces?
- Build an outdoor fireplace like this down the line
It’s funny how going into this reno we thought “well it’s not a kitchen or a bathroom so it probably won’t take that long” – yet it involved ripping out eight doors and a ceiling, adding all new electrical, installing a new ceiling plank by plank, painting a whole bunch of trim and windows and doors. And there are still fans and tiling to be tackled, as well as the dream of adding a fireplace someday. Turns out sunroom renos can be just as involved as a bathroom or a kitchen makeover. Who knew?

Leave a Reply